Elvenar ガイド:クエストを完了して繁栄する王国を築くためのヒント、コツ、戦略
モバイル ゲームの世界のほぼすべてのタイトルが、粉砕または広告を利用したショートカットによって征服できるため、Elvenar は新鮮な空気の息吹です。 Elvenar でのプレイヤーの役割は、王国を築き、それを拡大し、リソースの流れを徐々に増やしてさらなる成長を可能にすることです。統治者としての任務において、目的を早めたり粉砕したりする手段が非常に限られていることに気付くでしょう。
グラインディングとは、富、ポイント、またはアイテムをすばやく蓄積するために、特定のアクションまたはクエストを忠実に繰り返すことを意味します。スキルベースのゲームでは、「ゲーム感覚」と機械的スキルを開発することです。このアプローチ方法は、すべてのジャンルを超えています。
Elvenar の開発者である InnoGames は、PC ベースのタイトルがどのように作成されたかに似たこの戦略と都市建設ゲームを構築し、待機とリソース管理は重要な基盤です。確かに、待機タイマーで時間を短縮するパワーアップがありますが、かなりコストがかかります。真のグラインド メカニズムと、大幅に進歩するのに数日または数週間かかる進行ペースがないため、Elvenar はより成熟した忍耐強いプレーヤーにアピールすることを意図しています。
最初から、人間の王国とエルフの王国のどちらを建設するかを選択できます。どの種族を選んでも、挑戦の形式は同じであり、それらを克服する手段は忍耐と識別力にかかっています。
この Elvenar ガイドでは、待機要素と意思決定要素に関する視点を一致させることを目指しています。また、王または女王として、あなたの治世ができるだけ手間のかからず、豊かになるように、注意すべき重要事項にも取り組みます。

この記事は新しいプレイヤーにとってより価値のあるものかもしれませんが (ゲームが 7 年も前からあることを考えると)、ゲームをしばらく楽しんでいる人にも門戸が開かれています。 Elvenar の魅惑的な世界に飛び込みましょう!
1.目的と期待
王国を成長させるにつれて、あなたのルールはさまざまな課題やクエストによって満たされます。これらのクエストは一般的に、一定量の物資の収穫、特定の商品の生産、建造物の建設、軍隊の訓練、遭遇の解決、研究機能のロック解除、または建物のアップグレードの形をとる場合があります.
ほとんどの場合、ゲーム内のすべての課題は 2 つのルートで取り組む可能性があるため、上記の種類のクエストについて説明し、それらへのアプローチ方法と考慮すべき事項についてのヒントを提供します。しかし、それらに飛びつく前に、クエストに慣れておきましょう。
1.1 クエスト 101
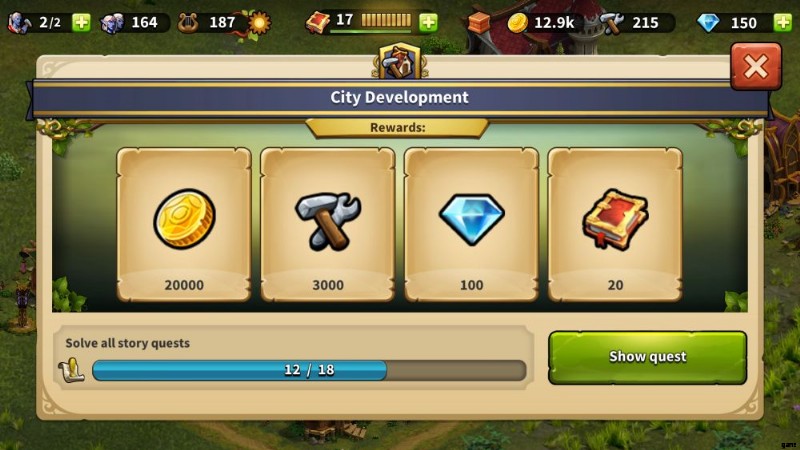
クエストを完了することで得られる報酬はすべて進行に役立つため、クエストはゲームにとって不可欠です。そういえば、Elvenar を初めて使用する場合は、18 のストーリー クエストを完了することを優先してください。それはあなたの王権を活性化させるのにふさわしいかなりの量の報酬を与えます.

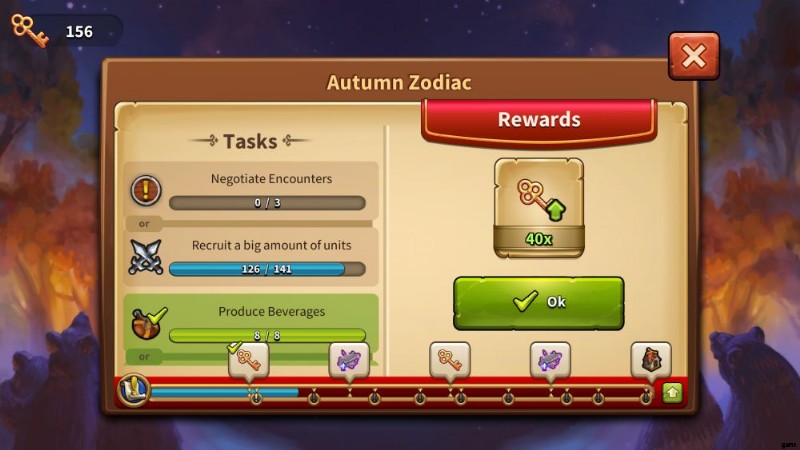
ゲームは常にクエストを提供します。少なくとも 1 つのアクティブなクエストが常に存在します。 At times, especially during events and festivals, there can be up to three active quests at a time.

There will also be situations where quests may be cancelled. If you find that a reward is not too enticing and you feel that it is not worth the time, resources, and potential space-related hassles you must go through just to finish it, feel free to cancel. There will ALWAYS be a replacement quest; say you currently have three in the bucket and you opted to cancel one, the quest slot will not be knocked off. The number of active quests will only be reduced if you cleared a particular set of quests.

When it comes to cancelling quests, one thing is for sure, never cancel those that give diamonds (the premium currency of the game) and those that promise an amount of spell-creation items or enchantments that will take days for you to manually craft.
Whichever quest is on your plate, you will likely encounter two common concerns:gathering or stockpiling resources and space management. We will give guidelines on hurdling these two issues through the common quest types the spirits of Elvenar will lead your way.
1.2 Quest Type:Supplies Stockpiling and Production
Stockpiling supplies is a quest type that won’t normally require you to do too much adjustments. The base story quests will introduce you to the Workshop and make you eventually make 4 or 5 of it. While the game will dispense random quests, what you will get is scaled with your kingdom’s apparent progress. The scaling is based on what quests you have finished already and your progress through the research tech tree.
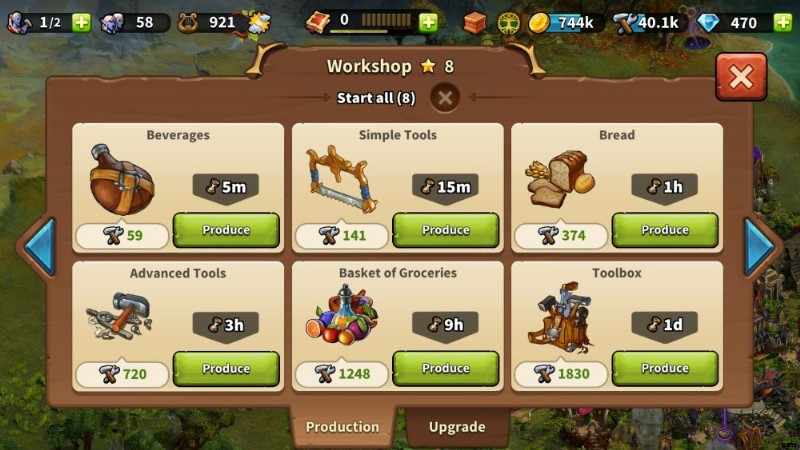
With the scaling concept in mind, beating stockpiling quests may likely just require a few batches of supplies from whatever number of Workshops the game has yet directed you to make. At times, if you play the game actively, you won’t even have to consciously make extra batches of supplies just to beat such a quest; your ‘directed’ production ability should be enough, provided you don’t overspend in negotiating Encounters.
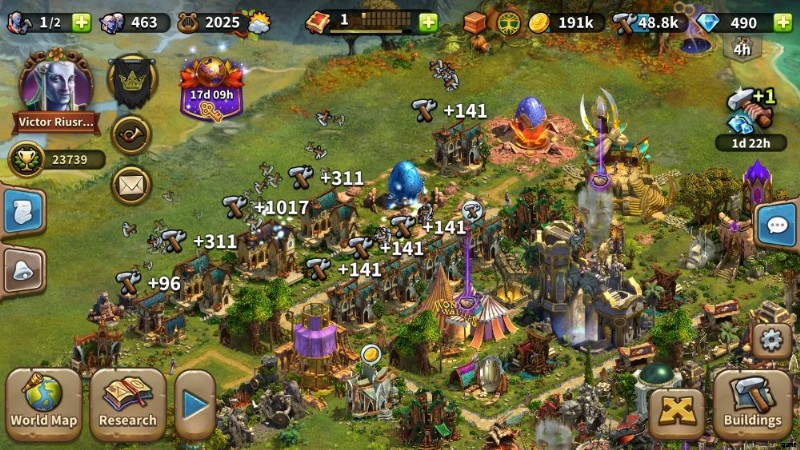
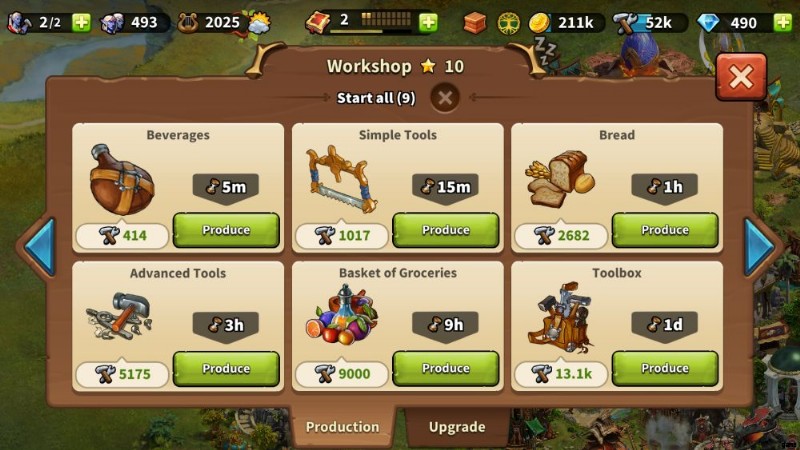
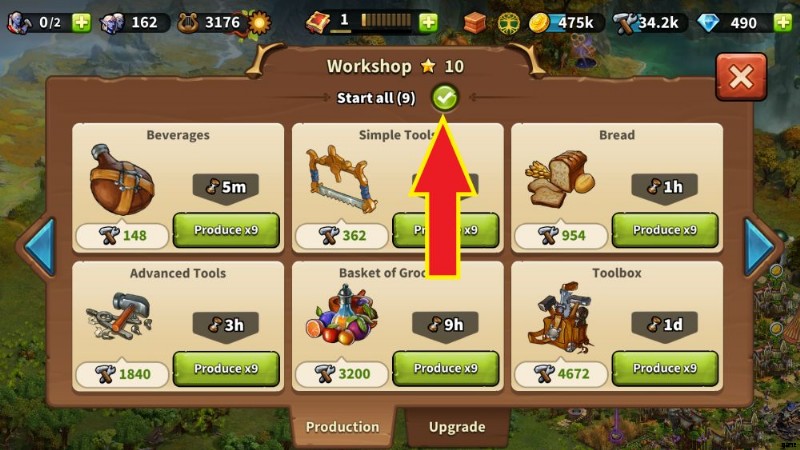
The primary mode of completion is to manually make supplies. For straight stockpiling, the fastest route is to diligently go for the five-minute option repeatedly; for requests that require a supply order of a particular kind, just comply accordingly and weather through the production timer.
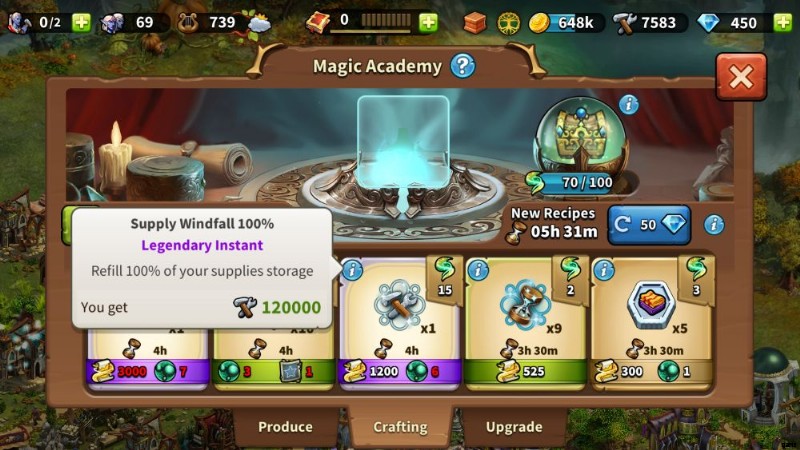
Meanwhile, the alternative route to up your supplies, whenever available, is to use a Supply Windfall spell or use any acquired Instants. However, since such spells come rarely, our suggestion then is to create 1 to 2 extra Workshops more than what the game has previously ‘requested’ you to have. This will ensure that the next time you were given a stockpiling supplies quest, you can finish it effortlessly.
1.2 Quest Type:Goods Production and Manufactories
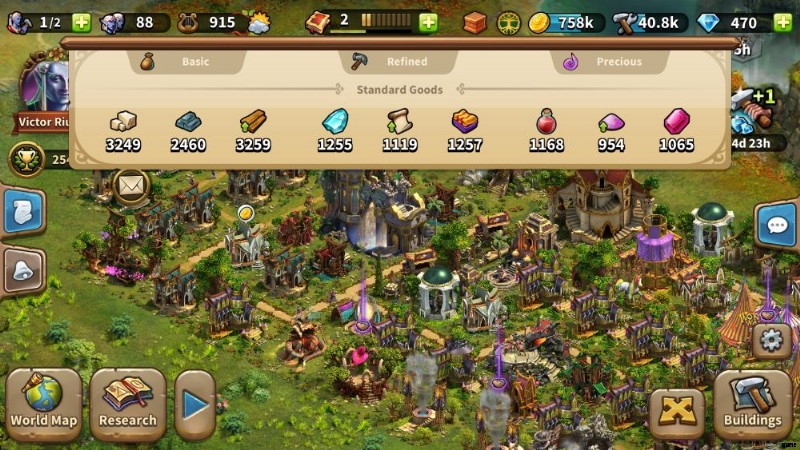
Goods production quests will either require you to amass particular types of goods or produce goods from a certain tier or class. There are nine types of goods spread through three different classes:
Basic – wood, lumber, steel
Refined – crystal, scroll, silk
Precious – potion, magic dust, gems
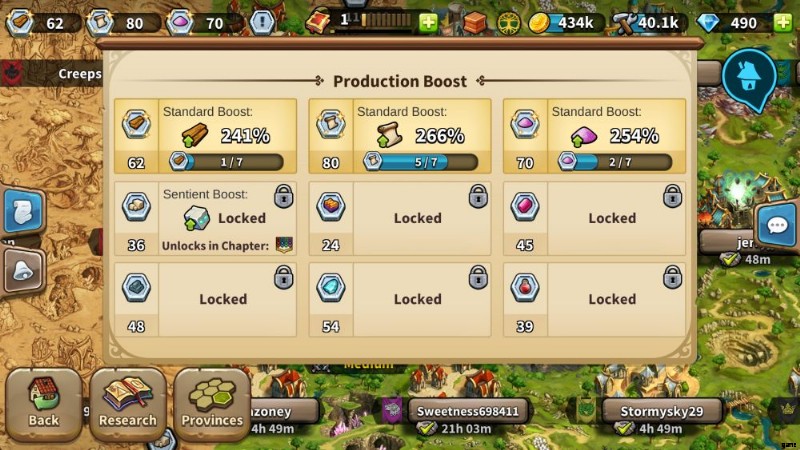
Each goods type has a specific Manufactory. Once you have unlocked the respective Manufactories for all the goods, the quests you will be assigned with will initially just require you to make one of each, except for the facility that creates the first type of goods that the game has ‘assigned’ you with a preset boost. In our case, it was wood (planks). Whatever type of basic goods was assigned to you, place 4 to 6 of them for good measure.
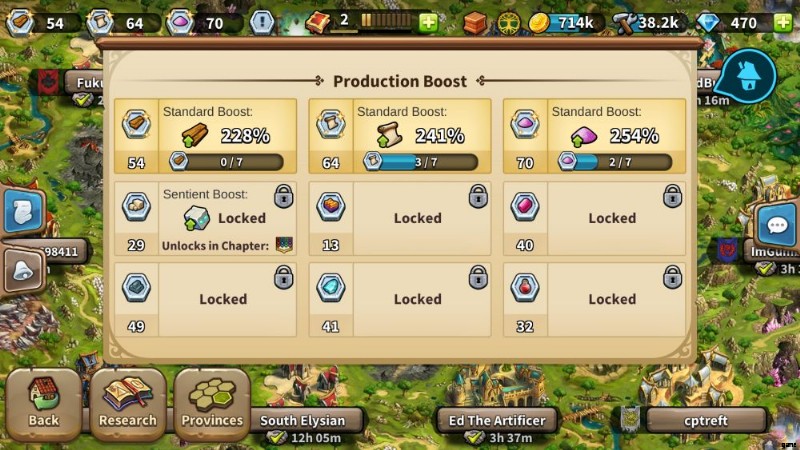
While all Manufactories may eventually be unlocked in just over a week of play time, resist the urge to create duplicates of all of them and focus on the goods you have the boosts for. Building multiple Manufactories of each type will eat up precious space of your claimed land. Space management is one of the inherent challenges in Elvenar, you have to wisely use every single grid of space in your kingdom efficiently because expansion is costly no matter which route you take.
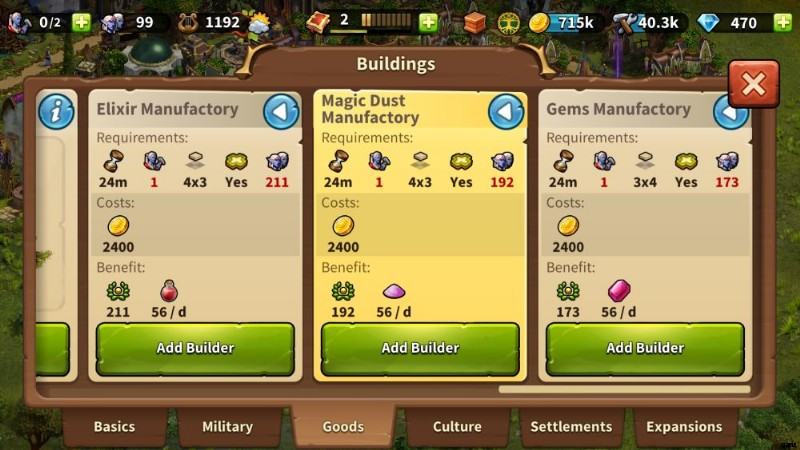
Apart from potentially running into space-related issues, too much Manufactories will unnecessarily use up manpower. Unlike in other city-building games, there is no penalty in having a high number of unemployed population in Elvenar. Still, manpower is a resource you must carefully conserve. See how much employees base form Precious Manufactories require in the image below. You would really like to just play on your strengths or boosted goods.
Now, in dealing with goods production quests, keep in mind that the “quickest” order is 3 hours. You may have to devote half a day or so if the task is for stockpiling or if the quest requires a particular batch (which usually is the 9-hour option).
The alternative means for stockpiling is to make use of the Trader. Create deals offering the goods you are abundant with to acquire whichever goods you need in return. We will discuss this feature in better detail later in this guide.
1.3 Quest Type:Constructing Structures
As you unlock items in the research tech tree, you will gain access to new structures or at least ones that give better stats and benefits than their lower counterparts. In most cases, if you proactively explore the research tab and build one of each structure you unlocked (except for the filler types under Cultural), you would instantly finish quests of this nature.
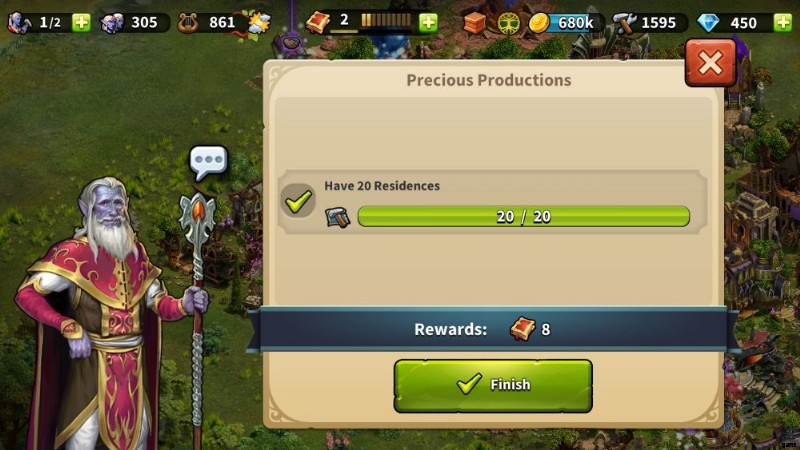
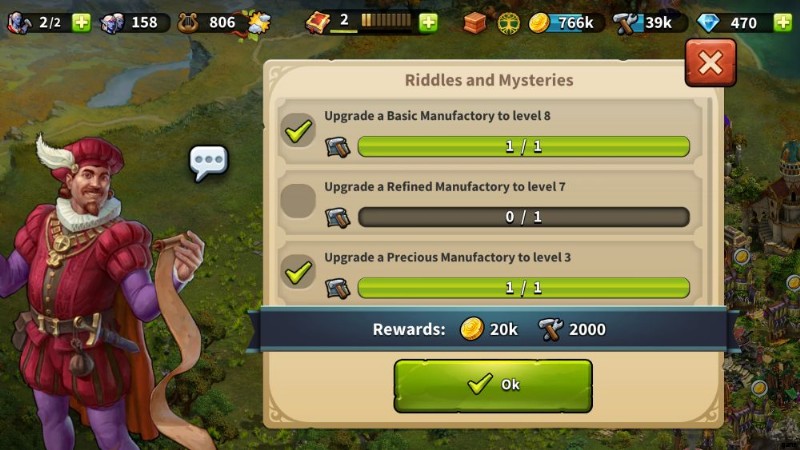
Completing structure quests is straightforward, simply build what is demanded. The potential catch though is, if you have run out of empty grids on your land to accommodate structures. There will be quests wherein you’d feel that the required amount of a particular building is too much for your kingdom’s current needs (like the early quest in the screenshot).
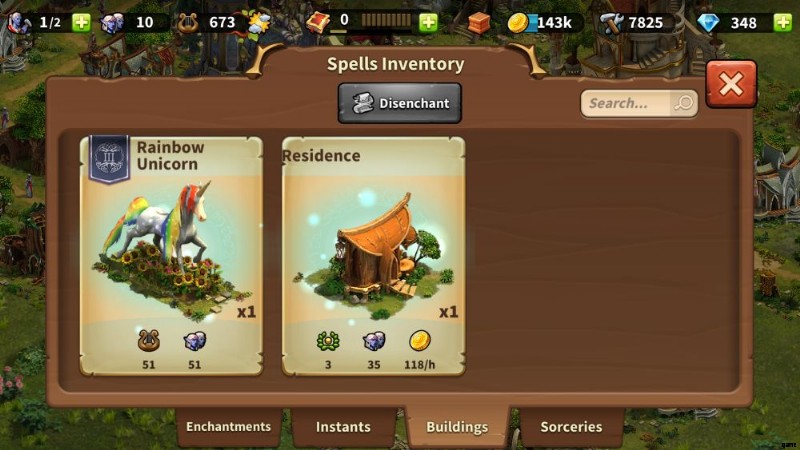
When you ran out of cleared land to build on and the next expansion opportunity is yet far, the best course in this circumstance is to use the Teleport Building spell. Teleported structures will be stored within the Buildings tab of Spells. While a building is stored, its benefits would also be nullified. Placing them back on the field would cost you no additional resource.
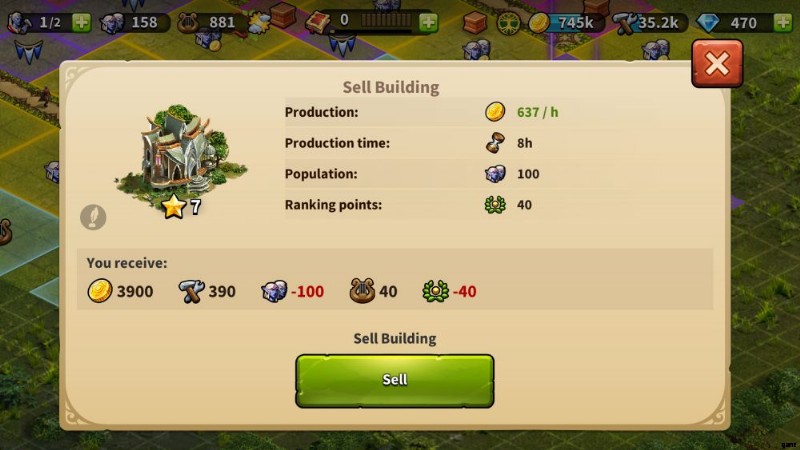
If in case you have no Teleport Building spell at your disposal, the last resort is to sell other structures with duplicates. In our gameplay, we have sold a couple of Manufactories, a few Workshops, and some Residences. Selling a building will award you back some of the coins and supplies you’ve spent to build or upgrade it but it will give you a full ‘refund’ of the population and culture that was consumed for its creation.
1.4 Quest Type:Training Army Units

Training army units mostly concern two things:1) the cost and duration of training and 2) how many units are produced per training order. Quests of this nature will simply ask you to secure a certain number of a particular unit type. Keyword is “secure.”
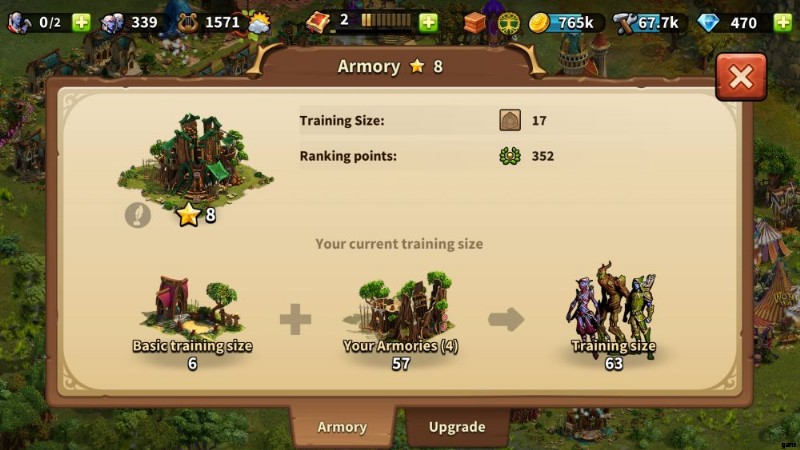
Addressing the first issue is mainly about having enough supplies for production. As long as you have enough supplies to queue up what is required, you’re all good. The second one is dependent on your Armories because their level and quantity define how much units are produced per order.
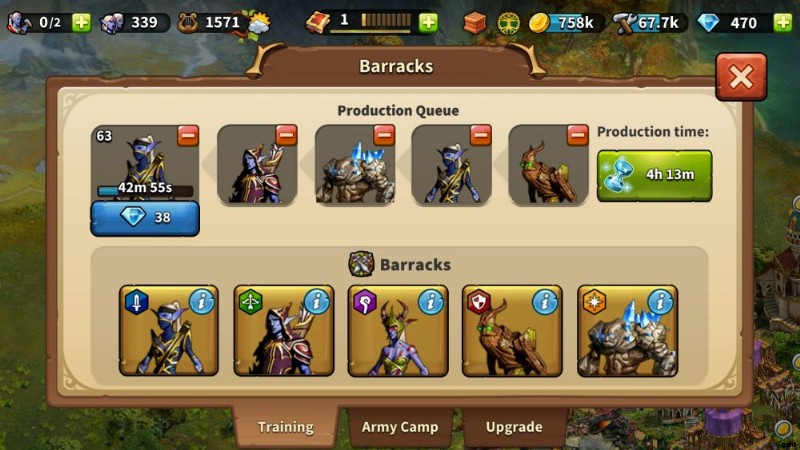
To handle quests of this nature, you may have to clear your queue to prioritize the demanded unit type. Using Instants is not a bad idea especially if your Barracks, Training Grounds, or Mercenary Camp is upgraded to further cut or totally eliminate waiting time. Speaking of which, it is important in the early game to focus on getting your Barracks to level 8 so each order will only take about an hour to finish.
While the current wording for the quests uses “train,” any units you have acquired as quest or festival rewards will also count towards the total. If you aren’t the type who uses the fight option frequently or you have too few Armories, you may want to pocket any rewarded army units, so you would have an instant answer for unit training quests.
1.5 Quest Type:Resolving Encounters
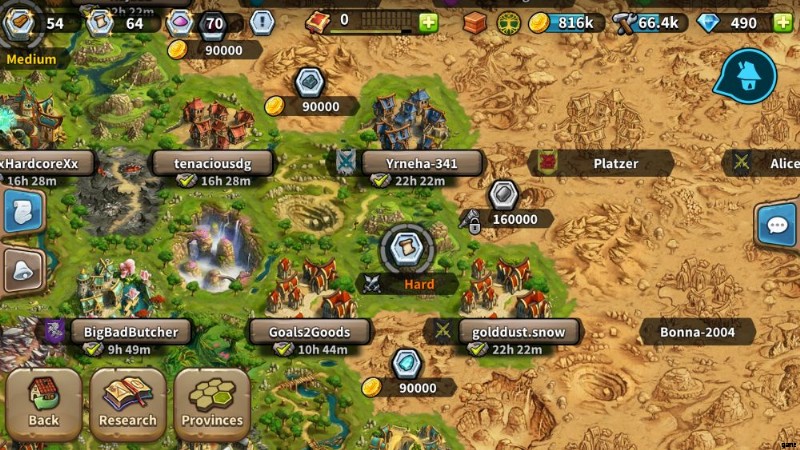
Conquering provinces is essential for expansion and discernment is significant in dealing with the encounters required to gain absolute control. This dynamic in Elvenar is where the saying “pick your fights wisely” literally applies.
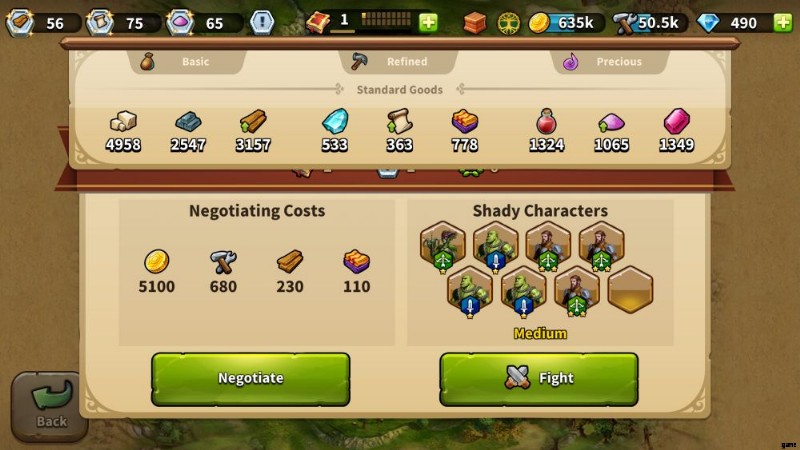
Encounters pertain to claiming spots in a scouted province. You may choose to either negotiate or fight to resolve them. Both options will make you spend resources and the costs scale up as you progress in the game.
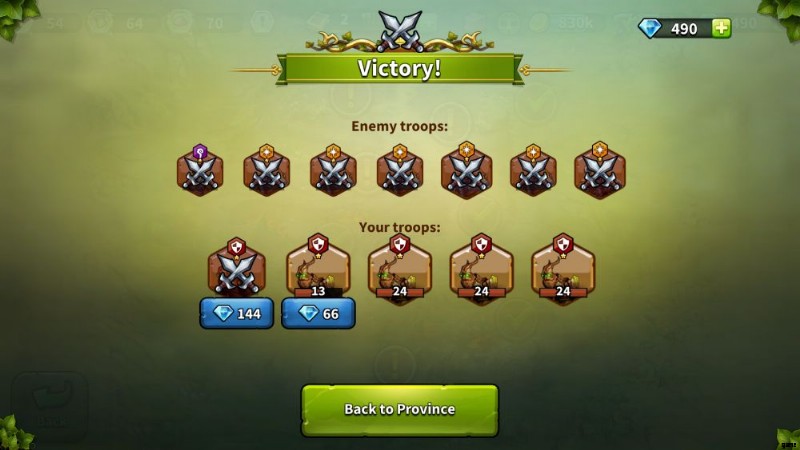
When choosing to fight, you are risking just two resources:supplies and time. Meanwhile, if you opt to negotiate, you are giving up a whole lot more as it may cost you a combination of coins, supplies, goods, and of course, the time spent to earn those resources. To cap it, fighting is a risk while negotiating is a sure win.
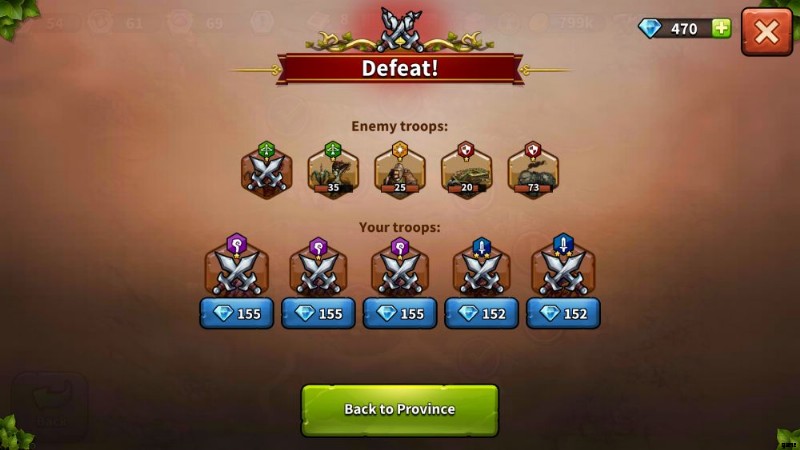
No matter how advanced your current progress is in Elvenar, what’s constantly true about encounters is that, the harder it is to fight the units guarding an area, the costlier it will be to bribe or negotiate with them. While essentially cheaper, engaging in medium and hard fights presents a chance that your squads may sustain heavy losses, or worse, be wiped out. Defeat is unpleasant especially on your pocket.
To keep the fight-or-negotiate decision making process simple, below are the steps you should take and the things you must consider when dealing with encounters in Elvenar.
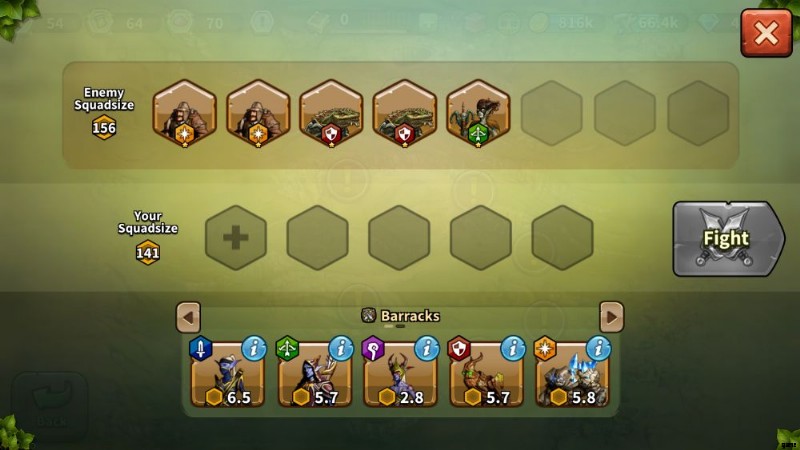
<強い>1. Size up your opponents – There is always strength in numbers. If you can field units enough to outnumber the opposition, feel free to overdo it. Filling all 5 slots even if using just 3 is enough won’t hurt. The only possible exception is if you are conserving a particular unit type.
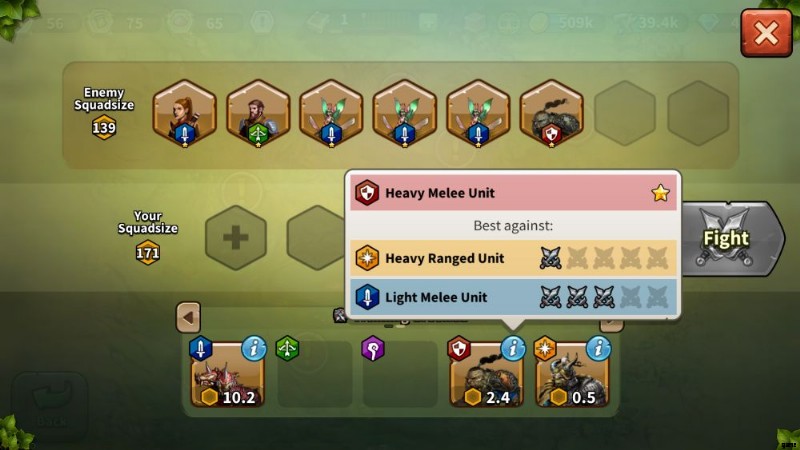
<強い>2. Check enemy composition – Every unit type is strong against two other types and you should check what your would-be opponents are deadly against. If the enemies are too hybrid (has 3 or 4 different types of units), it might be better just to negotiate to avoid the bitter taste of defeat.
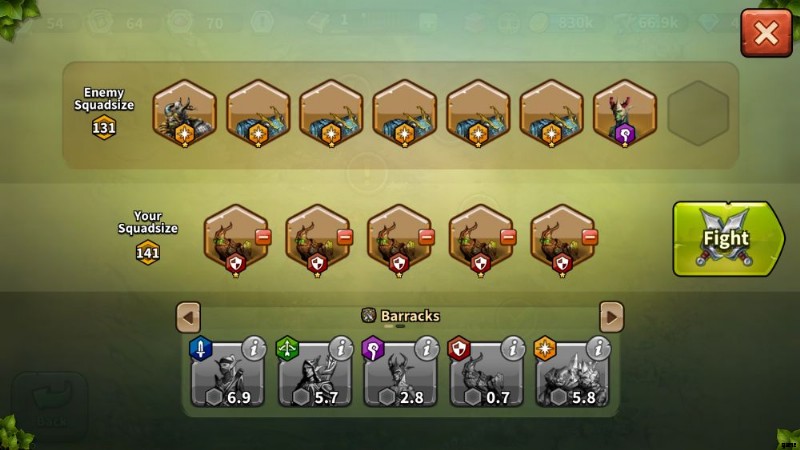
<強い>3. Always counter-pick – Due to the limit of being able to deploy only up to 5 squads, you may not always outnumber the enemy. As such, make sure that you will only field units that have an advantage. If it’s a fair showdown between 5 squads, sending more units with a type advantage will help ensure victory. However, if the opposing team has more than 5 squads and they have a hybrid lineup, it becomes impossible to play the counter game because they will have an answer to whatever type advantage you plan to bring. Still, the more counters you offer, the better the chances to win becomes.
For a quick recap, here are the strengths and weaknesses of military units in Elvenar:
Light Melee – strong against light ranged and mages; weak against; heavy melee and heavy ranged
Light Ranged – strong against mages and heavy melee; weak against light melee and heavy ranged
Mages – strong against heavy melee and heavy ranged; weak against light melee and light ranged
Heavy Melee – strong against light melee and heavy ranged; weak against mages and light ranged
Heavy Ranged – strong against light melee and light ranged; weak against mages and heavy ranged
<強い>4. Keep an eye on your resources – Victory is sweet and since negotiating assures that, it could be tempting to go on a bribing spree. But before you jump in such a mood, think first of how much time and conscious effort you would need to regain what you’re going to spend.
If the goods demanded in a negotiation correspond with the ones you have a boost for, go ahead and negotiate because all you’ll probably need in conquering an entire province is a batch of 3-hour orders from your Manufactories. In the same way, if you have developed a good trading habit to be abundant with every goods type, then you can have a slightly bigger appetite in negotiations.
Your success in resolving encounters quests, therefore, relies on having a high troop count, unit variety, and abundant resources. There is no special reward if your means to resolve encounters will be purely through fighting or negotiating, so choose whichever path is more cost-efficient and safe based on the four pointers in this subsection.
1.6 Quest Type:Unlocking Research Features
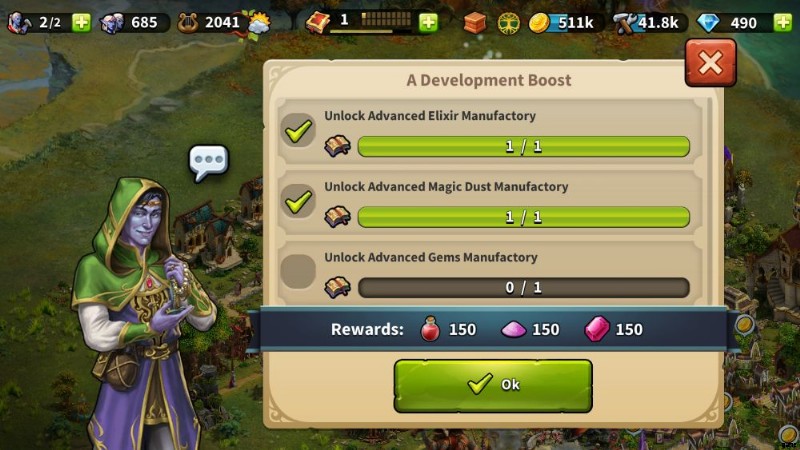
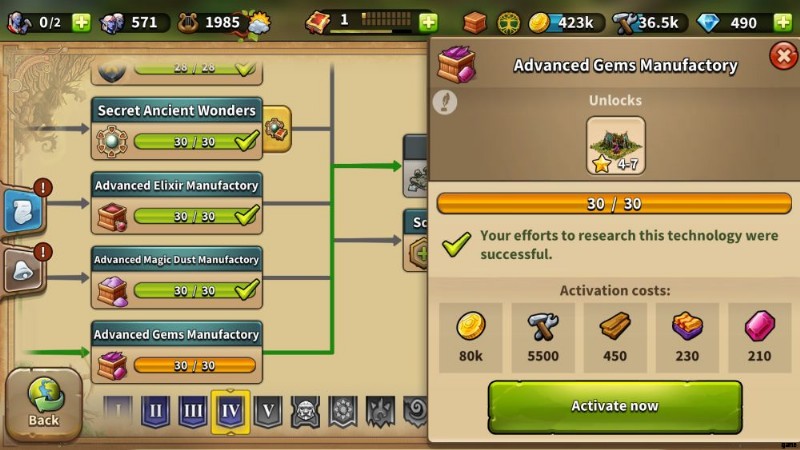
There is no specific or direct tip for quests that seek unlocking items and features in the research tech tree. The absolute fact about them, though, is that they get more expensive and demanding as you advance through the game.
The best you can do is to be proactive, unlock all the tech to get access to them and be wise with resources so you’ll have enough in stock to activate what you have unlocked. This means you have to keep on resolving encounters to earn Knowledge Points (KP) and develop a good inflow of supplies and goods.
In essence, what counts in preparing for research-related quests is to be laser-focused on spending your KPs and diligence in timing your order-harvest-order cycle in your Workshops and Manufactories. Actively creating offers in the Trader to stock upon goods you are not abundant with will also be helpful.
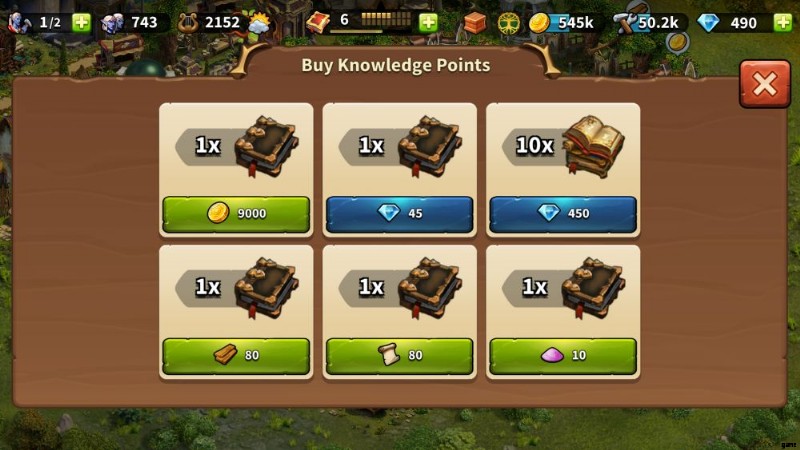
Sharing Knowledge Points is a practice for veteran players, but if you’re new to the game, you would want to hold yours and use them for yourself (until you have your own Ancient Wonder, at least). We also recommend to constantly check the prices in the Buy Knowledge Point interface and purchase as much as your resources can comfortably allow.
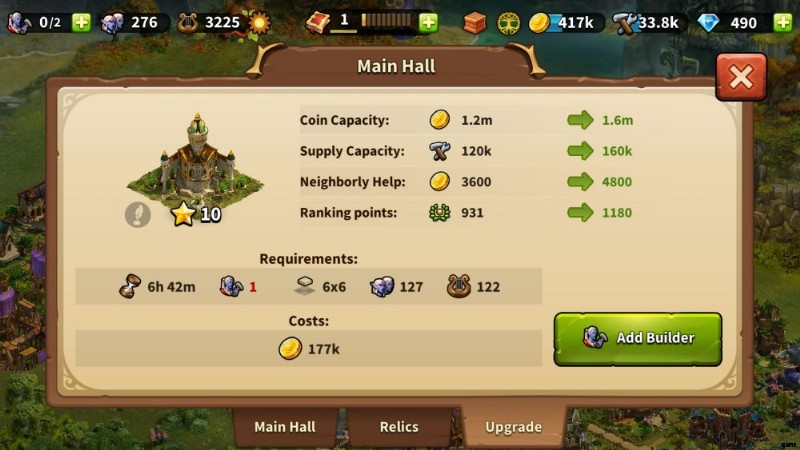
1.7 Quest Type:Upgrading Structures
Quests that impose to upgrade structures are directly tied with research because further upgrades of structures are tech-locked. The potential hurdles you may run into are related to having enough KPs, resources, and the most tricky of it all, space.
Structures increase in size after some point as you advance their level. A workshop, for example, starts off as a 2×2 structure, advancing it to level 5 will make it take a 3×2 plot and then further upgrading it to level 9 will push its size to almost as big as a cultural event building at 4×3. According to the Elvenar’s wiki, the ultimate form at level 45 (max) requires a 7×4 area for either race.
With this in mind, you need to manage your claimed area wisely in foresight of structural upgrades. Our recommendation then is to limit the number of structures you can have duplicates of like Residences, Workshop, and Manufactories or at least be prepared to sell a couple of them when you got no Teleport Building spell handy. Meanwhile, selling roads in Elvenar will offer you no refund, even for the expensive ones.

Another trick to be prepared for such quests is to let an area stay “loose” creating an allowance for structures. It may be tempting to build on every single grid (especially in a freshly-opened 5×5 plot), but exercising restraint, by leaving some space open, will let you slip through any unforeseen structure building/upgrade quests.
Creating a wiggle room will also be advantageous for vanity rearrangements. You can use the empty space as a temporary holding bucket for structures you wish to transfer; just in case you’re the kind who’s keen on grouping similar structures together.
To cap this section, here are quick facts you need to know about quests in Elvenar:
1. The quests in Elvenar are totally random; there is no quest list since the game’s creation in 2015.
2. Stockpiling supplies, coins, and goods will tremendously help in any quest. With an abundance of resources in tow, you’ll be capable to breeze through quests.
3. Most quest parameters are retroactive, being proactive with unlocking research tech and building/upgrading structures can get you insta-done a lot of quests. For example, if you have upgraded your Barracks as soon as you activate a tech for it, the quests requesting you to upgrade the said building will be marked as done, all you’ll need to do is claim the reward.
4. The quests dynamic scales with your progress and they are infinite. Don’t feel bad when you hit a plateau or you get stuck with the same quests for days. Elvenar is a game of patience and there will be objectives every now and then that may take days to manually finish.
5. Prioritize the festival quests. Festivals are timed events and the rewards you can get from them include structures that gives multiple benefits. It’s unwise to pass up on the opportunity of getting structures that gives population, culture, and goods all in one place, right?
We hope that this section of our Elvenar guide attunes you with the nature of quests and that the information we shared here help you build a patient yet proactive game plan in general. Read further in this article to know other strategies to respond to the other aspects of challenges in the game.
2. RESOURCES RHYTHM
Elvenar is reminiscent to the myth-inspired city-building games in PC, like Zeus, Caesar, and Pharaoh. It has captured the whimsical environment plus the necessity of patience, trading, and space management. What’s good in Elvenar though, is that the literal size of your kingdom does not oblige you to increase your resource production. But this doesn’t mean you don’t need to scale things up with growth.

In the Quest 101 section, we have aptly emphasized the need to stockpile resources and goods. The best approach to this is to form your own rhythm based on your playing appetite. Technically, Elvenar is a casual game so there really is no need to sit on it for hours every day. However, if you want to advance in the game quicker than the usual and you are willing to oversee your kingdom for as many hours in a day it takes, know that we’re on the same team! This section is for you.
2.1 Daily Catch Duties
While you can go as free-flowing as possible, it would be nice to keep tab of what hours of the day you usually play. This is crucial to maximize your production capability. Festival structures or basically anything that produces resources or troops on their own usually have a production timer of 24 to 48 hours. For brevity, we’ll simply call them self-sufficient buildings.
Self-sufficient buildings are nice to have because you are certain to harvest something from them after a set time even without your intervention. Usually, their products are either unique or has a daily yield ratio better than the “normal” structures you can freely build in the early game.
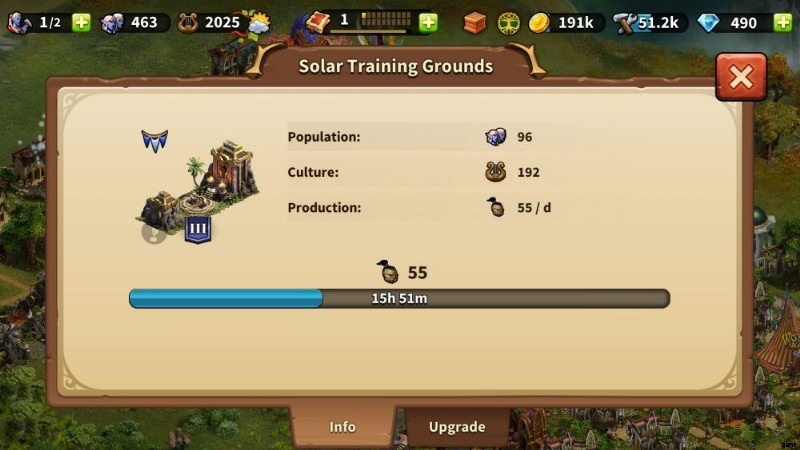
The catch with self-sufficient buildings, however, is that they don’t start a new production cycle unless you harvest their yield. For example, if you have Solar Training Grounds and you harvested it at 11am yesterday and then you are only able to resume playing by 5pm today, its next batch of Orc Warriors will be bumped off to 5pm tomorrow. Keeping mental tabs or even setting an alarm for your self-sufficient buildings may be too “next-level” for a casual game, but if you’re really into it, do so by all means.
2.2 Befriending Your Breaks
In addition to observing your play hours in Elvenar, it is smart to take into account your time off the game. This is important especially if you wish to capitalize on the order choices in your Workshops and Manufactories.
This is a matter of selecting whether to go for the 9-hour or 1-day options. If you think you’ll be able to quickly revisit the game by morning, going for the 9-hour option would be more fitting. It’ll only take a few minutes to harvest supplies and goods and then issue another batch of orders. Meanwhile, if you don’t intend to go online for a full day or beyond, choose the 1-day option.
Naturally, the 1-day order has the higher yield, however, we’re looking at a full 24 hours to realize the numbers they present. The shorter orders will always be more efficient. If you’ll be able to visit your kingdom in Elvenar twice a day, then go for two 9-hour orders.
One may think that a careful selection between 9 vs 1 day is not significant, but if you go set a full-production batch for your Manufactories and set a whole queue in your training facilities sooner than a day, you will be left with a negative supplies amount. In our game play experience, we once ran dry of supplies waiting for the 24-hour timer to finish. Leave the “learn from mistakes” part to us and watch your order options.
2.3 Pseudo-grinding
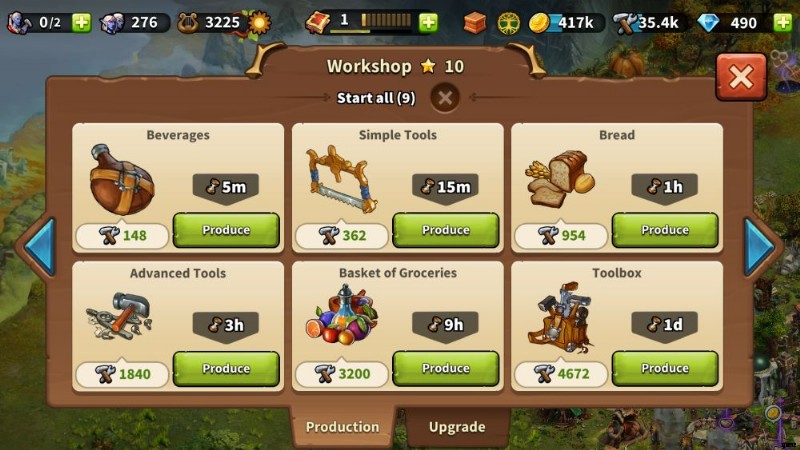
Earlier in this article, we have stated that Elvenar has no grind mechanism because everything has a waiting time. Sure, you can speed things up through diamonds, but it will entail you topping up a serious amount of real currency to meet objectives. The closest thing to a grind in Elvenar is repeatedly going for the shortest orders in Workshops and Manufactories.
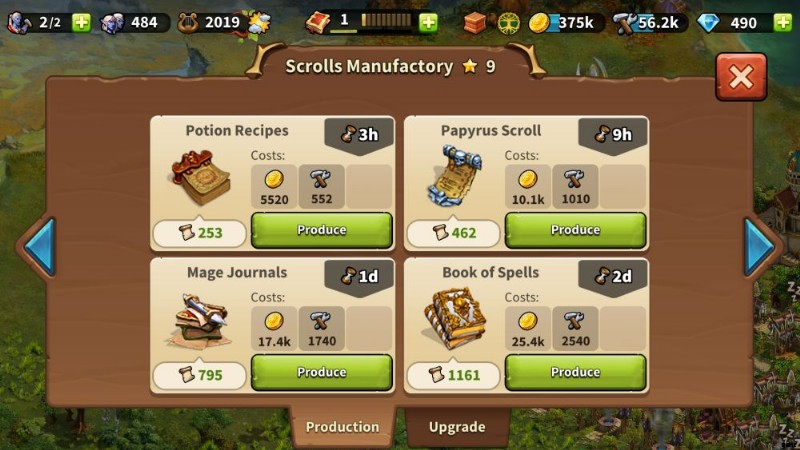
Pulling the same concept from the previous sub-section, the orders with shorter timers will always beat the one next to it. Take for example in a Scrolls Manufactory, the yield you can get from a single 9-hour order will easily be outclassed just by two 3-hour orders. To specifically illustrate, the screenshot below suggests that two 3-hour orders will produce 44 more scrolls and will just cost 940 coins and 94 supplies more. Those differences can easily be offset just by collecting the 1-hour yield of one Residence and a Workshop.
Pseudo grinding works better on Workshops with their 5-minute order option. If you think you’ll be able to play for a few hours straight, faithfully go for them and pop a Power of Provision spell on 1 to 2 Workshops. The said spell will last for at least 10 hours. By no means, don’t feel obligated to stay online for that long, but do take advantage of it while the effect is active.
The pointers we’ve mentioned in this section shall help you grasp what it takes to form a rhythm in harvesting resources. It may take a while for new players to understand its importance, but the longer you play the game, the better you’ll appreciate the increase in efficiency the tips above can bring.
3. THRIVING IN TRADING
The Trader is one of the useful features in Elvenar that is meant to be unlocked early. It is accessible just at the middle point of age/phase 1. If you are not using it regularly yet, this serves as your invitation telling you that you must include creating offers as a part of your harvesting cycles.
Trading is the key to be abundant with all types of goods in Elvenar. Every kingdom can only have up to three types of boosted goods, one from each type. You will only be able to include a fourth type of goods once you reach age 10; from age 3, where you will get your third goods boost, that will take months (especially if you’re on free-to-play). Due to this limit, you have to naturally just capitalize on your advantages as we emphasized in the previous section.
Players who have been in Elvenar for years can assure you that even if you can unlock all Manufactories and have no space woes at all (translation:topped up real currency for diamonds), producing non-boosted goods is simply inefficient. You may get enough for the internal needs of your kingdom (for upgrading Residences and beautifying roads), but you won’t have the spending power to negotiate through a lot of encounters. Trading is embedded in Elvenar and quite fortunately, the rich player base keeps this feature alive.
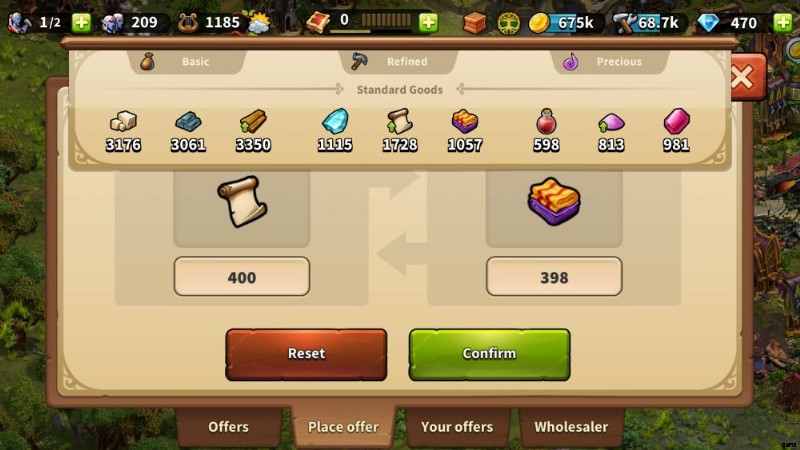
When creating offers, our recommendation is to balance out your goods. Once you claimed a batch of your harvested goods, trade an amount you are comfortable with in exchange of goods you don’t have a boost for. You can opt for a balanced-looking stock or prioritize one type and funnel the excesses from your boosted three, the choice is up to you.
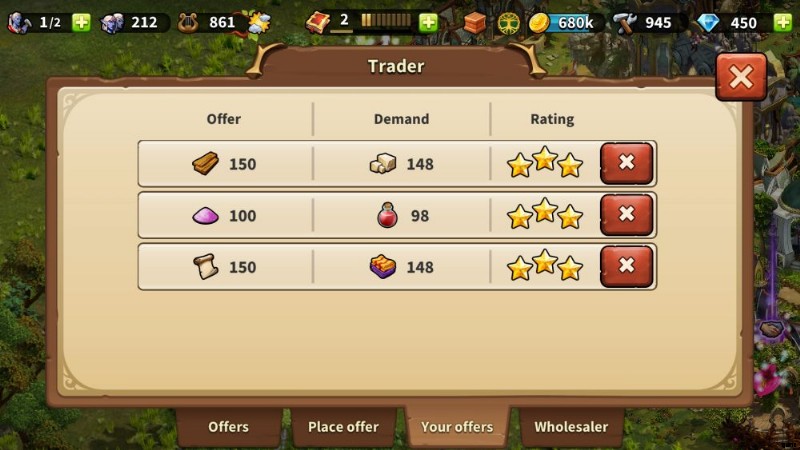
Some players may complain that it takes a long time for trades to be accepted by other players. There could be two reasons behind that. One, the players in their circle (nearby their kingdom or within their Fellowship) might be from a different time zone; two, the trade offers are underwhelming.
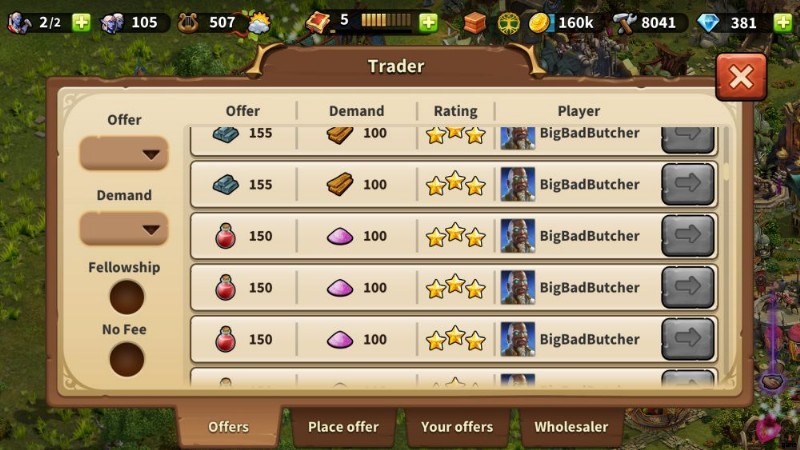
Offers will be rated as 1 star if it is a one-sided deal (the offer is low and whoever takes it is at a losing end), 2 stars if it’s just the default amount or 1 unit higher or lower, and 3 stars if the receiver of the deal takes more than the actual value of the goods.
The trick here is to make your deals be set as a 3-star offer because it will plainly stand out on other players’ offers list. Apart from making your offers visually appetizing, it can pop on top of everyone’s offers! The crazy thing about it is, just asking 2 units less of the default amount will make your deal a 3-star offer.
This strategy has worked for us brilliantly. More often than not, our offers will be accepted in minutes even when the offers tab is empty. Yes, there will be times that there won’t be any offers and it usually means that other players are not dispensing their excess goods or unwilling to let go of their stock, but offering just a minor discount gets them to open their fences.
We do not claim that our strategy guarantees 100% that your offer will be snagged in minutes, but it does work. If you do the same, you may see that the offers ‘older’ than your discounted deal will last a whole lot longer than yours. Elvenar, after all, is a game of patience, but waiting for less is very much welcomed.
You can trade whatever amount of goods you wish, don’t be compelled to ‘level’ with other trades offering by the thousands. For all we know, they may be whales or has been in the game for way much longer time than you. The rule of thumb is to trade only what you can dispense and trade actively. Enjoy leveraging on this feature as you enrich your kingdom.
4. CULTURE CONTROL
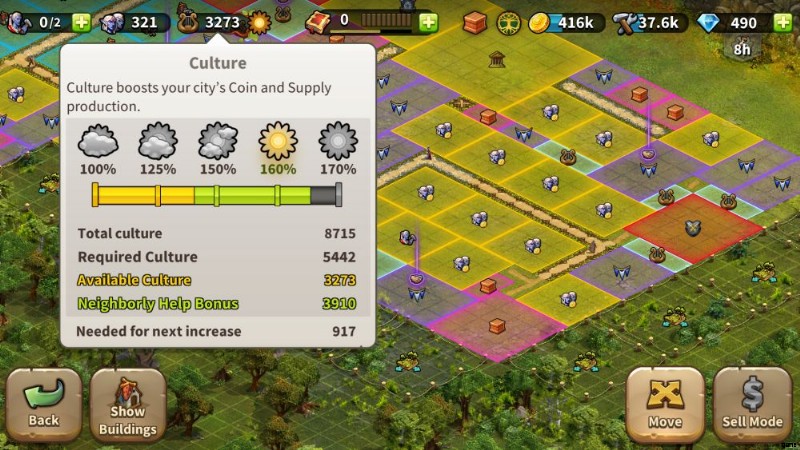
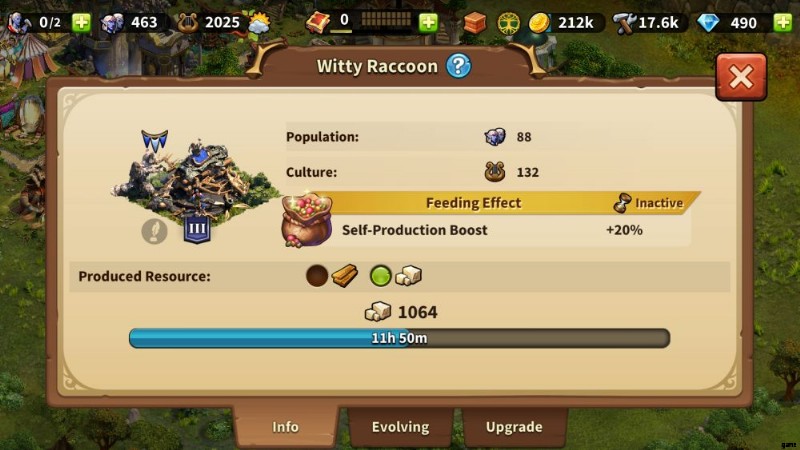
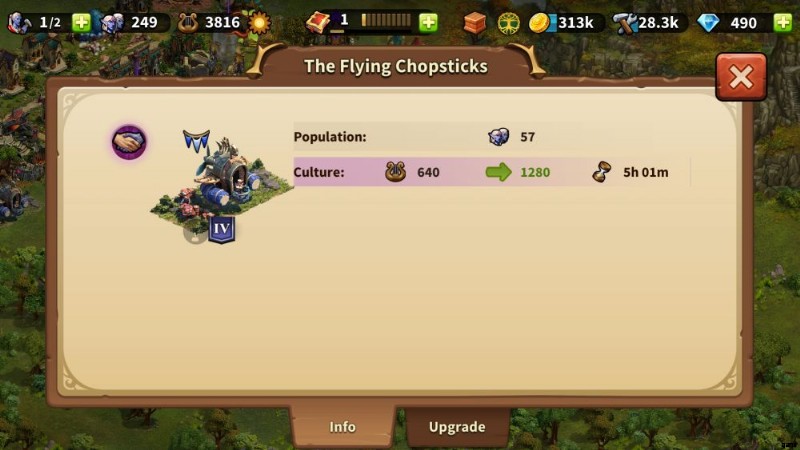
The culture element in Elvenar is not simply a citizen necessity as other city-building, simulation games would have it. Instead, it is a dynamic that boosts every single output from all your buildings that can produce coins, supplies, or goods. At max value, you can earn 70% more resources.
The impact of cultural bonus reflects on the numbers you will see when you browse the info of your resource-producing structures as well as the output projections per order type on your Workshops and Manufactories. If you see that the projected numbers are green, the culture bonus are already calculated with them.
Building or upgrading structures that doesn’t give culture will consume culture points. Treat it is another resource, but one that you are okay to have very little. Your city will still be fine if your culture dips to say, just 600 or below. Still, the bonus it gives but would be great to have. Imagine, just at 150% bonus, the yield of your shortest Manufactory order will give an output meant for 4.5 hours when you just waited for 3.
To not miss out on such a sweet bonus, you should dedicate space for cultural buildings. Unlocking cultural buildings will be spread through the research tech tree; quests may even direct you to build them. Think of it as a happy chore meant to give back to the citizens of your kingdom. What’s good with cultural buildings is that they do not require road access so you can essentially plant them in dead corners.
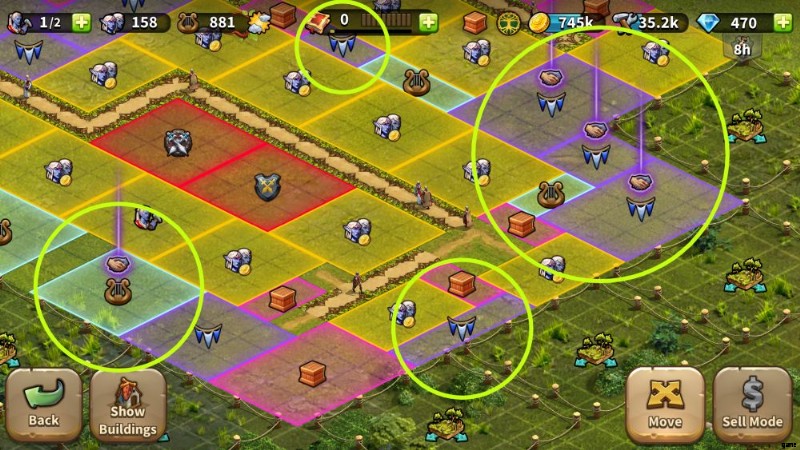
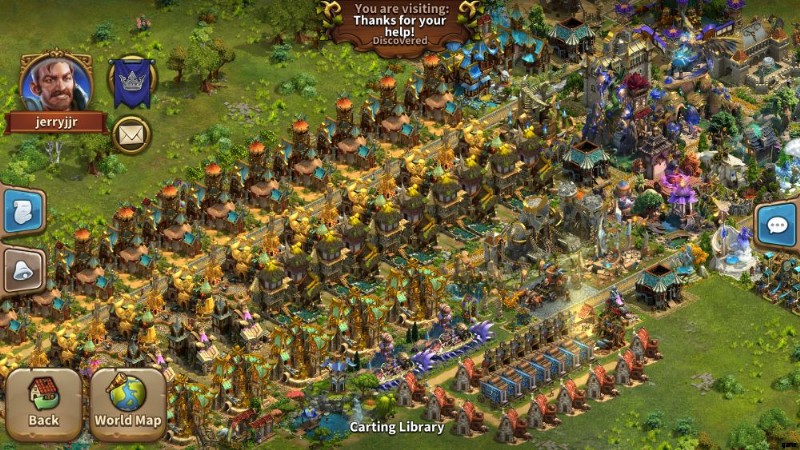
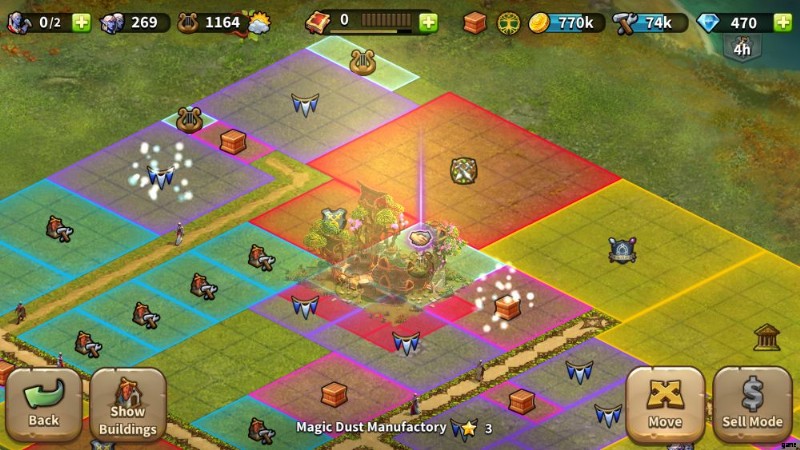
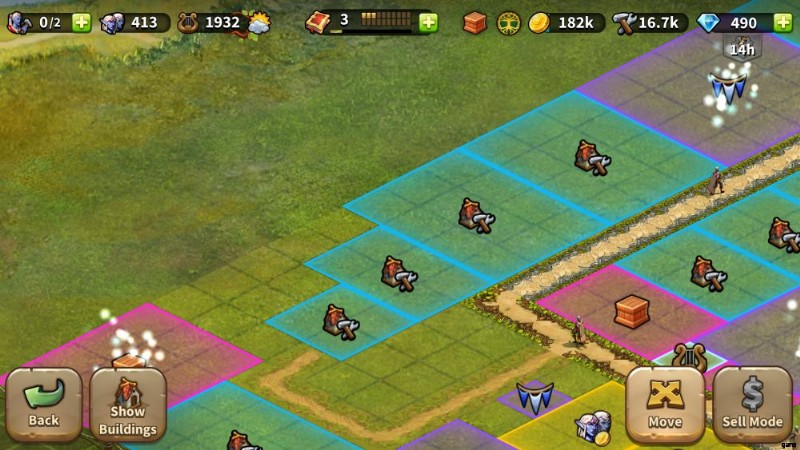
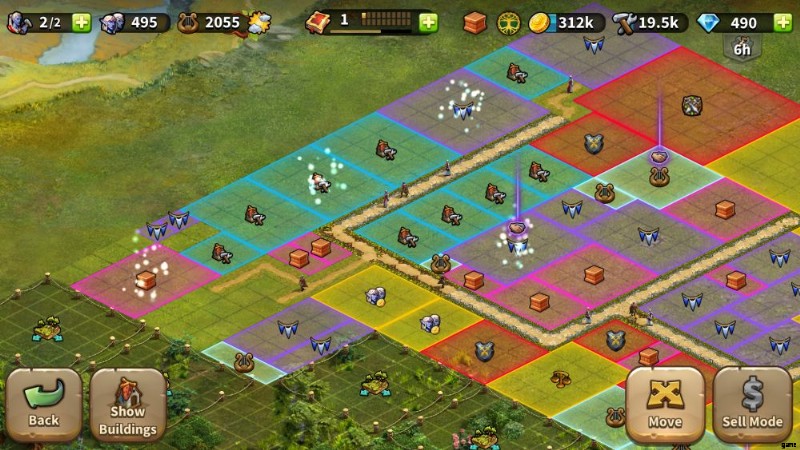
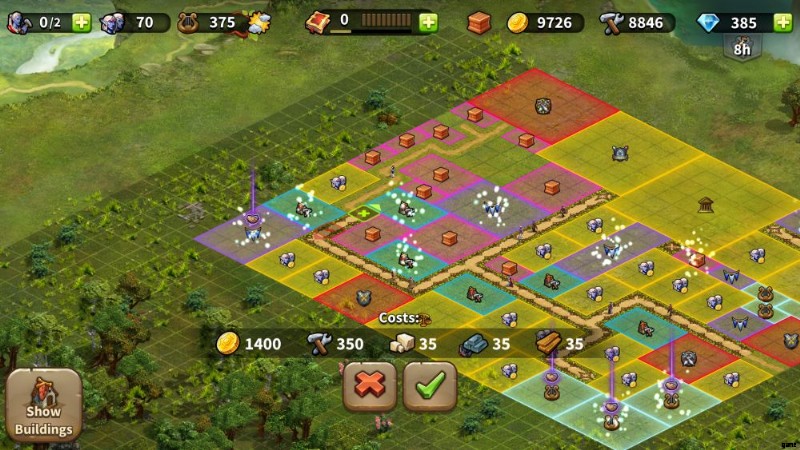
There will be cultural buildings that can fill the tiny gaps of your kingdom. If you have ‘dead’ grids you aren’t able to occupy yet, you can build those slim 1×1 or 2x1s. Also, all festival buildings (shaded as purple in the Move buildings interface) give culture and some of them don’t require roads. Speaking of roads, upgrading your roads may also give a good amount of culture depending on how many paths you have.
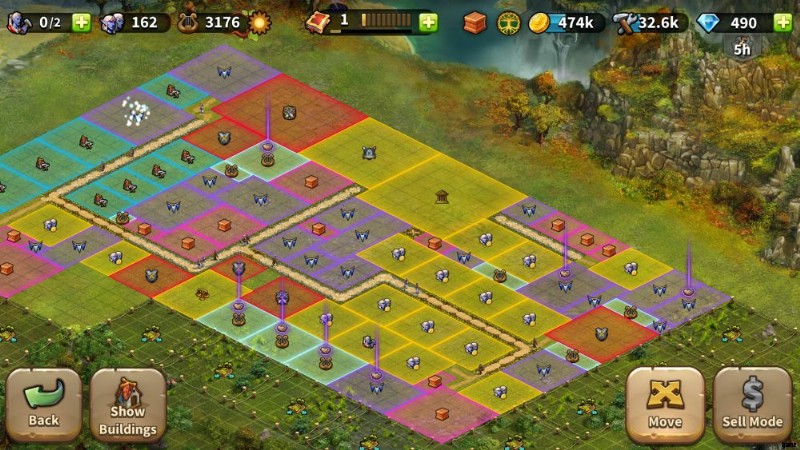
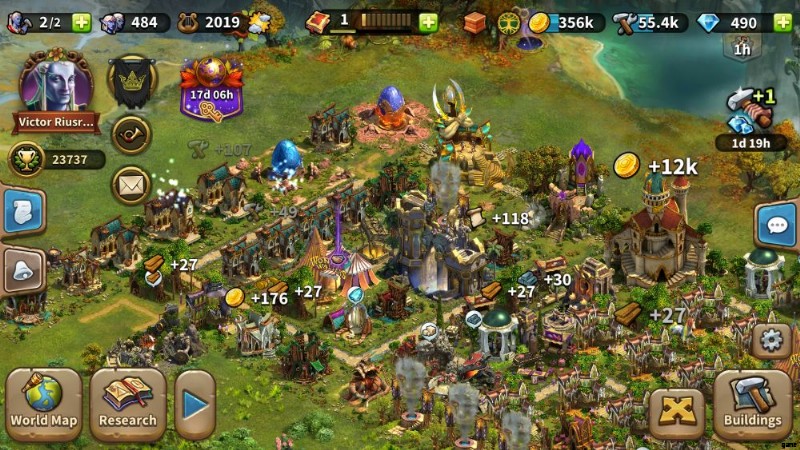
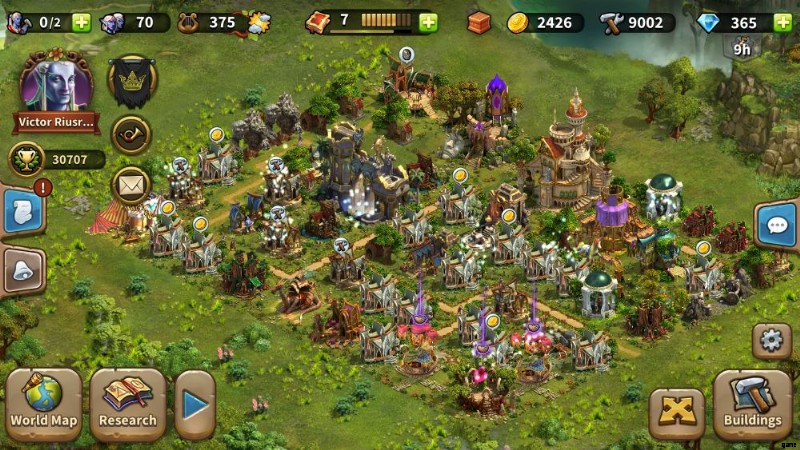
In the screenshot above, you can see how we essentially sandwiched and tucked cultural and festival buildings in between or behind ones that needs road access. You’d be surprise how enjoyable this space management trick is to pull off.
Culture, while an auxiliary element, should be given attention. After all, aside from the production bonuses, cultural buildings will beautify your Elven or Human kingdom in Elvenar the facelift it needs to make it more enchanted and majestic.
5. SPELLS AND THE MAGIC ACADEMY
What good is an elven lore-inspired game without enchantments and magic, right? Thankfully, Elvenar has exactly that. There are multiple spells in the game that can help your reign, they all work to boost your earning potential for a limited time, but designed to be perfectly balanced.
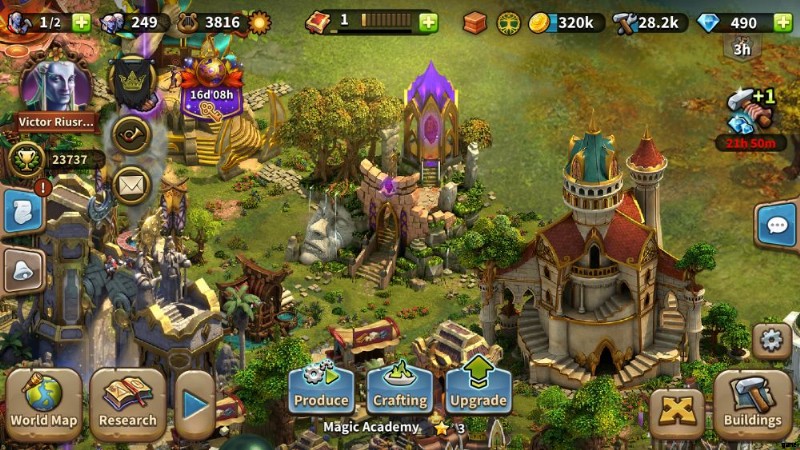
Spells aren’t exactly overpowered to the point that they can override the patience and waiting element in Elvenar. Nonetheless, wisely utilizing them is what will elevate you as a wise king or queen because with their help, you can easily achieve abundance without making similar resources-producing structures excessively. There are more than 4 spells in Elvenar, but we’ll only tackle the ones that you can create in the Magic Academy.
Power of Provision – This spell is your friend and by far the most useful of all the spells in Elvenar. It doubles the yield of any Workshop you bless with it for all the supplies you can claim for 10 straight hours. As such, it is best to use them only for your highest leveled up Workshop to maximize its effect and will be optimum for pseudo-grinding.
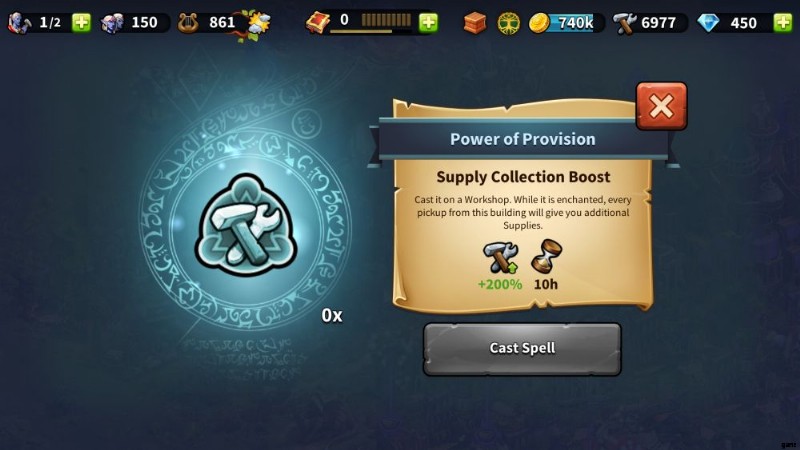
In our experience, we have once maxed spending our supplies in upgrades, army expansion, and usual cost of producing goods (Manufactories) and it took us two days to recover into abundance. What we’re basically emphasizing here is that having at least 5 to 10k extra supplies is ideal. To ensure that you’ll be able to keep such a surplus, we suggest to boost at least two beyond level 7 Workshops if you’re going to actively play.
Ensorcelled Endowment – A handy spell to have especially if your kingdom’s size has reached the point wherein reaching the maximum limit of the cultural gauge organically (without the help of allies/visitors) has become impossible. If an ally/visitor has blessed a culture-giving building while blessed with the spell, the bonus culture will be further increased
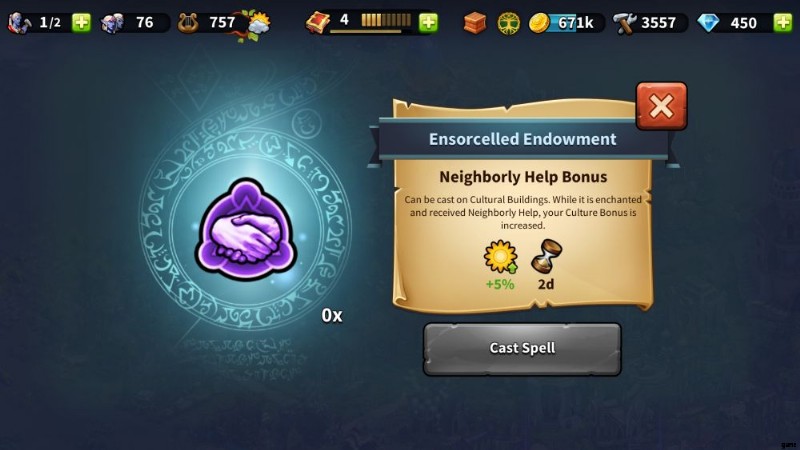
We have to state however that it is not as ideal as the Supply Collection Boost in terms of usability; its effect cannot be triggered in retrospect. This means that if a visitor’s blessing happened before you bless as building with it, its effect won’t kick in.
Magical Manufacturing – The counterpart of the Power of Provision but for Manufactories. While its numbers aren’t as impressive, a Manufactory blessed by one will allow you to have more goods for trading, negotiations, or internal upgrades. The Magical Manufacturing spell can be unlocked in age 3 when you have researched the Magical Inspirations tech.

While its duration stands at 13 hours (3 hours longer than the relative spell), the means to maximize its effect could be demanding if used in a pseudo-grind situation. Not everyone can sit on game for that long just to be able to take advantage of its effect in four batches of 3-hour orders, but if you’re like us and willing and devote time, then that would be the best use for it. An applicable trick if you have set a Manufactory for a long production and its yield is ready to be harvested, blessing it with a Magical Manufacturing spell will affect the claimable produce. Now, that’s something!
Quick note:Be careful when tapping on buildings while blessing them with the Power of Provision, Ensorcelled Endowment, and Magical Manufacturing because double tapping will cause the spell register twice on one building, not an efficient move when you intend to bless multiple structures.
Inspiring Meditation – The most fitting spell if you are certain that you won’t be able to play Elvenar for 1 full day. It extends your Knowledge Points cap to 20, letting you earn more from the hourly drop while you’re away. Its effect lasts for 48 hours upon casting, so make sure to return to the game before it expires.
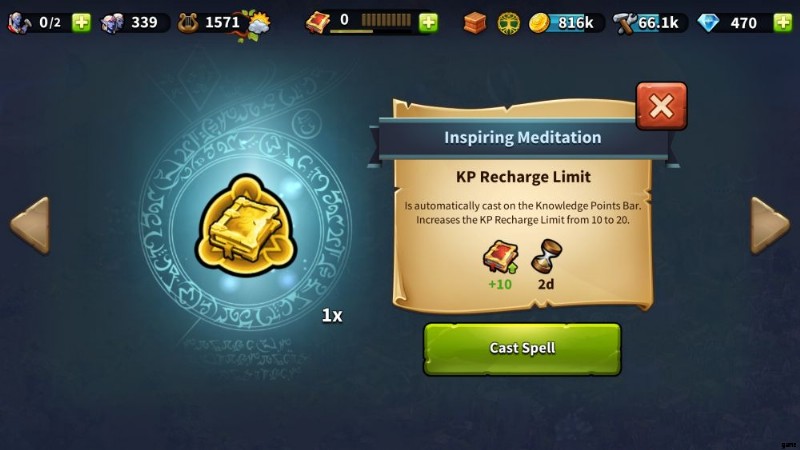
About Knowledge Points, if you’re on free-to-play, the default limit is 10. You can breach through that limit if you the exceeding KPs will come from resolving encounters, quest/event rewards, and daily login gift. However, if you let your current KP count above the default limit absent of the Inspiring Meditation blessing, you won’t gain an hourly drop.
Due to how the limit works, make sure to spend all your KPs before switching the game off or whether you intend to be away from the game for many hours. You surely wouldn’t want to miss those free KPs.
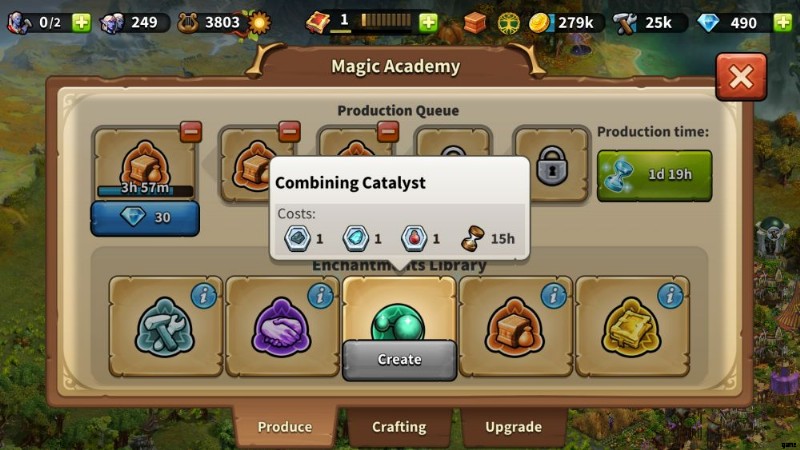
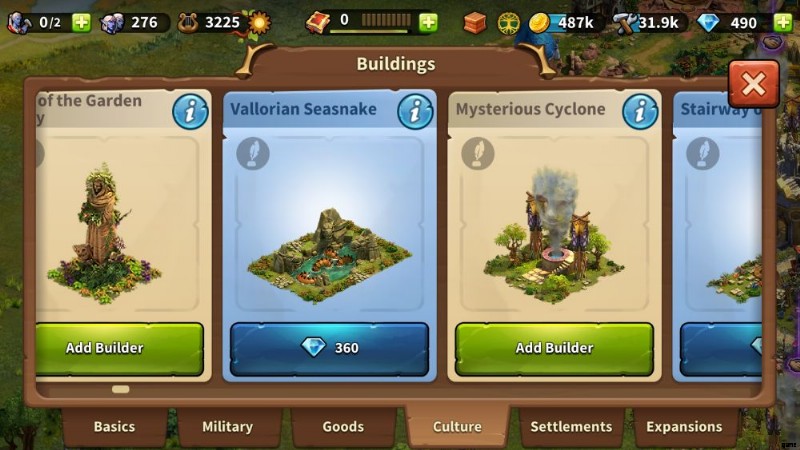
Apart from the four spells above, you can also create a Catalyst in the Magic Academy. This resource is essential for crafting and can only be unlocked in age 3. While it won’t give you an outright effect on its own, it is a requirement to craft most object that will be generated in the crafting tab.

The crafting tab populates five random objects that changes after a certain time. If you have researched the Crafting tech already, keep an eye on the tab regularly because the lineup will often include powerful spells, instants, relics, upgrade materials, and best of all, limited festival buildings that will do wonders for your kingdom.
6. FELLOWSHIPS
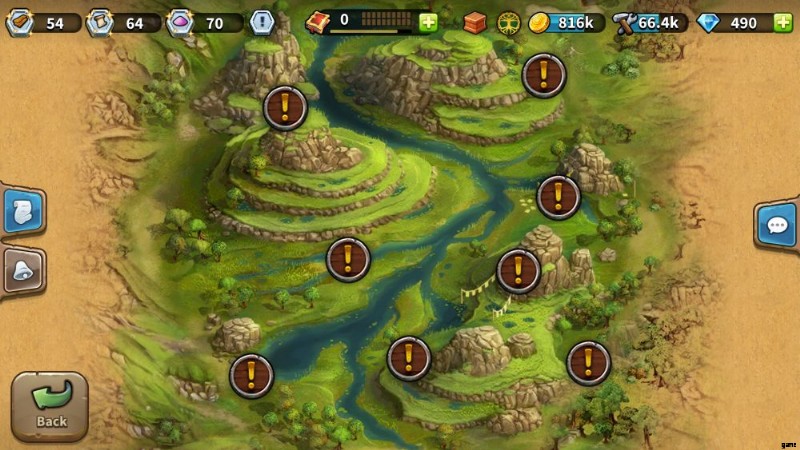
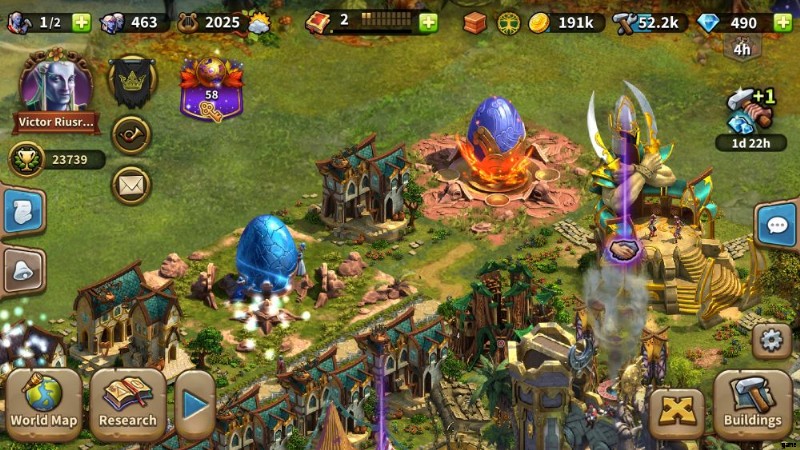
Magic is not the only power present in Elvenar; it has the power of friendship too. Like implied in the chapter about trading, your reign involves being interdependent with other kingdoms. You’ll be introduced to the World Map very early in the game.
The World Map is your way to reach other kings and queens and you can you expand your influence. Such expansion may be done by scouting provinces, this will grant you access to any kingdom nearby; conquering scouted province will let you scout on further.
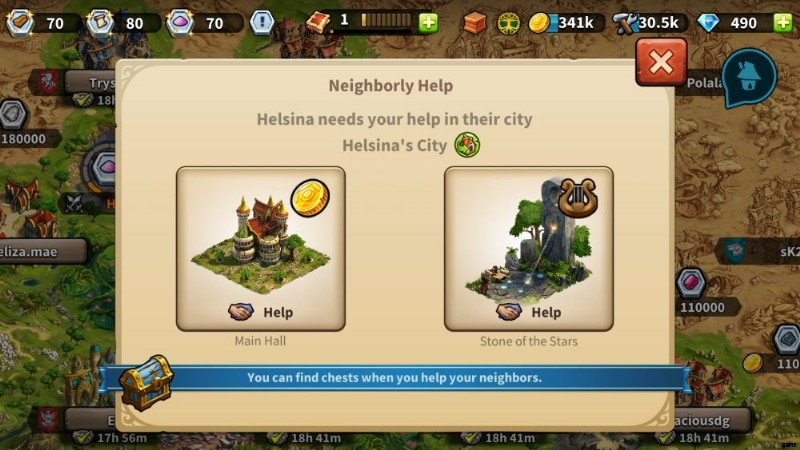
If the name of the kingdom is an interactive button already, you’ll have the ability browse the Fellowship they belong to, send the ruler a direct message, visit their kingdom (just a pure ocular visit and no interactions), help with their Ancient Wonders, and send neighborly help. Helping your neighbors is an action available every 24 hours.
The best neighborly help option to select, when available, is the one for culture, a unanimous opinion for Elvenar players mainly because its effect is a lasting x2 culture multiplier for the shown building. This is what invokes the power of friendship because other rulers will be aware of your presence and will likely return the favor.
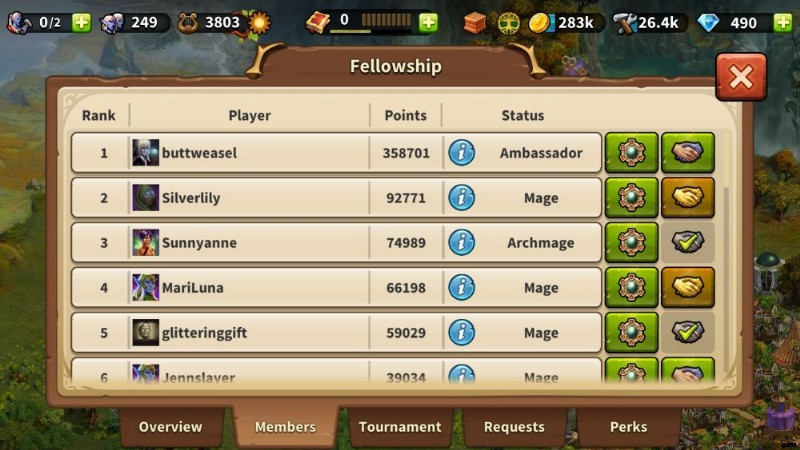
Your ability to help other kingdoms can extend beyond the reach of what you can see in the World Map through Fellowships. It is a tech that’s meant to be unlocked in age 2 which allows you to join a Fellowship. Once you have joined one, you can see a list of other players within the same Fellowship where shortcuts to help with their Ancient Wonders and send usual neighborly help are available. Additionally, you’ll be part of a group chat. There is a great chance that a lot of veteran members are in, so feel free to ask question when you need help with a feature.
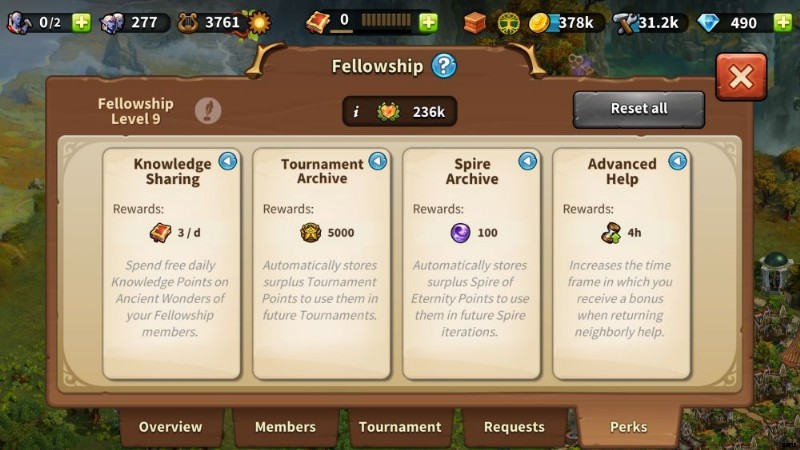
Being in a Fellowship will also let you participate in tournaments, from which you can earn rewards based on your contribution. You can also explore the perks already in effect for Fellowship, this is important to check because it will encourage you to participate and be active.
If you have read our article from the top up to this point, you definitely have a good understanding now of how to tackle each quest type in Elvenar. Because they are random and varied, some quests may not be the exact versions of what we tackled, but the approach to solve any ’uncommon’ quests will still be within the same bounds of what we discussed.
Take note as well of the tips, tricks, and strategies we shared about trading, managing resources inflow, and optimal use of spells. With the help of those, you can blaze your way up the rankings and be capable to develop your kingdom without even purchasing diamonds.
Before we formally end this Elvenar guide, we’d like to leave you with some quick basic facts that will make your decision making and management chores easier.
Quick Tips
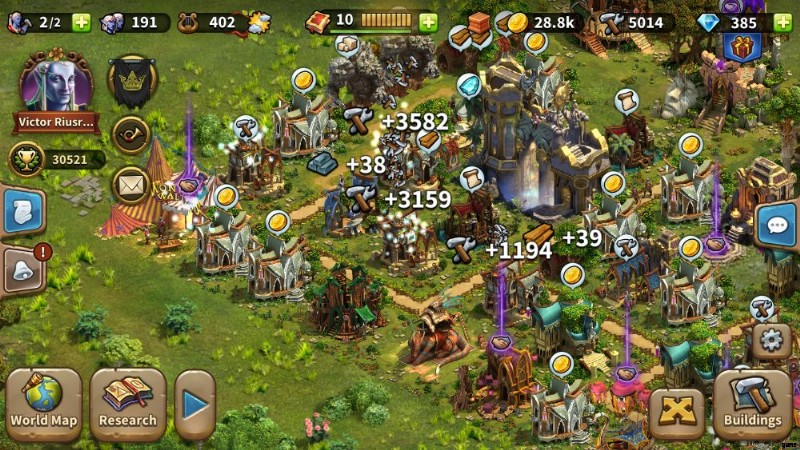
1. When harvesting resources, you can simply tap on one bubble and then swipe across all other bubbles. This will cut your harvesting time by a huge margin as compared to tapping one at a time.
2. Zoom out as much as you can. There is no need to micro-focus on anything and having a vision of your entire kingdom is better. As you unlock plots, the size of your kingdom will expand accordingly. You may have situated resource-producing structures at corners or behind/near ones that may at times create a visual contrast. A fully zoomed out view will make all “harvest-ables” easier to spot.
3. When choosing which products to make for a particular type of resource-producing structures, tick on the circle that you will see when. It will set the same item for all other structures. This will apply to all Workshops.
Manufactories, on one hand, will ONLY batch-produce with other identical Manufactories at the same upgrade/star level. Note that upgrading in pairs is common in free-to-play (because you can only have 2 “free” builders). As such, say if you have 6 Planks Manufactories and they’re at levels 4, 5, and 6, you have to access three to issue the batch produce command separately.
4. When upgrading roads from plain dirt to any form that has cultural bonus, you don’t have to sell or remove the dirt roads anymore, you can simply “overwrite” them by dragging the placer to the roads and plot the path accordingly. The same works for further upgrading roads.
5. When scouting provinces, you should prioritize according to what you need and don’t simply joy-scout just because you have the gold to spare. If you’re aiming to boost your capacity to trade, the best practice is to go for the ones that give relics for the goods you already have an active production boost for.
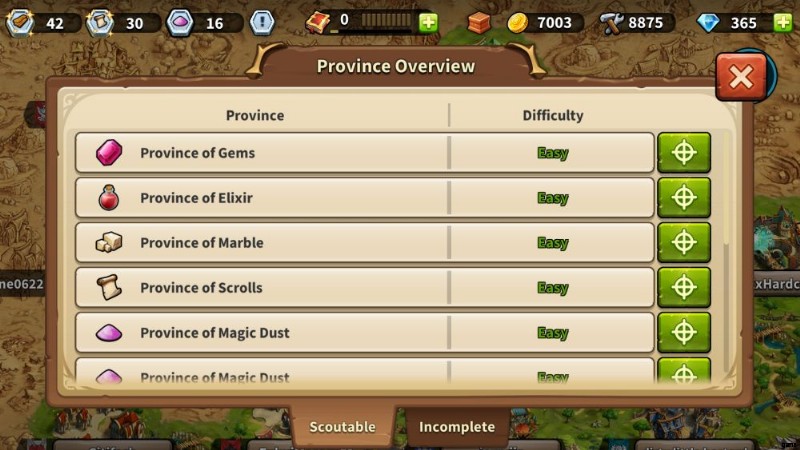
On the other hand, if your aim is to simply conquer provinces to unlock land expansions or meet mission requirements, check the ones with an easy difficulty. You can do so by opening the Province Overview; clicking on the target button will center your view to a particular province.
6. Due to the constant challenge of maximizing space and managing road connections, it is best to place big structures at the edges and give them minimal road access, preferably, just 1 grid touching the road. You can even make them ‘share’ just one path plot.
That concludes our Elvenar guide! Thanks for your time browsing our article. We hope you enjoyed exploring the information we shared all throughout. What we imparted here are based on our extensive game play, official wiki research, and even visits to Reddit entries about this wonderful, 7-year-old yet going strong city-building game.

If we’ve missed to discussed anything crucial and would count as basics, please share your knowledge to other kings and queens using the comment section below. Just like how Humans and Elves cooperate in this game, let’s help each other out for the improvement of our kingdoms.