ゼノファージ Destiny 2 ガイド:エキゾチック武器クエストの攻略
Destiny 2:影の砦では、失われた祭典が多くのトリックをもたらしました 、しかし、それはまたいくつかの御馳走をもたらしました。新しいエキゾチック武器のクエストについて話していますが、忍耐力が不足している場合、入手するのはかなり難しいようです.挑戦する気があるなら、ゼノファージ Destiny 2 ガイドをチェックしてください この新しいエキゾチックの入手方法を紹介します。
ゼノファージ Destiny 2 ガイド:ゼノファージとは?
ゼノファージは新しいエキゾチック マシンガンで、次の効果があります:
- ピロトキシン弾 – 爆発弾を発射
- 距離計 – 照準を合わせると、範囲と倍率が向上します
それはかなりクールに見えます、そして私たちはそれが間違いなくパンチを詰め込むと思います.他の武器に比べて弾倉は小さいかもしれませんが、一発一発の弾丸は間違いなく重要だと感じます。いずれにせよ、イベントで導入される武器は常にDestiny 2のコレクターの夢なので、これを見逃すわけにはいきません.
ゼノファージ Destiny 2 ガイド:クエスト攻略
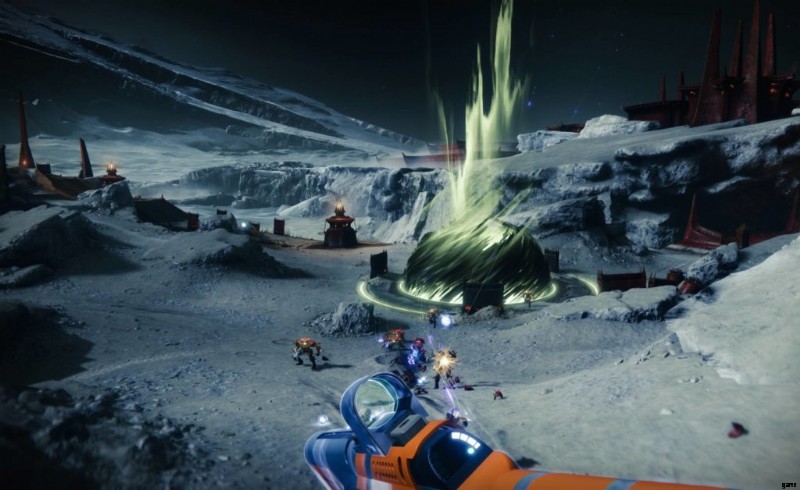
このエキゾチックな機関銃を追加したい場合は、Xenophage Destiny 2 クエストを完了するためのいくつかの手順があります。ただし、それを拾うには、いくつかの探偵作業が必要になる場合があります。クエスト チェーンの最初の部分を取得するには、ピラミッド オーバールックに移動する必要があります。エリス・モーンが通常いる場所の隣にある信頼できるポータルからアクセスできます。
オーバールックに着いたら、4 つのハイブ像を見つけて操作する必要があります .特定の順序でそれらを操作する必要があるため、数回かかる場合があります。これは、ピラミッドに向かって時計回りに 4 つすべてを操作することで実現しました。 .ただし、コミュニティは他の多くのバリエーションを報告しているため、正直なところ、チェストが生成されるまでそれらを打ち負かすことができます.宝箱を開けると「The Journey」というクエストが発生します。
ゼノファージ Destiny 2 ガイド – エマージェンス
このクエストを取得したら、アンカー オブ ライトに行き、ライト オーブを 6 つの異なる場所、または儀式用プレートに持っていく任務を負います。これを行う時間は短いので、効率的に作業を行い、最初に場所を計画する必要があります。
マップに移動し、そのエリアで Anchor of Light のテキスト ラベルを探すと、6 つの異なるプレートがテキストの周りに緩やかな三角形で配置されています 、そのうちの 1 つが真ん中にあります。それが完了すると、クエストの次の部分がアクティブになります。
ゼノファージ Destiny 2 ガイド – パスファインダー
クエストのこの部分では、すでによく知っている月のさまざまな象徴的な場所からフラグメントを収集することが問題になります。 Archer's Line、Hellmouth、K1 Communion、Sorrow's Harbor の 4 つの失われたセクターでパズルを解かなければなりません。
各失われたセクターには、ボスがいた壁にハイヴのルーン文字があります。毎回解決するグリッドベースのパズルを見ています。それぞれのトリックは、グリッドごとに9つのタイルすべてが、それぞれのグリッドに対して表示される特定のルーンと一致する必要があるということです.それを理解したくない場合は、正しい結果を達成するために射撃を介して各グリッドの各ルーンと対話する必要がある順序があります.
- アーチャーズ ライン – 左上、左下、中央、右中
- K1 コミュニオン – 左下、右下、中央上部、中央上部
- ヘルマウス – 右上、左中央、中央、中央下、右下、右下、中央下、中央下
- 悲しみの港 – 中央左、中央、中央、中央左、中央上、中央下、中央、中央右
ゼノファージ Destiny 2 ガイド – 発見された道
これらのパズルを解いたら、ゼノファージ Destiny 2 クエスト チェーンの次の部分に進みます。これには、Pit of Heresy ダンジョンに入ることが含まれます。ロックを解除する必要がある場合は、そのためのガイドもあります。
異端の穴に入ったら、最初の遭遇後に注意を払う必要があります。最初の遭遇までに、Hive シンボルのない 2 つの構造が存在しますが、それらには謎のグリフがあります。 Shoot the glyphs to spawn a Knight, then finish it and the first encounter off before interacting with another thing that’s missing symbols – a door. It’ll be on a wall chock full of other doors and symbols, so it’ll stand out.
Xenophage Destiny 2 Guide – The Pariah
While you’re still inside the dungeon, keep moving through it til you reach the encounter with the Pariah Ogre. You’re going to want to take some precautionary steps before the final fight, as follows:
<オール>Now, this is a two-parter. Once you hit the final boss, you’re going to have to play a game of match. There will be different orbs in the room, and each is a different element – Arc, Solar, Void, and Kinetic. You have to pick up the orbs and bring them to the plate that corresponds with their element. Each time you do this, you’re going to get a buff that will let you damage the boss so long as you’re using a weapon of that corresponding element. Matching the Solar orb and plate will allow you to do Solar damage to the boss. Match all the orbs and use the chance to whittle down their health until you’ve downed them for this final step.
Once you’ve completed all the steps above that we’ve listed in our Xenophage Destiny 2 guide , then you can head back to Eris Morn and pick up the Exotic weapon that you’ve rightfully earned after all your hard work. Need a hand with anything else in Destiny 2:Shadowkeep? You can check out these other guides:
Master of Disguise Destiny 2 Triumph Guide – Festival of the Lost
Where is the Haunted Forest in Destiny 2:Shadowkeep?
Destiny 2:Xur Location and Inventory for October 25