Kritika:Reboot – Operation Dimensional Portal Attack Guide (How to Defeat Tyranmutanoid)

Tyranmutanoid を倒すための比較的短いガイドです。
はじめに
オペレーション ディメンション ポータル アタックは、複数のパートからなる 4 つのステージを完了することに焦点を当てた 8 人のレイドです。これは、最後のフェイ タイプのボスであるティランミュータノイドを最終的に倒すために協力する複数のチームで行われます。
追加のカードを提供するため、レイドを行うときはプレミアムが好まれます。これは、より多くの戦利品とミシック ドロップのチャンスを意味します。
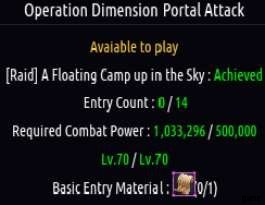
襲撃の前提条件
このレイドを開始するには、まず 500K の戦闘力の要件を満たし、OPDA の作戦命令を所有している必要があります。エバーグリーン スカイ ガーデン ポータルの近くにあるウィンディ ハイランド キャンプの NPC トランプからチケットを購入できます。

これらのチケットは、500,000 ゴールドまたは 50 グリーン ストーンのいずれかで購入でき、通貨の種類ごとに 1 日あたり 1 つの購入制限があります。これは、1 週間に 14 チケットを蓄積できることを意味します。これは、1 週間の試行回数制限 14 と完全に一致します。また、キャッシュ ショップでそれぞれ 100 キャッシュで、1 週間に最大 6 枚まで購入できます (これらのチケットには、同じ毎週の入場制限が適用されます)。

襲撃隊と襲撃インターフェースの作成
レイドを開始するための要件を満たせば、オペレーション チーム インターフェースを開くことができます (マウスのロックを解除し、基本メニューでクリックすることでアクセスできます)。
これがどのように見えるかの写真です:

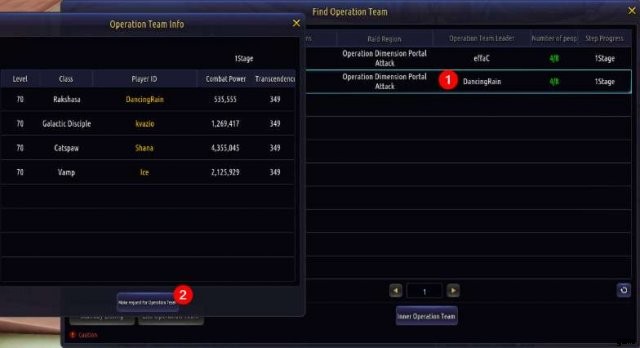
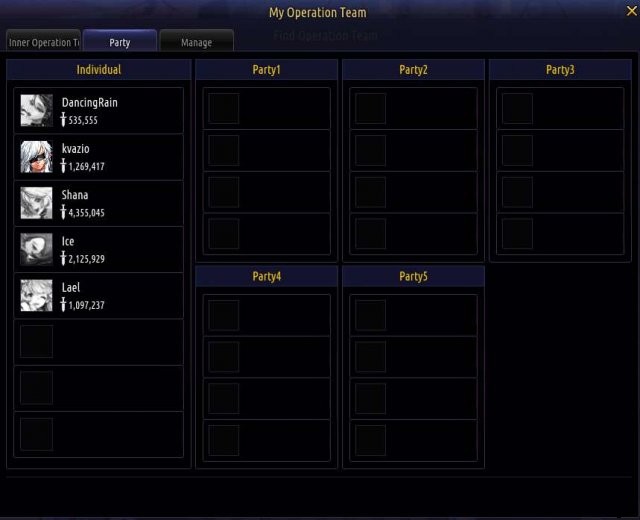
メニューを開いた後、運用チームをリストする (新しいレイド グループを開始する) か、既存の運用チームに申請する必要があります。以下は、既存のパーティに適用するインターフェイスです。希望のパーティーを選んで申し込むだけ。オペレーション チームのリーダーがあなたを受け入れると、レイドでのあなたの場所が確認されます。
運用チームに申し込むには、次のことを行う必要があります:
<オール>
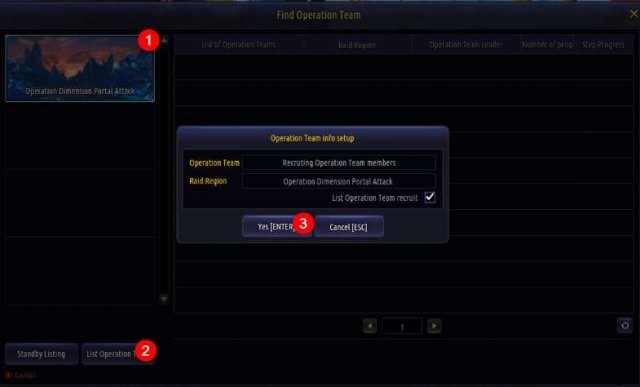
オペレーション チームを作成するには、まずパーティーに参加していない状態で、次の手順を実行する必要があります:
<オール>
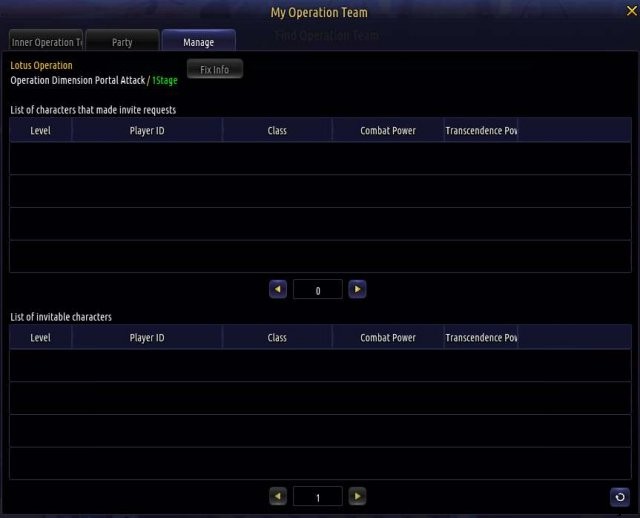
独自の運用チームを作成した後、[運用チーム] ボタンを再度クリックすると、このメニューが表示されます:
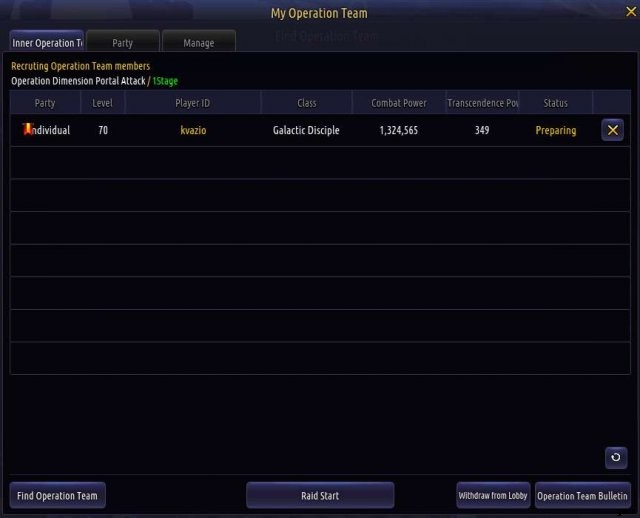
上記のボタンの機能は次のとおりです。
- レイドスタート – チーム全体の準備完了チェックを実行し、レイド ステージが開始するまでに全員がそれを受け入れると開始します (チーム リーダーのみが利用可能)。
- ロビーから退出 – あなたを町に送り返します。
- オペレーション チーム速報 – 現在のレイド ステージのタイマーと進行状況を表示します。
- 運営チームを探す – パブリック オペレーションの速報を開き、パーティを検索します。
中央のタブであるパーティーでは、作戦リーダーは自分自身とチームの他のメンバーをパーティーに割り当てて、レイドのグループを手配することができます。個々のメンバーもパーティーに参加できます。
最後に、[管理] タブで、招待リクエストを受け入れ、プレイヤーを自分のチームに招待することができます。
レイドの開始
レイド開始ボタンをクリックして全員が同意すると、タイマーがカウントダウンを開始します。このタイマーはステージ全体にわたって持続し、期限が切れる前に目的を完了できない場合、レイドは失敗します。タイマーが切れないようにするには、ステージの [メイン] ダンジョンを完了する必要があります。
各ステージの[メイン]ダンジョンに加えて、[メイン]ダンジョンの攻略をサポートする[サポート]ダンジョンがあります。ステージによっては、【メイン】ダンジョンを進めるために【サポート】ダンジョンのクリアが必要な場合があります。制限時間を増やしてバフを提供できる[サイド]ダンジョンもあります。
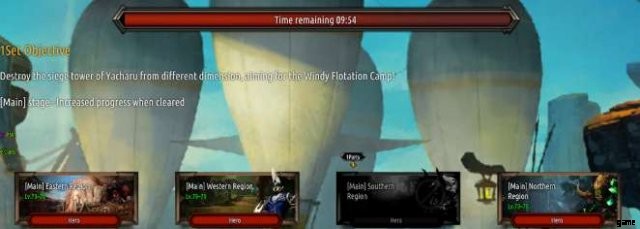
ステージ1
In stage 1 there’s 4 dungeons to complete, which can be done in any order. There is no special mechanics to them, just DPS them down as fast as possible.
Warning:Boss in “Southern Region” dungeon has slow, but very powerful attacks.
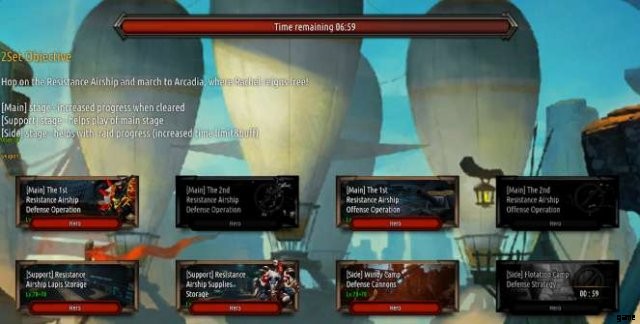
Stage 2
In stage 2 there’s 4 dungeons to clear, but this time some of them are locked until the previous [Main] dungeons are cleared. I suggest sending the stronger 4man party to Offense Operations and the weaker 4man party to Defense Operation. “1st Resistance Airship Offense Operation” has a mechanic that might make the dungeon easier if you’ll still find it troublesome.
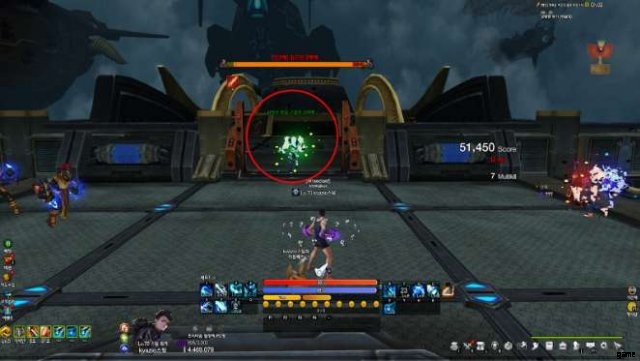
When you get to the boss room in “1st Resistance Airship Offense Operation”, you will find 2 engines on the sides you need to kill, but you might find them pretty tough to kill. To make it easier, you’ll have to defeat waves of enemies. After defeating each wave a green advanced enemy will spawn. After killing it, a short AoE effect will appear on the ground that gives you a strong damage buff which stacks to 2.
Stage 3
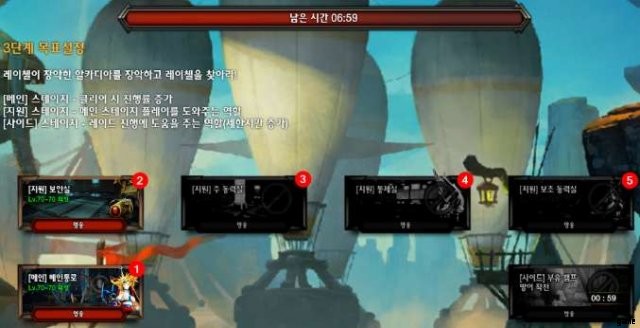
This gets a bit trickier from here so I’ll provide order in which party enters which dungeons.
Main Party enters dungeon #1.
In order to progress further in dungeon #1, the rest of the raid group will have to clear dungeon #2, #3, #4 and #5 which unlock one after another.
Some of the bosses in the dungeons #2 – #4 will be invulnerable until the Main Party progresses further in dungeon #1.
If only dungeon #2 and #3 is cleared, the Main Party will be able to finish dungeon #1, but there will be inconveniences if dungeons #4 and #5 have not been cleared(e.g. massive DoT on last boss of dungeon #1).
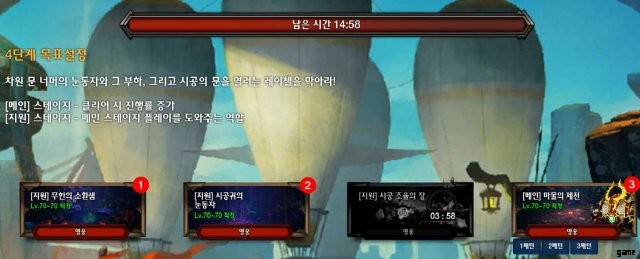
Stage 4
Main Party goes to Dungeon #3, while the rest of the raid group may party up and clear Dungeon #1 and #2 to help the Main Party.
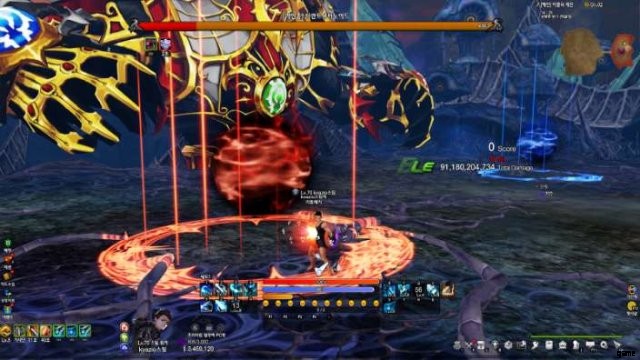
Dungeon #3 mechanics:
After getting the boss to 90% HP, it will summon these 2 circles. Simply walk into either of them to start the mechanic.
After the boss goes back to his basic attacks, you will start to see numbers stack on top of your head after you avoid the shockwaves of his attacks, it’s a buff that massively increases your Attack Power(stacks to 6, after reaching 6 stacks, triggers Burst Mode which boosts your damage even further and consumes the stacks).
If you failed to dodge the shockwave you will see a purple / pink symbol appear on top of your head, that means you’re about to “explode”(a damaging AoE for you and your party will appear shortly on top of you). Simply walk away from the party and i-frame the explosion.
If you haven’t walked into either of the circles you’ll be punished by putting the explosion attack on you every shockwave.
結論
That’s it, you’ve cleared the raid with your group. Remember that this can be done 14 times a week while the tickets can be bought daily meaning you can stack them up and choose one day to do them. Just keep at it and you’ll eventually get the items you need.