Sven Co-op – Info_Node について
このガイドでは、info_nodes の使用法についてすべて説明します。
ノードとは?
ノードは、AI がマップ内を動き回るために使用するナビゲーション ポイントです。新しいマップをロードするときに、「ノード グラフを再構築しています」というメッセージが表示されたことがあるかもしれません。この段階で、エンジンはすべてのノード間に回線のネットワークを作成しているため、モンスターと NPC はあるノードから別のノードへの有効なパスがどこにあるかを認識します。
ノードと AI
ノードがなくても、Goldsrc エンジンの AI は、3D 空間を歩き回り、小さなオブジェクトをナビゲートする方法を知っています。 AI は Sven Co-op で何年にもわたって改善されており、独自のナビゲーションがさらに優れています。ただし、より複雑なシナリオを通り抜けて AI の動作を実行するためには、依然としてノードに依存しています。
この最初の例のシナリオでは、ゾンビをカウンターの後ろに置きます。プレイヤーに向かって歩こうとしますが、明確なパスを特定できないため失敗します。 AI は小さなオブジェクトを通り過ぎてナビゲートするのに十分なほどスマートかもしれませんが、この大きなカウンターは処理するには大きすぎます。
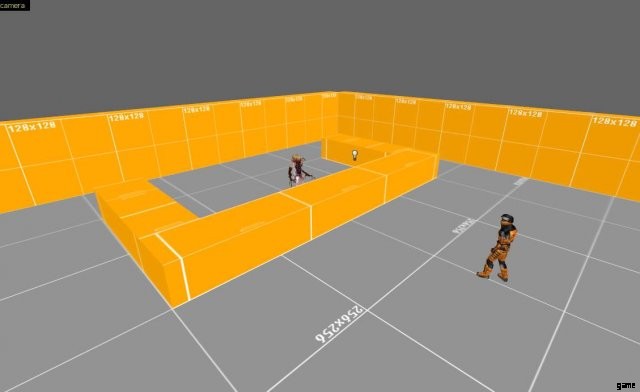
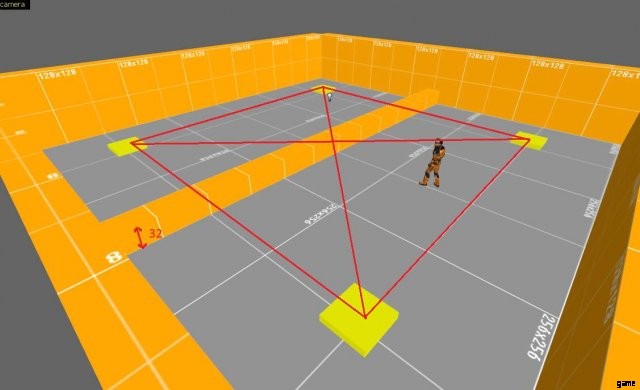
info_nodes (黄色の四角) をいくつか追加しましょう。これらのポイントは、ゾンビがたどる経路のネットワークを生成します。プレイヤーを見つけて直接交戦できないとすぐに、ノード ネットワークにガイダンスを求め、現在のノードからプレイヤーが現在最も近いノード (赤い線で示されている) までの最速パスを決定します。 .
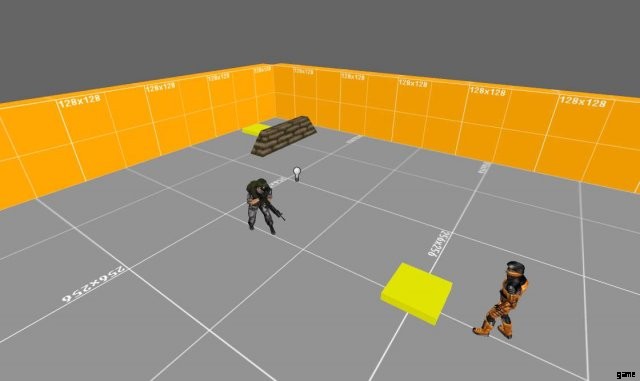
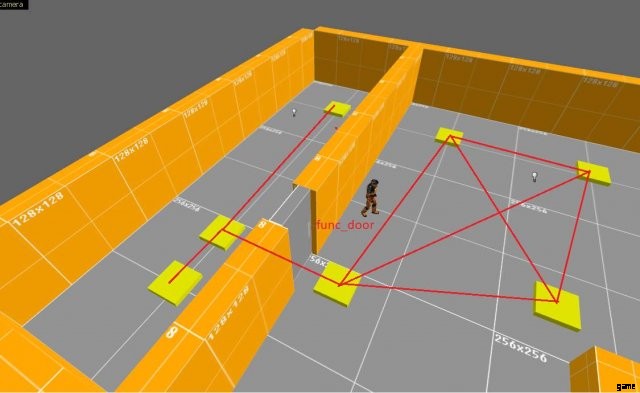
ノードの別の使用例は、AI がその特別な動作を実行できるようにすることです。たとえば、この Grunt の AI コードは、ダメージを受けているときにカバーを見つけるように指示します。この場所を見つけるためにノード ネットワークを参照するため、サンドバッグの背後に戦略的なノードを配置しました。
ノード ネットワーク
確立したように、ノードは AI が適切に機能するために重要です。しかし、ネットワークはどのように構築されているのでしょうか?エンジンは、2 つのノード間に視覚的な直線があるかどうかを判断し、ある場合はリンクが作成されます。この部屋に 4 つのノードを配置しました。リンクは次のようになります。
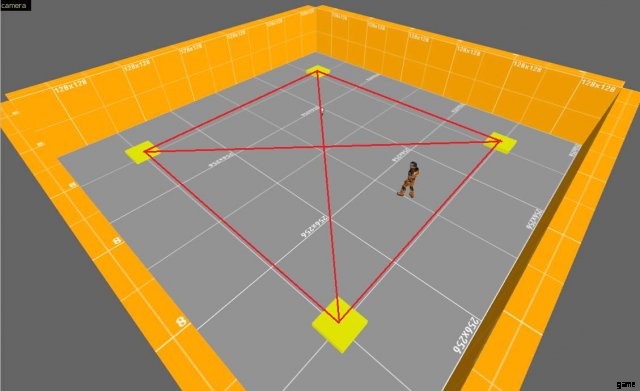
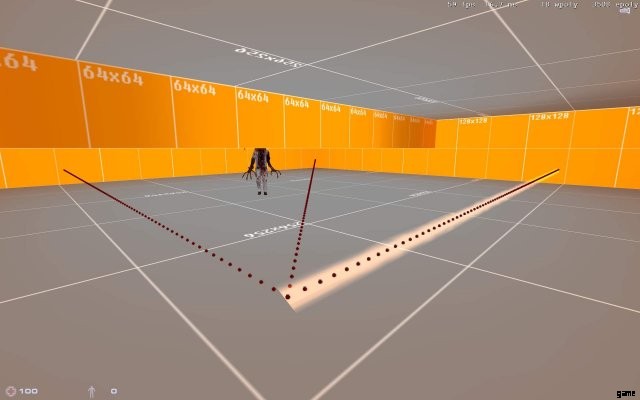
これらのリンクはゲーム内で実際に見ることができます。ノードがあることがわかっている場所まで歩いて、コンソールに「impulse 199」と入力します。これにより、このノードのすべてのリンクが一定時間表示されます。十分に近いノードのこの情報のみが表示されることに注意してください。マップ全体のネットワークは表示されません。
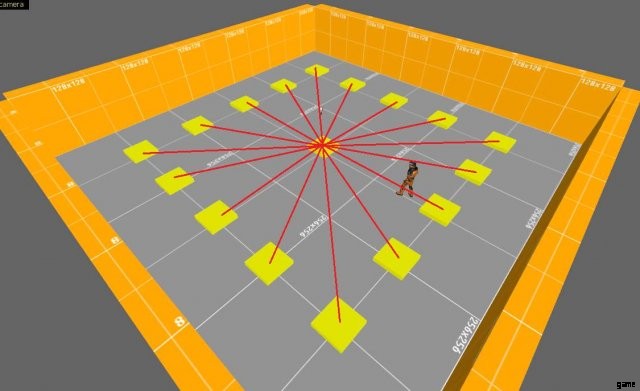
単一のノードは、ネットワークの残りの部分への非常に多くのリンクを保持できます。可能性のある視線がある限り、別のリンクがあるはずです.
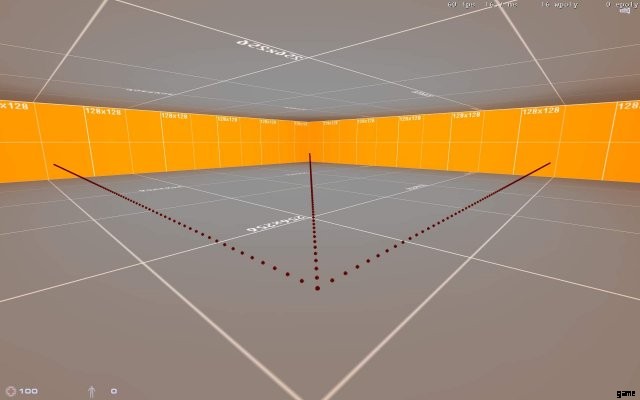
ノード間の可視性は、壁が 32 ユニットよりも高い限り、ソリッド ワールド ジオメトリと func_walls によってブロックされる可能性があります。
ノードが作成されるポイントは常に地面から 32 単位上に浮いているため、壁が 32 単位以下の場合はリンクが存在します。エンジンは、ブラシの高さに関係なく、非ソリッド ブラシを介してリンクも作成します。
Four Different Types
Now we know how the network is built, we can expand on this knowledge by introducing the different types of monsters. There are four types:
- Small sized (Headcrab, Chumtoad, etc)
- Normal sized (Zombie, Grunt, etc)
- Large sized (Gargantua, Bullsquid, etc)
- Flying (Alien Controller, Stukabat, etc)
When the node network is built, it will also determine if a certain monster type can actually use the paths. A passage might be too small for a Large sized creature, so it will not establish a usable link between the nodes. You can highlight the different types by use of the other impulse commands. Small creatures will use the default path visible with impulse 199. impulse 197 will show you the paths for Normal sized creatures, impulse 196 for Large sized Creatures and impulse 195 for all airborne creatures (more on them later!).
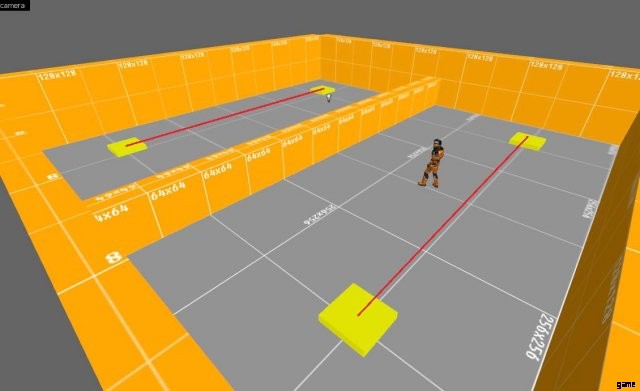
In the following example you can see how the node network for Normal sized creatures (highlighted as a pink beam) doesn’t extend into the other room, because the brush blocks the way. Small sized creatures would however be able to crawl under it and use the default node link to find their way.
How to Properly Place info_nodes
Now that we know how the node network works, we can move on to placing our nodes. What are good practises to get the most out of our nodes?
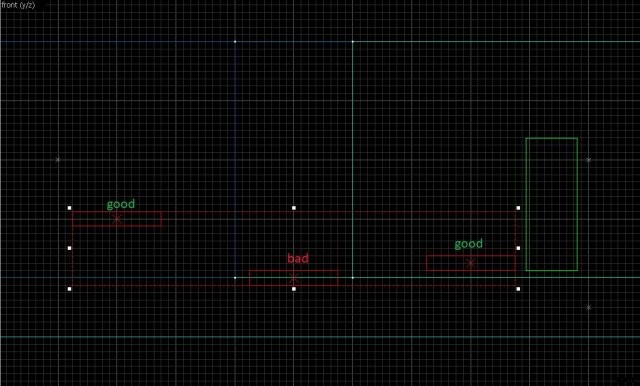
When the map starts, all info_node entities will fall to ground level, so it does not matter how high above the ground you place them. Node points will always be created 32 units above the ground where you place your info_node entity. Just make sure that the origin on the info_node is not inside the floor because this might cause the engine to overlook them.
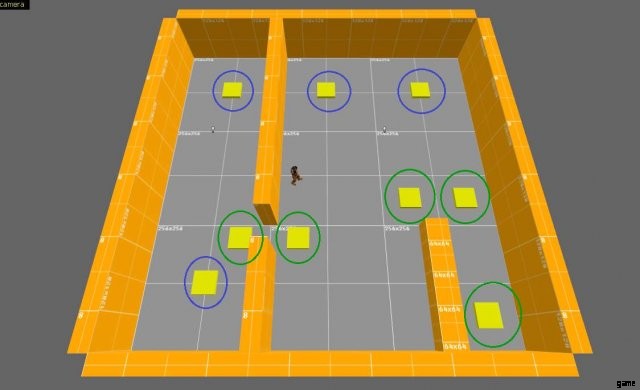
So where to place your nodes? We’ve seen that AI can get into trouble whenever there is an obstacle or no clear line between it and the player. So it’s good to add a few nodes to help them navigate around (green). You can see those nodes at the door and around the counter. Next to that it’s good to place a few ‘anchor points’ (blue) in the room. This will give the AI a starting point to navigate from and it can serve as a spot for special AI behaviour (such as the Grunt running for cover earlier).
Some guides might tell you to place an info_node every X units. This is not strictly necessary. The engine also doesn’t require it. You can place two nodes at a distance of 9000 units from eachother and they will still create a link, as long as they have a line of sight to eachother. You just have to place enough nodes for the AI to have enough anchor points. If you do not have enough, you might encounter undesirable AI behaviour. For instance, if the node a Grunt is falling back to is too far away, it will not resume its normal behavior for a long time. If the node is closer, it will then decide on a new course of action once it has reached the node.
As mentioned before, nodes will only create a link where there is a visual line of sight between two nodes. Luckily, it ignores movable brush entities, such as func_doors, so you can place this door in between the nodes and there still will be a link.
The nodes will link through most brush entities that are movable, such as func_train, func_rotating, func_button, but also func_breakables. Next to that it will go through all non-solid entities such as func_illusionary and everything that uses zhlt_noclip 1.
Info_node_air
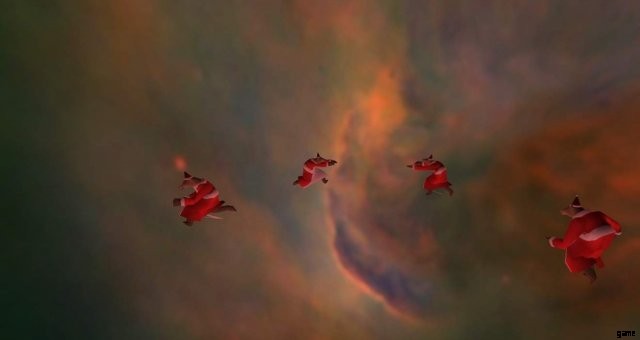
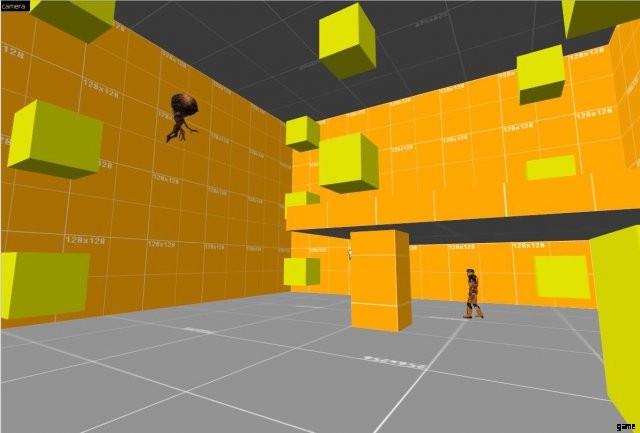
Airborne monsters use a special type of node called the info_node_air. Just as regular info_nodes, these are used for navigation and AI behaviour. However, you might find that airborne monsters are not as good as finding their way to the player as land creatures, since they also have to navigate in upward and downward directions. Info_node_air will not drop down to ground level, as the info_node does and info_node_air and info_nodes will not create links to eachother.
Especially the Alien Controller will hardly move on its own without the help of air nodes. To make sure it will float down or up to engage players on their level, you’ll need enough air nodes on that same level. Without these, the Alien Controller will just hover there, not knowing how to get to the player under the ledge. So when you use these monsters, it’s good to place extra nodes.
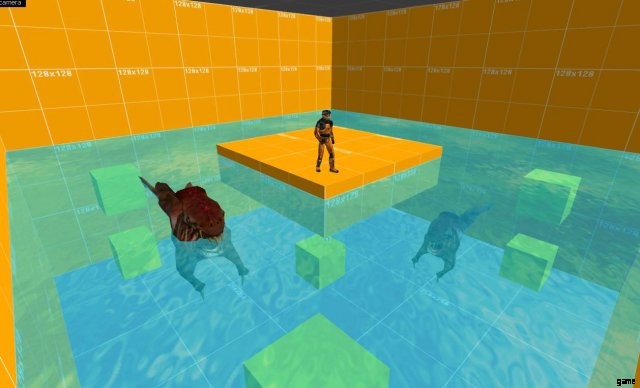
Other flying creatures that use the air nodes are the Stukabat and the Flyer Flock but also swimming creatures make use of them, such as the Leech and the Ichthyosaur. So make sure you place enough info_node_air entities in the waters that house them.
The Apache and the Osprey technically also use the air nodes network for navigation, however, the Osprey will only function with path_corners to guide it (the game crashes without). The Apache will use air nodes to find its way to the player but isn’t very good at it and will just wierdly wobble after the player. Setting up a network of path_corners for the Apache will make it behave for more realisticly and it will then require no air nodes for its navigation.
Less is More
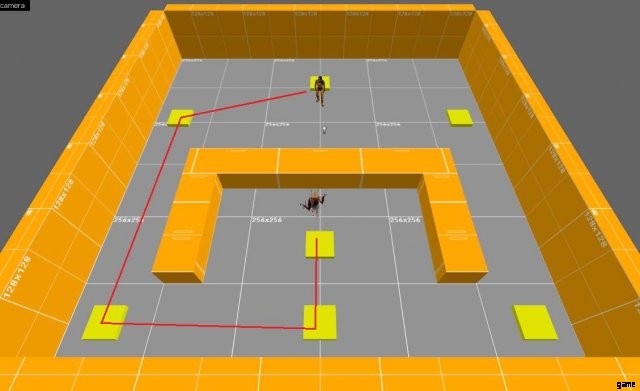
As we’ve established, you just need enough nodes for the monsters to find their way around. But often maps are littered with nodes that serve hardly any function at all. The example below shows you the route (red line) the Grunt has to take to find its way to the player. It only needs those four nodes to get there, so each node in between is just an extra unneccesary step. So if we remove all of those and leave a few nodes as anchor points for navigation and AI behaviour, we can do with almost a third of the nodes we started with.

Having less nodes is good in multiple ways. First, it uses up less entity slots (which are limited). Secondly, it makes the node graph calculation faster and finally, it makes the node network far less complex. This can benefit the performance of your map, since each monster has to do route calculations. For only a handfull of monsters this will not be a problem but imagine a large map with many active roaming enemies accessing the node network constantly.
Misc. Info
In Sven Co-op, the info_node entity also has an Activity and Hint type keyvalue. These currently have no function. Judging from the source code, Valve planned to put extra information into nodes, so the AI could use them for specific purposes. Imagine a node that suggests to a Grunt that this is a place to find cover. These hint nodes actually ended up being used in Half-Life 2. In HL1 the code for hint nodes is only found for the Houndeye, where it can investigate buzzing machinery and blinking lights.