戦争の選択 – 初心者向けの役立つヒント
新規プレイヤー向けの漠然としたアドバイス、ヒント、コメント。私も初心者ですが、脳が非常に大きいので、このガイドを書く資格があります。
初心者向けのヒント
はじめに
War Selection へようこそ。これは無料でプレイできる RTS であり、おそらく私がこれまでに見たビデオ ゲームの中で最悪の名前です。ウォー セレクションは、エイジ オブ エンパイア 2 やエンパイア アースなどのクラシックからインスピレーションを借りていますが、どちらのようにもプレイできず、さまざまな独特の癖や要因があり、このガイドでは初心者プレイヤーに説明しようとしています.ゲームの性質とそのジャンルに関する一般的なアドバイスから始めて、ゲームが表す 4 つの技術的「時代」のそれぞれについて具体的な指針に移ります。
注: このガイドは、主にゲームにまったく慣れていないプレイヤーを対象としています。西ヨーロッパ以外の文化をプレイするなど、高度な戦略については詳しく説明されていません。
用語
ゲームプレイの過程で、仲間のプレイヤーがあなたを怖がらせ、混乱させるような言葉を使うことがあります。通常、これらの単語はあいまいな人種的スラー、またはビデオ ゲームを 1 日 16 時間未満しかプレイしていない場合はなじみのない一般的な RTS 用語のいずれかです。以下は、よく見かける単語とその定義です。
- 好調 – より多くの労働者を作成し、リソースの収集率を高めることに重点を置いて、経済基盤を迅速に構築する行為。これを専門とするプレーヤーは、実際には「ブーマー」とは呼ばれません。
- 市民 – 「civilisation」の省略形。これは、文化的に特定されていない、鮮やかな色のユニットと建物のコレクションを表す用語で、あなたまたは他のプレイヤーが制御します。
- カウンター – ユニット タイプが別のユニット タイプに対して特に優れたパフォーマンスを発揮する状態。例としては、大砲に対抗する騎兵隊、低速の近接ユニットに対抗する遠隔ユニット、女性と話す能力に対抗するこのゲームのプレイなどがあります。
- エコ – 経済、またはリソースを収集する速度と、この速度を向上させる能力
- 本部 – 新しい労働者を作成し、次の時代に進むための建物である本社。これが破壊された場合、あなたはゲームに負けます。あなたの本部がユニークなサプライズのために選択されたら、「Backspace」キーを押してください。
- マイクロ – ユニットの効率と生存性を最大化するために、ユニット (通常は軍事ユニット) を細かく管理する行為。
- ラッシュ – プレーヤーがゲームの早い段階で強力な軍隊を構築することに集中する戦略で、通常は環境を犠牲にして、敵のプレーヤーをすばやく破壊します。せっかちな人、熟練した人、就寝時間を過ぎても遊んでいる子供にとって理想的な戦略です。
- 技術アップ – 次の時代に進む行為。ネイティブ アメリカンが最初にヨーロッパの銃器に遭遇したときにどのように感じたかに興味がない限り、これは最優先事項の 1 つです。
- ゴミ箱 – このゲームでの私のスキルをどのように説明していますか?あるいは、まとめて生産でき、通常は平均的な軍隊の大部分を構成する、安価で消耗品の軍事ユニットを表すために使用される用語.
- カメ – プレイヤーが何よりも防御に集中する戦略で、通常、過剰な防御用の建物やユニットを構築し、最終的にはゲーム終了までに無敵の大軍を構築することを目標とします。この戦略に魅力を感じるなら、子供を持つことは許されるべきではありません。
- ヴィル – エイジ オブ エンパイア 2 の用語から借用した労働者単位で、労働者は村人として知られています。
- )))) – 英語を話す人が「lol」と入力するのと同じように、ロシア人が使用する笑いの活字表現。これは RTS ゲームに固有のものではありませんが、含める価値がある EU サーバーでスピア ラッシュが発生した場合に十分に頻繁に表示されます。
一般的なアドバイス
戦争の選択に固有のヒント
- 同様の他の人気のあるゲームと比較して、War Selection は少しペースが遅いです。ユニットの構築には予想以上に時間がかかり、アップグレードには研究に時間がかかり、ユニットの動きは少し遅くなります。これは、急かされない、または何もせずに座っているべきだという意味ではありませんが、スタークラフトやエイジ オブ エンパイアよりも少しリラックスしています。
- スポーン位置は、マップの他の部分と同様に手続き的に生成されます。あなたはいつも近くのベリーと通常はまともなサイズの木のパッチを手に入れますが、それ以外はすべて抽選の運次第です.良いスポーンはゲームをより簡単にすることができますが、幸いなことに、スポーンがあまりにもひどいので勝利のチャンスが台無しになることはめったにありません.
- さまざまな動物が、あなたと他のプレイヤーの間のマップに住んでいます。シカとウシは無害でユニットから逃げ出し、ワニは沼地の近くにたむろしていて、近づかない限り攻撃しません。トラとイノシシは広範囲のユニットを積極的に攻撃して追いかけます。拡大や偵察を行っているときは彼らに注意してください。選択したターゲットがスポーン場所から遠く離れた場所まで十分に長く生き残ることができる場合、彼らはあきらめて逃げることに注意してください。
- ケナガマンモスは、近づかない限り攻撃しないという点で、太った毛むくじゃらのワニと考えるのが一番です。ただし、ワニとは異なり、オリンピックサイズのヘルスプールがあり、遭遇中に多くの村人を簡単に倒すことができます.有意義な軍事力を得る前に、これらの 1 つが基地に攻撃を仕掛けた場合、最善の戦略は、ゲームを終了して、これ以上害を及ぼさないようにすることです。
- 技術を向上させると、通常、自分の文明にどの特定の文化を模倣させたいかを選択するよう求められます。これらは、後の時代にユニークなユニット、ビジュアル、プレイスタイルに変換されるため、いくつかのゲームで自由に実験して、自分に最適なものを見つけてください.繰り返しになりますが、このガイドは初心者向けの西ヨーロッパ向けに作成されているため、鉄の時代や中世の時代について説明されている戦略の一部は完全には適用されない可能性があることに注意してください。
- 敵との距離はゲームごとに大きく異なる可能性があるため、玄関先の誰かとの短い暴力的なゲームを期待するのか、それとも親切で穏やかな平和的なゲームを期待するのかは、まったくわかりません。あなたが実生活にいるのと同じように、孤立しています。近くに隣人がいると思われる場合は、遅かれ早かれ一掃する計画を立ててください。
一般的な RTS ゲームプレイのヒント
- 常にユニット カウンターを念頭に置くようにしてください。動きの速い騎兵隊は射手と包囲ユニットに対抗し、重装甲の精鋭歩兵は弱い歩兵と塔の射撃に対抗し、射手は動きの遅い歩兵に対抗し、塔は軽装甲のトラッシュユニットに対抗し、攻城ユニットは壁と塔に対抗します。カウンター。
- 拠点全体を壁で覆うことは経済的に現実的ではないため、自然の障壁 (森林、資源の堆積物、崖、水路) を探し、それらを国境に組み込み、壁でそれらを橋渡しします。また、塔や家屋などの建物も戦略的な通路を遮断するために使用できることに注意してください。
- 常に経済を成長させ、生産しているリソースに投資してください。理想的には、特定の時点で 1,000 を超えるリソースの備蓄を保持しないようにする必要があります。特に、ウォー セレクションのほとんどのコストは、何かをすぐにではなく構築または研究する過程で差し引かれるためです。銀行口座に未使用のまま放置されている資源は、収穫を待っている地面に眠っている資源よりもわずかに役立つだけなので、必ずそれらを使い切ってください。
- 軍隊への投資に対して最高の利益を得るために、軍隊をマイクロ化します。敵の最前線を急いで通り過ぎて、脆弱な射手と大砲を手に入れ、遅い近接ユニットを遠距離ユニットで攻撃します。通常、より多くの人を連れてきて一度右クリックしたからといって、戦いに勝つとは思わないでください。 .とはいえ、ユニットは通常、攻撃を命じた敵が死亡すると、新しい標的を選ぶのが得意です。そのため、交戦中の最前線に執着しないでください。騎兵隊などに集中し、攻城兵器の射撃を避けてください.
石器時代
最後のネアンデルタール人を締め出し終えたところで、落ち着いて人類の歴史を始める時が来ました。通常、石器時代は静かで退屈な時代であり、実際にゲームをプレイできるように技術を駆使することに専念しています。
経済的
- まず、靴を発明するかどうかを決めるときです。祭壇から近くの木やベリーの茂みまでの距離を確認してください。労働者が祭壇とこれらの資源の間を行き来するのに数秒以上かかる場合は、すぐに毛皮の靴の研究を開始してください。そうでなければ、ユートピア的で裸足の社会を作ってください。
- スポーンの隣に牛がいる場合は、最高の幸運です。確実にあるベリーの茂みよりもはるかに強力な食料源を提供してくれるからです。近くにある場合はベリーの代わりに使用しますが、無理をしないでください。
- 作成した最初の労働者は、追加の小屋を建設する任務を負う必要があります。これにより、人口の上限が引き上げられます。追加の労働者は、労働者を構築しながら利益を上げるのに十分な食料を集めるまで、ベリーの収集と薪割りの間に均等に分配する必要があります。その時点から、すべての新しい労働者は木材鉱山に行きます。
- ベリーピッカーの駆け出しの社会が 20 人以上の労働者に達したら、神の発明を検討する時が来ました。あなたの最新の労働者を連れて野生に送り出し、寺院を建設するのに理想的な場所を見つけてください。これは理想的には鉄鉱床の隣にある必要があります。それができない場合は、銅または石のいずれかです。特に以前にそれらの靴を手に入れていなかった場合は、検索に 1 分以上費やさないようにしてください。
- 労働者が祭壇とその資源ノードの間を非常に長い距離移動していることに気付いた場合は、倉庫を建設することを選択できます (義務ではありません)。作成する場合は、ゲームの後半で役立つように、石や金属の堆積物の近くに配置してください。
- 順調に成長していれば、寺院が完成するとすぐに次の時代に進むことができるはずです。祭壇は老朽化で消滅し、技術を向上させると寺院が文明の新しい本部になることに注意してください。完全に防御できない場所に置かないようにしてください.
- 鉄器時代に到達するまでに少なくとも 30 人の労働者が必要ですが、時間を犠牲にしてこの水準に到達しようとしないでください。この時代に約 10 分以上費やすと、あなたはネアンデルタール人と同じ運命をたどるでしょう。
軍隊
- この時代に特別な戦略や用途を考えずに軍事ユニットを構築した場合、あなたは実際の穴居人と同じくらい頭がいいです。何をしているのか正確にわかっていない限り、集めたすべての丸太とベリーは、技術を向上させるか、より多くの丸太とベリーを集める必要があります。
- 祭壇の横にある防壁は、現時点では機能的に役に立ちません。感傷的であれば、それを保持して後で適切な塔にアップグレードすることができますが、多くの場合、後で小屋や他の建物のためのスペースを作るために削除します.
- 別の洞窟社会のすぐ近くでスポーンし、それをこれ以上存続させたくない場合は、「ブルワーク ラッシング」を使用してください。大量のブルワークを構築する任務を負った労働者を敵の幼生文明に群がらせる行為です。彼らの祭壇の周り – 一撃の価値があるかもしれません。この戦略は、対戦相手に対して非常に失礼であると同時に、非常に面白いものです。
鉄器時代
農業、車輪、金属を発明した今、物事は勢いを増し始めます。これは、本格的な軍事行動が期待できる最初の時代であり、通常は、良いものにたどり着く前に、武装した槍兵の群れがあなたの本部を破壊するという形で行われます.
経済的
- 最初に画面の右側にいくつかのボックスが表示され、原始的な石器時代の形態からユニットや建物をアップグレードするよう促されます。これらのアップグレードの最優先事項は、あなたの vils であり、次に倉庫、次に非 ware の人間の家です。その他は、必要に応じて、またはリソースに余裕があるときにアップグレードする必要があります。
- 石器時代の村人は、鉄器時代の建造物を建設したり、岩を叩いたり、種を植えたりするなど、鉄器時代の労働を行うことができません。そのため、穴居人を教育することが最優先事項です。 2 番目の優先事項は、新たに訓練された鉄器時代のヴィルを、ベリーを集めたり木を切ったりすることから遠ざけ、農場から作物を収穫して石を採掘することに移行することです。
- 最初の農場はできるだけ早く建設する必要があります。本物の農場と同じように、その畑はわずかなスペースしか占有せず、収穫量を失うことなく、作物を同じ土壌に永久に再植えて再収穫することができます.ゲームの残りの期間に食料を確保するために必要なのは、1 つの農場だけです。ただし、ときどきフィールドを補充することを忘れないでください。
- この年齢以降、あなたの本部で利用できる「エリアの探索」の有用性は、あなたにすぐに見える資源ノードの数、あなたの国の大きさ、そしてあなたが急ぐことを期待するかどうかによって異なります。この時代のある時点でそれを手に入れたいと思うでしょうが、タイミングは主にこれらの要因に依存します.
- これは、倉庫が重要なインフラストラクチャになる最初の時代です。倉庫は、石や金属の堆積物から少し離れた場所に配置してください。理想的には、労働者がそのスペースに立っている間に資源を採掘できるだけの十分なスペースを残してください。大いに役立つ効率の向上です。
- 理想的には、家の数はこの段階で少なくとも 10 に達する必要があります。これにより、最初の人口上限である 60 まで押し上げられます。これらの枠のうち 40 は労働者用に確保し、残りの 20 は軍隊用に空けておく必要があります。 .
- 以前のベリーピッカーを農業と採石に適切に分けたら、そのうちの何人かを金属の採掘に転用し、新しく訓練された労働者を派遣して彼らを支援します。 Metal isn’t critically important to your economy just yet, but you’ll need it to tech up to the second half of this age.
- As you gain experience in the game, you’ll learn to recognise early on whether or not the map that’s been generated for you contains a lot of water. If you suspect that it does, now’s the time to look into building a Pier or two. It won’t be useful except for fishing for now, but it’ll come into its own later.
- Regarding fishing, it can occasionally be difficult to justify the additional population cap that fishing boats take up, but for European civs in particular, which collect food much more slowly than their Asian counterparts, fishing can be a great boon. Note, however, that its efficiency will decline as your fishermen exhaust nearby fish deposits and must venture out further.
- When you hit the aforementioned second half of this age, your very first priority should be to purchase the Sickle upgrade from your Farm, and the Metal Chisel upgrade from one of your warehouses. These directly increase your workers’ productivity, so every second you don’t have them is a loss to your economy.
- If you’re not concerned about the possibility of a concerted enemy attack just yet, skip the population cap upgrade you’ll be offered at your HQ and rush to medieval tech. If a spear rush is indeed a concern, however, you’d be better off upgrading your population cap right now.
- Keep a very careful eye on your workers once you start teching up, especially if you’re just barely skirting 30 or 40 – if you drop below the requisite number of workers for advancing, typically due to a surprise boar incursion or an enemy rush, the advancement will pause and you’ll be forced to cancel it in order to create replacement workers. This can be a game killer if you don’t notice it, so stay on your toes.
Military
- The humble spearman is your go-to unit of choice in this era, due to his low cost and training time. If you’re feeling aggressive or you’re expecting an attack, invest in axemen instead, as they deal exceptional damage in an area of effect in front of themselves – perfect for cleaning out those pesky spearman infestations.
- Your economy, at this juncture, should be able to support constant unit production between at least three or four Barracks buildings, plus potentially many more as you train up more workers. Units take a very long time to create in War Selection compared to similar games, so you’re going to need this many Barrackses(?) at the bare minimum to build a meaningful army within a reasonable timeframe.
- The primary benefit of archers is that they don’t cost materials to create, which makes them handy if you’re low on those. Besides that, they’re pretty underwhelming.
- If you actually intend to fight in this era rather than booming, don’t forget to invest in the appropriate upgrades for your units of choice at the Forge and in one of your Barracks.
- This is the first age in which towers become useful. Walls, however, won’t come in handy until the medieval era, in which they get a buff to their armour significant enough to prevent a mob of infantry from beating them down.Until then, towers are the only defensive building you should be making.
Medieval Age
Scholars disagree on the precise beginning of the historical medieval era, but for you, it begins once the boys over at your HQ work out how to build things out of stone instead of wood. The third (and arguably best) era of War Selection offers little difference in terms of your economic management, but a huge step up in the complexity and significance of your military.
Economic
- As before, your first priority with upgrades should be your villagers. It’s starting to get expensive, so if you don’t have enough food to train up your entire proletariat, upgrade your farmers first, followed by the Farm that they’re centered around.
- Now that you can build bigger, better houses, your population cap will become an issue. Hit the upgrade for it at your HQ if you haven’t already, then upgrade your houses to make use of your additional space. You should have enough population space set aside for at least 30 military units, preferably more, with the rest of the beds going to additional workers.
- There’s more worker productivity upgrades available at your Warehouses, so make sure you grab them quickly. You wouldn’t want your hardworking vils to miss out on cutting-edge advancements such as the pickaxe.
- Era advancements are beginning to get very expensive, so a robust economy is a must at this point. You should have an absolute bare minimum of 50 workers by the time you’re a few minutes into the medieval age, and not least because this is the minimum amount you’ll need to tech up later.
- It’s around this point that your starting stone and metal deposits will be close to being exhausted. Check up on them every now and then, and once their remaining total dips below around 2000, send a couple of the workers mining it off to build a new Warehouse at another deposit. You don’t want to end up in a situation where you don’t have any more materials coming in while you’re trying to build this new Warehouse, so stay on top of this.
- It’s in this era that you need to start making informed decisions about exactly how long you’d like to remain medieval for. Teching up is still a priority, as always, but if there’s a nearby enemy putting pressure on you, your resources may need to go into defences or military units first. Remember, if he kills you, you’re not going to get to tech up anyway.
- Don’t forget to build at least a couple of Workshops. They’re a surprise tool that will help you later.
Military
- As with his dear old spearman dad, the pikeman is your rank-and-file space filler in your West European medieval army. He’s best used when paired with well-armoured Landsknechte, plus a modest amount of bowmen in case you get kited.
- I didn’t mention cavalry in the Iron Age, because they were bad back then and weren’t worth mentioning. They’re still very expensive and take a long time to train in this era, but they’re robust enough to consider building now, if you’re into that kind of thing. I wouldn’t put too much stock in them.
- The same goes for naval units, which weren’t even worth looking into previously, but now become useful. Construct Bombardier Ships to smash enemy bases from far out at sea, plus a few Galleys if you suspect that they want to do the same thing to you.
- Barracks buildings work a little different in this era. Each Barracks begins life as a Fort, which can only train up basic units. By turning it first into a proper Barracks and then a Royal Barracks, it can train elite melee infantry. The game goes for turning it into a Shooting Range for archers, or a Stable for cavalry.
- In the Late Medieval era, building armour begins to surpass the damage that basic infantry units can deal, which means that they can’t even attack a Late Medieval HQ. This makes an army of pure pikemen good for defence and military superiority, but ultimately incapable of winning the game for you. Keep this in mind if you’re going on the offensive.
- With the invention of the castle comes the invention of siege units. By now, you should have an idea of who’s near you and what their base is like. If it’s heavily fortified, you’re going to need siege engines. Wait until Late Medieval before you start building these, then go for a modest number of cannons. Don’t bother with them unless you actually intend to attack someone else’s buildings, since they’re awful against anything with legs.
- Walls and towers come into their own as a potent defensive option in this era, before falling off in usefulness in the next one. If you’ve been playing defensively and building these in excess, now’s when you’ll be at your safest – ease off on military expansion and focus on booming. Otherwise, you’ll need a strong army to make up for their absence, so focus on that if you’re lacking in static defence.
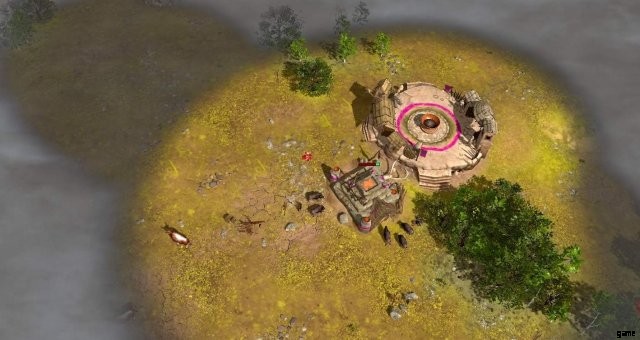
- Once you hit Late Medieval, you can opt to turn any tower into a defenceless Balloon that gives you a massive vision radius around itself. These are best placed near your border with opposing empires, so that you can potentially get sight on their base and see what exactly they’re up to. Build them sparingly, as they cost a significant amount of food.
- Unlike previously, only very few of the units you build in this era can be upgraded in the following Industrial era. If you have a large army and you’re considering teching up, it’s best to find a use for them before they become totally obsolete.
Industrial Age
This is where the rubber meets the road. Massive armies, massive economies and massive battles are all hallmarks of this final late-game age, and you’re unlikely to survive if you’re not pumping out units, resources and buildings as rapidly as you can.
Economy
- Nothing fundamental has changed about the way your economy functions. As before, upgrade vills first, focus on food producers so that the others can upgrade faster, and try to reach (then increase) your current population cap.
- At this point, you’ve got so many workers mining deposits that they’re getting exhausted very quickly. Always know where the next stone deposit you’re going to use is, and try to prepare a Warehouse (now legally known as a Depot) next to it ahead of time. Don’t get caught with your pants down, as a major economic failure in this era can easily spell death.
- You likely have large amounts of certain resources stockpiled now, so ensure that these resources are being spent – typically, in this era, that means spamming military units, military production buildings, or towers. Try to ensure that you’re investing everything you’re gathering instead of hoarding it.
- There’s really no upper limit on the amount of workers you should have by now, but keep in mind that the powerful military units you can create in this era can take up large chunks of your population cap. Leave plenty of room.
- If you’re really, truly an unbearable person, consider building a Wonder at your HQ once you’ve reached the final tech level. This will win you the game if it can survive for 25 minutes, but will certainly incur the wrath of every remaining player on the map.
Military
- Your basic cannon-fodder unit for this era is the aptly-named Soldier, who deals good ranged damage for a modest price. If you’re short on materials, the Ranger is a reasonable substitute that only costs food to create.
- Almost all of the units available to you are now ranged units, thanks to the all-powerful rifle, and most of them don’t have a minimum range, meaning they can fire on things that are directly next to them if needed. This makes kiting and getting around enemy armies with faster units much more difficult.
- Prioritise researching the Trench Mortar at your Arsenal, which used to be your Forge. This unit is essentially an infantry-sized artillery piece that can absolutely decimate both armies and bases when massed in large numbers.
- Conversely, if your opponent has read the above bullet-point and has spammed out Trench Mortars, the otherwise-useless Cavalryman serves as an effective counter – unless he’s escorting them with Soldiers or Machine Guns, in which case you’re better off just having more Trench Mortars than him.
- The Dreadnought, your only high-tier naval option for this era, is quite terrible for its price as of the current balance patch. In the unlikely event that there’s still a naval war raging, hold on to any Bombardier Ships you may still have left over, and exhaust them before building Dreadnoughts.
- Tanks are end-game military units that pack a significant punch beneath thick armour, without sacrificing too much speed. If you know the game is going to drag on in this era, build plenty of Factories and prep your economy to keep them fed as they churn tanks out.
- Your Balloons, if you have them, can now be upgraded into Aerostats, which do the same thing as before, but better. If you can get sight on an enemy base with one, they can allow your artillery units to fire on it at their maximum range – that is, outside of the range of the enemy’s towers. This, needless to say, is the ideal state of affairs for a siege.
- If you haven’t seen the armies of your remaining enemies yet, then you should be very concerned – they’re either boring turtles who are putting the finishing touches on a truly apocalyptic army, idiots who are still trying to invent gunpowder, or irredeemable subhumans who are going for a Wonder victory. In all three cases, you should be mobilising your own army to seek out and destroy them before they get any stronger.
結論
To round out, this guide provides mostly everything you need to know to win the occasional public FFA game, but doesn’t cover high-level strategies or specific build orders. For those, you’re advised to check out the game’s official Discord server, where the sweatiest, most dedicated players reside and compare ranked scores. Alternatively, play the game on your own and experiment with the advice given here in order to tailor your own playstyle.