ドラゴン テイマー ドラゴン ビルド ガイド:エピック ドラゴンとレジェンダリー ドラゴンをビルドする方法
ドラゴンテイマーの世界には多くのドラゴンが存在しますが、最も残忍な戦いを生き残るのは最強のドラゴンだけです。 Bekko Games のモンスター コレクター ジャンルへの参入である Dragon Tamer は、他のさまざまなコレクター ゲームと同様の機能を共有しています:レアリティ システムです。 RAID:Shadow Legends、Exos Heroes、Monster Super League などのゲームと同様に、レアリティ システムにより、プレイヤーは小麦と籾殻を分けることができます。
最近エピック ドラゴンまたはレジェンダリー ドラゴンを入手した場合は、新しいドラゴン テイマー ガイドが最適です。ここでは、ドラゴンを作成するさまざまな方法について説明します。あなたがかなりの数のエピックまたはレジェンダリー ドラゴンの誇り高い所有者である場合は、以下のガイドを参照してください。それらをより強くする方法についてのアイデアを得ることができます!
エピックとレジェンダリーのドラゴン ビルドのアイデア
ご覧のとおり、ゲーム内の各ドラゴンは異なる目的を果たします。それぞれの目的で、Dragonbrands の優れたセットによって補完することができます。これらのビルドは単なるアイデアであることを忘れないでください。いつでも自分でさまざまな組み合わせを試すことができます。
関連: ドラゴンテイマー初心者向けガイド:ドラゴン島の構築とドラゴンの管理に関するヒント、コツ、戦略
シングル ターゲット DPS ドラゴン
ゲーム全体で最も多産なタイプのドラゴン。これらのドラゴンは、一度に 1 つのターゲットで敵のドラゴンを一掃することを専門としています。彼らをチームに入れることで、厄介なタンク、ヒーラー、およびあなたの肌の下に潜む他のさまざまなドラゴンを倒すことができます.次のドラゴンはこのカテゴリに分類されます:
バットウィング (メタル/サイキック) (E)

入手先: イベント、ミステリーショップ
4 ピースのドラゴンブランド: フレイ、ホーダー、アレス
2 ピースのドラゴンブランド: Freyr、Hoarder、Tyr、Schiff、Vidar、Jammu、Bully
メモ: バットウィング、ダークでミステリアス、しかし強烈な一撃。この夜の戦士を構築する最善の方法は、私たちが推奨するような攻撃ベースのドラゴンブランドを使用して、より強力に攻撃することです.
カヌー (金属/水) (E)

入手先: 神秘の山、召喚士の洞窟
4 ピースのドラゴンブランド: 買いだめ
2 ピースのドラゴンブランド: ヴィダールまたはシッフ
メモ: 適切なドラゴンブランドが与えられれば、カヌーは非常に強力になります。スキルで敵を倒すのに非常に優れているため、敵の防御を迂回できるため、ホーダーセットで十分です.ただし、スタンをより頻繁に着陸させたい場合は、シフブランドのペアも試してみてください.
<強い>
ケラトシア (地球/電気) (E)

入手先: 繁殖、召喚士の洞窟
ドラゴンブランド 4 個 (メイン): 買いだめ
2 ピース ドラゴンブランド (サブ): Baldr、Amir、またはVidar
メモ: 電化したケラトシアの角を見下ろせば、ライバルのドラゴンを一瞬で退散させることができる。 Hoarder セットを使用すると、Ceratopsia のヒットを以前よりもはるかに難しくすることができます。このセットを Vidar セットと組み合わせると、Ceratopsia が敵にクリティカルを降らせる可能性があります。
残念ながら、Ceratopsia の最大 HP は非常に低いことに注意してください。買いだめセットの DPS 出力を犠牲にすることなく、Baldr または Amir ペアを使用してこれを軽減できます。もともとHPが低いので、アレスセットが役立つかもしれません。
<強い>
ケルヌンノス (金属/自然) (E)

入手先: 繁殖、闘技場、召喚士の洞窟
ドラゴンブランド 4 個 (メイン): ホーダーまたはティール
2 ピース ドラゴンブランド (サブ): Vidar、Jammu、Bully
メモ: ケルヌンノスの特筆すべきはソウルソードスキル。このスキルは途方もない量のダメージを与えます (攻撃の 270% から始まり、攻撃の 325% に上限があります)。Hoarder セットは、カットできないものがないことを確認します。
Hoarder があなたのスタイルでない場合、Tyr セットは、Cernunnos が一度に 1 つのドラゴンを敵のラインナップから全滅させます。 Vidar または Jammu セットは、よりクリティカル ヒットを与え、戦闘でより恐ろしい存在感を与えます。敵は何が彼らを襲ったのかわかりません。
フラッシュ (エレクトリック/サイキック) (E)

入手先: 神秘の山、召喚士の洞窟
ドラゴンブランド 4 個 (メイン): ティールまたはアミール
2 ピース ドラゴンブランド (サブ): ヴィダルまたはジャンムー
メモ: フラッシュは独特のドラゴンです。サイキック エレメントは両刃の剣ですが、ドラゴン ベア ファイア、ネイチャー、ウォーター アタックの主要なターゲットになります。フラッシュのやや貧弱な防御力を強化する場合は、アミール セットを与えると、敵の攻撃から生き残る可能性が高くなる可能性があります。ただし、この場合のサブブランドは、本当に輝かせることができるものです。 Tyrビルドを与えた場合、高いクリティカルはそのダメージ出力を保証し、戦闘でより多くのチェーンキルの可能性を保証します.
<強い>
Jack'O'Drak (火/自然) (E)

入手先: イベント、ミステリーショップ
4 ピースのドラゴンブランド: ホーダーまたはシフ
2 ピースのドラゴンブランド: Baldr または Amir
メモ: Jack’O’Drak の 3 番目のスキルである Smokescreen は、敵の防御力の一部を無視するため、Hoarder セットを与えることでその効果を積み重ねることがさらに楽しくなります。ただし、その統計ではガラスの大砲であることが示されているため、戦闘での寿命を延ばしたい場合は、シフのような防御セットを与えることに何の問題もありません.
Schiff はまた、Jack’O’Drak の Seed of Wrath スキルが当たった敵を確実に挑発するのにも役立ちます。防御力が低いため、バルドルまたはアミールは、もう少し長く生きるのに役立ちます.サブとメインの両方を他のものに切り替えて、敵に何か他のものを期待させることもできます.トリック・オア・トリート!
<強い>
ルビー (火/土) (E)
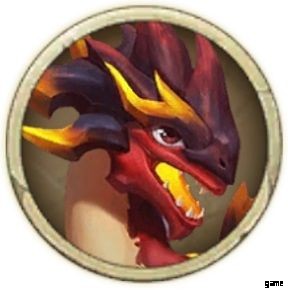
入手先: 神秘の山、名誉石碑
4 ピースのドラゴンブランド: Tyr、Frey、Jammu、またはHoarder
2 ピースのドラゴンブランド: ヴィダルまたはジャンムー
メモ: ゲームで最も攻撃力の高いドラゴンの 1 つであるルビーは、誰にとっても簡単に 2 番目のエピックになる可能性があります (最初にコアを取得しなければ)。ルビーのスキルは残忍で、適切に使用すれば敵のドラゴンを簡単に選び出すことができます。主に、ダメージ出力が他に類を見ないため、Tyr セットが最も理想的です。
このセットでキルを記録すると、弱いドラゴンをハートビートで拾うことができますが、代わりにフレイ、ジャンムー、またはホーダーを使用すると、3番目のスキルであるスコーチトルネードが複数回ヒットするため、ほとんどすべてのドラゴンを非常に簡単に破壊できます.さらに攻撃力を高めるために、Vidar や Jammu などのクリティカル セットを与えると、敵を燃え尽きさせます。
<強い>
ソード (火/土) (E)

入手先: サモナーズケイブ、フレンドシップショップ
4 ピースのドラゴンブランド: アミール、ホーダー、またはアレス
2 ピースのドラゴンブランド: アミールまたはバルドル
メモ: 剃刀のように鋭い刃をまとったソードは、恐れるべきドラゴンです。戦闘は熾烈だが、防御力はそこまで高くない。したがって、その攻撃ステータスはすでに S に分類され、クリティカル ステータスは A に分類されているため、代わりに自身を保護する方法に基づいて構築することをお勧めします。
アミールのセットは、防御力が高いため、近づいてくるダメージを反射できるため、アミールのピースまたはバルドルのピースを 2 つ追加することで、戦闘で立ち直ることができるため、役立つ可能性があります。攻撃的に構築しようとしている場合は、Hoarder メイン セットを使用すると、以前よりもはるかに強力になります。危険な生活が好きなら、アレス セットはいつでも楽しいオプションです。
<強い>
Valravn (火/サイキック) (E)

入手先: 繁殖
4 ピースのドラゴンブランド: アミールまたはバルドル
2 ピースのドラゴンブランド: 買いだめまたはフレイ
メモ: かめはめ波動拳!サイキックは習得や展開がかなり難しい要素であるため、Valravn が戦闘にとどまるようにする必要があります。その攻撃統計はすでにかなり高いので、HoarderまたはFreyrをサブブランドとして維持することで、十分な打撃を与えることができます.メイン ブランドを最も低いステータスである防御力に集中させることをお勧めします。
サイキックタイプであることを考えると、ドラゴンの数が多いため、アミールやバルドルなどの防御的なブランドが必須です.これは、Ultra Instinct を達成できる数少ない方法の 1 つです。
<強い>
ヴェロキラプトル (火/電気) (E)
入手先: サモナーズケイブ、フレンドシップショップ
4 ピースのドラゴンブランド: フレイ、または買いだめ
2 ピースのドラゴンブランド: ジャンムー、ヴィダール、バルドル、またはヘイムダル
メモ: ヴェロキラプトルは、ドラゴンテイマー全体で壊れやすいスピードスターのまさに定義です.優れた速度、注目すべき攻撃とクリティカルの統計を備えていますが、ひどい健康と防御を備えたヴェロキラプトルは、戦闘で必ずしも長く続くとは限りません。そのオフェンスを強化したい場合は、上記の理想的なメインのドラゴンブランド以外に探す必要はありません.
ジャンムーはクリティカル率が高いため、特に優れたセットです。攻撃があなたに合わない場合は、ヴェロキラプトルがガラスの骨と紙の皮を持っていることを常に覚えておくのが賢明であるため、カルテットとペアを交換して、より防御的なプレイ スタイルに合わせることができます。
<強い>
クリスマス (自然/水) (E)
入手先: イベント、ミステリーショップ
4 ピースのドラゴンブランド: ホーダーまたはシフ
2 ピースのドラゴンブランド: Mimir または Vidar
メモ: ほほほ!クリスマスが近づいており、痛みを伴う、凍りつくような衝撃的な攻撃のニュースが伝えられています。 Xmas は、その高いダメージ スキルにより、メイン ブランドの Hoarder または Schiff セットに最適です。シフ セットは、最初の 2 つのスキルを使用して敵を凍らせたり気絶させたりできるため、最も注目に値します。
これを補うために、凍結したドラゴンにさらなるダメージを与える Vidar サブセットがあります。 Mimir セットを与えると、それ自体が凍結したり、敵が投げるデバフに抵抗したりしないようになります。あなたがそれらを使い終わったとき、敵はそりの鐘を聞いているでしょう.
<強い>
アヌビス (水/闇) (L)

入手先: 繁殖、召喚士の洞窟
4 ピースのドラゴンブランド: Freyr、Hoarder、または Tyr
2 ピースのドラゴンブランド: Freyr、Jammu、Vidar、または Hoarder
メモ: 不気味でありながら堂々とした見た目の水竜であるアヌビスは、些細なことではありません。赤い死のスキルを使用して多くのダメージを簡単に与えることができるため、戦闘での存在は大きな違いを生む可能性があります.適切なセットがあれば、瞬く間に弱いドラゴンを簡単に倒すことができます.
その高いダメージを補完するために、最初のキル後に別のドラゴンを簡単に弱体化できるため、Tyr セットはそれにうまく適合します.また、ピアシング ハート スキルを使用して敵の生命力を利用することもできます。また、十分な攻撃力があれば、与えたダメージに応じてより多くの回復を行うことができます。これですべての攻撃を行うことをお勧めします.
<強い>
アシュラ (メタル/ダーク) (L)

入手先: 繁殖、召喚士の洞窟、フレンドショップ
4 ピースのドラゴンブランド: Freyr、Mimir、Hoarder、または Tyr
2 ピースのドラゴンブランド: Freyr、Vidar、または Jammu
メモ: Asura の素早い複数回攻撃は、いくつかの可能性を開くことができます。 3 番目のスキルのおかげで、ミミール セットを与えると、楽しく珍しいデバフが発生する可能性があります。
それ以外の場合は、上記の推奨セットを与えることで、常に大規模なダメージの可能性が積み重なっています。ただし、フレイは特別です。 Asura は何度も 3 番目のスキルを持っており、Freyr セットでそれを活用するのは良いことです。
<強い>
ベヒーモス (土/闇) (L)

入手先: イベント、召喚士の洞窟、ミステリーショップ
4 ピースのドラゴンブランド: フレイまたはホーダー
2 ピースのドラゴンブランド: ジャンムーまたはヴィダール
メモ: 恐ろしいベヒモスは、適切なブランドを持っている場合、準備ができていない敵をオフにすることができます.生ダメージに依存するため、敵の防御を簡単に突破できるように、Hoarder セットをお勧めします。その高いダメージと高いクリ率が相まって、それに加えて、ベヒーモスは敵にとって悪夢のようなものになります.
デュロン (自然/闇) (L)

入手先: EXPパス
4ピースのドラゴンブランド: Freyr、Hoarder、または Tyr
2ピースのドラゴンブランド: シフ
注: どんな戦いでも恐るべき存在感を放つ毒竜デュロン。その毒はすぐに敵の命を奪います。その毒のダメージを増やすには、攻撃力を上げる以外に方法はありません。
Freyr、Hoarder、または Tyr セットで報酬を与えて、敵のランクを下げるという仕事で優れた能力を発揮できるようにします。より頻繁に毒デバフを当てることができるように、セカンダリ セットにはシフ ペアをお勧めします。
<強い>
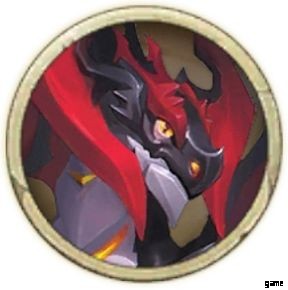
フェンリル (火/闇) (L)
入手先: レジェンダリーパス
4 ピースのドラゴンブランド: Tyr、Frey、Jammu、またはHoarder
2 ピースのドラゴンブランド: アミールまたはヴィダル
メモ: 月のために泣く!狼竜フェンリルは、怒りと抑えきれない強さの旋風です。防御力以外は特に高いので、柔らかいと感じたらアミールセットを装着することをお勧めします。
しかし、攻撃力を重視すれば、どんな戦いでもより輝けるかもしれません。 Freyr、Jammu、または Hoarder がメインのブランド セットとして推奨されます。楽しみのために、弱いドラゴンに解き放たれるのを見ることができるように、常にTyrセットを与えています.
ゴースト (エレクトリック/ダーク) (L)

入手先: レジェンダリーパス
4 ピースのドラゴンブランド: ティール、フレイ
2 ピースのドラゴンブランド: Tyr, Freyr, Hoarder, Ares, Vidar, Jammu, Bully
メモ: 単独で、単一ターゲットのダメージに関しては、ゴーストはすでに非常に強力です。 Tyr セットを使用してこれを増幅すると、敵チームを目もくらむような速さで簡単に引き裂くことができます。逆に、フレイ セットを与えると、負傷者をきれいに始末することができます。
<強い>
ハデス (火/闇) (L)
入手先: 繁殖、闘技場、召喚士の洞窟
4 ピースのドラゴンブランド: フレイまたはホーダー
2 ピースのドラゴンブランド: ヴィダルまたはジャンムー
メモ: バランスのとれた Hades は、敵のヒーラーを短時間で処理したい場合に最適です。
その激しい攻撃と回復減少デバフを組み合わせると、攻撃的なセットが最も推奨されます。 Hoarder を付与すると、Smokescreen の攻撃がよりクレイジーになります。彼らが言うように、オーバーキルほどのキルはありません。
<強い>
イリュージョン (火/闇) (L)
入手先: サモナーズケイブ、ミステリーショップ
4 ピースのドラゴンブランド: フレイまたはホーダー
2 ピースのドラゴンブランド: Freyr、Hoarder、または Schiff
メモ: イリュージョンの専門は、敵のドラゴンを選び出し、封印デバフを与えることです。そうは言っても、FreyrまたはHoarderのフルセットを与えると、戦闘でその可能性を最大限に引き出すことができます.それ以外の場合は、シフ サブ セットを与えると、敵を封印する追加のチャンスが与えられます。
<強い>
ネプチューン (水/カオス) (L)

入手先: 混沌の創造
4ピースのドラゴンブランド: フレイ、ホーダー、またはアレス
2ピースのドラゴンブランド: フレイまたはホーダー
注: その小さな身長にもかかわらず、ネプチューンはトライデントのスイングで海の力を指揮します。そのスキルにより、手ごわいデュエリストになります。 2 番目のスキルは 3 番目のスキルのクールダウンを短縮し、3 番目のスキルはターゲットの防御力を 30% 無視します。 Freyr または Hoarder を与えると、それは完了した取引です。アレス セットは、戦闘で興味深い優位性を与える可能性があります。
<強い>
レイセオン (エレクトリック/ライト) (L)

入手先: レジェンダリーパス
4 ピースのドラゴンブランド: Hoarder、Frey、Tyr、またはAres
2 ピースのドラゴンブランド: アミール、バルドル、またはヘイムダル
メモ: レイセオンのライトニング ボール スキルは、敵のドラゴンを簡単にカリカリに揚げることができます。敵の防御を無視するため、この耳の長いドラゴンに Hoarder セットを設定すると、途方もない量のバースト ダメージが与えられます。
ただし、ティルセットを与えると、弱いドラゴンを1つずつ拾うことができます.しかし、その防御は非常に哀れなので、提案された防御的なサブ ドラゴンブランドのいずれかを与えることで、少なくとも戦闘で長持ちします.
<強い>
リーパー (メタル/ダーク) (L)

入手先: イベント、召喚士の洞窟
4 ピースのドラゴンブランド: ティール、フレイ、またはアレス
2 ピースのドラゴンブランド: ティールまたはフレイ
メモ: その名の通り、リーパーは死の象徴です。さらに、Tyr、Freyr、または Ares セットを与えることで、その名前を正当化します。 3 番目のスキルであるソウル サクリファイスは、自身の HP の一部を消費し、それを 4 ターンの間クリティカル率と攻撃力に変えることができるため、攻撃した対象に多くのダメージを与えることができます。 Tyr とペアにすると、ドラゴン 1 体の軍隊が味方になります。アレス セットは、HP が低いほど有利になるため、このモンスターには絶対に必要です。
<強い>
鎌 (土/闇) (L)

入手先: イベント、召喚士の洞窟、期間限定テイム
4 ピースのドラゴンブランド: Hoarder、Frey、Mimir、Tyr
2 ピースのドラゴンブランド: ヴィダルまたはジャンムー
メモ: 鎌の爪はそのトレードマークであり、接触するほとんどすべてのものを切断することによってそれらを誇示するよりも良い方法はありません.迷惑な敵戦車には Hoarder または Freyr セットが推奨され、敵のランクをすばやくスライスするには Tyr セットが推奨されます。 Vidar または Jammu Sub セットを与えると、痛みを伴うクリティカル ヒットが発生します。最先端について話してください!
<強い>
サイレント ソイル (アース/ライト) (L)

入手先: 繁殖、同盟ホール、召喚士の洞窟
4 ピースのドラゴンブランド: アミールまたはバルドル
2 ピースのドラゴンブランド: Freyr、Hoarder、または Jammu
メモ: Silent Soil は全体的に非常に高い攻撃力を持っています。 2番目と3番目のスキルで、数ターン以内に敵のドラゴンを簡単に破壊できます.悲しいことに、レジェンダリー ティアのドラゴンとしてはスピードが著しく不足しています。このため、敵のドラゴンはこれを利用して容赦なく攻撃する可能性があります。 Amir または Baldr セットを装備すると、生き残るのに役立ちます。
すでに高い攻撃力に加えて、サブドラゴンブランドセットがあります.これらの攻撃的なセットのいずれも、ターン前に攻撃したものをかわしたり、完全に打ち負かしたりするのに貢献する可能性があります.逆に、Freyr セットは Eternal Bombs スキルで深刻なバースト ダメージを与えるために使用できるため、上記の提案されたビルドを逆にすることができます。
タンクドラゴン
ここにリストされているドラゴンは非常に高い防御力を持ち、敵を簡単に弱体化させたり、敵の注意を引き付けたりすることさえできます.タンク ドラゴンと見なされるものは次のとおりです。
アウリタ (水/電気) (E)

入手先: 繁殖、召喚士の洞窟
4 ピースのドラゴンブランド: ミミール、アミール、バルドル
2 ピースのドラゴンブランド: ヘイムダルまたはシフ
メモ: 一般的な想定に反して、Aurita はサポートではなくタンクです。 A レーティングのライフとディフェンスを備えているため、ディフェンシブなドラゴンブランドを詰め込まない理由はありません。 Amir と Baldr は、Waterspout で Taunt ステータスを与えることができるため、Aurita にとって驚くべき効果を発揮しますが、怪我に侮辱を追加したい場合は、Mimir が Taunt 以外のものを提供できます。
もちろん、Heimdallr ブランドのペアで強化することで頑丈に保つことができますが、攻勢に出ている場合は、Schiff ブランドが Waterspout の効果を確認するのに役立ちます.
<強い>
B 壷 (火/金属) (E)

入手先: サモナーズケイブ、ミステリーショップ
4 ピースのドラゴンブランド: アミールまたはシフ
2 ピースのドラゴンブランド: ヘイムダルまたはスケード
メモ: バーンズは全体として珍しいドラゴンであり、その非正統的なプレイ スタイルは、新規プレイヤーが見落としがちなものです。敵の攻撃を下げることと挑発することに特化しているため、ほとんどの戦闘で主要なターゲットです。 Amir または Schiff セットを与えることで保護され、Heimdalr または Skade のペアを追加することで戦闘での生存が保証されます。
<強い>
C オメット (土/金属) (E)

入手先: 繁殖、召喚士の洞窟
4 ピースのドラゴンブランド: シフまたはバルドル
2 ピースのドラゴンブランド: アミールまたはスケード
メモ: コメットの強力なハンマーは、敵を簡単に気絶させることができます。シフ セットを使用してその気絶にさらに効果ヒットを与えるだけでなく、敵のドラゴンがコメットを攻撃したときに敵のドラゴンを気絶させることで、確実にコメットを高く保つことができます。
Baldr セットは、3 番目のスキルである Earth's Protection を強化したい場合、Schiff セットを簡単に置き換えることができます。それに防御ペアを与えることで、その強力な防御も維持されます。結局のところ、気絶した敵のドラゴンは戦いの流れをあなたに有利に変える可能性があります.
<強い>
コア (火/水) (E)

入手先: 繁殖、召喚士の洞窟
4 ピースのドラゴンブランド: アミールまたはバルドル
2 ピースのドラゴンブランド: ヘイムダルまたはスケード
メモ: このドラゴンは、各プレイヤーの初期の叙事詩の 1 つです。コアは味方のドラゴンにプロテクションを与えることができますが、アイス バリア スキルを使用して自身のプロテクションを 2 倍にします。
ただし、その遅い速度は、特にその弱点を利用する敵によって最初にターゲットにされた場合、チームにとって非常に有害になる可能性があります.アミールまたはバルドルのセットを配置すると、自分の番ではないときに戦闘の流れを確実に助けることができます.その高い生命力と防御力は、アミール セットと組み合わせることで、攻撃者になる可能性を和らげますが、バルドル セットは、味方にアイス バリアを与える前にそれを保護することができます。それ以外に、Heimdallr または Skade のペアによる余分な塊は、敵の攻撃を撃退するのに非常に役立ちます.
<強い>
ウーグウェイ (自然/サイキック) (E)

入手先: 繁殖
4 ピースのドラゴンブランド: Amir、Schiff、Baldr、Skade、または Iaso
2 ピースのドラゴンブランド: SkadeまたはHeimdalr
メモ: 繰り返しになりますが、サイキック タイプは育てるのが難しいドラゴンのグループであるため、Oogway が多くの攻撃に対して無防備であることは間違いありません。ただし、アミール、シフ、またはバルドルを与えると、敵の集中力を自分自身に引き寄せることに集中しながら、敵を寄せ付けないようにすることができます.
その 2 番目のスキルは、特に敵の主なダメージ源を挑発し、チームが敵のランクを少しずつ減らしている間、それを忙しく保つことができます。一方、スケードは、メンタルバリアスキルを実行した後、非常に役立ちます.全体的にダメージが減っているので、相手をイライラさせること間違いなしです。イアソセットを与えると、より長く戦い続けることができます。
<強い>
サファイア (水/土) (E)

入手先: サモナーズケイブ、ミステリーショップ
4 ピースのドラゴンブランド: アミール、シフ、またはバルドル
2 ピースのドラゴンブランド: ヘイムダル、またはシフ
メモ: サファイアはルビーの対応物です。後者がより攻撃志向であるのに対し、前者はより防御志向です。 Earth's Rise を 3 番目のスキルとして使用すると、敵を気絶させることができ、コアと同様に、友人にアイス バリアを与えることができます。
シフ セットは地球の上昇で敵を気絶させるのに役立ち、アミール セットは攻撃者を弱体化させるのに役立ちます。シフのペアを追加すると、スタンのチャンスが2倍になり、ヘイムダルのペアはシールドをより頑丈にするのに役立ちます.
イージス (エレクトリック/ライト) (L)

入手先: イベント、召喚士の洞窟
4 ピースのドラゴンブランド: Baldr、Amir、Skade
2 ピースのドラゴンブランド: Baldr、Amir、Skade、Heimdalr、Mimir
メモ: はい、この小さなドラゴンは戦車です。欺瞞的なサイズで、以前はフローターとして知られていたイージスは、リフレクト スキルを使用してチームを保護することができます。エレクトロ シールドに加えて、この小柄なディフェンダーに、HP の増加または防御的な特典を与えるセットを与えることが不可欠です。
Baldr はシールドを作り続け、Amir は Reflect スキルを敵にさらに苦痛を与えるものにし、Skade は味方全員が戦いを生き残ることを確実にします。サイズは関係ないことを敵に示しましょう。
斧尾(土/闇)(大)

入手先: イベント
4 ピースのドラゴンブランド: アミール、バルドル、アレス
2 ピースのドラゴンブランド: ヘイムダル、スケード、アミール、バルドル
メモ: 攻撃的な見た目とは裏腹に、アックステイルは戦車です。味方にシールドを提供し、3 番目のスキルを使用すると、攻撃ダメージは最大 HP に基づいて計算されます。これが、Amir や Baldr のようなセットが重要な理由です。それにアレス セットを与えると、興味深いターンが得られます。弱くなるにつれて一撃一撃が強くなる。さらに、その 2 番目のスキルにより、戦闘に長く留まります。
<強い>
ブライト (アース/ライト) (L)

入手先: サモナーズケイブ、ミステリーショップ
4 ピースのドラゴンブランド: アミール、ティル、スケード、またはアレス
2 ピースのドラゴンブランド: ヘイムダルまたはバルドル
メモ: ブライトは間違いなく、すべてのドラゴンテイマーで最も英雄的なドラゴンの 1 つです。それはヒーローのように見え、ヒーローのように戦い、チーム全体が復活するために死ぬことさえあります. Amir や Skade のような防御的な Dragonbrands を装着するのは常識ですが、Tyr セットを使用すると、敵のドラゴンを倒す前に撃退することができます。これはあなたが実行できるリスクですが、ブライト自体がかなり強くヒットするため、その報酬は素晴らしいです.最後に、より大きな利益のために自滅する前に十分なダメージを与えることができると思われる場合は、常にアレス セットを与えてください。
<強い>
ブラナクル グース (自然/闇) (L)
入手先: 品種、アリーナ、召喚士の洞窟
4 ピースのドラゴンブランド: Skade または Amir
2 ピースのドラゴンブランド: アミールまたはバルドル
メモ: ブラナクル グースの 2 つのスキルは非常に防御志向であるため、Skade または Amir を付与することに疑いの余地はありません。すべての味方をシールドできないにもかかわらず、Skade を付与する理由は、シールドを解除できないためです。これを補完するものとして、そのヘルスと防御力は非常に高いため、完全な Skade セットを着用しても心配する必要はありません.
<強い>
クア (土/闇) (L)

入手先: 繁殖、闘技場、召喚士の洞窟
4 ピースのドラゴンブランド: Skade、Amir、Heimdallr、または Iaso
2 ピースのドラゴンブランド: バルドル
メモ: 強大なクアは、ゲーム内で最も頑丈なドラゴンの 1 つです。その高い防御力は、高い体力と 3 番目のスキルであるアース ウォールと相まって、チーム全体を確実に保護します。
Skade セットを使用すると、敵が投げるほぼすべての攻撃を簡単にかわすことができます。いざという時は、最初のスキルで自分自身を回復することさえできます。 Heimdallr と Iaso のセットは、特に自分自身に対して、その治癒能力にも役立つ可能性があります。
<強い>
サラマンダー (火/光) (L)

入手先: イベント、召喚士の洞窟、ミステリーショップ
4 ピースのドラゴンブランド: Amir、Baldr、Schiff、または Skade
2 ピースのドラゴンブランド: Baldr または Amir
メモ: With fiery wings fluttering about, the Salamander grants its protection to the entire team. By lowering the enemy’s attack using its second skill, it can slow the fight down on the enemy’s end.
Giving it a Baldr set is like adding insult to injury since it has the chance to spawn shields all over the Salamander’s allies. The Skade set is another good option since it also keeps all allied dragons from falling so easily to the enemy. Giving the Salamander a complete HP or defense build will certainly carry your team to victory.
Area Of Effect Dragons

Dragons that possess attacks that greatly damage multiple targets at once fall under this category. The following are Area of Effect dragons:
Arc (Electric/Earth) (E)

Where to Get: Events, Summoner’s Cave
4-Piece Dragonbrands: Hoarder, Freyr, Bully
2-Piece Dragonbrands: Hoarder, Freyr, Vidar, Jammu, Bully
Notes: Arc is the epitome of the dragons that possess the Thunderclap skill. That said, build around that skill so it may cause burst damage to the enemy team. A set like Hoarder will cause it to deal massive amounts of damage, Freyr will allow it to take weakened dragons out, and Bully will give it a chance to refresh all of its skills at once if it scores any kills. Complementing its main set should be more offensive sets or sets that improve critical hit chance.
<強い>
Carboro (Nature/Water) (E)

Where to Get: Event, Summoner’s Cave, Time-Limited Taming
4-Piece Dragonbrands: Hoarder
2-Piece Dragonbrands: Hoarder
Notes: There’s no better way to make the Carboro stronger than to stuff it full of attack Dragonbrands. The Hoarder set will especially complement its skills since its Tsunami skill lowers the enemy’s defense. Its successive attacks should be able to tear through the opposition with ease.
<強い>
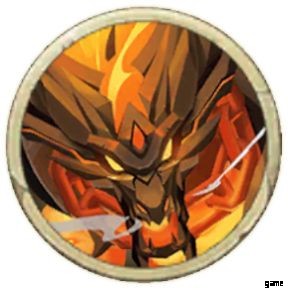
Evil Beast (Fire/Metal) (E)

Where to Get: Mystic Mountain, Summoner’s Cave
4-Piece Dragonbrands: Jammu or Hoarder
2-Piece Dragonbrands: Baldr, Amir, or Skade
Notes: This dragon is another example of a glass cannon. The Evil Beast is quite powerful when it comes to dishing out mass damage, but not when it comes to defending itself. Its second skill, Hard Shield, raises a shield which has strength based on the Evil Beast’s max HP. While its main Dragonbrands are offense-based, it’s wise to give it some Dragonbrands that raise its defense as the pair in its build.
<強い>
Gearing (Nature/Metal) (E)

Where to Get: Arena
4-Piece Dragonbrands: Freyr or Hoarder
2-Piece Dragonbrands: Vidar, Jammu, or Bully
Notes: The Gearing, in appearance, looks quite similar to Cernunnos. Both look like deer, but each have their own purpose. While Cernunnos focuses solely on one target at a time, Gearing is more suited to damaging multiple opponents at once.
Thanks to its Forest Wrath skill, sets like Freyr and Hoarder will suit it nicely. To further up its damage output, giving it a critical hit pair should suffice in any battle you deploy it in.
<強い>
Plough (Electric/Metal) (E)

Where to Get: Summoner’s Cave, Sprites Pyramid
4-Piece Dragonbrands: Hoarder or Ares
2-Piece Dragonbrands: Vidar, Bully, or Jammu
Notes: The Plough is a dragon quite easy to understand. Its skills are quite straightforward in the sense that it merely seeks the destruction of the enemy ranks. After using its Star Beacon skill, it may perform its Shattering Thunderboom. For Star Beacon as an opening, the Hoarder set is perfect for damage output overall.
<強い>
Triceratops (Earth/Psychic) (E)

Where to Get: Arena
4-Piece Dragonbrands: Amir or Hoarder
2-Piece Dragonbrands: Heimdallr, Baldr, or Freyr
Notes: The Triceratops’ Psychic element paints a huge target on its back for dragons with basic elements. To counter this, equipping it with an Amir set may help keep its attackers weakened enough for it to deal lots of damage with its Earthquake skill. Alternatively, you can play it up with an offensive build in which it hits hard and nothing else.
Ash (Fire/Dark) (L)
Where to Get: Events, Summoner’s Cave
4-Piece Dragonbrands: Ares, Baldr, Skade, Amir
2-Piece Dragonbrands: Freyr, Tyr, Hoarder
Notes: Possibly one of the edgier-looking dragons out there, the Ash may easily turn its opponents into… well… ash. In using its third skill which bases damage off of its max HP, the best way to make it rage through a fight is by giving it Dragonbrands that offer it bonuses to its HP.
Interestingly enough, if you give it Ares, it might even pull off a more frightening amount of damage when its health has been greatly depleted.
<強い>
Bone (Earth/Dark) (L)

Where to Get: Event
4-Piece Dragonbrands: Schiff, Freyr, or Hoarder
2-Piece Dragonbrands: Schiff
注: Bone, Behemoth’s more cheery counterpart (it’s a practical jokester, says its lore), is a new, powerful addition to the Dragon Index. This undead dragon excels in controlling a fight by stunning the enemy team with its third skill. Its second skill also does this but targets dragons one by one.
To keep it stunning its enemies, a Schiff set is highly recommended. However, if you’re up for making it hit much harder, give it a Freyr or Hoarder set. We recommend giving it a Schiff pair as secondary gear so it can keep stunning the enemy without fail.
Griffon (Earth/Light) (L)

Where to Get: Legendary Pass
4-Piece Dragonbrands: Freyr, Hoarder, Tyr, Ares
2-Piece Dragonbrands: Freyr, Hoarder, Tyr, Ares, Vidar, Jammu, Bully
Notes: The fabled “Lion Demon”. The Griffon’s aura is imposing and with good reason. Boasting impressive offensive stats, it’s a no brainer to give this one sets like Freyr, Hoarder, Tyr, and Ares. Tyr stands out especially. Its third skill, Screech, can be used to soften up the enemy team.
After which, it can begin to pick off its foes one by one starting with Wheel War and a barrage of Falling Light for the rest. Otherwise, the other three sets will benefit it nicely.
Helios (Metal/Light) (L)

Where to Get: Sprites Pyramid
4-Piece Dragonbrands: Hoarder
2-Piece Dragonbrands: Freyr, Hoarder, or Tyr
Notes: 太陽を讃えよ! Whoops, wrong game. Helios is a force to be reckoned with; its third skill can reduce all its allies’ skills cooldowns and raise their attack and its second skill can be spammed due to its low cooldown count. Therefore, giving it an all-out attack set is the key to making him a most formidable opponent.
Hermes (Earth/Dark) (L)

Where to Get: Events
4-Piece Dragonbrands: Jammu, Freyr, Mimir
2-Piece Dragonbrands: Jammu, Freyr, Hoarder, Ares
Notes: Hermes is all about speed. The best thing about it is its two skills, apart from its first one, hit multiple times. This is why a set like Jammu is preferred. If you’re feeling adventurous, Mimir would suit it nicely since it might have a chance of causing crowd control debuffs. Either way, building it offensively is key.
Hydra (Water/Dark) (L)

Where to Get: Honor Stele
4-Piece Dragonbrands: Freyr or Hoarder
2-Piece Dragonbrands: Freyr or Hoarder
Notes: The Hydra is a dragon rewarded to only the most deserving of tamers. Its fierce Toxic Cloud and Toxic Blast attacks base their poison damage on the Hydra’s attack stat and for that, it’s best to focus on this stat all the way. After such virulent attacks, the enemy’s ranks should be all but crippled.
<強い>
Lucifer (Fire/Chaos) (L)

Where to Get: Chaos Creation
4-Piece Dragonbrands: Freyr, Hoarder, or Ares
2-Piece Dragonbrands: Freyr or Hoarder
注: The bringer of doom, the exiled demon dragon king, Lucifer, brings nothing but terror and destruction to all that oppose it. Given that its third skill has a chance to ignore 20% of its enemies’ defense, a Hoarder set may be able to pile on that damage even more.
Otherwise, a plain Freyr set should be enough to make it powerful. If you’re feeling more adventurous, there’s always giving him the option of an Ares set so it causes more havoc as the battle rages on.
<強い>
Minotaur (Nature/Dark) (L)

Where to Get: Summoner’s Cave, Mystery Shop
4-Piece Dragonbrands: Hoarder or Heimdallr
2-Piece Dragonbrands: Freyr or Hoarder
Notes: While the Minotaur has an area of effect attack, it also comes with a healing skill. This skill can be quite handy when your team’s in a pinch and thus, equipping a Heimdallr set could definitely help.
However, if you’re hoping to make the Minotaur a more attack-oriented member of your team, there’s no harm in building it offensively. No harm for you, of course, but plenty of harm for your enemies.
<強い>
Nymph (Light/Psychic) (L)

Where to Get: Event, Summoner’s Cave, Limited-Time Taming
4-Piece Dragonbrands: Freyr
2-Piece Dragonbrands: Hoarder or Tyr
Notes: Don’t let the delicate appearance fool you, the Nymph can be built to be quite the destructive force if done correctly. With a set like Freyr, the Nymph can cause a fairly substantial amount of damage with its Shining Sun skill since it hits all enemies thrice. If that wasn’t enough, its Mental Ray skill could pick off the weakest dragon on the enemy party if they aren’t prepared.
<強い>
Phantom (Metal/Dark) (L)

Where to Get: Summoner’s Cave, Mystery Shop
4-Piece Dragonbrands: Jammu or Hoarder
2-Piece Dragonbrands: Vidar, Bully, or Jammu
Notes: The vampiric Phantom can be quite alarming to your enemy once they see it. The Phantom excels in keeping itself alive by stealing the life of enemy dragons.
That said, giving it a Hoarder set could suffice, but if you’re looking to play on its high critical hit rate, giving it a Jammu set may help it deal even more damage. Its sub sets may contribute to crit rate as well. Enough talk, have at them!
<強い>
Prophet (Light/Psychic) (L)

Where to Get: Event, Summoner’s Cave
4-Piece Dragonbrands: Hoarder
2-Piece Dragonbrands: Heimdallr or Skade
Notes: Prophet is one of the more eccentric dragons of the game. Due to it having an area of effect skill as well as a single-target skill that can heal its ally with the lowest HP, it doesn’t seem very versatile.
Using sets like Hoarder for its offensive capabilities is a must but giving it a higher amount of health using a pair of Heimdallr or Skade pieces will greatly aid in healing its friends while it fends off the opposition.
<強い>
Pyralis (Fire/Light) (L)

Where to Get: Breed, Arena, Summoner’s Cave
4-Piece Dragonbrands: Hoarder
2-Piece Dragonbrands: Vidar, Bully, Jammu, Hoarder, Freyr, or Tyr
Notes: Perhaps one of the most famous area of effect dragons in the game, the Pyralis stands out as that one dragon with balanced stats, rivaling Hades.
Its Firewall skill can easily rip through the enemy ranks if it triggers the Hoarder set’s passive. Because of that, it should be a good idea to add to its critical hit rate or even up its damage using attack passive brand pairs. Toasty!
<強い>
Reyne (Electric/Light) (L)
Where to Get: Breed, Mystic Mountain, Summoner’s Cave
4-Piece Dragonbrands: Vidar or Hoarder
2-Piece Dragonbrands: Schiff
Notes: Reyne’s third skill, Thunder Rolls, is quite powerful. If its Stun debuff triggers, that could mean the battle for the enemy team. Giving it a Schiff sub set could aid in helping the frequency in which the stunning could occur, but primarily, its main set should be Vidar.
While the enemy is stunned, the Reyne could cause more damage to them with any succeeding attack. If Vidar isn’t your style, the Hoarder set is another good alternative.
Rune (Metal/Dark) (L)

Where to Get: Legendary Pass
4-Piece Dragonbrands: Hoarder, Jammu
2-Piece Dragonbrands: Freyr, Tyr, Hoarder, Vidar, Jammu, Bully
Notes: Due to its tremendous speed, Rune would normally be built to go first. However, its skills don’t do that much damage compared to its fellow Legendaries. What you can do to make it shine is give it a Hoarder or a Jammu set.
Hoarder will help it pierce through thick-skinned dragons while Jammu will allow it to score more damage using the enemy’s max HP. Accompanying this are other offense-oriented dragonbrands.
Siren (Water/Light) (L)
Where to Get: Legendary Pass
4-Piece Dragonbrands: Hoarder
2-Piece Dragonbrands: Freyr, Hoarder, Jammu, Bully, Vidar, or Tyr
Notes: Siren’s raw damage potential can be easily amplified by giving it a full-on offensive set. Since it specializes in mass nukes, there’s no other way to make it strong than to play on its strengths. Its strong water attacks can easily destroy most fire-based dragons. Talk about a hydrogen bomb.
<強い>
Starry (Dark/Psychic) (L)

Where to Get: Legendary Pass
4-Piece Dragonbrands: Hoarder or Vidar
2-Piece Dragonbrands: Schiff
Notes: The mysterious yet powerful Starry has an interesting third skill. Because it strips away enemy shields and causes mass damage, a Hoarder set is in order.
However, because of its second skill, a Vidar set might suit it even better since it will deal more damage to any stunned enemy. The Schiff set should help increase the chances of that Stun debuff from happening.
Thunder Wolf (Electric/Dark) (L)

Where to Get: Events
4-Piece Dragonbrands: Freyr, Hoarder, Tyr, or Ares
2-Piece Dragonbrands: Freyr, Hoarder, Tyr, or Ares
注: Don’t look now, Fenrir! Yet another wolf has entered the fray! The Thunder Wolf is a wild beast that seeks nothing but to tear the opposition to shreds. Its third skill allows it to take an extra turn and its second skill reduces its target’s speed bar (if they survive). Giving it an offensive set such as Freyr or Hoarder will allow it to deal great amounts of damage.
However, given the nature of its third skill, a Tyr set might suit it, too, since it gains an extra turn, opening it up for many a possibility. Otherwise, giving it an Ares set will allow it to finish a fight strong if it finds itself in a corner.
Twins (Electric/Chaos) (L)
Where to Get: Chaos Creation
4-Piece Dragonbrands: Freyr, Hoarder, Ares
2-Piece Dragonbrands: Freyr, Hoarder, Tyr, Ares, Vidar, Jammu, Bully
Notes: While not as quick as other Legendaries, the Twins excel in dealing burst damage. This is why giving them Freyr, Hoarder, or Ares as main sets would make them rip through battles easily. Given that their third skill deals area damage and their second skill deals single damage, the Freyr set, for example, would put most injured enemy dragons out of their misery.
Hoarder will amplify their damage output even more and Ares will make them incredibly dangerous when they have been wounded.
Vine (Nature/Light) (L)

Where to Get: Events
4-Piece Dragonbrands: Ares, Hoarder, Freyr, Iaso
2-Piece Dragonbrands: Ares, Hoarder, Freyr
注: Low crit rate but high attack, the Vine makes itself the first true burst damage dealer. Naturally, giving it sets that make its third skill hit so much harder is preferred. But due to its penchant for getting stunned using the third skill, giving it Iaso set is another nice touch. That way, during its next turn, it will be able to at least contribute more to the fight.
Support Dragons

The dragons that fall under this category possess skills that can lower the enemy’s defense or buff your allies. The following dragons below are considered Support dragons:
Amethyst (Earth/Psychic) (E)

Where to Get: Mystery Shop
4-Piece Dragonbrands: Schiff or Baldr
2-Piece Dragonbrands: Heimdallr or Iaso
Notes: Among the newest entries to this game, the Amethyst is a fearsome support. With its Spirit Shield and debilitating earth attacks, it could easily keep your team protected from larger enemy threats. Due to it having Stun and Disarm debuffs, giving it a Schiff set could boost the likelihood of causing these to happen. On the side, boosting its already high HP with Heimdallr or Iaso could keep it alive long enough in a fight.
<強い>
Ammit (Nature/Earth) (E)

Where to Get: Summoner’s Cave, Limited-Time Taming
4-Piece Dragonbrands: Schiff
2-Piece Dragonbrands: Schiff
Notes: The Ammit could be a tank, but due to its offense-oriented skills, we chose to put it here in the support category. Because its debuffs are purely based on chance, it’d be best to put a full Schiff set on it so its chances of scoring its debuffs more frequently. Due to its high defense, it may also easily stun attacking dragons.
<強い>
Drarus (Water/Earth) (E)

Where to Get: Honor Stele
4-Piece Dragonbrands: Schiff or Hoarder
2-Piece Dragonbrands: Schiff
Notes: This walrus-like dragon is capable of mass-Sealing the enemy team by chance. With its second skill, it has a chance of Stunning an enemy dragon.
To improve these chances, much like some of the other dragons in this category, a Schiff set is advisable. However, due to the high damage of its Tail Whip skill, the Drarus could also use a Hoarder set if you want it to secure kills.
Emerald (Nature/Earth) (E)
Where to Get: Events
4-Piece Dragonbrands: Mimir, Jammu
2-Piece Dragonbrands: Freyr, Hoarder, Tyr, Ares
Notes: The spiky, sleek Emerald has the infamous Hurricane skill. Because it damages all enemies thrice, this looks like the perfect job for sets like Mimir or Jammu. Jammu will help it damage the enemy team more while Mimir would set them up for a nasty surprise. Give it a try yourself and pick what suits you!
<強い>
Enki (Nature/Water) (E)

Where to Get: Summoner’s Cave, Friendship Shop
4-Piece Dragonbrands: Amir or Baldr
2-Piece Dragonbrands: Amir or Baldr
Notes: The Enki is one of those dragons that has a pure support skillset. At most, its high health offers for more healing since its Moving Spores skill bases its healing value from the Enki’s max HP. Increasing this with an Amir or Baldr set (full or otherwise) will definitely get it to stand out in battle.
<強い>
Innsmouth (Water/Earth) (E)

Where to Get: Summoner’s Cave, Mystery Shop
4-Piece Dragonbrands: Hoarder or Freyr
2-Piece Dragonbrands: Hoarder or Freyr
Notes: The Innsmouth deals a good deal of debuffs in a fight:Damage Over Time and Defense Down. All of its skills solely rely on its attack stat and thus, going on the offensive when building this dragon is key.
Not only will it hit harder, but the poison it sprays onto the enemy will also deal more damage if given a proper set of offensive Dragonbrands.
<強い>
Joker (Metal/Psychic) (E)

Where to Get: Event, Honor Stele
4-Piece Dragonbrands: Schiff or Amir
2-Piece Dragonbrands: Amir, Heimdallr, or Skade
Notes: While the Joker has a skill that involves Taunting the enemy, its defense is quite low. To mitigate this, it’s important to ready it with some defensive Dragonbrands. Either way, giving it a Schiff or an Amir set will make the enemy think twice after their dragons get stunned or damaged right after attacking the Joker.
The Schiff set is especially preferred so it can easily disarm its opponents with its Mental Fluctuation skill. As it is a Psychic type, it’s bound to be a target for many enemies, but if you’ve built the Joker right, you’re sure to have the last laugh.
<強い>
Keydorah (Metal/Psychic) (E)

Where to Get: Summoner’s Cave, Friendship Shop
4-Piece Dragonbrands: Schiff or Hoarder
2-Piece Dragonbrands: Freyr, Hoarder, or Tyr
Notes: Thrice the heads, thrice the terror! The Keydorah prides itself in its high damage attacks. Similar to the Joker, a Schiff set is recommended for it to easily inflict more debuffs onto its enemies.
However, because of its Mental Torment skill, there’s always the option to give it a Hoarder set instead. The enemy will be reeling when this three-headed dragon is done with them.
<強い>
Ladon (Nature/Water) (E)

Where to Get: Arena, Honor Stele
4-Piece Dragonbrands: Schiff or Amir
2-Piece Dragonbrands: Schiff
Notes: The proud Ladon takes advantage of the weather. With its Rainfall and Crypto Freeze skills, it can give the enemy a slew of debuffs they won’t be prepared for. For it to land these debuffs, a Schiff set should be equipped.
However, due to the Ladon’s rather low defense, an Amir set could be used, too. Either way, with these defensive Dragonbrands at the Ladon’s disposal, the enemy will have a hard time finding a way to rain on your parade.
<強い>
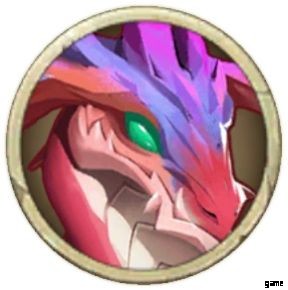
Red-violet (Nature/Fire) (E)
Where to Get: Breeding, Summoner’s Cave
4-Piece Dragonbrands: Amir or Schiff
2-Piece Dragonbrands: Baldr, Heimdallr, or Skade
Notes: This red dragon is known for its quick breeding and hatching time for an Epic. The Red-violet is no slouch when it comes to team support. Its Dragonbreath has a chance to Disarm enemy dragons and its Seed of Wrath skill has a chance to Taunt them.
Due to its low defense but high health, it’s advisable to build it defensively by using an Amir set. However, if you’re hoping it’d play the part of a support more, the Schiff set might be more of your speed.
Chameleon (Nature/Chaos) (L)

Where to Get: Chaos Creation
4-Piece Dragonbrands: Depends on the dragon it will copy
2-Piece Dragonbrands: Depends on the dragon it will copy
Notes: The Chameleon is one of the trickiest dragons to ever exist in the game. Its third skill, Mimic, allows it to completely morph into the same species of an allied dragon. Granted that it does this, we cannot give an exact build for it since its versatility is what makes it unique. Stat-wise, it’s also highly balanced with all of its stats at A except for its Attack which is at S.
If you’re going to make it fight as one of your other dragons, albeit as a clone, give it a similar loadout to the dragon it’s copying. While that does seem expensive, it’s definitely worth a try. The Dragonbrands don’t have to be exact copies. After all, a team of two Pyralis or Nix will make all the difference, especially if they’re both equipped alike.
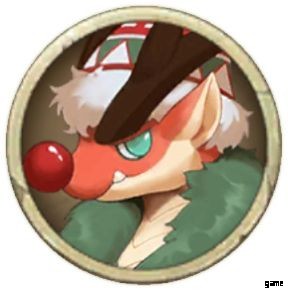
Jackalope (Nature/Psychic) (E)

Where to Get: Events, Mystery Shop
4-Piece Dragonbrands: Freyr or Tyr
2-Piece Dragonbrands: Freyr, Hoarder, Tyr, or Ares
注: This Easter-themed dragon (yes, it’s a dragon, not a rabbit), is quite mysterious. While we’ve put it here in the Support category, its other skills say otherwise. The primary reason why we put it here as a Support is because of its second skill, Downwind Attack, boosts the speed of the entire team. Unlike a Support, however, its first and third skills are hard-hitting, making it valuable in any fight.
Giving it attack-oriented Dragonbrands will make it dangerous but giving it a Tyr set would ultimately make it a force to be reckoned with. Because it’s a Psychic-type, it’s bound to help take enemy Legendary dragons down.
Dark Qilin (Dark/Psychic) (L)

Where to Get: Breeding, Alliance Hall, Summoner’s Cave
4-Piece Dragonbrands: Amir, Schiff, or Hoarder
2-Piece Dragonbrands: Schiff, Baldr, or Skade
Notes: The fearsome Dark Qilin can seal enemy skills away with its Horror Vision skill. It can also raise a shield based on its max HP. There are three ways you can go about this:build it defensively with an Amir set, make it a dedicated support that rains debuffs using the Schiff set, or make it go all out and turn it into a DPS by equipping a Hoarder set. This dragon is quite versatile and it’s important to equip sub Dragonbrands that complement the set it is wearing.
<強い>
Fores (Nature/Light) (L)

Where to Get: Summoner’s Cave, Mystery Shop
4-Piece Dragonbrands: Schiff or Hoarder
2-Piece Dragonbrands: Schiff, Freyr, or Tyr
Notes: Old and wise, the Fores makes a way to exploit every dragon’s greatest weakness. With the flapping of its wings, it could easily blow away the enemy team and if that wasn’t enough, it could send toxic powder toward its foes. Its Toxicity skill relies on attack power, so a Hoarder set is advisable for that extra kick.
For it to land its other debuffs, however, the Schiff option stands. With the right set, your enemies will be sorry they messed with this elderly dragon.
<強い>
Genie (Water/Light) (L)

Where to Get: Breeding, Summoner’s Cave, Friendship Shop
4-Piece Dragonbrands: Baldr or Amir
2-Piece Dragonbrands: Baldr or Skade
Notes: If you’re looking for that one support that could make some (not all!) of your wishes come true, look no further than the Genie. It can speed up its friends, heal while it fights, and overall support your entire team until the bitter end.
With a Baldr set, it could take advantage of its high health and allow for its friends to be protected. Another option would be to use the Amir set so as to make it return the enemy’s damage. It’s like magic!
Glaucus (Water/Light) (L)

Where to Get: Events
4-Piece Dragonbrands: Mimir, Jammu
2-Piece Dragonbrands: Jammu, Vidar, Bully, Freyr, Hoarder, Tyr, Ares
Notes: This jellyfish-like dragon uses its Whirlpool skill to damage all its enemies three times. Because of this, it’s a great opportunity to use Mimir or Jammu sets. To add insult to injury since Whirlpool removes the enemy’s shields, Mimir replaces the shields with a slew of debuffs.
If you’re feeling more straightforward, Jammu will damage the enemy team to an even greater degree. Naturally, equipping it with Dragonbrands that amplify its damage is a must.
Icey (Water/Light) (L)

Where to Get: Event, Summoner’s Cave
4-Piece Dragonbrands: Mimir or Schiff
2-Piece Dragonbrands: Schiff
Notes: The Icey is quite similar to the Freezey dragon that everyone gets in the beginning. Unlike the Freezey, however, the Icey has its powerful Flash Bomb skill. What really makes it shine is its penchant for freezing things solid, so putting a Schiff set on it is quite important.
However, if you’re looking to wreak some more chaos, there’s always the idea of putting a Mimir set on it just in case the enemy doesn’t get frozen.
<強い>
Lasvig (Nature/Light) (L)

Where to Get: Breeding, Alliance Hall, Summoner’s Cave
4-Piece Dragonbrands: Baldr, Schiff, or Amir
2-Piece Dragonbrands: Freyr, Hoarder, or Tyr
Notes: The time-warping Lasvig is easily one of the most support-oriented dragons in the game, much like the Enki. Its skills consist of only empowering its teammates while its basic attack doesn’t do so much. Because it’s known to make the entire team faster or allow an allied dragon to go before everyone else, this makes it a prime target for the enemy. Build it with protective Dragonbrands like Baldr, Schiff, or Amir.
If you wish for it to fight back or at least aid in cutting the enemy down, give it an offensive pair of sub Dragonbrands. If you’re looking to build it as a support all the way, there’s always the option of giving it a full set of any of the defensive brands we suggested here.
<強い>
Master Mo (Water/Light) (L)

Where to Get: Event, Summoner’s Cave
4-Piece Dragonbrands: Schiff or Hoarder
2-Piece Dragonbrands: Schiff or Hoarder
Notes: The great Master Mo specializes in keeping the enemy weakened and buff-less. If they’re really unlucky, Master Mo could even give them stuns, and thus, giving it a Schiff set could really help in landing them.
The Hoarder set will allow it to dish out more damage than usual. When built properly, Master Mo could most certainly write out the enemy’s last will and testament for them.
<強い>
Nix (Electric/Dark) (L)

Where to Get: Breeding, Mystic Mountain, Summoner’s Cave
4-Piece Dragonbrands: Tyr, Jammu, or Hoarder
2-Piece Dragonbrands: Tyr, Hoarder, Freyr, Jammu, Vidar, or Bully
Notes: Given that the Nix intends on keeping the enemy healer struggling, a full-on offensive set is recommended for it. The Tyr set, for example, will allow it to go nuts on the enemy team once it’s done reducing their healing. This is going to be especially effective when it uses its Vanishing Shadow skill to take out any surviving dragons.
Phoenix (Fire/Light) (L)

Where to Get: Events, Summoner’s Cave
4-Piece Dragonbrands: Baldr, Heimdallr, Amir, Schiff, Iaso
2-Piece Dragonbrands: Schiff, Iaso, Heimdallr, Baldr, Skade
Notes: This beautiful feathery dragon (nope, not a bird!) resurrects its fallen friends and can make a priority target on its team invincible for one turn. The Phoenix itself is a high-profile target and should be given all forms of defensive Dragonbrands possible.
Baldr will allow it to block attacks, Amir and Schiff will spell doom for its attacker, and Iaso can keep it from being stunned when a revive is much needed. Heimdallr, on the other hand, will allow it to heal its fallen ally with even more HP if you fancy that. Keep the Phoenix alive and it will protect your team.
Healer Dragons

Dragons that dedicate their skills to keeping themselves and the party alive through recovery magic fall under this category. Below are dragons that we categorized as healers:
<強い>
Fairy (Nature/Electric) (E)

Where to Get: Arena, Summoner’s Cave
4-Piece Dragonbrands: Freyr, Hoarder, Tyr, or Iaso
2-Piece Dragonbrands: Heimdallr or Amir
Notes: Easily one of the game’s most prolific healer, the Fairy prides itself of having two very powerful healing skills. Surprisingly, its heals are based on its attack values. To make the Fairy heal more effectively, it’s recommended to build it offensively.
Thus, Freyr, Hoarder, or Tyr sets are suggested. Unfortunately, because of its low defense, you may want to mitigate that a little with a pair of defensive Dragonbrands. If you find that your Fairy is continuously shut down by the enemy in a fight, give it an Iaso set.
<強い>
Storm (Water/Psychic) (E)

Where to Get: Breeding
4-Piece Dragonbrands: Heimdallr, Baldr, Amir, or Schiff
2-Piece Dragonbrands: Heimdallr or Amir
Notes: The Storm, a most regal-looking dragon whose presence graces the team with a balance of healing and damage output. Because its first two skills have the purpose of debuffing the enemy, using a Schiff set may come in handy.
But if you’re looking to up its healing factor, look no further than increasing its defensive stats using Heimdallr, Baldr, or Amir Dragonbrand sets. This will also slow it down being first blood in a fight.
<強い>
Bai Ze (Nature/Light) (L)

Where to Get: Events, Limited-Time Taming
4-Piece Dragonbrands: Amir, Baldr, or Iaso
2-Piece Dragonbrands: Amir, or Baldr
注: The mysterious white dragon, Bai Ze, spreads its wings out to protect any of its friends in battle. Because its third skill, Blessing, allows it to keep its allies safe from any status effects, it’s recommended to give it a full Iaso set.
That way, it can shrug off any and all debuffs, allowing it to cleanse its allies in times of need. If an Iaso set is too expensive for you, a plain Amir or Baldr set will suffice as well.
Dark Star (Electric/Dark) (L)

Where to Get: Alliance Hall
4-Piece Dragonbrands: Baldr, Heimdallr, or Amir
2-Piece Dragonbrands: Baldr or Amir
Notes: The Dark Star has one of the highest amounts of HP among all its peers. Thanks to this, its high HP contributes to an excellent healing factor for both friends and itself. Boost this further by giving it Dragonbrands like Baldr or Amir. If you’re after the raw healing factor itself, the Heimdallr set is a good option as well.
Mao (Psychic/Dark) (L)

Where to Get: Events
4-Piece Dragonbrands: Heimdallr, Baldr, Amir
2-Piece Dragonbrands: Freyr, Hoarder, Tyr, Ares
Notes: Now, wait just a minute! The Mao needs both a defensive set AND an offensive set? Let’s explain why. The Mao’s healing skills derive their strengths from both Attack and HP. Moonlight, its second skill, heals based on the Mao’s Attack while Gloomy Asylum, its third, heals based on the Mao’s max HP.
To keep it at its best, defensive sets like Baldr and Amir should be its main. Heimdallr, too, because it’ll heal better. Its secondary set should be anything offensive so that it could at least put up a fight using its Telekinesis skill.
Sakura (Nature/Light) (L)
Where to Get: Events
4-Piece Dragonbrands: Baldr, Amir, Heimdallr, Iaso
2-Piece Dragonbrands: Baldr, Amir, Skade
Notes: This beautiful, blossoming dragon has tons of HP to spare despite looking like a delicate flower. The Sakura heals its friends with finesse and it’s with these defensive Dragonbrands that will keep it alive.
Baldr and Amir will protect it, Heimdallr will give its heals a bigger kick, and Iaso will keep it from getting controlled by the enemy. The Iaso set is particularly useful for emergency heals, especially if you’re up against enemy disablers like Bone.
<強い>
Selene (Light/Psychic) (L)

Where to Get: Legendary Pass
4-Piece Dragonbrands: Heimdallr or Baldr
2-Piece Dragonbrands: Heimdallr or Baldr
注: The charming Selene is everyone’s best friend. With a healing skill and a support skill at its disposal, it has the ability to turn a fight around. Giving it a healer set like Heimdallr should help increase its amount of healing from its second skill. However, giving it a Baldr set may give its friends a better chance at survival, complementing its third skill as well.
Themis (Light/Psychic) (L)

Where to Get: Breeding, Arena, Summoner’s Cave
4-Piece Dragonbrands: Heimdallr, Baldr, Amir, or Iaso
2-Piece Dragonbrands: Heimdallr, Baldr, or Amir
注: Themis, the creator and guardian of order in this world, is a gentle soul that ensures that no one in the team is left behind. It raises the critical hit rate of its friends using its second skill and it greatly heals any of its allies with its third. Giving it a standard healing set like Heimdallr is a basic build idea, but giving it Baldr or Amir may make for some interesting scenarios in a fight.
This will also give it an edge when it comes to defending itself. When given an Iaso set, it may have the chance to save that one ally riddled with debuffs by keeping it alive a little bit longer.
Titania (Nature/Dark) (L)

Where to Get: Events
4-Piece Dragonbrands: Freyr, Hoarder, Ares, Jammu
2-Piece Dragonbrands: Freyr, Hoarder, Ares, Tyr, Vidar, Jammu, Bully
Notes: The Titania is a most unusual healer. Maybe not so much unusual, but more sinister than the rest. It has to harm its foes so its friends can be healed. In doing so the damage the Titania deals is converted into healing and thus giving it offensive sets will make it heal more. Freyr and Ares, in particular, will greatly improve its heals.
When the enemy has been weakened, the Freyr set will deal more damage to them. When the Titania itself has been weakened, the Ares set will do its job. Cute, cuddly, cruel.
Unicorn (Metal/Light) (L)

Where to Get: Breeding, Summoner’s Cave, Friendship Shop
4-Piece Dragonbrands: Heimdallr, Baldr, or Amir
2-Piece Dragonbrands: Baldr or Amir
Notes: The Unicorn is one of the only two dragons that could resurrect its fallen allies, the other one being Bright. The catch here is that the Unicorn can only resurrect its allies one at a time.
With its healing based off of its max HP, the Unicorn should be given a set that raises its HP or its survivability. Sets like Heimdallr, Baldr, or Amir should keep it alive long enough to bring a downed friendly back to life.
And that’s that for these Epic and Legendary builds. If you have better ideas or suggestions for certain dragon builds, please leave your thoughts in the comment section down below!