ツー ポイント ホスピタル – 究極のトップレス マウンテン ガイド
トップレス マウンテンで 3 つ星を獲得し、ウェーブ 42 を完了するためのクイック ガイド。
トップレス マウンテン チャレンジのガイド
はじめに
Topless Mountain で成功を収めるのは非常に難しい場合があります。お金は最初は逼迫しており、波は絶え間なく続きます。ただし、正しい戦略があれば、このレベルは実際には非常に簡単で、長くて退屈なグラインドに変わります.幸いなことに、レベルのほとんどを高速でプレイできます。
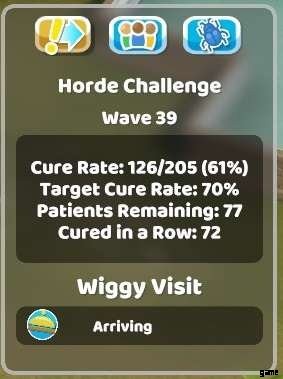
最初の波は 10 人の患者から始まり、50% の治癒率が期待されます。ウェーブごとに 5 人の患者が追加され、設定された間隔で予想治癒率が 5% 増加します。
つまり、ウェーブ 42 で治癒率が 70% と予想される 220 人の患者を見ています。
このレベルで成功した病院を運営するために私が使用した戦略の概要を説明します.
例として;ウェーブ 39 の間に治癒した 72 人の患者の連続治癒率に達し、ウェーブ 42 に入り、85 人のスタッフ、38 人の医師、24 人の看護師、ほぼ全員がレベル 4 ~ 5 で、約 1,000 万の現金を持っていました。
その過程で、次の成果を得ることができます:
- キュア・スプリー – トップレス マウンテンで癒しのひとときを。
- 生命、宇宙、すべて – トップレス マウンテンでウェーブ 42 を完了する。
まだロックを解除していない場合は、途中で他のその他の成果を取得することもできます。たとえば、レベル 5 の外科医を取得できます。これはここでは非常に簡単であり、高い患者の流れと治癒率を達成するために必要です。
警告
このガイドには、主にこのレベルを簡単にする報酬として受け取るアイテムに関する、他の DLC のネタバレの可能性が含まれています。
免責事項
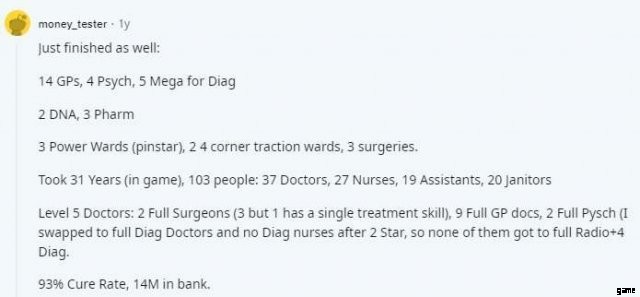
私のルーム戦略は、次のコメントに大きく影響を受けました:
一般的な戦略とヒント
支出に注意してください。少なくとも 3 か月の費用のバッファーを維持するように努めているため、波の終わり近くで収入が減少したときにマイナスの残高にならないようにしています。これを続ければ、マイナスの残高になってしまうことは決してなく、着実に素晴らしいバッファーを構築できます。私にとっては、ウェーブ 20 以降、途方もない利益を上げ始め、もうお金についてストレスを感じる必要はありませんでした。ウェーブ 42 の開始時までに、私の支出は月あたり約 20 万になり、1,000 万のバッファが増えました。
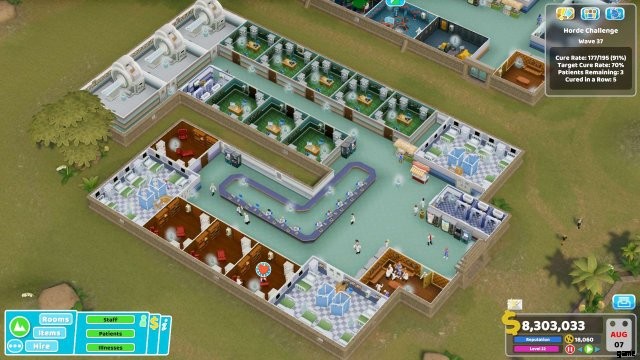
ウェーブの目標に達した場合は、最後の数人の患者を家に送ることを躊躇しないでください。特に、まだ完全に診断されていないか、治癒に長い時間がかかる病気にかかっている場合 (骨折病棟および外科患者)。時は金なりであり、波の終わりに少数の患者を維持すると、多額の費用がかかる可能性があります.例:残りの 3 人の患者の治療が成功すれば、それぞれ 10,000 ドルを得ることができますが、3 人だけを治療するために 1 か月が経過すると、スタッフの賃金が利益を大幅に上回ります。
たとえば、次のスクリーンショットでは、目標治癒率 (83% 対 65%) に達し、利益が減少し始めています。残りの 13 人の患者は大部分が手術の対象であり、そのうちの 1 人はまだ完全に診断さえされていませんでした。だから私は赤でマークされたものを家に送りました。治療がすでに進行中の場合は、すぐに終了するはずなのでそのままにしておくこともできます。
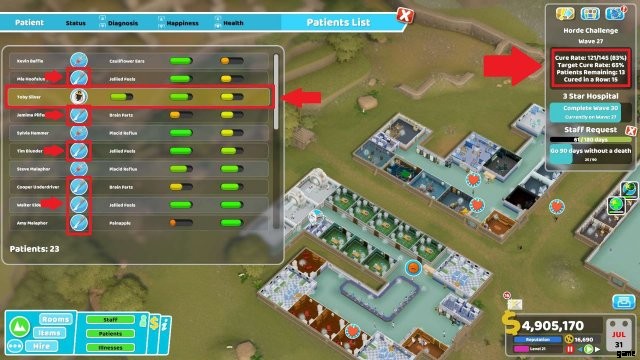
病院のポリシーを「治療の迅速な決定」に設定し、「治療の診断しきい値」を 80% に設定します。キューの警告の長さを 4 に設定すると、常に混雑している部屋を監視できます。スタッフ メンバーがいる間に 6 人から 8 人の患者が一定の列に並んでいる場合、スループットはもはや最適ではなく、その部屋の別のインスタンスを追加することを検討することをお勧めします。
病院の周りに十分な量の飲み物とスナックの自動販売機、アーケード マシンを配置して、患者に十分な栄養を与え、満足させます。次の種類のマシンのみを配置してください:下剤ドリンク マシン、高級ドリンク マシン、高級スナック マシン。
自動販売機の近くに有毒廃棄物容器を置きます。有毒なゴミ箱は、他のゴミ箱とは異なり、いっぱいになったときに魅力や衛生状態に悪影響を与えることはありません.
ベンチを配置しないでください。座る/立ち上がるアニメーションにより、患者の流れが遅くなります。いずれにせよ、最適なスループットのために病院を建設するので、治療を受けるまでに長時間立つ必要はありません。
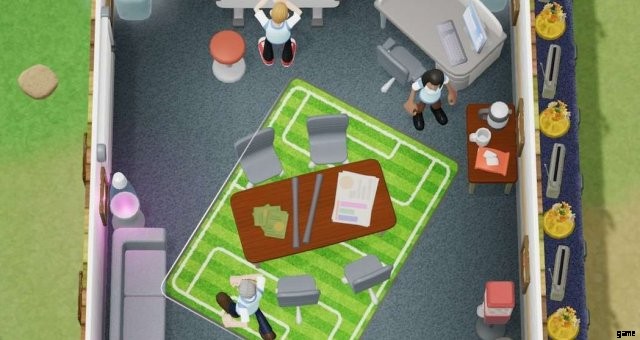
部屋
最初の建物の次の部屋から始めます:
- かかりつけ医のオフィス
- M.E.G.A.スキャン
- 薬局
- 病棟
- レセプション
壁にゴールド スター アイテムをスパムして、すべての部屋をレベル 4 にします。 GP のオフィスと薬局では、2 つの薬棚アイテムを追加して、診断と治療の成功率をそれぞれ高めます。高い衛生評価を維持するために、各部屋には常に手指消毒剤を設置してください。
受付は、アイテム リストから受付デスクにすることもできますが、複数のアシスタントを備えた受付にすぐにアップグレードできます。
M.E.G.A.以外の診断室を建設しないでください。スキャンルーム。これは、診断のための唯一の原動力になります。
Ward については、Pinstar による Power Ward MK II の詳細についての次のビデオを参照してください。この病棟の構築により、高い患者の流れと治療の成功が保証されます:
彼が指摘するように、病棟の職員を 2 人に増やしてください。
薬局とM.E.G.A.をアップグレードしてください。すぐにレベル 2 にスキャンします。お金が 100,000 を超えている場合は、レベル 3 にアップグレードしてください。
他の治療室は、ゲームが必要と示したときに構築する必要があります。ゴールド スター アイテムをスパムしてレベル 4 にし、部屋に少なくとも 3 つの消火器を配置します。また、新しい治療機器を組み立てたらすぐにレベル 2 にアップグレードし、慣れてきたらレベル 3 にアップグレードする傾向があります (部屋の統計ページの患者処理数を参照してください)。
太陽光線の自然現象によって消火器が破壊されることがあるため、治療室にまだ消火器があるかどうかを定期的に確認してください。また、治療室の廊下でそれらの束をスパムするのにも役立ちます。そのため、消火器は常に用務員の準備ができています.火事が発生した場合、またはアナウンサーが「病院が燃えている」と言うのを聞いた場合は、すぐにゲームを一時停止し、火事が発生している部屋に用務員を置き、部屋に消火器がない場合は消火器を置きます。これにより、火ができるだけ早く消火されます。マシンを爆破させたくありません。マシンを構築してアップグレードすると、時間とお金がかかり、これらのウェーブ レベルでは大惨事になる可能性があります。
最終的には、同じタイプの部屋がいくつか必要になります。これの良い指標は、6 人から 8 人以上の列に並び始めるとすぐです。そのため、進捗状況に応じて、最初の部屋のキュー インジケーターを監視し、問題の部屋をコピーして貼り付け、必要に応じて追加のスタッフを雇ってください。
ゲームで Fracture Ward を構築するように求められたら、Four Corners Fracture Ward のセットアップを参照してください:
病棟と同じように、スタッフを 2 人に増やしてください。
ゲームで DNA ラボを構築するように求められたら、必ず治療のみに設定してください。
患者が診断を受けるために何日も歩く必要がないように、診断室を近くに保つようにしてください。そのため、GP のオフィスと M.E.G.A. はそのままにしておきます。同じ建物内の互いに近くにある部屋をスキャンします。
このレベルは暑い気候なので、部屋や廊下の温度を下げる必要があります。これにはエアコンユニットを使用しないでください。代わりに、この DLC の Ice Sculpture を使用してください (75 Kudosh のロック解除、300 ドルのアイテム コスト)。 Placing a single one in the center of rooms up to 4×4 is sufficient to cool the entire room (except for DNA Labs which require 2, since the Healixer gets quite hot).
Final Layout Example
My final layout looked like this:
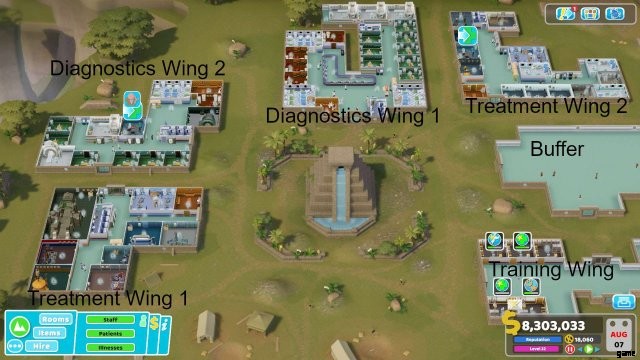
- 1 big Reception in the initial building (10 Reception Pods)
- 14 GP’s Offices
- 3 Pharmacies
- 4 Wards (Pinstar)
- 2 Fracture Wards (Pinstar)
- 5 Psychiatries
- 6 M.E.G.A. Scans
- 3 Surgeries
- 2 DNA Labs (Treatment only!)
- 2 Injection Rooms
- 1 of all the other treatment rooms the game indicates you need as diseases get discovered
0 (yes, not a single one) of these:General Diagnosis, Cardiology, Fluid Analysis, X-Ray. All your diagnosis power comes from high-level GP’s Offices (add Medicine Cabinets as your budget allows to increase diagnosis power) and M.E.G.A. Scan rooms (add Deep Thing 1 as your budget allows to increase diagnosis power), coupled with well-trained staff.
Also provide a decent amount of Toilets and at least a 3×3 Staff Room in each building.
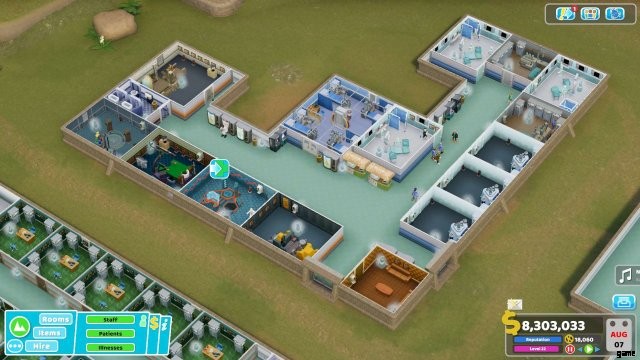
The diagnosis rooms and treatment rooms are grouped in separate buildings. Please refer to the screenshots below for an example of the final layout. Of course, at the start you can’t afford multiple buildings and will need to expand as the waves progress. In-between waves you can pause the game and move your rooms between buildings to optimize your layout. You’ll want your diagnosis rooms close together to reduce travel time for your patients to get fully diagnosed. Your treatment rooms can be further away, since that will be their final destination before leaving your hospital.
Diagnostics Wing 1
This is the initial building + the expansion you can buy right next to it.
- Reception (10 Reception Pods)
- 8 GP’s Offices
- 3 M.E.G.A. Scans
- 3 Wards (Pinstar)
- 4 Psychiatries
In the later waves (30+) you’ll see queues up to 20 people at each Reception Pod. Don’t worry about adding additional pods and assistants, since by then you’ll have trained your assistants past level 3 in customer service, which will ensure the queues get processed quickly.
Diagnostics Wing 2
- 6 GP’s Offices
- 3 M.E.G.A. Scans (1 disabled as a reserve if another is on fire or under maintenance)
- 1 Ward (Pinstar)
- 1 Psychiatry
- 1 DNA Lab (Treatment)
Treatment Wing 1
- 1 Fracture Ward (Pinstar)
- 1 De-Lux Clinic
- 1 Clown Clinic
- 1 Shock Clinic
- 1 Head Office
- 1 Pans Lab
- 1 Escape Room
- 1 Resolution Lab
Treatment Wing 2
- 3 Surgeries (Wall Monitors to increase Treatment)
- 3 Pharmacies (Medical Cabinets to increase Treatment)
- 2 Injection Rooms (Medical Cabinets to increase Treatment)
- 1 DNA Lab (Treatment)
- 1 Chromatherapy
- 1 Fracture Ward (Pinstar)
- 1 Pest Control
- 1 Correcting Pool (overlayed by the High priority ‘+’ sign of the DNA Lab)
- 1 Indentification
Training Wing
I added additional training rooms here when needed.
The training room layout is optimized for fast training and is basically the build of this video:
Buffer
I used this to shuffle rooms around in-between waves. Sometimes you want to switch 2 rooms and then you can just drop one here temporary.
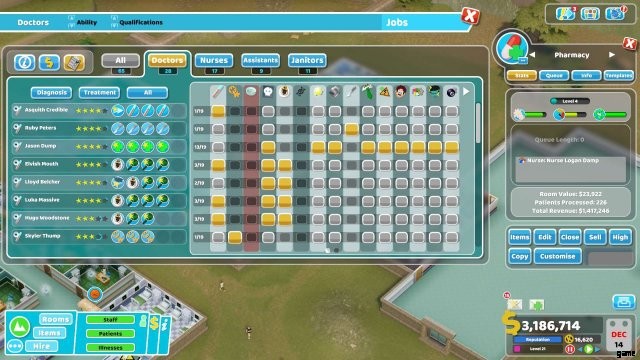
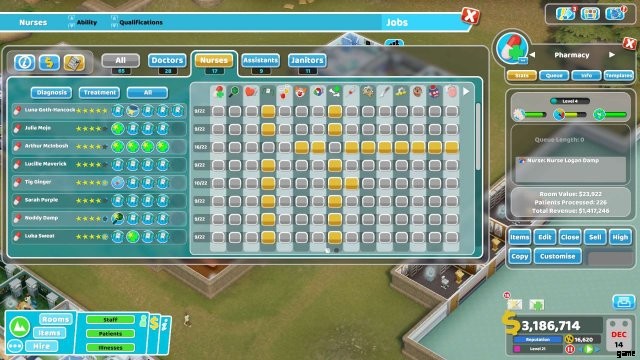
Staff
Try to hire staff with a single type of qualification or qualifications that are complimentary. For example, a doctor with both Radiology and Diagnostics is good, whereas a doctor with both Radiology and Treatment isn’t. In case there’s no staff available with interesting qualifications, hire staff with no qualifications. We’ll train them ourselves.
Try to avoid the staff with bad perks (unhygienic, hangry, etc.), or only hire them temporary until a suitable replacement shows up.
Avoid staff with ‘wants more money’ like the plague, especially in the initial waves, since money will be tight. Instead look for staff that ‘will work for peanuts’.
At the very start, try to get the following staff members:
- Doctor with either General Practice, Diagnostics or no qualifications.
- Doctor with Radiology.
- Nurse with Pharmacy Management or Treatment.
- Nurse with Ward Management.
- Assistant with Customer Service or no qualifications.
- Janitor with Mechanics
Keep an eye on your rooms, a staff member should be available for your core rooms at any time, so hire additional staff members as you see fit.
Get a Doctor with the Psychiatry qualification asap, you’ll need one after the first few waves.
Don’t promote your staff right away. Only do so when you’re ready to start training them to the next level of their qualification.
I kept only a single janitor with Mechanics I throughout the entire run to wave 42 and steadily upgraded equipment. I had 2 janitors with Ghost Capture to catch the occasional ghost. I focused all other janitors in the Maintenance qualification.
If you have the Robo-Janitor from the Close Encounters DLC, hire one of each of these as your budget allows. These are more efficient than human staff and require no pay, apart from their initial cost of 25k for the Robo-Kit + their deployment fee based on the type of robot
Job Assignment
After the first 10 waves, you should have enough staff with specific qualifications to be able to restrict them to work in rooms they’re specialized for:
- Doctors with General Practice, Diagnostics:GP’s Office only
- Doctors with Radiology:M.E.G.A. Scan only (+ GP’s Office if they have the Diagnostics qualification)
- Doctors with Treatment:any room, except GP’s Office
- Nurses with Ward Management:Ward and Fracture Ward only
- Nurses with Pharmacy Management:Pharmacies and misc treatment rooms
- Nurses with Injection Administration:Injection Room and misc treatment rooms
- Nurses with no specific qualification:all other treatment rooms except the ones mention above
Some examples:
Train your staff!
Add training rooms and train your staff steadily up to their max level in their qualification. For staff members with a qualification that only has a single level (e.g. Radiology), train them in complimentary qualifications:
- Doctors with General Practice:focus on reaching General Practice V
- Doctors with Surgery:focus on reaching Surgery V
- Doctors with Psychiatry:focus on reaching Psychiatry V
- Doctors with Radiology:focus on adding Diagnostics IV (also vice versa, train Radiology on doctors with Diagnostics)
- Nurses with Pharmacy Management, Injection Administration:focus on reaching Treatment IV
- Assistants:focus on reaching Customer Service V
- Janitors:focus on reaching Maintenance III or IV
Also hire some doctors and nurses where you focus on reaching Treatment V to populate the misc treatment rooms that don’t have a specific qualification tied to them.