EVERSPACE 2 – Bomber クラスで大混乱を巻き起こす方法
実際に始まる前に戦いを終わらせたいですか?次に、爆撃機クラスが探しているものです。非常識な範囲のダメージ能力とタフネスにより、最も影響力のあるクラスの 1 つになります。
爆撃機クラスで大混乱を破壊するためのガイド
はじめに
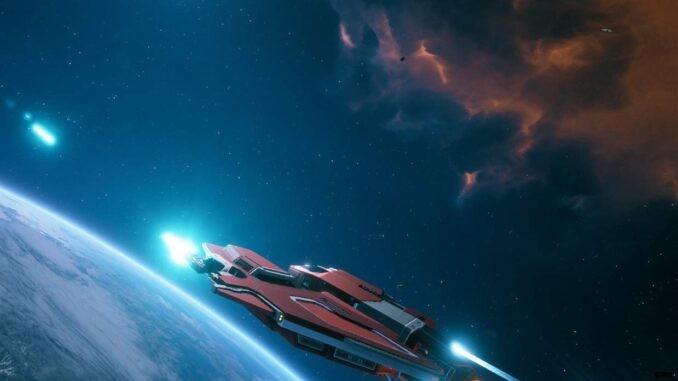
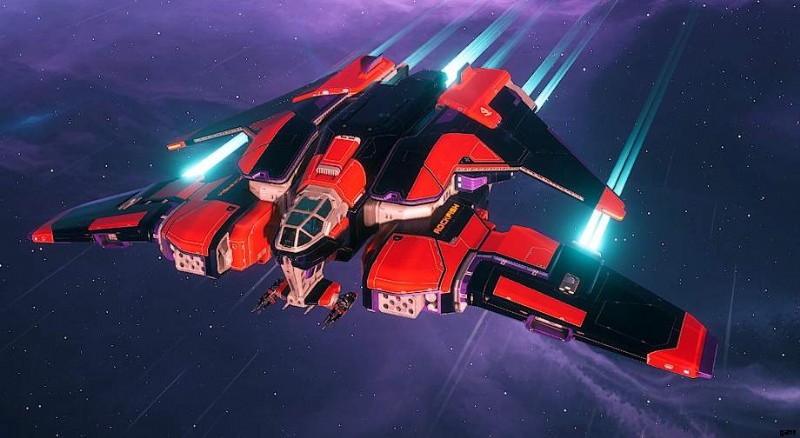
爆撃機クラスは、Everspace 2 で最も高度でタフな DPS 船の 1 つです。実際、リスクの高いエリアにいる敵の群れを簡単に破壊します。私の意見では、RFG は遅かれ早かれこの船を弱体化させるでしょう。この船は今プレイするのがとても楽しいです - 遅くて重い船が好きな限り.
私のもう 1 つのお気に入りの船は、射程距離が伸びた超高速スカウト クラスです。偵察機から爆撃機への変更は本当に大変でした。しかし、この船の性能に非常に感銘を受けたので、この小さなガイドを作成することにしました.

彼らが実際に始まる前に戦いを終わらせる方法を知りたいですか?もちろん、そうでなければあなたはここにいないでしょう 🙂
基本戦術
基本
爆撃機を最も効率的に扱うための主なコンセプトは、DPS を最大化し、機雷や ARC-9000 (その ult) などの戦闘機の翼に対して効果範囲の武器を使用することです。無制限の二次兵器を大いに活用してください。駆逐艦のような大きな目標では、ダメージを最大化して集中させます。爆撃機の吸血鬼効果により、船体ポイントをオーバーリーチしても死ぬことはほとんどありません。
ショートによると、絶え間なく攻撃することがこのクラスの最善の防御です。
サイクロプス B1 II+
片翼の戦闘機
それらに向かって突き刺すかテレポートし、機銃掃射で 2 ~ 3 個の腐食性地雷を吐き出します。機銃掃射は、機雷が敵の砲火によって早期に殺される可能性を下げるために必要です。ドローンはどんな地雷でも即座に死にます。しかし、弾幕が十分に散らばっていると、すべての翼が突然死することになります.
戦闘機の複数の翼の大規模なグループ
それらを攻撃し、突き刺したりテレポートしたりしながら引き寄せます。ときどき腐食性の地雷を群れの心臓に落として、それらを和らげます。次に、向きを変えて、準備ができている場合は、何かに直接当たらないようにしながら、最終的な武器を中央エリアに解き放ちます. ARC が時期尚早に爆発し、自分自身に大きなダメージを与える可能性があります。吐き出された腐食性地雷を散布するか、主な武器で生存者を始末してください。
駆逐艦、空母、巡洋艦
巡航速度またはテレポーターで接近します。強力なキネティックウェポンと地雷で船体をむしゃむしゃ食べながら、最初に1つの不安定化ミサイルで柔らかくする大きなターゲット。爆撃機は十分に頑丈で、多くの特典バフなしで多少の攻撃に耐えることができます。パッシブ ヴァンパイア効果により、通常は船体ポイントをオーバーリーチするため、より大きなターゲットに対して簡単に生き続けることができます。標的が駆逐艦の場合は、対ミサイル装置を使用して事態をさらにゾッとさせることができます。
この仕事をするのにアルティメットは必要ありませんが、楽しむこともできます。効果的なヒットを得るには、アークの直接ヒットを狙う必要があります。ただし、テレポートしている間は範囲内にとどまり、自分が深刻なダメージを受ける可能性を減らしてください。
ワーデン
ウォーデンは盾のみ。腐食性地雷は何もしません。これが、それを補う優れたプライマリおよびセカンダリ武器を手元に置くのが大好きな理由です.シールドブレイカー ミサイル、通常のミサイル、通常の地雷、EMP ジェネレーター、ディスタビライザー ミサイルなど。ワーデンは、あなたが動き続けている限り、あなたの船にほとんどダメージを与えないので、急いで殺す必要はありません.
装備
これは単なる提案です。どのプレイヤーにも独自のお気に入りがあり、これは問題ありません。爆撃機は獣なので、多くのことを変更しても、非常に致命的です.
主要武器
同期パルス

このちょっと新しい武器は、通常のパルスの改良版です。ただし、このパルスは、武器の属性が示すよりもはるかに多くのキネティック ダメージを与えるように感じます。オートキャノンと比較して、装甲や船体に対してはそれほど効果的ではありませんが、シールドに対してははるかに効果的です.射程が長い非常に汎用性の高い武器。シールドされた戦闘機、ウォーデン、またはリディーマー巡洋艦に対して優れています。
私は同期されたパルスに腐食チャンス効果があり、クリティカルチャンスが高いのが好きです。より頑丈な装甲のターゲットに対しては、さらに致命的になります。
機関砲

好きな武器の一つ。射程はやや低めだが、盾を持たない敵にダメージを与えるのが最も効果的。同期されたパルスが空の場合、または船体または装甲戦車のターゲットがある場合は、一時的にそれに切り替えます。
私は通常、発射し続けると追加のダメージを蓄積する属性を持つオートキャノンが大好きです。これにより、より長い弾幕のダメージが 2 倍になります。
二次兵器
(腐食性)地雷

これは重要な副次的要素の 1 つであり、重要です。地雷は接近すると爆発し、効果的なダメージを与え、敵のグループを簡単に吹き飛ばします。 Although normal proximity mines work too and look more awesome, I suggest using corrosive mines instead. The do not damage yourself, so you can literally unleash them clsoe to an enemy wing, and they more act like heavy dumbfire rockets and will not stop moving. They will deal no shield damage but do a lot more damage on hull/armor instead, killing enemies with shields still on. Who need to damage shields if the target dies anyway?
(Shieldbreaker) Missiles

I prefer normal missiles to do pinpoint hunting when NPC fighters are surrounding my targets to prevent making them aggro. Mines are not suitable for this type of encounters. If you want a more Warden focused secondary, equip the shieldbreaker missile.
Destabilizer Missiles

A superior destabilizer missile lets you deal nearly twice the damage than normal (84% more damage). This is a huge advantage against Wardens, carriers, destroyers and cruisers.
Use it, and they will fall apart very quick.
Modules
Every module should at least push the firepower attribute. Expertise, utility, handling and resistance are nice to have, but not necessary. There are only two modules I want to mention especially:
Shields

I prefer having the 500m ranged EMP effect when the shield is breaking on the shield module. This really helps a lot, especially in combination with the Defensive Massacre perk you can get multiple EMP blasts in short order.
Cargo

This module can occasionally have a ship speed bonus on it, which I really like for this particular class. This makes up a little for the slow and slugginess behavior.
Devices
This is also just a suggestion. Adapt to your personal liking.
EMP Generator

This device really helps if you are surrounded by a lot of enemies. It will give you some breathing and you can take down some enemies while the effect lasts. Also it will lower the enemies shields siginificantly.
I personally use the Hard Reset mode on it, to make the effect last longer for every kill done during this phase.
With my chosen perks I will get a nicely +20% weapon energy as well.
Teleporter

My favourite device. It can have up to 3 charges which will teleport you 600m in the direction you are look promptly. So you can use the right amount of little jumps (600m to 1800m with a triple-jump) to get close to targets (sniper drones, or big targets) or get away of an enemy group fast. This device also gives the bomber a little bit more movement freedom while exploring areas countering the slowness a little bit.
I love to have the Parting Gift mode activated. This will leave up to a free proximity mines back which will area damage the enemies in the vacinity or trying to follow you. Good thing if you escape-jumped out of a swarm of enemies.
Missile Defense System
This is not a mandatory device at all. But the bomber is a sitting duck if your teleport charges and thrust energy are used up. Activating this device will at least handle all incoming missiles, lessen the damage eaten significantly. Less time spend for dodging means more time for dealing damage.
I prefer the Sustenance mode on it. This will last the effect longer for every missile eaten. This is especially good against destroyers or enemy bombers.
You may replace it with an Annihilation Virus device. With my character perks you will get an extra of 20% weapon energy with it and it does a lot of group damage as well, maxing out your overall DPS capabilities even more. But it takes a long time to deal the damage. Most likely you destroyed a lot of infected ships with your mines until then. It’s up to you what you want to use more.
Perks
While in the Early Access state, we are capped at LVL 20 right now with 4 character perks unlocked.
Here are my suggestions:
Lvl 5 perk:Defensive Massacre

Will start recharge of shield as soon as an enemy dies. Can cause multiple EMP detonations in a short period with a shield that generates an EMP blast if running out. A very nice combination.
Lvl 10 perk:Downtime Warrior

One of my favourites. The more devices are recovering the less weapon energy your weapons will use. -30% for each, which is a lot. As I use my devices regularly I can reduce you energy consumption up to 90%. For the Teleporter it is just needed to have used one charge to count, so you still have 1 or 2 more whenever needed.
Lvl 15 perk:Relentless

Gives you 20% for any warfare module installed. As I always have EMP Generator installed, and on many other classes the Annihilation Virus, you will profit from it. But Crit Happens is also a good thing to use instead.
Lvl 20 perk:Unyielding Assault

Activating your ult (ARC-9000) will instantly repair 50% armor and erase all debuffs on your ship. This can be a life saver, especially if the ARC detonates too early and you already had none armor left.
Video Demonstration
I made a brief video to show what this ship is capable off while raiding superior high-risk areas on LVL 20, the actual level cap. Not my best encounters, but it should give you the basic idea how to play the bomber.
In the first part I will show all the used equipements, the augmentations, devices and perks. If you want to dive directly into the action, feel free to skip this part directly to minute 2:41.
The first 3 high risk areas are normally fitted, the forth and last one against Redeemers I’ll show you that even if you use bad gear (commons) and no perks and augmentations at all, you will still win. Though I must admit the distraction Elek, your companion who occasionally shows up and helps you, was causing at some point was very welcomed. Though it also lessend the chances for my corrosive mines to deal group damage as he spreaded the enemies too much away from each other.
Thanks for reading and watching. And good hunting, fellow pilots.