Rogue Tower – レベルに勝つためのヒント

これは、勝つための戦略を立てるのに役立ちます。 RNG の神々に嫌われていたら勝てませんが、RNG の神々に少しでも嫌われているだけなら、このガイドは成功の秘訣を教えてくれます。
勝利のヒント
はじめに
このガイドでは、RNG の神々が実行の早い段階でブランチ タイルを大量に与えて死を降らせない限り、勝つためのヒントを提供します。
カードの選択を制限し、異なるタワーのセットで実行するたびに仕様を変更することについて、多くの話/戦略があります.それはあなたに優位性を与えますが、私はそれが完全に必要だとは思いませんでした.結局のところ、すべてのタワーを使用するという成果を得たときに勝ちました.それは私のデッキを完全に汚染しましたが、それでも私は勝ちました. 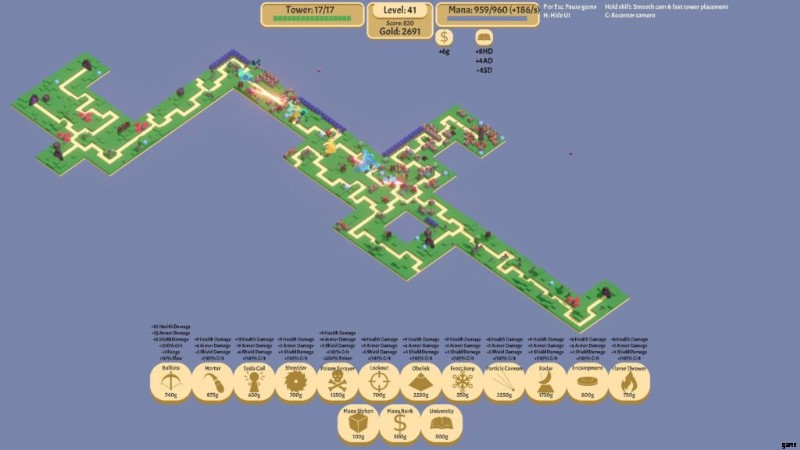
ですから、ご容赦ください。うまくいけば、これらのヒントがより良い戦略への洞察につながることを願っています.
これらのセクションは、各セクションの背後にある戦略とともに、一種のレシピを提供するためのものです.そのため、必要に応じて紹介し、次に行うことの背景情報を提供します。
タワーの組み合わせを 1 つだけ紹介するのはためらわれます。私はこのゲームが大好きで、うまくいく組み合わせはたくさんあると思います。カード/タワー/アビリティが何をするのかを理解し、これらを効果的に活用するだけです.
RNG ゴッドズ ウィル ヘイト ユー
これが発生した場合は、終了して再起動してください。勝つことはできません。勝利に貢献するマップに時間を投資することをお勧めします。
これは私がタオルを投げたマップであり、ゲームの早い段階で非常に多くのジャンクションが発生した場合は、同じことを行うことをお勧めします.

お金を稼ぐことが優先事項
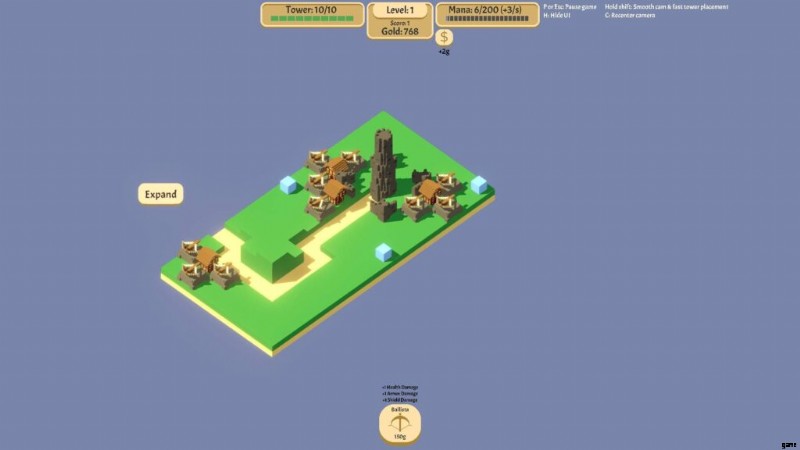
最初に開始するときは、基地の周りにいくつかの家がある可能性があります。家の隣に塔があると、拡大すると (wave)*(家の周りの塔の数) のコインを獲得できます。波 # が増加するにつれて、これは深刻なコインです。
最初の 4 ~ 8 回の拡張では、カバーされていないすべての家のすべての側面にバリスタを配置することに集中する必要があります。これは増加し続けるお金なので、これを優先してください。
ウェーブ 5 または 6 の後に盗賊カードを取得し、レベル 25 までに盗賊レベル 3 (キルごとに +6 ゴールド) まで収集する必要があります。バリスタの範囲またはアーマーのアップグレード。
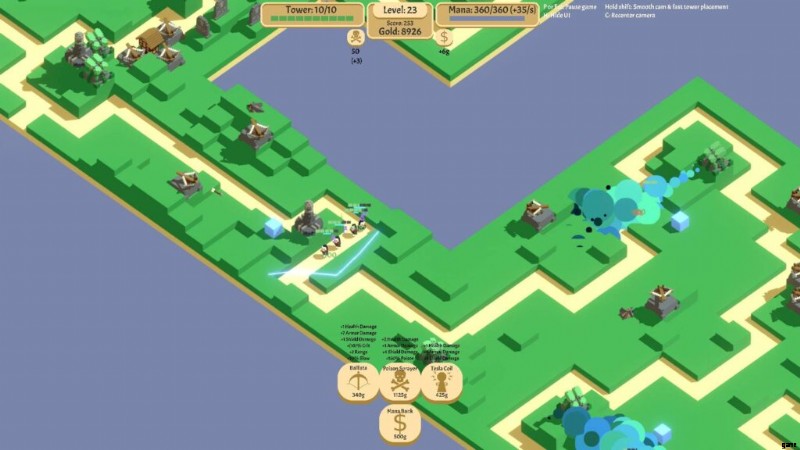
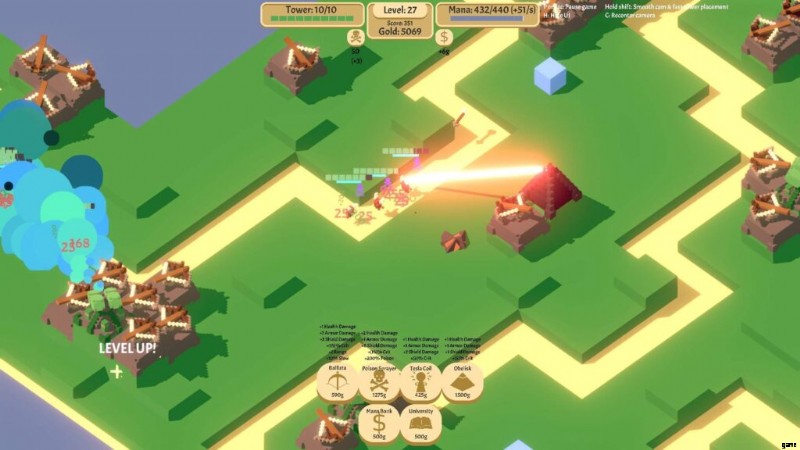
下の画像で、この画像の上部、マナ バーのすぐ下にある $ 記号の下にある +2g に注目してください。それがあなたのボーナス盗賊です。これをレベル 25 までに +6 にしたい.
カードを選ぶことはアートフォームです
ターンごとにカードを獲得するドロー頻度増加 II がありますか?そうでない場合は、アップグレードに移動して、最初に入手してください。
それはさておき、カードと、デッキに何枚入っていてもチャンスを増やす方法を確認しましょう:
オベリスクなどのカードを選ぶと、オベリスクの他のすべてのカードをドローで持ち込むことができるようになり、ウェーブ25が終わるまでオベリスクが必要になることはないため、実際に必要なものを薄めています。今すぐ必要であり、ゲーム序盤に本当に必要なバリスタ +1 範囲カードを引くチャンスを減らします。
したがって、タワー/アビリティを 3 ~ 4 個以下にするために、初期のウェーブ (経験則としては最大 25 個まで) に集中する必要があります。
最終的に必要になる素晴らしいカードを無視して、すぐに役立つカードを手に入れましょう。
タワーの強みではないカードに時間を無駄にしないでください。たとえば、オベリスクのシールド ダメージを高めたり、ポイズンのヘルス ダメージを高めたりすることは、最適な使い方ではありません。
タワーの種類については、Ohm_is_Futile によるガイドを参照してください。タワーは一部のダメージに対して弱いと彼が言うとき、そのくだらない統計を改善するカードを決して手に入れないでください!いっそのこと、それらをまったく選択せず、可能であればカードから除外してください。
わずかなマナ コストでベース ダメージを +3 増加させるバリスタのアップグレード?フィールドに 50 ~ 100 人のバリスタがいて、そのマナを他のタワーに回したい場合、それは少なくありません。これらのカードは、バリスタのみの実行、またはバリスタ + 1 つの他のタワー実績を実行している場合にのみお勧めします.
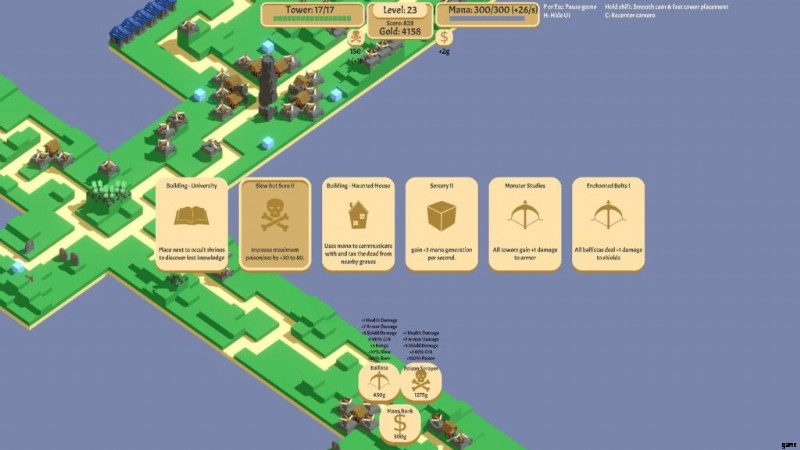
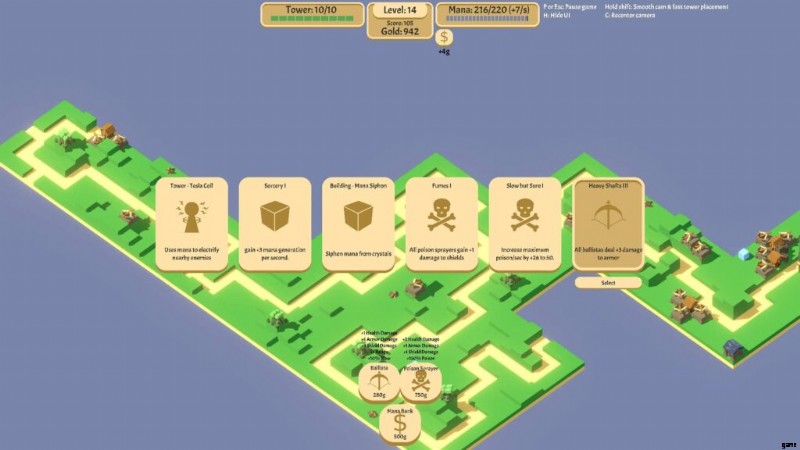
カード ドローの例と、私が何を選んだかについての理由を次に示します。

アーマーのダメージはバリスタにとって非常に大きなものであり、早期に取得することはさらに優れています。最終的に欲しいテスラや、本当に欲しい追加の毒よりも、このようなカードを選びます。これで、バリスタ アーマー アップグレードのセットが完成するからです。テスラのようなものを選択すると、これらの他のすべてのカードが後のドローで表示される可能性があり、アーマーのアップグレードが二度と表示されない可能性があります.
したがって、1 枚のカードから始めたら、別のカードを選ぶ前にレベル 2 とレベル 3 に進んでください。
クリティカル (+5 / +10) は、他のカードより優先して選択する必要があります。
クリティカルはこのゲームのスーパー キングであり、ゲーム終了までにクリティカルを +20 にすると、勝ちやすくなります。
パスがすべて
このゲームでは、パスをどのように成長させるかがすべてです。あなたのパスがうまくいかない場合、あなたは負けるでしょう。どうすれば嫌な道をたどることができますか?
各入口が次に短いパスより +3 長いマップを作成するのが最適です。
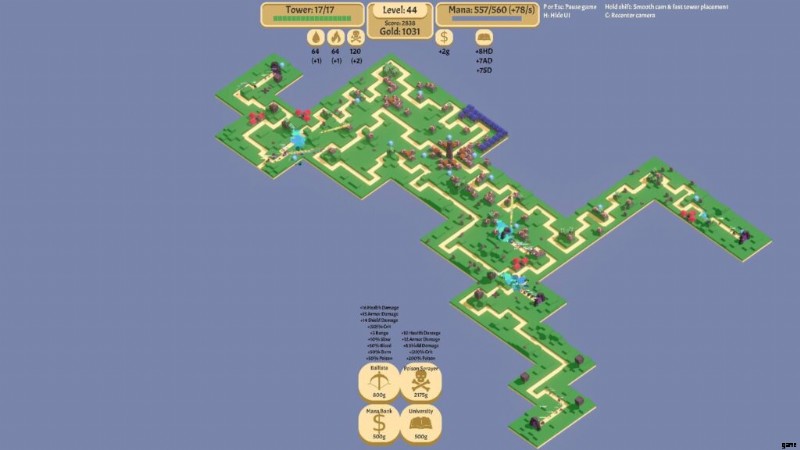
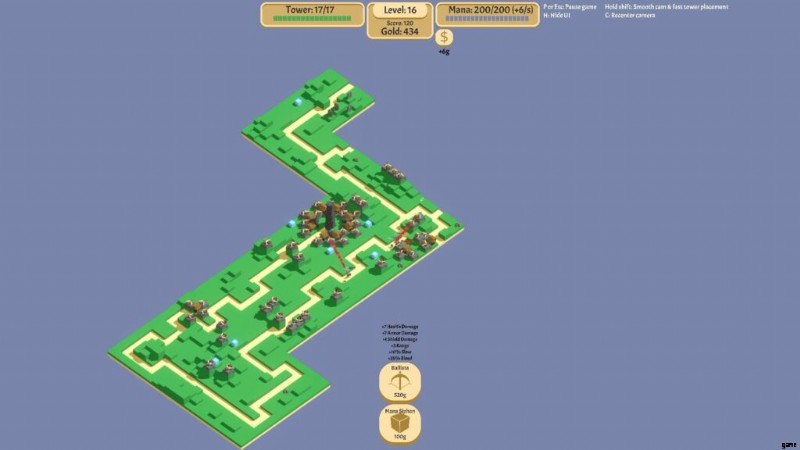
このマップを見てください (これはとても素晴らしいマップです。勝つのが非常に簡単になるので、夢の中でこれらを望んでいます) が、余談になります。
最初の分割を取得し、他のパスよりも長いパスを作成したことに注意してください:
現在、入り口は4つ。そこまではいきませんが、クリープが重なり合うのを制限するために、各入口の間に適切な +3 間隔を確保しようとしています.
これはいくら強調してもしすぎることはありません – 入口の間に少なくとも 3 つのブロックが空くまで、一方向に拡大し続けてください。
これは同じマップの 9 レベル後のものです:
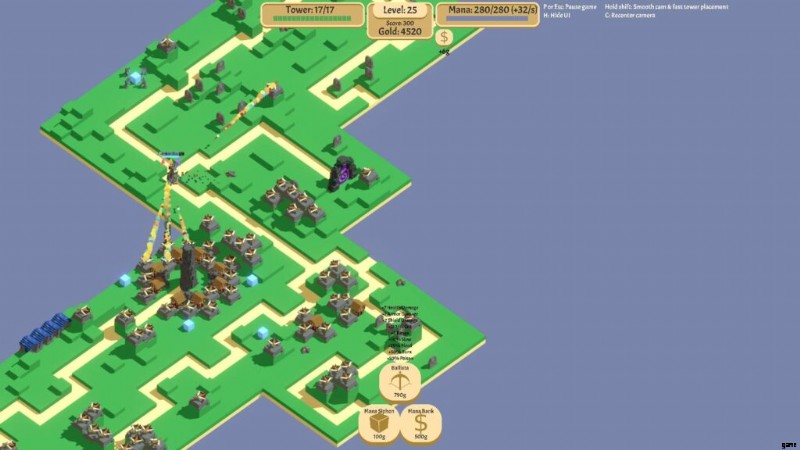
パスがうまく分離されていることに注意してください!
And if you keep trying to do this and the RNG gods decide they hate you, re-roll because if you have 3 or more entrances all hitting you at the same time, you’re likely going to lose and sometimes they become unsalvageable.
Upgrading Towers
This took me the longest time to come to grips with and that is until Level 40 or so, you really should only upgrade towers in an emergency.
Just lay down level 1 towers.
The costs of upgrading towers just doesn’t pencil out – it’s better to save that $$ and lay down another tower.
Once you hit level 40 or so, and you’re starting to run out of any appreciable elevations that can be used, upgrades make a lot more sense.
Levels 1-15
The first 15 levels are typically make or break. You will either be set up for the next set or you will be dead or you will quit because the RNG gods hate you. The good part about this is that the first 15 levels are pretty quick, so if you need to restart, it’s not too bad of a time investment you’ve lost.
Levels 1-8
- Put down ballistas around every house
- Only pick Ballista + mana cards. Note -> University if none of those are avail
Levels 9-12
- Create a “long” path that is 3-4 blocks longer than the next shorter path
- Get an AOE tower that hits many enemies at once on 3 of the primary paths (Poison or Mortar or Tesla)
- All ballistas not around your base should have priority “Most Armor” and “Most Health”
Levels 13-15
- Get your mana flow right for the towers you have
- Get your spacing better so each entrance doesn’t overlap the enemies
- Pray the RNG gods don’t hate you
Shields
Up through level 15, you’ve only had to deal with Armor &Health. With level 16, you’re going to get shielded creeps.
A tower that does good armor damage isn’t going to do squat if the creep still has shields.
You need to start thinking about how and where you are going to whittle down shields so the shields are all gone ASAP.
Go and look at Ohm_is_Futile’s guide again. Look at the towers that are strong against shields.
Pick one of those towers to use and place many of them as near the entrances as possible.
Continue placing them down until you notice that 90% of the creeps have lost their shields before your main killing area(s) that will focus on Armor and Health.
The Vampire Is a Bastard and the Demon Can Go to Hell
These little guys are my nemesis. They have ruined many runs for me and made me restart. The Vampire slowly loses health until you think he’s dead and then he turns into a quick little bat and sprints for your base.
And they regenerates health if not taking damage.
And they tend to travel in groups – which makes them very dangerous!
If you are using slows on your Ballistas, this will cause the lead vampire to get hit, slow down and your towers are now focusing on the next one while that first bastard is regenerating his health.
Can you tell I really hate this little guy? Good, because I do hate him and this is how you have to deal with him:
You need to create a group of 4-6 Ballistas or 1-2 Obelisks near each of your kill zones that have a priority of “Nearly Dead” and “Least Health”. When your other Ballistas hit them with slow and they drop back, these towers will finish them off.
These are the Vampires:
And these are the Demos:
Levels 15-25
I like to call this section of the game “Getting cocky” because you get into a rhythm of expanding the paths, dealing with the splits, adding AOE’s and building up your mana farms, and things seem really good.
You get complacent and then levels 27-30 happens and chews off your leg and spits out the bones and you see how ill prepared you really were and being cocky and confident will be your downfall.
If anything, levels 15-25 are the most important levels to prepare for future waves and if you don’t, your time is very limited indeed.
Level 16
All the towers that had priority of “Most Health” and “Most Armor” now need to be set to “Most Shields” and “Most Armor”
Level 17-24
Continue to expand the longest path – but don’t neglect the other paths! You should be expanding all the paths at least 1-2 times while expanding the longest path 4-5 times.
On the longest path, put a few extra towers that will whittle down shields for the level 25 boss who is stacked with shields.
Get your “Nearly Dead” + “Least Health” groups set up and watch them carefully and reinforce as necessary.
Get all the way to Banditry III.
Levels 25-35
I’ve lost more on level 27-30 than any other level, so YMMV, but this is really the test to see if you’ve got a layout that is working.
Universities are the key and getting the Crits and +1/+2/+3 learning you can get because these are really THAT good and are indispensable for getting the Health / Amor / Shield upgrades in addition to the cards you’ll draw.
Basically, you want to get ~10 universities running if possible – you are limited by how many of the veins spawn. And you want to get each university to +10 on each of the studies.
If you do this, you will be rewarded with 20-30 upgrades to Health, Armor + Shield damage for all your towers.
You should also be expanding your kill zone to mop up the fast runners, vampires and demons because they are going to come in force. You can either use Ballistas or Obelisks, with priority set to fastest for some of them, Nearly Dead or Least Health for others.
Finally, the longest path should be set and you should start to seed this path with Shield and Armor busting towers.
Personally, I have tried the Haunted houses so many times and it just hasn’t penciled out for me. Some people swear by them, but I’m going to need more proof and details, because they just never seem to generate the amount of coin for me.
Levels 36-45
Endgame!
Level 40-41 are the toughest in my experience and from 36-40, I fill in every +1 and even +0 spots with Ballistas to make sure things are dead way before my base. Numbers count here. It’s all about volume.
In order to get the slows to be distributed, it’s a good idea to have some set to priority Highest shield, some set to Highest Armor and some set to Highest Health. Don’t mix them! This way they will target only those with shields to slow them down where needed.
Levels 40-44
Upgrade your towers. You’re getting a lot of coin and you need to closely examine what creeps are making it the furthest and increase damage on the trait that will take them out.
Make sure to get the portal for your longest path expanded. You don’t want to have 1-2 hours invested and screw it up by opening that portal last because the last boss will then spawn at another portal.
Level 45
I had a map where I thought I had it won and the darn last boss barely lived. Since then, I am much more aggressive on the last level.
As towers become idle because no more creeps are coming. dispose of them and gain back the coin.
Use this coin to either add more Ballistas or upgrade existing towers.
Don’t leave anything to chance!
This is the map I lost on. Arrghhh!