奥の部屋に入る – レベル 0 ~ 3 をクリアする方法
このガイドは、私のような初心者向けです。このガイドは、ゲームを始めたばかりの人向けに作成したいと思います。ゲームを始めたばかりのときに、このガイドがあるとありがたいです。
ビート レベル 0 ~ 3 のガイド
はじめに、基本
それで、あなたはバックルームをプレイし始めています。 The Backrooms のファンとして、私はこのゲームが大好きです。そして、私はそれをお勧めします。とにかく、話すことを減らし、指示を増やします。
コントロール
- 移動コントロール: WAS D (通常のもの)
- しゃがむ: Ctrl (コントロール固有の可能性があると思うので、Left-Ctrl です)
- 実行: (左) シフト
- 瞑想する: スペースバー
- 詳細情報を確認: ひ
- 一時停止: エスケープ
- 交流: え
- 懐中電灯の切り替え: F
- ヒーリング/アーモンド ウォーター: 1
- 正気度/本: 2
- スタミナ/シュガー: 3
- バッテリー: 4
- スペシャル アイテム: 5
コントロールは設定でいつでも変更できます。
RAM に応じて、レンダリング距離を 8 ~ 15 に設定することをお勧めします。ただし、さらに恐怖体験が必要な場合は、8 未満に設定できます。
レベル 0 ~ 2 で 30 秒ごとに瞑想します。瞑想はあなたの正気度を維持するのに役立ちます。正気度が低下すると、より多くの敵があなたの周りにスポーンする可能性が高くなります。そのため、正気度バーに特に注意してください。
詳細情報を確認する(Hを押す)のはとても便利です。瞑想やヒーリングをしなくても、健康、正気、スタミナを確認できます。ただし、よりリアルな体験が必要な場合は、オフにすることをお勧めします.
敵から逃げるときは、砂糖を用意してください。スタミナバーが減少するため、再充電するにはじっとしている必要があります。インベントリには常に 3 つの砂糖を保管してください。
また、レベルの周りにメモが散らばっています。ノートをトレースするには、しゃがんで操作します (左 Ctrl と E)。メモはゲームの集合的な部分であり、ゲームプレイとはまったく関係ありません。
また、決して注意してください。そして、たくさんの笑顔で「>FUN<」と書かれた落とし戸には絶対に立たないでください。そんなことしたら、自分を苦しめて死ぬだけだから。
青い粒子が飛んでいるのを見ると、ドアの近くにいることがわかります。パーティクルは、近くのドアがどこにあるかを示します。それに従います。そこにドアがあります。
椅子を見かけたら使ってください。椅子は、ゲームの保存ファイルとして機能します。また、ゲーム自体は自動保存されないことに注意してください。別のレベルに移動したか、椅子に座ったときにのみ保存されます。ゲームを終了するときは、そのことを念頭に置いてください。
レベル0
This level is the starter level, and it is perfect for grinding loot for a good head start. Start opening boxes and everything related. Only go to the next level once you have 2 almond waters, 3 sugars, 1 book, 4 batteries, (optional) and a special item which is a lantern.
Level 0 is known for the least entity count and is a good room to start off with. If you start seeing eyes on walls. Then it’s a sign that you should start to meditate pretty quickly.
Never go up to any entity, even if it seems innocent. The only entity that you can come close to is the entity that looks like a buff concrete man with hair. Those are basically like Minecraft villagers, they can’t hurt you but they can trade with you.
There are also artifacts on every level. In this level, each artifact gives a 20% boost to your maximum stamina. So it’s good to collect 2-4 of these artifacts before going to the next level. Since running is essential in this game.
Level 1
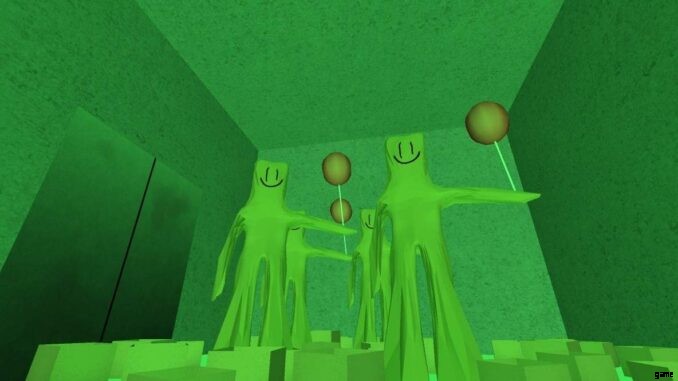
大丈夫。 So here it starts to get a bit more difficult. And you’ll encounter a new creature which is called the Smiler. You’ll know what entity it is once you start getting weird smiley faces floating on your screen. The only way to defeat the entity is to start to meditate, not move, and it will go away by itself. If you move around and heal your sanity with books, it will only get worse.
At this level, it’s important to have batteries since there are now more creatures which are called Dullers. Dullers make the room get darker when they are closer to you. Two hits from the Dullers will kill you. The first way to avoid them is to point the flashlight at them and walk away as far as possible, then run away and eat 1 sugar cube of stamina when your stamina ends. And run until your stamina ends. The second way of making them go away is to let them damage you, then drink some almond water.
The artifacts on this level increase the maximum battery level on your flashlight. Each artifact gives you a 20% boost on that. It is recommended that you have 2-3 of those artifacts before going to the next level.
Before going to the next level, prepare a lot of sugar cubes and almond water. Since the next level is harder than Level 1.
Level 2
Level 2 can make you feel claustrophobic, but don’t worry, this level is just the beginning of medium hardness. Here you want to collect as much more resources for your next level. Since Level 3 is hell for a beginner. In Level 3 Dullers spawn much more frequently.
Level 2 is similar to Level 1 but it just requires faster reactions than before.
Each artifact on Level 2 decreases the spawn rate of enemies by 5%. And that is very good since on Level 3 there’s a lot of enemy spawning. It is recommended to take 4-6 of these artifacts before going to Level 3.
Level 3
Now you’re in the beginner’s hell, or at least that’s what I call it. Dullers are like flies, they come even more frequently than before. It is recommended to meditate every 20-30 seconds. Since the spawning rate of Dullers is increased the lower sanity you have.
You might see elevators that look like doors, but they are not. Each interaction with the fake elevator will cause 50 damage to your character. It is significant damage since the spawning rate of Dullers. There’s also will be random moths that will attack you. And there’s no way to avoid them. So be prepared to heal yourself once you get attacked.
In this level, it is very important to have sugar cubes and almond water, since they give you a significant advantage against enemies.
The artifacts on Level 3 increase your maximum health. Each artifact gives a 20% bonus to your max health. It is recommended to take 3-5 of these artifacts before going to the next level. Since health is valuable in Level 4.