Blazin' Trails Mirage ウォークスルー – Genshin Impact Summertime Odyssey Xinyan Domain ボックスとパズル ガイド
2022 年 7 月 15 日から 2022 年 8 月 24 日まで開催される原神インパクトのサマータイム オデッセイ イベントにゴールデン アップル アーキペラゴが戻ってきました .さまざまなキャラクターが独自のドメイン (ミラージュとも呼ばれます) を持っており、一度クリアすると大量のチェストを略奪し、彼らの伝承について詳しく知ることができます。 Xinyan's Mirage は Blazin' Trails と呼ばれています 、宝箱 16 個と幻想巻き貝 1 個を略奪できます 中身。このガイドでは、Mirage の操作方法とすべてのパズルを解く方法について説明します。 .
Genshin Impact で Blazin' Trails Mirage に入る方法
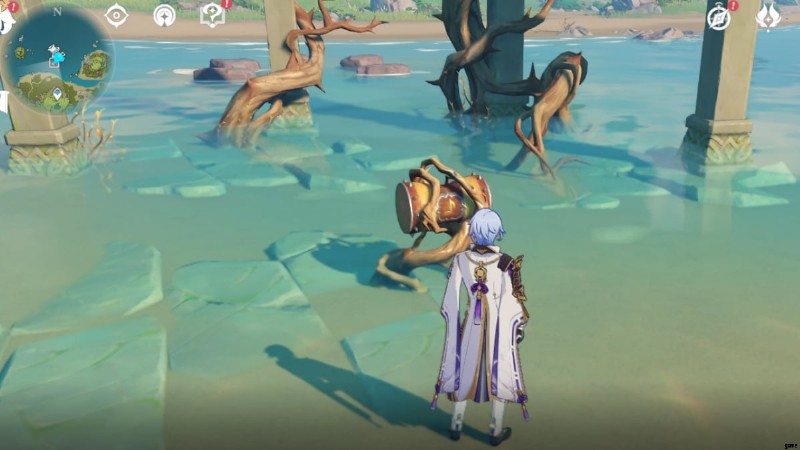
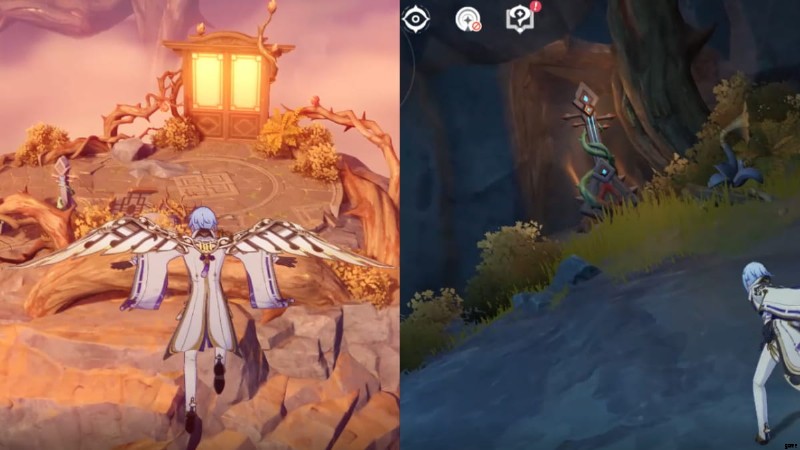
シンヤンの蜃気楼に自由に入るには、まずブレイジン トレイルを完了する必要があります。ワールドクエスト。それが完了したら、ドラムを操作します 壊れた島の北にあるシンヤンの島。 島々の魅力を選択 .
次に、ファンタズマル テイルズの下に 、ブレイジン トレイルを選択します .前のワールド クエストで 2 つの宝箱を獲得した場合、16 の宝箱と 1 つの幻の巻き貝が未獲得のままになります。 蜃気楼に入るをクリックします 画面右下の をタップして起動します。
Blazin' Trails のすべてのパズル ソリューションと宝箱の場所
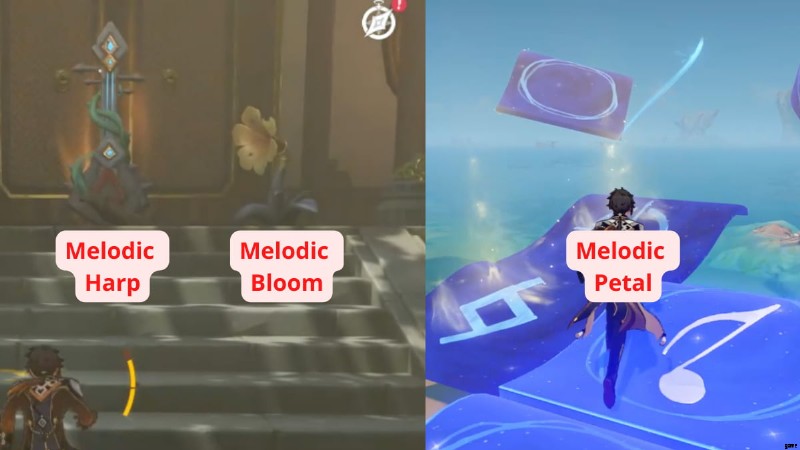
開始する前に、上の画像を参照して、この Mirage のパズルの仕組みを理解してください。メロディック ブルームは、メロディック ハープの力を中継して閉じ込められたメロディーを追い払います。一方、曲を完成させるには、すべての旋律の花びらを 1 回踏む必要があります。
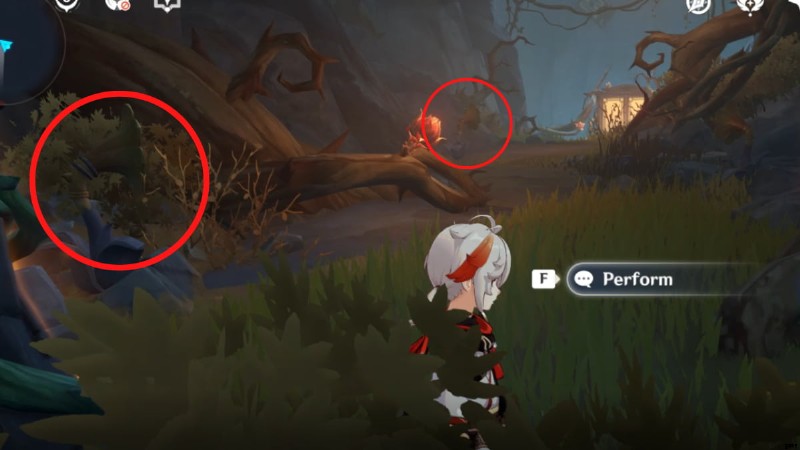
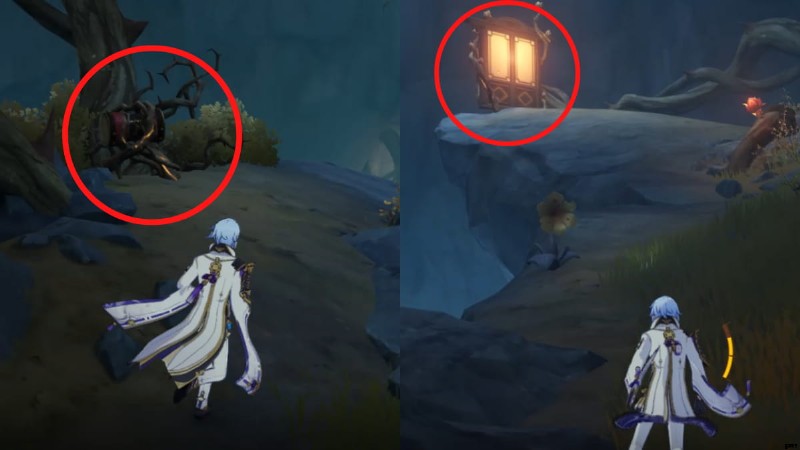
チェスト #1

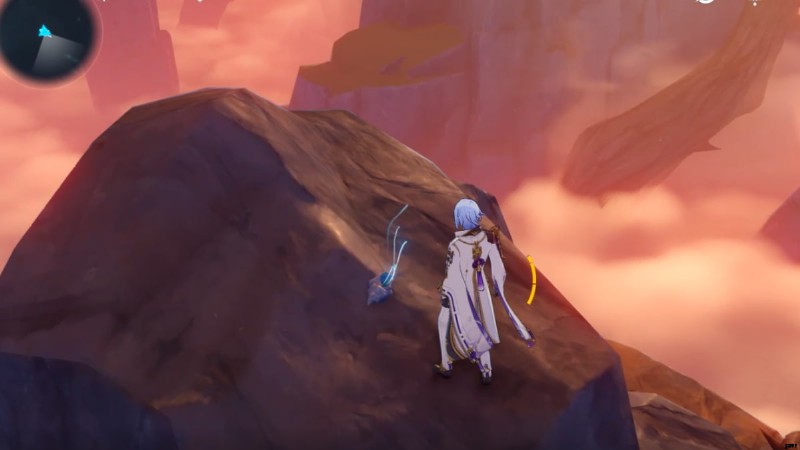
ドメインに入ると、Frozen Soul (大きな青い花) の前に直面します。ただし、前に進んではいけません。
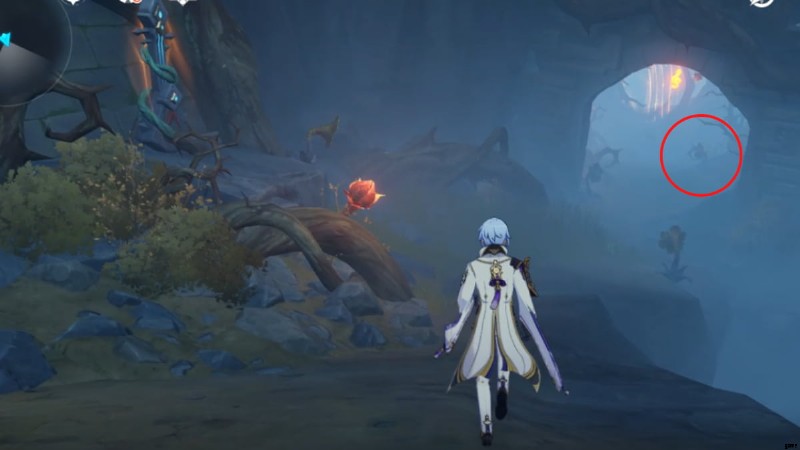
- 代わりに、向きを変えて 洞窟の外に出るアーチをくぐります。
- 出たら左折 地平線にドアが見えます。
- 交流 ドアを開けて入る 前に走ることで。
- 新しい環境でパフォーマンスを行う メロディック ハープを使って、プラットフォームの端にあるメロディック ブルームから赤い電流が流れるように促します。
- レッド カレントを使用して、次のプラットフォームに進みます。
赤い流れは、ゲーム内の既存の風の流れと同じように機能し、あなたを前進させます。朱色の空で少し見えにくいので、目を離さないように!
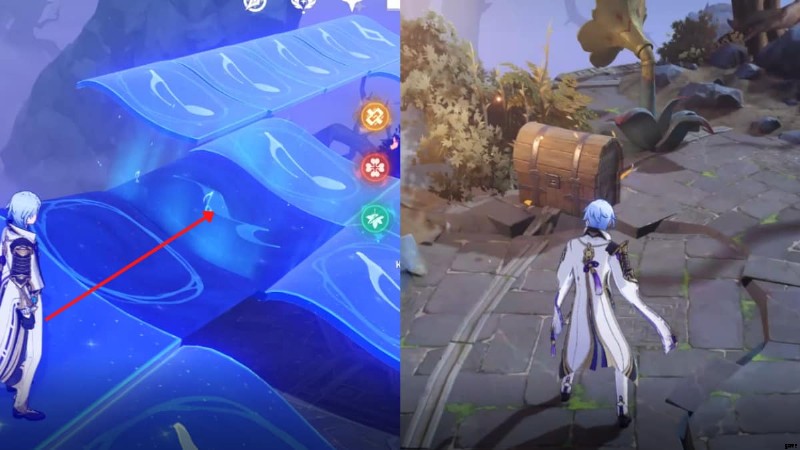
- 新しいプラットフォームに到達したら、左を見てください 、コモン ボックスを見つけます .
- コモン チェストに近づくと、敵がスポーンします。 Defeat the enemies to unlock the Common Chest and claim it.
- After claiming the Chest, go up the stairs and carefully glide over to the next platform.
- On the new platform, perform with the Melodic Harp to prompt wind currents and rings to spawn. Use them to propel you to the next platform.
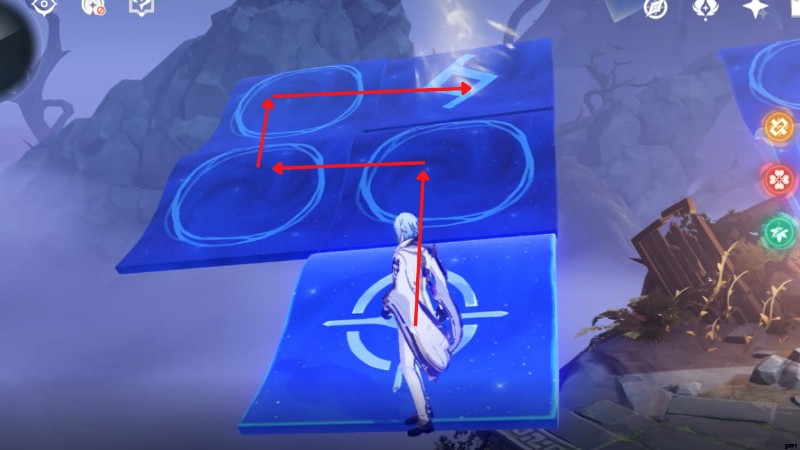
Chest #2
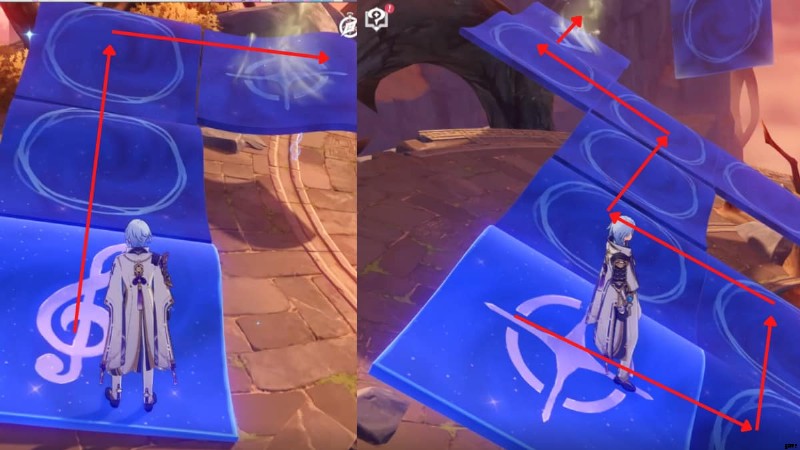
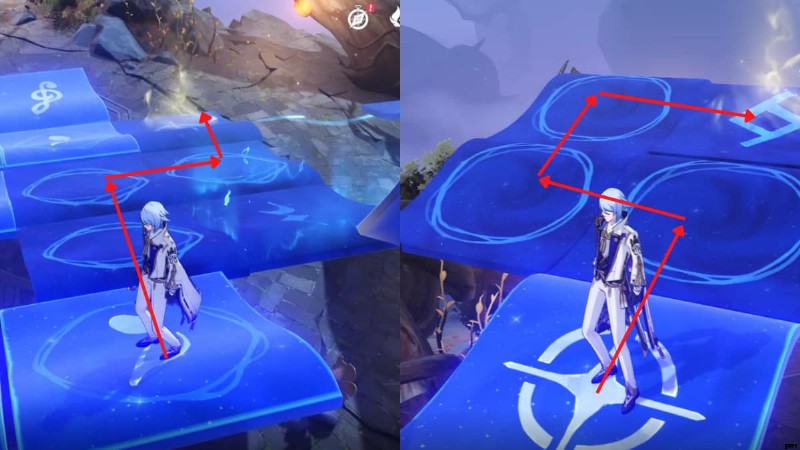
On this platform, you need to solve a Melodic Petal puzzle.
- Follow the paths prescribed above to solve the first two segments of the Melodic Petal puzzle. Make sure to only move forward—don't backtrack or step on a Petal twice, as the puzzle will fail.
- Follow the path above for the third segment of the Melodic Petal puzzle.
- Once that's done, perform with the Melodic Harp to unlock the Common Chest .
- Loot the Common Chest.
- Perform with the Melodic Harp again to summon wind currents to take you to the next destination.
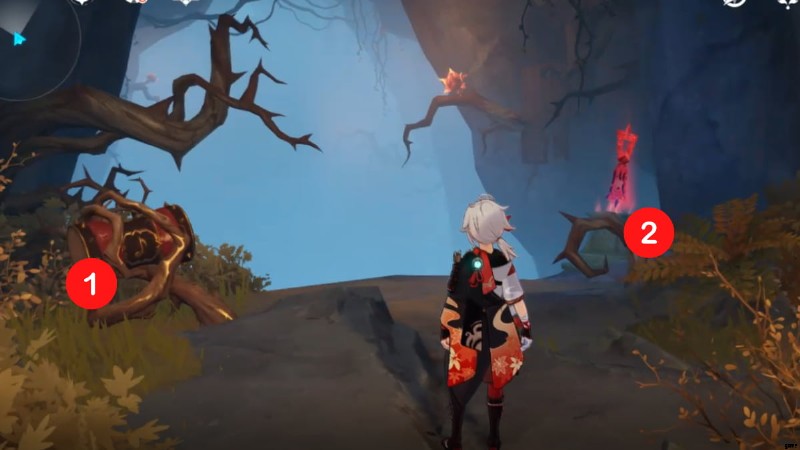
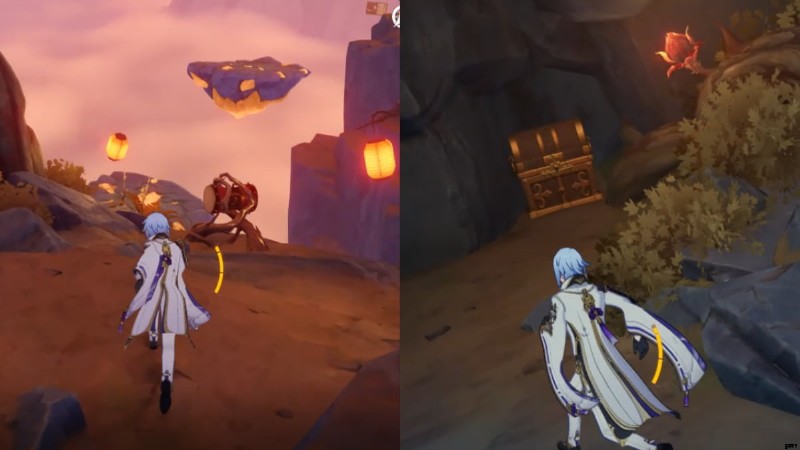
Chest #3
- On this platform, defeat all the enemies to unlock the Precious Chest .
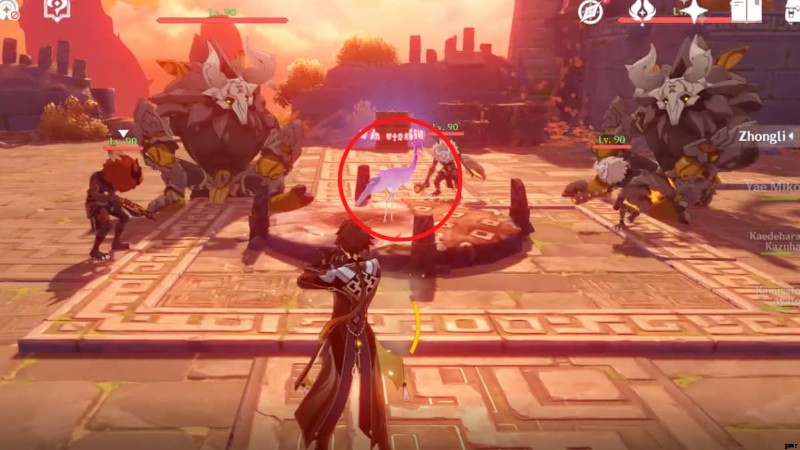
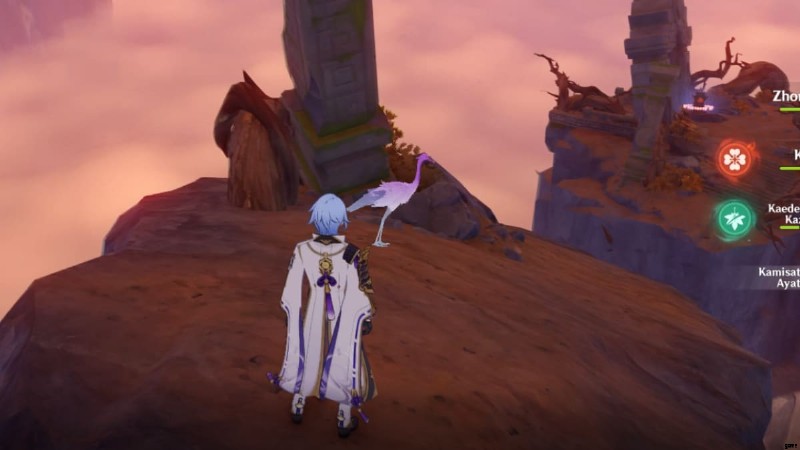
- After looting the Precious Chest, approach the purple crane and keep following it. It behaves like a Seelie.
- The purple crane will go through a door , signaling your next destination.
Chests #4

- In this new environment, interact with the drums to spawn a bridge.
- Keep following the purple crane until it becomes a Common Chest for you to loot.
- Interact with the drums beside the Chest to prompt a cutscene to play. The bridges will change.
Chests #5, #6, #7
- Now you need to turn back and go through the door you just came from .
- Once you're back, perform with the Melodic Harp located west of the door.
- A wind current will spawn. Use it to propel you all the way to the Mirage's starting point.
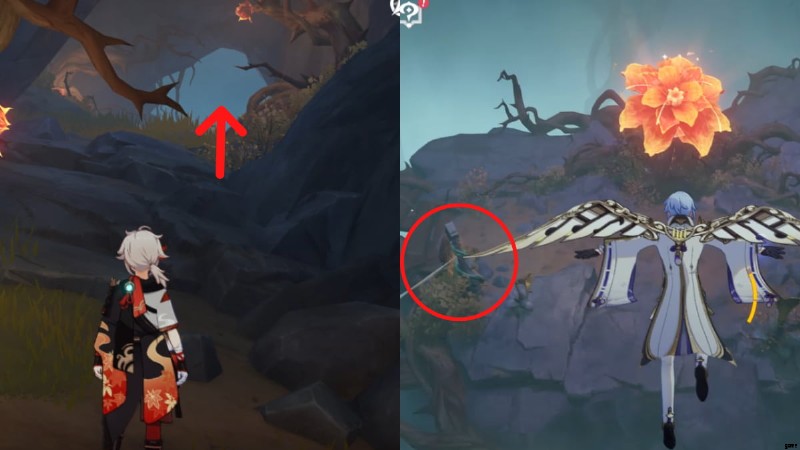
- You'll land on the platform with the first door you went through at the start of the Mirage. Go through it again .
- Once you're through the door, turn right until you see the Melodic Harp.
- Perform with the Melodic Harp and follow the notes as they will unlock a cave.
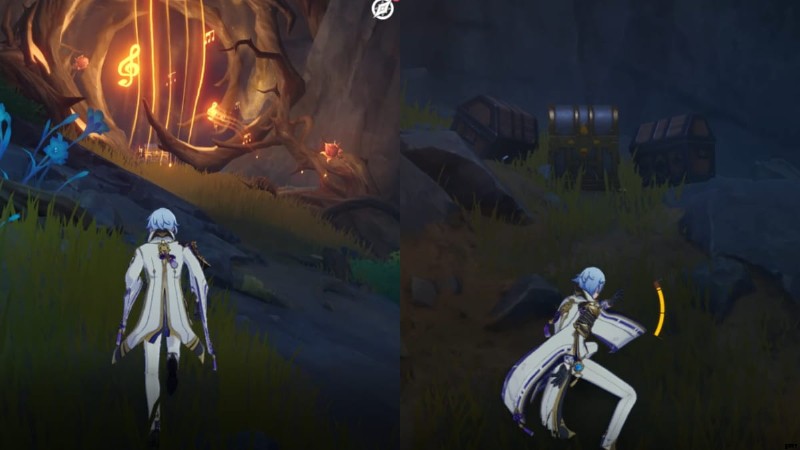
- Once the cave unlocks, you'll be greeted with one Luxurious Chest and two Exquisite Chests to loot!
Chest #8
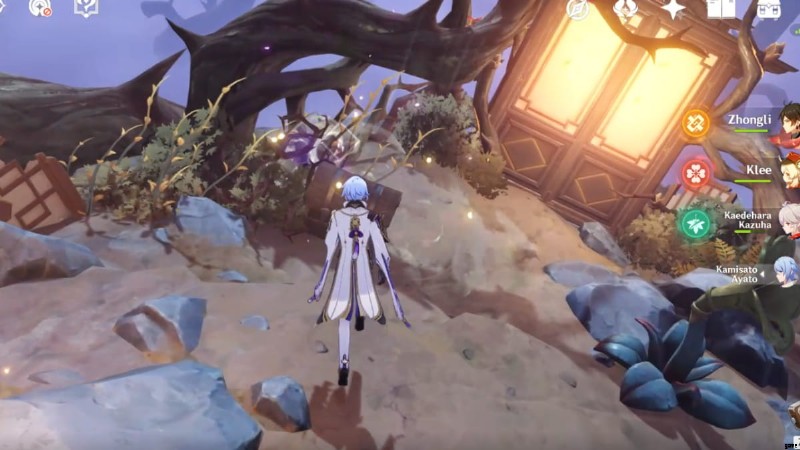
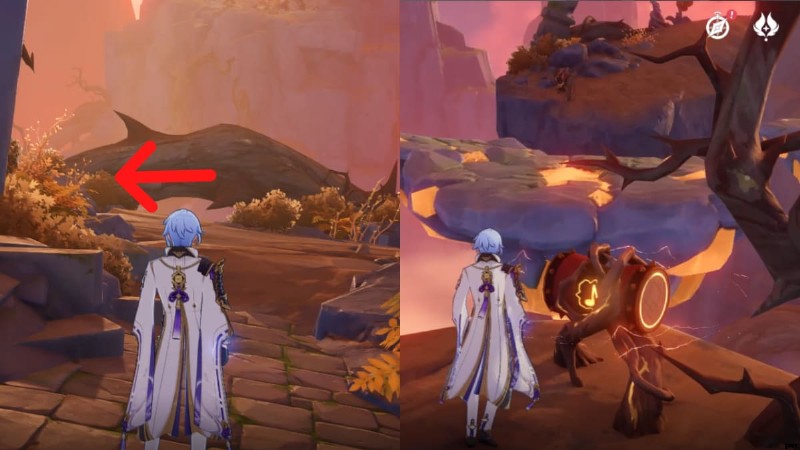
- After claiming the Chests, head back to the starting point of the Mirage, where you see the big blue flower in front of you.
- Like before, turn back and head toward the cave.
- This time, jump down until you see the big red flower.
- Turn left of the big red flower (where you see a Melodic Harp) and cross the bridge.
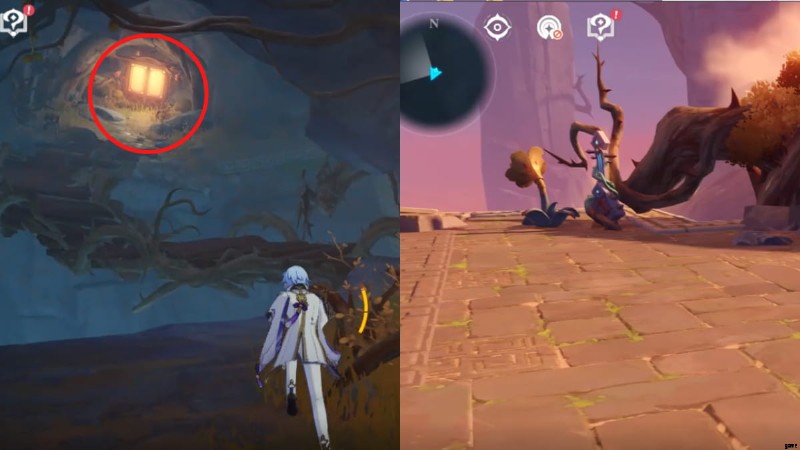
- You'll encounter another door , which you need to enter.
- Once you're in the new area, perform with the Melodic Harp to summon wind currents to propel you to the nearby platform.
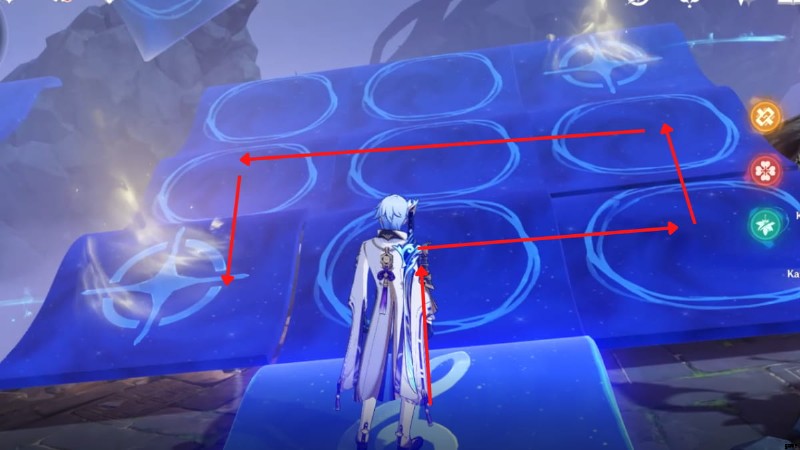
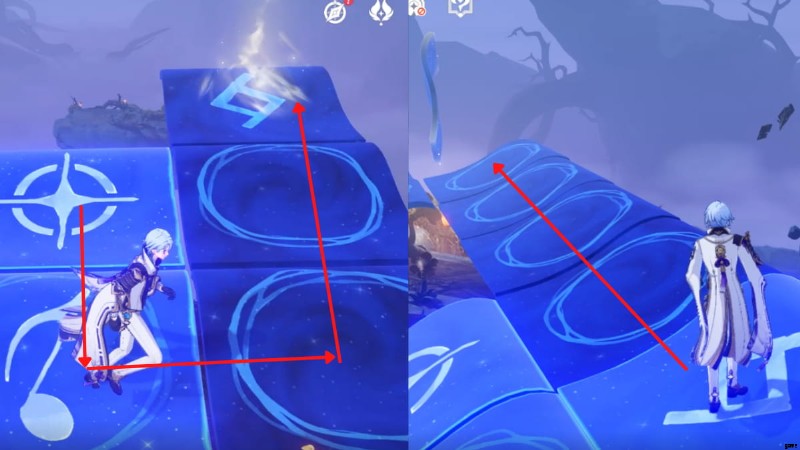
You need to solve a Melodic Petal puzzle.
- Step onto the Petal, then follow the path above to clear the first segment.
- Follow the path above to solve the next segment.
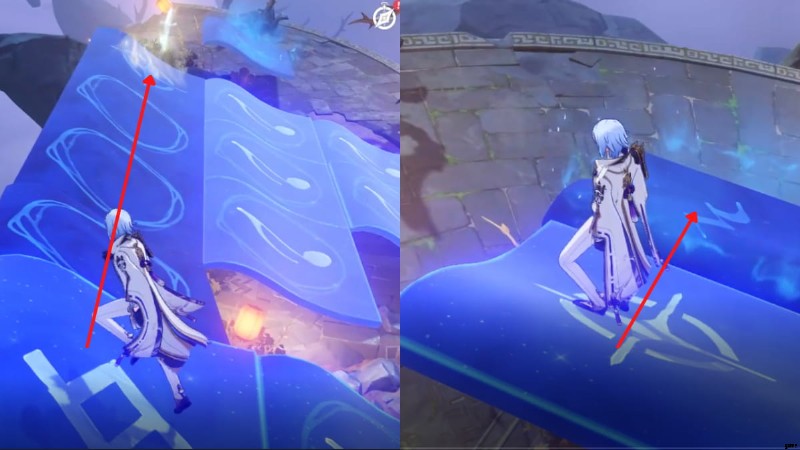
- Finally, follow the paths above for the last two segments. They're pretty simple—just go in a straight line!
- Once that's done, perform with the Melodic Harp to summon wind currents to propel you to the next platform.
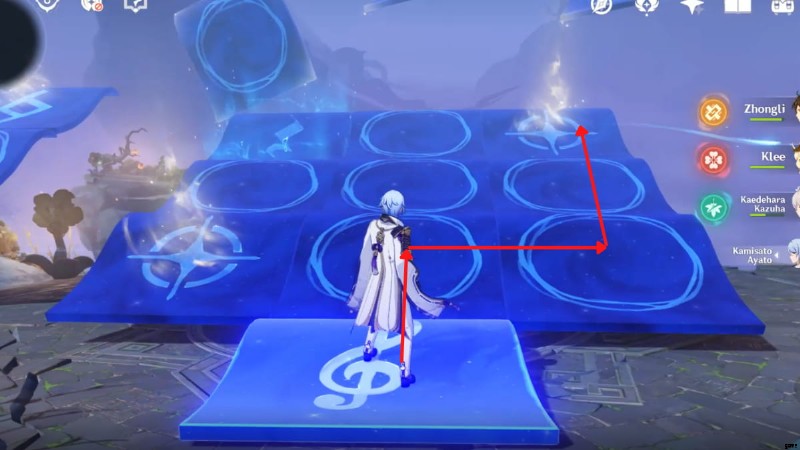
There's another Melodic Petal puzzle on this platform.
- Follow the path above to complete the first segment of the puzzle.
- Follow the path prescribed above for the next two segments.
- Almost done! Follow the paths above for the next two segments.
- Lastly, follow the path above for the last leg of the Melodic Petal puzzle.
- Once that's done, perform with the Melodic Harp.
- The Common Chest will unlock. Make sure to loot it!
- Perform with the Melodic Harp again . This will summon wind currents to propel you to the next area.
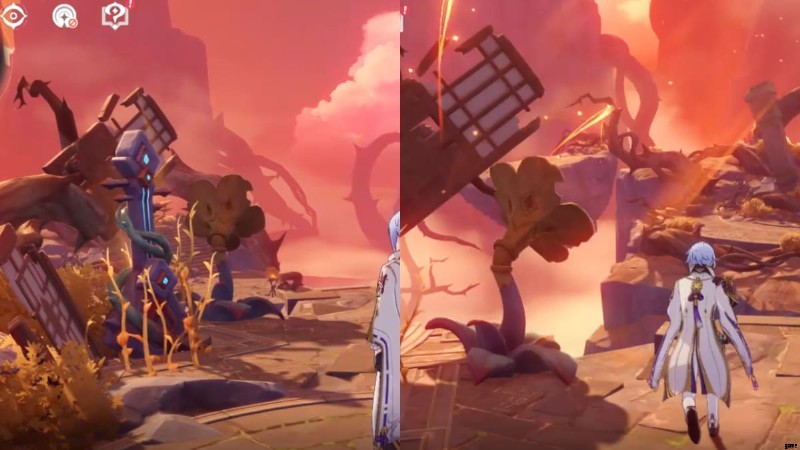
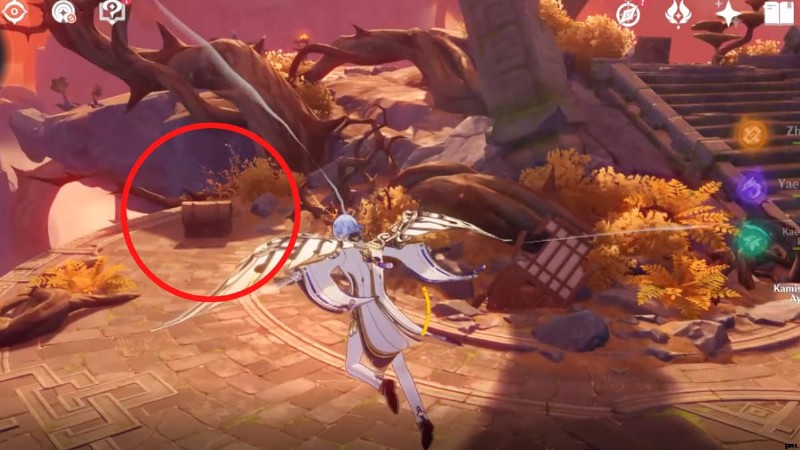
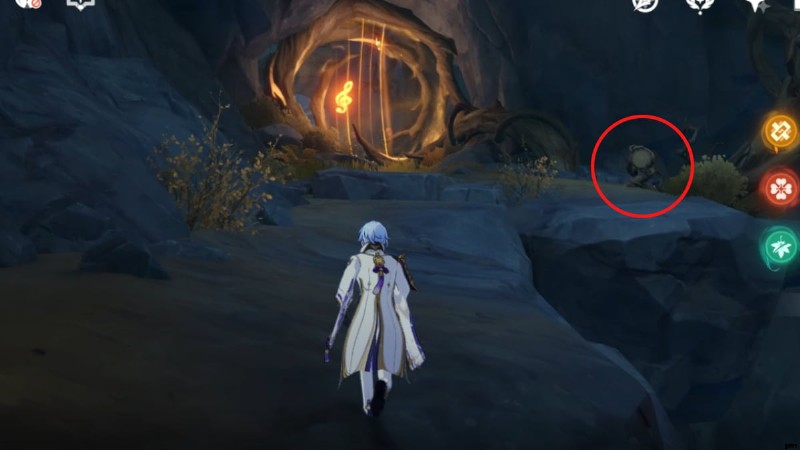
Chest #9
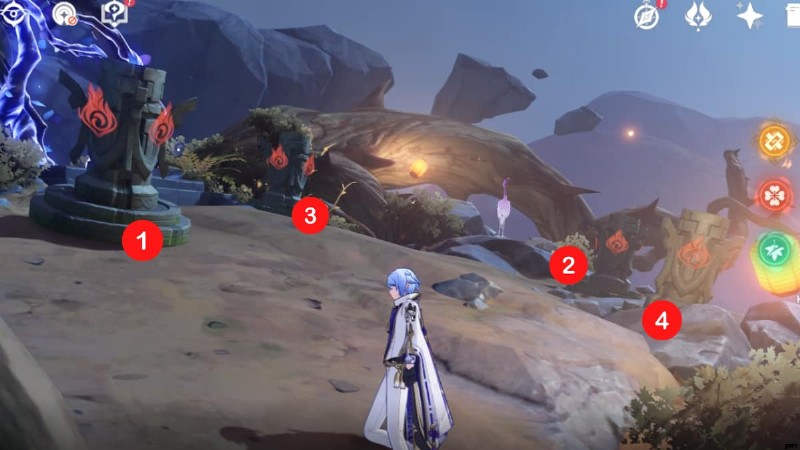
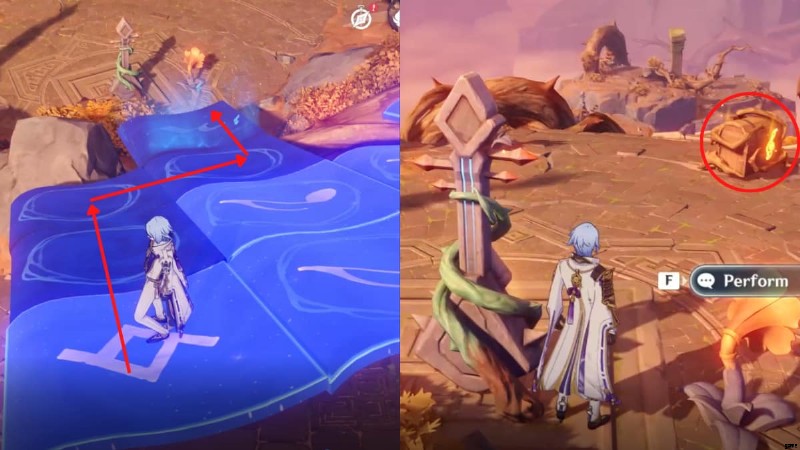
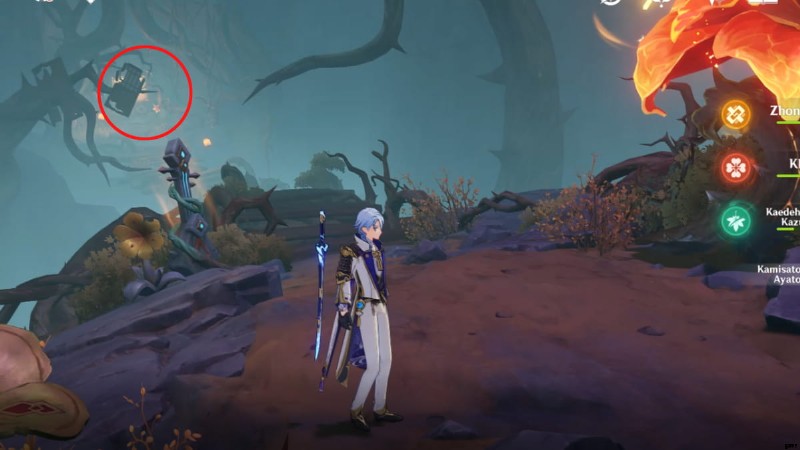
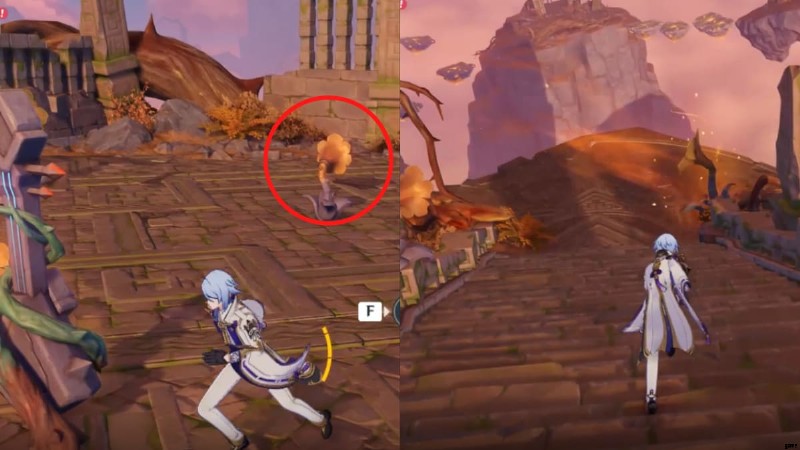
On this platform, you need to solve a Pyro Monument puzzle. If you don't have a character that can apply Pyro, interact with the glowing vines on the left to open the party setup menu and bring in someone like Amber to solve this puzzle.
- Reference the image above for the exact order of hitting the Pyro Monuments.
- If you hit all the Monuments in the right order, an Exquisite Chest 現れる。
- After claiming the Exquisite Chest, approach the purple crane and let it guide you.
Chest #10
- The purple crane will turn into a Common Chest for you to loot.
- After claiming the Chest, enter the door その横に。
Chest #11
- Once you're inside the new area, defeat the enemy Hilichurls.
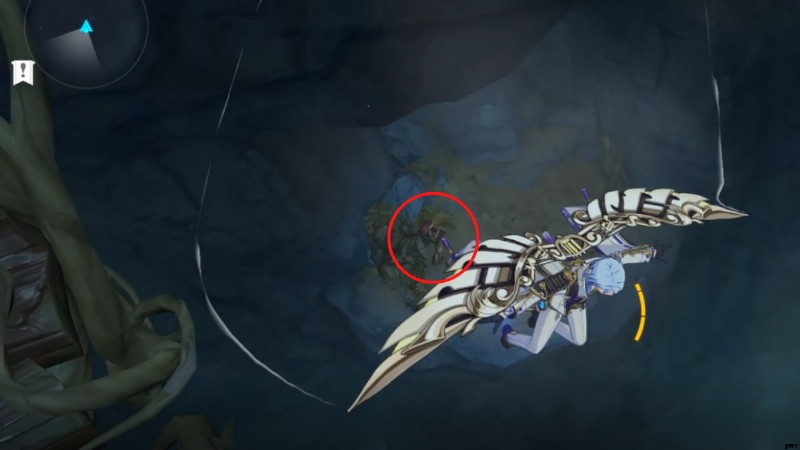
- There are three Melodic Blooms in the area. You need to adjust the orientation of the two Melodic Blooms circled in the image above once each so that they're facing forward.
- After that, perform with the Melodic Harp.
- An Exquisite Chest will unlock for you to loot. You will get a Quest Item called Reverberating Key .
Chest #12
- Go through the door .
- Interact with the Melodic Harp to summon a wind current to propel you onto the next platform.
- You will see another door , which can be unlocked using the Reverberating Key from earlier.
- Enter the door to cross to another area.
- Interact with the drums to summon a bridge.
- Then, interact with the Time Trial Challenge . All you need to do is run through the bridge really quickly to claim an Exquisite Chest . If you fail, don't worry and just try again.
Chest #13
- Once you've claimed the previous Chest, you'll see a door. Don't go through it .
- Instead, turn back and go through the cave.
- Glide down toward the big red flower.
- Perform with the Melodic Harp to summon a wind current to propel you upward.
- Next, you need to interact with the drums to summon a bridge.
- Cross the bridge and get to the other side.
- Next, you need to glide down until you see a little crevice under the platform you were standing on.
- Go to that small crevice.
- Interact with the drums to summon another bridge.
- Cross the new bridge and keep going forward until you see a door .
- Enter the door to get to the final area in the Mirage.
- The moment you enter the new area, turn left .
- Interact with the drums to summon moving rocks.
- Use the rocks as a path to the next platform.
- On the next platform, you will see some Slimes. Defeat them to claim an Exquisite Chest .
Chest #14
- After claiming the Chest, turn to the right and perform with the Melodic Harp to summon wind currents.
- Before riding the current, interact with the Time Trial Challenge first to initiate it.
- Use the wind current to complete the Time Trial Challenge and claim an Exquisite Chest .
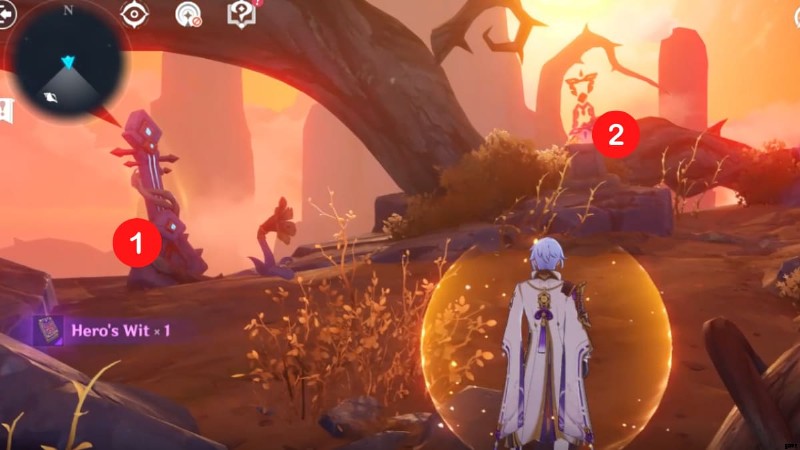
Chest #15 and Phantasmal Conch
- On this platform, perform with the Melodic Harp to unlock the Exquisite Chest .
- Once that's done, adjust the orientation of the Melodic Bloom circled in the image above twice .
- Perform the Melodic Harp again. This time, wind currents will appear.
- Use the wind currents to propel you upward.
- You'll find the Phantasmal Conch on top of a landform. Make sure to interact with it!
If you have collected the rest of the Phantasmal Conches in the Golden Apple Archipelago and Kazuha's Domain, you can now claim Fischl's Outfit!
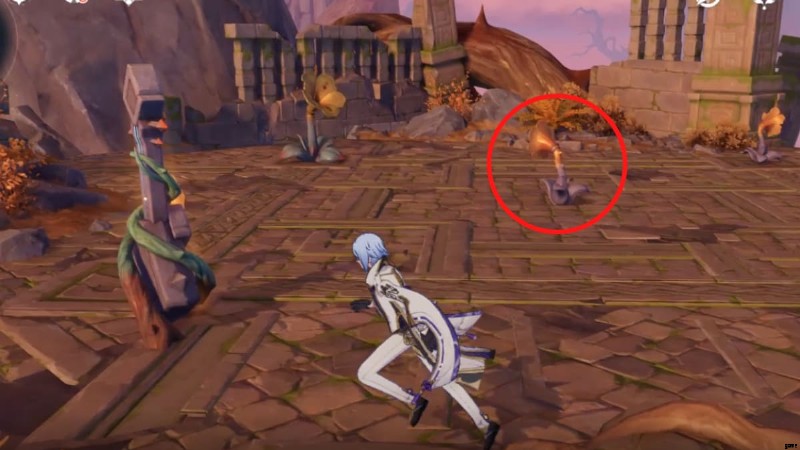
Chest #16
- Glide back down and adjust the orientation of the Melodic Bloom circled in the image above twice so that it's facing forward.
- Perform with the Melodic Harp.
- Go down the stairs and you'll see wind currents have been summoned. Use them to propel you to the next platform.
- You'll land on a platform with a purple crane . Approach it and keep following it.
- The purple crane will unlock the Pyro Monument on the next platform.
- Light up the Pyro Monument and enter the door .
- Turn left and enter the cave.
- Adjust the orientation of the very last Melodic Bloom (the one closest to the locked music note) once so that it's facing forward.
- Perform with the Melodic Harp.
- Go through the now-opened path and interact with the drums .
- Turn back and go through the door you just came from again.
- Interact with the drums to summon moving rocks. Use them to cross to the next platform.
- Just keep going forward until you see the door. Enter the door .
- Once in the new area, go straight, then turn right .
- You'll find the last Precious Chest —loot it and click the Paimon menu button to exit the Domain.
Other Blazin' Trails guides
- Genshin Impact Blazin’ Trails! World Quest walkthrough – Summertime Odyssey Xinyan Mirage Chest &puzzle guide
Check out our guide on All Chest locations in the Golden Apple Archipelago – Genshin Impact Summertime Odyssey event to loot even more Chests during the event!