Minecraft で船を建造する方法
Minecraft で船を建造することは、建造するのが最も難しいものの 1 つです。丸みを帯びた形状を大きなブロックで再現するのは非常に困難で、奇妙に見えません。
私は決して造船の専門家ではなく、このガイドが造船の最良の方法であるとは言いませんが、人々、特に初心者が独自の船を設計および作成するのに役立つことを願っています.
船とボートの違いは、ボートの方が小さいということです。ボートは船に収まると言えます。ただし、ほとんどの人は両方の用語を同じものに使用するため、違いはそれほど重要ではありません.
計画
船を建造するには、最初に設計を計画するのが最善です。必要な船の一般的な形状とサイズを考え、Minecraft のバージョンであれ実際の船の写真であれ、参照用の写真を見つけてみてください。
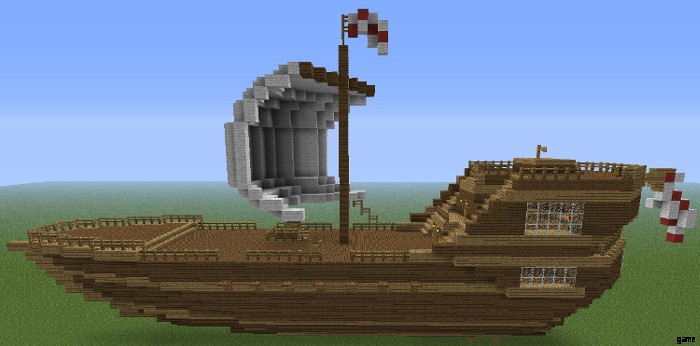
船を建造するとき、建造したいパーツを 4 つのセクションに分けることがよくあります。船首 (前部)、船尾 (後部)、船体 (船体) の残りの部分、およびマスト、旗などの他のすべての詳細。
船の前部と後部は、Minecraft のビルドに変換すると丸くて一般的に奇妙に見えるため、構築するのが最も難しいパーツであることがよくあります。
フレームワーク全体を最初に構築することもできますが、通常はフロントまたはミドルから始めます。このチュートリアルでは、各ステップを個別に説明するため、好きな順序で実行できます。ただし、常に最初に行う必要があるのは、船のサイズを決定することです。これにより、船底の幅が決まります。これが常に出発点になります。
弓 (正面)
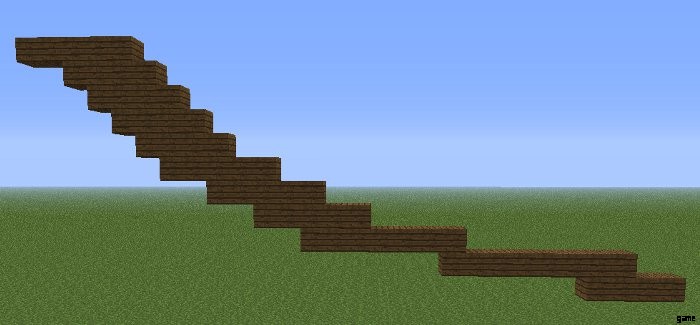
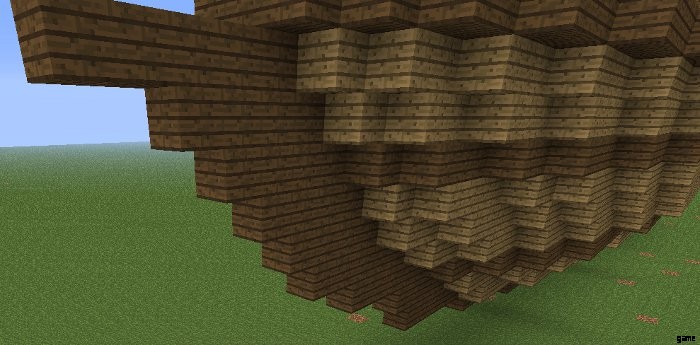
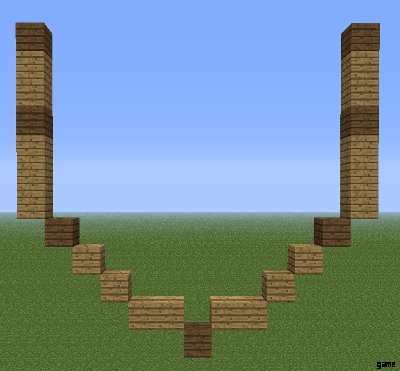
船の前部は丸くてとがっているので、少し注意が必要です。多くの場合、最初に全体的な形状を作成してからブロックを取り出して、より水色のダイナミックで全体的な見栄えを良くするのが最善です.最初に、船の中央を見つけるか作成することから始めます。これが最下点となり、フロントの残りの部分を構築する基準点として使用されます。
船の真ん中にブロックの長い列を作成することから始めます。その後、ゆっくりと好みの高さまで上げていきます。 3~5ブロックごとに約1ブロックずつ、非常にゆっくりと高さを上げ始めます。約半分になるまで、ゆっくりとこれを増やします。希望の高さに達するまで、1 ブロックまたは 2 ブロックごとに約 1 ブロックずつ、高さを速く上げてください。
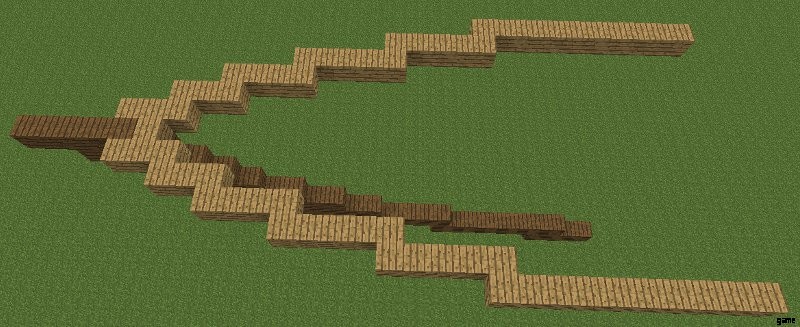
希望の高さに達したら、このポイントから側面に向かって構築を開始します。片側から始めて、ボートの希望の幅に向かってゆっくりと進みますが、幅が広すぎたり、幅が足りなかったりしないように注意してください.通常、船の中央線から約 8 ~ 11 ブロック離れたところに移動する必要がありますが、これも、作成している船のサイズと種類によって異なります。
Start out by increasing the width by about a block every 2 blocks you place. Then increase the width every 3 blocks you place. Keep making the intervals at which you increase the width longer and longer untill you’ve reached the desired width. Now copy this on the other side. If you’re having difficulties to recreate it, either fly over your ship and try to mirror the image, or take a screenshot and mirror it with an image editor.
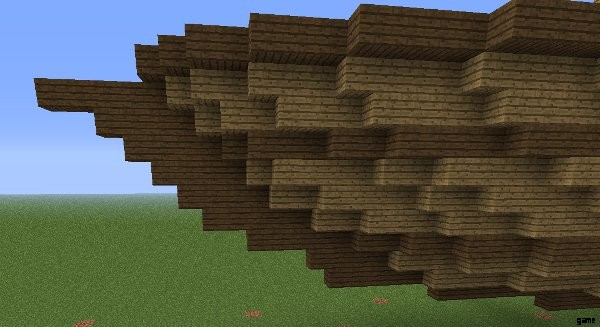
It’s very difficult to explain the exact steps you need to take to make the front look good from this point, as it’s generally just a matter of experimenting and it also depends a lot on the type of ship you’re building. Try to make the front look sharper by removing and adding blocks, play around with it until it looks good. Note that if the front is made entirely out of the same color wood (or same block), it will rarely look good enough on it’s own, so make a few layers out of a different color or a different block. It’ll look better right away.
If you’re really having trouble, try copying an existing minecraft boat to get a feel of it. Count the number of blocks they’ve placed on each layer and then change it to your own liking.
Stern (back)
I find the stern a little easier to start, but it’s often a little tricky to get it to look right, especially if you make it higher to create a captain’s cabbin.
I always start by creating an anchor-like shape the edge of the middle, at the height of the deck. This is often a great way to start, though higher ships might require you to start this lower.
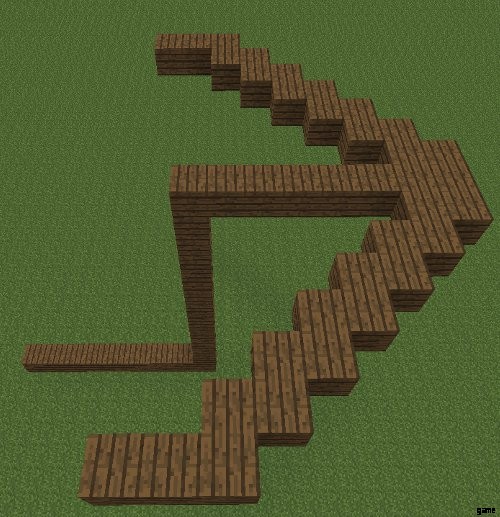
After this, I first connect the bottom of the ship to the edge of the anchor-like shape by simply placing blocks and making the length 1 block smaller every time I go down 1 block. Note that we need to leave some space for a room, like the captain’s cabin, so I’ve already placed some glass blocks to mark this space.
Once you’ve finished this, the general shape looks decent, but often quite odd. I then begin to trim the overall shape down, by removing and adding blocks to make it look longer and more aqua dynamic. I also add windows on the upper part, which will usually be a bedroom or office of the captain.
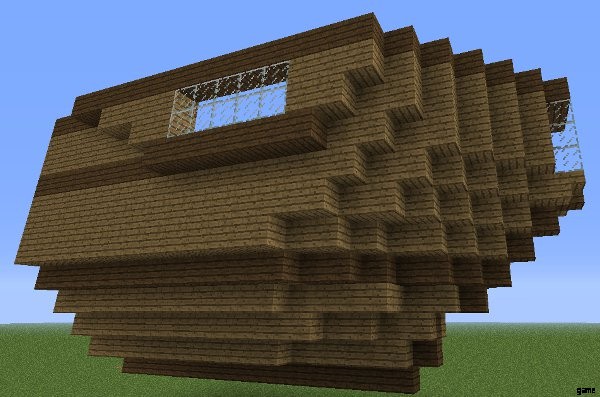
Once I’ve finished this it’s time to build upwards. I tend to simply add layers to the top layer, without increasing or decreasing the width, this will look quite good, but improvements can be made. After I’ve added enough layers for a second floor, I begin trimming it all down again. I tend to remove some corners and replace them with fences, this makes it all look less flat and plain, without losing the overall shape.
The top part can also stick out a little on all sides, which will also help to make it look less flat and plain. This is something I usually do after I’ve built up the layers, simply by adding another layer against the sides.
This is also usually the part where I add the windows to both the captain’s cabin and other rooms in the back, as windows can look quite odd, so they often need some extra attention.
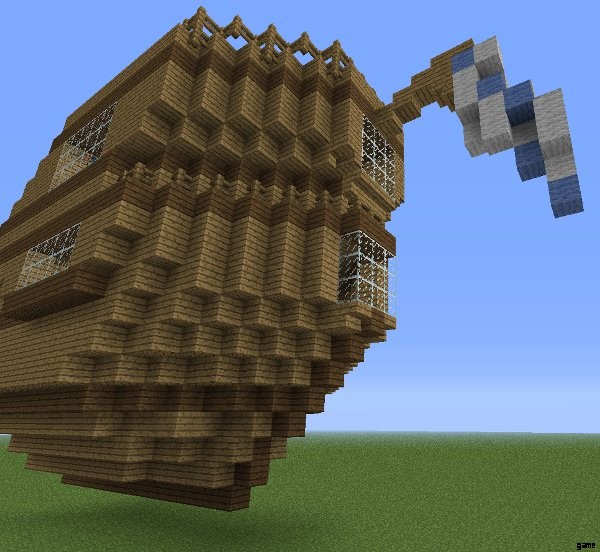
I often also add the rudder and possibly a pole with a flag, as I might forget to add them later (like I did in the picture).
Hull (body)
The hull is fairly easy, especially if you’ve already created either the stern or bow. You simply extend the blocks at the edges of those parts until you’ve reached the desired length.
However, if you’re starting with the hull, building it will still be quite easy. You start by creating the middle, which is just a long line of blocks.
Then determine how wide you want your ship to be and slowly work your way towards that height and width. Don’t increase the height too fast, or it’ll look very weird. It may take some practice and experimenting to get the right size, so don’t create the whole hull right away, instead, create a smaller 5 block long part and check if that part looks good, if it doesn’t, alter it and check again.
Details
Once you’ve completed the entire body of the ship it’s time to add details. This will once again depends on the type of ship you’re making, a pirate ship will usually have sails, while a steam punk style ship might have a hot air balloon with huge propellers.
One detail that will look good on pretty much all ships is a few layers in a different block. A ship made entirely out of wooden planks looks quite plain, so replace a few layers with logs or differently colored planks.
You may also want to add fences on the edges, both to prevent people from falling off and as a way to make them ship look better. Don’t forget to leave some openings to allow people to go on and off board.
Sails
Sails are quite difficult to make, so I often create the in their folded positions, as if the ship is laying at anchor. This will work best when the ship is in a harbor, where it’s a lot more realistic for a ship to have its sails folded.
However, if you do want to hoist the sails, creating a diagonal spreader, which are the branches on a mast, often look better, as they allow you to create better looking sails. Straight spreaders can also be used, but the sails will often look a bit odd and square, especially on smaller ships.
Creating a sail requires some practice and trial and error, it can take a while to make it looks good and you often have to adjust the width and length of the mast and spreaders. However, you generally create circular shapes, which start and end at spreaders, though they could also be attached to ropes on deck, which could be mimicked with fence posts.
A trick I use to create sails is to open paint and first draw the spreader, make sure each block you’ve used on your boat’s spreader is resembled by 1 pixel.
After this, I use the circle tool to create a circular shape from 1 side of the spreader to the other. This often gives me a great horizontal outline of the sails I want. I then do the same by drawing the mast, but again, remember the 1 pixel to 1 block ratio. After the mast is drawn I use the circle tool again to create another circular shape that marks the outline of the sail vertically. Once both shapes have been drawn, I only have to recreate it on my minecraft boat, though it often requires some more tweaking.
I usually find a few pictures of real-life examples and try to copy those as close as possible. I then make any needed alterations to make it look better with the overall design of the ship.
If you’re really struggling, try downloading some existing minecraft ships and take a closer look at the way those people have built that ship.