CosmicBreak Universal – 初心者ガイド
新規プレイヤー向けに明確に書かれたガイド
初心者向けスターター ガイド
ゲームのまとめ
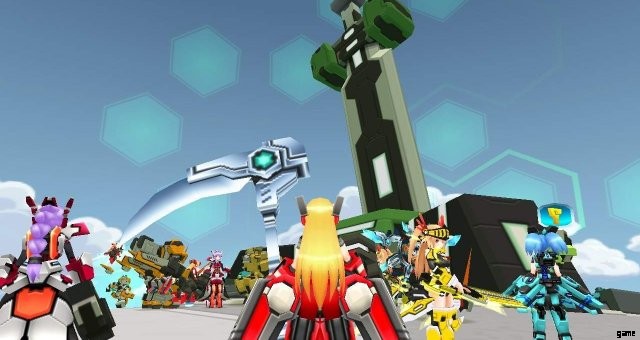
Cosmic Break の主な魅力は、腕、脚、頭、ブースターを交換して独自のキャラクターを作成できる広範なカスタマイズ システムです。次に、これらのキャラクターを、PvP に重点を置いたアリーナや PvE に重点を置いたミッション モードなど、さまざまなゲームモードに連れて行きます。これらの各モードには、後で換金できる独自の報酬があります。キャラクターは 4 つのクラスの 1 つであり、PvP モードは 2 つのチームに分かれており、他のチームからクズを殺すために競います。
クラス
このゲームのユニットは 4 つのクラスに分割され、その動作と使用可能な装備によってゲーム内での機能が決まります。陸、空、砲兵、支援。陸上はより速く走り、飛行時間が短縮され、空中は飛行時間が長くなり、芸術は垂直方向の照準角度が向上し、サポートは実際のボーナスがありません.土地はビームに弱く、空中は爆発に弱く、アーツは近接攻撃に弱く、サポートは何にも弱くありません。この装備以外にもクラス制限があります。
土地には通常、どのクラスにもボーナス ダメージを与えない砲弾ベースの銃と、多くの盾と近接武器があります。
エアはゲーム内で最も多くのビーム武器を持っており、かなりの量の長距離武器を持っています。彼らのギミックはブースト時間の延長であり、ゲーム内の他のどのクラスよりもはるかに長く飛行できます。
芸術は銃の中で最も銃へのアクセスが広く、利用可能な最も爆発的な武器を持っており、空中にボーナスダメージを与えます.
サポートには、許容できる武器の選択がありますが、快適ではありません。彼らはすべてのものをほとんど手に入れません。彼らは味方やバフ/デバフプレイヤーを癒すことができるサポート機器への独占的なアクセスでこれを補います.これ以外では、彼らの直接戦闘能力は一般的に低いです.
統計
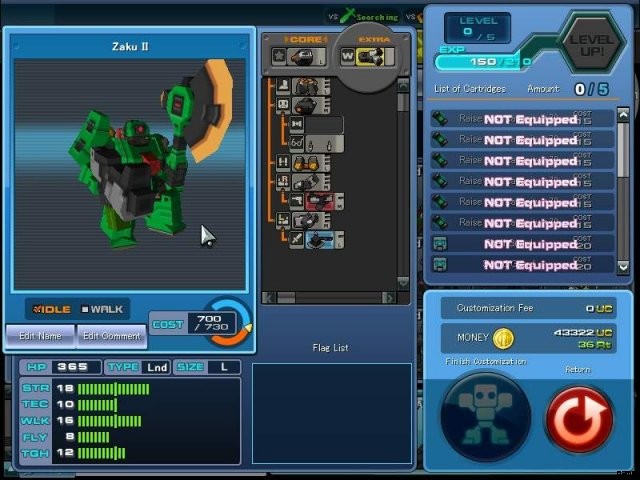
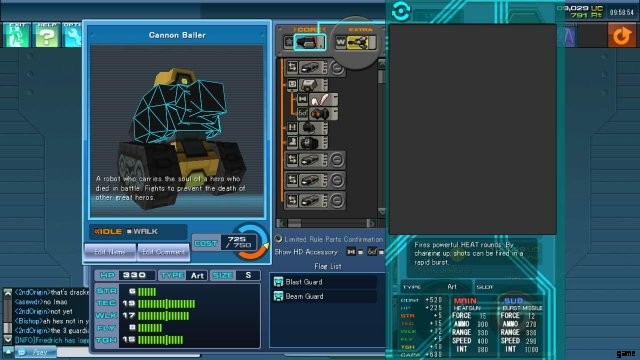
上から順に、コストは、ユニットが死亡したときにチームのヘルスバーから削除されるポイントの数です。キャパシティは、ユニットが持つことができる最大コストです。すべてのパーツ、武器、およびカートリッジは、ユニットにコストを追加します。キャパシティカートは、より多くのキャパシティとヘルスを提供します。 HPはあなたの健康です。ゼロになると死ぬ。アイテムとヒーラーで体力を回復できます。
STR/TEC は近接武器と銃のステータスです。 STR ダメージと TEC ダメージに基づく武器に一定のボーナスを提供するだけで、追加のボーナスはありません。ただの+ダメージです。ゲームは公式を使用しているため、これらの統計にあるすべてのポイントに対して 1 ダメージを得るわけではなく、武器の力 (ダメージ) に応じて特定のブレークポイントでのみ結果が得られます。より強力な武器は、ダメージ統計からより良いボーナスを得ます。明確にするために、これらは「照準能力を向上させる」などではありません。そのようなパフォーマンス統計は、武器自体から得られます。ただのダメージです。
WLK/FLY はあなたの機動性統計です。 1 つは地上移動用で、もう 1 つは飛行用です。 Boost Run などの一部のカートリッジはこれらを組み合わせて使用し、Sway などの一部は WLK のみを使用します。
このゲームは、短時間に受けるダメージが多いほどダメージが軽減されるシステムです。 This resets after several seconds, and TGH dictates how quickly this system kicks in. TGH also increases your resistance to being stunned by damage (only damage, certain weapons will stun you regardless and melee-type damage will always stun you unless you have super armor)
That yellow thing in the corner is your wonder bit, which is like those floating gun things you get in Gradius. Activating and deactivating them makes you invincible during the animation, and while they’re active they’ll attack nearby enemies automatically.
Fight Stats
Weapons have stats on them that are confusing.
Force is the raw damage, TEC and STR are working to increase this number. A weapon’s base damage is it’s force.
Ammo is ammo. You’d think this is straightforward, but there are some weapons that use multiple counts of ammo every time the weapon fires. These are usually obvious though and you’ll notice it when you shoot them.
Range means several things, for guns it means the lock on range, and it’s also generally representative of how far the bullet will travel.
For melee, range generally refers to the range that the weapon will track, but some weapons are weird and range refers to how far out the submelee goes. You’ll have to experiment on these ones.
Speed on guns refers to how many range units the projectile travels in one second. If a gun’s range and speed are the same then the bullet will travel to that range in one second. It used to be that having a speed 1.5x higher than your range made landing hits easy.
On melee weapons, speed can refer to several things, but it generally refers to how fast your unit travels during the time it moves.
INT gets complicated. It refers to way too many things and it flips between which one on a weapon basis. On guns, it generally means the firerate, but on certain guns it seems to refer to the cooldown time. On melee weapons, it’s generally representative of the cooldown time.
Fights
Weapons are split into two categories, main weapons and sub weapons. The short explanation is main weapons are the red ones that you use the left mouse button for, sub weapons are the blue ones you use right mouse button for. Mains are generally guns, and subs are split up into melee weapons, selfbuffs, and lockon projectiles.
Aiming a main weapon at someone will lock on to them and enable aim assist, but aim assist isn’t 100% and you have to lead your shots or else you won’t hit anything.
Sub melees involve pressing the right mouse button and the attack animation will play out. Some sub melees are special snowflakes and will have directional inputs, pressing the left mouse button to do different attacks, etc. Generally the game tells you about this.
Every sub melee has a set combo, or amount of attacks the weapon does on it’s own. If the weapon allows for it, you can combo from one melee weapon into another, which gives a damage bonus when you do this. Some weapons don’t allow for comboing into them, some don’t allow for comboing from them, and some don’t allow comboing at all. After a combo of a certain length, enemies will obtain a flashing melee invincibility. As usual, you’ll have to test these things.
Lockon subs usually refer to things like missiles and debuff shots, but can sometimes refer to certain melee weapons. You activate these by looking at an enemy while in the range of the weapon and waiting for the faint lockon circle to appear. The game will let you know when the subweapon is locked on, and at that point you can activate it. It’s hard to give a description of these because there’s so many lockon sub ranged attacks in the game.
Choose Your Pokemon
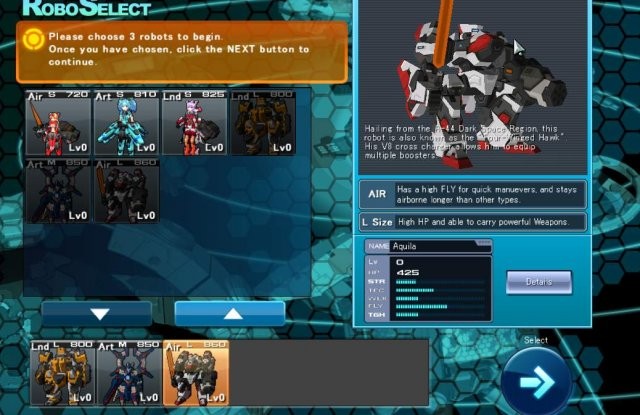
The girls are cute and all, but you can buy them with UC at any point in time. You’ll need parts from mechs to make strong builds later on and every mech here costs paid currency to obtain. Amateus is a direct counter to Baltheon, who is a strong meta viable unit right now and Aquila has decent core weapons and is good for clearing out one of the quests in the game.
Hound Dog exists. He’s not that good so you can replace him with one of the girls if you absolutely want to. His weapons aren’t that good and Mighty Byne is available in the shop as a far superior land unit in today’s balance. Amateus is a decent alpha core and his parts can be repurposed for custom Art builds on units you’ll recieve later. His built in weapons are pretty good too. Aquila has a built in boost regain in his core and his weapon is decent, but not great.
レベリング
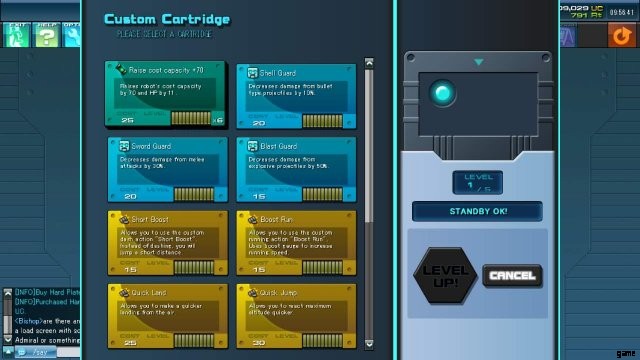
As you participate in activities on the Ark, your units will gain experience and eventually become eligible for leveling up. When you level up, you select one (1) cartridge that grants a benefit to your unit. One of the first thing you’ll need is capacity cartridges, as these increase your capacity and allow you to hold better weapons and tune your unit with higher stats. It’s also generally a good idea to have at least one guard cart. Sword Guard, Blast Guard, and Beam Guard are all really good, but shell guard’s bonus is too low to be worth taking. You can’t take a guard for a damage type your unit is weak to.
Certain units with an internal weapon will have cartridges that usually increase the damage of the built in weapon. In order to see the benefit of these cartridges you’ll have to click on the weapon itself to see the updated stats. In Buff Devastator’s case, it makes his heal bubble heal for 100.
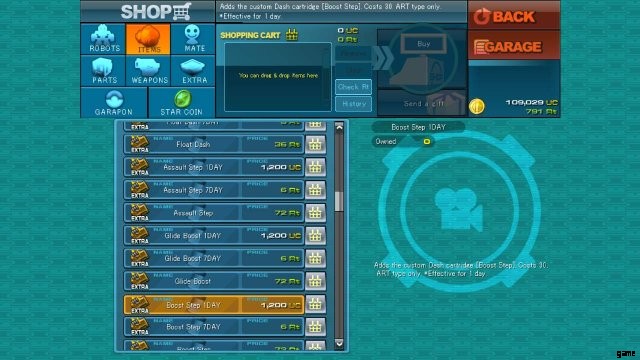
While most cartridges are passive and grant background buffs, like invisibility on radar, some cartridges are active and will cause your unit to do something different. Most of these active carts are dash carts like Short Boost or Assault Step. A lot of the active carts are custom install only, meaning you have to go to the shop to buy and install them. You can even find some of the standard dash carts here, which is good if you want to custom install it and swap in an extra capacity cart or guard into a build.
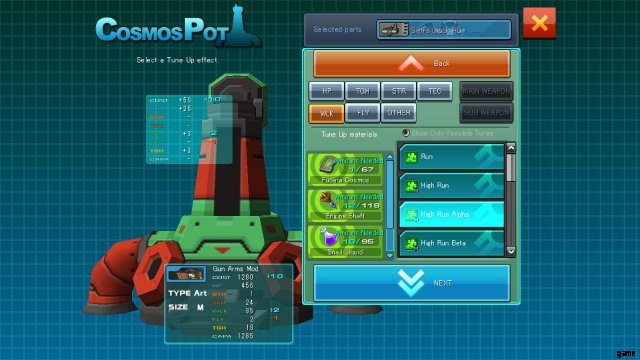
Tuning
In order for you to not get harvested like a crop in the arena your unit is going to need tunes, and more specifically you’re going to need mobility as soon as possible. Throughout the game there are activities like Arena or Mission that will give out tuning materials that you can use to increase the stats on your unit. Once you have a supply of materials from doing Legion missions and your rank up rewards, you can find the Cosmos Pot which is located in several areas in the game.
Tunes are split up into several categories. +1 tunes have a 100% success rate, but because of slot limitations, no viable build is using exclusively these. High tunes give +2 to a stat and have a chance to fail, although High Alphas are going to be the main tune you use in this category due to cost reasons. A straight High is 15 cost while a High Alpha is 10 and gets rid of a stat point you weren’t using anyways. High Betas and Gammas are cheaper and will deduct a second stat if your build doesn’t require it. These are good for freeing up cost in a build for more stats or parts, but you have to be careful with them because you can easily bring a stat in the negative by doing this.
Mobility tuning got simplified, so every point in a mobility stat will increase your movement speed by a small amount. You want your mobility stat to be upwards of 30, because everyone else in arena is tuning their mobility to numbers like 38 or 40.
Hitting zero in either of your mobility stats will severely cripple the unit.
- Details on movement speed here.
STR and TEC tuning are pretty much straightforward and you want as much of it as you can get. The more of it you have the higher your damage will be with weapons that scale off of that stat. Hitting zero in either damage stat will cause your wonder bit duration to end in a matter of seconds.