Cube Escape:Paradox ウォークスルー:第 1 章の解決策
Cube Escape:Paradox が登場しました。モバイル向けのすばらしいパズル アドベンチャー ゲームです。完成させるのは難しいですが、魅力的でもあります。そして、Cube Escape:Paradox ウォークスルーを支援したいと考えています !
今日の記事では、Cube Escape:Paradox のチャプター 1 のウォークスルーを紹介します。美しく、時には不気味な冒険に参加したくなるでしょう。また、第 1 章を完了するのは難しいため、以下の完全なソリューションも気に入っていただけると確信しています。
それでは、1 秒も無駄にせず、Cube Escape:Paradox Chapter 1 チュートリアルをチェックしましょう。
1. テレビの下のケーブルをタップし、右側のケーブルをタップして差し込みます。
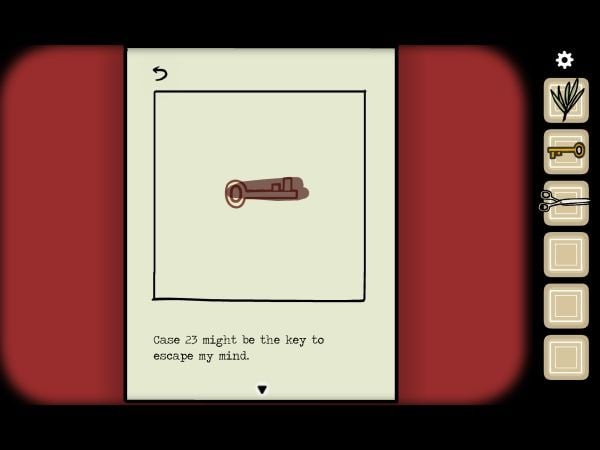
2. 戻って右に移動し、赤いカーテンを 2 回タップしてオウムを表示します。鏡の下にあるドレッサーの茶色の箱から鍵を取り出します。鏡を 2 回タップして、寒いと言ってください。
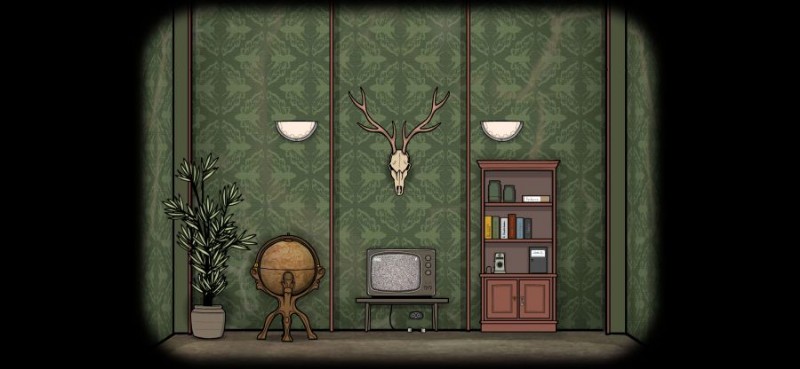
3. 窓の下のドレッサーに戻り、右のボックスをタップします。すべてのピースが正しい位置にあるように、パズルを完成させる必要があります:
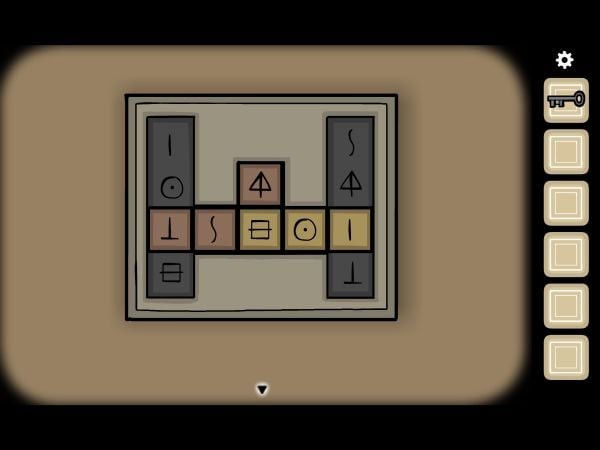
パズルは時間がかかりますが、簡単に完成できます。一番下のスポットと真ん中のスポットを使って四角形を入れ替え、正しい位置に配置します:
箱を開けたら、タップして写真のピースを手に入れましょう。
4. 戻って右へ。絵をタップして、一番上の写真を拾います。絵の左下にも手がかりがあります。
5. 右のナイトスタンドをタップしてメモを読みます。左のナイトスタンドをタップして葉巻を手に入れよう
6. 戻って右に進み、ドアの横にあるドレッサーをタップします。各引き出しからすべてを取り出し、鍵を使って一番下の引き出しを開けてください。
7. ハンガーからコートを取り出し、右側の植物をタップします。はさみを使って小枝を手に入れましょう。
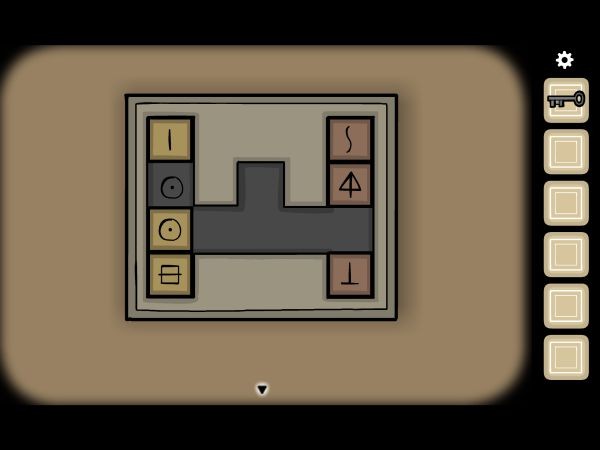
8. タイプライターを 2 回タップしてメモを読み上げます:
9.鏡のある部屋に戻り、ジャケットを使用します。怖い!鏡をもう一度タップすると、ライトを確認する必要があると表示されます。
10. 右に 2 回移動すると、写真の一部が落ちます。手に取ってください。
11. 左に進み、左のナイトスタンドにあるフレームに写真を置きます。残り 1 ピースです!
12. 再び左に移動し、鏡の下のドレッサーの真ん中の箱 (箱の間の箱) に木の立方体を置きます。
13. 左に 2 回進み、ドアの近くにある電気のスイッチをタップします。もう一度タップしてアクティブにします。
14. 右に進み、左のライトをタップします。そこから写真の最後のピースを取得します。フォトフレームのある部屋に行き、あるべき場所に置きます。新しい手がかり:
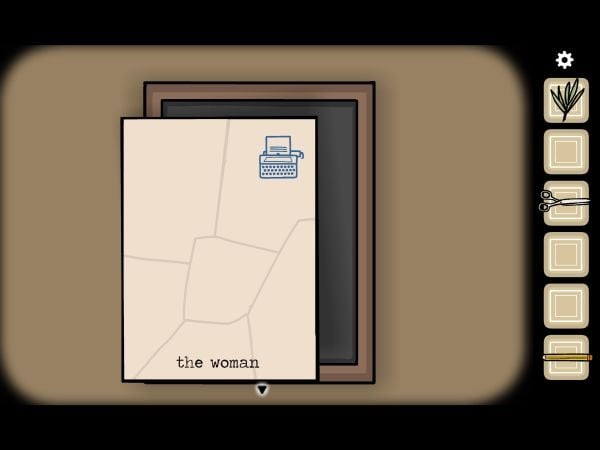
15. 右に進み、タイプライターを 2 回タップします。タイプライター「The Woman」のキーを使用して入力します。一枚の紙を取り、インベントリにある鉛筆を使用して、その上に絵を完成させます。鉛筆を選択した後、男性の服をスワイプするだけです。
16. 次に、鉛筆を使ってドアに色を付け、最後に女性に色を付けます。首の線に色を付け、最後にキーに色を付けます。タップして本物を選びます:
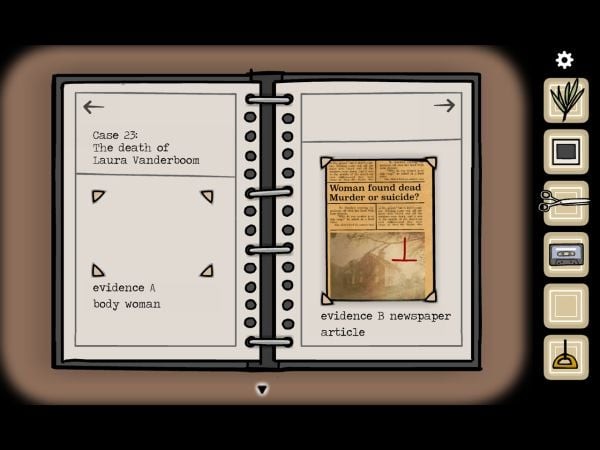
16. 右に進み、大きな食器棚をタップします。 Use the key on the top lock and swipe it up. Tap the upper part and tap the Evidence file, then pick up the photo, cassette and page. Go back and from under the Evidence file, pick up that yellow handle.
17. Move to the bottom side of the cupboard and tap the Case 23 file. Add the piece of paper under the “evidence B” area:
18. Tap the projector to the left of the Case 23 file and place the frame inside. Turn it on by tapping the switch at the top.
19. Move right twice and tap the line over the painting. Add the handle to it and draw downwards to reveal your next clue:
As you can see, by sliding it up and down and following the on-screen clues, we’ll get the V in the upper left circle, and the IV in the other one. Tap the photo as well in order to pick it up.
20. Go right and tap the top of the left night stand near the door. Tap the Cassette player, then tap the eject button (to the right), put the cassette inside and tap the cover to place it in. Tap play.
The man says that he was watching TV and said “enin xis xis lennahc” – which must be read backwards as per the clue to reveal the channel (669).
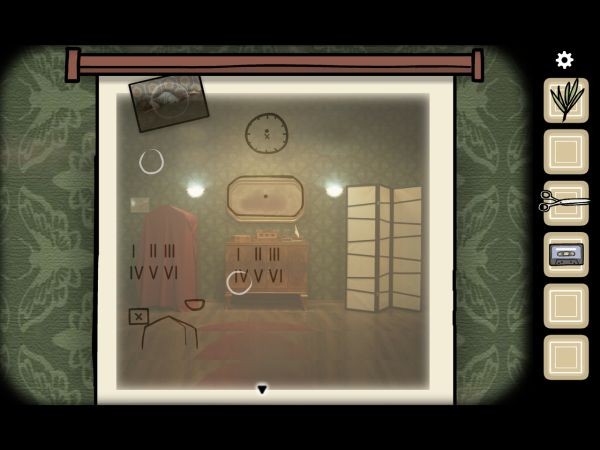
21. Before heading towards the TV, let’s tap the clock on the night stand. Drag the short hand at IV and the long one at V, then pick up the matches.
22. Go back to the room with the mirror and tap it. use the matches on the mirror, then tap it, paying attention to the smoke shapes:circle, S, square cut in the middle, Z and spiral.
23. Go left twice and tap the doors under the projector. Tap the left one to open it and use the signs we’ve seen in the mirror to open it. Pick up the tape.
24. Tap under the TV and use the tape to fix the broken cable. Then plug it in. Tap the buttons to the left until you get 669, then tap the square at the bottom. A man will give you a new channel:
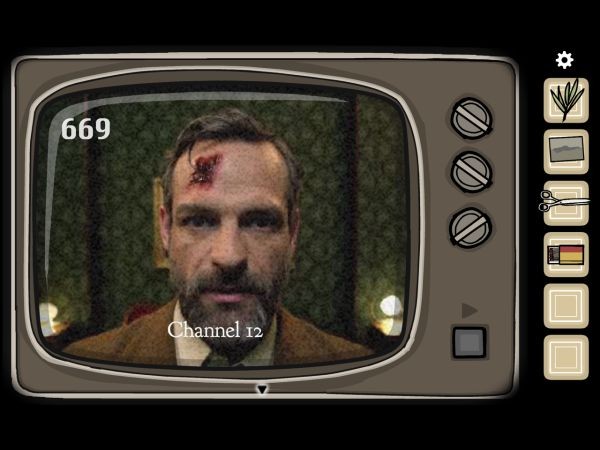
Switch to channel 12 and the same man will now tell us to switch to Channel 67. Let’s do it! We hear the man quoting the things written on the new piece of paper on the typewriter, and we get the answer:“the lake”.
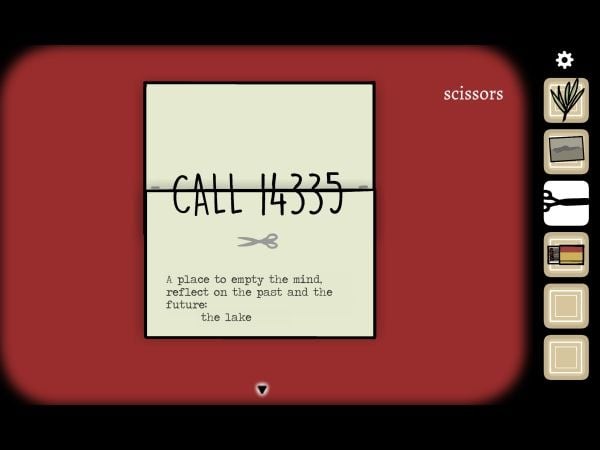
25. Go back and left and tap the typewriter, then write:the lake. Use the scissors to cut the paper, then drag the bottom part up to the indicated marker to reveal the phone number:
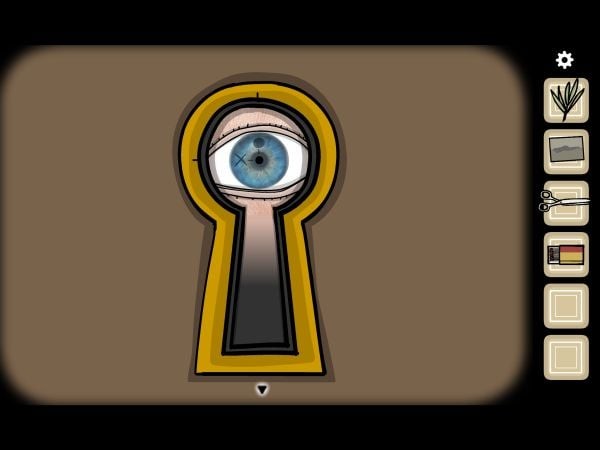
26. Go left and tap the phone, then dial 14335. The man tells you to look through the key hole, so go to the door and tap to the keyhole until you get this spooky clue (a new setting for the clock):
27. So tap the clock to the left and set it to the indicated hours:small one at XII and long arm at IX. Pick up the triangle.
28. Go left and tap the night stand to the left. Use the triangle key to open the bottom drawer. Then do the same with the top drawer, and swipe through all the files to find the clues to the books similar to the one below:
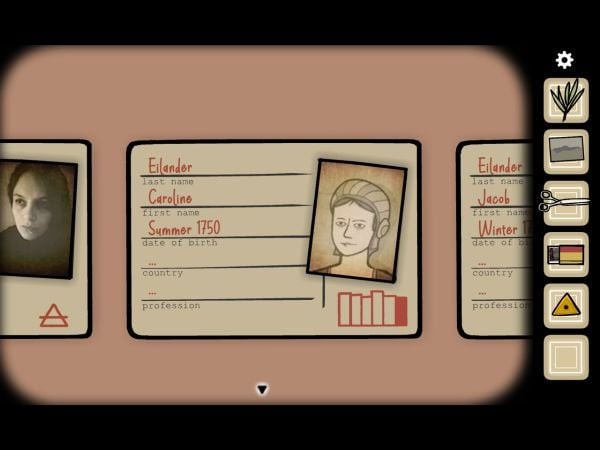
Also notice that some files have some symbols. Finally, from the bottom drawer, swipe all the way to the right to Laura Vanderboom’s profile and pick up the prescription.
29. Next, go to the right night stand and use the key to open the top drawer to get the Slide 2, and then get the handkerchief from the bottom one. Fortunately, no more scrolling needed!
30. Go left and tap the mirror. Take the cigar from the man’s hand.
30. Now go left again and place the photo in the Case 23 evidence folder. Put the prescription there as well.
Now arrange the books in the order shown by the files:Robert Hill – False Accusations, Vincent van Gogh, A. Vanderboom, J. Eilander – My Family, Ida Reiziger – The Art of Fortune Telling, C. Eilander:
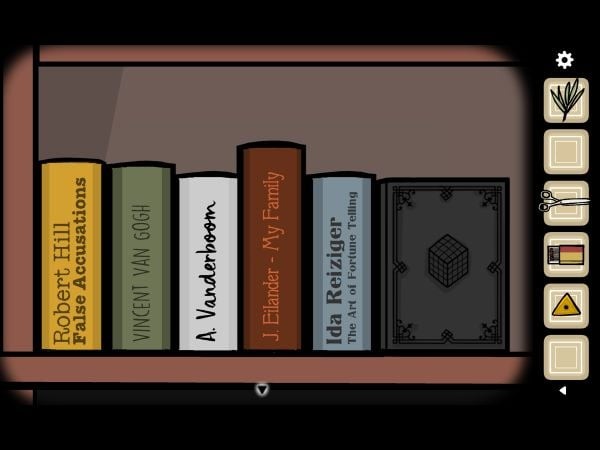
Tap the book and read through it, then pick up the glass eye and the wooden block.
And this is it for now. We’re working on completing the Chapter 1 in Cube Escape:Paradox and we’ll update this article with the rest of the walkthrough soon. So make sure to come back soon for the updated version.