AEM:Lost Ruins Revenge on Atlantis Chapter 2 ウォークスルー
はじめに
Adventure Escape Mysteries:Lost Ruins Revenge on Atlantis Chapter 2 では、パズルを解くスキルが試され、隠されたオブジェクトを見つけるのが簡単ではない古代の寺院に連れて行かれます。 Temple を含む 3 つの異なる部屋を利用できます とゴールド ルーム .テンプルにアクセスするのに特別な鍵は必要ありませんが、ゴールド ルームに行くにはトリッキーなパズルを解く必要がある場合があります。パズルを解くには、地図を見たり、本を読んだりして手がかりを見つけ、それらを利用して必要な形を見つける必要があります。さらに、アトランティスの失われた遺跡の復讐、第 2 章のチュートリアルを読むことができます すべての答えと解決策を一度に見つけることができます。
Adventure Escape Mysteries:Lost Ruins Revenge on Atlantis Walkthrough Chapter 2
兵士とその船長は、ピーターとソチを大きな穴に蹴り落としました。両方のキャラクターは、シーンを検索して方法を見つけることにしました。事件の最中にピーターが怪我をしたため、それは不可能であり、ソチはピーターを治療するための医療キットを見つけなければなりません.それとは別に、Xochi は隠されたオブジェクトを発見し、彼の治療とドローンの修理のためにピーターに戻るために一人でテンプルに向かう必要があります。本を読んで旅を始めましょう。
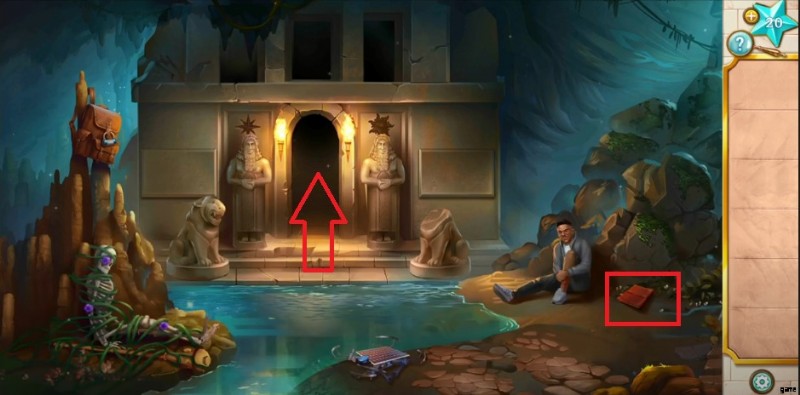
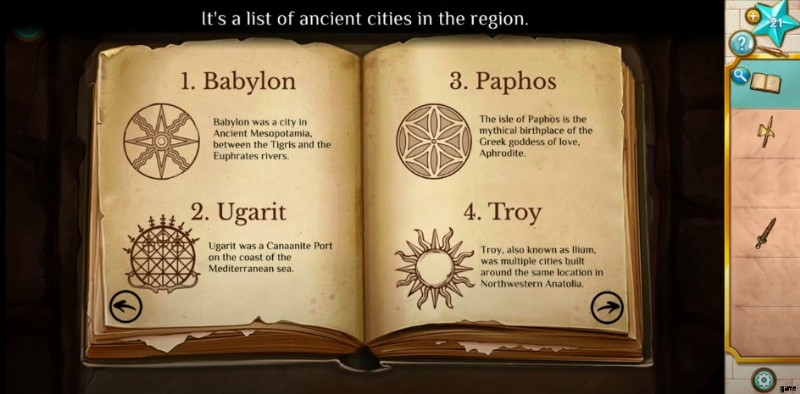
- まず、日誌を手に取ってください バーンズ教授の近くにいて、それを読んで手がかりを見つけてください。
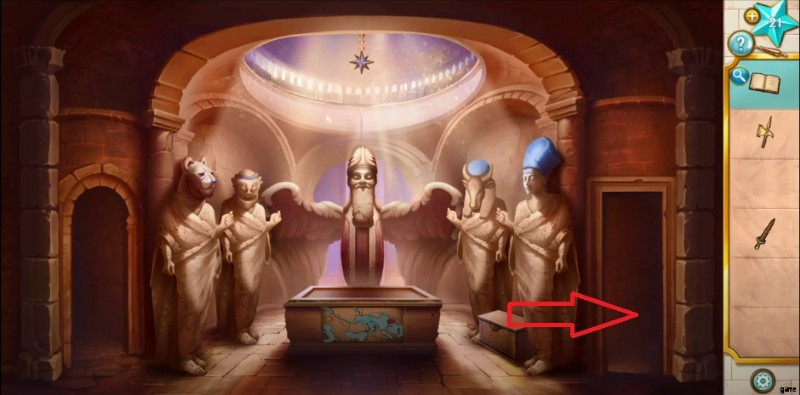
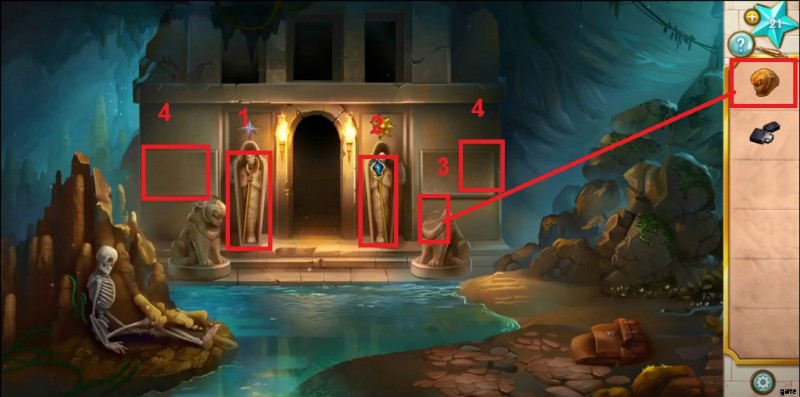
- 通路をタップして通り抜け、寺院に入ります。寺院に到着すると、5 つの彫像を発見します。中央の彫像は Lamassu です。 .
寺院
- 最初の彫像の手から剣を回収し、インベントリに追加します。
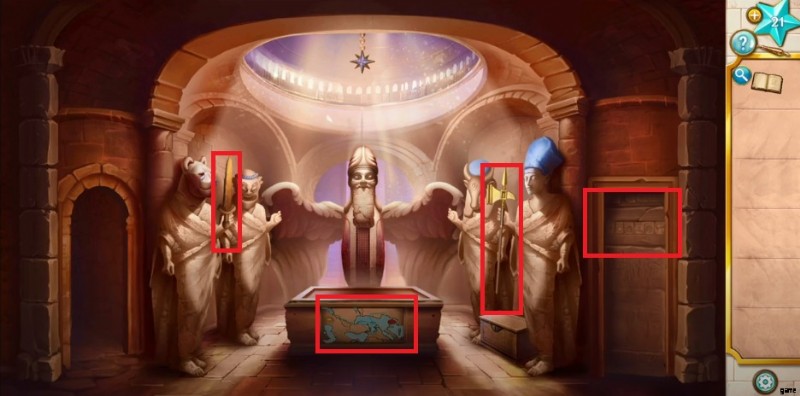
- 右側から 1 番目の像に向かい、その手からウォーハンマーを手に取ります。
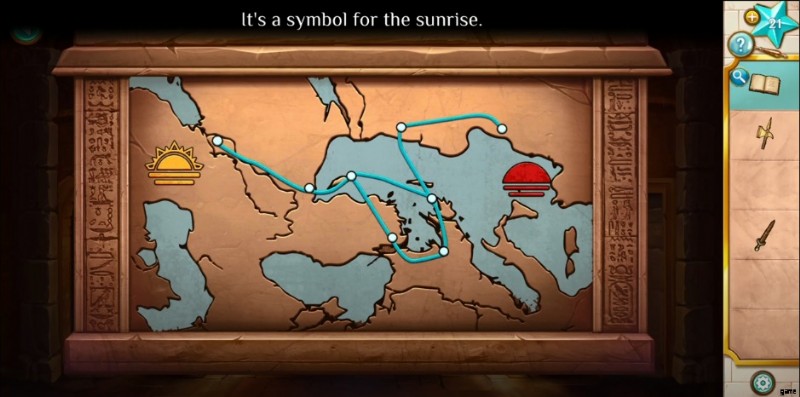
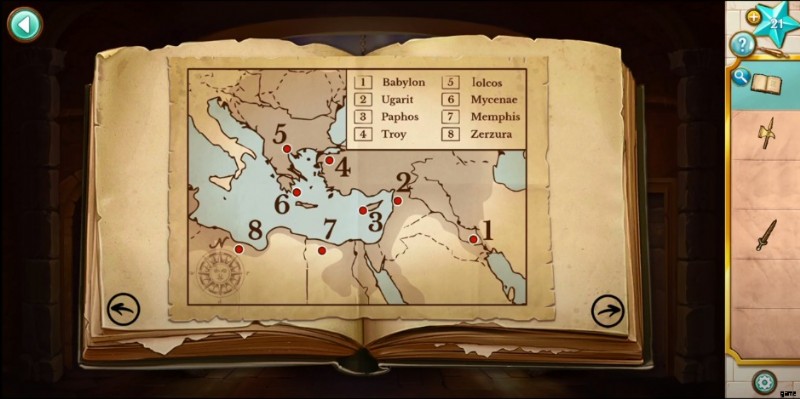
- 主な像の下に印刷された地図をクリックして、日の出のシンボルを見つけてください。
- 次に、「ゼルズラへの最短経路をたどる」という文を含む最初の彫像の右側にあるパズルをクリックします .」
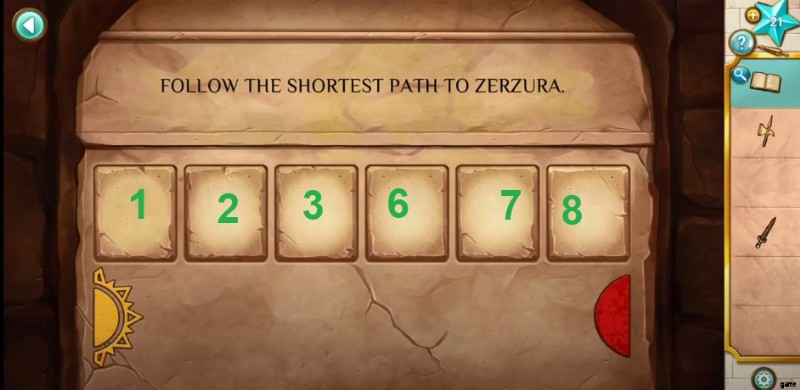
- ここでの最終的な目標は、日誌を使用して地図上の場所と最短経路を検出することです。すべてのシンボルを見つけたら、下の画像に示すようにロックに設定する必要があります。
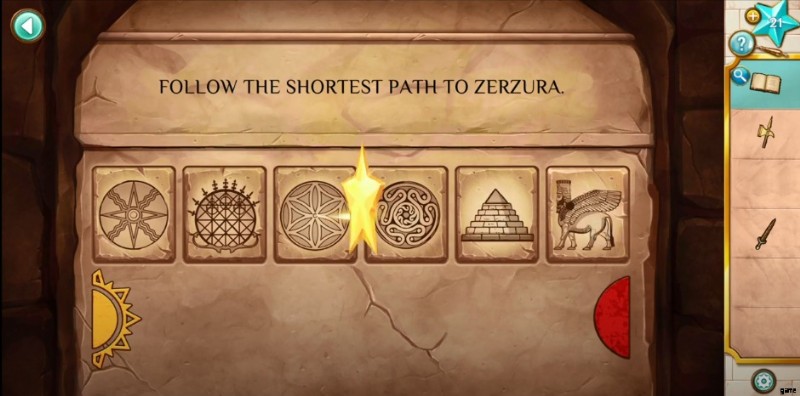
- まもなく、秘密の通路が開き、そこを通って新しいシーンを発見できるようになります。
神殿を出て外へ
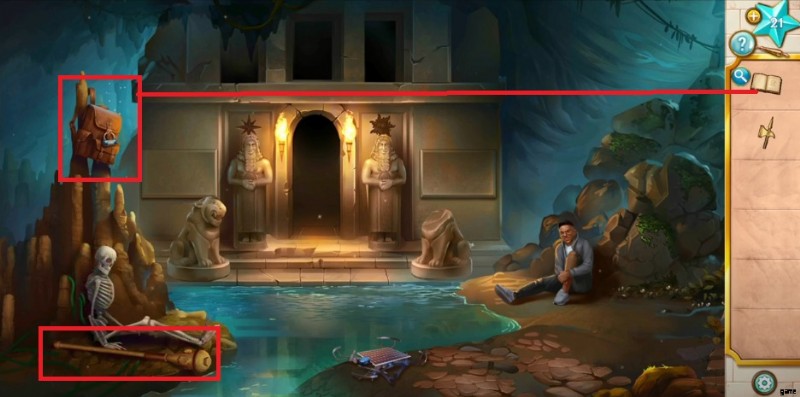
- Before going through the passageway, you should leave the temple, select the sword, and use it to get the Beekeeper Staff from near the skeleton.
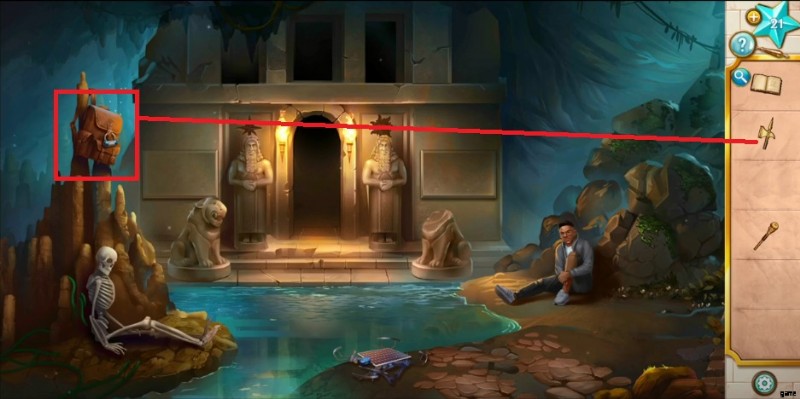
- Next, use the Warhammer from the inventory to get the bag from the height above the skeleton and crack the lock.
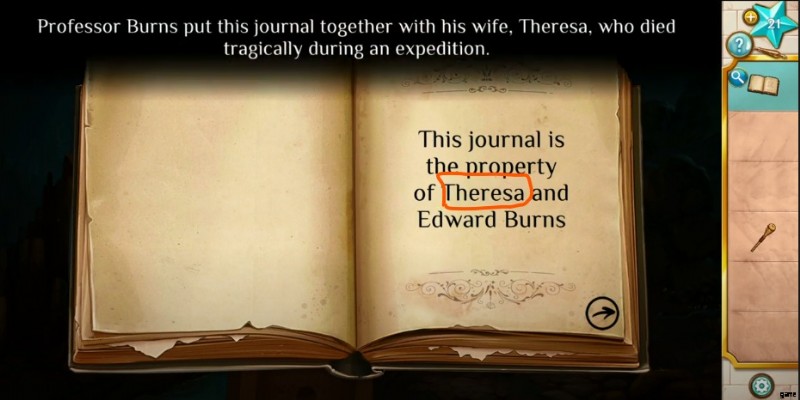
- To find the code, you need to open the book once again and discover the code, which would be “Theresa .”
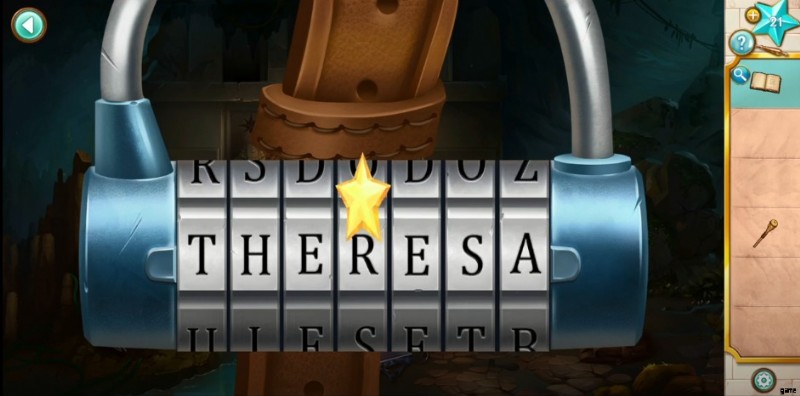
- Head to the bag again and tap on it to enter the passcode “Theresa” to discover the following hidden objects:Medical Kit and Lighter .
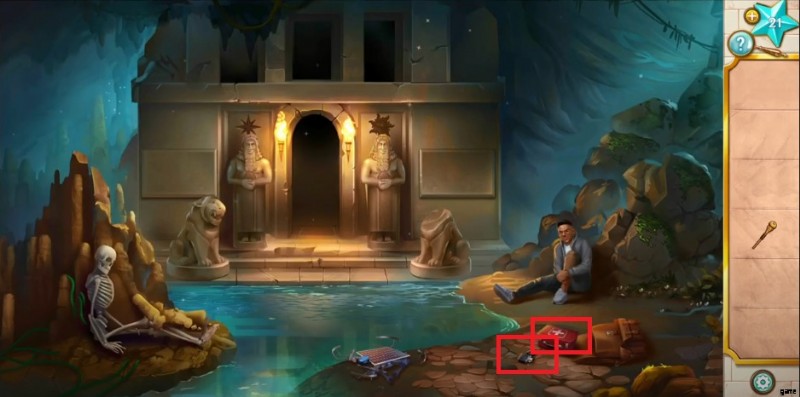
- After that, select the Medical Kit and help Peter to recover.
Return to the Temple and Go through the Passageway
After helping Peter, you should go inside the temple and pass through the secret passageway to reach the room full of gold and jewelry. Note:You should be careful as the room is cursed.
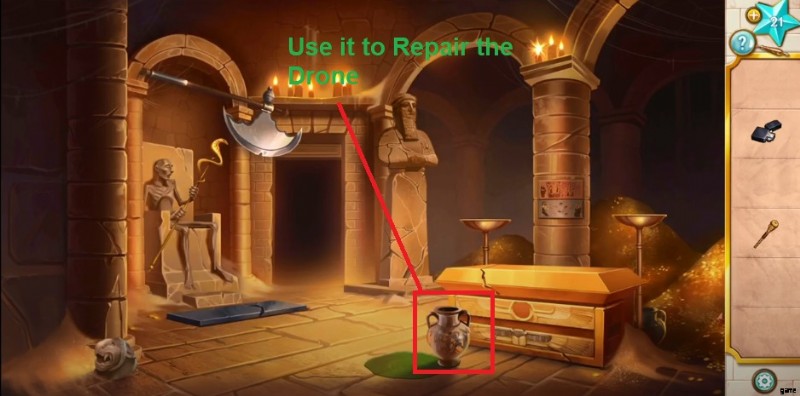
- At the start, pick up an Amphora of Oil from the ground and take it outside to Peter. Select the Amphora from your inventory and pour it on the Drone to repair it.
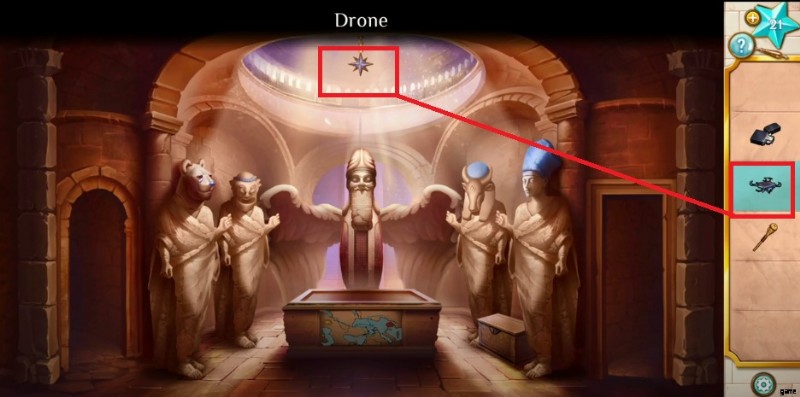
- Tap on the drone to collect it and add it to your inventory for later use.
- Return to the temple, select the drone, and tap the start above the statues to release it and collect the Star of Ishtar .
Gold Room
- Visit the Gold Room by tapping the secret passage and using the lighter to light up all lamps.
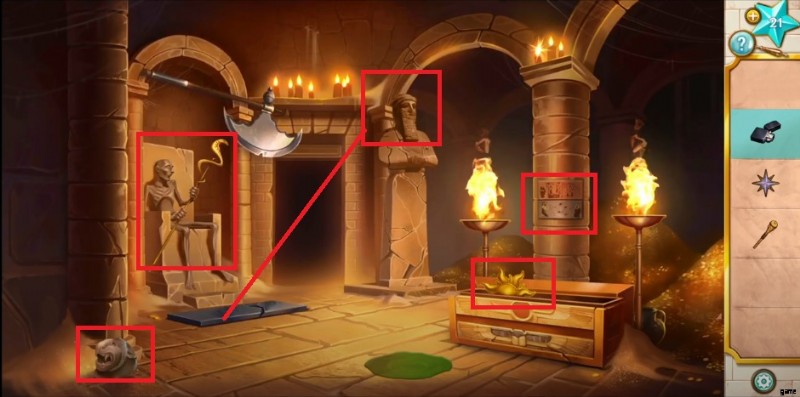
- Lightning the lamp may help you remove the box’s cover and discover a mini-game to play.
- Once you solve the puzzle, pick up the Sun of Smash from the box inside and add it to your inventory. Before leaving the scene, don’t forget to pick up the lion head on the left side from near the sand.
- There’s a statue on the right of the passageway that you must break by doing repetitive taps . Click the Heavy Statue Head and add it to your inventory.
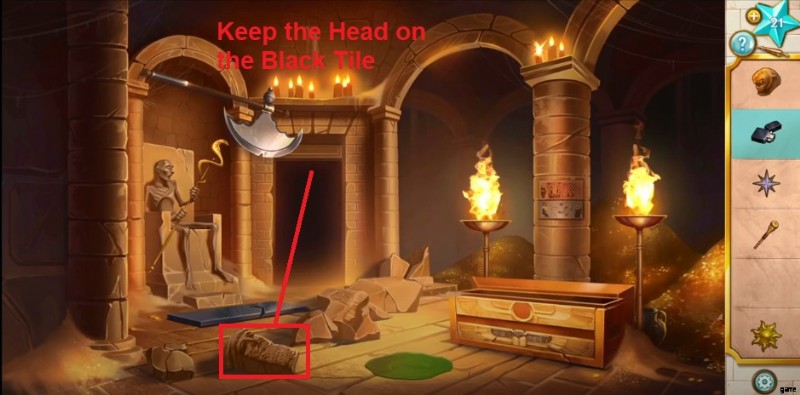
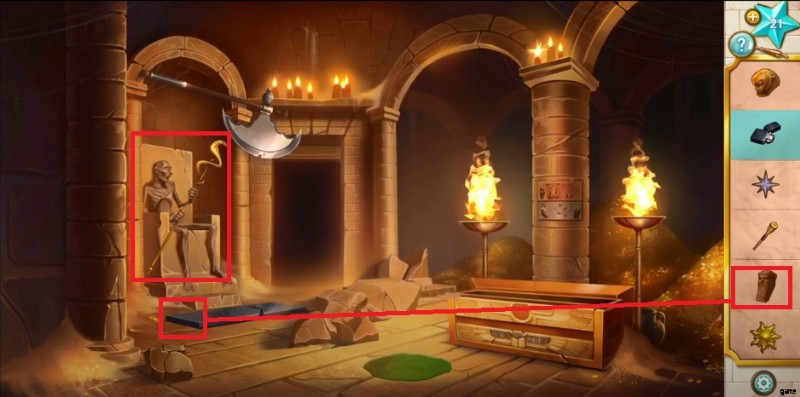
- Select the statue head from the inventory and place it on the black tile that in itself is a trap. Next, collect the Vintner Staff from the mummy and hit the back button to reach the previous room.
- Before leaving the area, don’t forget to see the painting of ancient people printed on the pillar of the right side.
Temple
- After reaching the previous room, select the Beekeeper Staff from the inventory, tap the lion’s statue, and give the stick to it.
- Next, select the Vintner Staff and give it to the statue next to the lion.
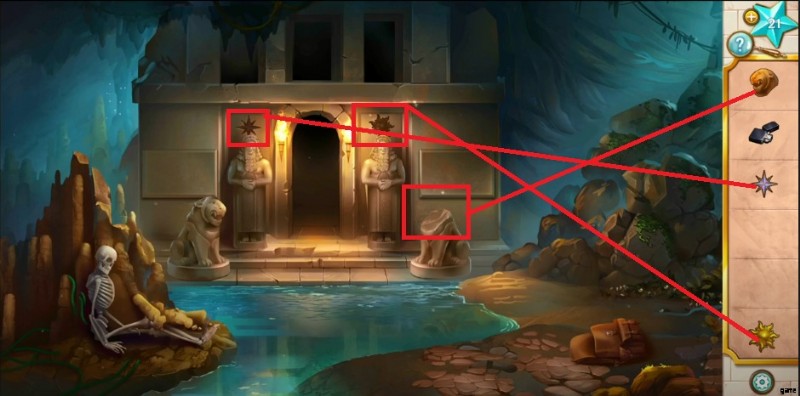
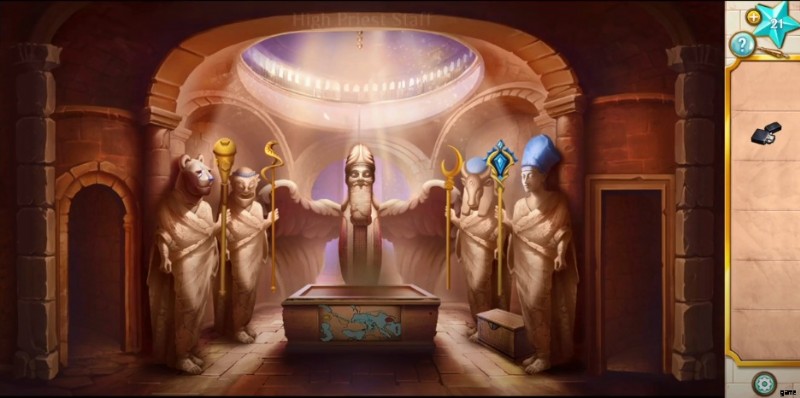
- Leave the temple for a while and head to the statue standing on both sides of the entrance. Select the Sun of Shamash and Star of Ishtar, and place them above both figures to open the coffin and collect Scythe Staff and High Priest Staff .
- Next, select the lion head from the inventory and place it on the lion with the missing head.
- The earth shakes and opens two windows as you place the head. Discover the paintings to find clues and get into the temple.
Return to Temple
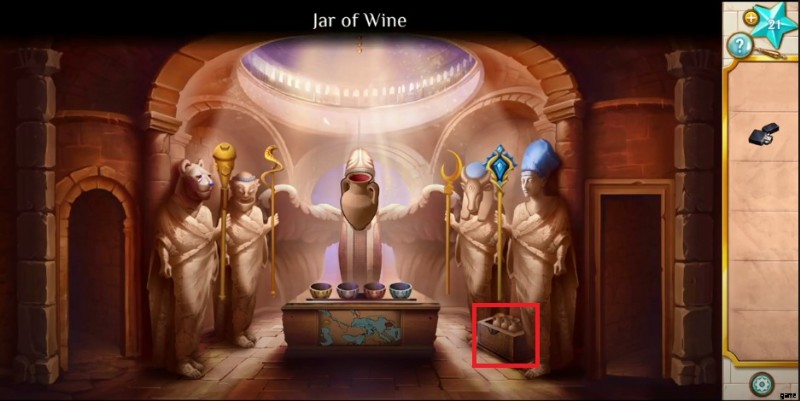
- Before leaving the temple, we’ve collected two objects and gave them statues on the left side. Now, there are two other sticks available that you must offer to the figures on the right side, as shown in the image given below.
- After that, a platform appears on the spot, holding four cups and a key. Tap the key and use it to open the trunk between two statues to collect a Jar of Wine , along with other jars and One Empty Jar .
Return to the Gold Room
- Go through the passageway to reach the Gold Room, where you must choose the Empty Jar and fill it with Amphora of Oil spread on the ground.
- Now, leave the temple and head to the pond, where you must fill another empty jar with water .
Go Back to Temple
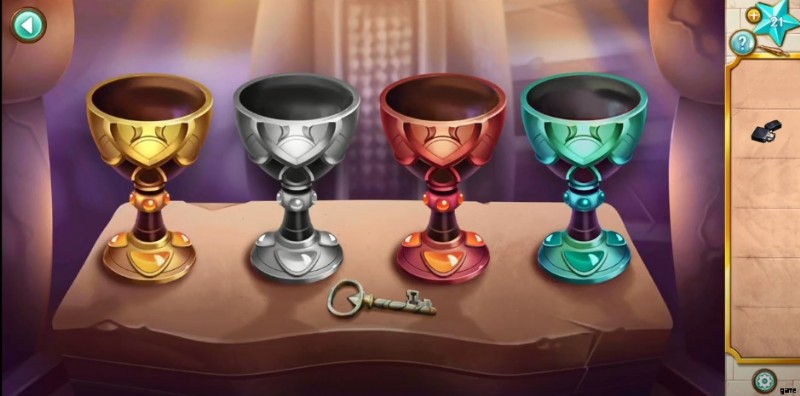
- After collecting Amphora of Oil , you should return to the temple where you discovered four cups. Select the Jar of Honey from your inventory and pour it on the silver cup, and for others, follow the steps given below:
- Silver Cup – Jar of Honey
- Red Cup – Jar of Wine
- Yellow Cup – Jar of Water
- Green Cup – Jar of Amphora of Oil
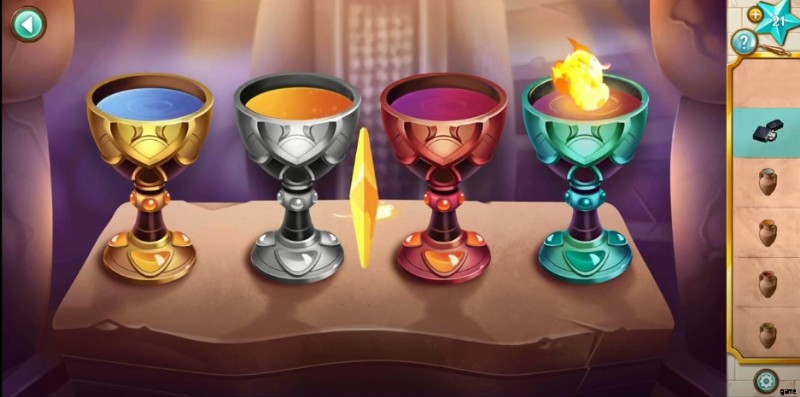
- After pouring jars to their related cups, you have to select the lighter from the inventory and use it to light up fire on the green cup.
- Something happens on the spot as you solve the puzzle; meanwhile, stairs appear behind the statues.
As it seems, Lost Ruins:Revenge on Atlantis Chapter 2 has been ended; meanwhile, the game takes you back to the Ziggurat Chamber .
Back in Ziggurat Chamber
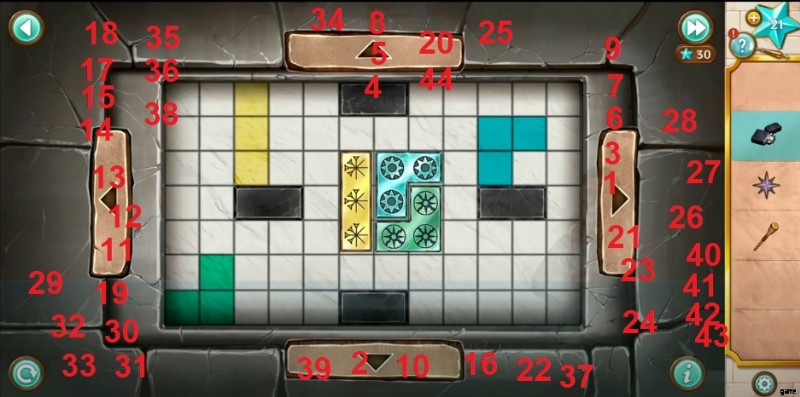
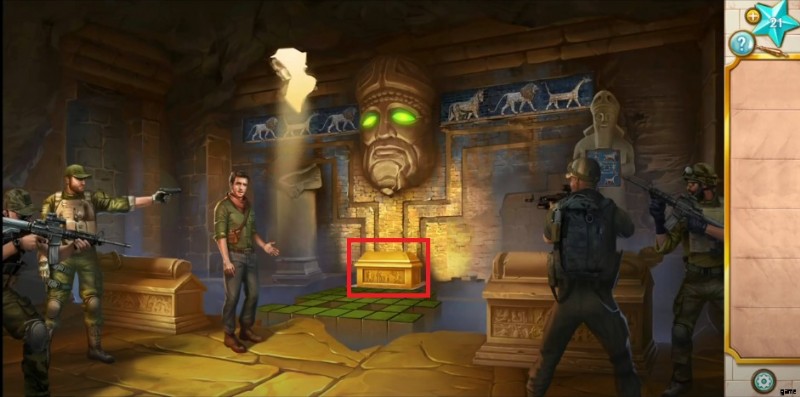
- Upon reaching the Ziggurat Chamber and ending the discussion with soldiers, tap the treasure box to help Professor burns reach there and unlock to play a mini-game.
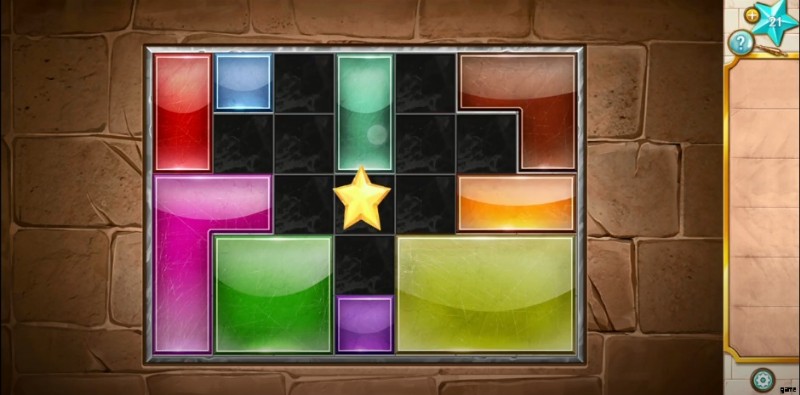
- When playing the mini-game, your objective is to slide the colored pieces around until all black tiles are uncovered.
That’s the end of AEM:Lost Ruins Revenge on Atlantis Chapter 2 Walkthrough .