Raft – コンプリート アチーブメント ガイド

このガイドでは、Raft で 100% の実績を達成するために知っておくべきことをすべて説明します。
Raft ですべての実績を取得する方法
ガイド
すべての成果をさまざまなカテゴリに分類して、すべてを整理し、まだ取得する必要がある成果を簡単に見つけられるようにしました。カテゴリは次のとおりです。
サバイバーの実績
- これらは、一定の日数を生き残るために必要な実績です。
ハンターの実績
- これらは、動物の種類ごとに一定数を殺す必要がある実績です。
ビルダー、ギャザラー、ペインターの実績
- これらは、いかだで土台を構築し、スクラップ フックでアイテムを収集し、いかだでブロックをペイントすることに基づく実績です。
ラングラー、ホーダー、ファーマーの実績
- これらは、動物の捕獲、コンテナの配置、作物区画の配置に基づく実績です。
歴史家の功績
- これらは、ストーリーの場所で見つけたメモに基づく実績です。
ストーリーの実績
- これらは、ストーリーに関連する特別な場所を見つけることに基づく実績です。
ゲームプレイの実績を通じて獲得
- これらは、ゲームを自然にプレイすることで得られる成果です (少し研ぎ澄まされます)。
隠された実績 (ネタバレ注意)
- これらは Raft の隠された成果のすべてです。自分で調べたい場合は、このセクションを無視してかまいません。
実績
それぞれの成果について、可能な限り深く掘り下げて説明します。ただし、Raft は本質的に非常に反復的なゲームであるため、このガイドでは反復を避けるようにします.
歴史家の実績など、一部の実績には多くの詳細が必要です。サメ 1 匹、サメ 10 匹、サメ 50 匹をそれぞれ倒す必要がある 3 つの Shark Hunter 実績のようなその他の実績では、実績ごとに同じ方法が使用されるため、1 つの段落ではなく、3 つの実績すべてを取得するための 1 つの段落のみが使用されます。
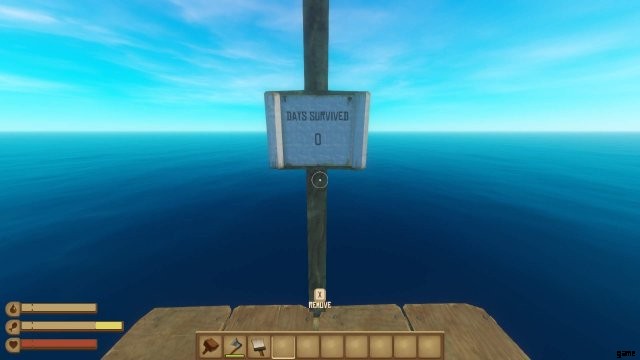
生存者の実績
初心者サバイバー
- 1日生き残る
中間サバイバー
- 7 日間 (1 週間) 生き残る
エキスパートサバイバー
- 30 日 (1 か月) 生き残る
マスターサバイバー
- 365 日 (1 年) 生き残る
Survivor の一連の実績を取得するには、忍耐が必要です。この成果を非常に退屈なものにしている 1 つのことは、日数が複数の世界に蓄積されないことです。たとえば、Expert Survivor を取得するには、2 つの異なる世界で 15 日間生き残ることはできません。30 日すべてを 1 つの世界で行う必要があります。
Raft の実績のほとんどは、難易度 Easy で取得するのが最も簡単です。これは、サバイバー セットとハンター セットに特に当てはまります。難易度ハードでは、フレンドの助けなしではリスポーンできないため、ソロで長時間生き残ることは非常に困難です。イージー難易度では、ほとんどペナルティなしで好きなだけリスポーンできるため、必要な日数の間生き残ることはただの待機ゲームになります。
Raft の昼夜サイクルは 20 分続きます。これは、マスター サバイバーを取得するには、1 つのワールドで約 122 時間を費やす必要があることを意味します。ただし、これは寝ることで短縮できます。 Raft で寝るときは、午後 8 時から午前 4 時まで、つまり 1 日の約 1/3 をスキップします。これにより、毎晩寝ると、約 41 時間のプレイ時間を節約できます。
サバイバーの各実績の最大プレイ時間は次のとおりです。
初心者サバイバー
- 20 分
中間サバイバー
- 2 時間 20 分
エキスパートサバイバー
- 10時間
マスターサバイバー
- 121 時間 40 分
カレンダーを使用して、生き残った日数を追跡できます。これらは 2 つの釘と 2 つの厚板で作成できます。
友達と協力ワールドをやっている場合。そのフレンドは、そのワールドからサバイバー アチーブメントを受け取るために、ゲーム内プレイ時間の少なくとも半分の間、あなたと一緒に筏に乗っている必要があります。
ハンターの実績(序盤)
シャークハンター
ビギナーシャークハンター
- サメを 1 匹倒す。
中級サメハンター
- サメを 10 匹倒す。
熟練のサメハンター
- サメを 50 匹倒す。
サバイバーの実績セクションで述べたように、難易度イージーですべてのハンターの実績を取得するのが最も簡単です。そうすれば、動物のダメージを最小限に抑えることができ、死んでもペナルティなしでリスポーンできます。
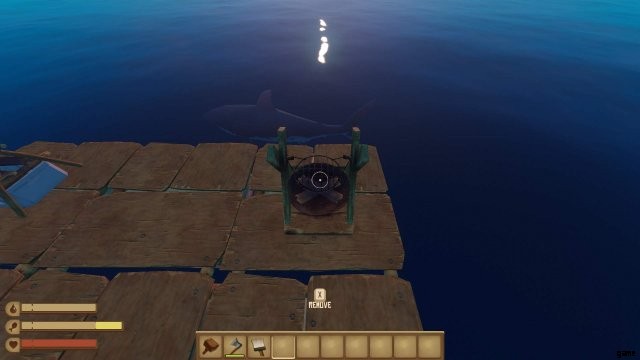
ゲームをプレイしていると常にサメが筏を追いかけてくるので、単純にゲームをプレイしているだけでサメを簡単に殺すことができます。サメはいかだから弓で撃つことができますが、それは多くの矢を消費します.また、水中を泳いでいるときに槍で刺すこともできます。
サメを殺す最善の方法は、サメに正面から向き合って泳ぎ、サメが口を開いてあなたを噛むときに顔を刺すことです.タイミングが合えば、バイトを中断し、ダメージを与えることなく泳いで通り抜けます。この最初の攻撃の後、あなたが刺した後、彼らは少しの間泳ぎ去ります。フリッパーを装備していれば、サメをより簡単に追いかけることができ、代わりに尾を 3 ~ 4 回刺すことができます。
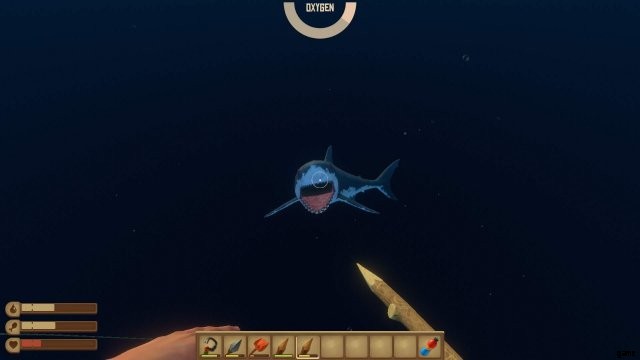
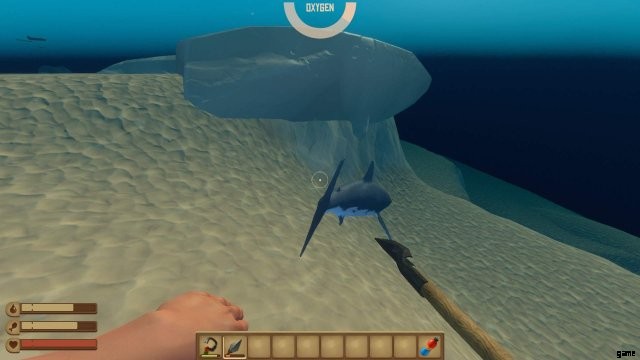
難易度イージーでは、サメは木製の槍で 16 回、金属製の槍で 15 回突き刺して殺します。金属製の槍の耐久性も大幅に向上しています。
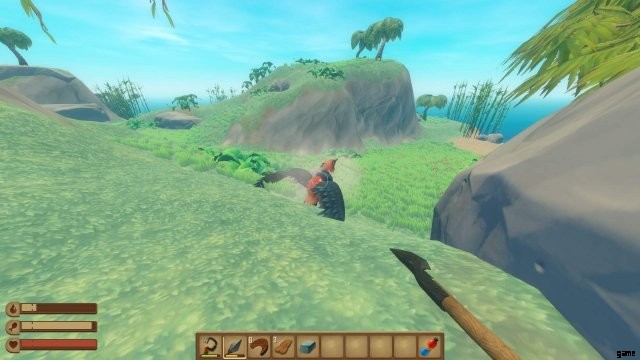
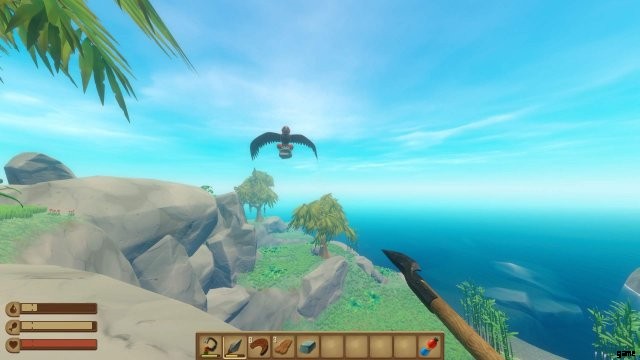
バードハンター
初心者バードハンター
- 鳥を 1 羽倒す。
中級バードハンター
- バードを 10 羽倒す
エキスパート バード ハンター
- バードを 50 羽倒す
鳥の殺害は、さまざまな方法で行うことができます。いかだの周りを飛んでいるときに矢で撃ち落とすことも、牧場をつついている間に刺したり撃ったりすることもできますし、かかしを作って畑をつついている間に刺したり撃ったりすることもできます。
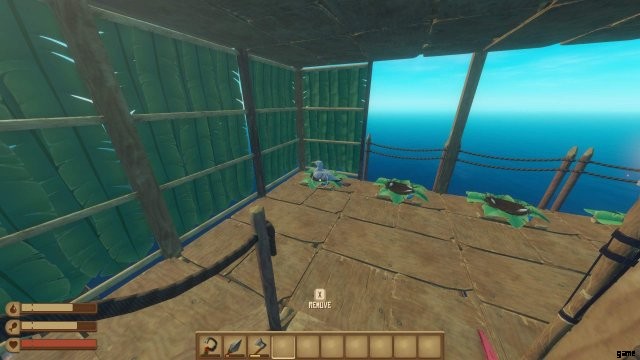
ただし、鳥を殺す最も簡単な方法は、鳥の巣を作り、10〜20個をいかだに置くことです.これには、巣ごとにヤシの葉6枚、厚板6枚、シャコガイ1枚が必要です。筏に鳥の巣を置くと、鳥が寄ってきます。彼らは巣の中に羽を残し、しばらくの間巣の中にとどまります。彼らがそこに座っている間、あなたは彼らを急いで金属の槍で1回攻撃するか、弓から1本の金属の矢で殺すことができます.鳥に近づくと飛んでいき、飛んでいる間に槍でヒットボックスを打つのが難しい場合があるため、弓の方法ははるかに簡単です.
ハンターの実績 (ゲーム中盤)
スクリーチャーハンター
ビギナー スクリーチャー ハンター
- スクリーチャーを 1 体倒す。
中級スクリーチャーハンター
- スクリーチャーを 10 体倒す。
エキスパート スクリーチャー ハンター
- スクリーチャーを 50 体倒す。
スクリーチャーは、大きな島に生息する巨大な赤と黒の鳥です。すべての大きな島にはスクリーチャーが 1 人います。つまり、エキスパート スクリーチャー ハンターを入手するには、少なくとも 50 の大きな島を訪れる必要があります。
スクリーチャーは、島から岩を拾い上げて頭に落として攻撃します。あなたを殺すのに数個の岩がかかるだけなので、金切り声がどこにあるか常に細心の注意を払う必要があります。
着地したスクリーチャーを槍で突き刺して岩を拾うことは可能ですが、島を走り回らなければならず、スクリーチャーが着地した場所に間に合うようにたどり着くのが難しくなります。それらを刺します。槍でスクリーチャーを攻撃することも危険です。なぜなら、スクリーチャーは地面から離陸するとすぐにその岩をあなたに落とす可能性があり、ダメージを受けるのを避けるのに十分な時間が与えられないからです.
スクリーチャーを倒す簡単な方法は、島の高いところに弓を持って行き、飛んでくるスクリーチャーを撃ち落とすことです。スクリーチャーを倒すには、通常の難易度で金属の矢で 7 発撃つ必要があります。
毒フグハンター
ビギナー・ポイズン・フグ・ハンター
- ポイズンフグを1匹倒す。
中級毒フグハンター
- 毒フグを 10 体倒す。
熟練の毒フグハンター
- 毒フグを 50 体倒す。
毒フグは小さな黄色いフグで、大きな島の周りで見られます。大きな島ごとに 4 ~ 5 匹の毒フグが生息しているため、殺す方法を習得すれば非常に簡単に飼育できます。
Poison-puffers は、Minecraft の Creepers とほとんど同じように機能します。近づきすぎて長時間泳ぐと、爆発して毒の雲になり、あなたに多くのダメージを与えます.それらを爆発させた場合、キルとしてカウントされないので注意が必要です.
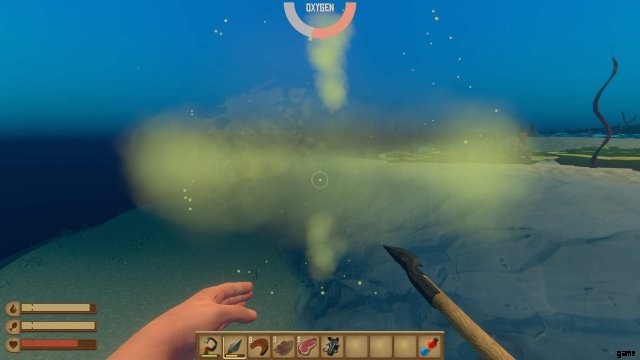
それらを殺すには、弓または槍を使用できます。弓を使用すると、それらを殺すのに3本の金属の矢が必要になります。これは、リスクが最も少なく、時間もかからないため、最も簡単な方法です.槍を使いたい場合は、金属の槍で 4 回刺す必要があるので、足ひれも使用することをお勧めします。槍を使用しているときに足ひれを使用しないと、毒フグが爆発しないように、突き刺すたびに毒フグと十分な距離を取るのが難しい場合があります。 Minecraft のクリーパーとは異なり、ポイズン フグが爆発アニメーションを開始すると、離れて泳いで停止することはできません。
イボイノシシハンター
ビギナー イボイノシシ ハンター
- イボイノシシを 1 匹倒す。
中級のイボイノシシ ハンター
- イボイノシシを 10 匹倒す。
エキスパート イボイノシシ ハンター
- イボイノシシを 50 匹倒す。
イボイノシシは大きな島でも見られます。大きな島ごとに 0 ~ 2 匹のイボイノシシがいます。イボイノシシはあなたに突撃し、あなたとつながるとダメージを与え、あなたを持ち上げて突撃の終わりまで運びます。彼らの突進を避けると、彼らは横滑りして止まり、回復する前に、ある程度の距離を走り続けます。
イボイノシシを殺す最も安全な方法は、岩の上から弓で撃ち、あなたに届かないようにすることですが、すべての島に安全な場所があるわけではありません.イボイノシシを殺すもう1つの方法は、槍を使用して突撃の周りを機銃掃射することです.イボイノシシがあなたに突撃するのを待って、突撃が始まると方向を変えることができないため、彼らがあなたに近づいてきたら、ジャンプするか邪魔にならないようにして、その周りを機銃掃射することができます.ただし、イボイノシシとの間にある程度の距離がないと、これを行うことはできません。イボイノシシがあなたを通り過ぎて突進した後、あなたはそれに駆け寄って尻を1〜2回刺すことができます。その後、回復して再び突進することができます.何度でも刺すことができますが、再びチャージしてダメージを与える前に逃げるのに十分な時間はありません。イボイノシシを殺すには、金属の槍で約 10 回刺す必要があります。
ハンターの実績 (ゲーム後半)
ラーカーハンター
ビギナー・ラーカー・ハンター
- ラーカーを 1 人倒す。
中級ラーカーハンター
- ラーカーを10人倒す。
エキスパート ラーカー ハンター
- ラーカーを50人倒す。
ラーカーは、ヴァサガタンの物語の場所でしか見られない動物です。ラーカーは Raft で 2 匹しかいない動物のうちの 1 つで、プレイヤーがスポーン地点から一定の距離を離れるとリスポーンします。 Vasagatan には 5 つのラーカーがあり、最上階を除く各フロアに 1 つずつスポーンします。
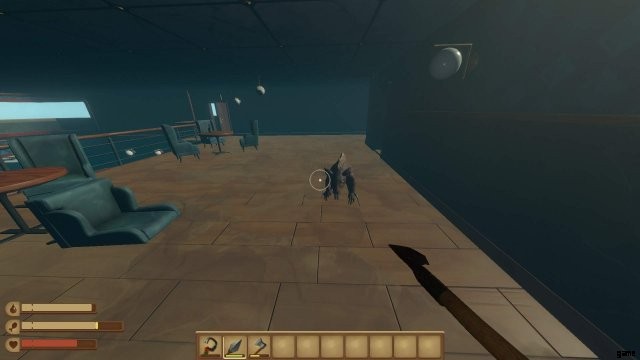
ラーカーには 2 つの異なる攻撃があり、遠くにいる場合はジャンプして攻撃し、近くにいる場合はスワイプします。彼らを殺す最も簡単な方法は、彼らの近くに立ち、槍で突き刺しながら彼らの周りを一周することです.ラーカーは金属の槍で 3 回刺すだけで倒せます。
戻ってくる必要がないように、Vasagatan に行って、そこにいる間に 50 人の潜伏者全員を飼育することをお勧めします。ボートを登りながら各フロアの潜伏者を倒し、外に飛び出して底に戻ることができます。ボートを上ってから下に戻るのにかかる距離は、5 体のセットを倒すまでにラーカーがリスポーンするのに十分なはずです.
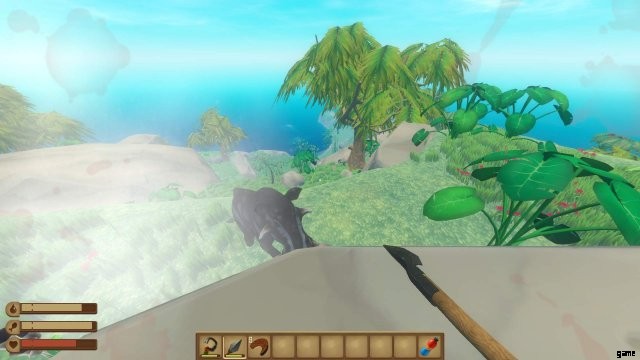
ベアハンター
ビギナー ベア ハンター
- クマを 1 頭倒す。
中級ベアハンター
- クマを 10 匹倒す。
エキスパート ベア ハンター
- クマを50匹倒す。
Expert Bear Hunter の実績は、現在 Raft プレイヤーにとって最も珍しい実績です。このガイドを書いている時点で、プレイヤーの 0.1% がこの実績を獲得しています。
その結果、これらの成果を最も最適かつ効率的な方法で取得する方法を示すために、できるだけ詳しく説明したいと思います.
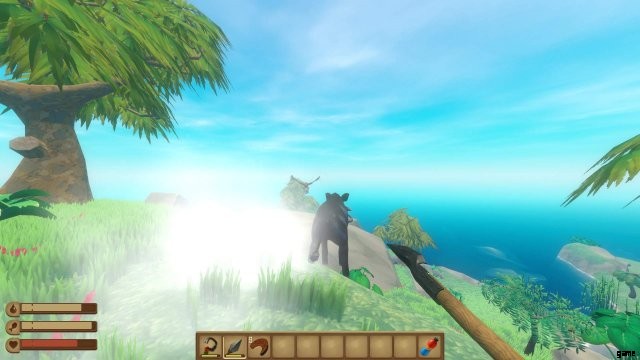
まず、クマ自身について少し。クマはかなりの打撃を与え、3 つの異なる攻撃を行います。彼らには跳躍(ラーカーと同様)があり、スワイプ(ラーカーと同様)があり、ストンプがあります。これらのすべての攻撃では、攻撃を行っている間、クマはほとんど静止しているため、クマの範囲に出入りする必要があります(離れすぎた場合の跳躍は別として)。クマの攻撃の合間に 1 つか 2 つの槍で突き刺すようにしてください。機銃掃射をしているときに攻撃に巻き込まれると、悪いニュースになる可能性があります。弓を使うこともできますが、クマが届かない安全な場所を見つけるのは難しい場合があり、クマごとにかなりの数の矢が必要です.ママベアと戦うときのために、すべての矢を保存しておくことをお勧めします.クマは、金属の槍で 10 回突き刺して殺します。
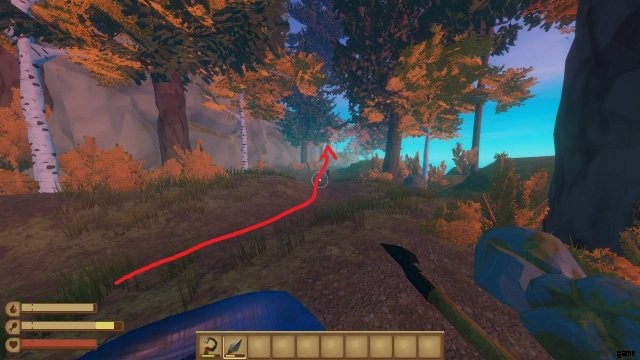
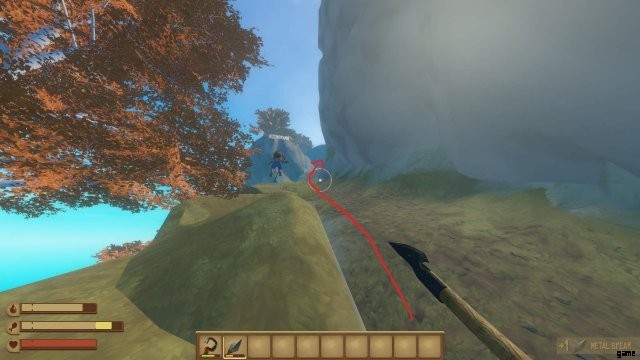
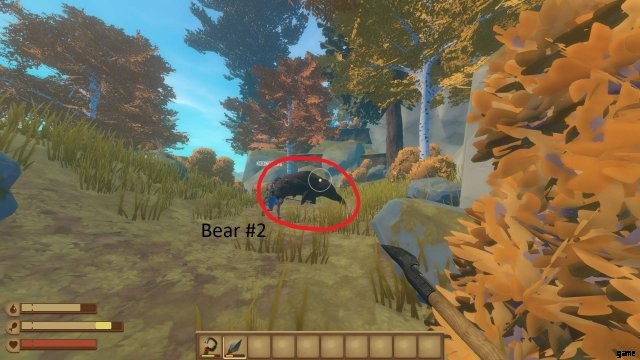
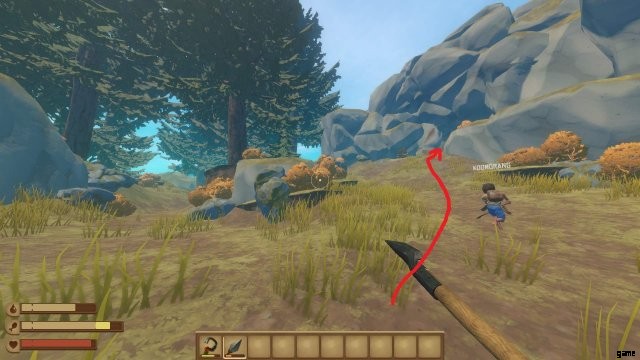
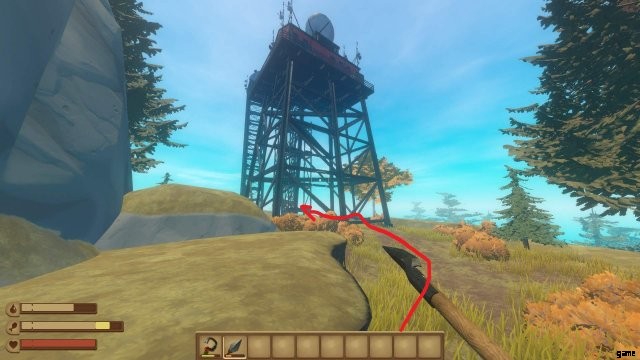
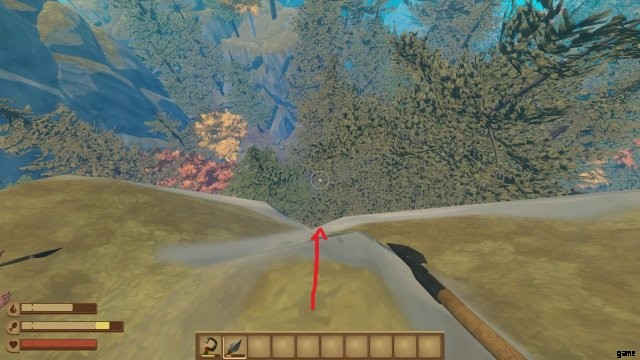
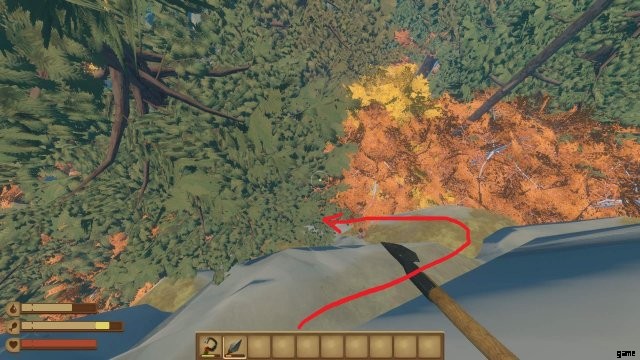
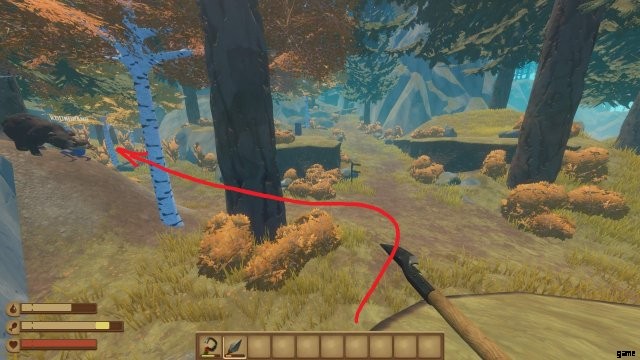
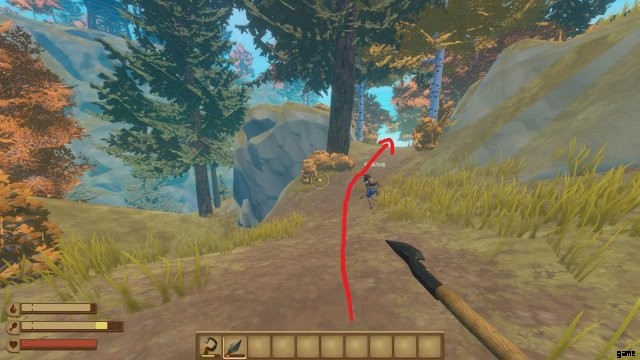
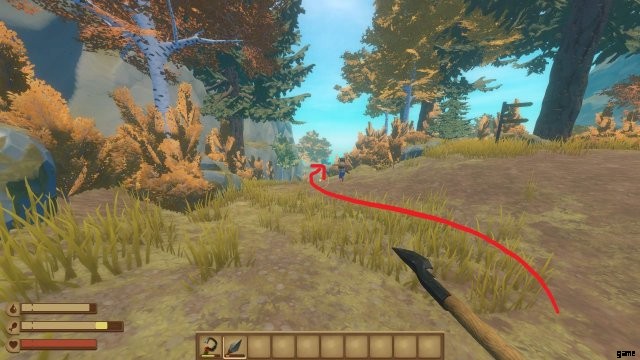
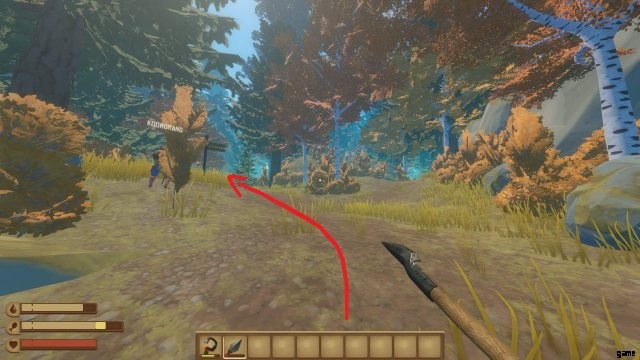
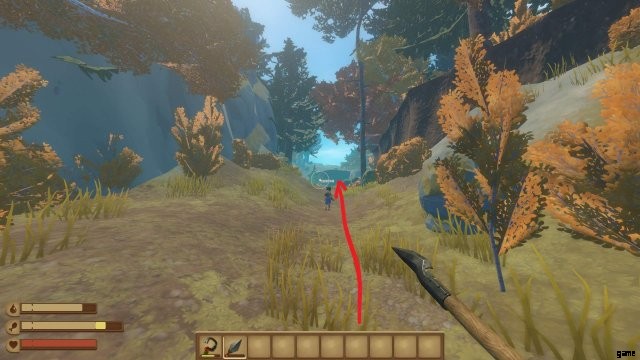
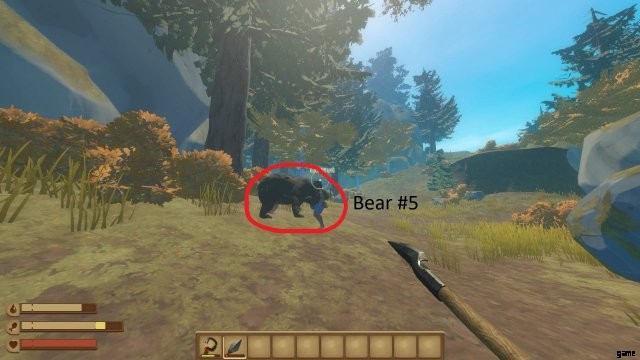
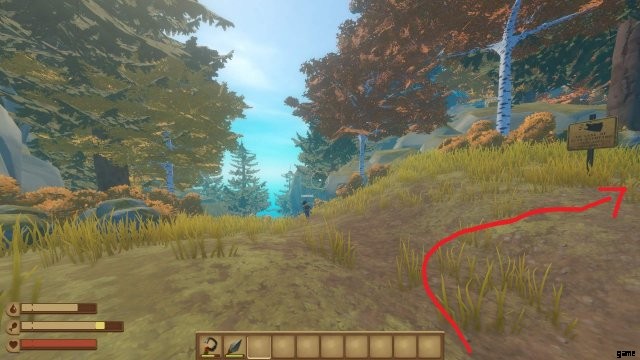
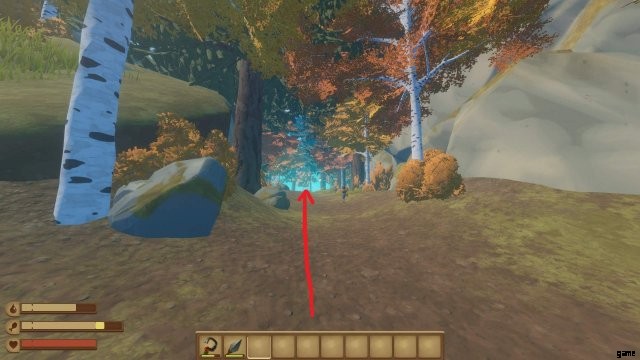
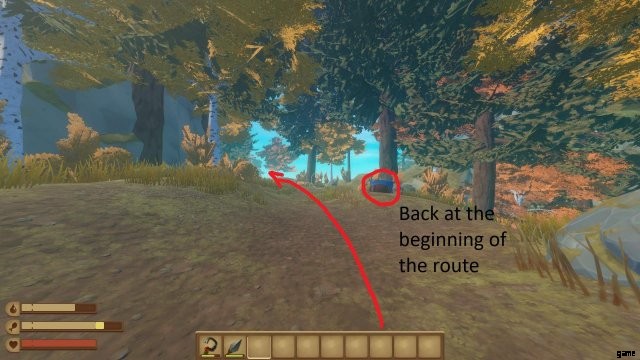
クマはバルボア島とバルボア周辺の小さな島々で見られますが、バサガタンでラーカーが行うように、ここでクマがリスポーンするため、バルボアに固執します.バルボアを探索していると、私がクマを飼育するのに最適なルートを描いた手描きの島の地図を見つけることができます.
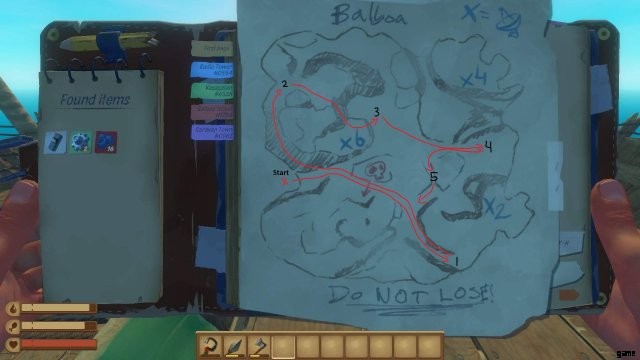
このルートでは、1 ループごとに 5 匹のクマを殺すので、10 ループで 3 つの「ベア ハンター」の実績をすべて取得できます。クマはスポーン地点から一定の距離を離れるとリスポーンするので、問題なくループを連続して実行できるはずです.
手書きの地図はあまり良くないので、スクリーンショットを使ってできる限りルートをプロットしました。
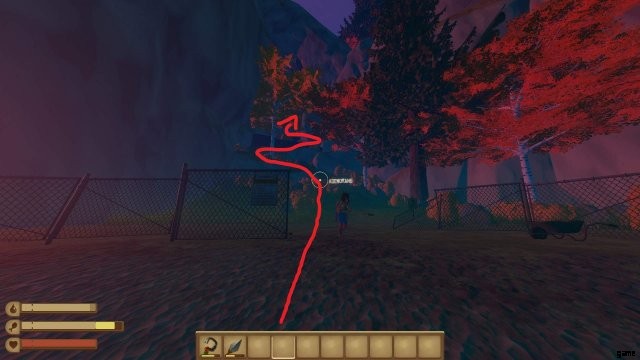

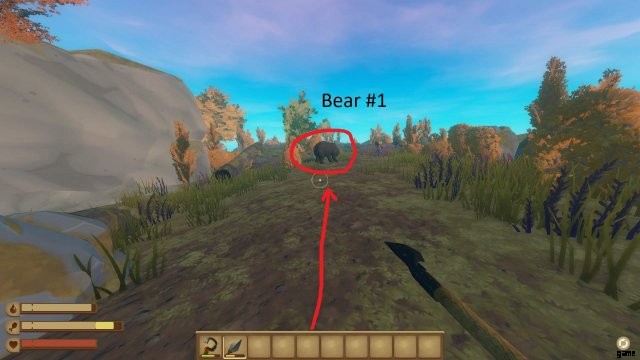
クマ #1 を倒した後、ルートを続けるには方向転換する必要があります。クマ #1 の後ろの道をたどらないでください。
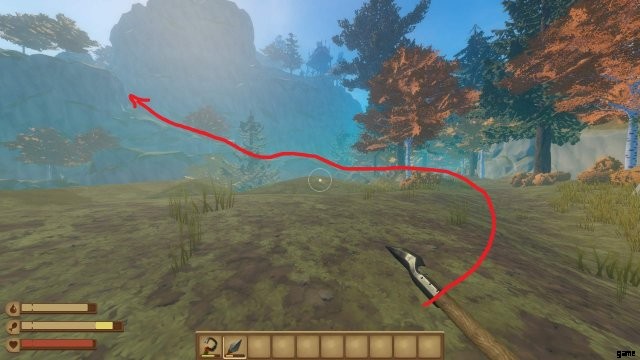
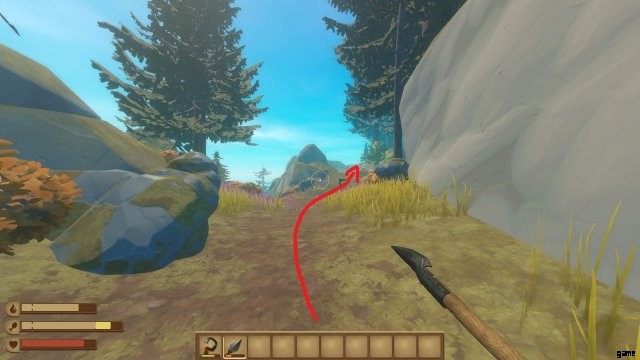
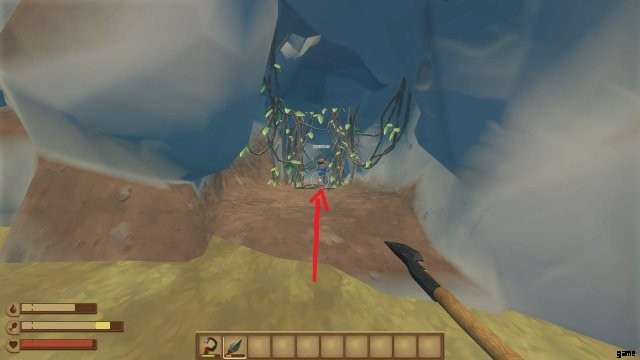
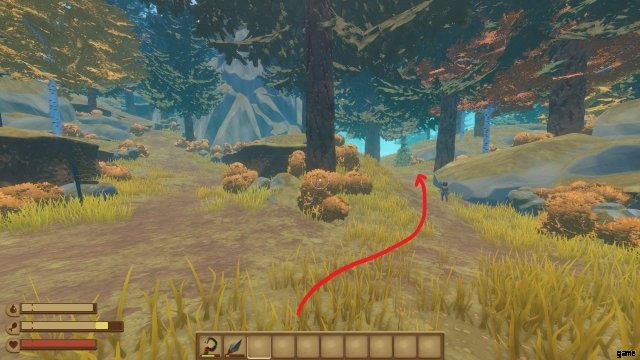
これらのつるを通り抜けるには、ママ ベアの近くの洞窟の中からなたを手に入れる必要があります。
Raft には Skyrim の物理演算がありますが、落下ダメージが少ないため、この崖を降りるには、崖の側面を滑りながらジャンプして勢いを落とすことができます。降りる途中に十分な露頭があるので、落下によるダメージを受けるべきではありません。
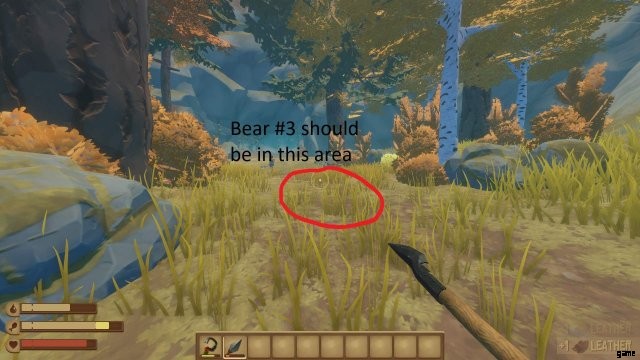
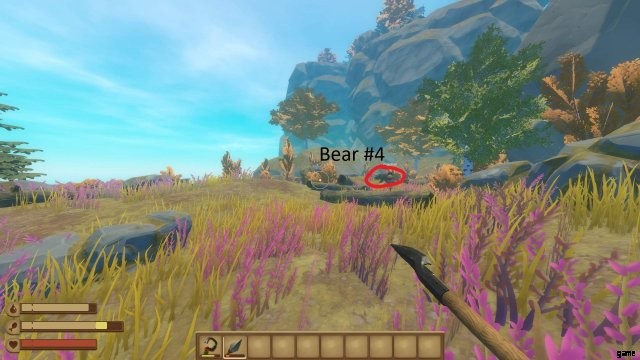
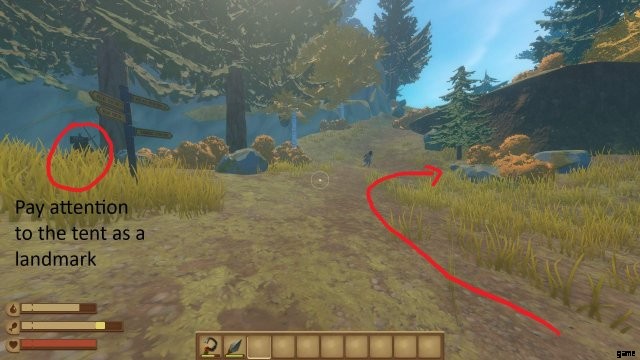
Bear #4 を倒した後は、向きを変えて来た道を部分的に戻る必要があります。どこに行くか迷ったら地図を参考にしてください。
この方法を使用している間は、これら 3 つの実績を達成するのにそれほど時間はかかりません。ガイドの前半で述べたように、バルボア島への最初の訪問でこれら 3 つの成果をすべて取得するのが最も簡単です。クマの攻撃をそらすために友達と一緒にいると、鎧を必要とせず、ダメージを受けることさえないほど、クマと戦うのがはるかに簡単になります.
ビルダー、採集者、ペインターの実績
ビルダー
初心者ビルダー
- 財団を 10 個建設する
中級ビルダー
- 財団を 100 建設する
エキスパートビルダー
- 1,000 の財団を建設する
Builder、Gatherer、および Painter の実績は、Raft の実績のより厳しい側面に分類されます。彼らはかなり率直なので、私が彼らに与えることができるアドバイスはあまりありません.ただし、これらの実績は複数のワールドにわたって追跡されるため、1000 のすべての基盤を構築したり、1 つのワールドで 5000 のアイテムすべてをフックしたりする必要はありません。ビルダーの実績については、ラフトの背面から延長を構築し、余分な木材とプラスチックがたくさんできたら、10×10 チャンクで土台のプラットフォームを構築します。 100 の基盤を構築し、次の 100 の基盤を構築する前にそれらを破壊することで、大規模な構築に伴う世界のラグの量を減らすことができます。
採集者
採集初心者
- 100 個のアイテムをフックする
中級採集者
- アイテムを 500 個フックする
エキスパート ギャザラー
- 5,000 個のアイテムをフックする
最初の 2 つの Gatherer の実績は、標準プレイですぐに達成できます。ただし、5000 個のアイテムをフックするには、かなりの時間がかかります。コレクションネットからアイテムを拾ったり、水中でアイテムを採掘したりすることは、この一連の実績にはカウントされないことに注意してください.バレルは、バレルに含まれるアイテムの数ではなく、フックされた 1 つのアイテムとしてカウントされます。
多くのリソースを節約できるため、Expert Gatherer に向かってグラインドするときは、プラスチック製のフックを使用することをお勧めします。
この功績に対して私ができる唯一のアドバイスは、辛抱強く待つことです。それはいずれ実現します。
ペインター
初心者ペインター
- ブロックを 50 個ペイントする
中級ペインター
- 200 ブロックをペイントする
エキスパートペインター
- 1,000 ブロックをペイントする
Painter の実績は、Builder や Gatherer の実績よりもはるかに簡単に取得できます。絵付けは、絵の具工場で花の種から絵の具を作り、いかだのブロックに染料を塗った絵筆を使用して行います。
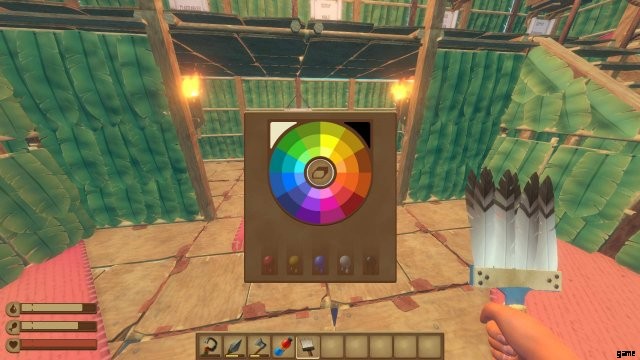
あなたが見つけることができる基本的な花の色は、黒、白、青、黄、赤です.塗料の使用量が少ないので、ベースカラーのみで塗装することをお勧めします。また、ブロックをペイントし、ブラシの消去機能を使用してブロックをきれいにしてから、ブロックを再ペイントすることをお勧めします。ペイントされたブロックを消去すると、以前の更新で Painter の実績にカウントされていましたが、まだカウントされているかどうかはわかりません.
ラングラー、ホーダー、ファーマーの実績
ラングラー
ビギナーランジャー
- 動物を捕まえる。
中級ラングラー
- 10匹の動物を捕まえる
エキスパート ラングラー
- 50匹の動物を捕まえる
動物の捕獲は、スクラップ 2 個、プラスチック 4 個、金属インゴット 1 個、ボルト 2 個でできたツールであるネット ランチャーを使用して行います。弾薬用のネット キャニスターは、1 つの爆薬 (ポイズン フグから精錬された爆薬の粘液)、4 つの石、および 4 つのロープから作成できます。
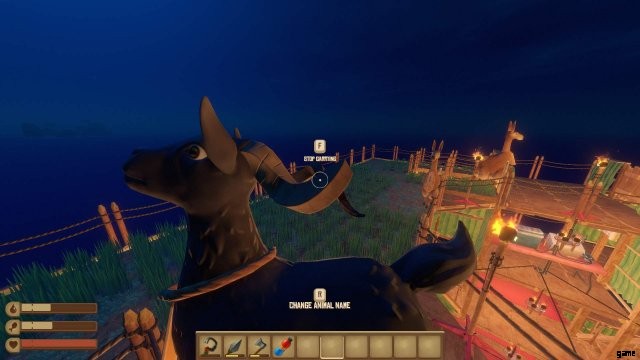
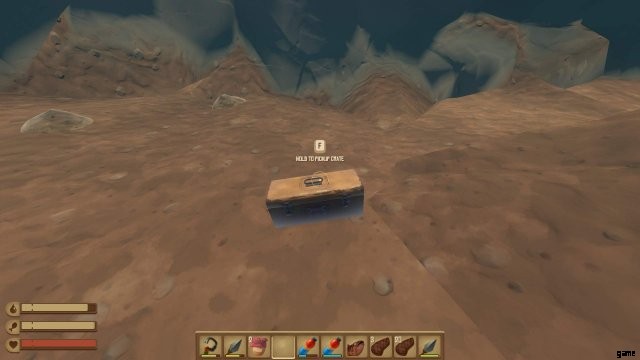
In order to capture an animal you have to be as close to the animal as possible as the net does not launch very far. You are able to capture llamas, goats, and cluckers on large islands and there will be 1 – 4 of any combination of these animals per large island.
It should be noted that currently there is a bug in the game where if you have two people on one raft, each animal will count for two animals captured instead of one.
Some Look Different
- Capture a rare animal.
Rare animals are like shiny pokemon, you find them randomly on large islands and they will be a different colour than the normal version of that animal.
Hoarder and Farmer
Hoarder
- Have 20 storages on the same raft.
農夫
- Have 20 cropplots on the same raft.
The Hoarder and Farmer achievements are pretty self explanatory, not much to say about them. Only that it’s easiest to do with the small storage containers and the small cropplots.
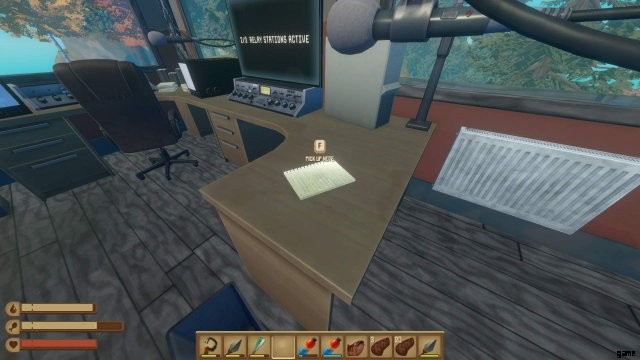
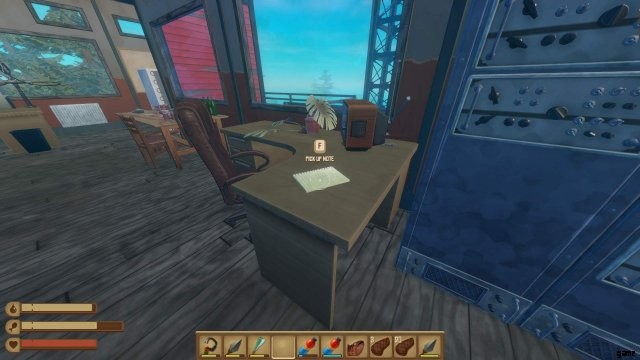
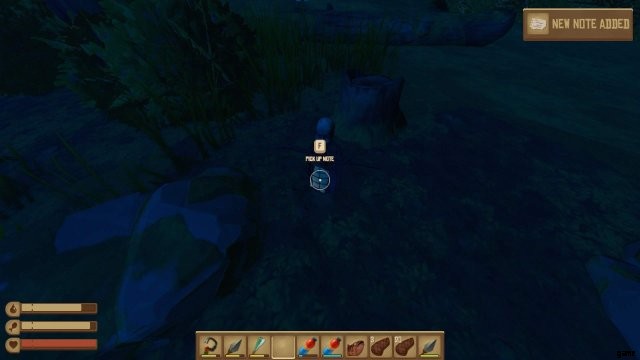
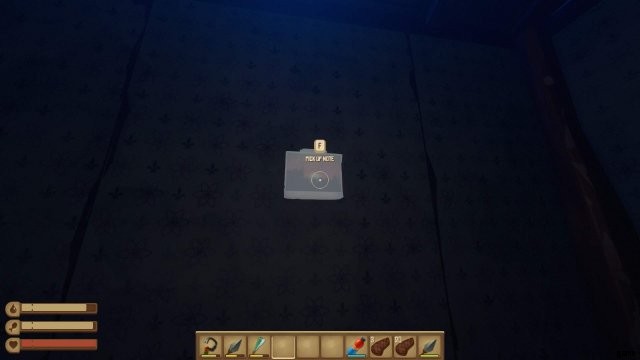
Historian Achievements
Radio Tower Historian
- Find all notes on the Radio Tower.
To get the Historian achievements, you will need to find all of the notes at each of the three story locations. These notes are not difficult to find but they can be easy to pass up if you’re not paying attention or if you don’t know how many notes are at each location.
The Radio Station has five notes that you can find.
One is in a briefcase that is holding a door open under water.
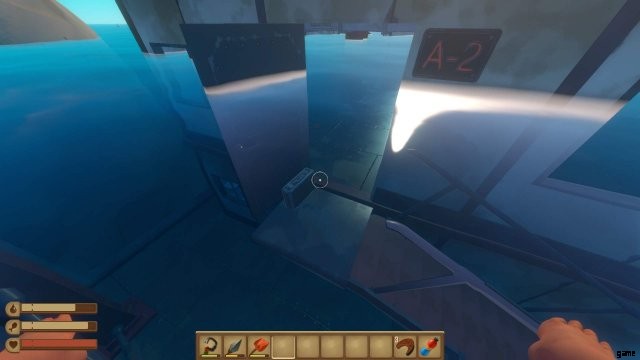
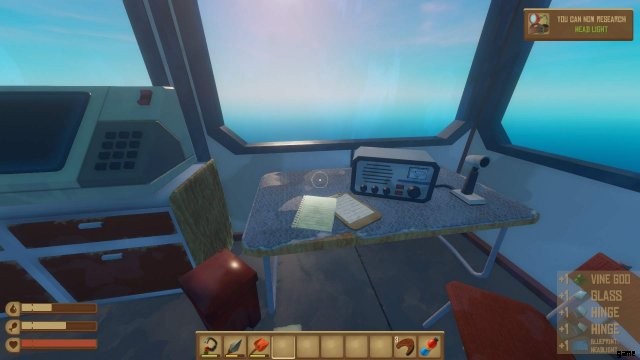
Two are in rooms that you can explore while ascending the station.
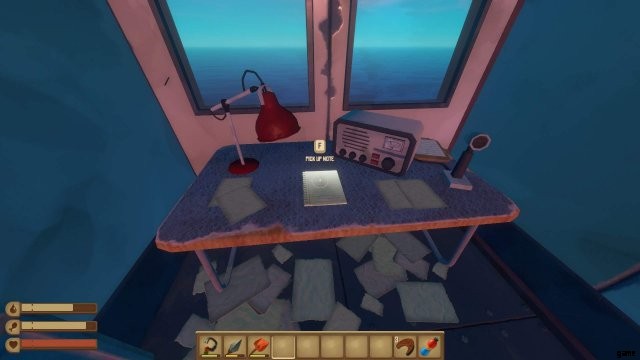
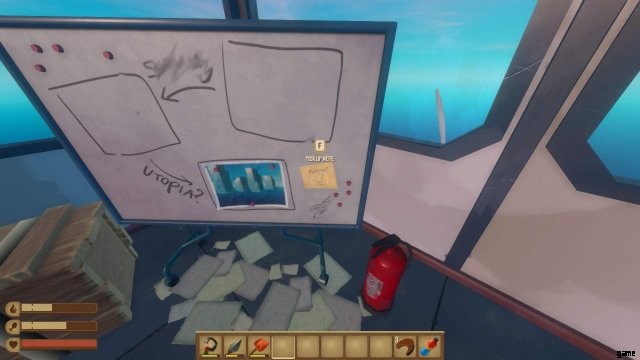
Two are in the uppermost room with the whiteboard.
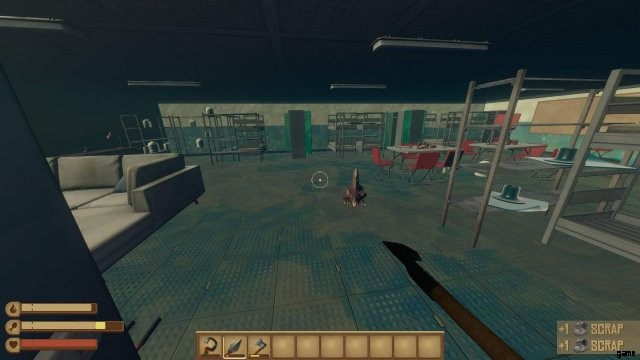
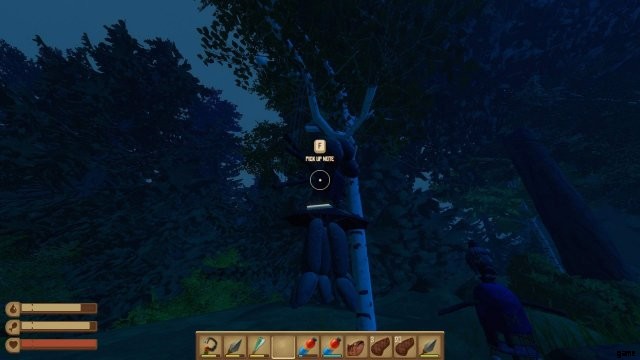
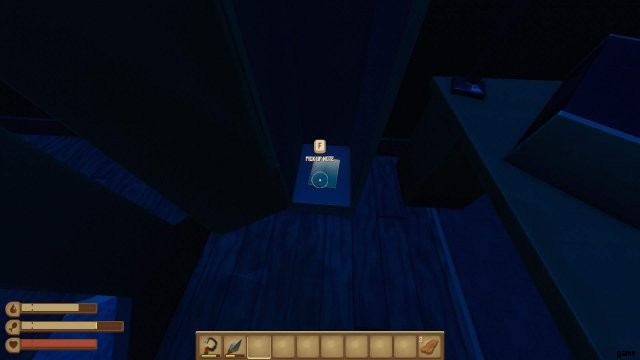
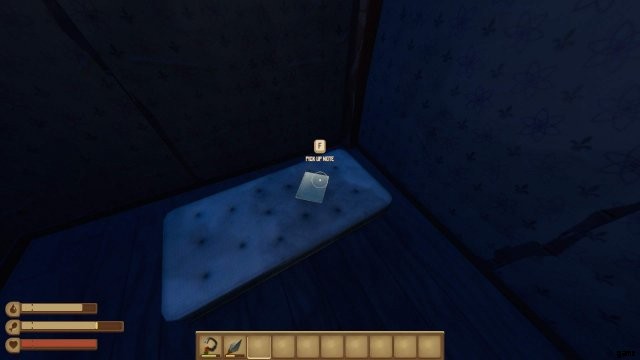
Vasagatan Historian
- Find all notes on Vasagatan.
The Vasagatan has ten notes to find throughout the boat. I tried to list them in the order that you would come across them while exploring since the Vasagatan is more linear than the other story locations.
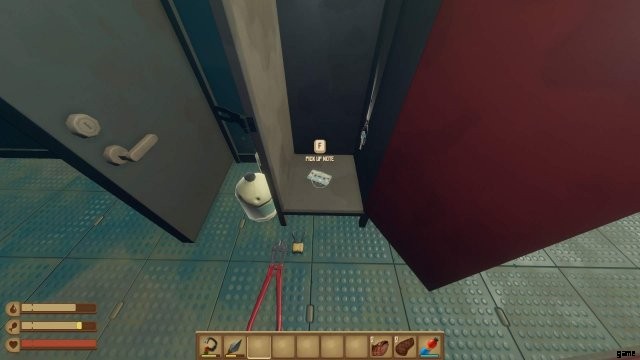
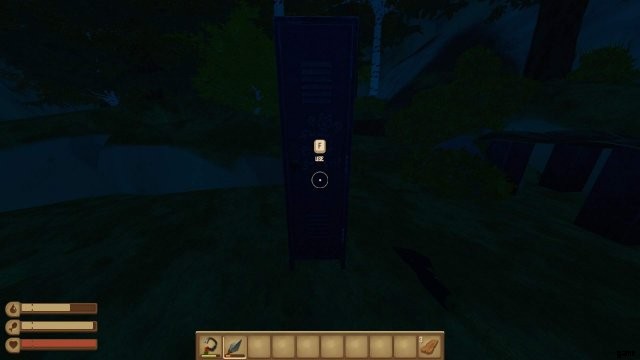
On floor 1 (the basement) there are two notes. One is on a table in the large room and the other is in a locker that you have to open with the bolt cutters.
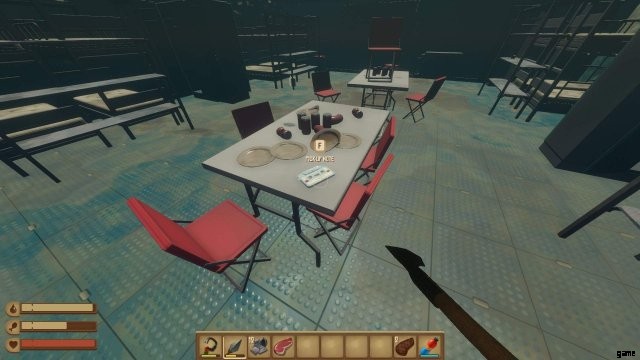
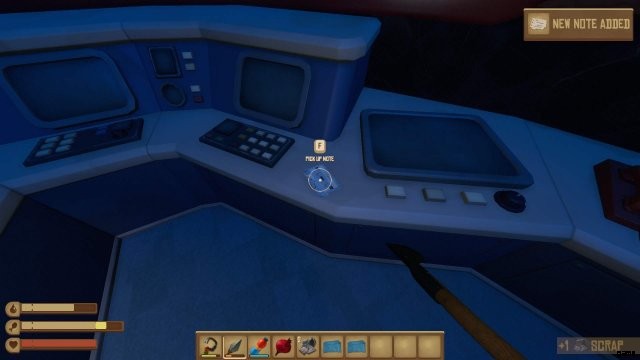
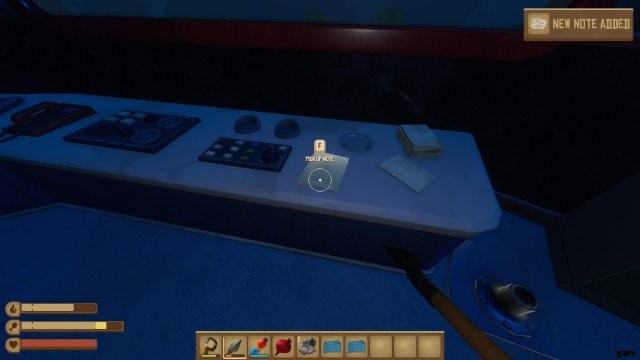
On floor 2 there are three notes. One is on the bar next to the bullet item and the other two are in the safe with the electrical wires that you have to open with the four digit code.

On floor 4 there is one note. To get it you have to craft the carjack in order to move the safe that is blocking the door.

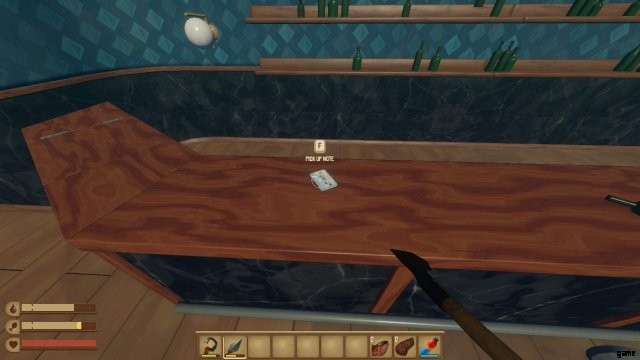
On floor 5 there is one note on a table.
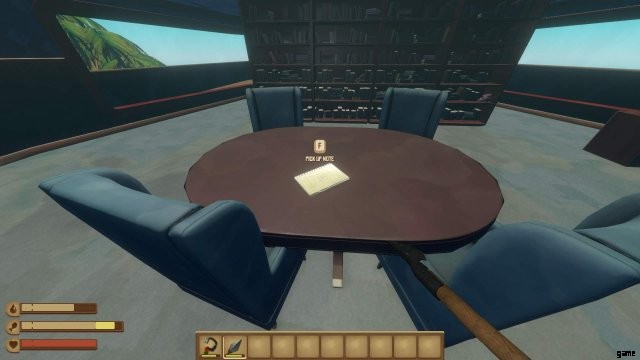
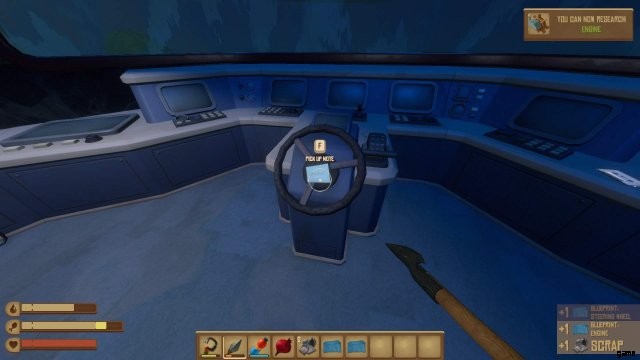
Finally, on floor 6, there are three notes. One is on the steering wheel and two are on the counter to the right.
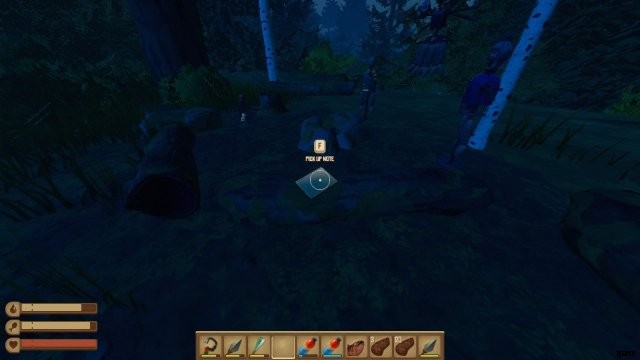
Balboa Historian
- Find all notes on Balboa.
Balboa Island has twelve notes to find and it can be very annoying to collect them all. Your character’s movement speed is very slow on land and if you don’t know where to go to get everything you can end up doing a lot of backtracking. The best order to do things in is to first find five of the blueberries in order to distract the Mama Bear and get the machete from the cave. Getting the machete immediately will prevent a large amount of backtracking.
After getting the machete, follow the path signs to relay station’s 4 and 6. Go to relay station 4 first and get the two notes that are inside of the station.
Relay station 6, which is the station you should go to next, will also have two notes.
Around the base of the cliff that relay station 6 is on top of, you will find a trail of notes leading to the campfire where you get the Tiny Little Murderer achievement. There are five notes to be found in this area.
Lastly, you will go to relay station 2 and the ranger’s station. There is one note inside of station 2.
There are two notes inside of the ranger’s station, however you can only get the one behind Bruno’s board after finding all of his tools as part of the A Revelation achievement.
Story Achievements
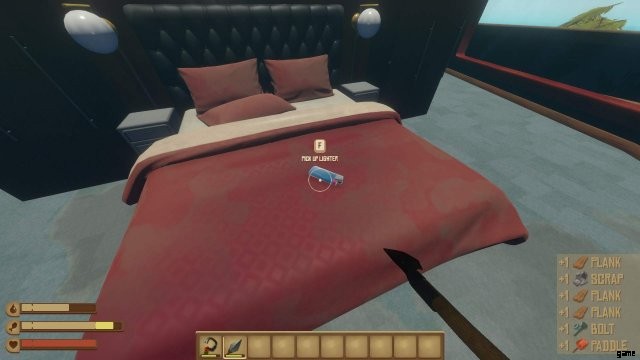
Bootleg Fireworks
- Breach the cockpit of the Vasagatan.
In order to get into the cockpit of the Vasagatan you will need to craft the bomb at the workbench found on floor 1 of the boat. The bomb will require four items to make.
The gas tank can be found on floor 1 in the kitchen.

The bullet can be found on floor 2 on the bar. It is easy to miss because it looks more like a bottle of alcohol than a bullet.
The electrical wires can be found in the safe on floor 2.

The lighter can be found on top of the bed on floor 5.
You shouldn’t have too much trouble finding each item. The game makes it especially easy by making each item you can pick up glow white. It can be very difficult to see in the Vasagatan at night which is why you find the recipe for the headlamp at the Radio Station, however, you can just sleep so you don’t have to waste materials on the headlamp. The Vasagatan is so small that, unlike Balboa Island, getting back to your boat quickly to sleep is no problem.
Mother Lode
- Slay the Mama Bear.
The next four achievements all take place on Balboa Island. I listed them in the order in which you are most likely to do them in case you are following this guide as you play through the game.
While on Balboa Island you will find the Mama Bear which is a bear much larger than the other bears found on the island. Not only is she larger but she also has much more health and does much more damage. It is not required that you fight her unless you want the achievement.
Blueberries can be found on bushes all across the island. These can then be placed into the red container with the blue tarp near where she spawns in order to distract her.
The Mama Bear is dangerous to engage with melee weapons, even with two people, so I recommend using a bow. Near the Mama Bear’s area, to the left of the cave entrance, is a couple of boulders which you can climb in order to get onto a ledge. This ledge is a safe spot that the Mama Bear cannot hit you on. From this ledge, you can shoot the Mama Bear with a bow and in some cases she wont even aggro you.


It will take between 40 – 50 arrows to kill the Mama Bear so make sure you come prepared. Make sure to grab the machete from the cave near Mama Bear if you haven’t already because it will be a pain to come back to this area to get it once you are across the island.
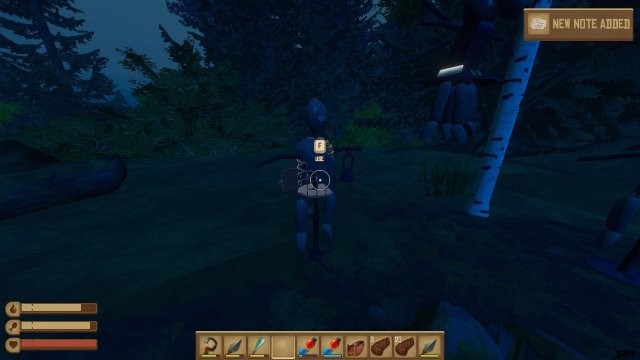
Tiny Little Murderer
- It’s all so obvious now (find the campfire on Balboa Island).
In order to get this achievement you have to find the campfire location on Balboa Island and pick up all five of the notes around it. The campfire is at the base of the cliff that relay station 6 is on top of and you can see station 6 from the campfire.
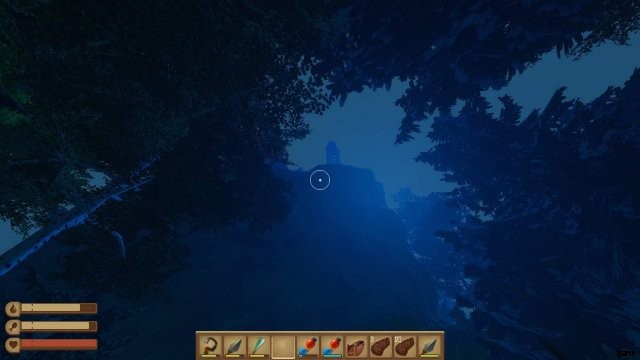
If you are following the signs and trails, you can follow the ones that lead to relay stations 4 and 6 until you come to this sign.
While you are at the camp, pick up the five notes in the surrounding area (see Historian Achievements section for details). Also, make sure to pick up the lightbulb from one of the figures surrounding the campfire as this will be used for the “Fix Errol” achievement.
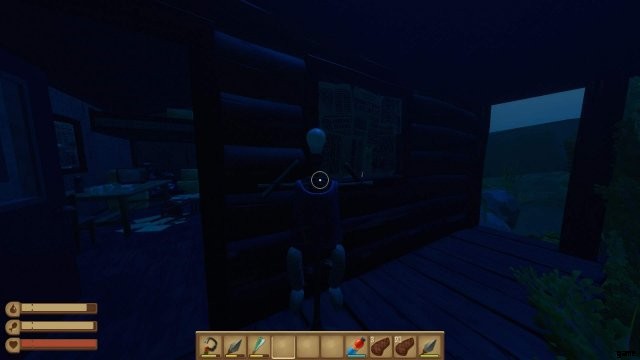
Fix Errol
- There you go Errol (find the lightbulb and attach it to the figure outside of the Ranger’s Station on Balboa Island).
After you get the lightbulb from the figure at the camp, take it to the ranger’s station. Outside of the ranger’s station will be another figure that is missing it’s “head”. If you have the lightbulb in your quest item inventory and click use on the figure you will get this achievement.
A Revelation
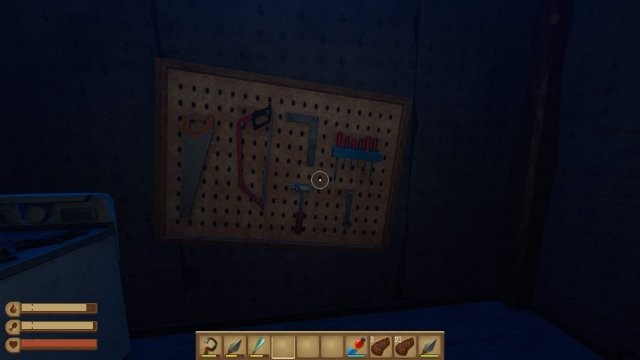
- Why is there a photo behind the toolboard (find all of the tools and hang them on the board on Balboa Island).
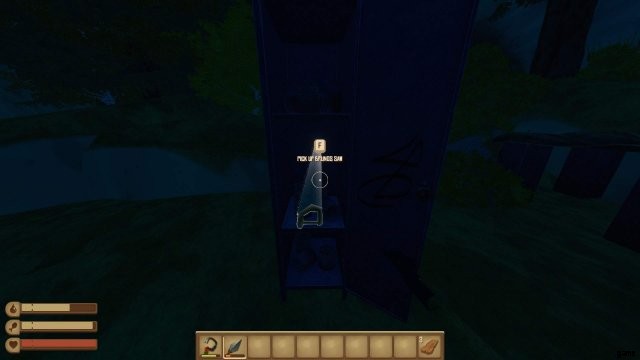
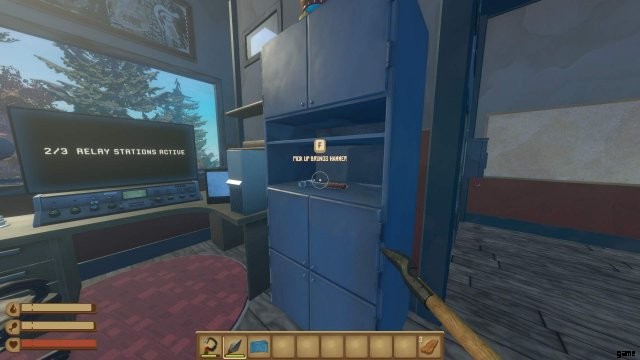
This achievement will require you to find Bruno’s three tools that are scattered across Balboa Island.
Bruno’s Saw can be found inside of a locker at the base of the pathway that leads up to relay stations 4 and 6. Be careful because taking the saw will cause the bear down the hill to become aggro.
Bruno’s Hammer can be found on a shelf in relay station 4.
Bruno’s Wrench can be found on a table in relay station 6.

Once you have all three tools, head to the ranger’s station and place them on the tool board. This will cause the board to fall to the floor and you can pick up the note behind it which will grant you the achievement.
Earned Through Gameplay Achievements
It’s better without the salt
- Craft and place a simple purifier.
Dinnertime
- Craft and place a simple grill.
The purifier and grill are probably the first two items you will craft on your raft. They are necessary for survival so long as you aren’t respawn-scumming.
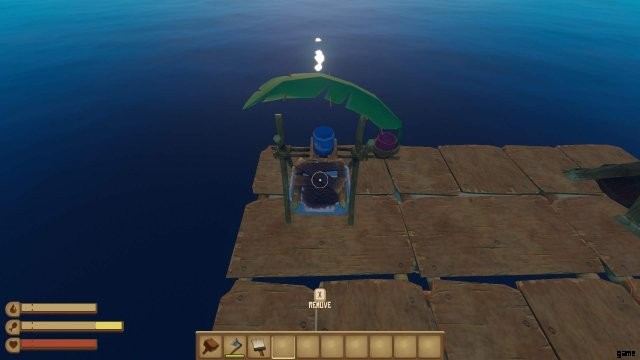
The purifier can be made with 6 planks, 6 leaves, and 4 plastic while the grill can be made with 6 planks, 1 scrap, and 3 rope. The purifier will be easier to make first because getting a scrap for the grill from a barrel is based on random chance.
Teamplay
- Team up with a friend in multiplayer.
This is one of the toughest achievements in Raft to get as the average Raft player doesn’t have many friends, much less friends who also play Raft (I know from experience).
Aye Aye Captain
- Place a sail and a stationary anchor on the same raft.
You will probably get the sail soon after getting your purifier and grill. The sail can take a bit of waiting and hooking barrels in order to get the 3 scrap required to craft it but it shouldn’t take too long. Along with 3 scrap, the sail also requires 20 leaves and 10 planks. Once you have the sail placed you can start controlling your raft to be in favour with the wind in order to move more quickly and steer towards islands.
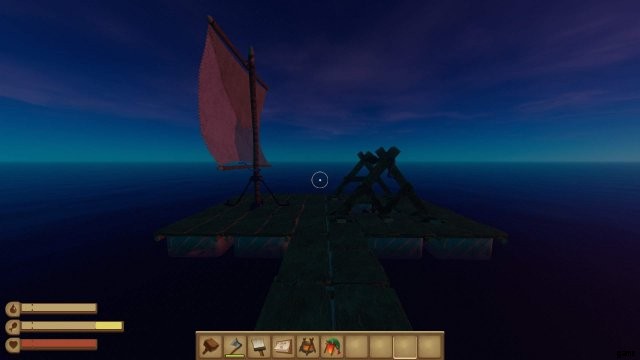
The stationary anchor will take longer because it requires 3 metal ingots and 1 hinge. You could find these from crates on abandonded rafts or underwater at islands but it is more likely that you will have to mine metal ore at small islands and smelt the metal in a smelter. Once you have placed both a sail and a stationary anchor on the same raft, you will get the achievement.
Bookworm
- Research everything in the research table.
The research table is another item you will craft early on as it only takes 14 planks and 2 scrap and it is used to learn many recipes that are necessary for progression. However, getting the “Bookworm” achievement will take much longer as it requires you to research one of each component item in the game.
In order to research new items, you must research each of the components first. For example, before I can craft a smelter, which requires wood, dry bricks, scrap, and nails, I need to research each one of those items. Once each of those items has been researched, I can research the smelter recipe which will unlock it for crafting.
When you research an item, that item is consumed by the research table so if you are planning on crafting something that you haven’t researched yet, make sure you have one extra of that item.
A more complex Concoction
- Cook a meal by following a recipe.
The cook station is a more mid to late game item that allows you to cook meals based on certain combinations of ingredients. These meals will not only fill part of your hunger bar, like any other food in the game, but they will also provide you with hunger saturation which will extend your bar further than it’s maximum limit.
The cook station takes 6 planks, 6 plastic, 2 metal ingots, 4 vine goo, and 1 bolt to craft so it is not that demanding of an item. You can find recipes in chests on abandoned rafts or in chests underwater which can be placed on a wall or post and tell you which ingredients make which meals. For the achievement, the easiest meal to make is the vegetable stew, which can be made with 4 potatoes, 4 beets, or a combination of the two. To take the meal out of the cooking station pot you need a bowl which can be crafted with 2 clay.
Large landmass ahoy
- Discover a large island.
In this new update, large islands can be found simply through drifting and coming across one like you would a normal sized island. However, the original intention with this achievement was to have the player use their receiver, after find the Radio Tower (Utopia), in order to locate a large island. It can take a lot of patience to find a large island by chance so if you have the receiver built you can plug a battery into it and it will show you where to go.
The large islands will appear as green dots on the map while the blue marker will be a story location based on whatever coordinates you have entered into the right module of the receiver. Just go to one of these green dots and you will get this achievement.
Hidden Achievements (Spoiler Warning)
Is there a Utopia?
- Find the whiteboard in the radio station.
When you turn on the receiver for the first time, the module on the right side will have four numbers entered and the light will be green. These numbers are the broadcast frequency for the Radio Station. I recommend writing these numbers down somewhere, maybe on a sign in game, although they should appear in your journal as well. On the radar part of the receiver you may see some green dots, which represent the large islands in your surrounding area, but you will also see a blue marker which shows the story location based on the broadcast frequency number that you have entered.
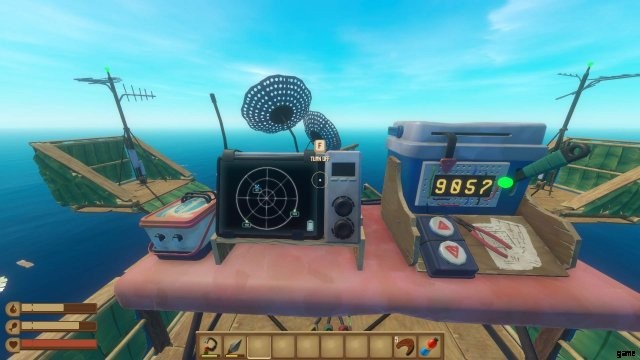
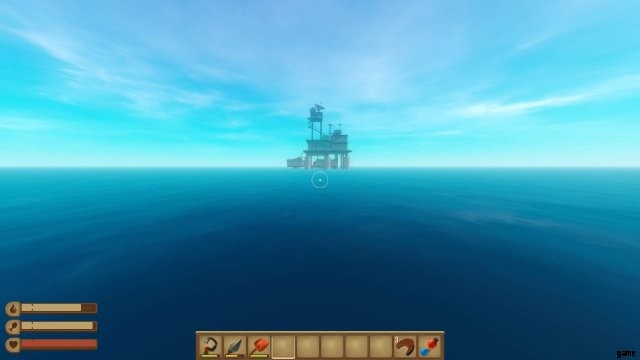
Sailing in the direction of the blue marker will take you towards the Radio Station. You can turn off the receiver to save battery power and you can replace the battery without the location of the Radio Station changing. However, I recommend checking the receiver regularly to make sure you are still going the right way. When you get to be about 300 blocks away from the Radio Station you will begin to see it faintly.

Climbing up to the top-most room of the Radio Station and standing in front of the whiteboard will grant you the achievement.
An ocean cemetary
- Die 25 times.
Pretty self-explanatory. You can drown or let the shark kill you. I know I have said this a lot during this guide already, but I especially recommend doing this achievement on Easy difficulty because you will not lose your inventory when you die on Easy.
Trivia:The achievement has “cemetery” spelled incorrectly
Exploring the depths
- Reach a depth of 100 meters below the surface.
Equip a pair of flippers and an oxygen bottle. Just keep swimming downwards and you will eventually get this achievement. It will probably be easier to get this achievement if you kill the shark first.
This goes here
- Break or pick up 100 blocks.
If you are also going for the Builder achievements, you will get this achievement as well as the optimal method for getting the Builder achievements will require you to place and subsequently break over 100 blocks. If you already have the “Builder” achievements, however, this can be done by placing and then picking up a collection net over and over until you have the achievement.
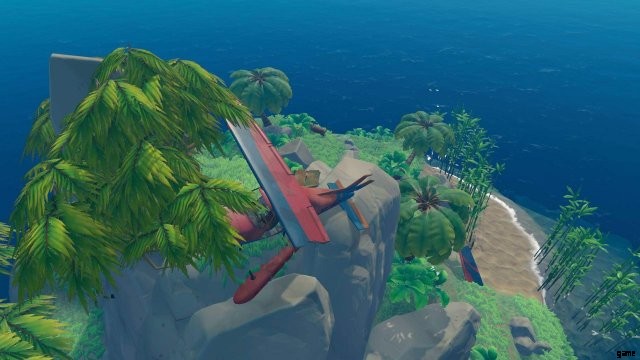
Not a great landing
- Discover a crashed plane.
O Captain My Captain
- Reach Captain’s Island.
The crashed plane island and the Captain’s island are rare islands that you have a small chance to find while drifting on your Raft. Some people will play for hundreds of hours and not find them and some people find them within their first day of playing the game. You only need to get near or step foot on the two islands to get their respective achievements and the islands will each have crates of items and a rare hat.
Remember, you cannot find these islands using the receiver, you have to encounter them randomly. Raft worlds from before “The First Chapter” update might be glitched and you may be unable to find either of these islands while playing on those older worlds, or, if you do find one of the rare islands on an older world, you might not get the achievement for it. It is possible to get these achievements on worlds from before “The First Chapter” update but I think you will have a better chance if you start a new world.
Captain’s Island
Crashed plane
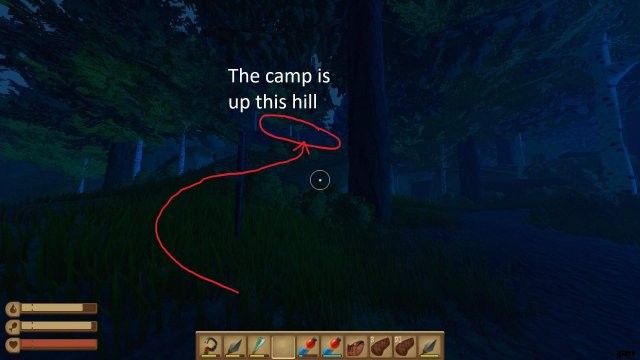
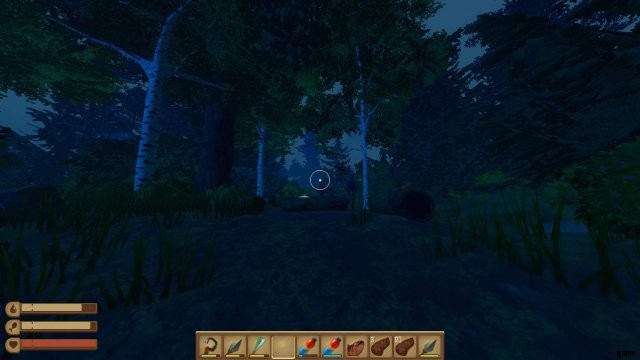
Pling
- Can bears use the bicycle bells (Find the bicycle on Balboa Island).
While you’re on Balboa Island, if your volume is turned up, you may here a small ringing sound every once in a while. To find the source of the ringing, go to the tent and turn around (this can be found by following the “Bear Hunter” achievement route).
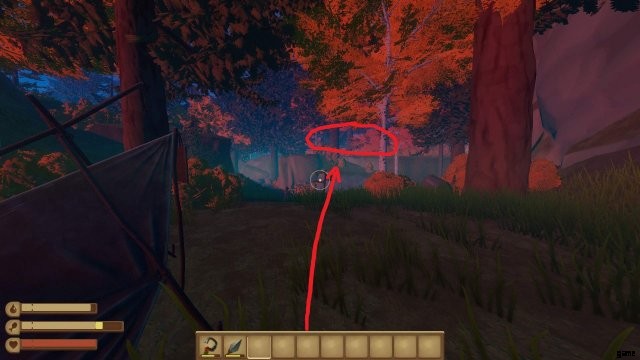
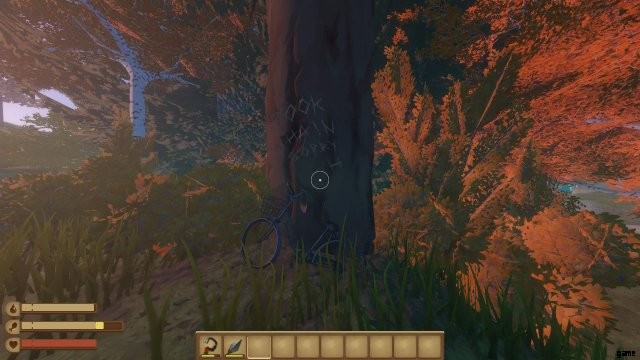
You will find a bicycle on top of this hill in the red circled area. Standing near the bicycle will grant you the achievement.