深部から – 粒子砲の可能性を最大限に引き出す方法
このガイドは、粒子砲の可能性を最大限に引き出すことに焦点を当てています。各設定を最適化する方法と、さまざまなアプリケーションに最適な大砲を構築する方法について説明します。近接モードではなく、PAC の遠隔コンポーネントについて説明します。
粒子加速器キャノンの詳細な内訳
PAC の浮き沈み
PAC は From The Depths で最も過小評価されている武器の 1 つです。
粒子砲の特徴:
- [投射物タイプのスキャン] をクリックします。
- 弾薬代なし
- 莫大な損害の可能性。
- 優れた EMP。
- 衝撃ダメージ
- ダメージタイプの簡単な変更
- 水中でのダメージや速度低下はありません。
残念ながら、PAC は次のことも行います:
- 遠距離でのダメージの可能性は限られています。
- 信じられないほどのエネルギーを使う。
- 構築するのが難しい場合があります。
- かさばる可能性があります。
- 保護するのが難しい場合があります。
使い方
水中で何かを打つ必要がありますか?水中ですか?真っ二つに引き裂かなければならないターゲットに超接近していますか?あなたのターゲットは超高速で動いていますか? 5k離れたところに小さな穴を開けたいですか?何をすべきかを知っているよりも多くのエネルギーを持っていますか?これらの質問のいずれかに「はい」と答えた場合は、PAC が適している可能性があります!
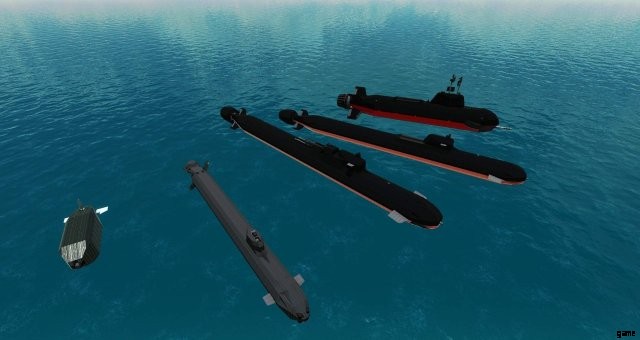
PAC は水の影響を受けないため、潜水艦のミサイル システムの最良の代替手段です。また、このため、PAC は潜水艦を殺すのに非常に効果的です。
パーティクル キャノンは、精度と減衰の両方が十分に近くにあれば、ゲームで最も強力な武器になる可能性があります。
これは 13 ピースからなる大砲からの 1 発でした!
最後に、PAC のヒットスキャンの性質により、レーザー、ミサイル、対空砲よりも小型航空機などの高速で不安定なターゲットを破壊することができます。
PAC の主な開口部はかなり正確に突き刺すことができ、通常はそれほど多くの力を必要とせず、これを実行可能な狙撃兵にしています.
潜在的なターゲットにもかかわらず、PAC は通常、発射するためのわいせつなエネルギー コストのため、大型の専用船でのみ使用できることに注意することが重要です。
構築のヒント
粒子砲は比較的簡単に構築できます。そのためのゲーム内ガイドがありますが、ビルドを簡単にし、ダメージの可能性を最適化するためのいくつかのことについて話します.
建物
- 最初に、大砲の正確なサイズと形状 (円形や長方形など) を計画する必要があります。
- いくつかの回転対称性を取得することをお勧めします。これにより作業がはるかに簡単になり、一部をコピーして回転させることができます。
- レイヤーを前後に蛇行させることは、より大きなデザインにも役立ちます。
最適化
- パイプを追加するたびに、ダメージ、サイズ、エネルギー使用量、効率が向上します。
- 例:1 本のパイプを備えた大砲は 20000 エネルギーで最大 20000 ダメージを与えることができますが、2 本のパイプを備えた大砲も 20000 ダメージを与えることができますが、10000 エネルギーのみです。
パイプには次の 3 種類があります。
- 双方向
- 戻る。
- 二次発砲駒。
リターン パイプは、2 ウェイ パイプと比較すると、必要なパイプの長さがほぼ 2 倍になります。パイプの長さは長い方が常に優れているため、2 ウェイ パイプの代わりに常にリターン パイプを使用するようにしてください。
副発射ピース アームは、同じ長さの双方向パイプの半分のエネルギーで半分のダメージを与えます。元。長さ 7 の双方向アームは 140000 エネルギーで 140000 ダメージを与えることができ、長さ 7 の副発射アームは 70000 エネルギーで 70000 ダメージを与えることができます (UI では 35000 と表示されていますが)。
まとめ
可能な限り戻りパイプと回転対称を使用してください。
ダメージの種類
ピアス
突き刺すと、船全体に 1 ブロック幅の穴が開けられます。
通常、このオプションはあまり役に立ちませんが、遠距離では問題なく、他のオプションに比べて非常に低電力のオプションになる可能性があります。
爆発的な衝撃
基本的に、このオプションは、非常に強力な 5 メートルの爆発が船の表面で発生し、非常に強力でダメージを与える可能性がありますが、装甲の積み重ねと空間装甲のために弱められます。
EMP
PACs can have the most powerful emp blast in the game often gutting smaller ships in one shot. This is also a very good option for taking out aircraft or capturing a nearby vessel without having to go and find and kill the AI yourself.
Impact
This option is typically my goto since it can create a massive hole in an enemy. Impact ignores armor stacking but is weaker against alloy, metal, and heavy armor due to impact only having an AP value of 15.
Horizontal -> Vertical focus
The Horizontal -> Vertical focus setting allows you to turn your circular dispersion pattern into an oval.
A value of 0 will result in a tall and skinny oval.
A value of 1 will result in a long and short oval. This can be good when fighting surface ships because in a broadside a horizontal miss is more likely to hit then a vertical one.
Field of Fire
- This setting will prevent the gun from firing at large angles but otherwise has no effect.
- This can be useful because when firing at large angles the gun losses accuracy.
- If your cannon is on a 2-axis turret use a 3-degree FOF.
- If your cannon is on a 1 axis turret determine how high a target will be from the axis of rotation and use that.
- Lastly, if your cannon is spinal mounted determine your cannon’s angle relative to the target in a broadside then maybe add a few degrees and use that.
Damage &Inaccuracy
The concept of this setting is pretty self-explanatory.
If you have a charge time of 0.25 seconds and a Damage &Inaccuracy of 0.25 you will start to see some spread around 250m. There is a linear relationship between damage and distance before spread and Damage &Inaccuracy, thus if you bring Damage &Inaccuracy up to 0.5 you will double your damage but the spread will start around 125m.
Now this leaves us with some options. If the target is close we could set the Damage &Inaccuracy high the maximize the damage or we could set it low to hit certain parts of the ship but with less power.
Something to also note is that dispersion and accuracy are far worse on secondary firing arms.
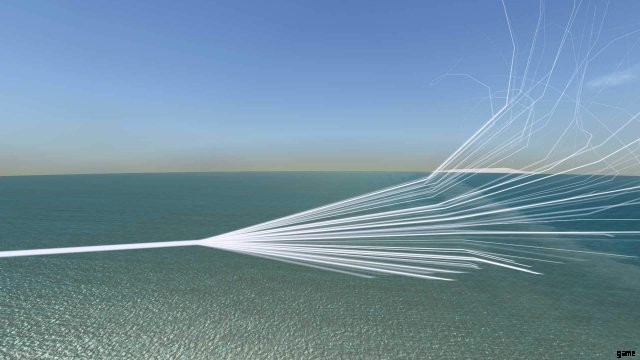
This is the overall shape of the beam:
Damage and Attenuation
This one is all numbers. Low Damage and Attenuation means low damage but low fall off while high Damage and Attenuation means high damage and quick fall off.
What this looks like:
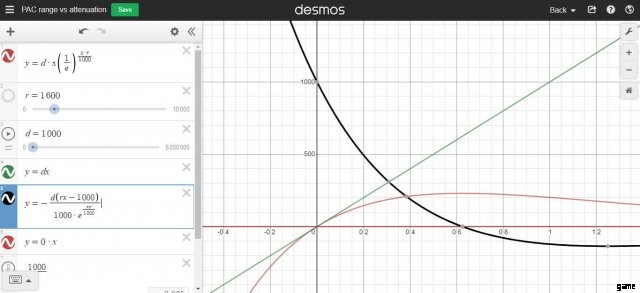
- r is the range set to 1600m.
- d is the potential damage set to 1000.
- The y-axis is damage and the x-axis is damage and attenuation.
- The green line shows the initial damage for every damage and attenuation.
- The red line shows the damage at the specified range for every damage and attenuation.
- And the black line is the derivative of the red line showing the slope of the red line and the maximum when it reaches 0.
Lastly, the point where the black line reaches 0 is calculated by 1000/r. Thus at 1km or less use a Damage and Attenuation of 1 and for more than a km use 1000/r.
- Here is the link to the graphs.
Efficient -> Overclock
This is also pretty straight forward where smaller numbers mean smaller damage and smaller energy usage. This is used so that you can still have a very powerful gun without having to make it bigger than your ship. What this does is it lets you balance size vs energy.
Charge Time
This won’t affect your DPS or energy use but it will affect your fire rate and accuracy.
I recommend normally setting this to 10 because it will drastically improve your accuracy and allow you to do more damage at the start of the battle. Sometimes setting it lower can be good against multiple or small targets or fast targets so you don’t waste energy.