Hylics 2 – 総合ツアー ガイド

Hylics 2 のツアーガイドで、クールなものを見逃したり、見回して迷子になったりすることはありません。明らかにネタバレが随所にあります。あなたがネタバレに耐えられない赤ちゃんの 1 人である場合は、ガイドを読むべきではないかもしれません.
Hylics 2 ツアーガイド
ウェインハウスから出発
ベッドから飛び起きて辺りを見回す。奥の階段をたどって地下室に行くと、いくつかのアイテムとジュースのプールがあり、溺れて死後の世界に行くことができます.来世から以前に使用した他のプールにワープできます。建物の中には、数ターンの間ステータス効果を無効にする浴槽と、肉を投げてパーティーの全員にHPを追加できる肉挽き器があります.左側にはブリトーと瀕死の幼虫があり、踏みつけて肉を食べることができます。
ウェインハウスに戻ると、ポロマーブレブを取得するために使用できるテレビがあります。これは、誰かを癒して防御ステータスを与えるために使用できる呪文で、次の攻撃のダメージを大幅に軽減します。外に出て、他のウェインからヒントを学ぶことができます。家のてっぺんにはオールド・ウェインがいて、次に何をすべきか教えてくれます。彼を階段として使用して傘の上に乗り、ジャンプして左側の島にホバリングすると、ロンググローブとコインを見つけることができます.手袋はかなりまともなので、それを着用してください。彼らはまた、あなたが以前に持っていたものよりも優れています.見回して満足したら、世界地図に向かいましょう。
新しいムルドゥル
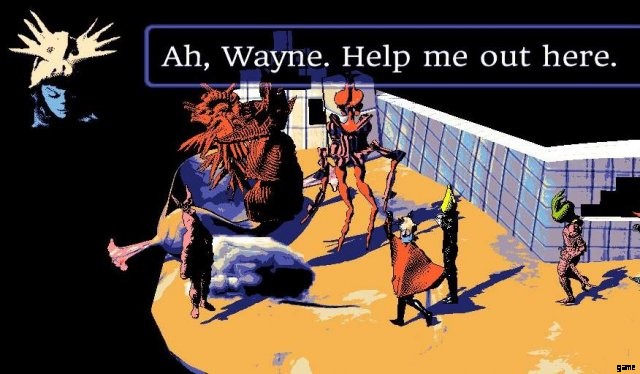
この島でできることはほんのわずかです。他の島への行き方を教えてくれる岩の上に座っている男、今すぐあなたを殺すモンスターでいっぱいの発掘現場、そしてニュー・ムルダルの町があります.必要に応じて発掘現場を走り回ってバナナを数本拾うことができますが、あまり意味がありません.ニュー・ムルドゥルへ向かう。入り口で人々に挨拶する男は、「素晴らしさを見てください」と尋ねます。最初にやりたいことは、右上の城に向かうことです。パーティーに参加するポンゴルマに会い、空中ダッシュの方法を教えてくれます。ポンゴルマはライトニングと呼ばれる特別な呪文を持っており、2 倍のダメージを与えますが、1 ターンの間気絶させます。ソファを屋根に登ると、選択した人に永久に+1パワーを追加するアイテムであるマッスルアップリケを見つけることができます.必要に応じてポンゴルマに渡すこともできます。彼は確かに今すぐヘルプを使用することも、後で使用するために保存することもできます.屋根から飛び降りて、草むらに沿って下に降りると、ジュースがあります。水に落ちても心配いりません。町の中心部にテレポートされるだけです。
ポンゴルマとエアダッシュを手に入れたので、町をもう少し探索しましょう。ここには、ジュースやブリトー、そしてまだ買えない高価なものを販売する店があります。オルガン フォートと筋肉のアップリケは覚えておく価値があります。街中の鍵のかかったドアがたくさんあることに気付くでしょう。空のコーヒーショップにつながる煙突があります。町の右側に行くと、たたいて HP/MP を回復できるものがたくさんあるペンがあります。
次に、日光浴をしている男の隣にあるこの穴に飛び込んで、町の下にある鉱山にアクセスします.労働者と気軽に話して、奇妙な会話を聞いてください。青いワイヤーに出くわしたら、それをたどって、接続されているボタンを押します。これにより、鉱山からのゲートが開き、町の他のすべての地下エリアに接続されます.そのまま下に降りていくと、最初の敵にぶつかります。難しいことではありませんが、ウェインの解散で最初に洞窟シネストを攻撃するだけです。彼は完全なパーティー攻撃を行うことができるからです.戦いの後、下に向かって進み、ここの小さな池に飛び込んでコインを見つけてください.ここで鉱山労働者に話しかけ、先ほど見つけたジュースを渡してください。彼はあなたに感謝して、時間の経過とともに燃焼ダメージを引き起こす火の攻撃であるソウルクリスパーを教えてくれるテレビのある彼のアパートをあなたに使わせてくれるでしょう.
必要に応じて、ポンゴルマ用のロンググローブのセットを購入できる島の右側にグローブストアもあります.街を見終わったら、ワールド マップに戻り、座っている男の元に戻ります。空中ダッシュを使って島を渡り、ビューアックスのエディフィスに向かいましょう。
Viewax の建物
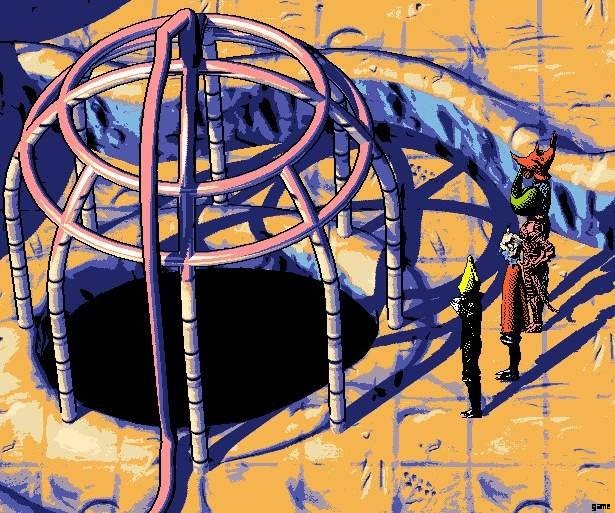
まっすぐ上に歩くと、ドアが閉まっていることがわかります。右に進み、橋を渡ります。ここでは階段を無視して、次の来世ワープをオンにするために右に向かいます。ここの階段を上り、南向きのホームからエアダッシュで穴に到達します。穴の中には、まだ答えのない奇妙なループ パズルがあります。ランダムな穴を選ぶと、下のビーチに移動します。ここで、ビーチでキャンプをしているデダスムルンに会います。彼に話しかけると、彼はあなたのパーティーに参加します。その後、彼のテントと火で調理された肉を略奪できます.彼がくれた櫂を使って、浜辺のボートを使ってビューアックスの建物に忍び込むことができます。すべてのドアがロックされている刑務所エリアに到着します。 2 階に上がると中に入ることができます。
ここには、好きなように殺したり避けたりできる敵がたくさんいます。私は個人的に、肉と戦いが楽しいので、みんなを殺すのが好きです. SilamvogはVulnerableステータスを与えることができ、幹細胞で敵のパーティーメンバーを癒すことができるので、ちょっと厄介です.エレクトロランは危険な敵になる可能性があります。彼はSleep Sporesで対抗し、両側の全員を眠らせます。クリーン状態の場合、エレクトロランを先に倒すと敵パーティを眠らせます。 Poolmen は、Soul Crisper を使用しないと自分自身をコピーする厄介者です。 Warpo は自己破壊し、多くのダメージを与えますが、気にせず無視してください。
中に入ったら、壁を最後までたどってコインを拾い、以前にブロックされていた正面玄関を開けて、ボートを使用する必要がないようにします。北に向かい、いくつかのアーケードマシンのある部屋へのドアの中に入る.場所を略奪し、北に進んで暗い部屋に入ります。左の壁をたどって、戦闘で死んだパーティーメンバーを復活させるために使用できるソウルスポンジを見つけます.次に北に向かい、ライトアップされたアーケード マシンを使用します。
プラットフォーム
この部分はプラットフォーマーです。上に向かい、敵を吐き出すマシンを倒します。その後、屋根に登り、左に向かいます。降りて、ソファを通り過ぎて、左側のゆるいものをチャージショットで殺します.あなたが彼を撃つと、溶岩の中の男は一時的にプラットフォームに変わります.コインを持って穴に落ち、右に空中ダッシュして上院の鍵を手に入れましょう。
再びソファに戻り、跳ね返って(ホールドアップ)、より高いプラットフォームに到達します. 2 番目のソファを左に移動すると、ボタンを押してゴンドラを開始できます。このボタンを押すと、セーブ ポイントとマッスル アップリケが表示されます。セーブポイントとブリトーを見つけるために右に向かって進んでください.ピラミッドに登り、頂上のイカを倒す。セーブポイントをヒットし、ピラミッドにドロップダウンします。スパイクを空中でダッシュしてバナナを見つけ、左端の床近くにブリトーを見つけることができます.セーブポイント左の穴から落ちるのではなく、右にジャンプするとバナナと大きなコインをゲットできます。右に進み続けると、移動するプラットフォーム シーケンスの上に筋肉のアップリケがあります。この後、右に進み、ソファを使用して別のセーブポイントに跳ね上がります.右に登り続けると、最後の船に移動するボタンに到達します.バナナとウェインの形をした開口部がある最後のエリアの右側に降りると、余分なコインを拾って船を見ることができます.開口部を操作すると、エリアが終了し、タワー キーを守っていたシールドのロックが解除されます。
Viewax を打ち負かす
鍵を手に入れたので、外に出て、前に気づいた階段を上ってください.クッキーといくつかのコインがある右側にエアダッシュできるエリアがあります.曲がりくねった崖を登り続け、トランポリンを使用して、タワーの鍵で開くことができるドアまでジャンプします。中には紙コップとワープホールがあり、その周りにいくつかの奇妙な植物があります.
穴に飛び込んでから、前に見た穴のパズルに戻ります。同じ植物のデザインの穴が見つかるまで、少し歩き回ってください。そこに入ると、飛んでいる賢者の脳に出会い、賢者のトークンとコンバーター ワームを与えてくれます。これは、+50 の意志を与え、戦闘で MP を再生する非常に素晴らしいアイテムです。彼は空中に浮いているので、彼と話すにはジャンプする必要があります。とりあえずポンゴルマにコンバーター ワームを装備して、彼がより頻繁にライトニングを利用できるようにするか、デダスムルンに装備して全員にフォーム アーマーを使用できるようにします。冷蔵庫にはマルチジュースもあります。
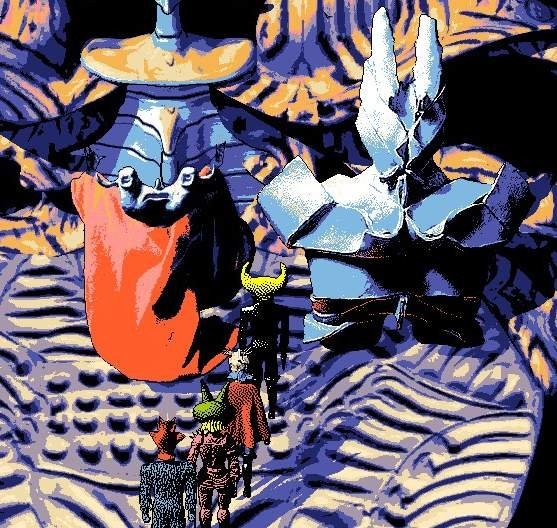
次に、タワーのドアを通り過ぎて右側に進み、Viewax の部屋に入ります。戦いの前に彼から食べ物を略奪してください. ViewaxでSoul Crisperを使用して、彼を燃やし始めます.次に、デデスムルンにポンゴルマにフォームアーマーを使用させます。その後、幹細胞を使って全員を再生させ、HPが少なくなったらポンゴルマにポロマーブレブを使用させます.あとはビューアックスへの攻撃に集中。彼は彼以外のすべてを攻撃する特別な攻撃を持っており、Tyros を一掃します。彼を燃やし続け、Poromer Bleb でみんなの健康を維持すれば、大丈夫です。勝った後、地下室のドアのロックを解除する刑務所の鍵を取得します。
ブレロールと喫茶店の男に話しかけて救出してください。 4 番目のセルは空に見えますが、それを通り抜けると、トランポリンと壁の高いテレビが設置された別のエリアに落ちることができます。タイム シジルは、3 ターンの遅延を引き起こし、敵を攻撃する呪文です。寝るため。その後、死後の世界に向かい、ニュー マルドゥルに戻ります。

ニュームルドゥルに戻る
戻ってきたらまずやりたいことは、ブレロールの家にいるブレロールと話をすることです。素晴らしいカットシーンを見た後、彼はドックキーと飛行船のマニュアルをくれます。何度か話しかけるとボーン100個もらえる。新しい飛行船にたどり着くには、ブレロールの家から出た道をたどってください。今は飛び回って飛行船を作ることができますが、最初に少し買い物をします.ストアからオルガンフォートを購入し、ポンゴルマに装備します。マッスル アップリケも購入しますが、とりあえず取っておきます。

上院の鍵を手に入れた施錠されたドアに向かいます。中の男は4つのアイテムを1つにまとめてくれるので、パーティー全体で使用できます.彼のベッドのコインをつかみ、左の穴を飛び降り、右の壁を抱きしめると分岐通路に移動します. Faded Poncho と Materiel Mitts があります。それらは特に有用ではありませんが、一部のキャラクターについてはおそらく現在のものよりも優れています.ミットはロング グローブよりも強力なので、ポンゴルマのライトニング用にミットを装着します。色あせたポンチョは、ウェインが履いていたブーツの代わりになります。
次に、コーヒー ストアに向かい、必要に応じてコーヒーとソウル スポンジを入手できます。コーヒーは睡眠を使用する敵に対して便利であり、魂のスポンジは死んだ味方を復活させるので、非常に便利です.コーヒーチップは本当に必要ありません。レギュラーコーヒーを購入し、コンバーターガイを使用してマルチコーヒーを作る方が良いでしょう.とりあえず手袋屋は飛ばしてください。
ソムスノサ
飛行船を手に入れたので、最後のパーティメンバーを手に入れましょう。次のような島に飛んでください:
ここにはいくつかのジュース牧場があり、見回すといくつかのジュースの箱とコインを拾うことができます.崖にぶら下がっている牧場主に話しかけると、毒に強いランチャーポンチョをもらえます。色あせたポンチョよりいいから、ウェインに着せて。
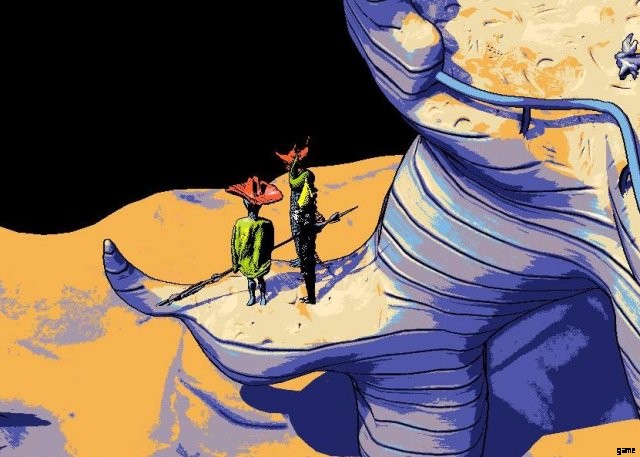
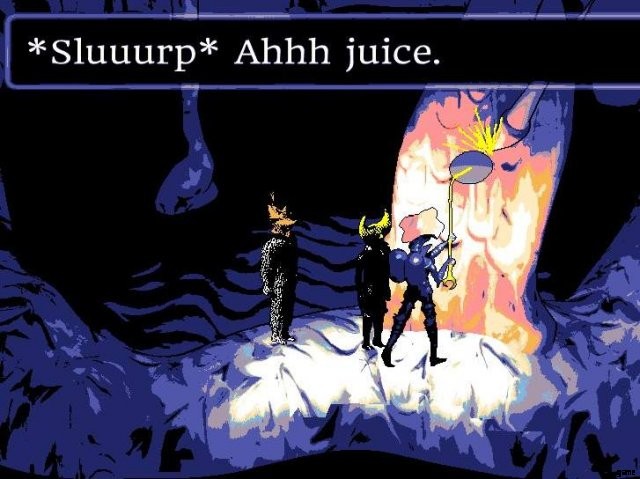
開口部までの道をたどります。入って右側のテレビを見ると、フェイト サンドボックスが教えられます。これは、パーティー メンバーが 3 ターンの間、スタン以外の負のステータス効果を無効にする呪文です。左に向かい、戦いで少し助けが必要なソムスノサと話してください。ソムスノサの必殺技は敵全体を攻撃する弱攻撃「ウェーブアーティフィス」。マルチコーヒーを使用し、ソムズノサに Wave Artifice をキャストしてもらい、エレクトロランの反撃で敵チームを眠らせます。
敵を倒すと、ソムスノサが仲間になります。冷蔵庫にプリーザーゲージがないか確認してください。ソムスノサに装備してコンバーター ワームを渡すと、ウェーブ アーティフィスをより頻繁に使用できるようになります。持っているマッスル アップリケをすべて彼女に飲ませます。飛行船に戻り、空中でメニューボタンを押して船を見回します。パーティ メンバーと会話し、ウォーター クーラーで以前に見つけた紙コップを使用して、25 意志を得ることができます。
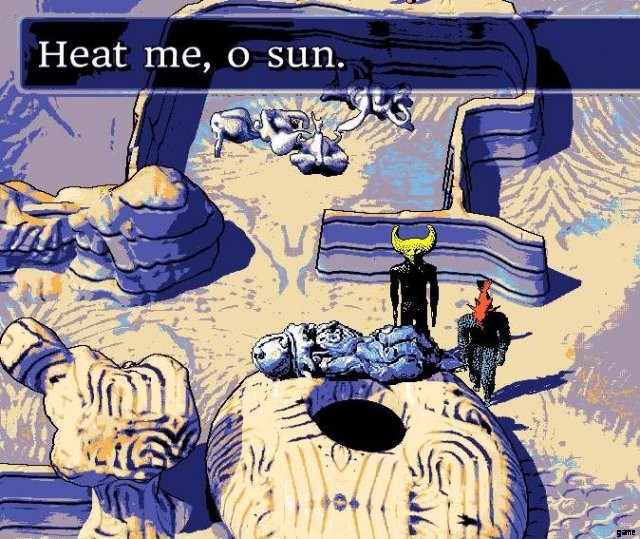
次はテレビ島に向かいます。マップの端にあるのは、それだけです。ステップを上って、次に使用するジェスチャーのパワーを増加させる呪文であるチャージアップを学びます。建物の上には、あなたが見つけたアンテナを取り、それらであなたのチャージアップパワーを増加させる男がいます.左側には、来世ワープのために溺れることができるジュースプールがあります.パーティーの HP を増やすために肉を投入することを忘れないでください。
発掘現場
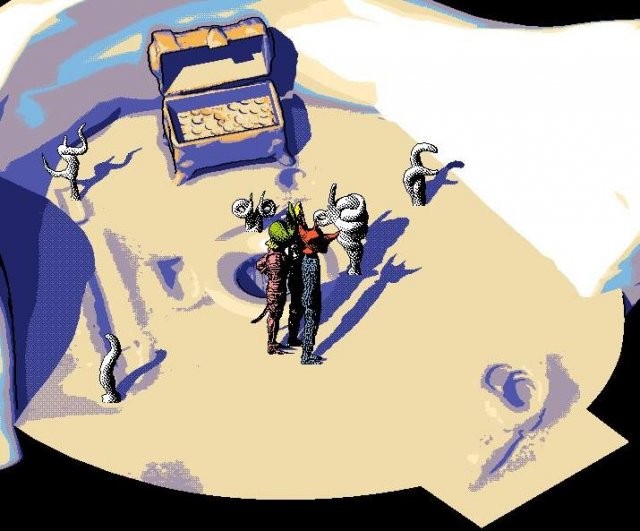
パーティーがいっぱいになったので、発掘現場に戻りましょう。 Galliforms は強力で、Accelerate を使用して毎ターン追加攻撃を行います。 Time Sigil は、Dissolution と同様に、それらに対して非常にうまく機能します。丘を登ってバナナを見つけ、考古学者と話してください。考古学者は後で取得するスカル ボムを必要としています。島の左側に露頭があり、空中ダッシュでビーチのドアを開くボタンに到達できます.飛び降りてカップケーキをつかみ、開いたばかりのドアに入ります。北にまっすぐ歩くと、-10 Flesh を犠牲にして +50 Speed を追加するグローブである Brain Digits が見つかります。 Dedusmuln が着用している Long Gloves よりも優れています。次に、穴に飛び込んでテレビを見て、敵とユーザーにリーキングを与える呪文である Nematode Interface を学びます。フォーム アーマーを使用すると、漏れに対する耐性が得られることに注意してください。ここで行うことは、すべての敵を倒してアイテムを獲得すること以外にはありません。
シールド施設
巨大なニワトリを倒した後、最初にソムスノサに会った島に戻ります。牧場を過ぎた先には、シールド施設と呼ばれる建物があります。ジュースプールは入り口にあり、見逃せません。先ほど入手したワームルームの鍵で扉が開きます。中に入ると、中の人がワームシールドを修理するためにここにいるのかと尋ねます。彼と戦いたい場合は、彼を平手打ちして肉を奪うことができます。 Truculentは、あなたを気絶させることができ、強力なダブルアタックを持つ新しい敵です.はしごを下り、必要に応じて男を平手打ちし、ボタンを押して虫の迷路への扉を開きます。
この場所はかなり紛らわしく、時間をかけて拾いたい場合は、ここにたくさんのコインが置かれています。しかし、実際にはそれほど大きな領域ではありません。ここのイカはバーニングであなたを攻撃します。 Hand of Moodbleen はあなたを圧迫するので、その攻撃は基本的に何もしません。治癒はまだ完全な強さになります。彼はまた、Leaking を与える Sharp Fingers を使用することもできます。 Dedusmuln に Charge Up を使用させてから、Foam Armor を使用させるのは優れた戦略です。 Somsnosa の Wave Artifice も素晴らしいチャージです。最後にいくつかの追加攻撃を追加します。もちろん、ポンゴルマのライトニングはよりよくチャージされています。
短い入り口エリアを通過したら、迷路の左側に向かい、洞窟の鍵を見つけます.迷路を羽ばたきしているすべてのイカと戦ってみてください。あなたが中にいる間、あなたは完全なHP / MPですべての戦闘を終了します.迷路の右側には、いくつかのコインと戦うことができるイカがあるサイドエリアがあります.迷路の北東の角には、前のトンネルと同じような別のトンネルがあります。このトンネルだけを出ると、迷路の中央近くにドロップします。ジュースの噴水に向かい、それをアクティブにしたら、階段を上って北に移動します.小さな部屋を通って北に向かい、クラクションを鳴らしてボスのフォンシントレルパインと戦ってください。
マルチ ステム セルとフォーム アーマーで全員を攻撃してから、マルチ コーヒーを使用します。その後、彼が死ぬまで、可能なすべてのステータス効果を彼に押し付けます.シールドが下がり、クエストを続行できます。死後の世界に向かい、見つけた洞窟の鍵を使用して、敵からポジティブなステータス効果を取り除く呪文である Teledenudate を取得します。リアクティブアーマーをキャストする人にとっては便利です。
プラットフォーム 2:リベンジ
見晴らしの連続であるあの不思議な島に向かいます。ここでは、新しい敵、Poolmagne と戦います。Poolmagne は基本的に、攻撃するたびに反撃するより大きな Poolman です。同じように、彼をソウルクリスパーにして無意味に打ち負かします。はしごを登り、アーケード マシンを使用して別のプラットフォーム セグメントに入ります。あなたが最初にしたいことは、左に向かい、飛行船でコインを拾うことです.
次に、魔法のじゅうたんに向かい、途中でコインをつかみます。そのまま進むとセーブポイントに突入。動くプラットホームを横切ってソファに飛び乗り、旗が見えるまで上っていきます。次に、別の動くプラットホームと魔法のじゅうたんを左に進みます。ここまで登るとコインがもらえる。次に左にホバーすると、飛行船の上に着陸してさらにコインを獲得できます。
今度はカーペットに戻りますが、今度は頭を左に下げて回転するものの下に行き、頭を上げてソファに飛び乗ります.これはかなり難しいので、何度か失敗しても驚かないでください。ソファに着いたら、別のカーペットにジャンプして、船の左側のコインをたどります.ここでコインを略奪し、手の届かないところにあるあなたの上の宝物を怒って睨みつけます.今度はそのソファとカーペットに戻りますが、今度は船に乗る代わりに、左に飛び降りてコインに従ってください.奇妙な道をたどって、最終的に二重らせんを通り抜けて紙コップとセーブポイントに落ちる.この魔法のじゅうたんを持ち上げて、敵を通り抜けてマッスル アップリケを見つけてください。
次に、巨大なジャンプを行い、できるだけ右にホバリングします。たくさんの家の近くに着陸し、矢印のある家の中に入って保存します。ここまで行って、コインとブリトーを手に入れましょう。次に、セーブハウスから降りて右に向かい、敵を殺します。ドアに入って完了です。シールドが上に移動し、ディープ キーを入手できます。
フォグラスト
飛行船に戻り、ウォータークーラーで紙コップを使用します。ソムズノサに話しかけてマッスルアップリケを入手。 New Muldul のグローブ ストアに行って、Somsnosa と Pongorma のために Tendril Hands を購入しましょう。このグローブはパワーが+18なので、Wave ArtificeとLightningに大きなダメージを与えます。ウェインにプリーザーゲージを渡すことができます。物資が十分にあることを確認してから、フォグラストに飛んでください。
ここにはいくつかのタフな新しい敵がいます。ボメラウグのホムンクルスを動かせば、パーティー全体に脆弱性を与えることができます。 Highway Fleam はダメージを与えますが、それ以外はあまり効果がありません。 Sauoplit は非常に迷惑で、Lightning を使用できます。コーティエは厄介な敵であり、ウェーブ アーティフィスをチューブ ステーキ マニホールドでカウンターし、敵パーティを完全に回復する攻撃を行います。また、Galliform と Poolmagne にも直面します。
これは、やるべきことがたくさんある大きな領域です。まずは左下に行き、建物の上に登りましょう。北の露頭から空中ダッシュしてテレビを持った男に会い、300 ボーンで軟体動物のリンクを教えてくれます。この呪文は、詠唱者が持っているすべての負のステータスをすべての敵に適用します。設定すると大変なことになります。テレビを使用した後、床に降りて、コインの円が見える場所を右に向かいます.赤いワイヤーを北東にたどり、地下エリアに入ると、ジュースの噴水といくつかの敵が見つかります.
次に、砂漠の床を横切ってマップの左上隅に進みます.途中で待ち伏せを待っている砂の中に隠れている敵を見つけるでしょう。左上隅に、後で漠然としたヒントを与える Smuldunde に会います。彼の隣のボックスにマルチソウルスポンジがあります.右上隅に向かうと、別のマルチソウルスポンジが入った冷蔵庫のある洞窟があります。ジュース プールの洞窟に戻り、赤いコードに従って道を進みます。ロープが崖の北面への道から落ちているのを見たら、代わりに右に曲がりくねった道を進んでください.コードが側面を登る洞窟に来ます。洞窟に入って、ジャンクを売らせてくれる男を見つけてください。 You can sell off all the old gloves and boots you acquired, as well as the clicker you just bought to access the TV. After selling all your junk, head right and climb the ladder. You will find a monitor that asks you for a Bridge Key you don’t have yet.
Finding a Bridge Key
Jump down to the south of the bridge monitor and hit the button. This will unlock one of the shielded areas. You can follow the cord if you want, but it’s this one:
Jump into the hole and air dash across through the coins. The area below this is the same room with the juice fountain you found earlier. Take the yellow stairs to the south to find a Multi Juice, then head back up the path until you reach a statue and another button to press. There are coins hiding behind the pillars here as well. Jump down and smack the two Gibby followers and use the juice fountain if you wish to grind your meat and use the tub. Then go up the ramp out of the cave and find the next shield you you just disabled. You can follow the cord if you want but it just leads to that cave we climbed on top of to get the TV. Inside you will find the Bridge Key.
Before you leave, there’s a secret area above the north cliff. You can either follow the wall to get there or jump and air dash repeatedly up the rocks. Follow the winding path up outside to an outcropping and a difficult air dash jump. You will have to use the hover right after the air dash runs out to reach a platform above TV guy. The coins floating on the way are a trick, go above them if you want to actually reach the other side. There is a thin path to the right that leads to another shield button. This one is in that room I told you to avoid on the way to the bridge monitor. It has Cursed Gloves. They give +24 Power, but will inflict the user with Vulnerability and Burning. You can equip them on Pongorma if you want so he can use Link Mollusc and power up his Lightning, or just ignore them if you don’t want to deal with the status effects. If you do decide to use them, give the Tendril Hand to Wayne and the Pleather Gage to Dedusmuln.
To get back to the bridge, head outside the Cursed Gloves room, then air dash to the right and you’ll land at the door with the selling guy. Plug the key into the machine and head across the bridge to a temple. You’ll see some cultists parading around and another shield. Unfortunately, you can’t slap them. First, jump in the hole on the left. It will trampoline you up to the roof where youll find a pedestal containing a Looped Dome. It adds +50 Flesh, +50 Will, and -25 Speed. I put it on Dedusmuln because it doesnt have any extra Power that Somsnosa or Pongorma need for their spells.
Next, jump into the hole on the right. Follow the path, ignoring the red cord for now, and explore the tiny side areas for another Soul Sponge, some coins, and a Tendril Hand that you can equip on Dedusmuln. Fall off the platform where you found the Tendril Hand to access a secret area.
Secret Area and Odozeir
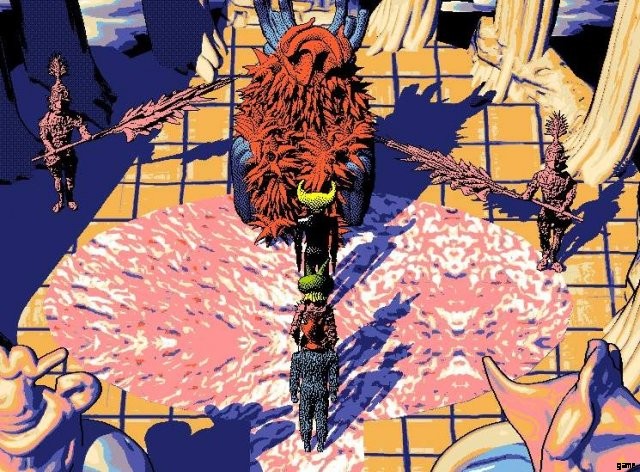
Explore the tiny room here and fall in the hole to get a useless Coffee Chip. If you walk towards the north edge, you will see plants spring up to make a path for you. Save the game here so you can load if you fall off and you wont have to walk back here. Follow the path of plants upward and eventually you will find a staircase. There are quite a few dead ends along the way, so if you find one, just back up to the main path and continue on. Up the stairs, you will find another sage who will give you a Sage Token and a Bottomless Juice, which works exactly like it sounds. After that, jump off the side and you will appear in the room with the fridge below the temple we looted earlier. Go back up to the temple and fall in the right side hole, but this time follow the red cord out of the hallway you found the Tendril Hand in. Head straight up to find a Cloud Germ, a full party healing item. Then follow the cord up to the button and press it, disabling the last shield. Past the shield is a boss fight with Odozeir and Carsoro. The Cursed Gloves won’t help much here, so put the Tendril Hand on Pongorma.
Carsoro starts the fight invincible, so focus your attacks on Odozeir. Start by buffing the party with a Multi Stem Cell and a charged Foam Armor. Then just hit Odozeir with status attacks and regular attacks until he falls over. When Odozeir dies, Carsoro will buff himself with Fast and Angry and drop his shield. Have Dedusmuln use Poromer Bleb on anyone who gets hit. Carsoro likes to use Whip, which inflicts Vulnerability and Leaking. You can use Link Mollusc to inflict Vulnerability on Carsoro and then Lightning him for 150+ damage. Use a Multi Juice if you start to run low on Will. When you win, Odozeir will turn into a puddle and brag that the ritual cant be stopped.
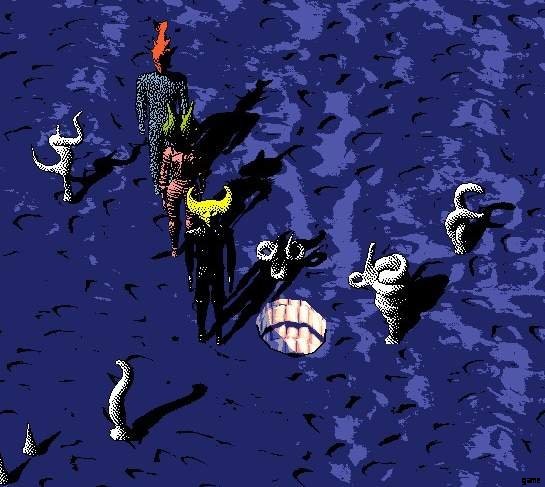
Head to the south and punch the sarcophagus to begin a battle with Gibby Redivivus. I say a battle, but the first thing he does is use an attack that instakills the entire party. Then watch the cutscene and head back to New Muldul from the Afterlife.

New Muldul and the Dig Site Again
You will notice something bad has happened to the people. The shopkeepers will still sell you things, though. Head up to Blerol’s house, slap him if you want, and go to the treasure vault in the basement. Looting the place will get you about 400 bones, a Skull Bomb, an Organ Fort for Wayne, and a Telescopic Sleeve for Dedusmuln. Next, teleport to TV Island and turn in your Antennae. Then, teleport back to New Muldul and head to the dig site with your Skull Bomb. Give the dig master the bomb and jump down into the pit to find a giant maze.
Like the worm maze, every fight here will restore your HP/MP. There are some new enemies here. Nonconformist likes to use Four Blades which hits 4 times like you might expect. He also will charge up and use Photon Grapeshot, which damages the entire party. Coiffed Stalker will cast Specterant, which hits the entire party and inflicts Dissolute. Poolmagne needs to be Soul Crispered and will counter any attack with Allotrope, which causes Leaking. Wandering Tyro is the same jerk from before but with 100 HP now. Using the Cursed Gloves + Link Mollusc works really well here because of all the 5 enemy groups.
This area is extremely annoying and I honestly don’t know how to make a description of how to get through here. If you want to find all the items, you will have to hit all the walls. Start off by walking forward into the empty section of wall and knocking it down. Follow the left wall around until you see some curtains and an alcove, then knock down the alcove, revealing a meaty room with 4 cat looking statues. Keep following the wall to the left and you will find a ladder up. If you climb the ladder right now you will just loop back around. Go back to the meaty room, but instead of going inside, follow the path and you will find a juice fountain. Continue past and you will find a tiny loop with a ladder leading down. There’s another hidden room with an enemy and a Soul Sponge on the same side of the wall the fountain is on. After getting it, head down the ladder to a lower floor.
Head left and press the walls to find a meaty room with several hidden doors. One of them leads to a Cookie and a Multicoffee. Head out and look around. This area is pretty big and loops around a lot. There’s a hidden room behind 3 false walls that contains an enemy and a Multi Soul Sponge. There’s also a Muscle Applique for Somsnosa hidden down here in one of the corners. Eventually you will come to a hallway with a ladder down and a ladder up. Take the ladder down to find a short hallway with a hidden room containing a Multi Juice. On the other side of the hall, theres a room with a Tarp, a pretty useless item that reduces speed by -50 and makes you immune to status effects, except ones you get from equipment (cursed gloves, etc). Head up the ladders and hit the switch.
Sage Labyrinth
The switch will open up more of the first floor to explore. There’s a hidden wall chest containing Peptide Bodkins, which are great for Wayne who doesn’t have much besides Dissolution. They inflict Poison with normal attacks.. Follow the path up the ladder and down again to another switch which you should hit. Then use the Mini Crystal to return to Waynehouse and use the juice fountain there to use your meat/antennas, then teleport back to the Sage Labyrinth fountain. You should have turned in around 75 antennas by now. Head left to find a ladder that will bring you on top of the main floor, then follow the narrow path to another ladder and a Looped Dome for Wayne. Use the Deep Key to open the door and head up the long winding path and several ladders to reach the last Sage.
He will give you the third Sage Token and a Single Glove, which halves MP usage. Give it to Somsnosa and also equip her with the Organ Fort you had on Wayne before the Looped Dome. The sage will give you a hint about where to place the Sage Tokens. Then head back down the stairs to the raised platform overlooking the main room, but this time turn right and follow the path to an area with two ladders down next to each other. Take the one on the right and follow the path to a pit. You’ll drop down next to a cat statue. Follow the path around to the ladder, but walk past it and press the wall here to reveal a chest with a Paper Cup.
Now take the ladder up. Look around the main room here for a switch and press it to move the platform back. Then head left and enter the small hallway here with several cat statues and a pit down. Before you go down, hit the walls here to reveal a Multi Soul Sponge, 50 bones, and an enemy. In the pit, the left wall contains two Multi Stem Cells. Head forward and drop down into a room with a lot of pillars. Walk forward and you will be ambushed by Motor Hunter.

Start the battle with a Multi Stem Cell and a charged Foam armor. Have Somsnosa charge up Wave Artifice. If the Highway Fleams are alive,Motor Hunter will use Awaken Lance, killing a Highway Fleam and hitting the entire party for about 90 damage. It’s not too hard of a battle, have Wayne poison with his basic attack, Somsnosa use charged Wave Artifice, and the others hit him with every status effect. Head forward and hit the switch. Behind the switch is a Cloud Germ and the ladder out. Use the Mini Crystal to return to the entrance. Then get on your airship and fly high up to find the Sage’s Airship.
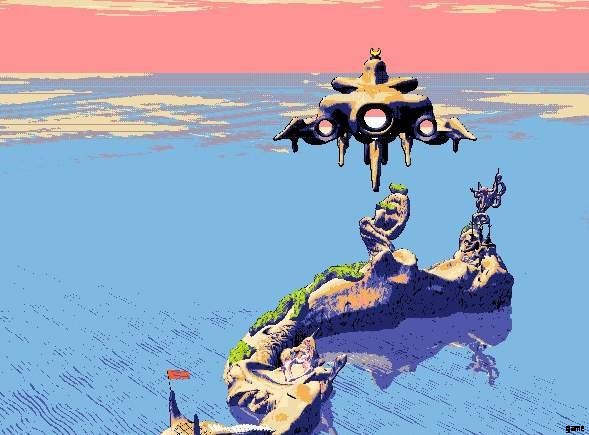
Sage’s Airship
Crash your ship into the Sage’s ship to dock. You can use the Paper Cup on the water reservoir to increase your will by another 25 points. On the first floor youll find a sage selling some useful items. Buy Organ Forts for everyone who doesn’t have one equipped and a Single Glove for Pongorma. Wayne doesn’t really need one because of the Peptide Bodkins. Pongorma and Somsnosa will lose a bit of Power, but half MP for all spells is worth it in my opinion. Follow the blue cord over to a receptacle for a sage token and place it. Then take the ladder up to the second floor and follow the coins to another room with a receptacle and some people you can talk to. The pot on the guys head contains a Multi Soul Sponge and you can get it easily by falling off the platform above and hovering onto it. Next climb to the roof where you will find the last receptacle and a Muscle Applique for Somsnosa. The yellow TV on the second floor will teach you Bombo – Genesis. You need to be charged to cast it, and it takes all your will and multiplies the damage by 1x for every 100 will drained. It costs 99 MP, so this is where that Single Glove comes in handy.
So your equipment should look something like this:
- Wayne:Peptide Bodkins and Organ Fort.
- Somsnosa:Single Glove and Organ Fort.
- Dedusmuln:Telescopic Sleeve and Organ Fort.
- Pongorma:Cursed Glove or Single Glove and Organ Fort.
Hylemxylem
Before heading to Gibby’s fortress of Hylemxylem, stop at TV Island and turn in all the antennas you’ve gathered so far, take a bath in the Afterlife and turn in all your meat, and head to New Muldul to make all your single items into multi items. Also make sure you stock up on Multi Juice, Multi Soul Sponges, and whatever other items you think you need. Then fly up above the clouds and land on Hylemxylem.
There are many of the enemies here from the Sage Labyrinth here, as well as some new ones. You can try using Link Mollusc + Cursed Gloves to spread Vulnerability and then a charged Wave Artifice, but it’s really easy to get Pongorma blasted to death here. The new Bombo-genesis spell works quite well instead. Viewaxian is basically just a regular enemy version of Viewax that you fought in the beginning of the game. Foliated will cast Arcane Indisposal, which removes a character from combat for several turns. Counter this with Fate Sandbox. Fierce Coutured is the same jerk as before with better stats and more HP.
Head inside and take a left down into the juice pit. Follow the coins to the south to pick up an Upper Chamber Key. Climb the spiral staircase and continue left to find a Soul Sponge. Continue left, climb the curved staircase and head outside. To the south is the last juice fountain in the game and a banana to the right. Drop down to the south, enter the first door again, then head straight north and through the next door to use the Upper Chamber Key. You’ll notice a finger pointing to the right, air dash across a series of platforms to a room containing a chest with a Multi Soul Sponge and an ambush on the right side with two Warpos. After looting, fall off the side to get teleported to the entrance, then go through the Upper Chamber door. Follow the path up to find yet another shield. There’s a staircase to the north and a banana to the right of the staircase. Follow the twisting path up the stairs to the north. Jump into the hole with the line of coins leading downwards. Then head south into a small juice pit. Use the platforms to air dash to the northwest corner. Head north through this area to find a chest containing Ductile Habit, which reduces damage taken by 25%. This works pretty well on Pongorma if he’s still using the Cursed Gloves. Otherwise give it to Dedusmuln. Then head left and fall down the hole.
This will bring you back to the room with the shield and a button you can press to disable it. South of the button is a switch that will drain the lower juice reservoir. The place you need to go is in the first room of the castle. It used to be a little fountain, but now it’s empty and you can jump in the pipe. Inside you will find some coins and a chest containing Psychic Knuckle, which adds +30 power. Give it to Pongorma to jack up her Wave Artifice damage. Follow the path onward to find a Burrito, then head north from the burrito to find a chest containing another useless Tarp. Continue down the southern path and follow the coin trail into yet another hole. This one contains a drain switch for the upper reservoir. There are also chests containing a Cloud Germ and nothing. Head south, which will bring you back to the first room. Loop back around to the Vessel Room door, then head south into the hole that had the coins. The juice is drained now, revealing 3 burritos and a hole in the floor. This hole leads to yet another winding path with a Vessel Room Key at the end.
This key opens the last door in the game, so I suggest you head back to TV Island and the Afterlife to deposit your meat/antennas one last time. Then make your way back, jump the trampoline and face Lord Gibby.
Start off by using a Multi Stem Cell and a charged Foam Armor. You’ll notice each time you hit Gibby that he releases a minion. His main attack is Teardown, which hits for about 100. A charged Wave Artifice will splatter all the minions. Really you are so powered up now that it’s an easy fight. You can use Bombo-genesis if you like, but it isnt necessary.
After defeating Gibby, you’ll land on a stage where you can play around and talk to some of the characters from the game. When you’re done, dive off stage to the south and climb the winding mountain to watch the ending credits. Congratulations!