ブルー アーカイブ ティア リスト:ゲームで最高の生徒のランキング
ブルーアーカイブからかなりの時間が経ちました ティアリストが更新され、それ以来ゲームは大きく変化しました。昨年から 30 人ほどのキャラクターが追加されたので、ここに新しいティア リストとキャラクターの内訳を示します。(願わくば) ゲームの現在の状態をよりよく表しています。

すべてのスキルは最小値と最大値とともにリストされており、レベル固有のアップグレード (コストの削減など) は個別に示されています。また、スキル コストを「EX スキル ゲージ」または「バー」、場合によっては「メーター」と呼ぶ傾向があります。
覚えておいてください:このティアリストは万能ではなく、あなた自身のマイレージは異なる場合があります.一粒の塩でそれを取り、最終的に、あなたがプレイしたい人をプレイしてください.
そうは言っても、ゲームで最高の学生をランク付けするため、詳細なブルーアーカイブティアリストを提示します!
ブルー アーカイブ ディーラー ティア リスト
| S | イオリ、ハルナ、アル、ヒビキ |
| A | ひな(水着)、あずさ、あずさ(水着)、かりん、睦月(お正月)、桃井、みどり、ののみ、白子(サイクリング) |
| B | ひな、いおり(水着)、いづな、しろこ、しゅん、まき、むつき、じゅんこ、あかり、ちせ、ましろ(水着)、ちせ、あるる(お正月)、ありす |
| C | Saya、Saya (カジュアル)、せりか、はすみ、つるぎ、つるぎ (水着)、すみれ、うたは、ねる、ぴな、ましろ、ゆず、かりん (バニー)> |
| D | いずみ、あすな、よしみ、しゅん(小) |
S ティア
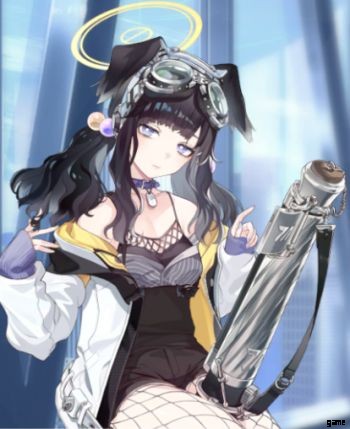
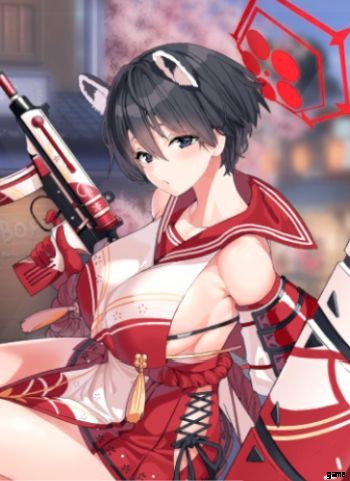
伊織しろみ

レア度: ***
バックストライカー、貫通ダメージ、ヘビー アーマー、カバー
ストリートコンバットパワー:C
屋外戦闘力:C
屋内戦闘力:S
| スキル | 効果 |
| (EX、3 小節) 主なまとめ | イオリが飛び跳ねて 3 発発射し、背後にある扇形の AOE 内のターゲットと敵に 350% - 666% のダメージを与えます。 |
| (ベーシック) 報奨金 | 敵1体に229%~436%のダメージを与える。 25 秒のクールダウン |
| (強化) ワンショットブルズアイ | イオリの命中率が 14% - 26.6% 増加します。 |
| (サブ) プリフェクト チーム ナーヴ | カバーの外にいるとき、イオリは攻撃力の 22.6% - 43.1% の追加ダメージを与えます。 |
ゲヘナの監督チームはばかげており、伊織も例外ではありません. Major Roundupは、基本的に3つのAOEを解き放つ、優れた低コストのEXスキルです。イオリの高いATKとサブスキルと相まって、メジャーラウンドアップは、波のクリアとボスの倒しの両方に非常に効果的です. Prefect Team Nerve は、あいまいなボーナスのように見えるかもしれませんが、Iori はスナイパーを使用するバックラインの学生であるため、カバーについて心配する必要はほとんどありません。
しかし、この少女が先生のがらくたにうんざりしていない理由は私にはわかりません.
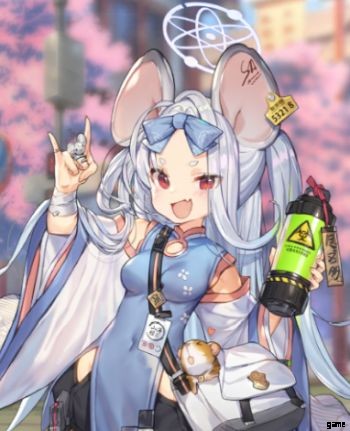
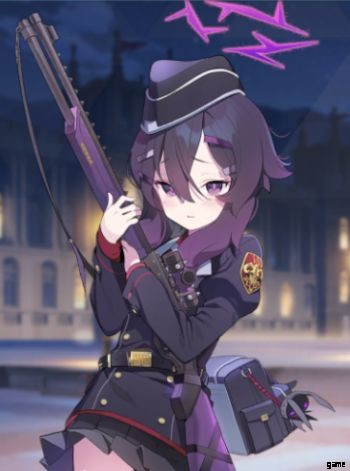
黒館はるな

レア度: ***
バックストライカー、ミスティック ダメージ、ヘビー アーマー、カバー
ストリートコンバットパワー:S
屋外戦闘力:D
屋内戦闘力:B
| スキル | 効果 |
| (EX, 4 バー) ピアシング エレガンス | 非常に狭い直線に 506% - 887% のダメージを与える貫通弾を発射します。敵を無限に貫通するが、貫通するたびに 10% のダメージを失い、最大で 30% のダメージを失う。 レベル 5: -1 コスト。 |
| (ベーシック) エキゾチック爆薬 | 30 秒ごとに、ハルナが敵 1 体に 200% - 380% のダメージを与える。 |
| (強化) グルマンの名誉 | ハルナの HP を 14% - 26.6% 増加させます。 |
| (サブ) 慎重な目利き | 静止時のハルナの攻撃力を 10% - 19.1% 増加させます。 |
関連: Blue Archive 初心者向けガイド:Kivotos で秩序を回復するためのヒント、コツ、戦略
ハルナは、グローバル ブルー アーカイブの初期の頃、最高のミスティック ダメージ ディーラーの 1 人でした (そして、正直なところ、それほど多くはありませんでした)。彼女の仲間とは異なり、ハルナは今日まで水を保持しています。この女性は武器のおかげで攻撃力が非常に高く、EXスキルは適切にターゲットするのが少し面倒ですが、まともなAOEです. Perorodzilla の襲撃で 3 つ以上のターゲットを攻撃するのは、常に本当に満足のいくものです。
陸八馬ある

レア度: ***
バックストライカー、爆発ダメージ、ライトアーマー、カバー
ストリートコンバットパワー:S
屋外戦闘力:B
屋内戦闘力:D
| スキル | 効果 |
| (EX, 4 小節) ハードボイルド ショット | アルが発砲し、敵 1 体に 274% - 521% のダメージを与える。ショットは数秒後に爆発し、最初のターゲットの周囲に 292% - 554% の円形 AOE を与えます。 |
| (基本) ノワール攻撃 | 25 秒ごとに、ある敵に 152% - 290% のダメージを与えるショットを発射します。このショットは、しばらくすると 50% の確率で爆発し、最初のターゲットの周囲に 251% - 476% の円形 AOE を与えます。 |
| (強化) ボスの重力 | Aru のクリティカルダメージが 14% - 26.6% 増加します。 |
| (サブ)無法者の道 | ハードボイルド ショットを使用すると、アルのクリティカルが 20.1% - 38.3% 増加します . |
Aruとあまり変わっていません。彼女のトリック ショットは今でも有効であり、4 EX スキル コストが許容範囲内であるため、ウェーブ クリアとボス キラーの両方として使用できます。 Aru の Enhanced スキルと Sub スキルは、ハードボイルド ショット使用時のクリティカル ダメージとクリティカル レートをそれぞれ増加させることで、彼女の EX スキルを補完するように構築されています。
私がアルについて気づいたことの1つは、彼女が特にぐにゃぐにゃしているように見えることです.信頼できる AOE を持つモブ (アリウスのミニガンナーなど) と戦う場合は、アルの健康状態に注意してください。
猫塚響
レア度: ***
特待生、爆発ダメージ
ストリートコンバットパワー:S
屋外戦闘力:B
屋内戦闘力:B
| スキル | 効果 |
| (EX, 4 小節) これは痛い | Hibiki は迫撃砲弾を 5 発発射し、それぞれが円形の AOE で爆発して 311% - 591% のダメージを与えます。 |
| (ベーシック) 十分な火力 | Hibiki は HP が最も低い敵を爆発的な砲弾で爆破し、円形範囲で 144% - 275% のダメージを与えます。 20 秒のクールダウン。 |
| (拡張) 危険かも | 響のクリティカルダメージが 14% - 26.6% 増加します。 |
| (サブ) お役に立てば幸いです | 響は味方のクリティカルダメージを 9.1% - 17.3% 増加させます。 |
サポートディーラーの学生として、ヒビキはHP、防御、アーマータイプなどの些細なことを気にする必要はなく、代わりにダメージを与えることに完全に集中しています.そしてどのように - 彼女の迫撃砲の砲弾は常に見栄えがよく、EX スキルの AOE は、PVP で敵のディーラーに発砲している場合でも、PVE で波をクリアしている場合でも、多くのターゲットを攻撃する必要があることを意味します。 Hibiki は優れたベース ATK も持っており、それをユニットの Strikers に伝えます。また、Sub スキルは必須のクリティカル ダメージ ステータスを高めます。
Aティア
空咲ひな(水着)

レア度: ***
バックストライカー、爆発ダメージ、ヘビーアーマー、カバーなし
ストリートコンバットパワー:B
屋外戦闘力:S
屋内戦闘力:D
| スキル | 効果 |
| (EX, 3 バー) Sealess :Ishbosheth | ヒナが扇形のエリア内の敵を爆破し、232% - 441% のダメージを与える。 |
| (基本) スロー &ノックアウト | 敵 1 体に 141% - 226% のダメージを与え、1.6 - 2 秒間気絶させます。 20 秒のクールダウン。 |
| (強化) 冷酷な規律委員会 | ヒナのクリティカル率が 14% - 26.6% 増加します。 |
| (サブ) 致死力 | ヒナは、シーレス :イシュボシェスを使用するたびに、攻撃力が 8.7% - 16.5% 増加します。 .最大 5 回スタックします。 |
NAT Gamesさんの水着ひなちゃんは本当に良かったです。ダメージと、さらに重要なことに、彼女の EX スキルのコストの両方をトーンダウンし、他のスキルをより重視することで、安価で強力な EX スキルを持つヒナができました。それ自体が強力であるだけでなく、Hina のサブ スキルにより、彼女は戦いの過程で確実に勢いを増し、低い乗数をかなり相殺します。彼女のスキルを PVP で最初にトリガーすることは、非常に多くの場合ゲームチェンジャーです。なぜなら、彼女は通常、Aru や Shun のようなフワフワした軽鎧の学生に十分なダメージを与えるからです.
残念ながら、水着ひなは現在グローバルでは利用できません。彼女はあなたが持っていない学生のリストにも表示されないので、私はキャラクターを彼女の非グローバルスキル名に使用しています.彼女が再びやって来たら、必ず彼女のためにロールしてください。
しらすあずさ

レア度: ***
ミッドストライカー、爆発ダメージ、ヘビーアーマー、カバー
ストリートコンバットパワー:B
屋外戦闘力:D
屋内戦闘力:S
| スキル | 効果 |
| (EX、5 バー) Intulit Mortem | 敵 1 体に 1065% - 2023% のダメージを与える |
| (ベーシック) サジッタ・モーティス | 敵 1 体に 299% ~ 468% のダメージを与え、防御力を 20 秒間 18.9% ~ 24.6% 減少させます。 |
| (強化) 過酷なトレーニング | 梓のクリティカル率が 14% - 26.6% 増加します。 |
| (サブ) 彼らがダウンしている間に蹴る | 梓の攻撃は、状態異常を持つ敵に攻撃力の 46.6% - 88.5% の追加ダメージを与えます。 |
何か死にたいですか?非常に非常に死んでいるようですか?あずさのEXスキルで撃つ。 2023% のダメージは、標準的なステージの暴徒やステージのボスでさえもばかげてやり過ぎですが、ヒエロニムスのようなタフなターゲットには最適です。専用のボスキラーとして、梓は組み込みのDEFデバフとそれを利用する方法にもアクセスできます.私が梓について持っている唯一の不満は、彼女にはAOEが完全に欠けているということですが、それはチームの他のメンバーが望んでいることです.
白洲梓(水着)

レア度: ***
ミッド ストライカー、ミスティック ダメージ、ライト アーマー、カバー
ストリートコンバットパワー:C
屋外戦闘力:C
屋内戦闘力:S
| スキル | 効果 |
| (EX, 5 バー) Spicea Aqua | 1 つのターゲットに 651% - 847% のダメージを与えます。時間の経過とともに 406% - 650% のダメージをチル ダメージとして与えます。 20秒間続きます。 |
| (基本) イラ リトーレ | 梓のクリティカルダメージが 30 秒間 21% - 40% 増加します。 35 秒のクールダウン |
| (強化) 冷水 | あずさの攻撃力を 14% - 26.6% 増加させます。 |
| (サブ) 傷口に塩水 | 梓の通常攻撃は 30% の確率でターゲットの DEF を 8% - 15.3% 13 秒間減少させる。 5 秒のクールダウン。 |
メイクアップワーククラブのアイスクイーンは、ビーチで楽しい時間を過ごしているようです.実際、彼女は特殊装甲の脅威を簡単に打ち負かすことができるほど良い時間です.通常のフォームと同様に、梓はボスキラーの役割を保持しますが、今回は特殊装甲の敵を対象としています。
彼女はまた、ある程度のサポートを提供することもできます。特に、Salt Water in the Wound は非常に優れたスキルで、多くのアップタイムがあり、自身のダメージだけでなく味方のダメージも増強します。彼女はまだ AOE を欠いていますが、それは他の誰かの問題です。
角館かりん
レア度: ***
特待生 貫通ダメージ
ストリートコンバットパワー:D
屋外戦闘力:S
屋内戦闘力:B
| スキル | 効果 |
| (EX, 4 バー) ターゲット除去 | カリンが敵 1 体に 687% - 1099% のダメージを与えるショットを発射します。大型の敵は、これによりさらに 481% - 625% のダメージを受けます。 |
| (基本)支援射撃 | 40 秒ごとに、カリンは 223% - 424% のダメージを 1 体の敵に与え、50% の確率で 3.1 秒間スタンさせます。 |
| (強化) 武器のアップグレード | カリンの攻撃力が 14% - 26.6% 増加します。 |
| (サブ)味方増援 | カリンは味方の攻撃力を 9.1% - 17.3% 増加させます。 |
響と同じように、カリンは特別なディーラーの学生であるため、生存率を心配する必要はありません. AOE ダメージを専門とする Hibiki とは異なり、Karin の取引は大成功を収めています。非常に迅速に。結局のところ、女の子は対戦車ライフルを詰め込んでおり、彼女の EX スキルは重装甲のレイド ボスに対して特に効果的です。カリンが他の生徒によってバフされることができれば、彼女は間違いなくゲームブレーカーになるでしょうが、現状では、彼女はかなり優秀です.
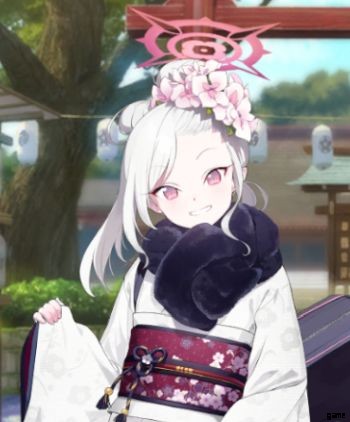
浅葱睦月(正月)
レア度: ***
バックディーラー、ミスティックダメージ、ヘビーアーマー、カバーしない
ストリートコンバットパワー:D
屋外戦闘力:S
屋内戦闘力:B
| スキル | 効果 |
| (EX, 2 小節) ニューイヤーズ シンフォニー | 大きなアーチ型の範囲で 159% - 302% のダメージを与えます。 |
| (ベーシック) インプコーラス | 直線で 217% - 315% のダメージを与えます。ムツキがかわいいインプ計画でインプを6体持っている場合 、これは追加の 117% – 169% のダメージを与えます。 50 秒のクールダウン。 |
| (強化) もっと楽しむ方法 | ムツキの攻撃力を 14% - 26.6% 増加させます。 |
| (サブ) かわいいインプの計画 | ニューイヤーズ シンフォニーの攻撃を受けた敵 3 体ごとに 、ムツキは1インプを獲得します。インプは 56 秒間持続し、各インプはムツキのクリティカル ダメージを 2.1% - 4.1% 増加させます。 |
Mutsuki の通常のフォームには多くの要望が残されていますが、正月のフォームは手ごわいスキル スパマーです。彼女のEXスキルであるNew Year's Symphonyは、スキルバーを2つだけ後退させ、彼女の前に非常に広いアーチを打ち、最終的にミスティックダメージディーラーに一貫した安価なウェーブクリアスキルを与えます.
彼女の EX スキルは、彼女の戦略の中核でもあります。スパム シンフォニー、インプ スタックを取得してより多くのクリティカル ダメージを与え、インプ コーラスのパワーを高めます。 6 体のインプは多いように思えるかもしれませんが、彼女を他の低コストの生徒数人とペアにして、花火を打ち上げましょう!
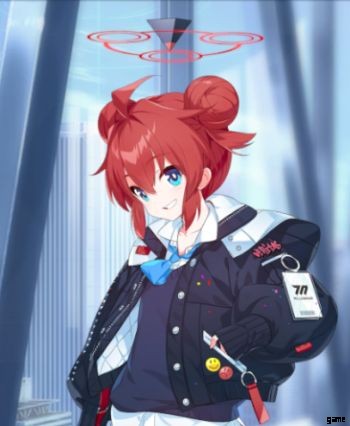
桃井彩葉

レア度: **
ミッドストライカー、貫通ダメージ、ライト アーマー、カバー
ストリートコンバットパワー:A
屋外戦闘力:A
屋内戦闘力:D
| スキル | 効果 |
| (EX, 3 小節) 創造的な苦悩 | モモイは扇形の範囲内の敵に 338% - 541% のダメージを与えます。 みどりなら パーティーにいる場合、命中した敵は 20 秒間 72% - 93.6% の火傷ダメージを受けます。 |
| (ベーシック) デッドライン クランチャー | モモイは自身の命中率を 20 秒間 22.3% - 42.3% 上昇させます。 30 秒のクールダウン。 |
| (強化) クリエイティブ センス | モモイのクリティカルが 14% - 26.6% 増加します。 |
| (サブ) 発達相乗効果:みどり | モモイの攻撃力が15.1%~28.7%上昇。 みどりなら もパーティーにいる場合、このブーストは代わりに 18.1% - 34.4% に変更されます。 |
桃井が輝くのは、創意苦悩 EX スキルのおかげです。 Creative Anguishis は、Midori がパーティーにいる場合、わずか 3 バーのコストで強力なウェーブ クリアを行い、時間の経過とともにダメージを与えます。それだけですが、Momoi を Midori と一緒に実行して、より大きな ATK ブーストと、彼女の EX スキルに火傷効果を追加することを選択できます。
斎場みどり
レア度: ***
バックストライカー、貫通ダメージ、ライトアーマー、カバー
ストリートコンバットパワー:B
屋外戦闘力:S
屋内戦闘力:D
| スキル | 効果 |
| (EX, 3 小節) 描画アート | みどりはランダムな敵を 5 回攻撃し、各ヒットはヒットごとに 119% - 191% を与えます。 モモイなら がパーティーにいる場合、これらのショットは 20 秒間 39.8% - 51.8% の毒ダメージも与えます。 |
| (基本) 芸術的なポーランド語 | 25 秒ごとに、現在の HP が最も低い味方が、みどりの回復量の 77.5% - 147% 回復されます。ミドリをターゲットにすることはできません。 |
| (強化) アーティストのインスピレーション | ミドリのクリティカルが 14% - 26.6% 増加します。 |
| (サブ) 発達相乗効果:モモイ | ミドリの攻撃速度が 15.1% - 28.7% 増加します。 モモイなら がパーティにいる場合、このブーストは代わりに 18.1% - 34.4% に変更されます。 |
サイバの双子は補完的です.モモイのEXスキルは暴徒に対処するために作られていますが、ミドリのEXスキルは単一のターゲットに火を集中させるのが得意ですが、非常に軽い暴徒の掃討もできます.
みどりは妹に比べて遅く、几帳面です。彼女はショットに時間をかけますが、より多くのダメージを与えます. 同じチームで両方の双子を実行することを選択することで、問題をわずかに軽減できます.みどりは基本スキルのおかげでオフヒーラーでもありますが、みどりはそれで自分自身を癒すことができないので注意が必要です。
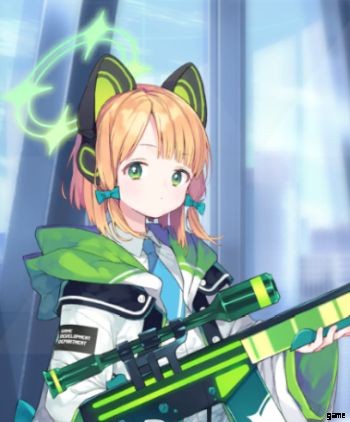
十六夜ノノミ

レア度: **
バックストライカー、貫通ダメージ、ライト アーマー、カバーなし
ストリートコンバットパワー:A
屋外戦闘力:A
屋内戦闘力:D
| スキル | 効果 |
| (EX, 5 バー) 罰タイム! | ノノミは扇形の範囲で 432% - 821% のダメージを与えます。 |
| (基本) タダ! ☆ | 20秒間、攻撃力が21.8%~41.4%増加します。 30 秒のクールダウン。 |
| (強化) ちくちゃ、恥を知れ! | ノノミのクリティカル ダメージが 14% - 26.6% 増加します。 |
| (サブ) きしみクリーン スイープ | ノノミは大型の敵に対して追加の 6.7% - 12.8% のダメージを与えます。 |
ノノミは新規プレイヤーが利用できる最高の無料ユニットの 1 つであり、彼女のパフォーマンスは十分に堅固であり、ほとんど予約なしで高レベルにスロットインすることができます。彼女のEXスキルは少し高価ですが、非常に立派なエリアをカバーし、2回ヒットするため、おそらくゲームで最も強力なウェーブクリアです.ノノミのほぼすべてが適切です。まだトレーニングしていない場合は、彼女をトレーニングすることを強くお勧めします。
砂大神白子(サイクリング)
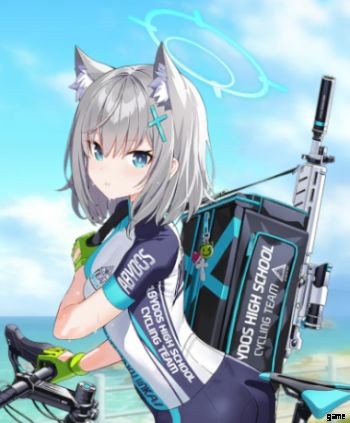
レア度: ***
ミッドストライカー、ミスティック ダメージ、ヘビー アーマー、カバー
ストリートコンバットパワー:S
屋外戦闘力:B
屋内戦闘力:D
| スキル | 効果 |
| (EX, 4 バー) ライディング グレネード | 円形 AOE で 431% - 690% のダメージを与えます。また、攻撃力を 38.4% ~ 50% 10 秒間低下させます。 |
| (基本) 集中射撃 | 直線で 194% - 369% のダメージを与えます。 40 秒のクールダウン。 |
| (強化) ラピッド ファイア | 白子の攻撃速度が 14% - 26.6% 増加します。 |
| (サブ) インサイトフル ファイア | 状態異常の敵を攻撃すると、攻撃力の 3.8% - 7.3% の追加ダメージを与えます。 |
サイクル白子のミスティック AOE 能力は正月睦月によって挑戦されましたが、私たちのオオカミの女の子はまだ彼女の長所を持っています.私自身デバフは好きではありませんが、ライディング グレネードは 10 秒間 50% という驚異的な効果を発揮します。
デバフがなくても、彼女の手榴弾は手頃な価格の素晴らしいウェーブ クリア スキルであり、デバフ期間中にダメージを押し上げるのに役立ついくつかの強力な自己バフを持っています。彼女がメイン ディーラーの役割を果たすことはほとんどありませんが、彼女が提供するユーティリティの価値は常にあります。
B ティア
空咲ひな

レア度: ***
バックストライカー、爆発ダメージ、ヘビーアーマー、カバーなし
ストリートコンバットパワー:S
屋外戦闘力:C
屋内戦闘力:C
| スキル | 効果 |
| (EX, 7 小節) デノウマン :イシュボシェス | ヒナが扇形のエリア内の敵を爆破し、636% - 1208% のダメージを与える。 |
| (基本) ロック &ロード | ヒナは即座にリロードします。リロードすると、ヒナの攻撃力が 16 秒間 21% - 39.9% 増加します。 |
| (強化) プリフェクト チーム メンバーの判定 | ヒナの攻撃速度が 14% - 26.6% 増加します。 |
| (サブ)アウトアンドアウト | ヒナは、遮蔽物にいない敵に攻撃力の 2.7% - 5.2% の追加ダメージを与えます。 |
「ヒナのEXスキルは使わない」と繰り返し。 Denouement :Ishbosheth は、その機能に対してコストが高すぎるため、彼女のキットの主な問題です。つまり、本当に必要な場合に使用でき、PVP で接近戦を締めくくることができます。つまり、なんと 7 つのエネルギーバー を支払うことができれば、 費用がかかります。安価な核で何かが死なないことはめったになく、ヒナの EX スキルの適用範囲はそれほど大きくありません.
これらの不安があっても、ヒナは依然として非常に優れた自動攻撃者ですが、リロードの代わりに特別なアニメーションを実行するため、彼女の基本スキルは少し誤解を招くと言わざるを得ません (技術的にはまだリロードです)。 /P>
伊織しろみ(水着)
レア度: ***
バックストライカー、爆発ダメージ、スペシャルアーマー、カバー
ストリートコンバットパワー:B
屋外戦闘力:S
屋内戦闘力:D
| スキル | 効果 |
| (EX, 4 バー) ゲイルレイジ | 円形 AOE で 463% - 880% のダメージを与えます。 |
| (ベーシック) クイック麻痺ナイフ | 敵1体に186%~297%のダメージを与える。また、51% - 66.3% のダメージを与える DoT を 20 秒間 Chill ダメージとして与えます。 25 秒のクールダウン |
| (強化) プレシジョン ショット | イオリの攻撃力が 14% - 26.6% 増加します。 |
| (サブ) スペシャリストの脅迫 | 攻撃は 25% の確率で、34.1% - 64.8% のダメージを与える Chill DoT を 20 秒間与えます。 10 秒のクールダウン。 |
DoT 自体はあまり役に立ちませんが、ダメージ風味のケーキのアイシングとして使用すると、かなり甘いものになります。水着イオリはこれを正しく理解しています:彼女の EX スキルは常に有用な円形核であり、DoT をショーのスターにしようとする (そして失敗する) のではなく、代わりに彼女の基本スキルの副作用としてスロットに入れます。彼女のサブスキルだけが、専用の DoT スターターとして本当に際立っています。水着イオリはそれほど素晴らしいわけではありませんが、強力なオートアタッカーであり、副作用としての DoT アビリティにより、ボス戦で優位に立つことができます。
水着ひなと同じように、水着伊織も現在グローバルで利用できないことに注意してください.これは、私が正式な翻訳されたスキル名を使用しない理由にもなります。運が良ければ、次に彼女が転がるかもしれません。もし彼女が転がっていたら。
久田いずな

レアリティ: ***<強い>
フロントストライカー、ミスティックダメージ、ライトアーマー、カバー
ストリートコンバットパワー:S
屋外戦闘力:B
屋内戦闘力:D
| スキル | 効果 |
| (EX, 3 バー) イズナ忍者スクロール! | イズナが指定された場所にテレポートします。これにより、攻撃速度が 30 秒間 27.4% - 52.1% 増加します。 |
| (基本) 秘密兵器、爆発する手裏剣! | 通常攻撃を 6 回行うたびに、Izuna は範囲内に爆発的な手裏剣を投げ、AOE ラウンドで 444% - 845% のダメージを与えます。 |
| (強化) イズナ流トゲ忍術! | イズナのクリティカルダメージが 14% - 26.6% 増加します。 |
| (サブ)イズナ流急成長忍術! | いづなのEXスキルも、30秒間攻撃力を20.1%~38.3%上昇させます。 |
「ジーザス・クライスト・イズナ、後ろに下がって戦車に仕事をさせてください」は、この訓練中の忍者をパーティーに入れるときに私が最も言うことです. Time hasn’t exactly been kind to Izuna; Blue Archive has released a lot of Mystic damagers since this tier list was first put up, and some of them completely overshadow Izuna.
Nonetheless, she’s still a decent unit if you can get used to teleporting her around to maximize her Sub skill buffs. Attack speed is the name of her game – if you can get her roided with someone like Hot Springs Chinatsu, Izuna’s Basic skill will proc a lot more.
Sunaookami Shiroko

Rarity: ***
Mid Striker, Explosive Damage, Light Armor, Takes Cover
Street Combat Power:S
Outdoor Combat Power:B
Indoor Combat Power:D
| Skills | Effect |
| (EX, 2 bars) Drone Support | Shiroko’s attack drone opens fire on a single enemy, dealing 400% - 760% damage to that target over multiple hits. |
| (Basic) Grenade Lob | Chucks a grenade at a random enemy every 25 seconds, dealing 193% - 368% damage in a circular AOE. |
| (Enhanced) Target Weaknesses | Increases Shiroko’s crit rate by 14% - 26.6%. |
| (Sub) Very Rapid Fire | Shiroko’s normal attacks have a 20% chance to give her a 30.2% - 57.4% attack speed buff that lasts for 30 seconds. This has a 25 second cooldown. |
Shiroko sits squarely in the middle of my Dealer tier list. Like her placement, she doesn’t really lack for anything, but doesn’t shine in any particular regard. This leads to a specific problem:if you have someone better for a specific role than Shiroko, then you’d probably pick that student over her. Nonetheless, this wolf packs solid performance and is a good all-rounder for a Light armor squad.
I will say that one thing that Shiroko has going for her is the very low cost of her EX skill – at just 2 bars, Drone Support can be cycled very quickly through your skill cards.
Sunohara Shun

Rarity: ***
Back Striker, Explosive Damage, Light Armor, Takes Cover
Street Combat Power:S
Outdoor Combat Power:B
Indoor Combat Power:D
| Skills | Effect |
| (EX, 3 bars) Where Did You Go, You Rascals? | Shun’s normal attacks deal 153% of her damage, her range increases by 24.4%, her crit increases by 26.3% - 50%, but her attack speed drops by 18.8%. Lasts 30 seconds. |
| (Basic) Pay Attention, Everyone! | At the beginning of combat, Shun instantly adds 2 – 3.8 Skill Cost (bars) to the EX Skill gauge. |
| (Enhanced) Instructor’s Poise | Increases Shun’s ATK by 14% - 26.6%. |
| (Sub) Plum Blossom Training | Shun deals 50.7% - 96.4% of her ATK as bonus damage against medium-sized targets. |
Shun is built almost solely for PVP. This “student” doesn’t have a very impressive EX skill:it’s not immediately impactful, it doesn’t inflict debuffs of any sort, and it actually gives Shun a debuff. No, the real reason people use Shun is because of her Basic skill, which gives up to 3.8 Skill Cost at the start of a fight. Just being able to use your skills off the bat in PVP is a huge gamechanger, even if you are restricted to auto combat.
In theory, Shun can also do good damage against students in PVP due to her Plum Blossom Training Passive, but really, all she’s really there for is the free meter, which alone warrants slotting her into your PVP team.
Konuri Maki
Rarity: ***
Back Striker, Piercing Damage, Light Armor, Doesn’t Take Cover
Street Combat Power:C
Outdoor Combat Power:C
Indoor Combat Power:S
| Skills | Effect |
| (EX, 5 bars) World Beautification! | Maki deals 676% - 1081% to a single enemy. This also increases her ATK by 41.9% - 54.5% for 30 seconds. |
| (Basic) Paintball Lob! | Every 25 seconds, Maki reduces one enemy’s defense by 18.3% - 34.8% and applies Mark to them for 15 seconds. |
| (Enhanced) Dazzling Display | Increases Maki’s attack speed by 14% - 26.6%. |
| (Sub) Suffering for Art | Maki deals an extra 14.9% - 28.3% damage against Marked enemies. |
Maki remains a niche pick – single-target damage Dealers are rarely relevant outside of Total Assault, and she doesn’t pack any relevant AOE to make her worth slotting in for stages. On the other hand, Maki is a fantastic pick against Heavy armor raid bosses, like Binah. The fact that you can eventually get Maki by trading in Total Assault medals ensures that even unlucky Senseis will eventually have a big hitter for these raid bosses.
Maki’s main problem is her EX skill, which has to compete with say, Iori, who has a lower, multi-hit EX skill. It’s hard to justify the 5 bars for an EX skill that’s sometimes useful, versus a cheaper EX skill that’s always useful.
Asagi Mutsuki
Rarity: **
Back Striker, Explosive Damage, Light Armor, Doesn’t Take Cover
Street Combat Power:S
Outdoor Combat Power:D
Indoor Combat Power:B
| Skills | Effect |
| (EX, 4 bars) Scorching Serenade | Mutsuki hurls her duffel bag at a target enemy, causing a horizontal explosion that deals 409% - 778% damage. Left and right explosions are somewhat delayed. |
| (Basic) Explosive Aria | Every 20 seconds, Mutsuki summons 3 mines in front of her. The mines deal 334% - 635% damage to enemies that step on them, and last 15 seconds. |
| (Enhanced) Let’s Have Some Fun! | Increases Mutsuki’s ATK by 14% - 26.6%. |
| (Sub) Wanna Have Some Fun? | Mutsuki’s normal attacks have a 25% chance to give her a 30.2% - 57.4% Accuracy buff for 30 seconds. 25 second cooldown. |
If I recall correctly, new Senseis will be able to get Mutsuki for free after progressing past the first chapter. As a starter student, Mutsuki is pretty decent; her EX skill gives you some much-needed AOE when you’re starting out, and if needed, she can serve as your go-to AOE all the way to the harder levels.
Mutsuki’s main problem is HER MINES. Oh God HER MINES . See, Mutsuki might be higher on this list if she didn’t place her mines directly in front of herself. As a back Dealer, you’ll virtually never ever see these mines get any use. Just pretend the mines don’t exist, keep slinging the exploding duffel bags, and everything will be fine. Which is a darn shame as 635% * 3 damage would be very impactful.
Akashi Junko

Rarity: **
Mid Striker, Piercing Damage, Light Armor, Takes Cover
Street Combat Power:B
Outdoor Combat Power:A
Indoor Combat Power:B
| Skills | Effect |
| (EX, 5 bars) I’m Hangry! | Junko deals 746% - 1417% to enemies in a straight line. Junko loses 25.7% of her current HP. |
| (Basic) Don’t Talk To Me When I’m Hungry! | When her HP dips below 20%, Junko becomes invulnerable for 12.8 – 24.3 seconds. This can only occur once per battle. |
| (Enhanced) Tiny Advantage | Increases Junko’s Evasion by 14% - 26.6%. |
| (Sub) Hungry Foodie | Junko deals 0.9% - 4.9% to 1.7% - 9.4% of her missing HP as additional damage. |
Junko utilizes HP-sacrificing mechanics to empower her own attacks. Her EX Skill does a massive amount of damage at max level, which is further compounded by her own respectable attack power. Any HP she loses is turned into more attack power by her Sub Skill, while her Basic Skill gives her some modicum of survivability.
On paper, this sounds great. In practice, her wide linear AOE is a lot less useful than the more common circular AOE, and the trigger condition for her Basic Skill triggers a lot less than expected as getting one-shotted is a lot more common than taking constant damage to lower her below 20%. The fact that you’ll need to carefully manage her health to get the most out of her, coupled with the danger that having average base health and always losing a quarter of it per EX Skill means that you need to keep a constant eye on Junko.
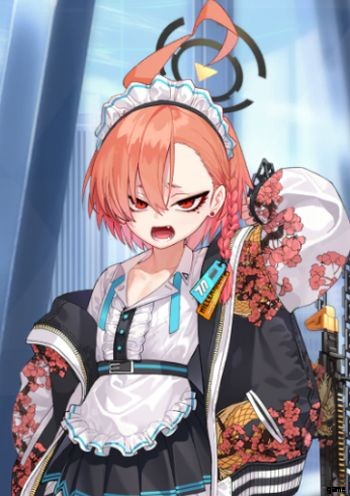
Wanibuchi Akari

Rarity: **
Mid Striker, Explosive Damage, Light Armor, Takes Cover
Street Combat Power:A
Outdoor Combat Power:B
Indoor Combat Power:B
| Skills | Effect |
| (EX, 4 bars) One Heaping Helping of Grenades! | Akari fires a grenade from her underbarrel grenade launcher, dealing 392% - 744% damage to enemies in a circular area. |
| (Basic) One More Spicy Serving! | Normal attacks have a 10% chance to grant 38.7% - 73.6% ATK for 20 seconds. 15 second cooldown. |
| (Enhanced) Thanks for the Great Meal! | Increases Akari’s HP by 14% - 26.6%. |
| (Sub) I Still Got Room For More! | Normal attacks have a 10% chance to grant 34.4% - 65.5% ATK for 26 seconds. 18 second cooldown. |
Akari is good student due to her ability to provide consistent performance via her two self-buffs and a good AOE. This allows her to fulfill both the AOE nuker role and the DPS role, though she’s overshadowed in both roles by rarer students. While she will eventually be replaced by more specialized students, building her is still a good choice, and she’ll likely serve you for a long time.
Waraku Chise

Rarity: **
Mid Striker, Mystic Damage, Heavy Armor, Takes Cover
Street Combat Power:A
Outdoor Combat Power:D
Indoor Combat Power:A
| Skills | Effect |
| (EX, 4 bars) You Might Get a Boo-Boo! | Blasts a circular area and sets it afire. Enemies within the area take 56% - 106% damage per tick. |
| (Basic) I’m Gonna Shoot! | Deals 219% - 416% damage to enemies in a circular AOE. 25 second cooldown. |
| (Enhanced) Put Your Back Into It! | Increases Chise’s ATK by 14% - 26.6%. |
| (Sub) This Is Gonna Sting! | Normal attacks have a 10% chance to proc a burning attack that deals 53.7% - 102% damage as Burn damage for 20 seconds. 5 second cooldown. |
The arrival of more Mystic damage dealers has pushed Chise into a more niche role. Like other students who depend on DoTs as their primary source of damage, the ever-increasing speed of Blue Archive means that Chise struggles to keep up with the likes of New Year Mutsuki or Cycling Shiroko. Even in raids, her role is threatened by the existence of Swimsuit Azusa, who nukes on top of her DoT. Chise isn’t a bad student, but she’ll quickly be overshadowed by other Mystic damage students.
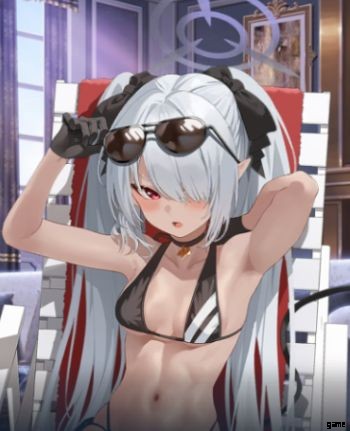
Shizuyama Mashiro (Swimsuit)

Rarity: ***
Special Student, Mystic Damage
Street Combat Power:B
Outdoor Combat Power:S
Indoor Combat Power:D
| Skills | Effect |
| (EX, 4 bars) Justice Baptism | Drops a target’s Evasion by 30.1% - 39.1% for 30 seconds, then deals 640% - 1025% damage to it. |
| (Basic) Justice Cooperation | The ally with the highest ATK gains 18.9% - 36% crit damage for 20 seconds. 30 second cooldown. |
| (Enhanced) Justice Gaze | Increases Mashiro’s crit by 14% - 26.6%. |
| (Sub) Justice Blessing | Increases ally Accuracy by 9.1% - 17.3%. |
Swimsuit Mashiro is here to do one thing:one-shot Tsubaki in PVP. This is a job she’s so good at that her mere presence in my opponent’s lineup is enough to persuade me to switch to a different tank. The debuff before the damage isn’t just a typo either:as Tsubaki has a very respectable Evasion, lowering it before delivering the nuke increases the chance that it’s going to go through. Apart from nuking Tsubaki, Swimsuit Mashiro doesn’t see much use. She does, however, have a nice targeted crit damage buff that can work as a (poor) substitute for some of the stronger buffers like Ako.
If you’ve decided after reading this that you want Mashiro (or dislike running into Tsurugi all the time in PVP), tough luck:Swimsuit Mashiro is not available in Global right now. You’ll have to wait and see if her banner comes back.
Renkawa Cherino

Rarity: ***
Mid Striker, Piercing Damage, Light Armor, Takes Cover
Street Combat Power:B
Outdoor Combat Power:D
Indoor Combat Power:S
| Skills | Effect |
| (EX, 7 bars) Call in the Guards! | Deals 515% - 605% damage to enemies in a circular AOE centered on Cherino. Level 3: -1 cost. Level 5: -1 cost, for a total of 5 cost. |
| (Basic) You Shall Be Purged! | Targets the enemy with the highest ATK and causes Cherino’s allies to focus their attacks on it. Also drops the target’s crit damage resistance by 18.7% - 35.6% for 15 seconds. 40 second cooldown. |
| (Enhanced) Mustache Power! | Increases Cherino’s ATK by 14% - 26.6%. |
| (Sub) Respect the ‘Stache! | Increases Cost Recovery by 269 – 511, with a further bonus of 77 – 146 per Red Winter student in the formation. Stacks up to 3 times, but doesn’t include Cherino herself. |
It is my personal opinion that Cherino is mislabeled as a Dealer rather than as a Support.
As a commander-type unit, Cherino takes control of the battlefield through her many skills:Call in the Guards is an absolutely massive AOE that hits multiple times, You Shall be Purged starts a heavy damage beatdown on the single strongest enemy, and Respect the ‘Stache vastly boosts Cost Recovery in a Red Winter formation. And while she doesn’t do too much damage with her autoattacks, Cherino’s presence greatly bolsters her allies. A good leader maximizes their underlings, after all.
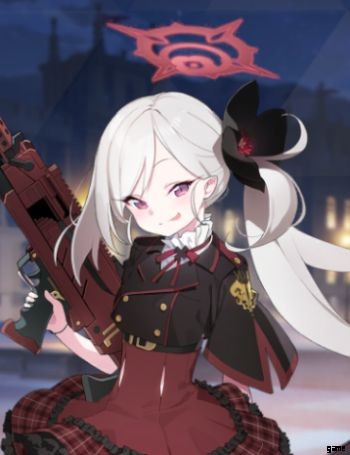
Rikuhachima Aru (New Year)

Rarity: ***
Back Striker, Piercing Damage, Special Armor, Takes Cover
Street Combat Power:D
Outdoor Combat Power:B
Indoor Combat Power:S
| Skills | Effect |
| (EX, 6 bars) Hard-Boiled Hanetsuki Shot | Gain 0.5 – 0.7 Skill Cost per Evil Deed, then resets Evil Deeds. Deals 179% - 340% damage to 1 enemy, then ricochets up to 11 times towards nearby enemies. Does full damage per bounce. |
| (Basic) Noir-Style Hanetsuki Attack | Deals 169% - 321% damage to enemies in a circular AOE. 30 second cooldown. |
| (Enhanced) Gorgeous Dignity of a Boss | Increases Aru’s max HP by 14% - 26.6%. |
| (Sub) Perfect Tactics of a Boss | Aru gains 1 Evil Deed for every 6 enemies defeated by her allies, to a maximum of 3 – 6 Evil Deeds. Each Evil Deed decreases Aru’s DEF by 26.8% - 5.3%. |
Our favorite dork got all dressed up for New Year, and she looks fantastic. Her kit though, isn’t as plug and play as her regular form. Aru’s got great wave clearing capabilities thanks to the ricochet effect of her EX Skill, and can potentially (and very rarely) do great single (actually double) target DPS if it can keep bouncing off two targets:which will virtually never happen. It also has the added effect of refunding a bit of your EX Skill gauge back. This comes with the drawback of reducing Aru’s DEF per Evil Deed she’s holding, though her base DEF is low enough that it doesn’t really matter.
Tendou Aris

Rarity: ***
Back Striker, Mystic Damage, Special Armor, Takes Cover
Street Combat Power:B
Outdoor Combat Power:D
Indoor Combat Power:S
| Skills | Effect |
| (EX, 6 bars) Balance Breakdown | Deals 311% - 591% damage in a straight line. Can deal 1.5x – 2x bonus damage, based on Aris’s Energy Charges. Resets Energy Charges. |
| (Basic) Bright Light! | Increases crit rate by 17% - 32.3% for 20 seconds. Also gains 1 Energy Charge, to a maximum of 2. 25 second cooldown. |
| (Enhanced) Enhanced Magic! | Increases Aris’s ATK by 14% - 26.6%. |
| (Sub) Supernova Awakening! | Increases crit rate by 12.1% - 22.9% when using Balance Breakdown for 20 seconds. Effect can be boosted by 1.5x – 2x, based on Aris’s Energy Charges. |
This refrigerator-wielding android hits hard, but she needs a lot of time before hitting her full potential. Each Energy Charge she builds up is an effective +50% bonus to both the damage of her EX Skill and the crit rate of her Sub Skill, to the point that 2 Energy Charges is essentially 1000%+ damage and a guaranteed crit. The problem here is that she gains Energy Charges at the rate of 1 per 25 seconds – a lot can have happened in those 50 seconds you were prepping her to fire.
C-Tier
Yakushi Saya
Rarity: ***
Special Student, Explosive Damage
Street Combat Power:B
Outdoor Combat Power:D
Indoor Combat Power:S
| Skills | Effect |
| (EX, 6 bars) Voila, My Masterpiece! | Saya deals 126% - 239% damage per second to enemies in a circular AOE for 8 seconds. |
| (Basic) A New Experiment! | Reduces 1 enemy’s crit rate by 12.1% and deals 36.5% - 69.3% damage to them as poison damage for 20 seconds. 20 second cooldown. |
| (Enhanced) I Am The Greatest! | Increases Saya’s ATK by 14% - 26.6%. |
| (Sub) I’ve Got This! | Increases ally crit rate by 9.1% - 17.3%. |
In another game where damage over time makes the difference between victory and death, Saya would shine. Alas, Blue Archive is not that game. Saya’s reliance on her DoTs scrabbles to find purchase in the nuke and burst damage gameplay of Blue Archive, and unless the first burst of her poison from her EX skill is lethal, it’s very hard to justify the high energy cost. On top of that, it’s not hard to find someone who just straight-up deals AOE damage.
Yakushi Saya (Casual)

Rarity: ***
Special Student, Piercing Damage
Street Combat Power:D
Outdoor Combat Power:B
Indoor Combat Power:S
| Skills | Effect |
| (EX, 5 bars) A Gift from Me! | Saya deals 40% - 75.9% damage per second to enemies in a straight line for 20 seconds. |
| (Basic) The Experiments Must Continue! | Deals 205% - 389% damage in a circular AOE every 30 seconds. |
| (Enhanced) Focus Elixir | Increases Saya’s crit damage by 14% - 26.6%. |
| (Sub) This Isn’t Suspicious | Increases ally crit damage by 9.1% - 17.3%. |
Casual Saya still relies on DoTs to do real damage, which is still her downfall. She does come with a slightly cheaper EX Skill, but it changes her circular AOE to a linear-type one, which is harder to maximize and also has a lower multiplier.
On the upside, it lasts a heck of a lot longer than her base form and does Piercing damage. This gives Casual Saya great utility in the Chesed raid, but not much else. She also has a better Basic Skill, but who runs Supports for their Basic Skills? But at least she buffs crit damage this time!
Kuromi Serika

Rarity: **
Mid Striker, Explosive Damage, Light Armor, Takes Cover
Street Combat Power:A
Outdoor Combat Power:D
Indoor Combat Power:A
| Skills | Effect |
| (EX, 2 bars) Outta My Way! | Instantly reloads Serika’s weapon after the animation completes. Gives Serika a 35.5% - 67.7% ATK boost for 30 seconds. |
| (Basic) Focused Fire | Every 25 seconds, Serika deals 223% - 425% damage to one enemy. |
| (Enhanced) Part-Time Worker’s Spirit! | Increases Serika’s ATK by 14% - 26.6%. |
| (Sub) Wrath of the Task Force! | Using Outta My Way! also boosts Serika’s attack speed by 20.1% - 38.3%. This buff lasts for 30 seconds. |
Serika is a basic attack speed and attack power self-buffer type student. Her skills are remarkably focused on her DPS role, which gives Serika surprisingly decent performance for her rarity. She’s also got a decent ATK stat that goes up to 3112 at level 100 (with no bonuses from relationship, unlocked Mystic, or equipped gear). She does, however, lack that special oomph that makes dealers stand out, and the resources you spend on leveling her up could be better invested elsewhere.
Hanekawa Hasumi
Rarity: **
Back Striker, Piercing Damage, Heavy Armor, Takes Cover
Street Combat Power:B
Outdoor Combat Power:A
Indoor Combat Power:B
| Skills | Effect |
| (EX, 5 bars) Piercing Shot | Hasumi deals 574% - 1091% damage to one enemy. |
| (Basic) Shrewd | Defeating an enemy instantly reloads Hasumi’s weapon and gives her a 30% - 57% crit damage buff for 13 seconds. |
| (Enhanced) Precision Aim | Increases Hasumi’s crit damage by 14% - 26.6%. |
| (Sub) Target Search | The first normal attack made after reloading has a 50% - 95% increased crit rate. |
Hasumi suffers from two main problems:an EX skill that’s far too expensive for what it does and a reliance on getting and chaining kills with her slow attack speed. If you want to get the most out of Hasumi, you’ll need to feed her kills, which, with her sniper rifle, can be very slow. It’s far easier to just plug in a bunch of constant DPS students and get the same results.
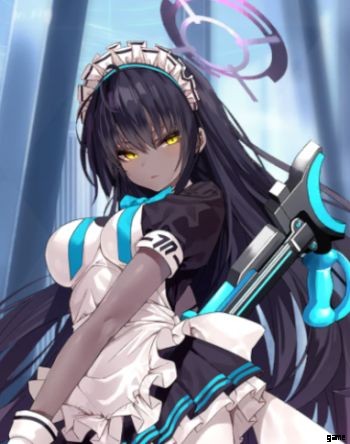
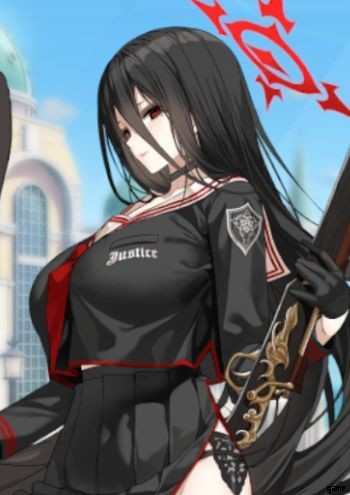
Kensaki Tsurugi

Rarity: ***
Front Striker, Piercing Damage, Heavy Armor, Doesn’t Take Cover
Street Combat Power:D
Outdoor Combat Power:B
Indoor Combat Power:S
| Skills | Effect |
| (EX, 3 bars) Bizarre Devastation | Transforms Tsurugi’s normal attack into a fan-shaped blast that deals 138% damage. Tsurugi also gains a 25.8% - 45.2% buff that lasts until she reloads. At max level, the buff persists until Tsurugi reloads twice. |
| (Basic) Intense Passion | Defeating a foe heals Tsurugi by 116% - 221% of her Healing. This has a 10 second cooldown. |
| (Enhanced) Agility | Increases Tsurugi’s move speed by 14% - 26.6%. |
| (Sub) Uncontrollable Power | Defeating a foe has a 30% - 57% chance to instantly reload one bullet. |
Tsurugi is a frontline unit who believes that the best defense is a good offense, and her kit fully reflects that. The problem that Tsurugi faces is consistency:yes, she has a life regen on kill, but A.) It has a cooldown of 10 seconds, and B.) She has to go through the animation. Tsurugi will also constantly be reloading as she only has two shots per reload, so outside of her EX or lucky procs of her Sub skill (which require her to land the final hit), you’ll likely run into problems.
This problem is exacerbated by Tsurugi’s role of frontline Dealer, meaning that she’ll be competing with the team’s tank for aggro. This can be a problem as unlike dedicated tanks, who usually have an EX skill and sub skills to mitigate damage, Tsurugi has none of these. As the game matures and enemy compositions become trickier, Tsurugi’s lack of an on-demand damage reduction or recovery becomes harder and harder to deal with.
On the plus side, Tsurugi does have high base defense and has equipment slots for a bag and a charm. This also means that Tsurugi will shine much later than your other dealers as you’ll likely need to get your bag to at least T4 so its DEF bonus kicks in.
Kensaki Tsurugi (Swimsuit)
Rarity: *
Front Striker, Mystic Damage, Special Armor, Doesn’t Take Cover
Street Combat Power:B
Outdoor Combat Power:C
Indoor Combat Power:A
| Skills | Effect |
| (EX, 3 bars) Torrent | Tsurugi’s normal attacks also deal 67% - 167% of her ATK as extra damage for 20 seconds. |
| (Basic) Hot Strike | Deals 190% - 362% damage to one foe every 35 seconds. |
| (Enhanced) Nimble On My Feet | Increases Tsurugi’s attack speed by 14% - 26.6%. |
| (Sub) Warmed Up | Hot Strike also gives Tsurugi 16.8% - 31.9% attack speed for 30 seconds. |
This version of Tsurugi isn’t too far from her original incarnation. While she may enjoying her time with Sensei on the beach, she’s still an in-your-face Dealer. Tsurugi’s swimsuit form, however, does have some notable differences:first off, she’s traded the piercing damage and heavy armor for mystic damage and special armor, which changes her matchups by quite a lot.
Secondly, this damage and armor switch came at a cost of lowering her base stats (compared to her base form). Finally, her kit in this mode is full-on offense, with a less restrictive EX skill, a powerful attack speed steroid, and a passive attack speed buff.
As with her base form, you’ll need to be careful when using Swimsuit Tsurugi as she’s still prone to the same pitfalls of eating aggro and lacking sustainability – perhaps even more so than regular Tsurugi. On the plus side, she still has the bag and charm slot!
Otohana Sumire
Rarity: ***
Front Striker, Piercing Damage, Special Armor, Doesn’t Take Cover
Street Combat Power:B
Outdoor Combat Power:D
Indoor Combat Power:S
| Skills | Effect |
| (EX, 3 bars) Shoot and Score | Sumire ducks and rolls, firing her shotgun in a fan-shaped area to deal 742% - 1410% damage to enemies caught in the blast. |
| (Basic) Warm-Up | Sumire increases her ATK by 25.2% - 47.9% for 20 seconds. 40 second cooldown. |
| (Enhanced) Pinpoint Attack | Increases Sumire’s HP by 14% - 26.6%. |
| (Sub) Tension Boost! | Sumire has an extra 13.4% - 25.5% DEF while she’s unaffected by any Crowd Control. |
Let’s finish up with the third shotgun-toting frontal damage dealer:Sumire. Compared to Tsurugi, Sumire trades off HP for higher DEF both via her base stats and her Sub skill. Thanks to this, as well as her HP boost, Sumire is notably more durable than Tsurugi, and the bag and charm slots really help. She also has the advantage of a powerful EX Skill that comes with a very hefty damage multiplier at max level.
However, like Tsurugi, Sumire suffers from a lack of active damage mitigation, as well as pulling aggro off the main tank thanks to her front position. Use her if you’re confident she can handle aggro and incoming damage, or have a way to keep her topped up.
Shiroishi Utaha

Rarity: **
Special Dealer, Piercing Damage
Street Combat Power:A
Outdoor Combat Power:D
Indoor Combat Power:A
| Skills | Effect |
| (EX, 4 bars) Rise of Thundergun | Utaha plops down a turret on a targeted location. The turret deals 81.4% - 154% of Utaha’s damage. Turrets last 30 seconds. |
| (Basic) Thundergun MK-II | Utaha summons a turret every 30 seconds. This turret deals 38.2% - 72.6% of Utaha’s damage. MK-II turrets last 20 seconds. |
| (Enhanced) Tech Revolution | Increases Utaha’s ATK by 14% - 26.6%. |
| (Sub) Meister’s Pledge | Utaha’s allies have 9.1% - 17.3% increased max HP. |
Just as with my first tier list / character analysis, Utaha’s real value comes from the shenanigans you can pull off with her turrets. They’re not strong and they’re not sturdy…but they’re an extra body on the field that can buy you the time you need. I’m actually left wondering why they classified Utaha as a Dealer when she’s technically a support, but I digress.
Thundergun isn’t that great; for one thing, you commit to it when you summon it as it can’t move at all, and you have to wait for Utaha’s skill card to appear again. You’ll also need to commit 4 bars to activate Thundergun at all, which might be better spent directly healing or buffing your Strikers instead.
Mikamo Neru
Rarity: ***
Front Striker, Piercing Damage, Light Armor, Takes Cover
Street Combat Power:D
Outdoor Combat Power:S
Indoor Combat Power:S
| Skills | Effect |
| (EX, 2 bars) You Got a Death Wish or Somethin’? | Neru deals 476% - 762% damage to one enemy. When Neru is Enraged, damage from this skill is multiplied by 1.5 – 1.7. |
| (Basic) Cruisin’ for a Bruisin’! | Neru becomes Enraged and gains 17.8% - 33.9% Evasion for 20 seconds. 30 second cooldown. |
| (Enhanced) Codename Double O | Increases Neru’s crit damage by 14% - 26.6%. |
| (Sub) Enhanced Rage | When Neru becomes Enraged, she gains 16.8% - 31.9% ATK for 30 seconds. |
Neru is another one of Blue Archive’s frontline attackers. While she does have even more punching force than Sumire thanks to her unique Enrage mechanic, she’s also the most fragile of all frontline dealers:not only does she have incredibly paltry defense compared to Sumire or Tsurugi (both forms), Neru also cannot equip a bag, instead having a badge slot for her Evasion-based defense.
This is a major problem as Evasion is super niche, requires a specific set of support students, doesn’t get any bonuses from badges until T7 which Global doesn’t have yet, and it’s so much easier to assemble a standard defense team. Couple all of this with the fact that Neru will also be competing for aggro with the tank, and you can see where this is going.
Asahina Pina

Rarity: *
Back Striker, Piercing Damage, Light Armor, Doesn’t Take Cover
Street Combat Power:A
Outdoor Combat Power:B
Indoor Combat Power:C
| Skills | Effect |
| (EX, 4 bars) Rapid Fire Mode! | Instantly reloads. Increases ATK by 29.1% - 46.6% and ignores her attack delay for 3-5 hits. for 30 seconds. |
| (Basic) Burn it Again! | Heals Pina for 355% - 674% of her Healing when her HP drops below 20%. Once per battle. |
| (Enhanced) Keen Senses | Increases Pina’s crit by 14% - 26.6%. |
| (Sub) Ready, Set, Spray! | If Pina doesn’t move for 10 seconds, increases her attack speed by 20.1% - 38.3%. |
First off, Rapid Fire Mode! isn’t explained very well:what it actually does is increase the number of shots fired per burst, without actually depleting Pina’s ammo. In the end though, what it boils down to is that Pina is attack speed-reliant. The trouble with this is that she needs to sit still to reach her full potential, meaning that Pina is at her absolute best during raids, raids where you will likely want somebody else in your Striker slots.
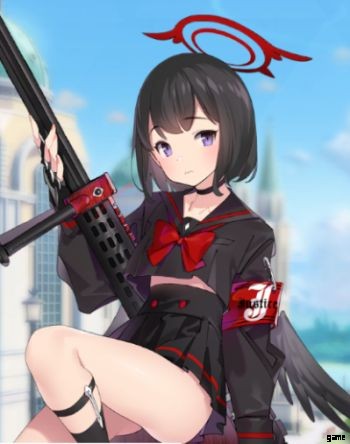
Shizuyama Mashiro
Rarity: ***
Special Student, Explosive Damage
Street Combat Power:B
Outdoor Combat Power:S
Indoor Combat Power:D
| Skills | Effect |
| (EX, 3 bars) Strike of Justice | Mashiro hits a single enemy for 415% - 664% damage. This attack has a 50% chance to deal 623% - 716% extra damage. Level 5:Bonus damage chance raised to 75%. |
| (Basic) Righteous Justice | Damages enemies in a circular AOE for 150% - 286% damage. 20 second cooldown. |
| (Enhanced) Breath of Justice | Increases Mashiro’s crit by 14% - 26.6%. |
| (Sub) Binding Justice | Increases ally Accuracy by 9.1% - 17.3%. |
Mashiro’s main problem is that she’s competing with Hibiki. For just one bar, Hibiki hits a big area, while Mashiro is stuck to a single target. On the other hand, Strike of Justice does hit hard – even without the extra damage proc, which is pretty much just icing on the cake. While she’s great at taking out single Light armor targets, she also has the problem of having Accuracy for her team support skill, which isn’t really relevant right now.
Hanaoka Yuzu

Rarity: ***
Mid Striker, Piercing Damage, Special Armor, Takes Cover
Street Combat Power:S
Outdoor Combat Power:B
Indoor Combat Power:D
| Skills | Effect |
| (EX, 4 bars) Press Start! | Deals 312% - 594% in a circular AOE. |
| (Basic) Max Chain Combo! | Deals 140% - 266% damage in a circular AOE. Always targets the enemy with the highest ATK. 25 second cooldown. |
| (Enhanced) Debugging Process... | Increases Yuzu’s crit damage by 14% - 26.6%. |
| (Sub) A Shy Girl’s Courage | Increases crit damage by 22.3% - 42.4% for 6 seconds when using Press Start! or Max Chain Combo! |
Yuzu can shine, but it’s hard to get her to that point. The first thing you need to know about Yuzu is that SHE RELOADS AFTER EVERY SHOT. Her ponderous attack speed really detracts from the amount of damage she could be doing, and it’s really tied to the grenade launcher she uses.
She does have great AOE, but her performance is marred by her attack speed. Yuzu can also be used as a wildcard in PVP due to her Basic Skill immediately locking on to the highest ATK target, but in general, it’s a lot better to use somebody with more consistent performance.
Kakudate Karin (Bunny)

Rarity: ***
Back Striker, Mystic Damage, Heavy Armor, Takes Cover
Street Combat Power:D
Outdoor Combat Power:B
Indoor Combat Power:S
| Skills | Effect |
| (EX, 7 bars) Fast and Accurate | Deals 325% - 521% damage in a large fan-shaped AOE. Ignores 32% - 48% DEF. |
| (Basic) Area Fire | Deals 111% - 192% damage in a circular AOE. Ignores 20% - 325 DEF. 25 second cooldown. |
| (Enhanced) Enhanced Firepower | Increases Karin’s ATK by 14% - 26.6%. |
| (Sub) Precise and Careful | Increases crit rate by 12.9% - 24.5% when using Fast and Accurate . |
This version of Karin comes in a bunny suit, and is also a Striker. Like Hina, Karin suffers from an EX Skill that’s far too expensive for what it does – Karin’s respectable ATK means that she can get away even with low multipliers, and the DEF pierce effect is unnecessary. It also eats a massive SEVEN BARS, so have fun with that. You won’t even want to use it on raid bosses; I, for instance, would rather just use Swimsuit Azusa to deal a heavy nuke + DoT.
D-Tier
Shishidou Izumi

Rarity: ***
Back Striker, Explosive Damage, Light Armor, Doesn’t Take Cover
Street Combat Power:S
Outdoor Combat Power:D
Indoor Combat Power:B
| Skills | Effect |
| (EX, 3 bars) Cheese ‘n’ Chocolate Hamburger! | Heals Izumi for 145% - 254% of her Healing. Level 3+: Increases Izumi’s attack speed by 38.4% for 21 seconds. |
| (Basic) Ready, Set, Boom! | Normal attacks have a 20% chance to deal 275% - 523% damage to a single enemy. 10 second cooldown. |
| (Enhanced) What to Eat Next? | Increases Izumi’s Recovery Boost by 14% - 26.6%. |
| (Sub) Savor the Flavor! | Izumi deals 0.4% - 2.2% (level 1) to 0.7% - 4.1% (max level) of her current HP as additional damage. |
Izumi is still a “what were they thinking” student. My previous gripes still hold – she’s a gimmicky DPS unit that relies on her HP for her damage. There’s few, if any things, that Izumi does that another Dealer can’t do. At least she’s cute, and she passes bonuses to her swimsuit version.
Ichinose Asuna

Rarity: *
Mid Striker, Mystic Damage, Light Armor, Takes Cover
Street Combat Power:B
Outdoor Combat Power:B
Indoor Combat Power:B
| Skills | Effect |
| (EX, 2 bars) On My Way! | Increases attack speed by 30.2% - 57.3% and Evasion by 43.4% for 30 seconds. Moves Asuna in the direction of the arrow when skill is cast. |
| (Basic) I’ll Fire! | Every 20 seconds, Asuna deals 219% - 416% damage to a single enemy. |
| (Enhanced) This is Gonna Hurt | Increases Asuna’s crit damage by 14% - 26.6%. |
| (Sub) Wanna Pick Up the Pace? | On My Way! also increases Asuna’s attack speed by another 20.1% - 38.3% for 30 seconds. |
The one good thing about Asuna is that she’s a snapshot of the early days of Blue Archive. Mystic damage dealers were very rare, and you took what you could get. And even then she just barely made it on to teams – her EX skill isn’t useful, her skills are all over the place, and she’s all in all a very meh unit. At least her stats pass on to Bunny Suit Asuna, so there’s that.
Ihara Yoshimi

Rarity: *
Special Student, Piercing DamageStreet Combat Power:B
Outdoor Combat Power:B
Indoor Combat Power:B
| Skills | Effect |
| (EX, 4 bars) I-I’m Not Worried! | Yoshimi deals 220% - 353% damage to enemies in a circular area; this also stuns them for 2.2 – 2.9 seconds. |
| (Basic) You Wanna Get Burned?! | Every 25 seconds, Yoshimi deals 191% - 364% to enemies in a round AOE. |
| (Enhanced) Don’t Underestimate Me! | Increases Yoshimi’s crit rate by 14% - 26.6%. |
| (Sub) E-Everyone, Please Listen! | Increases ally crowd control power by 9.1% - 17.3%. |
…if I wanted to stun, I’d just use Hare. You could make the argument that technically Yoshimi does more damage, but A.) The point of a stun is to disable, not to kill, and B.) Hare’s stun is 3.5 seconds compared to Yoshimi’s 2.9. Yoshimi’s EX skill also has a very noticeable and annoying startup (a missile falls, and it has to detonate before any damage/stun is dealt), and on top of that, she and Hare have the exact same AOE radius. There’s really no reason to use Yoshimi unless you really like her.
Sunohara Shun (Small)

Rarity: ***
Back Striker, Explosive Damage, Light Armor, Takes Cover
Street Combat Power:S
Outdoor Combat Power:D
Indoor Combat Power:B
| Skills | Effect |
| (EX, 5 bars) Someone’s Been Naughty | Deals 593% - 803% damage to target enemy. Ignores 28% - 44% DEF. |
| (Basic) You Need a Talking To! | Deals 167% - 317% damage to 1 enemy. 25 second cooldown. |
| (Enhanced) Bundle of Energy | Increases Shun’s attack speed by 14% - 26.6%. |
| (Sub) Sooo Heavy! | Decreases Shun’s ATK by 21.7% when she uses Someone’s Been Naughty for 20 seconds. 20 seconds later, gains 34.6% - 65.7% ATK for 20 seconds. |
Small Shun is let down because of her Sub skill, which requires really precise timing. It’s not hard to find someone who does damage like her with a lot less setup. If you’re set on running her though, exploit her high multiplier and DEF ignoring to hit raid bosses hard – ideally with a composition that supports Shun as the sole damage dealer.
Blue Archive Tank Tier List
| S | Tsubaki |
| A | Natsu, Hoshino |
| B | Yuuka, Neru (Bunny), Haruka, Eimi |
S-Tier
Kasuga Tsubaki
Rarity: **
Front Striker, Piercing Damage, Special Armor, Doesn’t Take Cover
Street Combat Power:A
Outdoor Combat Power:A
Indoor Combat Power:D
| Skills | Effect |
| (EX, 4 bars) Deploy Tactical Shield | Taunts enemies in a circular area for 4.7 – 6.2 seconds, forcing them to attack only Tsubaki. Increases DEF by 28.1% - 44.9%. |
| (Basic) Sleep Cures All | Tsubaki heals herself for 349% - 663% of her Healing when her HP drops below 30%. This can only happen once per battle. |
| (Enhanced) Fortitude | Increases Tsubaki’s DEF by 14% - 26.6%. |
| (Sub) Expert Reload | Tsubaki takes 24% - 45.6% less damage while reloading. |
Tsubaki is still pretty much the best tank in the game. 2* rarity making it easy to get her, a taunt (with a useless DEF buff), a powerful self-heal with a better trigger threshold (30% compared to the usual 20%), good evasion, and the Special armor type means that Tsubaki is really hard to put down. So hard that they probably custom-built Swimsuit Mashiro to end her reign. The only real problem with her loadout is her Enhanced Skill, since Tsubaki is not a DEF-based tank.
If Tsubaki does well in PVP, she’s even more potent in PVE where even enemies with Mystic damage struggle with her. If you have her, you pretty much always use her.
A-Tier
Yutori Natsu

Rarity: **
Front Striker, Mystic Damage, Heavy Armor, Takes Cover
Street Combat Power:D
Outdoor Combat Power:B
Indoor Combat Power:S
| Skills | Effect |
| (EX, 3 bars) Hidden Ace | Heals self for 178% - 338% of Healing. Removes 1 status ailment. |
| (Basic) One Bite at a Time! | Throws a pie at a random ally, which grants an 8.5% - 16.1% ATK buff for 20 seconds. Ricochets up to three times, applying its full effect to allies hit. Cannot affect nor target Natsu. 30 second cooldown. |
| (Enhanced) Hearty! | Increases Natsu’s max HP by 14% - 26.6%. |
| (Sub) A Mouth Full of Happiness | Using Hidden Ace increases Natsu’s Recovery Boost by 7.2% - 13.8%. Stacks up to three times. |
Natsu is a supremely self-sufficient tank that comes with her own self-heal / cleanse that increases in potency as the fight goes on, which is great as she takes an HP-based approach to tanking. Natsu also takes a better approach when it comes to dealing with mobs:rather than trying to do something herself, she instead buffs her allies, which allows them to do their job better.
Takanashi Hoshino

Rarity: ***
Front Striker, Piercing Damage, Heavy Armor, Doesn’t Take CoverStreet Combat Power:D
Outdoor Combat Power:S
Indoor Combat Power:B
| Skills | Effect |
| (EX, 4 bars) Tactical Suppression | Hoshino deals 435% - 697% damage in a fan-shaped area. Level 3+: Also stuns enemies for 1 – 1.4 seconds. |
| (Basic) Emergency First Aid | When Hoshino’s HP drops below 30%, she continuously heals for 100% - 191% of her Healing for 20 seconds. Once per battle only. |
| (Enhanced) Foreclosure Task Force President | Increases Hoshino’s DEF by 14% - 26.6%. |
| (Sub) Expert Suppression | Using Tactical Suppression also gives Hoshino a shield with health equal to 108% - 205% of her Healing. |
Hoshino mixes and matches from pretty much every other tank’s kit. The result is surprisingly potent:a stunning nuke that also grants a shield, a self-heal at critical health, and an Enhanced Skill that pushes Hoshino’s already good DEF a bit higher. This makes Hoshino a great tank that can work with almost any team.
B-Tier
Hayase Yuuka

Rarity: **
Front Striker, Explosive Damage, Heavy Armor, Takes Cover
Street Combat Power:B
Outdoor Combat Power:B
Indoor Combat Power:A
| Skills | Effect |
| (EX, 3 bars) Q.E.D | Yuuka puts a temporary shield around herself for 15 seconds. This shield has HP equal to 190% - 248% of Yuuka’s Healing. |
| (Basic) I.F.F | Deals 301% - 573% damage to one enemy. 15 second cooldown. |
| (Enhanced) Optimal Solution | Increases Yuuka’s DEF by 14% - 26.6%. |
| (Sub) Speedy Mental Calculations | Whenever Yuuka takes cover, she heals for 75% - 142% of her Healing. This has a cooldown of 10 seconds. |
The starter tank that new players get is decent, and yet there’s lots of things that she’s lacking if you spend time getting to know her. Yuuka has a decent self-shield (which, like all shields, isn’t exactly great), a single target nuke (which is out of place in a tank’s kit), a DEF passive (Yuuka’s DEF isn’t good at all), and a self-heal.
A unique problem that Yuuka has is that rather than having a bag slot, she has a badge slot, thus missing out on the hefty DEF bonus that a bag affords. Yuuka will carry you through much of the early and maybe part of the mid game, but if you have a better tank by that point, switch her out.
Mikamo Neru (Bunny)

Rarity: ***
Front Striker, Explosive Damage, Heavy Armor, Takes Cover
Street Combat Power:B
Outdoor Combat Power:S
Indoor Combat Power:D
| Skills | Effect |
| (EX, 4 bars) Hold It Right There | Neru jumps to the center of the targeted circular AOE, then grants herself a shield with HP equal to 276% - 401% of her Healing for 20 seconds. Also deals 366% - 531% damage to and taunts enemies inside the AOE. |
| (Basic) What Are You Looking At?! | Increases Evasion by 22.1% - 41.9% for 23 seconds. 30 second cooldown. |
| (Enhanced) Abrasion | Increases Neru’s crit damage by 14% - 26.6%. |
| (Sub) Much More Painful | Deals 3.2% - 6.2% of ATK as extra damage when attacking medium-sized enemies. |
Do you like numbers? Bunny Neru’s EX Skill makes lots of numbers fly, and is always fun to watch. It’s also a great skill as it grabs aggro and is very disruptive while giving Neru slightly more durability.
On the flip side of this, Bunny Neru isn’t as durable as other tanks:relying purely on Evasion-based defenses is iffy, and Neru also has the least HP of all tanks available in Global たった今。 She also doesn’t have passives that help her survive better, instead trying to push for more damage – which isn’t the tank’s main job, to begin with.
Igusa Haruka
Rarity: *
Front Striker, Explosive Damage, Light Armor, Doesn’t Take CoverStreet Combat Power:C
Outdoor Combat Power:B
Indoor Combat Power:A
| Skills | Effect |
| (EX, 4 bars) Shotgun Blast | Haruka marches forward, blasting enemies in a fan-shaped area for 821% - 1560% damage. |
| (Basic) Over Trigger | Increases DEF by 18.9% - 36% for 20 seconds. 20 second cooldown. |
| (Enhanced) I’ll Keep My Chin Up! | Increases Haruka’s HP by 14% - 26.6%. |
| (Sub) Hauugh?! | Taking damage has a 5% chance to increase DEF by 18.1% - 34.4% for 15 seconds. 10 second cooldown. |
They laughed me off when I told them Haruka could be good. They called me mad. They weren’t laughing when super Haruka came back to one-shot everybody.
The problem with Haruka is that she requires a lot of investment to become really strong. As a 1* unit by default, you’re going to need a lot of duplicates to get Haruka to 5*, where she needs to be. And as a pure stonewall-type defender, Haruka suffers a lot in the early game, barely able to keep up with tanks like Tsubaki or even Yuuka. When she does get going though, she has a ton of base DEF, a DEF buff that’s pretty much always active after the first 20 seconds, and oh look, even more DEF when she gets hit.
That said, I wouldn’t recommend using Haruka unless you’re really, really, REALLY invested in her character or are far enough in the game that you want to try meme tanks.
Izumimoto Eimi

Rarity: ***
Front Striker, Explosive Damage, Light Armor, Doesn’t Take Cover
Street Combat Power:S
Outdoor Combat Power:B
Indoor Combat Power:D
| Skills | Effect |
| (EX, 4 bars) Undying Will | Eimi gives herself a regeneration buff, healing for 8.6% - 16.4% of her Healing plus 3.4% of her missing HP for 20 seconds. |
| (Basic) Single-Minded Assault | Eimi deals 297% - 564% damage against enemies in a fan-shaped area. 15 second cooldown. |
| (Enhanced) Specialist’s Respite | Increases Recovery Boost by 14% - 26.6%. |
| (Sub) Iron Will | When Eimi’s HP is below 50%, her Crowd Control Res increases by 20.1% - 38.3%. |
Eimi also utilizes the stonewall strategy (despite what her wardrobe might suggest) but this time focusing on HP instead of DEF. The result is serviceable:she’s got high durability with a regen-type self heal coupled with some unfortunately iffy skills. Crowd Control Res isn’t relevant in either PVP or PVE, and Eimi’s Basic Skill slot would be better served with, say, a one-time burst heal at low health. Eimi’s EX Skill can also be improved as while the regen is good, it’s not good enough to keep with crazy constant damage.
Healer Tier List
| S | Koharu |
| A | Nodoka (Hot Springs), Serina, Hanae |
| B | Fuuka, Ayane, Chinatsu, Hanako |
S-Tier
Shimoe Koharu

Rarity: ***
Back Striker, Explosive Damage, Heavy Armor, Takes Cover
Street Combat Power:D
Outdoor Combat Power:S
Indoor Combat Power:B
| Skills | Effect |
| (EX, 3 bars) Holy Grenade | Koharu throws a grenade which heals allies for 101% - 192% of her healing while dealing 227% - 431% damage to enemies. |
| (Basic) I’ll Heal You! | Heals all allies below 50% HP for 80.8% - 153% of Koharu’s Healing. 20 second cooldown. Cannot heal Koharu. |
| (Enhanced) I’m Trying! | Increases Koharu’s ATK by 14% - 26.6%. |
| (Sub) Being The Elite! | Increases Koharu’s Healing by 21.5% - 41% for 20 seconds. 30 second cooldown. |
Koharu is Blue Archive’s first frontline healer (and as of writing, the only one) , and no, Midori doesn’t count as she’s a Dealer. With both a targeted heal / nuke and a party heal at her disposal, as well as a passive heal for allies below 50%, Koharu excels at keeping her allies alive while chipping in with some damage of her own. Some precise targeting is needed with her EX Skill to hit the most targets at once, but that’s usually not an issue. All in all, Koharu is a fantastic healer / damager who will have no difficulty fitting into any composition.
Also, every other healer just bumps down a tier due to not being as good as Koharu. Sorry, girls.
A-Tier
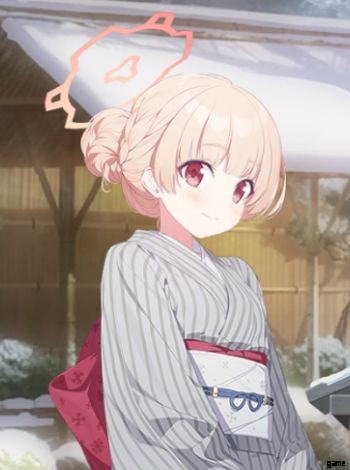
Amami Nodoka (Hot Springs)
Rarity: ***
Special Healer
Street Combat Power:B
Outdoor Combat Power:D
Indoor Combat Power:S
| Skills | Effect |
| (EX, 4 bars) Hot Springs Resort No. 227, Open for Business! | Deploys Nodoka in a circular AOE for 32 seconds. Every 3 seconds, she tosses a random snack at the ally with the least HP in her AOE. The snacks heal allies based on Nodoka’s Healing: Hot Spring Manju: 20.3% - 38.6% Healing. Corn Stick: 24.8% - 47.1% Healing. White Milk: 29.3% - 55.7% Healing. |
| (Basic) The Hostess’ Welcome | Increases Recovery Boost for the ally with the least HP by 16.6% - 31.6% for 25 seconds. 20 second cooldown. |
| (Enhanced) Hot Springs Therapy | Increases Nodoka’s Healing by 14% - 26.6%. |
| (Sub) Hot Springs Heat | Increases ally ATK by 9.1% - 17.3%. |
Hot Springs Nodoka differs a lot from her lackluster original incarnation. As a heal spammer who’s dependent on positioning, Nodoka excels at keeping her allies topped up in boss fights – and not to mention Hieronymus’ relics. While she’s rather hard to use in regular combat, what she does offer is extremely hard to match with any other character.
Sumi Serina

Rarity: *
Special Healer
Street Combat Power:A
Outdoor Combat Power:C
Indoor Combat Power:B
| Skills | Effect |
| (EX, 2 bars) Intensive Care Set A | Serina drops a healing package, moving the closest ally to it and healing them for 120% - 228% of Serina’s healing. |
| (Basic) Urgent Rescue Set B | Every 35 seconds, Serina heals an ally for 94% - 178% of her Healing. |
| (Enhanced) Ministering Angel | Increases Serina’s Healing by 14% - 26.6%. |
| (Sub) Guardian Angel’s Smile | Increases ally Crowd Control Res by 9.1% - 17.3%. |
The fact that Serina is still the most accessible and easy-to-use healer after almost a year really speaks of her efficacy. Her low-cost EX Skill is still the star of the show, and its relocation abilities only make it better. Serina’s low rarity is a blessing in disguise, as it pretty much guarantees that everyone has at least one copy of her. Even though she may lack the flashy heals or pseudo-nuke of other healers, you can always rely on this stalker nurse to keep your students in the fight.
Asagao Hanae

Rarity: **
Special Healer
Street Combat Power:A
Outdoor Combat Power:D
Indoor Combat Power:A
| Skills | Effect |
| (EX, 4 bars) Time for Your Treatment! | Hanae gives an ally a regeneration buff, which heals for 54.1% - 102% of Hanae’s Healing per tick. |
| (Basic) Don’t Fall! | Hanae gives the ally with the least HP 17.7% - 33.7% DEF buff for 20 seconds. 25 second cooldown. |
| (Enhanced) Medical Mastery | Increases Hanae’s Healing by 14% - 26.6%. |
| (Sub) Break a Leg, Everyone! | Increases ally crit rates by 9.1% - 17.3%. |
Hanae now serves an interesting niche:a combination of Serina’s quick and always-relevant heals with Nodoka’s bigger total heals, which she accomplishes by giving her allies a regen buff. This makes Hanae great for difficult fights where you’ll constantly be on the move, such as late-game hard mode stages. Her Sub skill is also miles better than Serina’s, giving a far more useful crit rate boost over CC resistance.
B-Tier
Aikiyo Fuuka

Rarity: **
Special Healer
Street Combat Power:A
Outdoor Combat Power:A
Indoor Combat Power:D
| Skills | Effect |
| (EX, 5 bars) Lunchtime! | Fuuka drops a pot of food, drawing nearby allies close to it. Upon touching the pot, allies are healed for 109% - 207% of Fuuka’s Healing. |
| (Basic) Gift of the School Lunch Club | Gives the ally with the highest max HP a 18.1% - 34.4% DEF buff for 16 seconds. 20 second cooldown. |
| (Enhanced) Fresh Ingredients! | Increases Fuuka’s Healing by 14% - 26.6%. |
| (Sub) Pride of the School Lunch Club | Increases ally crit res by 9.1% - 17.3%. |
While Fuuka’s EX Skill is on the pricier side at 5 bars, it’s notable in that it’s virtually guaranteed to heal everybody unless your placement is really bad. Like Serina, this also has the extra purpose of pulling students in danger zones back into relative safety. Fuuka is a lot more niche than the other healers, but she’s still reliable.
Okusora Ayane

Rarity: **
Special Healer
Street Combat Power:D
Outdoor Combat Power:A
Indoor Combat Power:A
| Skills | Effect |
| (EX, 4 bars) Special Delivery:Combat Supplies | Ayane’s drone drops medical supplies that heal 118% - 224% of her healing for allies in a round AOE. |
| (Basic) Scholastic Support | Ayane increases the crit res of allies by 15.5% - 29.4% in a round AOE every 30 seconds. |
| (Enhanced) Self-Development | Increases Ayane’s Healing by 14% - 26.6%. |
| (Sub) Morale Boost | Increases ally max HP 9.1% - 17.3%. |
Newer players be wary:Ayane’s EX Skill looks great on paper, but it can and will miss if you don’t practice dropping it properly. If you’re willing to put in the time and the patience to master her drone drop, you’ll have a reliable party healer that can almost do what Fuuka does, minus one bar.
Hinomia Chinatsu

Rarity: *
Special Healer
Street Combat Power:B
Outdoor Combat Power:B
Indoor Combat Power:B
| Skills | Effect |
| (EX, 4 bars) Tactical First Aid | Heals one ally for 195% - 342% of Chinatsu’s Healing. Level 3+:Also removes one debuff from healed target. |
| (Basic) Regroup | The ally with the lowest health gains 50.9% - 67% Evasion for 30 seconds. 40 second cooldown. |
| (Enhanced) Reinforced Medical Enhancement | Increases Chinatsu’s Healing by 14% - 26.6%. |
| (Sub) Reinforced Defenses | Increases ally DEF by 9.1% - 17.3%. |
Big single-target heals mean a lot of overshoot potential, and with no overheal mechanic in place, Chinatsu’s EX Skill requires judicious timing and use. It does, however, come with a dispel that can be invaluable for clearing certain debuffs, like Perorodzilla’s -10000 DEF debuff. Other than that, there’s little reason to bring Chinatsu when you can have Serina’s more measured heals or Hanae’s regen-based heal that provides more practical value.
Urawa Hanako

Rarity: **
Special Healer
Street Combat Power:A
Outdoor Combat Power:D
Indoor Combat Power:A
| Skills | Effect |
| (EX, 5 bars) Want to Break The Rules? | Creates a round AOE which heals for 26.9% - 51.1% of Hanako’s Healing for 8 seconds. |
| (Basic) Toughen Up! | The ally with the lowest health gains 24.2% - 46% DEF for 20 seconds. 13 second cooldown. |
| (Enhanced) Full of Energy | Increases Hanako’s Healing by 14% - 26.6%. |
| (Sub) It’s Okay If It’s You | Increases ally Healing by 9.1% - 17.3%. |
Hanako faces some pretty stiff competition in that anything she can do, another healer can do better. Her one saving grace is that her EX Skill procs really fast, at roughly 5 healing bursts during its time. Said EX Skill is also expensive – on par with Fuuka’s – and there’s no guarantee your students will remain in the circle for the entire duration. She’s not bad enough to merit a lower rank, but I’d highly advise caution when using Hanako as your healer.
Support Tier List
| S | Ako, Kotama |
| A | Hifumi, Hare, Akane |
| B | Hatsune Miku, Asuna (Bunny), Chinatsu (Hot Spring) |
| C | Tomoe, Izumi (Swimsuit), Mari, Airi, Suzumi |
| D | Kayoko, Juri, Nodoka, Kirino, Kotori, Shizuko, Shimiko |
S-Tier
Amau Ako

Rarity:* **
Special Student, Mystic DamageStreet Combat Power:D
Outdoor Combat Power:B
Indoor Combat Power:S
| Skills | Effect |
| (EX, 3 bars) Reconnaisance Report | Target ally gains 27.2% - 39.5% crit rate and 50.5% - 73.3% crit damage for 16 seconds. |
| (Basic) Supply Operation Plan B | Heals 1 ally for 129% - 245% of Ako’s Healing every 45 seconds. |
| (Enhanced) Beginning Supply Support | Increases Ako’s Healing by 14% - 26.6%. |
| (Sub) Beginning Tactical Support | Increases ally crit damage by 9.1% - 17.3%. |
Open the game right now, go to Total Assault, and look at the top placers. Notice who’s always in the support slots? For an incredibly cheap 3 energy bars, Ako can buff a single damage dealer to ridiculous degrees, with almost 40% crit rate and 73% crit damage on top of any other bonuses. Optimal Ako use does require arranging and using EX Skills in such a way that she’ll always be ready to support your main Dealer, but learning this is quite easy and the payoff is so big that you won’t really care. Oh, and she can heal too.
Otose Kotama

Rarity: *
Special Student, Explosive Damage
Street Combat Power:A
Outdoor Combat Power:C
Indoor Combat Power:B
| Skills | Effect |
| (EX, 3 bars) Commence Wiretap | Increases the ATK of all allies in a circular AOE by 24.9% - 47.4% for 30 seconds. |
| (Basic) Tap Vulnerabilities | Deals 237% - 450% damage to 1 enemy and lowers its ATK by 18.9%. 20 second cooldown. |
| (Enhanced) Intensive Analysis | Increases Kotama’s Accuracy by 14% - 26.6%. |
| (Sub) EM Wave Diffusion | Kotama increases ally attack by 9.1% - 17.3%. |
Kotama’s simple yet effective approach to Support is still fantastic. There’s not much to say about her, and that’s her appeal:quick, easy, cheap buffs that are always welcome.
A-Tier
Ajitani Hifumi

Rarity: ***
Mid Striker, Piercing Damage, Light Armor, Takes CoverStreet Combat Power:D
Outdoor Combat Power:B
Indoor Combat Power:S
| Skills | Effect |
| (EX, 5 bars) Help Me, Peroro! | Summons a Peroro plush that deals 202% - 386% damage, and taunts enemies damaged by this burst for 3.4 – 3.9 seconds. The plush has 160% of Hifumi’s max HP. |
| (Basic) Peroro’s Support | Every 35 seconds, Hifumi deals 212% damage to an enemy and drops their Accuracy by 16.8% - 32% for 30 seconds. |
| (Enhanced) Collector’s Spirit | Increases Hifumi’s max HP by 14% - 26.6%. |
| (Sub) Agile Collector | Using Help Me, Peroro! also increases Hifumi’s Cost Recovery by 980 – 1861 for 5 seconds. |
If you thought Utaha’s Thundergun shenanigans were funny, try Hifumi’s EX Skill. Not only does Peroro start off with burst damage, but he also taunts enemies for almost 4 seconds at max skill level. And you never technically have to pay the full cost (unless Hifumi is downed, I suppose) as Hifumi’s Sub Skill accelerates the rate at which you gain EX gauge after summoning Peroro. Best of all? Hifumi is grindable, if you haven’t gotten her yet.
Omagari Hare

Rarity: **
Special Student, Explosive DamageStreet Combat Power:A
Outdoor Combat Power:B
Indoor Combat Power:B
| Skills | Effect |
| (EX, 4 bars) EMP Drone Launch | Deals 271% - 435% damage to enemies in a circular AOE. Stuns hit targets for 2.7 – 3.5 seconds. |
| (Basic) Sabotage:Plan A | Decreases Recovery Boost for a random enemy by 26.7% - 50.7% for 15 seconds. 30 second cooldown. |
| (Enhanced) Enhanced Arms:Plan B | Increases Hare’s crit by 14% - 26.6%. |
| (Sub) Interception System Ops | Increases ally Evasion by 9.1% - 17.3%. |
Hare packs fast, reliable stuns that hit quickly. That’s about it. Your only other choice for off-field EX Skill stuns is Yoshimi, so…
Murokasa Akane

Rarity: *
Mid Striker, Piercing Damage, Light Armor, Takes Cover
Street Combat Power:A
Outdoor Combat Power:A
Indoor Combat Power:D
| Skills | Effect |
| (EX, 2 bars) Elegant Removal | Akane deals 547% - 876% damage to one enemy and lowers their DEF by 29% - 37.7% for 30 seconds. |
| (Basic) Elegant Infiltration | Deals 356% - 753% damage to one enemy. 40 second cooldown. |
| (Enhanced) Agile Advancement | Increases Akane’s move speed by 14% - 26.6%. |
| (Sub) Total Suppression | Attacks have a 10% change to reduce enemy Evasion by 6.7% - 12.7% for 30 seconds. 10 second cooldown. |
Akane’s combat performance itself is meh. Middling stats and a propensity to move ahead of the team to get herself killed doesn’t leave a good impression – but that’s not why she’s so high on this list. What she does have is a great combo starter with her low-cost EX Skill that shaves off a good third of an enemy’s DEF. Couple her with another DEF reducer and a dedicated single-target DPS nuker like Azusa and watch the big numbers pop.
B-Tier
Hatsune Miku

Rarity:* **
Special Student, Explosive DamageStreet Combat Power:S
Outdoor Combat Power:D
Indoor Combat Power:B
| Skills | Effect |
| (EX, 5 bars) My Heart in This Moment! | Heals allies in a circular AOE for 111% - 144% of Miku’s Healing. Allies within the AOE also gain a 21.2% - 34% ATK buff. Lasts 26 seconds. |
| (Basic) Hatsune Miku’s Passion | Increases crit rate by 19.8% - 37.7% in a circular AOE for 30 seconds. 20 second cooldown. |
| (Enhanced) Hatsune Miku’s Support | Increases Miku’s Healing by 14% - 26.6%. |
| (Sub) Hatsune Miku’s Blessing | Increases ally Recovery Boost by 9.1% - 17.3%. |
Miku is probably the single biggest waifu over meta character in Blue Archive. Her EX Skill heals and buffs, but most importantly, it lets you know that yes, Blue Archive got an official Vocaloid collab by having her song play over the stage’s BGM. Take that, other gacha games!
In practical terms, Miku is an alright character, though she’s let down by the high cost of My Heart in This Moment and the hybrid buff/heal it gives is overshadowed by dedicated buffers/healers doing a far better job of it than Miku. It’s also hard to measure, but I believe that the ATK buff only persists as long as allies remain in Miku’s AOE, which is another problem as stage clearing teams hit hard and move fast, and Total Assault formations require specific supports.
One other thing about Miku:collab events in gacha games are few, far between, and very rarely rerun. If Miku ever comes back to us and you regret not getting her, so if by any chance there’s a rerun, you know what you have to do.
Ichinose Asuna (Bunny)

Rarity:* **
Mid Striker, Mystic Damage, Light Armor, Takes CoverStreet Combat Power:D
Outdoor Combat Power:B
Indoor Combat Power:S
| Skills | Effect |
| (EX, 5 bars) Watch This! | Decreases enemy DEF in a circular AOE by 18.9% - 24.6% for 40 seconds. Also deals 274% - 438% damage. |
| (Basic) Get Pumped! | Increases ATK by 18.4% - 29.5% for 23 seconds. 35 second cooldown. |
| (Enhanced) Savoring It! | Increases Asuna’s max HP by 14% - 26.6%. |
| (Sub) Here’s a Freebie! | Using Watch This! increases attack speed by 20.1% - 38.3% for 30 seconds. |
Bunny Asuna is an okay Special armor wave clearer. Her main concern is that her DEF debuff tacks on an additional cost that’s unnecessary; if I wanted to peel DEF for raids or tough enemies, I’d bring Akane instead as she can do it faster. Bunny Asuna does have the added advantage of being a pretty good auto attacker, with an ATK self-buff and an attack speed Sub skill, which makes her a decent addition to any Special killer team.
Hinomia Chinatsu (Hot Springs)

Rarity: ***
Mid Striker, Mystic Damage, Light Armor, Doesn’t Take Cover
Street Combat Power:D
Outdoor Combat Power:B
Indoor Combat Power:S
| Skills | Effect |
| (EX, 2 bars) Type A Combat Stimulant | Increases attack speed for target ally by 31.5% - 60% for 30 seconds. Cannot target Chinatsu. |
| (Basic) Reinforced Combat Enhancement | Increases attack speed for an ally by 18.4% - 35% for 20 seconds. 25 second cooldown. |
| (Enhanced) Relaxing Vacation | Increases Chinatsu’s max HP by 14% - 26.6%. |
| (Sub) Cautious First Aid Head | Using Type A Combat Stimulant also gives Chinatsu a shield with health equal to 108% - 205% of her Healing for 30 seconds. |
Hot Springs Chinatsu is in a weird spot on the support list as she’s a dedicated attack speed buffer over the more conventional ATK or crit rate / crit damage fare. This gives Chinatsu a niche that only she can fill, and she can enable some really dumb meme builds (like give Izuna steroids) or can be used to just indirectly buff damage as 60% bonus attack speed is no joke.
However, using Hot Springs Chinatsu comes with the cost of sacrificing one of your Striker slots, and her own stats are pretty bad, meaning you’ll have to make do with one less damage dealer.
C-Tier
Sashiro Tomoe

Rarity: *
Back Striker, Piercing Damage, Special Armor, Takes Cover
Street Combat Power:C
Outdoor Combat Power:B
Indoor Combat Power:A
| Skills | Effect |
| (EX, 3 bars) Everyone, Please Listen to Me! | Allies in a circular AOE receive 13.9% - 20.1% crit damage and crit rate and 30.8% move speed, but -38.5% normal attack range. Effects last 30 seconds. |
| (Basic) Clever Incitement | Deals 235% - 447% damage to one enemy every 30 seconds. |
| (Enhanced) Smooth Sailing | Increases Tomoe’s ATK by 14% - 26.6%. |
| (Sub) Irrefutable Evidence | Deals 57.1% - 108% of ATK as extra damage when attacking enemies with barriers. |
Tomoe is an interesting case:on one hand, a crit rate plus crit damage buff is the same buff that Ako gives (though that’s a major overstatement) and it also gives 30% movement speed. The downside is that it tanks normal attack range, meaning that if you use it on your back Dealers, even if it’s just to pop their skills, they’ll be forced to move close to continue firing which will put them in harm’s way.
On the other hand, movement speed buffs are few and far between, which gives Tomoe a niche in stage clearing that no one else can do. Tomoe’s not a universally useful support, but she can have useful applications.
Shishidou Izumi (Swimsuit)

Rarity: *
Back Striker, Explosive Damage, Light Armor, Doesn’t Take Cover
Street Combat Power:B
Outdoor Combat Power:A
Indoor Combat Power:C
| Skills | Effect |
| (EX, 4 bars) Cold Coconut Juice! | Chucks a coconut at one enemy to deal 332% - 532% damage and a 2.4 – 3.1 second stun. The coconut then ricochets to strike another nearby target, dealing 10% less damage per ricochet and bouncing up to 5 times. |
| (Basic) Sweet n’ Sour, Crunchy n’ Crispy! | Increases ATK by 20.2% - 38.4% for 30 seconds. 35 second cooldown. |
| (Enhanced) Take a Bite and Smile! | Increases Izumi’s attack speed by 14% - 26.6%. |
| (Sub) Leaves Your Head Spinning! | Attacks have a 10% chance to stun for 1.23 – 2.34 seconds. 20 second cooldown. |
Izumi’s summer version is a lot more consistently useful. With a powerful chain stun EX Skill, some pretty decent self-buffs, and a 10% stun proc on normal attacks (which is sadly constrained by a 20 second cooldown), Swimsuit Izumi finally has something good to offer her team.
Iochi Mari

Rarity: **
Special Student, Mystic Damage
Street Combat Power:D
Outdoor Combat Power:A
Indoor Combat Power:A
| Skills | Effect |
| (EX, 2 bars) Divine Protection | Target ally gains a barrier with health equal to 172% - 328% of Mari’s Healing. Removes 1 debuff from target. |
| (Basic) Purifying Barrage | Deals 191% - 364% damage in a circular AOE. 25 second cooldown. |
| (Enhanced) Resolute Determination | Increases Mari’s crit rate by 14% - 26.6%. |
| (Sub) Benevolent Blessings | Increases ally max HP by 9.1% - 17.3%. |
Mari is aesthetically one of my favorite students. However, her skillset is meh, with the most practical application of her EX being to remove debuffs – and even then, I think I would rather take a heal from Chinatsu for just one more bar as her barrier doesn’t last long enough for the fights where it would matter. She also, oddly, has an AOE nuke for her Basic Skill; coupled with her middling ATK, Mari doesn’t do enough damage to make a difference.
Kurimura Airi

Rarity: **
Special Student, Explosive DamageStreet Combat Power:A
Outdoor Combat Power:D
Indoor Combat Power:A
| Skills | Effect |
| (EX, 5 bars) If I Have To | Deals 265% to 464% damage to enemies in a circular AOE. Enemies affected are hit with a 22.8% move speed debuff. Level 3+: Also decreases attack speed by 26.2%. |
| (Basic) You Might See Stars | Decreases attack speed by 18.4% - 35.1% for 1 enemy. 25 second cooldown. |
| (Enhanced) Dessert Power | Increases Airi’s ATK by 14% - 26.6%. |
| (Sub) Airi’s Encouragement | Increases ally attack speed by 9.1% - 17.3%. |
I’ll level with you:I keep forgetting this character exists. She’s just…there. It’s hard to think of a practical use for move speed debuffs, and the attack speed debuff comes in with some investment. Airi is okay, but it’s not hard to find someone that can do her job better.
Morizuki Suzumi

Rarity: *
Mid Striker, Explosive Damage, Heavy Armor, Takes Cover
Street Combat Power:B
Outdoor Combat Power:B
Indoor Combat Power:B
| Skills | Effect |
| (EX, 4 bars) Holy Flash Grenade | Deals 389% - 518% damage in a circular AOE. Level 3+: Also stuns for 3.6 seconds. Level 5: Stun duration increased to 4.1 seconds. |
| (Basic) Ranger’s Endurance | Deals 233% - 443% damage to one enemy. 25 second cooldown. |
| (Enhanced) Urgent Evasion | Increases Suzumi’s Evasion by 14% - 26.6%. |
| (Sub) Ranger’s Assault | Deals 27.5% - 52.3% of ATK as extra damage on enemies under any kind of Crowd Control. |
Suzumi is easy to use, but she’ll quickly be overshadowed by dedicated AOE Dealer students. Still, she’s a great way to see how great AOE is in the game, and that’s about it.
Suzumi deserves better. Please make it so.
D-Tier
Onikata Kayoko

Rarity: **
Mid Striker, Explosive Damage, Heavy Armor, Takes Cover
Street Combat Power:A
Outdoor Combat Power:D
Indoor Combat Power:A
| Skills | Effect |
| (EX, 6 bars) Panic Bringer | Kayoko fires a shot into the air, dealing 349% - 558% damage in a large circular area centered around herself. This shot inflicts Fear, which lasts 3.9 – 5.1 seconds. |
| (Basic) Panic Shot | Deals 132% - 252% damage to a single enemy. This shot has a 30% chance to inflict Fear for 3.6 seconds. 20 second cooldown. |
| (Enhanced) Scary Face | Increases Kayoko’s Crowd Control strength by 14% - 26.6%. |
| (Sub) Oh, Well... | Kayoko deals an additional 74.8% - 142% damage to enemies affected by any kind of Crowd Control. |
Kayoko is my favorite character in the game. That doesn’t exempt her from scrutiny. In a word, she’s bad. Like really bad. She has a dismally low ATK stat, and her whole gimmick revolves around inflicting Fear. Blue Archive rounds are hard and fast, and status effects that don’t directly influence enemy stats rarely, if ever, have any use. Couple this with an expensive EX Skill at 6 bars, and you have a super niche character.
Ushimaki Juri

Rarity: *
Special Student, Explosive Damage
Street Combat Power:C
Outdoor Combat Power:B
Indoor Combat Power:A
| Skills | Effect |
| (EX, 3 bars) Juri’s Cooking Time! | Drops a pot of “food” that attracts up to 4 enemies in a circular area. Enemies that eat the “food” are poisoned, taking 58.9% - 112% of Juri’s ATK as damage for 20 seconds. |
| (Basic) Peak Culinary Effort | The enemy with the highest ATK is hit with a 18.1% - 34.4% attack speed debuff for 16 seconds. 20 second cooldown. |
| (Enhanced) Extreme Zeal! | Increases Juri’s ATK by 14% - 26.6%. |
| (Sub) Juri’s Mealtime | Juri increases ally max HP by 9.1% - 17.3%. |
Once again, Blue Archive is not a fertile ground for DoTs. Juri’s EX Skill is however, technically a pseudo-stun where enemies will be preoccupied with moving towards the target, but it’s still not consistently useful. You could make the case that it’s technically enemy displacement, but in my experience, enemies taking cover is a non-issue outside of PVP, but when a single shot from a support unit can take out a tank, it’s hard to argue that Juri should have one of the two valuable support slots.
Amami Nodoka
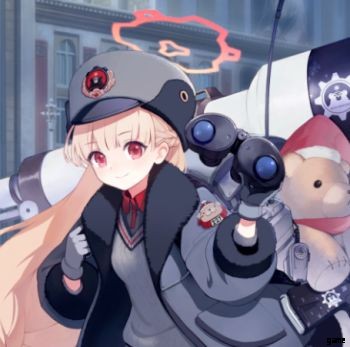
Rarity: *
Special Student, Explosive Damage
Street Combat Power:B
Outdoor Combat Power:B
Indoor Combat Power:B
| Skills | Effect |
| (EX, 3 bars) Observational Support | Increases ally accuracy by 25.2% - 47.9% in a round AOE for 30 seconds. |
| (Basic) Persistent Surveillance | Deals 221% - 421% damage to one enemy and lowers their Evasion by 17.7% - 33.7% for 20 seconds. |
| (Enhanced) Aesthetic Observation | Increases Nodoka’s accuracy by 14% - 26.6%. |
| (Sub) A Special Bond | Increases ally accuracy by 9.1% - 17.3%. |
The trouble with Nodoka is that she buffs accuracy and Evasion, neither of which are terribly relevant (yet) in Blue Archive Global. As it is right now, there’s zero reason to run her, unless your students somehow can’t hit the broad side of a barn.
Nakatsukasa Kirino

Rarity:* *
Mid Striker, Explosive Damage, Special Armor, Takes CoverStreet Combat Power:D
Outdoor Combat Power:A
Indoor Combat Power:A
| Skills | Effect |
| (EX, 3 bars) Done Talking! | Deals 337% - 540% damage in a circular AOE. Also deploys a smoke grenade in the AOE which reduces enemy accuracy by 26.1% - 30%. Smokescreen lasts 20 seconds. |
| (Basic) Suppressing Violence! | Deals 199% - 289% damage to the furthest enemy and lowers their accuracy by 19.4% - 28.1% for 13 seconds. |
| (Enhanced) Back on the Horse! | Increases Kirino’s max HP by 14% - 26.6%. |
| (Sub) No Time to Rest! | Normal attacks have a 30% chance to reduce Recovery Boost by 22.7% - 43.2% for 13 seconds. 5 second cooldown. |
Take the above two supports, combine them, and who do you get? Kirino. A combination of debuffs that aren’t yet relevant to the game, as well as a horrendously low ATK stat means relegates this diligent cop to the sidelines.
Toyomi Kotori

Rarity: *
Back Striker, Piercing Damage, Light Armor, Doesn’t Take CoverStreet Combat Power:B
Outdoor Combat Power:B
Indoor Combat Power:B
| Skills | Effect |
| (EX, 4 bars) Box of Answers | Drops a box at a target point, which draws allies towards it. When allies touch the box, they gain a shield with health equal to 175% - 334% of Kotori’s Healing. |
| (Basic) Pardon! | Kotori deals 269% - 511% damage in a fan-shaped AOE every 35 seconds. |
| (Enhanced) Getting the Point | Increases Kotori’s crit damage by 14% - 26.6%. |
| (Sub) Roger That, Crystal Clear! | Kotori gains 20.1% - 38.3% crit damage for 30 seconds if she defeats an enemy. |
Kotori’s sort of like Fuuka in that she has a relocation skill. The trouble here is that Kotori is a 1* student by default, meaning her stats are meh even at max level, and you’ll need to farm or buy her Eleph if you really want to use her. The second problem is that she’s a Striker, and her shields contribute little to increasing clear speed – and let’s face it, if your tank needs Kotori’s shields to do her job, she’s not a very good tank. If she was a Special student, she might bear some consideration, but as is? Pass.
Kawawa Shizuko

Rarity: **
Special Student, Mystic DamageStreet Combat Power:A
Outdoor Combat Power:A
Indoor Combat Power:B
| Skills | Effect |
| (EX, 3 bars) Behold, Momoyodou! | Increases the Accuracy of allies in a circular AOE by 16.3% - 21.3% for 30 seconds. Summons a barrier at the center of the AOE which can be used as cover. The barrier has an additional 29.2% - 46.8% of Shizuko’s HP. |
| (Basic) Don’t Stand in the Way of Business! | Deals 184% - 341% damage to one target and gives it a 17.4% - 18.3% ATK debuff for 21 seconds. 25 second cooldown. |
| (Enhanced) T-Tehe-Pero?! | Increases Shizuko’s Accuracy by 14% - 26.6%. |
| (Sub) Pop Idol’s Encouragement | Increases ally crit rate by 9.1% - 17.3%. |
I love her personality, but unfortunately, Shizuko isn’t a very good support unit. Cover-summoning EX Skills, of which there are 2, aren’t that great. It has the bonus of giving Accuracy, but again, Accuracy isn’t a particularly good stat to focus on. Any other bonus she can give, like crit rate, can also be found on better supports.
Endo Shimiko

Rarity: *
Special Student, Explosive Damage
Street Combat Power:C
Outdoor Combat Power:A
Indoor Combat Power:B
| Skills | Effect |
| (EX, 3 bars) Shield of Knowledge | Increases DEF for allies in a circular AOE by 16.1% - 26.2% for 30 seconds. Level 3+: Cover also has 20.1% of Shimiko’s max HP as HP. Level 5: Cover also has 38% of Shimiko’s max HP as HP. |
| (Basic) Food for the Soul! | The ally with the least HP gains a shield with health equal to 119% - 226% of Shimiko’s Healing, for 16 seconds. 35 second cooldown. |
| (Enhanced) Time To Gain Some Knowledge! | Increases Shimiko’s Healing by 14% - 26.6%. |
| (Sub) Study While You Can! | Increases ally DEF by 9.1% - 17.3%. |
Cover is nice, but it shouldn’t be your priority. Shimiko doubles down on this concept. The result isn’t pretty. Use a direct DEF support, please. If the 2* Shizuko with the objectively better cover-building skill isn’t that good, what more a lesser barrier?
Tactical Support (T.S) Tier List
| B | Cherino (Hot Springs) |
| D | Hifumi (Swimsuit) |
B-Tier
Renkawa Cherino (Hot Springs)

Rarity: ***
Back Special, Explosive Damage, Heavy Armor, Doesn’t Take Cover
Street Combat Power:S
Outdoor Combat Power:B
Indoor Combat Power:D
| Skills | Effect |
| (EX, 6 bars) Purginator No. 1, Mobilize! | Summons Cherino riding the Purginator No. 1 to the field for 50 seconds. Purginator No. 1 is has bonus ATK equal to 9% - 17.1% of Cherino’s ATK. Every 3 normal attacks triggers Total Annihilation!, dealing 184% - 216% damage to one enemy and 276% - 324% damage to another enemy and those behind it in a fan-shaped AOE. |
| (Basic) Aim, Purge! | Deals 136% - 259% damage in a circular AOE. 15 second cooldown. |
| (Enhanced) Mustache Rage! | Increases Cherino’s ATK by 14% - 26.6%. |
| (Sub) Power of the ‘Stache! | Increases ally crit damage by 9.1% - 17.3%. |
Blue Archive Global’s second T.S unit, while still wonky, is worth a shot. At face value, Cherino’s Purginator is a lot better than Hifumi’s Crusadie as Cherino procs her tank’s skill every 3 normal attacks instead of on a hard timer; the fact that you can buff T.S units on the field can help greatly with proccing Total Annihilation!.
The AOE nature of this skill also means she serves as a continuous source of AOE damage if you’re lacking someone like Hibiki. On the downside, it does cost 6 bars, so consider the fights you’re heading into carefully before committing to Hot Springs Cherino.
D-Tier
Ajitani Hifumi (Swimsuit)

Rarity: ***
Back Special, Piercing Damage, Heavy Armor, Doesn’t Take Cover
Street Combat Power:D
Outdoor Combat Power:B
Indoor Combat Power:S
| Skills | Effect |
| (EX, 10 bars) Crusadie Backup! | Summons Hifumi and Crusadie to the field for 50 seconds. Crusadie has bonus ATK equal to 19.4% - 36.8% of Hifumi’s ATK. Every 20 seconds, activates Loading 2-Pound Explosives , which deals 266% - 359% damage in a circular AOE. |
| (Basic) Peroro’s Strike | Deals 159% - 302% damage in a circular AOE. 25 second cooldown. |
| (Enhanced) Collector’s Drive | Increases Hifumi’s ATK by 14% - 26.6%. |
| (Sub) Angry Adelie’s Blessing | Increases ally attack speed by 9.1% - 17.3%. |
As the first Tactical Support unit to be released, Hifumi was probably an experiment. An experiment that went south real fast, to be sure. All T.S units are wonky, but Hifumi really takes the cake here. For a whopping TEN EX BARS you get a 5 body on the field who has a ponderously slow attack speed and a decent AOE skill hampered by a hard 20 second cooldown.
There are so many other things – useful things – that you could do with ten EX bars, and summoning Crusadie is not one of them. While it is amusing to see a giant tank behind your students, your, it’s not worth it in the long run.
Play Who You Want To Play
Even with all these suggestions and character lists, Blue Archive is still ultimately a single-player game outside of its shoehorned PVP mode. Thus, I believe the best way to enjoy it is just to play with whichever students you like best. But if you’re looking for easier outs or are trying to optimize teams, or are thinking of rolling on banners if (when, I hope) they come around again, then hopefully this list helped you make your decision.
Now we just need to sit tight and hope for a Mika banner.