マグナム クエスト ティア リスト:ゲームのベスト キャラクターのランキング
Arduran が再びあなたに挨拶します、ヒーロー!新旧両方のプレイヤーのために、独自の分析とゲームのプレイ経験に基づいて、独自の Magnum Quest ティア リストを作成しました。すべての階層リストと同様に、これは主観的なものであり、すべてを網羅したチャートではありません。むしろ、これは、ヒーローを引っ張ったり、投資したりする価値があるかどうかを判断するのに役立つ方法です.
ヒーロー スキルについては、数値リストとして追加し、各数値はスキルのレベルに対応しています。ゴールド層のヒーロー (作成する必要のあるヒーロー) のみを対象としているため、ここに記載されているすべてのヒーローには 4 つのスキルがあります。
関連: Magnum Quest ビギナーズ ガイド:伝説のヒーローを集めて壮大なボスを倒すためのヒント、コツ、戦略
ヒーローのランク付けには、S、A、B、C、D のティアを使用しています。ヒーローのランクは、ヒーローの強さ、使いやすさ、チーム構成にどのように適合するかによって異なります。また、ゲーム内のクラスに基づいてそれらを分類しました。そのため、彼らのティアは常に、同じ仕事をすることができる他のヒーローと比較したパフォーマンスに基づいています.
マグナム クエスト ウォリアー ティア リスト

S ティア
アレス
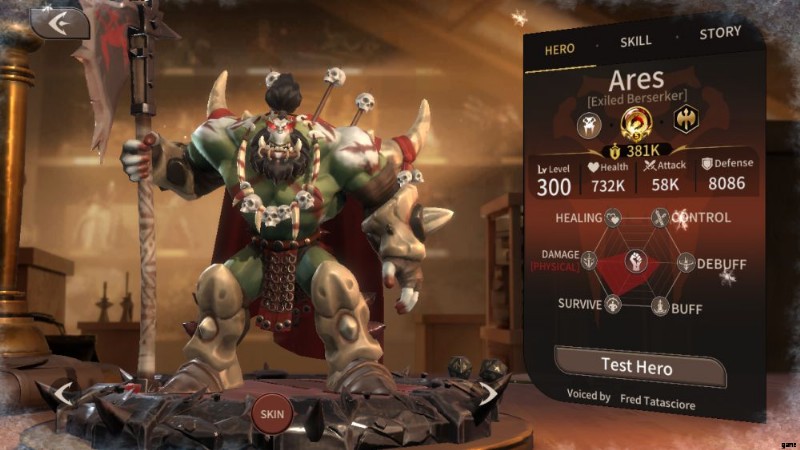
派閥: ワイルド<強い>
スキル:
(アルティメット) トルネード スラッシュ:
- アレスが咆哮し、周囲の敵に 175% のダメージを与えた後、前方に回転して同じダメージを一列に与えます。
- トルネード スラッシュ中の魔法ダメージ耐性
- 与えたダメージの 40% を HP として回復
スイープアタック:
- アレスは目の前の敵に 140% のダメージを与えます。ヒットした敵は出血の影響を受けます, アレスの毎秒攻撃ダメージの 60% を 4 秒間受けます。
- 初期ダメージが 160% に増加します。
- 攻撃を受けた敵は、4 秒間、-25% の物理防御デバフも受けます。
- 初期ダメージが 180% に増加し、出血が 75% のダメージを与えるようになり、物理防御デバフが -35% になりました。
ブラッドラスト:
- アレスはダメージを与えると攻撃力と速攻を獲得します。最大攻撃力は 60%、速力は 15 ポイントです。
- 上限が 75% の攻撃と 22.5 の速攻に引き上げられます.
- キャップは攻撃力 90%、ヘイスト 30 まで引き上げられます。
エンドレスフューリー:
- 致命的なダメージを受けると、アレスはダメージとすべてのコントロール スペルに対して 4 秒間無敵になります。戦闘ごとに 1 回のみトリガーされます。
- 持続時間が 7 秒に延長されました。
- 持続時間が 8 秒に延長されました。
彼は大きく、破壊的で、トラックのようにヒットします。 Ares は、正当な理由により、私たちを含むほとんどの Magnum Quest ティア リストで S ティアです。アレスは本当に膨大な量の範囲ダメージを与え、攻撃とヘイスト (攻撃速度) の両方の自己バフと、AOE のアルティメットおよびセカンダリ スキルが相まって、彼が最優先のターゲットであることを意味します。アレスはすでに倒すのが難しいことで知られていますが、彼のエンドレス フューリー パッシブは形勢を逆転させるチャンスを与えてくれます。
鳳

派閥: 要塞<強い>
スキル:
(アルティメット) タオ スプリマシー:
- 風水がコンボ攻撃を開始し、各パーツが 300% のダメージを与える。この呪文のアニメーション中、Feng は制御呪文の影響を受けません。
- ステージごとのダメージが 360% に増加
- フェンは、スキル終了後、与えた合計ダメージの 30% に相当する HP を持つシールドを獲得します。
タオ強度:
- 直線上の敵に 120% のダメージを与える
- ダメージが 140% に増加
- ダメージが 160% に増加し、2 秒間のノックダウンが発生します。
- ダメージが 180% に増加しました。
タオ・エピファニー:
- Feng は HP が最も低い敵を 2 回攻撃し、140%、次に 180% のダメージを与えます。
- ダメージが 160% と 210% に増加
- このスキルでターゲットを倒すと、クールダウンがすぐにリセットされます。
タオへの献身:
- 風水が与えるすべてのダメージを受動的に 8% 増加させます。
- ボーナスが 16% に増加しました。
- ボーナスが 24% に増加しました。
このゲームでハード キャリーの賞品があれば、おそらく Feng に行くでしょう。 Feng は最初は弱いですが、スキルのロックを解除してより良い装備を手に入れると、実際に上昇し始めます。 Feng が実際に行うことは 1 つ (ダメージを与えること) だけですが、彼は非常に優れた仕事をしています。彼はダメージの一部をセルフ シールドに変えて生存力を高めていますが、もちろん、専用のヒーラーが必要になることもあります。
Aティア
カトス
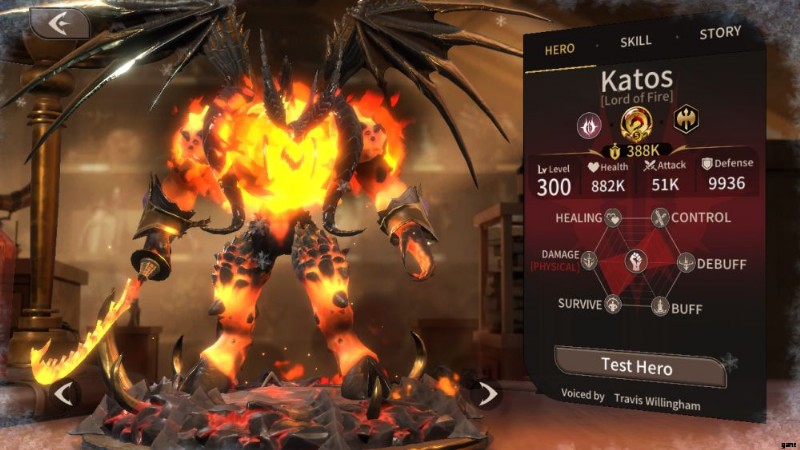
派閥: アビス<強い>
スキル:
(アルティメット) 恐怖の咆哮:
- 加藤 沈黙 と火傷 すべての敵を6秒間。彼らはスキルを使用できず、カトスの攻撃の 60% を 1 秒あたりのダメージとして受けます。
- やけど ダメージが75%攻撃に増加。持続時間が 8 秒に延長されます。
- 沈黙のとき 切れると、敵に 150% の攻撃ダメージを与え、各敵から 160 エネルギーを取り除きます。
火の盾:
- カトスは自分を守るためにシールドを生成します。シールドは彼の攻撃の 500% まで吸収でき、解除することはできません。
- シールドのダメージ吸収が攻撃力の 550% に増加
- また、シールドはカトスの近くにいる敵に毎秒 50% の攻撃ダメージを与えます。
- シールドのダメージ吸収が攻撃力の 600% に増加し、ダメージが毎秒攻撃力の 75% に増加しました。
邪悪な攻撃:
- カトスが敵 1 体に攻撃力 100% + 自身の最大体力の 8% のダメージを与え、火傷を与える。バーンは 6 秒間、毎秒 75% の攻撃ダメージを与え、解除できません。
- このスキルの火傷は、防御力が-50% になります。
- ヘルススケーリングは、カトスの最大ヘルスの 8% から 12% に増加しました。
灼熱の地獄の鞭:
- カトスが戦闘で倒れた場合、復活できなくなりました。最大体力の 30% 未満の敵ヒーローがいる場合、カトスはその中で HP パーセンテージが最も低いヒーローを即座に殺します。ボスはこのスキルの対象から除外されます。
- 即死効果の正当な対象が存在しない場合、体力の割合が最も低い敵が最大 HP の 30% をダメージとして受ける。このダメージはカトスの最大 HP の 30% を超えることはできません。
- インスタント キルのしきい値が最大 HP の 50% 以下に増加しました。失敗すると、ダメージはヒーローの最大 HP の 50%、最大でカトスの最大 HP の 50% に増加します。
特定の鞭を振るう炎の悪魔に受動的に似ているだけでなく、カトスは妨害に優れた戦士です。彼のアルティメット スキルは火傷で敵の命を奪い、セルフ シールドはまともです。最も際立っているのは彼のアルティメットです - カトスは一人では倒れません.これは敵に独特の問題をもたらします:カトスを生かして妨害を実行させるか、チャンスをつかんで彼を破壊し、カトスが主要なヒーローを倒さないことを望みます.
レヴナ
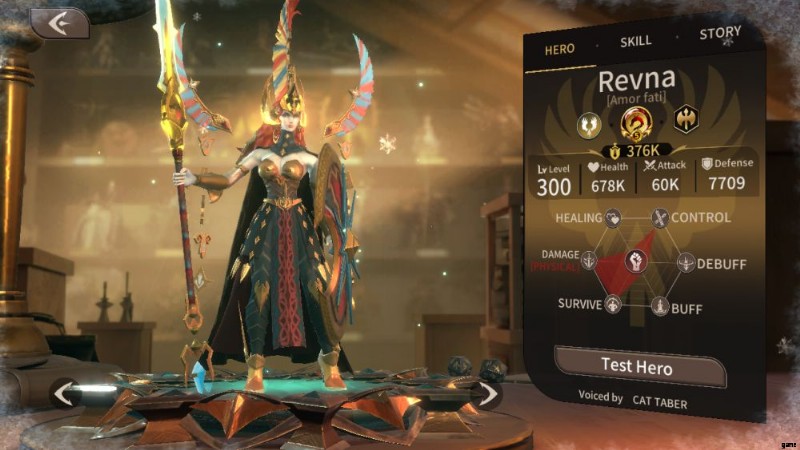
派閥: 神性
スキル:
(アルティメット) 神性の目覚め:
- 戦闘の開始時に、レヴナは敵のプレイ フィールドの中心を粉砕し、200% のダメージを与え、2 秒間のノックダウンを与えます。戦闘中、レヴナは 10 秒間覚醒状態になります。これにより、彼女の他のスキルのクールダウンが瞬時に解除され、50% の攻撃バフ、通常攻撃の AOE スプラッシュ、およびあらゆる攻撃で敵のバフを解除するチャンスが与えられます。
- レヴナがこのスキルを発動すると、彼女の最大 HP の 50% を回復します。 1 つおきのアクティベーションでは HP が 10% 減少し、レヴナの最大 HP の最低 10% まで回復します。
- 覚醒攻撃バフが70%に増加
ブリーチング アサルト:
- 目の前の敵に 150% のダメージを 3 回与えます。最後の一撃は 2 秒間のノックダウンを与える。レヴナは、このスキルのアニメーション中、コントロール スペルの影響を受けません。覚醒した場合、このスキルは AOE を獲得し、防御力を 50% 無視します。
- スイングごとのダメージが 160% に増加しました。
- スイングごとのダメージが 170% に増加しました。
- 覚醒時の防御バイパスが 70% に増加しました。
神の盾:
- レヴナは 3 秒間すべてのダメージをブロックし、2 秒間のノックダウンでエリア内に 200% のダメージを与えます。覚醒した場合、レヴナはブロック期間中に挑発も行います。
- ブロックすると、攻撃者に 70% のダメージが返されます。
- 範囲ダメージが 220% に増加
神の威厳:
- 近くの敵ごとに、レヴナの被ダメージが 15% 減少します。覚醒した場合、彼女に与えるダメージが +15% になります。
- スケーリングが -20% の被ダメージと 20% の被ダメージに増加
- スケーリングが -25% の被ダメージと 25% の被ダメージに増加
レヴナは自立の女王です。ウォリアーに分類されますが、彼女は非常に攻撃的なガードと考えたほうがよいでしょう。彼女の戦闘中のスキルは、戦闘を開始するのに最適であり、自己バフ、ダメージ軽減、自己回復と相まって、彼女を倒すのは非常に困難です.
B ティア
ジュリアン

派閥: シャドウ<強い>
スキル:
(アルティメット)デスチャージ:
- ジュリアンは敵のランクに激突するゴーストを召喚し、300% のダメージを与えます。この技のライフ スティールは 80% です。
- 命中した敵は脆弱ステータス効果を獲得し、8 秒間 20% 増加したダメージを受けます。
- 2 回攻撃とチャージダメージが 140% に増加し、最終攻撃が 260% に増加し、スキルが命中したターゲットの物理防御力を 8 秒間 -20% 減少させます。
ライフ スナッチ:
- ジュリアンの前にいる敵に 120% のダメージを与えます。この攻撃は、対象の残り HP の 5% までダメージとして与えますが、上限はジュリアン自身の最大 HP の 5% です。この攻撃の 2 番目の部分にはライフ スティールがあります。
- 基本ダメージが 120% から 160% に増加しました。
- 基本ダメージが 200% に増加。敵の残り HP の 10%、ジュリアン自身の HP の最大 10% でライフ スティール攻撃の上限。
- 基本ダメージが 240% に増加
アンダーワールドの呪い:
- HP が最も低い敵に弱体化を与え、8 秒間、受けるダメージが 20% 増加します。このデバフが切れると、ジュリアンは失った HP の 30% を回復します。
- このデバフで死亡したターゲットは、ジュリアンの攻撃力と防御力の 20% を獲得します。
- Vulnerate は受けるダメージを 30% 増加させます。
エーテルフォーム:
- 受ける物理ダメージを 30% 軽減します。ジュリアンが致命的なダメージを受けると、代わりに最大 HP の 50% を回復し、復讐状態になります。復讐中、ジュリアンは物理ダメージを受けなくなりますが、受ける魔法ダメージは 30% 増加します。復讐でタイマーが切れるか、彼の HP がなくなると、ジュリアンは死亡します。
- ジュリアンは復讐で 30% の攻撃力と 30 の速攻を得る。さらに、このモードでの攻撃は、ヒットごとにターゲットの防御力を永久に 3% 減少させます。
- Vengeance の持続時間が 20 秒に延長されました。受ける魔法ダメージのペナルティが -30% から -15% に減少しました。
ジュリアンは紙の上では興味深いキャラクターであり、健康操作の動きの武器庫です。実際には、彼は平均的で、多くのことが望まれています。ジュリアンは堅実なムーブ キットを持っていますが、より優れたキャラクターと肩を並べる特別な何かが欠けています。おかしく聞こえるかもしれませんが、能力を最大限に引き出すために死ななければならないキャラクターは非常に危険です。
C ティア
ビル

派閥: 要塞<強い>
スキル:
(アルティメット)凶暴なチャージ:
- ビルが目の前を 2 回攻撃し、120% のダメージとカタパルトを与える。その後、前方に突進してさらに 120% のダメージとノックダウンを与え、突撃の最後に 200% のダメージ攻撃を行う。チャージ中、ビルは制御呪文の影響を受けません。
- 2 回攻撃とチャージダメージが 130% に増加し、最終攻撃が 230% に増加し、クリティカル ヒットが +30 になります。
- 2 回攻撃とチャージダメージが 140% に増加し、最終攻撃が 260% に増加し、スキルが命中したターゲットの物理防御力を 8 秒間 -20% 減少させます。
ジャイアントソードスイング:
- ビルの通常攻撃が、130% のダメージを与えるダブル攻撃になり、AOE で命中します。ビルの通常攻撃間隔を延長します。
- 攻撃はスイングごとに 140% のダメージを与えるようになりました。
- 2 回目の攻撃のクリティカル ヒットが +30
- 攻撃はスイングごとに 150% のダメージを与えるようになりました。
血まみれのスワイプ:
- ビルは 140% の正面 AOE ダメージを与え、4 秒ごとに毎秒ビルの 50% のダメージを与える出血を与えます。
- スイング ダメージが 160% に増加しました。
- スイングダメージが 180% に増加。流血ダメージが毎秒 75% に増加しました。
ヘビーアーマー:
- ビルはノックダウンと、彼を移動させるすべての制御呪文の影響を受けなくなります。
- 受ける物理ダメージを受動的に 50% 軽減します。
- 受ける魔法のダメージを受動的に 20% 軽減します。
ビルが得意とすることが 1 つあるとすれば、それは一貫性です。つまり、一貫してがっかりすることです。ビル自身はすべての動きで乗数が低く、さらに悪いことに、敵を常に移動させているため、他の近接ヒーローが何かを成し遂げるのが難しくなっています.ビルが与える継続ダメージ効果でさえ、非常に多くのヒーローがそれをよりうまく行うことができるので、まあまあです.ウォリアーは物事を殺すことになっていますが、ビルはダメージディーラーとタンクのどちらになりたいか迷っているようです.
イリヤ

派閥: 要塞<強い>
スキル:
(アルティメット) バロラスチャージ:
- イリヤは、攻撃ステータスが最も高い敵に突進します。チャージに巻き込まれた敵は 200% のダメージを受け、カタパルトで攻撃されます。メインのターゲットはこのダメージの 2 倍になります。
- チャージダメージが220%に増加
- イリヤが放った敵は、7 秒間、ダメージが 20% 減少します。
ブリーチブロー:
- イリヤの前方の敵に200%のダメージを与え、後方に弾き飛ばします。このスキルのアニメーション中、イリヤはダメージと制御呪文の影響を受けません。
- ダメージが 220% に増加
- Breaching Blow は、崩壊する前にイリヤの最大体力の 20% をダメージとして受け取れるシールドも付与します。 5 秒間続きます。
- ダメージが 240% に増加
マウント アーチェリー:
- イリヤはターゲットまでの距離に応じてさまざまな攻撃を行います:180% のダメージを与えて 6 秒間命中率を 100 低下させる矢を放つか、メイスで 220% のダメージを与えてスタンさせます。 2 秒
- 矢のダメージが 200% に増加、メイスのダメージが 240% に増加
- どの攻撃が実行されたかに関係なく、ターゲットは 7 秒間 -20% の攻撃デバフを受けます。
ファーストブラッド
- 戦闘の開始時に、イリヤはすぐに最も近い敵ユニットに 150% のダメージとカタパルトで突進します。これによりイリヤが敵の盤面の半分で終わる場合、イリヤは武勇と強靭なスキンを獲得し、それぞれ与ダメージが増加し、被ダメージが 30% 減少します。
- ダメージが 170% に増加しました。
- 勇気とタフなスキン効果が 40% に上昇
イリヤは見栄えがしますが、アルティメットで敵をノックアウトするもう 1 つのディスプレイスメント ウォリアー ヒーローです。彼が突撃するときに敵をあらゆる方向に気絶させなければ、彼ははるかに優れたパフォーマンスを発揮するでしょうが、残念ながらそれだけです.彼の他のスキルは大丈夫です – First Blood はかなり気の利いたものですが、イリヤは敵の領土に彼を置き去りにする彼の突撃で無謀さと予測不可能性の要素をもたらします.
マントン
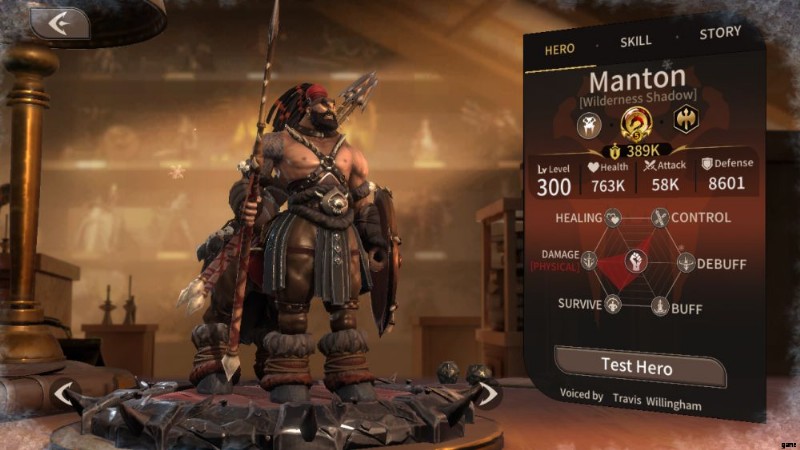
派閥: ワイルド<強い>
スキル:
(アルティメット) 獰猛のジャベリン:
- マントンが踏みつけて 150% の AOE ダメージを与え、最も遠い敵にジャベリンを投げつける。このジャベリンは、その進路にいるすべての敵に 220% のダメージを与え、撃退します。
- ストンプのダメージが 170% に増加し、ジャベリンのダメージが 250% になりました。
- ストンプ ダメージが 190% に増加し、ジャベリン ダメージが 280% になり、8 秒間、ターゲットを攻撃する際の防御力が 50% 減少します。
部族の怒り:
- 8 秒間、マントンの通常攻撃が 2 回攻撃になり、ヒットごとに 70% のダメージを与えます。
- 1 ヒットあたりのダメージが 80% に増加しました。
- ダメージが 90% + マントンの 1 ヒットあたりの失われた体力の 5% に増加
- ダメージが 100% + ヒットごとにマントンの失った体力の 5% に増加。持続時間が 12 秒に延長されました。
ワールウィンド キック:
- マントンがターゲットに 200% のダメージを与え、発射します。
- ダメージが 220% に増加
- ダメージが 240% に増加。マントンは 8 秒間、20% の攻撃バフを獲得します。
遊牧民の遺産:
- マントンが HP を失うと、彼のステータスが増加します。これには、攻撃力 +90%、クリティカル ヒット +90、クリティカル ヒット ダメージ +90 が上限です。
- 攻撃ボーナスの上限が 135% になり、クリティカル ヒットのダメージの上限が +135 になりました。
- マントンの体力が 10% 以下になると、戦闘終了までコントロール スペルの影響を受けなくなり、ヘイストが 10 増加します。
私は彼のデザインを掘り下げるので、マントンが本当に好きになりたいのですが…ええ。確かに、彼はアルティメットで反発を与えるため、他のディスプレイスメント ヒーローほど悪くはありません。しかし、彼のキットの残りの部分は、ウォリアーよりもガードに適しています。このゲームは、Manton が hp を失うことを奨励します (なんと 90% の HP を失います)。
急ぎたいなら、ハリーを連れてきます。 HPを失うことによるステータスブーストは素晴らしいですが、マントンはほとんどの戦闘で後ろ足(この場合はひづめ)に置かれ、彼を生かし続ける代わりにダメージの可能性を低下させます.彼は悪いユニットではありませんが、一緒に仕事をするのは非常に難しいです。全体として、私はもっと一貫性のある人を好みます.
マグナム クエスト ガード ティア リスト

S ティア
ハリー
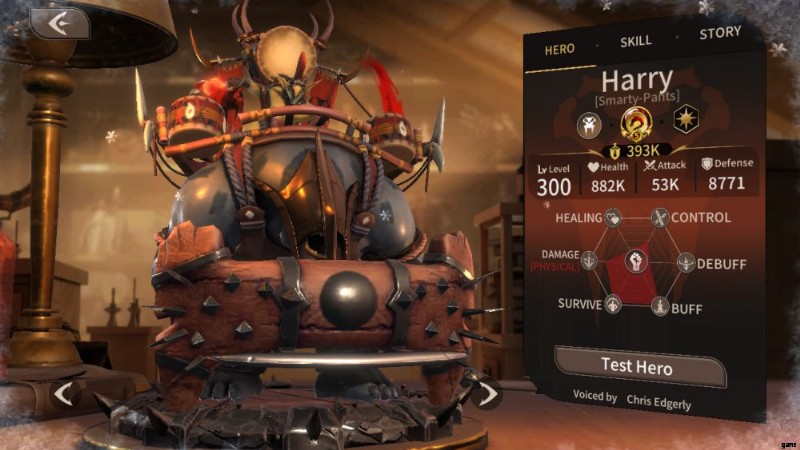
派閥: 野生
スキル:
(アルティメット) 戦争の達人:
- ハリーがドラムを叩き、周囲のすべての敵に 80% のダメージを与えます。ハリーに最も近い味方 2 人は、ハリーの攻撃の 30% に相当するボーナス攻撃と、10 秒間 40 のヘイストを獲得します。
- 攻撃バフは、ハリーの攻撃の 40% にスケーリングされます。ヘイスト バフが 50 に増加。
- ハリーとの距離に関係なく、味方全員がインスパイア効果を受けるようになりました。
ガットパンチ:
- ちびっ子が 120% のダメージを与えるパンチを放ち、ターゲット 1 人をノックダウンさせます。また、ターゲットは 12 秒間、受けるダメージが 10% 増加します。
- ダメージが 140% に増加
- 受けるダメージのデバフが 20% に増加。
- デバフがまだアクティブな間にターゲットが死亡した場合、とどめの一撃を当てたヒーローは +40 のクリティカル ヒットと 10 秒間のクリティカル ヒット ダメージを獲得します。
ヒーリング ノイズ:
- ちびっ子が 10 秒間地面を踏みつけます。揺れる大地は、足踏みごとに 60% の攻撃ダメージを与え、影響を受けた敵のヘイストを 30 低下させます。ハリーは、すべての敵が受けた合計ダメージの 30% に相当する HP を回復します。
- ストンプのダメージが 80% になりました。
- ハリーは合計ダメージの 40% を回復します。
悪魔のチームワーク:
- まだアクティブな味方 (ハリー自身を除く) ごとに、ハリーは +10% の防御力増加と -10% の被ダメージ バフを獲得します。
- スケーリングが 12% の防御バフに増加し、-12% の被ダメージ
- スケーリングが 15% の防御バフに増加し、-15% の被ダメージ
ハリーと彼のオーガであるリトル・ワンは、非常に積極的な戦車のヒーローであり、自立しています。最も重要なのは、ハリーが味方に多くの強力なバフ (特に速攻) を与えることで、攻撃速度が向上することです。ヘイストを見つけることは非常にまれで、ハリーのレベル 3 アルティメットによる無条件のヘイスト バフもあります。ハリーはまた、優れたデバフを提供し、彼自身で多くの生存率を持っています.ハリーがいるなら、彼を使ってください。
リキダス
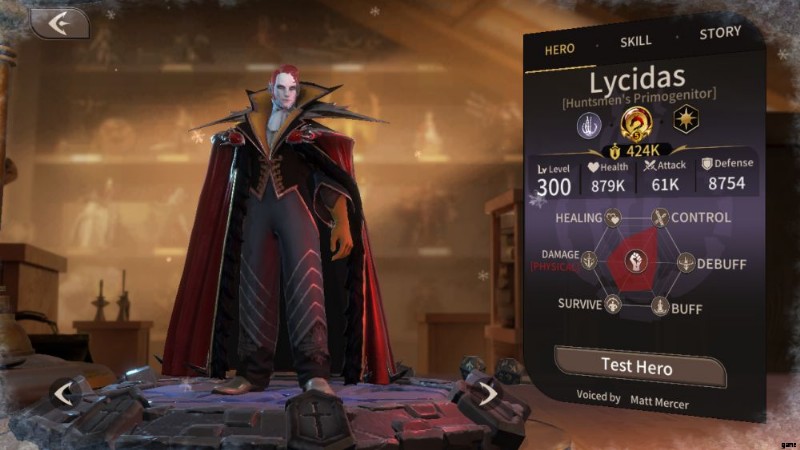
派閥: シャドウ<強い>
スキル:
(アルティメット) 血の祭壇:
- リシダスは敵の最も密集したエリアに血の祭壇を召喚します。祭壇は 3 秒間、毎秒リシダスの攻撃の 20% を与え、地面デバフでマークします。祭壇によって与えられたダメージはリシダスのエネルギーに変換され、最終的にバーストして、奪った HP の合計に等しいダメージを与えます。
- 祭壇のダメージが毎秒 25% に増加しました。
- 地面のデバフを持つ敵は沈黙します。
コウモリの怪人:
- 戦闘開始時、リシダスは前列のランダムな味方 (自身を除く) を敵の後列のランダムな場所にテレポートさせ、出現時に 120% のダメージを与えます。そのヒーローは血の契約バフを受け取り、自身とリシダスの間で受けるダメージを分割します。戦闘中、Lycidas はランダムな敵を最も密度の高い敵エリアにテレポートさせ、出現した場所に 120% のダメージを与え、10 秒間、-30 の精度を与えます。
- テレポート エンドポイントのダメージが 130% に増加しました。
- テレポートした敵も 1 秒間気絶します。
- テレポート エンドポイントのダメージが 140% に増加しました。
ハート抽出:
- リシダスが敵ユニットからそのユニットの攻撃力の 200% に相当する HP を奪い、弱体化を与えて、5 秒間、ダメージ出力を 10% 低下させます。奪われたHPはすべて、血の契約バフを持つ味方に与えられます。このバフを持つ味方がいない場合、代わりに体力が最も低い味方に HP が与えられ、そのヒーローは契約血を受け取ります。
- 奪われたHPがターゲットの攻撃力の220%に増加
- 弱体化効果がダメージ -20% に増加
サングインの家:
- リシダスは、彼が与えるすべてのダメージに対して 50% のライフ スティールを持っています。受ける物理ダメージを20%軽減。血の契約を持つ味方も同様に同じバフを受け取ります。
- ライフ スティールが 60% に増加しました。
- 物理ダメージ軽減が 30% に増加
Lycidas は、ライフ スティール ギミックを備えた多くの自己維持能力を備えた強力なガードです。 ハート抽出 リシダスの攻撃ではなく、対象ユニットの攻撃を軽減するという点でユニークです。しかし、本当に重要なのは、Lycidas のばかげたテレポート スキルと彼の Blood Contract バフです。 2 つの言葉:アレスを驚かせます。アレスを驚かせるだけでなく、ライフスティールとダメージ軽減を備えたアレス。敵に使うと面白いが、自分に使うと面白くない。これ以上言う必要はないと思います。
Aティア
アーサー

派閥: 要塞<強い>
役割: ガード<強い>
スキル:
(究極) 神の介入:
- 崩壊する前にアーサーの攻撃を最大 500% 吸収できる一時的なシールドを追加します。このシールドは、アーサー自身を含むすべての味方に影響を与えます。シールドは 8 秒間持続します。
- また、アーサーの毎秒攻撃の 100% に対してシールドが回復し、持続時間が 10 秒に延長されます。
- シールド吸収がアーサーの攻撃の 550% に増加しました。
聖なるオーラ:
- アーサーは、彼と近くの味方に影響を与える 6 秒間のオーラを発動します。このオーラは、アーサーの防御力を 20% 増加させ、味方の防御力を 10% 増加させます。
- 自衛バフが 30% に増加し、味方は 15% の防御バフを受け取ります。
- オーラは距離に関係なくすべての味方に影響を与えるようになりました。持続時間が 8 秒に延長されました。
- 自衛バフが 40% に増加し、味方は 20% の防御バフを受け取ります。
聖なる光:
- アーサーの攻撃の 220% で、現在の体力が最も低い味方を回復します。
- ホーリー ライトはその味方に 120 のエネルギーも与えます。
- 回復量がアーサーの攻撃の 260% に増加しました。
神聖な境界:
- アーサーはシールドを上げ、受ける物理ダメージを 70% 減らし、コントロール スペルの影響を受けなくなります。これは5秒間続きます。この間、アーサーはアルティメット スキルしか使用できません。
- シールドが物理ダメージを 100% 軽減するようになりました。
- これがアクティブな間、アーサーは毎秒 50 のエネルギーを獲得します。
アーサーの攻撃統計は不足していますが、タンキングへの先制的なアプローチにより、彼の有用性が大幅に向上します。味方にシールドを提供することで、アーサーはチームの耐久性を大幅に向上させます。彼はまた、フォールバック メカニズムとして、ヒールとさらなる防御バフを持っています。
運賃

派閥: 森<強い>
スキル:
(アルティメット)ディバインシールド
- フェアはシールドから衝撃波を発射します。このエネルギーの爆発は 160% のダメージを与え、ノックバックとスタンの両方を与えます。このスキルをキャストしている間、Fare はコントロール スペルの影響を受けません。
- ダメージが 220% に増加
- ウェーブが終了すると、ファレのスキンが強靭になり、受けるダメージが 8 秒間 30% 減少します。
止められない刃:
- Fare は目の前の敵に 170% のダメージを与えます。
- ダメージが 185% に増加しました。
- 命中した敵の防御力が 4 秒間 -25%
- ダメージが 210% に増加。防御デバフが -40% に増加
致命的な魅力:
- フェアは近くの敵を引き寄せます。
- 引っ張られた敵は挑発され、Fare を攻撃するよう強制されます。また、攻撃デバフが 7 秒間 -60% になります。
- このスキルがアクティブな間、シールド トレーニング のブロック確率が 2 倍になります。
盾の訓練:
- Fare は 15% の確率でダメージをブロックします。
- 攻撃の防御に成功すると、フェアは 150% のダメージをカウンターします。
- ブロックのチャンスが 20% に増加しました。
Fare はごく普通の戦車です。ダメージ軽減、気絶、ノックバック、挑発があります。彼は特に派手でもパワフルでもありませんが、Fare が行うことは非常に優れています。運賃は、ギミックヒーローからの素晴らしい変化である一貫したパフォーマンスを提供します.
一方、彼には自己回復の動きがないため、フェアが倒される前に敵を倒すか、ヒーラーを連れてくるようにしてください.彼の衝撃波は敵を分散させ、彼の挑発を役に立たなくすることもできるので、一貫性を保つために彼のオートスキルをオフに設定してください.
B ティア
リッカーズ
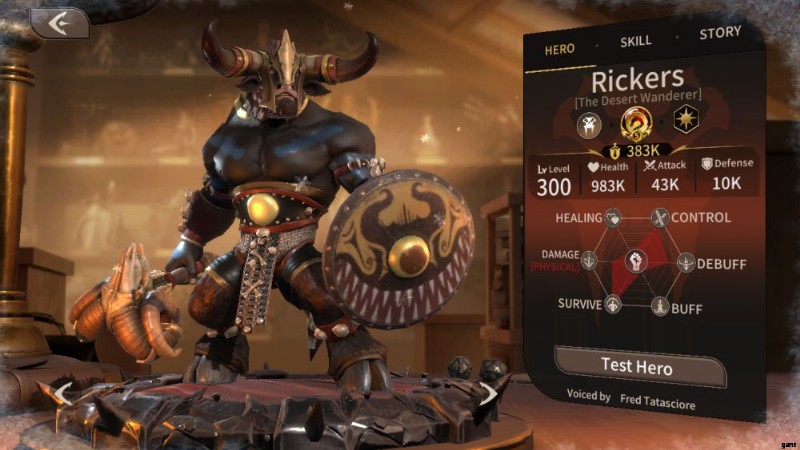
派閥: ワイルド<強い>
スキル:
(アルティメット) プライマルスタンピード:
- 大地を踏みつけて、リッカーの周囲に AOE で 110% の攻撃を与え、命中した敵を 2 秒間スタンさせます。
- また、ヒットしたターゲットに 8 秒間 -50 のヘイストを与えます。
- ダメージが攻撃の 120% に増加し、スタンの持続時間が 3 秒に増加しました。
猛烈なコンボ攻撃:
- リッカーズの前にいる敵に 65% のダメージで 2 回命中し、3 回目の攻撃で 130% のダメージを与えます。最後の一撃も 1 秒間の気絶を引き起こします。
- 2 コンボ ヒットは 70% のダメージを与え、最後のヒットは 140% のダメージを与えるようになりました。
- 気絶の持続時間が 1.5 秒に増加し、ヘイストが 6 秒間 25 減少します。
- 2 コンボ ヒットは 75% のダメージを与え、最後のヒットは 150% のダメージを与えるようになりました。
雄叫び:
- リッカーズは 12 秒間、最大 HP の 20% を獲得し、同じ量だけ回復します。彼がこのバフを持っている間、リッカーズの通常攻撃は 0.5 秒間 15% の気絶のチャンスがあります。
- 最大 HP ボーナスが 30% に増加しました。
- 気絶の発動率が 30% に増加。
部族防衛:
- HP が 70% 以下になると、リッカーズは 2 秒間すべてのダメージを受けなくなります。その後、彼は 10 秒間強靭な皮膚を得て、受けるダメージを 30% 減らします。戦闘ごとに 1 回のみトリガーされます。
- タフスキンのダメージ軽減が 60% に増加
- このスキルは、HP が 30% 以下になると再びアクティブになります。
この強力なミノタウロスは、幅広いスタンの選択で敵をコントロールすることで、味方のために戦車を走らせます。彼は最高のダメージを与えないかもしれませんが、少年、リッカーズは敵を悩ませ、彼らのプレーを妨害するのが得意です.残念ながら、ボスはコントロール効果の影響を受けないため、可哀想なリッカーズはボス タンクとして適していません。また、彼の非常に少ないダメージ軽減のソースは、他のタンクと比較することはできません。
オールデン
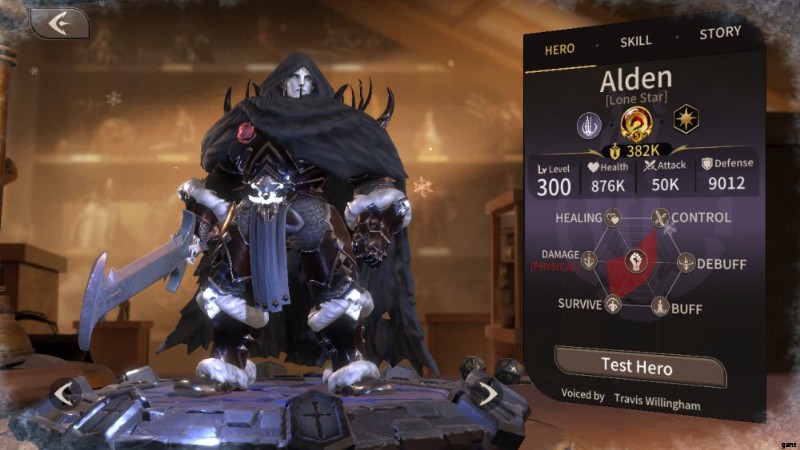
派閥: シャドウ<強い>
スキル:
(アルティメット) 凍てついた土地:
- 近くの敵に 150% のダメージを与えて凍らせ、4 秒間移動や行動ができなくなります。
- 凍った敵にもエネルギー ブロックが当たり、8 秒間エネルギー獲得が無効になります。
- ダメージが 180% に増加し、凍結時間が 5 秒に増加しました。
悪の盾:
- Alden の肌を 10 秒間強化し、受けるダメージを 20% 軽減します。
- タフスキンのダメージ軽減が 25% に増加
- いつ悪の盾 ダメージが減少すると、オールデンは次の通常攻撃で減少したダメージに等しいボーナスダメージを与えます。
- タフスキンのダメージ軽減が 30% に増加し、持続時間が 14 秒に増加しました。
ネクロマンサー:
- ランダムな倒れた味方をステータスの 75% で復活させます。復活したヒーローはスキルを使用できません。
- 復活したヒーローは、ステータスの 100% で戻ってきて、究極ではないスキルを使用できます。
- Alden は倒れた敵のヒーローをターゲットにできるようになりました。ヒーローは、復活したときに Alden のチームのために戦うことになります。
復活:
- 初めて致命的な打撃を受けたとき、オールデンは最大 HP の 150% に相当するシールドを獲得し、4 秒間、毎秒最大 HP の 15% を回復します。 復活中、オールデンは攻撃できません まだアクティブです。
- Also creates a 120% damage blast when this skill triggers. This blast also freezes enemies for 3 seconds.
- Shield scales to 250% of Alden’s max HP, recovery rate increased to 25% of Alden’s max HP.
Alden has the unique ability to bolster your ranks with your fallen enemies. With Alden on your team, death is a minor inconvenience for your allies as Alden can bring them back time and time again. Alden also has some control and disable utility through his freeze applications. On the other hand, this makes him a niche pick against bosses, who are immune to Alden’s cold grasp.
C-Tier
Monroe
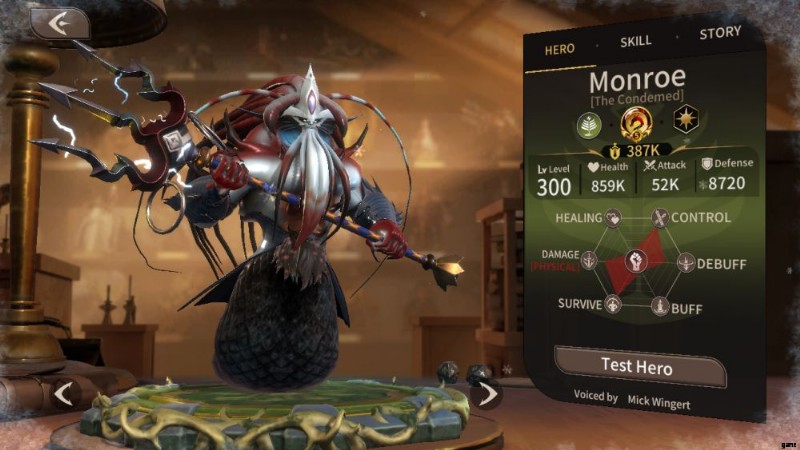
Faction: Forest
Skills:
(Ultimate) Tidal Surge:
- Summons 5 water jets that blast enemies at random for 180% damage and knockdown.
- Each subsequent jet does 20% more damage than the last. Jets will now prioritize enemies that haven’t been hit by a jet.
- Water jets also inflict -30 haste for 10 seconds. Does not stack with itself.
Aegir’s Rage:
- Deals 150% damage to one enemy and reduces its physical defense by 30% for 6 seconds.
- Damage increased to 170%.
- Damage increased to 190%. Also reduces target’s haste by 30 for 6 seconds.
- Damage increased to 210%.
Clashing Waves:
- Deals 120% damage in an AOE around Monroe and stuns them for 3 seconds.
- Damage increased to 140%.
- For each enemy that’s been hit by Clashing Waves, Monroe blocks one incoming attack.
Shield of Tide:
- Whenever Monroe receives 3 normal attacks, he automatically blocks the next attack.
- Number of hits required reduced to 2.
- Number of hits required reduced to 1.
Monroe isn’t a bad hero per se, it’s that he can’t seem to commit to any specific strategy and is thus a very niche pick. He does have some crowd control via his water jet knockdown and area stun. You could argue that Monroe fares better against bosses than Rickers or Alden, but then again, you could just use a better tank like Arthur or Harry. His Shield of Tide looks impressive on paper, but in practice he’s going to be eating more skills than normal attacks.
On the other hand, his water jets can do very impressive damage to a single target – but would you rather have Monroe, or a dedicated damage dealer? Monroe has a mix of everything, but rather than making him stronger, it turns him into more of a generalist with no solid battle plan.
Magnum Quest Hunter Tier List
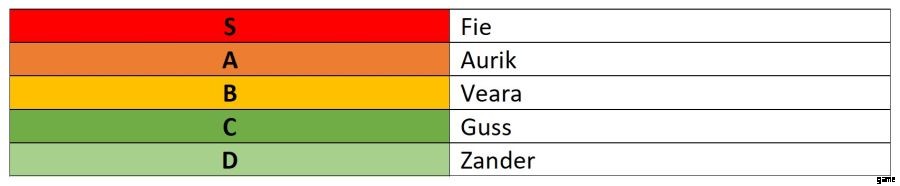
S-Tier
Fie

Faction: Forest
Skills:
(Ultimate) Gale Strafe:
- Deals 220% damage to enemies in front of Fie and repels them.
- Damage increased to 240%.
- Damage increased to 260%.
Wind Guardian:
- Fie gains 2 haste after every normal attack, and can gain up to 10 stacks.
- Haste per attack increased to 3.
- At full stacks, Fie also gains 30% attack.
- Haste per stack increased to 4.
Rapid Fire:
- Attacks an enemy thrice for 90% damage per shot. Getting hit with this skill does not grant its target any energy.
- Damage increased to 150% per shot.
- The third attack also inflicts a -20% defense debuff for 6 seconds.
Scurry:
- Allies gain 30 haste for 8 seconds when battle begins.
- Haste buff increased to 45.
- Also gives 60 energy to allies at the start of a battle.
Fie is notable for his very high attack stat. While his kit is basic, it’s really all he needs. His haste self-buff slowly but surely turns him into a machine gun, while his passive skill lets Fie’s team score early kills and move into an advantageous position. Fie’s job is to execute brutal ranged takedowns on all enemies, and his simple, yet effective loadout makes him excel.
A-Tier
Aurik

Faction: Fortress
Skills:
(Ultimate) Explosive Rounds:
- Deals 240% attack in an AOE around the primary target.
- Targets hit also lose 45 haste and burn for 80% per second for 5 seconds.
- Initial damage increased to 270%, burn damage increased to 100%.
Toast:
- Aurik quaffs a mug of liquor, gaining 30 haste and a 25% attack buff for 8 seconds.
- Haste buff increased to 45 and attack buff increased to 30%.
- Aurik also gains +30 critical hit for the duration of the effect.
- Critical hit buff increased to +45.
Smoke Screen:
- Enemies in an area lose 60 accuracy for 6 seconds.
- In addition, they lose 35 energy per second.
- Accuracy debuff increased to -70, duration set to 8 seconds.
Headshot:
- Normal attacks have a 30% chance to deal 140% damage and mini stun a target, interrupting their actions.
- Damage bonus increased to 160%.
- Headshot chance increased to 45%.
Aurik’s mini stuns are very disruptive and – with a bit of luck – can completely ruin an enemy’s game plan. Since these are dependent on his normal attack, you’ll want to buff Aurik’s haste so that he has more opportunities to proc Headshot . The rest of his kit isn’t too shabby either – he does decent AOE damage and has debuffs to boot.
B-Tier
Veara
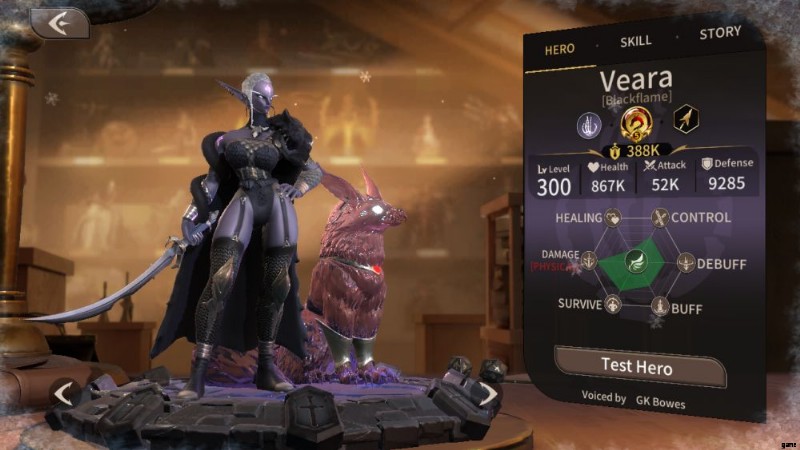
Faction: Shadow
Skills:
(Ultimate) Clashing Dark Energy:
- Summons Misty at the start of combat to assist Veara. Misty has 70% of Veara’s stats.
- Deals 400% damage to nearby enemies. If Misty is alive, strips enemy shields before inflicting damage.
- Misty stat scaling increased to 90% of Veara’s stats. Damage increased to 480%. On skill use, Misty also reduces all enemies’ physical defense by 40% for 8 seconds.
- As long as Veara is alive, Misty is resurrected 15 seconds after it dies. Damage increased to 560%. On skill use, Misty also reduces all enemies’ physical defense by 60% for 8 seconds.
Energized Slash:
- Deals 180% damage to one target.
- Damage increased to 200%.
- Damage increased to 220% + 30 % of the target’ lost HP, up to a maximum of 1000% of Veara’s attack.
- Base damage increased to 240%.
Strike of Mist:
- Veara deals 220% damage to the enemy with the least HP. 60% chance for Misty to join in and add a 3 second stun.
- Damage increased to 280%, Misty extra attack chance increased to 90%.
- If Misty’s extra attack triggers, both Veara and Misty gain valor and tough skin for 8 seconds, increasing outgoing damage and reducing incoming damage by 30%.
Intwined Souls:
- While Misty is alive, Veara and Misty recover 5% max HP every 5 seconds.
- If Misty dies, Veara gains 45% attack, 45 critical hit, and 40 haste for 12 seconds.
- If Veara dies while Misty is alive, Misty sacrifices itself to revive Veara with 100% of her HP. Misty can no longer be summoned for the rest of the battle.
Veara is technically two characters like Harry, but unlike Harry and Little One, Veara and Misty can both fight. Veara also has a neat execution-style attack that scales off the target’s lost HP, making her a good pick for boss battles, and a skill that specifically targets enemies with low health, helping Veara fill the role of assassin. She’s a whirling dervish of blades whose purpose is to deal damage – a role that she fills well.
C-Tier
Guss

Faction: Fortress
Skills:
(Ultimate) Slime Barrage:
- Fire 8 shots of slime that deal 120% damage to random enemies.
- Guss is immune to control spells during the first 3 attacks.
- Damage increased to 140%.
Slime Spray:
- Deals 120% damage to 1 target.
- Damage increased to 135%.
- This skill now has 15% life steal.
- Damage increased to 150%.
Overdose:
- Guss whips his mount, gaining 40 haste for 10 seconds, then loses 30 haste for the next 6 seconds.
- Haste buff increased to 55.
- Haste buff duration increased to 12 seconds, haste debuff duration decreased to 4 seconds.
Corrosive Mucus:
- Guss’ attacks inflict weaken on his targets, reducing their damage by 10% for 5 seconds.
- Weaken damage reduction increased to 15%.
- Weaken damage reduction increased to 20%.
Guss is a…thing riding some kind of larva. Visually, he doesn’t look that great. Sadly for Guss, this also translates to his battle ability. Guss is nowhere near passable enough to be B-tier, and just barely avoids being D-tier thanks to his constant weaken debuff.
D-Tier
Zander

Faction: Wild
Skills:
(Ultimate) Blade Fan:
- Deals 120% damage in a fan– shaped AOE in front of Zander.
- Damage increased to 140%.
- Damage increased to 160%.
Piercing Dagger:
- Normal attacks pierce through enemies in a straight line. Each time an attack pierces, it does 5% less damage.
- No damage reduction from piercing.
- +5% damage increase after piercing.
- +10% damage increase after piercing.
Venom:
- Zander throws a bottle of poison that deals 80% initial damage to one target, and inflicts poison in an AOE around the primary target. The poison deals 40% damage per second for 5 seconds.
- Initial damage increased to 100%. Poison damage increased to 45%.
- Initial damage increased to 120%. Poison damage increased to 50%.
Stealth:
- Zander gains 40 haste and gains Stealth for 6 seconds. While he has Stealth, he cannot be targeted by enemies. Zander still takes damage from AOE attacks he’s caught in.
- Haste buff increased to 50.
- Duration increased to 8 seconds.
Zander has the dubious honor of being so bad that the Hunter tier list had to be extended down to D-tier. His skill multipliers are incredibly low and there are many other heroes that can do his job better. Scratch that, literally anyone can do Zander’s job better than him. While his Stealth skill is nice, it’s wasted on his low damage skills. To call him a jack of all trades is an insult, as that would imply some level of proficiency at what he does.
Magnum Quest Rogue Tier List

S-Tier
Flann
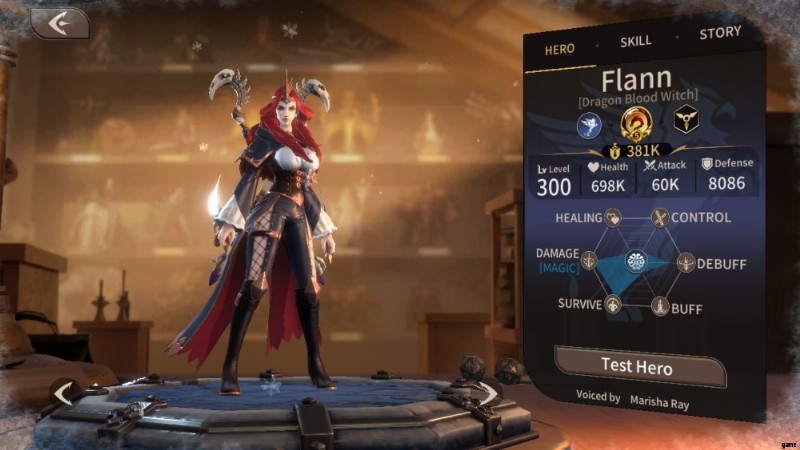
Faction: Fortress
Skills:
(Ultimate) Witch’s Hunt:
- Deals 280% damage in a fan-shaped AOE in front of Flann. Does 4x as much damage to enemies below 30% HP. If using auto mode, Flann will not use this skill on enemies above 30% HP.
- Enemies hit are dispelled of all their buffs.
- If there is an enemy with less than 30% health, Flann teleports in front of them before activating this skill. If the enemy dies, Flann regains all the energy used for that activation.
Enchanted Ring-Blade:
- Deals 180% damage to enemies in a path and places a Death Mark on them. Death Marked enemies take 12% more damage from Flann’s attacks per stack. Death Mark stacks up to 2 times and lasts for 10 seconds.
- Damage increased to 200%.
- Damage increased to 220%.
- Death Mark bonus damage increased to 18%.
Hunter’s Instinct:
- Flann gains 40 dodge for 12 seconds. Enemies that miss Flann during this time gain a stack of Disruption Mark, losing 12% damage for 10 seconds per stack (max 3 stacks). Flann can inflict one Disruption Mark per second.
- Dodge bonus increased to 80.
- Disruption Mark outgoing damage debuff increased to -18%.
Hunter’s Enchanted Marks:
- All Death Marks passively increase Flann’s damage by 12%. All Disruption Marks passively reduce damage taken by Flann by 12%. These effects cap at a 60% bonus.
- Any time a foe is hit with one of Flann’s marks, she recovers 5% of her max HP.
- Death mark passive damage boost increased to 18%, Disruption Mark damage reduction increased to 18%. Cap raised to 90%.
Flann is a close-range assassin who deals magic damage. Her ability to critically hit low health enemy heroes while continuously buffing her own attack and having a self-sustain mechanism easily puts her above other rogues. Just point at what you want dead, and Flann will erase them.
A-Tier
Gila

Faction: Wild
Skills:
(Ultimate) Death Swirl:
- Gila deals 3 hits of 150% damage to the enemy with the lowest HP. These attacks have 30% life steal. Gila is immune to control spells during this skill.
- If Death Swirl kills its target, all remaining allies gain an attack buff equal to the target’s, divided evenly among them.
- Damage per hit increased to 170%.
Dance of Chaos:
- Deals 3 hits of 70% damage to enemies in front of Gila and repels them, pushing them slightly backwards. Gila is immune to control spells during this skill.
- Damage per hit increased to 80%.
- Adds a 4, final hit to the combo that hits for 120% in an AOE in front of Gila.
- Damage for 3 hit combo increased to 90%, final hit damage increased to 150%.
Foul Mouth:
- Spits poison at all enemies in a fan-shaped AOE. This poison lowers haste by 35 and deals 80% damage per second for 8 seconds.
- This skill also inflicts vulnerate, increasing incoming damage by 15%.
- Duration increased to 12 seconds.
Venom Eruption:
- Normal attacks and Dance of Chaos leave marks on Gila’s enemies. At 8 stacks, they explode, losing 12% of their current HP but not more than 500% of Gila’s attack.
- Explosion now deals AOE damage.
- Number of stacks required reduced to 6.
Gila is another assassin who excels at picking off low health enemies and supporting her allies on the battlefield. Her poison spray not only deals decent damage, but also inflicts haste down (looking at you, Zander). Gila also has some AOE abilities in her exploding marks, which is complimented by multi-hitting attacks. If you’re looking for an assassin who excels in a team, Gila’s got you covered.
B-Tier
Carlotta

Faction: Shadow
Skills:
(Ultimate) Prance:
- Carlotta teleports around the battlefield, hitting random enemies for 220% damage per hit.
- Number of attacks increases.
- Damage increased to 260%.
Shunpo:
- Teleports to and strikes the farthest enemy from Carlotta for 130% damage.
- Damage increased to 150%.
- Also grants a shield with HP equal to 200% of Carlotta’s attack.
- Damage increased to 170%.
Blade Ring:
- Deals 110% damage to nearby enemies.
- Blade Ring has 60% life steal.
- Damage increased to 120%.
Traceless:
- Carlotta gains stealth for 10 seconds when her health dips below 40%. In stealth, Carlotta cannot be targeted but she can still be hit by AOE attacks. This only triggers once per battle.
- During stealth, Carlotta has +30% attack.
- Stealth duration increased to 18 seconds.
Carlotta excels at destroying the enemy backrow with her Shunpo skill, ensuring that no one is truly safe from this harlequin’s daggers. She’s a very agile fighter that continuously dances around the battlefield, making it hard to lock her down and ensuring she’s free to cause chaos. On the other hand, she doesn’t have the skills to secure kills, unlike Flann’s execution attacks.
Hista
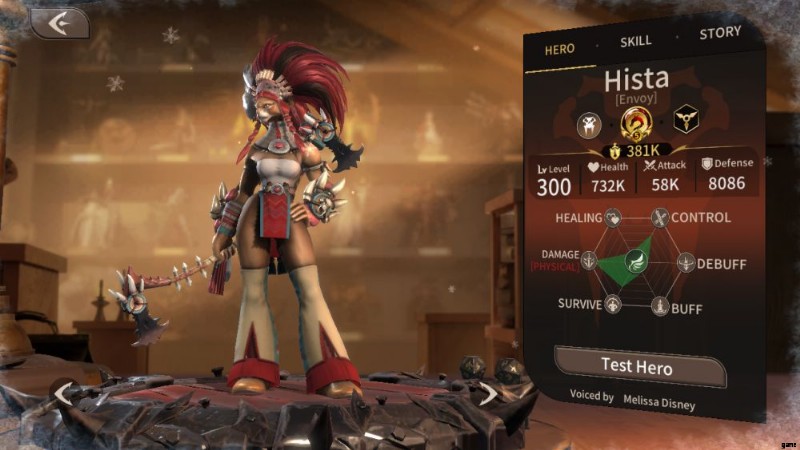
Faction: 野生
Skills:
(Ultimate) Lion’s Wrath:
- For 8 seconds, Hista has +30 haste, +25 critical hit, +20% attack, and immunity to control spells.
- Attacks made while in this state have a 25% chance to bleed, dealing 50% damage per second over 5 seconds.
- Bonuses increased to +40 haste, +30 critical hit, and +25% attack. Duration increased to 12 seconds.
Lion’s Leap:
- Deals 180% damage to the enemy that has inflicted the most damage in battle and stuns them for 4 seconds.
- Damage increased to 200%.
- If target is successfully stunned, Hista gains 30% attack for 8 seconds.
- Damage increased to 220%.
Dual Axe Swipe:
- Hista creates two rotating axes around herself that deal 90% damage to enemies they hit. These also inflict bleed for 25% damage per second for 4 seconds.
- Damage increased to 100%.
- Damage increased to 110%.
Bloody Chase:
- Hista deals 20% more damage to targets that have bleeding.
- Damage bonus increased to 30%.
- Also has +30 critical hit against bleeding targets.
Hista excels at taking down single targets with her focus on bleed effects. This makes her great against single boss battles, but leaves her performance lacking when faced with multiple enemies.
Cyan
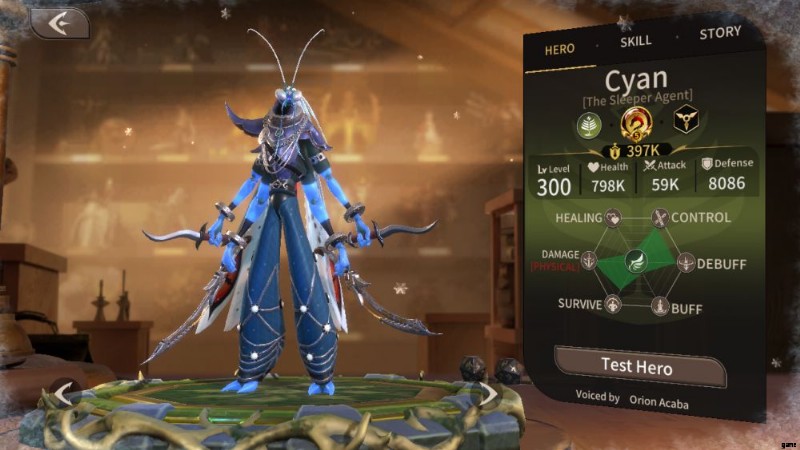
Faction: Forest
Skills:
(Ultimate) Mantis Abduction:
- Cyan abducts a target, removing both of them from play for 3 seconds. The abducted enemy takes 120% * the number of bleed stacks on it every second while abducted. If the abducted enemy is killed before the 3 seconds are up, Cyan emerges beside the enemy with the lowest HP, reducing accuracy by 30 and attack by 10% in an AOE. If the abducted target survives, both it and Cyan reappear in a random location on the left of the board.
- If the abducted target survives, it cannot be healed for 6 seconds.
- Cyan’s next attack after reappearing is a guaranteed critical hit and adds 3 stacks of bleed.
Mantis Sabre:
- Cyan’s normal attacks inflict bleed for 20% damage per second for 10 seconds. Enemies can hold up to 5 stacks of Cyan’s bleed. If they have 3 or more stacks, they lose 20% attack, take 10% more damage, and lose 20 energy per second for 10 seconds.
- Bleed damage increased to 30% damage per second.
- 50% of energy lost via Cyan’s bleed is given to Cyan.
- 100% of energy lost via Cyan’s bleed is given to Cyan.
Rabid Assault:
- 25% chance that Cyan’s normal attacks become a double attack that ignore 50% of the target’s defense and mini stunning them.
- Upgraded attacks are now a triple attack.
- Extra attacks do not generate energy for the target.
Stab of Gale:
- Cyan appears behind the enemy in the same team position as him, dealing 150% damage to it and inflicting a 2 second stun. For the next 12 seconds, Cyan has a 25% chance to block incoming attacks.
- Blocking an attack increases Cyan’s next attack’s damage by 20%.
- Block chance increased to 35%.
Cyan is another hero whose gameplay revolves around bleed – making him a perfect partner for Hista. While Hista’s bleeds deal decent damage on their own, Cyan uses his bleeds to weaken enemies before swooping in for the kill with his ultimate. As they’re still both classified as bleeds, these two heroes complement each other perfectly.
By himself, Cyan is also a potent assassin and disabler who can banish a key enemy hero (at the cost of himself) and stun another enemy off the bat. Cyan works best with heroes who can give him haste so that he can both stack bleeds and trigger his own passive skills faster.
C-Tier
Fabian

Faction: Forest
Skills:
(Ultimate) Honey Badger Punch:
- Fabian launches a triple attack that deals 120% damage per hit and ignore defense.
- Each strike adds a stack of Ferocity that lasts 5 seconds. Per stack of Ferocity, each hit of Fabian’s triple attack deals 10% more damage.
- This skill’s Ferocity damage buff increased to 12%.
Hypermania:
- Fabian’s normal attacks grant him 1 stack of Ferocity. Each stack of Ferocity increases attack by 1%. Fabian can hold up to 30 stacks. At 10 stacks, Fabian’s normals attacks become a 2-hit combo for 75% damage per hit.
- At 20 Ferocity stacks, Fabian’s normal attacks ignore defense.
- Ferocity attack buff per stack increased to 2%.
- Ferocity stack life increased to 8 seconds per stack. At 30 stacks, Fabian becomes immune to control spells.
Sleek Fur:
- Passively gives Fabian 20 dodge. When activated, Fabian’s dodge is doubled for 10 seconds and he gains 1 stack of Ferocity for each attack he dodges.
- Increases passive dodge gain to 30.
- Now gains 2 Ferocity stacks from dodging while this buff is active.
Opportunist:
- Fabian enter stealth at the beginning of combat, then strikes the closest enemy for 200% damage and a 2 second stun. During stealth, Fabian cannot be targeted but can still be affected by AOE attacks.
- Fabian also gains 2 stacks of Ferocity at the start of battle.
- Damage increased to 250%.
Rogues usually have some sort of stacking mechanic. Flann has her marks, which she applies liberally throughout the whole battle; Hista and Cyan have bleeds, which facilitate the rest of their skills. Fabian, on the other hand, has Ferocity, which is a self-buff rather than an enemy debuff.
On paper, Fabian’s Honey Badger Punch can deal enormous damage – IF he can gather enough steam to get it going in the first place, and even that’s not viable since each stack only lasts 5 seconds. While his damage can be quite good, Fabian is outclassed by other rogues who have more potent disables and finishing moves.
Magnum Quest Mage Tier List

S-Tier
Sur
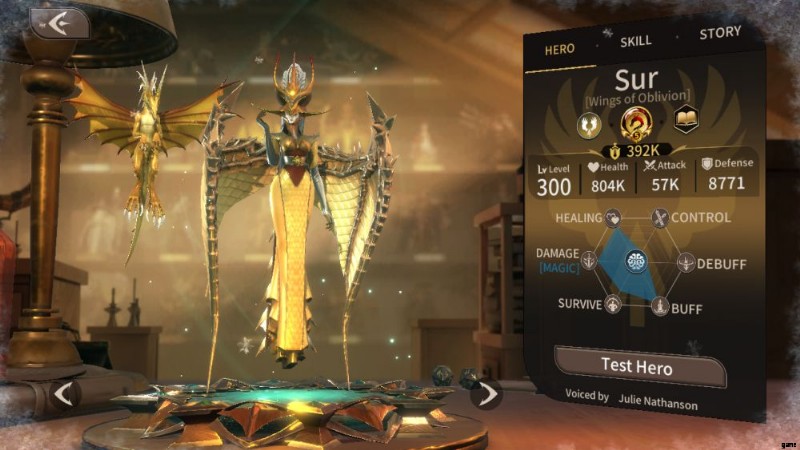
Faction: Divinity
Skills:
(Ultimate) Dragon’s Awakening:
- Switches Sur to Awakened Form. In this mode, she gains a 50% attack buff and immunity to all control spells, and her normal attacks do 20% more damage and inflict splash damage. This form drains 160 energy per second.
- Attack buff increased to 70%. Additionally gains 10 haste while Awakened.
- Sur will now target 2 enemies simultaneously while Awakened. Reduces energy drain to 150 per second.
Scorched Earth:
- At the beginning of combat, Asgard lays down a wave of flame that burns enemies for 150% damage per second for 6 seconds. Allies hit by the wave gain the cure status, regenerating 100% of Sur’s attack as HP per second for 6 seconds. During combat, Asgard breathes fire that deals 240% attack damage to enemies and 120% of Sur’s attack as healing to allies.
- Fire breath damage increased to 280%, healing increased to 140% of Sur’s attack.
- If Sur is Awakened, increases the healing of this skill by 300% of her attack.
- Fire breath damage increased to 320%, healing increased to 160% of Sur’s attack.
Reign of the Past:
- Sur passively gains 6% attack every 5 seconds. Each stack of this buff lasts 12 seconds, and Sur can have up to 8 stacks. If Sur is Awakened, allies also receive this effect.
- Sur regenerates 100 energy every 5 seconds while Awakened.
- Attack buff increased to 10%.
Unyielding Wings:
- In normal mode, Sur has tough skin, reducing incoming damage by 40%. If Awakened, she gains valor, increasing her own damage by 30%.
- In normal mode, Sur has a 20% chance to gain 100 energy when attacked. If Awakened, she has a 15% chance to gain 100 energy when attacking.
- In normal mode, tough skin damage reduction is increased to 60% and energy generation chance is increased to 30%. In Awakened form, valor buff is increased to 40% and energy generation chance increased to 20%.
While Sur is a nuker at first glance, her kit also allows her to serve as a healer and buffer. This lady can lay down a trail of flame to incinerate her foes just as easily as she can support her allies. Key to using Sur is her unique Awakened form, which requires careful management of when and where to use her ultimate. Once you’ve got that down though, Sur will easily fit into most teams.
Ecra

Faction: Fortress
Skills:
(Ultimate) The Ruling Crown:
- Deals 160% damage to all enemies and burns them for 25% attack per second for 6 seconds.
- Initial damage increased to 180%, burn damage increased to 50%.
- Enemies hit gain the heal block debuff for 8 seconds. During this time, they are unable to heal.
Bouncing Fireball:
- Ecra shoots a bouncing fireball that deals 180% damage and bounces 3 times.
- Damage increased to 200% per bounce.
- Damage increased to 220% per bounce.
- Fireball can now bounce 4 times.
The Protégé:
- One enemy takes all damage Ecra would take for 8 seconds. Any energy generated by this damage is still credited to Ecra.
- Duration increased to 12 seconds.
- Ecra steals 20% attack and 50% of all healing the target receives.
Seductive Gaze:
- After activating any skill, Ecra’s next normal attack hits 2 enemies and burns them for 75% damage per second for 6 seconds.
- Burn damage increased to 100%.
- Number of targets increased to 3.
Ecra is a pure nuker who also brings unique mechanics to the field. While her ultimate doesn’t do too much damage, it inflicts the deadly heal block debuff. She can also force an enemy to take all damage she would, which not only increases her own durability but also makes enemies hurt more. Add her potent Bouncing Fireball AOE and her numerous ways of inflicting burn and you’ve got an incredible damage dealer on your hands.
Emilia

Faction: Forest
Skills:
(Ultimate) Hurricane Blast:
- Summon 2 blasts of wind that deal 120% damage and repel targets they hit. Prioritizes the enemy’s front row.
- An extra blast is summoned. This blast deals 180% in an AOE, repels, and prioritizes the enemy’s back row.
- Front row damage increased to 140%, back row damage increased to 220%.
Cyclone Blade:
- Throws a blade at a random target. The blade does 140% damage to enemies in the way, and 160% damage in an AOE around the primary target.
- Blade path damage increased to 150%, final attack increased to 180%.
- Now throws 2 blades at random targets. Blades now inflict knockdown to enemies caught in their path.
- Blade path damage increased to 160%, final attack increased to 200%.
Goose Trick:
- Turns an enemy into a harmless goose and lures it in for 4 seconds.
- Hexed enemy also gains vulnerate, increasing incoming damage by 20%.
- After turning back to normal, the hexed enemy loses 30% attack for 6 seconds.
Enchantment of Wind:
- Emilia gains 25 haste.
- Emilia gains an aura that grants allies 20 haste.
- Self haste buff increased to 40, aura buff increased to 30 haste.
Like Harry, Emilia sees widespread use because of her haste buff. She just has to show up, and her allies automatically become better at fighting. The duck hex is also incredibly useful not only for its disable but also for disrupting enemy formations. Emilia’s attacks are so-so, but they’re more of icing on the cake.
A-Tier
Issy
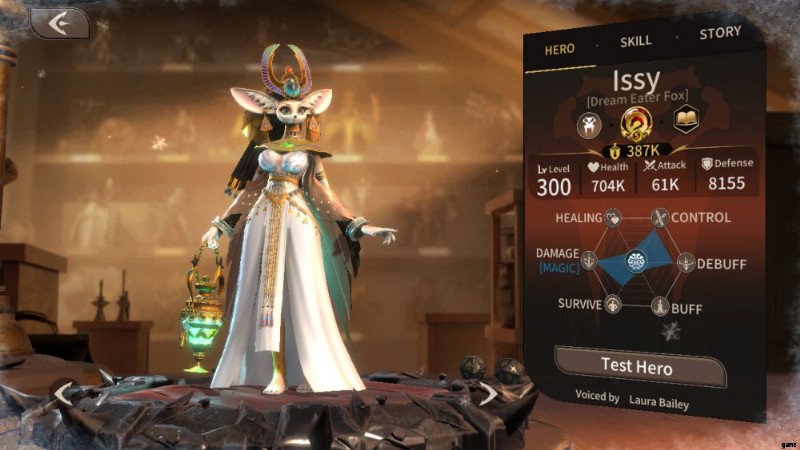
Faction: 野生
Skills:
(Ultimate) Growth Hormone:
- Issy’s normal attack summons an insect swarm on hit. All swarms last 12 seconds and deal 50% damage every 3 seconds.
- Deals 140% damage to all enemies and adds one swarm to each of them. Activates all swarms and increases their passive damage to 75%.
- Damage increased to 160%. Being attacked by a swarm decreases an enemy’s attack by 2%. Max 5 swarms per enemy.
- Damage increased to 180%. Being attacked by a swarm decreases an enemy’s energy by 20.
Harassing Swarms:
- Deals 160% damage to a random target and adds 1 swarm to it.
- Damage increased to 180%.
- Damage increased to 200%, summoned swarm lasts for 15 seconds.
- Damage increased to 220%.
Swarm Proliferation:
- Deals 180% damage to one swarmed enemy. Adds 1 swarm in an AOE around the affected enemy.
- Damage increased to 210%.
- Search radius for adding swarms is greatly increased.
Vile Swarms:
- If a swarm lands a critical hit, the target is stunned for 1 second. This can only be triggered once every 7 seconds.
- Swarm critical hits add 1 swarm to the target. This can only be triggered once every 7 seconds.
- Stun duration increased to 1.5 seconds.
Issy uses her normal attack to build up swarms of nasty insects on her enemies, then supercharging them with her ultimate. This makes for unconventional yet surprisingly reliable pseudo-AOE damage-over-time. The more time she’s allowed to control her swarms, the stronger Issy gets.
Derla
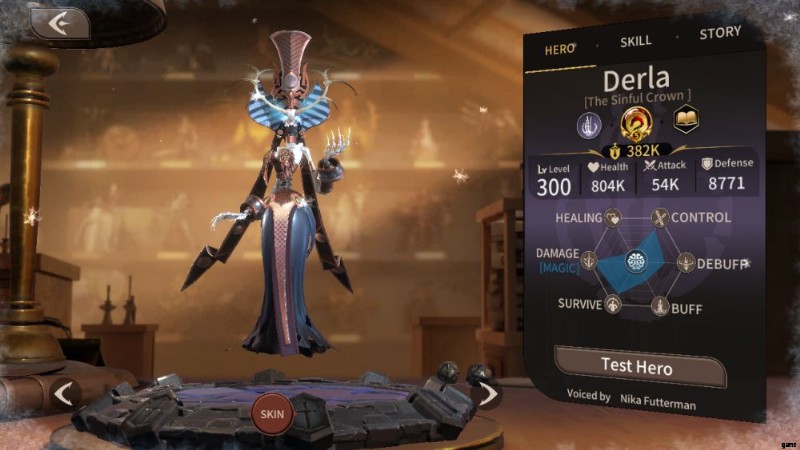
Faction: Shadow
Skills:
(Ultimate) Foul Boneyard:
- Deals 70% damage per second for 12 seconds to all enemy heroes. Heals Derla for 50% of damage inflicted after the damage is finished.
- Damage per second increased to 80%. End life steal increased to 100% of damage inflicted.
- Damage per second increased to 90%. As long as Foul Boneyard is active, Derla has 25% life steal.
Skeleton Armor:
- Derla gains a 25% buff for 6 seconds.
- While this skill is active, nearby enemies lose 40 haste.
- Defense buff increased to 35%, duration increased to 8 seconds.
- Defense buff increased to 45%, haste debuff increased to 55.
Death Finger:
- Deals 90% damage to a random target and stuns them for 3 seconds.
- Also deals 65% and a 2 second stun in an AOE around the primary target.
- Primary target damage increased to 120%, AOE damage increased to 85%.
Immortal Undead:
- Derla gains 5% attack and defense for each dead enemy unit.
- Bonus scaling increased to 7.5%.
- Bonus scaling increased to 10%.
Derla’s ultimate skill is an incredible nuke – steady damage over time with a decent multiplier that has inherent life steal AND gives Derla life steal on her other attacks for the duration. Derla’s already strong, but her passive lets her gather steam better and helps your team push harder the more enemies you down. Sometimes the simple things are best, and Derla’s a perfect example of that.
B-Tier
Winden

Faction: Fortress
Skills:
(Ultimate) Eagle of Dawn:
- Winden charges up and fires a spell that deals 400% damage to enemies in front of him. Enemies hit by this spell also take extra damage equal to 120% of Winden’s attack the first time they’re attacked.
- Damage increased to 500%.
- Enemies that are hit by the extra damage also lose 150 energy.
Glint:
- Deals 180% damage to in a circular AOE centered on a random enemy.
- Damage increased to 200%.
- Enemies hit also lose 40 accuracy for 3 seconds.
- Damage increaed to 220%.
Magical Blessing:
- Winden gains 20 critical hit and 40 critical damage for 12 seconds.
- The ally with the highest attack also gains these buffs.
- Critical hit bonus increased to 30, critical damage bonus increased to 60.
Magical Resonance:
- All allied intelligence (mages and priests) gain a 10% attack buff.
- Attack buff increased to 15%.
- Attack buff increased to 20%.
While Winden isn’t spectacular, you can get a copy of him for free by logging in for 7 days. This lets him carry the player’s group through the early levels and rush to unlock important content. Other than that, he’s pretty standard. His ultimate skill has a high 400% multiplier and helps with its extra damage proc. When you get a better mage, feel free to replace Winden – but until then, he will serve adequately.
Sorsha

Faction: Fortress
Skills:
(Ultimate) Hard to Bear:
- Enemies that have been affected by a control spell also gain a stack of Honey Curse.
- Sorsha recalls all Honey Curses, dealing 150% damage to each enemy that has a stack of the curse. Afterwards, Sorsha deals 240% damage in an AOE to the enemy in the same formation slot. This skill does 40% more damage for each Honey Curse on the field before it was triggered.
- Honey Curse recall damage increased to 160%, final attack damage increased to 280%.
- Enemies can now have up to 2 Honey Curses at once. This skill now does 50% more damage for each Honey Curse before the skill was activated.
Sneak Attack:
- Sorsha deals 180% damage to the enemy in the same formation slot as herself. This also inflicts a 1 second stun.
- Damage increased to 200%.
- Damage increased to 220%, stun duration increased to 1.5 seconds.
- Damage increased to 240%.
Fatigue Curse:
- Curses the enemy in the same formation slot as Sorsha. The cursed enemy takes 75% damage per second for 6 seconds, and is hit with weaken, which reduces damage by 15%.
- Weaken damage debuff increased to -20%, damage per second increased to 100%.
- Fatigue Curse also places 2 Honey Curses on its target.
Bear Hug:
- When killed, Sorsha summons Honey to fight in her stead. Honey has 80% of Sorsha’s stats and can only use normal attacks. When Honey dies, Sorsha is resurrected with 50% of her HP. This only triggers once per battle.
- Honey now has 100% of Sorsha’s stats. Sorsha returns to the battlefield with 80% HP.
- For each time that a Honey Curse has been activated, Honey’s stats increase by 1%.
The psychic head of the Assassins Guild is strange in that her potential is entirely dependent on the rest of her team. Sorsha relies on enemies hit with control spells, with each debuff marking them for her ultimate that explodes for fantastic damage.
On the other hand, no control spells mean low damage, and while Sorsha can inflict her own debuffs, her full potential is realized in a team that’s constant with the crowd control. Like Cyan, Sorsha makes use of the mirrored position mechanic, meaning that she can be used to disrupt common enemy formations with stuns and damage debuffs. By herself, she’s nothing special, so plan accordingly if you’re going to use Sorsha.
Magnum Quest Priest Tier List

S-Tier
Cinia
Faction: Fortress
Skills:
(Ultimate) Royal Ceremony:
- Cinia distributes all of her remaining energy to her allies after 4 seconds. Cinia is immune to control spells during the animation of this skill.
- Each point of energy an ally receives from this skill is multiplied by 1.5.
- Energy cost decreased to 800.
Bling Bling:
- Deals 150% attack in an AOE and inflicts vulnerate, increasing incoming damage by 15% for 8 seconds.
- Damage increased to 175%.
- Damage increased to 200%, vulnerate incoming damage debuff increased to 20%.
- Damage increased to 225%.
Royal Bestowal:
- The one ally with the highest attack gains 20% of Cinia’s attack for 8 seconds.
- Buff affects two allies with the highest attack.
- Scaling increased to 25% of Cinia’s attack, duration increased to 10 seconds.
Royal Blessing:
- Backrow allies gain a one-time damage blocking effect at the start of battle, 200 energy, and puts up a 15 second shield. The shield gives allies within it tough skin, reducing incoming damage by 30%.
- Tough skin damage reduction increased to 40%.
- Shield lasts 25 seconds.
Cinia isn’t a healer, she’s a battery. She’s there to help your energy-hungry heroes activate their skills faster and more often. Her backrow protection is nice, too. Shame I find her face so creepy.
A-Tier
Lilian

Faction: Fortress
Skills:
(Ultimate) Holy Touch:
- Heals the ally furthest ahead by 1000% of Lilian’s attack. Any overheal is converted into an 8 second shield.
- The healed ally also gains a 20% of Lilian’s attack as a damage buff for 8 seconds.
- Heal increased to 1500% of Lilian’s attack.
Prayer of Exorcism:
- Deals 200% damage in an AOE to a random enemy. Farthest ally ahead gains a 6 second shield with HP equal to all the damage Lilian dealt.
- Damage increased to 250%.
- Shield also gives -20% damage taken.
- Also casts a shield on the ally with the lowest HP. If the same target receives both shields, it receives the damage reduction and HP of both shields.
Blessings of the Divine:
- When the ally furthest ahead is hit with any form of debuff, Lilian dispels those debuffs and makes that ally immune to debuffs and control spells for 5 seconds.
- For the next 5 seconds after this skill activates, enemies attacking the blessed ally lose 80 accuracy for 5 seconds.
- Status immunity duration increased to 8 seconds.
Gift of the Divine:
- Allies targeted by Lilian’s skills regenerate 20 energy per second for 3 seconds.
- Energy regeneration increased to 25.
- Energy regeneration increased to 30.
Lilian is a potent healer but can be niche due to her selective targeting. Nonetheless, her sole beneficiary receives a lot of buffs – a gigantic amount of healing that becomes a shield, attack buffs, and status immunity. Lilian should be used with caution and should’t be thrown into just any team composition.
Aeluin

Faction: 森
Skills: <強い>
(Ultimate) Nature’s Light
- Restores HP for all allies equal to 30% of Aeluin’s max HP over 4 seconds.
- Healing effect increased by 30% for allies below 20% health.
- Also increases defense of allies by 15% while they’re being healed.
Bewitch:
- Deals 90% damage to a random target and inflicts bewitch. Bewitched enemies attack their allies with normal attacks.
- Damage increased to 110%.
- Bewitched enemies can use other skills except their ultimate.
- Bewitched enemies have a 30% attack buff.
Nature’s Shelter:
- Adds Shelter to all allies for 8 seconds. Sheltered allies recover HP equal to 45% of Aeluin’s attack when attacked. This recovery only triggers once per second.
- Duration increased to 10 seconds.
- Healing increased to 65% of Aeluin’s attack.
Natural Regeneration:
- 10% chance to double any incoming heal from Aeluin.
- If a unit is overhealed, 50% of the overheal value becomes a shield.
- Proc chance increased to 15%.
Aeluin is a pretty standard healer that you get from the beginner tasks. Unlike Lilian, Aeluin is a better fit for generalist parties due to her party-wide healing skills. Keep in mind that Aeluin’s ultimate skill scales off her max HP and not her attack.
Ione

Faction: Forest
Skills:
(Ultimate) Jungle’s Fury:
- Deals 60% attack damage to all enemies for 6 seconds, then entangles all enemies for 1 second with 110% damage. Entangled enemies cannot move or attack.
- Ione is immune to control spells while using this skill. She also gains tough skin for the duration, reducing incoming damage by 25%.
- Initial damage increased to 70% per second, entangle damage increased to 130%.
The Lurking Seeds:
- Plants a seed in an enemy unit. Upon activating Jungle’s Fury , the seed bursts forth, dealing 120% damage and entangling that enemy for 3 seconds. Seeds have a lifespan of 10 seconds.
- Damage increased to 140%.
- Targets 2 enemies for the seed planting effect.
- Damage increased to 160%.
Jungle’s Protection:
- Gives the ally with the least HP a shield that blocks 4 attacks. The shield also deals 120% damage to enemies that attack it, and entangles them for 2 seconds.
- Number of blocks increased to 6.
- Now targets the 2 allies with the least HP.
Vines to the Rescue:
- Once per battle, when an ally receives fatal damage, they are enveloped by vines and recover 5% of their max HP per second for 6 seconds.
- Heal scaling increased to 8% of target’s max HP.
- This skill can activate twice per battle.
While Ione looks like a standard disabler, her main use is her Vines to the Rescue skill, which is great when combined with damage-focused melee heroes. That you can get Ione for free also helps a lot in her case, and she’ll serve as a good offensive support for the whole game.
B-Tier
Naomi
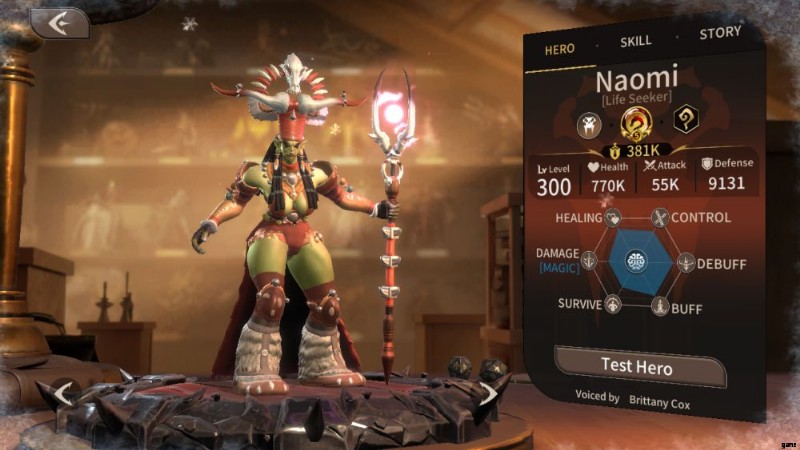
Faction: Wild
Skills:
(Ultimate) Dragon Fall:
- Deals 150% damage in an AOE and removes all buffs from enemies hit.
- Allies caught in the blast are cleared of all debuffs.
- Damage increased to 180%.
Wolf Bone Curse:
- Deals 180% damage to a target and silences it for 3 seconds, rendering it unable to use any skills.
- Damage increased to 200%.
- Skill also hits 2 extra targets for 120% damage and a 2 second silence.
- Primary target damage increased to 220%, extra target damage increased to 130%.
Power of Totem:
- Summons a healing totem that heals for 55% of Naomi’s attack per second for 6 seconds.
- This skill’s healing is 30% more effective on allies with less than 20% HP.
- Heal scaling increased to 65% of Naomi’s attack.
Spiritual Leader:
- Wild heroes gain 10% of Naomi’s attack and 20% of Naomi’s defense as long as she’s alive.
- Attack bonus increased to 15% of Naomi’s attack, defense bonus increased to 30% of Naomi’s defense.
- Attack bonus increased to 20% of Naomi’s attack, defense bonus increased to 40% of Naomi’s defense. Affects all allies but is 50% weaker on non-Wild heroes.
Naomi has a powerful dispel effect that strips enemies of buffs and purges debuffs from allies. She also fares much better in a squad composed of Wild heroes. She doesn’t have a very reliable heal unlike other priests, nor as many buffs, so she’s best as a capstone to complement a Wild team.
Osishe
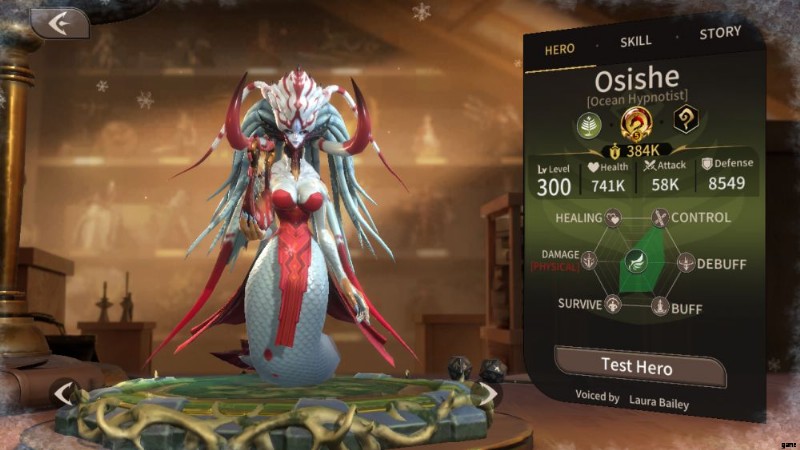
Faction: 森
Skills: <強い>
(Ultimate) Tide Chorus:
- Adds sedate and vulnerate to all enemies. For 4 seconds, enemies are put to sleep and receive 25% more damage.
- Sedate (sleep) effect increased to 5 seconds.
- Vulnerate damage amplification increased to 30%.
Tidal March:
- The ally with the highest attack gains 20 haste for 5 seconds.
- Haste buff increased to +25, duration increased to 6 seconds.
- Now affects the two allies with the highest attack.
- Haste buff increased to +30, duration increased to 7 seconds.
Variations:
- Inflicts confine on the enemy with the highest attack for 4 seconds. Confined units cannot attack nor be attacked.
- Adds weaken at the end of the confine effect, decreasing the target’s damage by 35% for 4 seconds.
- Confine duration increased to 5 seconds.
Ethereal Lied:
- When attacked, Osishe blinks backwards and leaves a mirage behind, which stuns enemies in an AOE for 2 seconds. This has an 18 second cooldown.
- Every time Osishe takes damage, Ethereal Lied ’s cooldown is decreased by 1 second.
- When the mirage pops, Osishe heals for 20% of her max HP.
Osishe is like Rickers – she’s got powerful control, possibly even surpassing him – but is absolutely useless on bosses. She’s great for clearing mobs, but keep her away from boss battles where she’ll have a hard time contributing anything.
Merialeth
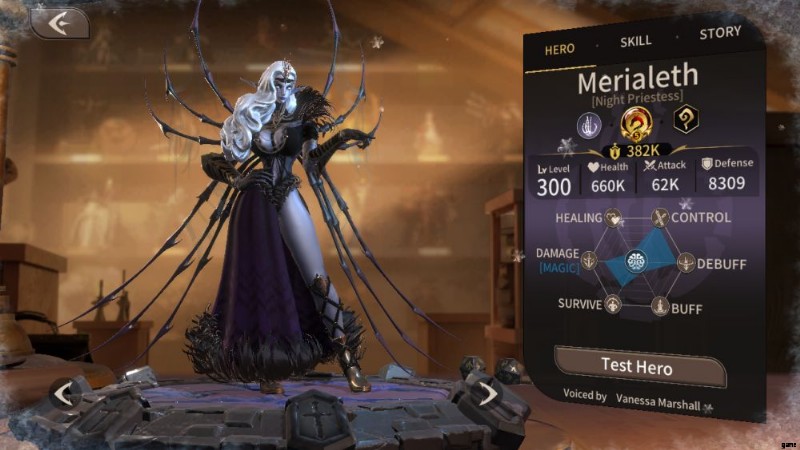
Faction: Shadow
Skills:
(Ultimate) Puppet on Strings:
- Hits the enemy with the most energy with Bewitch. Bewitched enemies attack their allies for 6 seconds, cannot use their ultimate skill, and lose all energy upon being released. While controlling an enemy, Merialeth is immune to control spells but cannot attack.
- Bewitched enemy instantly gains full energy and immediately triggers its ultimate.
- Bewitched enemy has a 30% attack buff.
Vicious Entrapment:
- Lays down a trap at the feet of the enemy with the most energy. Enemies standing on the trap take 50% damage and lose 5% of their current energy for 3 seconds.
- Damage increased to 75%, energy burn increased to 10%.
- After the trap disappears, it deals 100% damage to enemies and inflicts silence for 4 seconds, blocking skill use.
- Trap size increased.
Soul Syphon:
- Controls a random enemy unit for 4 seconds while stealing 5% of its remaining HP per second. Merialeth is immune to control spells while controlling an enemy, but cannot attack.
- Also steals 5% of remaining energy per second.
- Now targets 2 enemies.
Spider Queen’s Intervention:
- If an attack causes Merialeth to drop below 75% HP, the enemy that triggered this effect loses 15% attack and energy for 8 seconds. This can only trigger once per battle.
- Triggers another time if Merialeth’s HP drops below 50%.
- All enemy heroes are hit with the debuff.
Much like fellow Shadow hero Sorsha, Merialeth’s strength is dependent on something else – in this case, the enemy team’s composition. Merialeth’s ultimate not only controls their hero that’s nearest to firing their ultimate, but also uses that ultimate against your enemies AND strips it of all energy after it’s released. While it’s a gimmicky strategy, it’s very effective on strong enemies, and almost entirely useless on weak ones, firmly putting Merialeth in a niche position.
That concludes our Magnum Quest tier list, and hopefully our list helped you pick out heroes to raise and invest in (anyone but Zander, please). Ultimately, it’s your choice which heroes you want to pick and use, and since Magnum Quest is more PVE-centric than PVP, you can get away with quite a lot of stuff. If you have any suggestions or tips of your own, let us know in the comment section below!