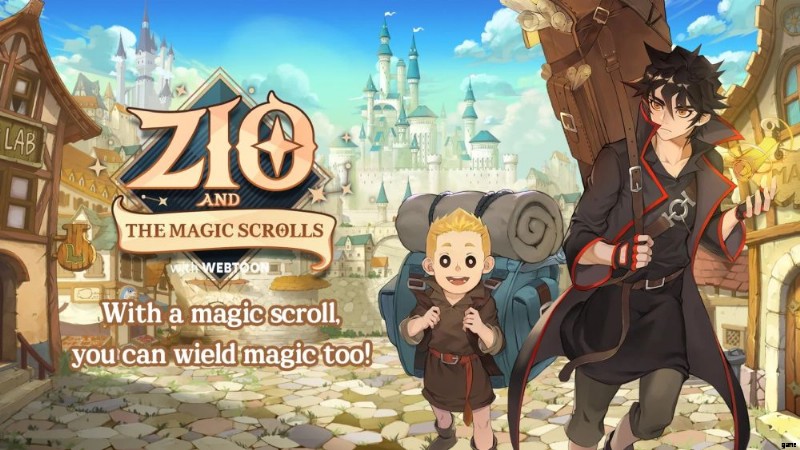
ZIO と Magic Scrolls ティア リスト:ゲームのベスト キャラクターのランキング
おかえりなさい、マジスター。どのヒーローを引き寄せるべきか、どのヒーローに投資すべきかを判断するのに役立つように、ZIO and the Magic Scrolls をプレイしたときの私たち自身の経験に基づいてティア リストをまとめました。 .すべての層リストと同様に、これは主観的なものであり、情報の決定的なリストではありませんが、チームのヒーローを厳選するのに役立つことを願っています.
ヒーローのスキルは番号付きのリストとしてラベル付けされており、各番号はスキルのレベルを表しています。ドラゴン Exavius、Diogoram、Gallistos には追加のパッシブ スキルがあることに注意してください。
ヒーローは、それぞれのクラス内で S、A、B、および C の 4 つのティアに分けられているため、一般的に同じことを行うキャラクターと比較しやすくなっています。また、遺伝子単位をできるだけ早く置き換えるための免責事項と一般的なヒントもここに記載します。
それでは、ZIO と Magic Scrolls ティア リストから始めましょう。 !
マジシャン ティア リスト

S ティア
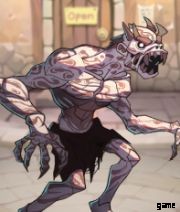
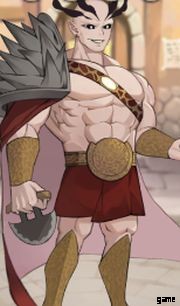
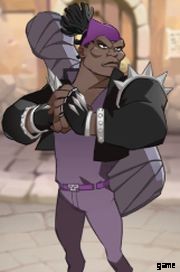
エクサビアス

防具の種類: 布
スキル:
パワー: 敵の物理攻撃力を10%ダウン、味方の魔法攻撃力を10%アップ。
(アルティメット)爆発
- 近くの敵に 120% のダメージを与え、地面を燃やします。燃えている地面に立っている敵は、毎秒 20% のダメージを受けます。
- 初期ダメージが 140% に増加
- 燃える地面は、そこに立っている敵に-10% の DEF デバフを与えます。
ドラゴンの咆哮
- すべての敵に 80% のダメージを与え、3 秒間沈黙させます。 10 秒のクールダウン
- ダメージが 100% に増加
- 命中した敵は、マナ回復速度が 3 秒間 2% 低下します。
強力な火の玉
- 敵に 120% のダメージを与え、2 秒間気絶させます。 5 秒のクールダウン
- ダメージが 140% に増加
- 気絶時間が 4 秒に増加しました。
戦術
- 戦闘開始時にエクサヴィウスが最前列にいる場合、彼は 10% の被物理ダメージ軽減バフを持ちます。彼が後列にいる場合、彼は 10% の攻撃バフを獲得します。
- 最前列ボーナスにより、エクサビウスの防御力 +10% が付与されるようになりました。
- 後列のダメージボーナスがさらに増加します。
ファイア ドラゴン エクサビウスは、炎の達人に期待されるものです。巨大な AOE、破壊的な火傷、パーティ全体の沈黙攻撃、そして多彩な位置依存のバフです。 Exavius のユニークなボーナスは、彼の燃える地面デバフを中心に展開し、持続時間、ダメージを改善し、マナ バーンダウンを追加します。
関連: ZIO と Magic Scrolls の初心者向けガイド:最高のチームを編成して敵を倒すためのヒント、コツ、戦略
これらすべてに加えて、Exavius はパッシブ パワーを持つ数少ないヒーローの 1 人です。彼の場合、Exavius はフィールドにいるだけで敵を弱体化させ、魔法ベースの味方を強化するため、あらゆるメイジ ベースのチームの手ごわい中心的存在となっています。
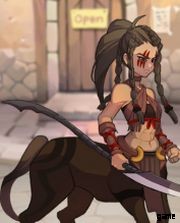
スミマ
防具の種類: 布
スキル:
(アルティメット)ダンセイハンティング
- ターゲットに到達すると爆発する進行性の電波を生成し、爆発に巻き込まれた敵に 260% のダメージを与えます。
- ダメージが 280% に増加
- ダメージが 320% に増加
白電舎
- 3 発の稲妻を発射して 100% のダメージを与える。これらのボルトは敵を貫通し、通過するすべてのものにヒットしますが、追加の敵ヒットごとに 10% のダメージを失います (最大 3 回まで)。 7 秒のクールダウン
- ダメージが 110% に増加しました。
- もう 1 つの稲妻を発射します。
マジックリフレックス
- スミマは 40% の確率で、受ける魔法ダメージを 100% 反射します。カウンターダメージはスミマの攻撃力の200%を超えない。 3 秒のクールダウン
- 反撃のチャンスが 50% に増加しました。
- 反撃のチャンスが 70% に増加しました。
セルフケア
- ダンセイ ハンティングを使用した後、スミマは 5 秒間 20% のマナ回復速度バフを獲得します。
- マナ回復速度バフが 25% に増加しました。
- また、5 秒間 10% の攻撃バフを付与します。
ドラゴンによって設定された S ティアの高いバーに立ち向かうことができるキャラクターはほとんどなく、スミマはその 1 つです。彼は素晴らしい AOE 能力を持っているだけでなく、彼の独自の能力を向上させると、スミマは自身のマナ再生をブーストし、倒した敵ごとに強くなります。
白電社 は、敵にヒットするたびに効力を失うにもかかわらず、密集した敵のフォーメーションを素早く処理できる驚くべきスキルです (挑発者は挨拶します)。 魔法の反射 強い敵の魔道士を罰し、彼ら自身の薬の味を与えます.
Aティア
ミシェル

防具の種類: 布
スキル:
(アルティメット)ダークスタッフ
- 命中した敵に 260% のダメージを与え、15% の DEF デバフを 3 秒間与えるダーク アローを発射します。
- DEF デバフが 20% に増加。
- ダメージが 290% に増加しました。
死を確認した時間の呪い
- 敵に呪いの印を付ける。 4 秒後、その敵は爆発して 270% のダメージを与えます。このスキルで敵を倒した場合、呪いはランダムな敵に転送されます。このスキルの複数のインスタンスはスタックできません。 7 秒のクールダウン
- ダメージが 300% に増加
- 敵は 3 秒後に爆発するようになりました。
グレート ウォーロックの力
- 攻撃力が10%増加
- ボーナスが 15% に増加しました。
- ボーナスが 20% に増加しました。
重なる世界に辿り着いた者
- 倒れた味方ごとにミシェルの攻撃力が 5% 増加します。
- ボーナスが 7.5% に増加しました。
- ボーナスが 10% に増加しました。
愚かな究極の名前はさておき、ミシェルはまともなダメージを与えますが、彼の本当の価値はダークスタッフに付随する防御デバフにあります .アルティメットに関連付けられているデバフや条件付きでないデバフを見つけることは驚くほどまれであるため、ミシェルのアルティメットは仲間へのウェルカム ギフトとして提供されます。
彼のユニークな能力に投資することで、彼の呪いが 15% の DEF デバフを与え、敵の動きを遅くすることもできます。彼の 4 スキルはかなりまあまあです。それはかなりハードにスケーリングしますが (ミシェルが単独の場合、最大 40% の攻撃バフ)、積極的に行きたいものではありません.
Bティア
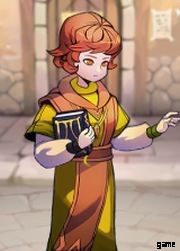
ジオ

防具の種類: 布
スキル:
(アルティメット)インストゥルメント ヘルレイザー
- 小さな AOE で 250% のダメージを与え、2 秒間スタンします。
- 気絶時間が 3 秒に増加しました。
- ダメージが 310% に増加
魔法の大暴れ
- 近くの敵に 250% のダメージを与えます。 9 秒のクールダウン
- ダメージが 270% に増加しました。
- 敵に命中するたびに、10% の確率で気絶または沈黙を 2 秒間付与します。
スクロール – 回復
- 体力が 50% を下回ると、ジオは最大 HP の 15% を回復します。 10 秒のクールダウン
- 回復が 20% に増加しました。
- 9 秒のクールダウン
スクロール – 沈黙
- ランダムな敵に 240% のダメージを与え、2 秒間沈黙させます。 7 秒のクールダウン
- 沈黙の持続時間が 3 秒に延長されました。
- ダメージが 240% に増加
Zioを無料で入手できるので、それは彼に有利な点です.物語の主人公として、ジオは一般的にかなりまともです.彼はいくつかのAOEと自立していますが、それほど派手ではありません.彼はすべてを少しだけ提供しますが、ダメージを与えた人を本当に輝かせる特別な熱意が欠けています.
ズベラ
防具の種類: 布
スキル:
(アルティメット)マンモサン召喚
- 範囲内で 150% のダメージを与え、2 秒間スタンします。
- ダメージが 170% に増加しました。
- ダメージが 200% に増加しました。
アンダーワールドの人食い人種
- 範囲内で 150% のダメージを与え、命中した敵に 2 秒間 -150% の移動速度デバフを適用します。 9 秒のクールダウン
- ダメージが 200% に増加しました。
- ダメージが 250% に増加
副司令官の力
- 攻撃力が5%増加
- ボーナスが 10% に増加しました。
- ボーナスが 15% に増加しました。
低い士気
- 通常攻撃では、20% の確率で 10% の DEF デバフを付与します。
- 防御ペナルティが-15%に増加
- 防御ペナルティが-20%に増加
ズベラは、気絶と移動速度のデバフにより、強力な群集制御を戦場にもたらします。しかし、本当の楽しみは彼女の 2 パッシブ スキルにあります。 20% は妥当な発動率ですが、Zbella の攻撃速度を上げることができる味方が彼女を最大限に活用できるようにする必要があります。悲しいかな、彼女の乗数は低いので、すぐに強力なヒーローの影に隠れてしまいます. Zbella は、魔道士にダメージを与えるというよりも、攻撃的なサポートと考えたほうがよいでしょう。
フアン

防具の種類: 布
スキル:
(アルティメット)イグニス、ゲル
- 最大HPが最も高い敵に200%のダメージを2回与える。ターゲットは 50% の確率で 3 秒間凍結します。フリーズ ロールに失敗すると、代わりに燃焼して 20% の追加ダメージを与えます。
- 初期ダメージが 230% に増加
- 初期ダメージが 270% に増加
ジャイアント ファイアボール
- 範囲内で 200% のダメージを与える
- ダメージが 220% に増加
- ダメージが 250% に増加
ベスト スピリット ユーザー
- 攻撃力が5%増加
- ボーナスが 10% に増加しました。
- ボーナスが 15% に増加しました。
精霊の祝福
- フアンの攻撃力の 5% に相当する体力で自分にシールドを作成します。 9 秒のクールダウン
- シールドのヘルス スケーリングがフアンの攻撃力の 10% に増加しました。
- シールドのヘルス スケーリングがフアンの攻撃力の 15% に増加しました。
フアンは、かなりの状態異常を引き起こす強力な核兵器です。彼の乗数は高いですが、基本レアリティが低いことにがっかりしています。つまり、ステータスの上限が低く、ユニークな能力がないということです。 Juan は確かに便利ですが、あまり投資しないでください。
シルビア
防具の種類: 布
スキル:
(アルティメット)メテオ
- 敵に 80% * 3 のダメージを与えます。また、3 秒間、毎秒 30% のダメージで敵を燃やします。
- 燃焼ダメージが 40% に増加しました。
- 一撃あたりのダメージが 110% に増加しました。
ブーム
- 近くの敵を爆発させ、その敵とその周囲の敵に 80% のダメージを与えます。燃えている敵がこれによってダメージを受けると、敵も 2 秒間気絶します。
- シルビアがスキルを使用するたびに、ブームのダメージが 10% 増加し、最大 50% になります。
- 気絶時間が 4 秒に増加しました。
激戦
- クリティカルダメージが20%増加
- クリティカル率が10%増加
- クリティカル ダメージ ボーナスが 30% に増加。
炎の祝福
- メテオを使用すると、すべてのスキル ダメージが 10% 増加します。
- ダメージボーナスが15%に増加
- 火傷した敵は、シルビアからのあらゆるダメージ インスタンスから受けるダメージが 10% 増加します。
シルビアのアイデアは、Meteor をスパムするために彼女を放っておくというものです と ブーム 彼らのダメージを増やすために。問題は、これには時間がかかるだけでなく、1 回の使用で 10% という非常にゆっくりとスケールすることです。かなりのダメージを与える前に、シルビアが地面に倒れてしまうことも珍しくありません。それに直面しましょう – 乗数は低く、単一のバンドルで究極のダメージを与えることができる人は誰でもより良い仕事をするでしょう.
ナルフメ

防具の種類: 布
スキル:
(アルティメット)エンチャント
- 近くの敵 2 体を 2 秒間エンチャントし、180% のダメージを与えます。エンチャントされた敵はスキルを使用できず、味方を攻撃します。
- ダメージが 220% に増加
- エンチャントの持続時間が 4 秒に増加しました。
甘い夢
- ナルフメと敵をリンクさせ、毎秒 45% のダメージを 4 秒間与え、その間敵を気絶させる。ナルフメはスイートドリーム発動中は他のスキルを使用できません。 10 秒のクールダウン
- 1 秒あたりのダメージが 50% に増加しました。
- 1 秒あたりのダメージが 60% に増加しました。
不当な契約
- 5 秒間、攻撃速度 15% のデバフをランダムな敵に当てます。ナルフメの攻撃速度が15%上昇。 7 秒のクールダウン
- 持続時間が 7 秒に延長されました。
- 攻撃速度デバフが 20% に増加。
エネルギー吸収
- ナルフメの通常攻撃は、30% の確率で 50 マナを与えます。
- Procチャンスが50%に増加。
- 回復するマナが 80 に増加しました。
Narfume は、あなたが戦っている敵の種類に大きく依存しており、より強い敵にエンチャントすることで最大のマイレージを得ることができます。問題は、彼女のターゲティングでは、強力な攻撃であなたのユニットを攻撃するバックラインの敵を選択できないことです.
Narfume は非常に混乱を招く可能性がありますが、クラウド コントロールが難しいという問題は残ります。通常は、ギミックのあるステータス効果で仕上げるよりも、敵を踏みにじって粉々にするほうがよいでしょう。
マリリン

防具の種類: レザー
スキル:
(アルティメット)ダークナイト
- ターゲットの位置にダーク ナイトを召喚し、毎秒 60% のダメージを与え、15 マナを消費します。
- 1 秒あたりのダメージが 70% に増加しました。
- 暗黒騎士の攻撃力ブーストが 70% に増加しました。
フェルクロマー
- 近くの敵の後ろにフェルクロマーを召喚し、近くの敵を 3 秒間挑発します。フェルクロマーは、マリリンの攻撃力と最大 HP の 70%、防御力の 100% を持っています。 10 秒のクールダウン
- フェルクロマーは現在、マリリンの最大 HP の 100% を持っています。
- フェルクロマーは毎秒最大 HP の 1% を再生します。
バイチュレーション
- 最も攻撃力の高い敵のマナ回復速度を 5 秒間 15% 低下させます。 7 秒のクールダウン
- また、攻撃速度を 5% 低下させます。
- また、攻撃力を 10% 減少させます。
ストーンスコーピオン プラムの種
- マリリンの HP が 50% 以下になると、マリリンは 3 秒間停滞状態になります。マリリンはステイシス中は攻撃も攻撃も受けない。このスキルは戦闘ごとに 1 回発動します。
- マリリンは停滞している間、最大 HP の 30% を回復します。
- 停滞中はマリリンのマナ回復速度が 30% 増加します。
マリリンはもう 1 つのギミック キャラクターで、今回は使い捨てで再生可能なミニオンを使用しています。 ダークナイトのスキル説明 非常に不足していますが、ATKの増加に注目しているので、実際のミニオンを召喚すると思います.
マリリンのフェルクロマー 本当の脅威です – 彼らは挑発し、事実上、フィールドの新しいヒーローです.マリリンの固有能力レベルを上げると、フェルクロマーも強化され、一度に最大 3 体まで召喚できるようになります。これらを除けば、彼女は直接的なダメージのオプションがないため、メイジとしてはかなりまあまあです.
C ティア
メイジ

防具の種類: 布
スキル:
(アルティメット)チャント
- 近くの敵に 230% のダメージを与える
- ダメージが 250% に増加
- ダメージが 280% に増加
バフ
- 最も攻撃力の高い味方に10%の攻撃バフを付与します。 10 秒のクールダウン
- ATK ボーナスが 12% に増加しました。
- ATK ボーナスが 15% に増加しました。
魔法のトレーニング
- 攻撃力が5%増加
- ボーナスが 10% に増加しました。
- ボーナスが 15% に増加しました。
フィジカルトレーニング
- DEFが5%増加
- ボーナスが 10% に増加しました。
- ボーナスが 15% に増加しました。
マジでマジシャン系ヒーロー「メイジ」? 「宮廷魔道士」でも「見習い魔道士」でもなかったのか?この汎用性は、戦闘での彼の有用性に波及し、彼は特定の 1 つのことに特に力を入れていません。メイジについて注意すべきことの 1 つは、彼がダメージバフ (バフという名前のバフ、メイジという名前のメイジに最適) を持っていることです。
ウォーロック
防具の種類: 布
スキル:
(アルティメット)チャント
- 近くの敵に 250% のダメージを与える
- ダメージが 280% に増加
- ダメージが 330% に増加
呪い
- 最も攻撃力の高い敵に 220% のダメージを与えます。 3秒間、自身の攻撃力を5%減少させ、攻撃速度を10%減少させます。 9 秒のクールダウン.
- ダメージが 230% に増加
- ダメージが 260% に増加
見習い黒魔術
- DEFが5%増加
- ボーナスが 10% に増加しました。
- ボーナスが 15% に増加しました。
魔法のトレーニング
- 攻撃力が5%増加
- ボーナスが 10% に増加しました。
- ボーナスが 15% に増加しました。
2 番目の Mage パレット スワップである Warlock は、紙の上では素晴らしく見えますが、実際の戦闘ではそれほどうまく機能しません。彼の高いマルチプライヤーは、彼の低い基本ステータスによって影が薄くなっており、初期のゲーム コンテンツは、パーティーに専用のデバッファーを持ち込むことを正当化するほど難しくはありません.
チェ・ミョンゴル

防具の種類: 布
スキル:
(アルティメット)フレッシュフラッシュ
- 近くの敵に 4 秒間、毎秒 60% のダメージを与えます。また、1.1 秒間、ATK と DEF を 10% 減少させます。
- 1 秒あたりのダメージが増加しました。
- 1 秒あたりのダメージが増加しました。
生命吸収
- 敵1体に220%のダメージを与える。このスキルは 5% のライフ スティールを持っています。 8 秒のクールダウン
- ダメージが 250% に増加
- ダメージが 290% に増加しました。
上級黒魔術
- 攻撃力が5%増加
- ボーナスが 10% に増加しました。
- ボーナスが 15% に増加しました。
呪い
- 通常攻撃は 20% の確率で攻撃力 10% のデバフを付与します。
- ATK デバフが 15% に増加。
- ATK デバフが 20% に増加。
チェ・ミョンゴルは残念すぎてスキル情報書いてる人が途中で諦めた。 フレッシュ フラッシュ AOEまたは単一のターゲットとしてラベル付けされておらず、ダメージの増加はあいまいです.彼のキットはスキルの説明と同じように中途半端であり、デバフでさえ 1.1 秒のアップタイムをほとんど助けません。
彼はライフ ドレイン スキルを持っていますが、あなたのタンクが仕事をしていれば、危険から逃れることができるでしょう。チョイと同じニッチに収まるかもしれないズベラとは異なり、チョイは、他の誰かがより上手にできないことをテーブルにまったくもたらしません。 Choi はまた、希少性と品質が同じではないことを思い出させてくれます。
ファイター ティア リスト
S ティア
メイ
防具の種類: レザー
スキル:
(アルティメット)宣戦布告
- 近くの敵に 240% のダメージを与えます。メイの最大 HP の 15% を回復します。
- ダメージが 260% に増加
- また、5 秒間 10% の DEF バフを付与します。
ウォール パワー プラント
- メイの目の前にいる敵に 200% のダメージを与え、2 秒間気絶させます。 8 秒のクールダウン
- ダメージが 230% に増加
- 気絶時間が 4 秒に増加しました。
反撃
- ダメージを受けると、30% の確率で、メイが受けていたダメージの 120% をカウンターします。さらに、カウンター攻撃がメイに与えるダメージが 50% 減少します。反撃ダメージはメイの攻撃力の150%が上限。 3 秒のクールダウン
- カウンター率が 50% に増加しました。
- 対抗ダメージが、メイが受けるであろうダメージの 150% に増加しました。
挑発
- ランダムな敵を 2 秒間挑発します。メイは 5 秒間、最大 HP の 15% に相当する体力を持つシールドを獲得します。
- シールドの最大 HP スケーリングが 20% に増加しました。
- 挑発の持続時間が 4 秒に延長されました。
ゲーム内の戦闘機は非常に少なく、メイに近づくことさえできないため、A-Tier として分類することはできません。 Mei は単独で大きなダメージを与えるだけでなく、強力な自立、挑発、気絶を備えているため、タンクと DPS のハイブリッドとなっています。 反撃 それだけでもばかげていますが、メイにいくつかのユニークな能力レベルを与えて、彼女が最強の敵でさえ打ち負かすのを見てください.楽しいでしょう。
Bティア
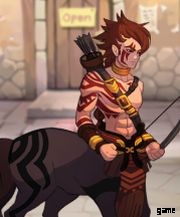
ケンタウロスの戦士
防具の種類: プレート
スキル:
(アルティメット)貫通
- 当たったターゲットに 110% のダメージを与える槍を投げ返します。
- ダメージが 125% に増加しました。
- ダメージが 160% に増加
ケンタウロスの蹄
- 近くの敵に 200% のダメージを与え、1 秒間気絶させます。 6 秒のクールダウン
- ダメージが 250% に増加
- 気絶時間が 2 秒に増加しました。
ケンタウロスの強靭な肉体
- 最大HPが5%増加
- ボーナスが 10% に増加しました。
- ボーナスが 15% に増加しました。
並外れた回復
- 受ける回復量が 10% 増加しました。
- ボーナスが 15% に増加しました。
- ボーナスが 30% に増加しました。
おそらく、ケンタウロスの戦士の最悪の点は、「彼女はアンデッドよりも希少性が高いため、ステータスの上限が高いため、少なくともBティアに上げられる」以外に、彼女について何も言うことがないことです.代わりにハンターを選んでください – 彼らのほとんどは、ケンタウロスの戦士よりも優れた仕事をすることができます.
カーン
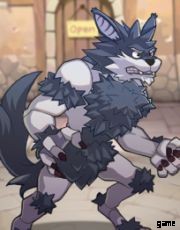
防具の種類: レザー
スキル:
(アルティメット)ブラザーズ リベンジ
- 近くの敵に 70% * 4 のダメージを与える
- 一撃あたりのダメージが 90% に増加しました。
- このスキルのライフ スティールは 60% です。
ライカンスロープの歯
- 敵1体に230%のダメージを与える。 7 秒のクールダウン
- ダメージが 250% に増加
- また、カーンの受けるダメージを 3 秒間 10% 軽減します。
リベンジ
- 攻撃力が5%増加
- ボーナスが 10% に増加しました。
- ボーナスが 15% に増加しました。
成長の痛み
- 通常攻撃では、30% の確率で 10% の回復デバフを付与します。
- 入ってくる回復デバフが 15% に増加しました。
- 入ってくる回復デバフが 20% に増加しました。
驚き、驚き - カーンは実際にはまともな戦闘機になりますが、彼のキットは戦車に適しているように見えるかもしれません.カーンのアルティメットは大量のライフ スティールを持っています。これは素晴らしいことですが、ダメージが低く、DEF によってより大きなペナルティを受けるマルチヒット攻撃を完全に補うわけではありません。
彼のライカンスロープの歯 10% と 3 秒間だけですが、ダメージを軽減します。 「まともな戦闘機」と言ったことに注意してください。彼はそれ自体は悪くありませんが、カーンは近接ユニットに望まれるものを多く残しており、より強力なユニットによってすぐに影が薄くなります.
C ティア
アンデッド
防具の種類: レザー
スキル:
(アルティメット)連続涙
- 近くの敵に 130% * 2 のダメージを与える
- 一撃あたりのダメージが 140% に増加しました。
- 一撃あたりのダメージが 170% に増加しました。
スクラッチ
- 近くの敵に 240% のダメージを与える
- ダメージが 260% に増加
- ダメージが 280% に増加
生命の搾取
- 最大HPが5%増加
- ボーナスが 10% に増加しました。
- ボーナスが 15% に増加しました。
人生に対する怒り
- 攻撃力が5%増加
- ボーナスが 10% に増加しました。
- ボーナスが 15% に増加しました。
当然のことながら、それぞれの役割で層リストの一番下にあるさらに別の一般的なユニット.アンデッドは、ファイターの役割において目新しいことも刺激的なことも何も提供しません。
ハンター層リスト
S ティア
ガリストス

防具の種類: レザー
スキル:
パワー: 味方全体の物理攻撃力を7.7%アップ。パーティに物理タイプのヒーローが3人以上いる場合、ボーナスは15.4%に増加します。
(アルティメット) ノー・マーシー
- 近くの敵に 100% のダメージを 4 回与えます。また、4 ヒットは 5 秒間、毎秒 5% のダメージを与えます。
- 初期ダメージが 110% に増加しました。
- No Mercy でヒットすると、同じスキルの次のヒットのダメージが 5% 増加します。
狂気
- 敵1体に110%×4ダメージ。 10 秒のクールダウン
- 一撃あたりのダメージが 130% に増加しました。
- さらに 3 秒間スタンします。
素早さ
- ガリストスがターゲットを倒すと、すぐ近くの敵にテレポートし、150% のダメージを与えます。
- ダメージが 170% に増加しました。
- 素早さは戦闘開始時にトリガーされ、ガリストスから最も離れた敵をターゲットにします。
駆逐艦
- シールドされた敵を攻撃すると、ガリストスは 5 秒間 10% の攻撃バフを獲得します。
- バフが 20% に増加しました。
- バフが 35% に増加しました。
ハンタークラスにとってのガリストスは、メイジクラスにとってのエクサビウスです。彼は、特にフォーメーション状態で、他のハンターに非常に大きなバフを与えます。ご想像のとおり、Gallistos 自身は物理的な大国であり、彼が戦っている敵の HP に基づいて最大 30% のボーナス ダメージを与えながら、スクイーズしたターゲットを暗殺し、戦場をテレポートし、シールドを破壊することができます。
Exavius のように、Gallistos を中心にチームを編成する必要がありますが、ありがたいことに、彼の要件はそれほど厳しくありません。Gallistos 自身とさらに 2 人の味方を含めることができ、必要に応じてサポーターやメイジを追加できます。 .
Aティア
トゥミア
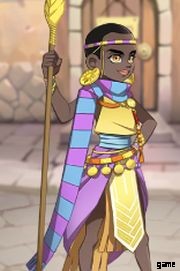
防具の種類: レザー
スキル:
(アルティメット)エクソシズム
- 近くの敵に 250% のダメージを与え、2 秒間気絶させます。
- AOE が増加しました。
- ダメージが 300% に増加
浄化の儀式
- 近くの味方は 5 秒間、10% の攻撃バフを獲得します。 9 秒のクールダウン
- また、5 秒間 10% の移動バフを付与します。
- ATK バフが 15% に増加
聖域
- トゥミア周辺の範囲内で敵の攻撃力を 5 秒間 10% 減少させます。 15 秒のクールダウン
- 攻撃デバフが-15%に増加
- ATKデバフが-20%に増加
真実の巡礼者
- 最大HPが10%増加
- ボーナスが 15% に増加しました。
- ボーナスが 20% に増加しました。
トゥミアは単体でまともなダメージを与えるだけでなく、仲間をバフする能力もあり、彼女を貴重なピックにしています。彼女のダメージ、スタン、デバフのキットは、突撃を敵のランクに導くのに理想的であり、彼女のユニークなスキルはフロントライナーとしてのステータスを実際に押し上げ、トゥミアが戦闘の開始時に最前列にいる場合、味方に15%のダメージ軽減を与えます.
ザバトゥス
防具の種類: レザー
スキル:
(アルティメット)ブラッドスラッシュ
- 近くの敵に 80% のダメージを与え、70% の確率で切断状態を獲得します。斬った敵は通常攻撃3回ごとに6秒間、ザバトゥスの攻撃力の150%を受ける。ブラッド スラッシュのアニメーション中、ザバトゥスは無敵です。
- 初期ダメージが 90% に増加しました。
- カットダメージが 180% に増加
クレセント スラッシュ
- 近くの敵に 250% のダメージを与えます。このスキルのライフ スティールは 15% です。
- ダメージが 280% に増加
- クレセント スラッシュが致命的な場合、クールダウンはすぐにリセットされます。
デーモンスキン
- 被魔法ダメージをパッシブで 30% 軽減します。
- 魔法ダメージ軽減が 40% に増加します。
- ザバトゥスの攻撃は、15% の DEF デバフを 5 秒間付与します。
フラッシュ
- 攻撃力が最も高い敵にテレポートし、150% のダメージを与えます。ヒットしたターゲットに20%の攻撃力デバフを与え、ザバトゥスは5秒間20%の攻撃力を獲得します。ターゲットが死ぬと、Flash は新しいターゲットを選択します。
- また、ヒット時に 3 秒間気絶します。
- また、ザバトゥスの攻撃力の 150% に等しい体力を持つシールドをザバトゥスに作成します。
ザバトゥスは魔道士との戦いを専門とする強力なハンターですが、遭遇した敵を簡単に殺すことができます。 ブラッドスラッシュ 初期乗数が低く、そのダメージのほとんどが 70% カット状態から発生する非常にギミックです。
クレセント スラッシュ 、一方、優れた乗数、ライフスティール、およびキルを達成した場合は独自のクールダウンをリセットします。 フラッシュ どちらも、ザバタスが存在する最強の敵を拘束し、強力な攻撃デバフで攻撃することを可能にします。 Zabatus thrives on the chaos of combat, and even the mightiest foes should be wary of his presence.
White

Armor Type: Leather
Skills:
(Ultimate) Thousand Fires
- Deals 260% damage to all enemies. Also has a 70% chance to inflict bleed, which causes 40% damage per second for 5 seconds.
- Bleed damage increased to 60% per second.
- Initial damage increase to 290%.
Abyssal Being
- White buffs himself, gaining 20% attack speed and 10% ATK for 5 seconds. 7 second cooldown.
- Duration increased to 7 seconds.
- ATK buff increased to 20%.
Foreign Shotgun
- Deals 60% damage to nearby enemies. 7 second cooldown.
- Damage increased to 70%.
- Damage increased to 80%.
Blink Trigger
- If White loses more than 15% of his max HP in a single attack, that damage is blocked and White is teleported to a random area within your side of the field. Also increases White’s attack speed by 10% for 5 seconds. 15 second cooldown.
- Attack speed buff increased to 15%.
- Attack speed buff increased to 20%.
White is a fantastic hunter who knows what his job is and executes it with pinpoint precision. Ultimate that hits everyone and has a chance to apply a DOT? Check. Self-buff that’s virtually always up? Check. Self-preservation move? Check. The only reason he isn’t higher on this list is that Gallistos exists.
Tun

Armor Type: Leather
Skills:
(Ultimate) Celestial Blue-Black Slash
- Deals 230% damage to enemies in front. Marked enemies take 30% extra damage from this skill.
- Damage increased to 230%.
- Damage increased to 250%.
Celestial Blue-Black Double Blade Dance – Attack
- Deals 220% damage to nearby enemies and marks them for 10 seconds. 10 second cooldown.If Tun hits a marked enemy 3 times with his normal attack, this skill’s cooldown is reset instantly.
- Damage increased to 240%.
- Damage increased to 270%.
The Shaos’ Swordsmanship
- Deals 90% * 3 damage to one enemy. 7 second cooldown.
- Damage per hit increased to 100%.
- Damage per hit increased to 120%.
Strength Absorption
- Attacking a marked enemy gives Tun a 5% ATK and DEF buff for 5 seconds.
- DEF buff increased to 8%.
- ATK buff increased to 8%.
Tun is a hunter who benefits a lot from investment in his unique ability and attack speed buffs. With enough buffs, Tun’s Celestial Blue-Black Double Blade Dance – Attack (what a mouthful!) will continuously reset its own cooldown for massive damage. Apart from this ridiculous combo, Tun’s not too bad, but nothing spectacular either. That combo is just too good.
Morrison
Armor Type: Leather
Skills:
(Ultimate) Electric Barrage
- Deals 270% damage to nearby enemies and reduces their mana by 50.
- Supporter heroes hit by this skill also have 10% reduced mana recovery for 5 seconds.
- Damage increased to 310%.
Overload
- Deals 250% damage to nearby enemies and stuns for 2 seconds. 7 second cooldown.
- Damage increased to 280%.
- Stun time increased to 3 seconds.
Colorless Flash
- Teleports behind the enemy furthest from Morrison at the start of combat. If that target dies, instantly teleports to the next enemy.
- Evasion increased by 20% for 5 seconds after teleporting.
- ATK increased by 10% for 5 seconds after teleporting.
Electric Shock
- Morrison’s skills also inflict 1 stack of electric shock to enemies. At 5 stacks, enemies are stunned for 2 seconds.
- Stun requirement reduced to 4 stacks.
- Morrison adds a shock stack to an enemy every 3 normal attacks.
I was expecting Morrison to be a mage, but he’s a hunter. The dev team seems to really like hunters. Hunters like Morrison, who hate supporters, who deal huge AOE damage, and who have a way to consistently stun enemies.
Like Tun, Morrison gets great mileage out of attack speed buffs due to how his shock stacks work, and his Colorless Flash means that he automatically goes for the squishiest enemies in the enemy ranks, tying them up and making it more difficult for them to support their allies.
B-Tier
Angel

Armor Type: Leather
Skills:
(Ultimate) Angel’s Judgment
- Teleports to the enemy with the least HP, then deals 270% damage to them.
- Damage increased to 290%.
- Damage increased to 320%.
Continuous Slash
- Deals 240% twice to a nearby enemy. 7 second cooldown.
- Damage increased to 260%.
- Damage increased to 280%.
Protection of Faith
- Max HP increased by 5%.
- Bonus increased to 10%.
- Bonus increased to 15%.
Battle Angel
- ATK increased by 5%.
- Bonus increased to 10%.
- Bonus increased to 15%.
Angel will probably serve as your introduction to the game’s many assassins. Angel’s Judgment has hefty multipliers, allowing it to reliably assassinate unprepared foes, while Continuous Slash deals a huge amount of damage for such a low-rarity unit.
Angel’s passives also let him both stay in battle a bit longer and improve his already formidable damage-dealing capabilities. Angel is definitely worth a shot, especially if you’re in the early game. Don’t forget to replace him with more powerful heroes when the time comes, though.
Delph

Armor Type: Cloth
Skills:
(Ultimate) WINTER IS COMING
- Deals 150% damage in a frontal AOE with a 50% chance to freeze for 2 seconds.
- Damage increased to 180%.
- Freeze rate increased to 60%.
ABSOLUTE ZERO
- Freezes 1 enemy for 2 seconds and deals 170% * 2 damage. 13 second cooldown.
- Damage increased to 190% per hit.
- Now targets 2 random enemies.
Ice Skin
- DEF increased by 5%.
- Bonus increased to 10%.
- Bonus increased to 15%
Ice Shield
- Creates a shield with health equal to 100% of Delph’s ATK for the ally with the lowest HP. 10 second cooldown.
- Shield health scaling increased to 125% of Delph’s ATK.
- Shield health scaling increased to 150% of Delph’s ATK.
That’s not a typo – Delph likes ALL CAPS IN HIS SKILLS. Aside from making them sound more intimidating and also goofy, they’re…not that good, really. If we swapped the guaranteed freeze between ABSOLUTE ZERO and WINTER IS COMING , you might get a more consistent disabler, which is what Delph is.
Despite being a hunter, he’s more of a support character – an offensive support whose main gimmick is a chance to disable on his ultimate. See where this is going? His ABSOLUTE ZERO freezes up to 2 enemies for 2 seconds, sure, but with a prohibitive cooldown of 13 seconds, it’s not going to stick.
Also, like most crowd control characters in games, there’s a better form of crowd control called “killing your enemies before they can do anything”.
Fanzifei

Armor Type: Leather
Skills:
(Ultimate) Frost Dragon Missile
- Fires a talisman at an enemy, dealing 50% damage per second for 5 seconds. Each tick of damage also adds 1 slow stack; enemies are frozen if they have 5 slow stacks.
- Duration increased to 6 seconds.
- Damage increased to 60% per second.
Strike
- Deals 220% damage to nearby enemies. Frozen or slowed enemies take 20% extra damage from this skill. 7 second cooldown.
- Initial damage increased to 240%.
- Frozen or slowed enemies now take 30% extra damage.
Gravity
- Deals 180% damage in an AOE at the beginning of combat. Enemies hit by this skill are pulled in front of Fanzifei. 12 second cooldown.
- Damage increased to 200%.
- Damage increased to 220%.
Chilly Air
- Passively increases ATK by 10%. Normal attacks have a 20% chance to add a slow stack to enemies.
- Slow proc chance increased to 30%.
- ATK bonus increased to 15%.
Fanzifei is a pretty strange hunter that relies on her slow stacking gimmick that eventually freezes enemies. Her ultimate isn’t a nuke; it’s a DOT that also freezes an enemy at the end. Her ATK stat is pretty good, but her skills push her more into the role of a support than a full-on assassin. The main problem here is her Gravity スキル。
You don’t want your tanks to be competing with your damagers for aggro duty, and Fanzifei can disrupt her own team as much as her enemy’s. As is, Fanzifei is usable, but will require heavy investment into her unique ability and careful team construction to get the most out of her.
C-Tier
Aerok Warrior

Skills:
(Ultimate) Horizontal Cut
- Deals 230% damage to enemies in front.
- Damage increased to 250%.
- Damage increased to 270%.
Strong Stab
- Deals 200% damage to enemies in front. 7 second cooldown.
- Damage increased to 220%.
- Damage increased to 250%.
Warrior Training
- DEF increased by 5%.
- Bonus increased to 10%.
- Bonus increased to 15%.
Apprentice Knight
- Max HP increased by 5%.
- Bonus increased to 10%.
- Bonus increased to 15%.
For a low-rarity unit, the Aerok warrior is actually fairly decent. He’s got AOEs – small, but they’re still AOES, and some level of self-defense if you invest in his passives, which you probably won’t. That still won’t save him from being passed over in favor of stronger heroes.
Elf Archer
Armor Type: Leather
Skills:
(Ultimate) 3 Shots
- Deals 90% * 3 damage to the enemy with the least health.
- Damage per shot increased to 100%.
- Damage per shot increased to 120%.
Elf’s Arrow
- Deals 250% damage to the enemy with the least HP. 8 second cooldown.
- Damage increased to 260%.
- Damage increased to 290%.
Defense Training
- Max HP increased by 5% in battle.
- Bonus increased to 10%.
- Bonus increased to 15%.
Elf Archery
- ATK increased by 5% in battle.
- Bonus increased to 10%.
- Bonus increased to 15%.
There’s not much to say about Elf Archer. Her attacks target the weakest enemy, which can be boon or bane based on your formation – but really, I’d take AOE any day. Her low rarity reflects in her stats, meaning that even if she hits thrice, she’s still woefully outclassed by anyone with a higher rarity.
The triple-hit nature of her ultimate also means that she’s penalized more heavily by DEF than other heroes. Her passives are lackluster too. While they are nice, they’re not particularly useful, and will require spending resources for disappointing returns. Use her only if you have nobody else.
Imp

Armor Type: Leather
Skills:
(Ultimate) Continuous Thrust
- Deals 250% damage to the enemy with the highest ATK.
- Damage increased to 270%.
- Damage increased to 310%.
Imp’s Strike
- Deals 220% damage to the enemy with the highest ATK and inflicts a -5% ATK and -10% attack speed debuff on them for 3 seconds. 8 second cooldown.
- Damage increased to 240%.
- Damage increased to 270%.
Naughty Boy
- Max HP increased by 5% in battle.
- Bonus increased to 10%.
- Bonus increased to 15%.
Rough Prank
- ATK increased by 5% in battle.
- Bonus increased to 10%.
- Bonus increased to 15%.
The Imp is only marginally better than Elf Archer. While his attacks are less penalized by defense, they’re still nothing special. His Imp’s Strike inflicts debuffs, but unfortunately it’s the damage and not the debuff strength or duration that scales with leveling up that skill. Imp can see niche use as a debuffer, if you have literally nobody else to do the job.
Swordsman

Armor Type: Plate
Skills:
(Ultimate) Downstrike
- Deals 200% damage to nearby enemies.
- Damage increased to 225%.
- Damage increased to 250%.
Split
- Deals 180% damage to nearby enemies.
- Damage increased to 200%.
- Damage increased to 220%.
Strong Fireball
- Passively reduces incoming damage by 2.5%.
- Bonus increased to 5%.
- Bonus increased to 2.5%.
Swordsman’s Training
- Max HP increased by 5%.
- Bonus increased to 10%.
- Bonus increased to 15%.
He’s Aerok Warrior, but with a sword.それでおしまい。 That’s his whole character:decent, but will be replaced very quickly.
Tan Liming
Armor Type: Leather
Skills:
(Ultimate) Swordsman’s Swordsmanship
- Hits a nearby enemy for 40% * 5 damage.
- Damage increased to 45% per hit.
- Damage increased to 50% per hit.
Poison
- Deals 150% damage to one enemy and binds them for 2 seconds. 9 second cooldown.
- Damage increased to 170%.
- Damage increased to 190%.
Fierce Swordsmanship
- ATK increased by 5%.
- Bonus increased to 10%.
- Bonus increased to 15%.
Swordsman’s Master
- Max HP increased by 5%.
- Bonus increased to 10%.
- Bonus increased to 15%.
Take Elf Archer’s multi-hit attacks and make them even worse and you get Tan Liming. Is that his name? A title? A mistranslation of “Tam Lin”? And his ultimate is almost as repetitive as the mage named Mage. Whatever the case, this unit somehow manages to be the bottom of the barrel among the generic mooks, and that’s a distinction in itself.
Centaur Elite Archer
Armor Type: Leather
Skills:
(Ultimate) Arrow Rain
- Deals 50% * 5 damage to the enemy with the highest ATK.
- Damage per shot increased to 55%.
- Damage per shot increased to 75%.
Wide-Area Arrow
- Deals 170% damage in a fan-shaped AOE.8 second cooldown.
- Damage increased to 200%.
- Damage increased to 240%.
Hawk Eye
- ATK increased by 5%.
- Bonus increased to 10%.
- Bonus increased to 15%.
Quick Fire
- If Centaur Elite Archer participates in killing an enemy, he gains 2.5% attack speed for 5 seconds.
- Bonus increased to 5%.
- Bonus increased to 7.5%.
And would you believe it, there’s someone even worse than Tan Liming in the multi-hit department. Maximizing Wide-Area Arrow means using the Elite Archer as a tank, and the damage isn’t that much better than anyone else. Oh, and this guy is rarer than the other mooks above him. Elf Archer’s starting to look pretty good right about now.
Ganzo
Armor Type: Leather
Skills:
(Ultimate) Moon Swallower
- Gives Ganzo a 10% ATK, DEF, and attack speed buff for 5 seconds.
- Duration increased to 7 seconds.
- ATK buff increased to 15%.
Goldsmith – Bondage
- Deals 250% damage to an enemy and binds them for 4 seconds. 9 second cooldown.
- Damage increased.
- Also gives the target a 20% incoming healing debuff for 4 seconds.
Leader’s Strength
- ATK increased by 5%.
- Bonus increased to 10%.
- Bonus increased to 15%.
Performance of Training
- Max HP increased by 5%.
- Bonus increased to 10%.
- Bonus increased to 15%.
Joining the ranks of C-Tier hunters is Ganzo, who suffers from low rarity statlines in what might otherwise be an okay kit. While he can self-buff, Moon Swallower isn’t particularly potent on Ganzo even with the 15% ATK buff from maxing the skill out, and Goldsmith – Bondage could have given the enemy a DEF down debuff for faster kills.
But no, it gives an incoming heal penalty instead, no doubt allowing Ganzo to savor the terror of his prey, while said prey is building up their own mana meter for a counterattack. And once again, Ganzo’s skill is lacking information.
We’ll just have to assume that level 2 Goldsmith – Bondage deals more than 250% but less than 300%. It’s a shame since Ganzo almost has a completely coherent kit but is let down by his the secondary effects of his own skills, placing him in the ranks of “replace immediately” heroes.
Tanker Tier List
S-Tier
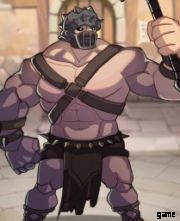
Hrachas
Armor Type: Plate
Skills:
(Ultimate) Infinite Regenerative Power
- Hrachas regenerates 5% of his max HP per second for 4 seconds.
- Duration increased to 6 seconds.
- Heal scaling now increased to 7.5% of Hrachas’ max HP.
Immortal Body
- If Hrachas takes lethal damage, he heals to 50% of his max HP and gains a 20% ATK buff and a 30% DEF buff for 5 seconds. This can only trigger once per battle.
- ATK buff increased to 25%, DEF buff increased to 30%.
Glutton
- Creates a shield around Hrachas. The shield lasts 3 seconds and has 10% of Hrachas’ max HP. 8 second cooldown.
- Shield health increased to 12.5% of max HP.
- Shield health increased to 17.5% of max HP.
Tenacious Vitality
- Max HP increased by 10%.
- Bonus increased to 15%.
- Bonus increased to 20%.
While Hrachas will win no awards in the offense department, he is very hard to kill . The entirety of demon king’s kit is dedicated to keeping him alive and kicking for as long as possible, which makes him a perfect tank for your squishier backline units. With a huge amount of self-sustain, shields, and a one-time self-revive, Hrachas simply refuses to die and might even be the last one standing in an encounter.
A-Tier
Kenta
Armor Type: Plate
Skills:
(Ultimate) Merciless Assault
- Charges forward, dealing 150% damage to enemies caught in the stampede and stunning them for 2 seconds. After the charge, Kenta returns to his initial position, dealing 160% damage in an AOE.
- Kenta gains 10% incoming damage reduction for 4 seconds after using Merciless Assault.
- Kenta gains a shield with health equal to 100% of his ATK for 4 seconds after using Merciless Assault.
Battle Instinct
- Taunts enemies around Kenta for 2 seconds. 10 second cooldown.
- Kenta also gains a 15% DEF buff for 5 seconds.
- Taunt time increased to 3 seconds.
Iron Skin
- Kenta is immune to status ailments while he has 80% HP or more.
- HP threshold reduced to 70%.
- HP threshold reduced to 50%>
God’s Creation
- If his HP is 30% or less, Kenta has 40% incoming damage reduction.
- Damage reduction increased.
- Now triggers on 50% or less HP. Damage reduction increased to 50%.
The mighty centaur king Kenta is a very in your face tanker. His Merciless Assault does decent damage as it hits twice and pierces enemy ranks, and it stuns too. A taunt allows Kenta to pull enemies off his allies, while his own status immunity and damage reduction passives make it difficult to shut him down. This regal lord of horses will make a fine addition to any team.
B-Tier
Nyahu
Armor Type: Plate
Skills:
(Ultimate) I Will Take It for You!
- Taunts nearby enemies for 3 seconds, forcing them to attack Nyahu. Increased Nyahu’s DEF by 10% for 3 seconds.
- Taunt duration increased to 5 seconds.
- Nyahu also gains 10% damage reduction for 5 seconds when this skill is activated.
Dinner Acquired!
- Deals 250% damage to one enemy and knocks them back. 8 second cooldown.
- Damage increased to 270%.
- Damage increased to 310%.
Devil is Stamina!
- Max HP increased by 5%.
- Bonus increased to 10%.
- Bonus increased to 15%.
Overcoming Crisis
- If Nyahu has less than 40% health, he has 30% damage reduction.
- Damage reduction increased to 50%.
- Damage reduction increased to 60%.
Nyahu is a tank that doesn’t have any doubts (or delusions) regarding his role in battle. He’s got a taunt with a DEF boost and possible damage reduction, minor control with knockback, and passives that augment his survivability in combat.
His second passive is particularly potent – 60% damage reduction is nothing to sneeze at though you will have to find a way to keep Nyahu’s HP below 40%. Your damagers can only work with a good tank on the field, and Nyahu does a passable job.
Celsius &Fahrenheit

Armor Type: Plate
Skills:
(Ultimate) Hellfire
- Deals 50% * 5 damage to nearby enemies. Enemies take 30% of Celsius &Fahrenheit’s ATK as burn damage for 3 seconds.
- Damage per hit increased to 60%.
- Also inflicts a -30% incoming heal debuff for 5 seconds.
Lava Shield
- Creates a shield with health equal to 15% of Celsius &Fahrenheit’s max HP. Enemies that strike the lava shield with a normal attack take 30% of Celsius &Fahrenheit’s ATK as damage.
- Shield health scaling increased to 20% of max HP. Shield also gives a 15% DEF buff.
- Counter damage increased to 40%.
Ignorant Strike
- Deals 240% damage to nearby enemies and stuns for 2 seconds.
- Damage increased to 260%.
- Stun time increased to 3 seconds.
Dull Movement
- Evasion reduced by 10%. DEF increased by 15%.
- DEF bonus increased to 20%.
- Also gives 10% damage reduction.
Nice design aside, Celsius &Fahrenheit are a passable tank. They lack a way to pull aggro, but at least they make up for it in other aspects – a self-shield, passive damage reduction, and a stun that gains duration when leveled up. Improvements could be made here and there, but this two-headed hero (or heroes?) will suffice as a decent tank.
Inca
Armor Type: Plate
Skills:
(Ultimate) Silent Leaper
- Deals 50% damage per second for 4 seconds to nearby enemies and reduces their mana by 20%.
- Damage increased to 60%.
- Mana burn increased to 30%.
Curse of the Flash Helplessness
- A random enemy is hit with a 10% ATK and DEF debuff for 5 seconds. 7 second cooldown.
- This skill now targets 2 enemies.
- ATK debuff increased to 15%.
Inborn Body
- If Inca receives damage equal to or greater than his max HP, that damage is applied over 5 seconds instead. 3 second cooldown.
- When Inborn Body triggers, Inca also gains a 20% DEF buff for 5 seconds.
- When Inborn Body triggers, Inca also gains a 10% ATK buff for 5 seconds.
Price of Curse
- Enemies that attack Inca receive a 10% ATK debuff for 5 seconds. 3 second cooldown.
- ATK debuff increased to 15%.
- ATK debuff increased to 20%.
Inca is one of those characters that was probably better during conceptualization than actual execution. In theory, a tank that relies on debuffing enemies sounds good – IF paired with a way to keep enemies controlled. In practice, Inca respond to enemy actions more than he forces them into attacking him or keeping them controlled.
Inborn Body is a very niche passive that only activates if Inca gets overkilled to ridiculous proportions; if your enemy is doing that much damage, I don’t think any amount of damage mitigation will help you. The rest of his kit is decent enough that I can’t justify putting him in C-tier. Consider yourself lucky, Inca.
Rudemila
Armor Type: Plate
Skills:
(Ultimate) Ground Explosion
- Deals 230% damage to nearby enemies and stuns for 2 seconds.
- Damage increased to 260%.
- Stun duration increased to 4 seconds.
Iron Woman
- Deals 200% damage to nearby enemies. Gains a shield with health equal to 150% of Rudemila’s ATK.
- Damage increased to 220%.
- Shield ATK scaling increased to 180%.
Iron Wall
- If Rudemila receives skill damage, she gains 10% incoming damage reduction for 5 seconds.
- Damage reduction increased to 15%.
- Damage reduction increased to 20%.
Magic Armor
- Enemies that damage Rudemila lose 10 mana. 3 second cooldown.
- Mana burn increased to 20.
- Mana burn increased to 50.
Rudemila is a tank who would be great if she had a way to pull aggro to herself. As it is, she’s great at keeping herself alive. She does apply shields to allies and inflicts a very heavy 4 second stun, so she’s not all bad – but there are better choices. Shame, really, the dark knight design was growing on me.
C-Tier
Pilgrim

Armor Type: Plate
Skills:
(Ultimate) Shredder
- Deals 150% damage in an AOE.
- Damage increased to 200%.
- Damage increased to 250%.
Judgement
- Deals 250% damage to one enemy and inflicts a -10% ATK and DEF debuff for 3 seconds. 7 second cooldown.
- Damage increased to 270%.
- Damage increased to 310%.
Blessing
- Reduces incoming damage by 2.5%.
- Damage reduction increased to 5%.
- Damage reduction increased to 7.5%.
Faith
- Heals self for 150% of ATK. 10 second cooldown.
- Heal increased to 170% ATK.
- Cooldown reduced to 8 seconds.
The Pilgrim is a tank that doesn’t specialize in a particular niche. He has access to an AOE (that doesn’t have crowd control), a single-target debuff, a damage reduction passive, and a self-heal. He’s not bad, per se, but offensive tanks are rarely worth talking about. The tank’s job is to take hits and control enemies, not deal damage.
Torturer
Armor Type: Plate
Skills:
(Ultimate) Downstrike
- Deals 270% damage to nearby enemies.
- Damage increased to 290%.
- Damage increased to 320%.
Split
- Deals 240% damage to nearby enemies and knocks them back. 8 second cooldown.
- Damage increased to 260%.
- Damage increased to 280%.
Analgesia
- Passively reduces incoming damage by 2.5%.
- Bonus increased to 5%.
- Bonus increased to 7.5%.
Huge Muscle
- Max HP increased by 5%.
- Bonus increased to 10%.
- Bonus increased to 15%.
Ah, another tank that doesn’t have a defensive ultimate. Much of what applies to the Pilgrim can be applied to the Torturer, except worse. Due to his low rarity, the Torturer is on the butt-end of tanks. Use only as a last resort.
Rai
Armor Type: Plate
Skills:
(Ultimate) Lycanthrope’s Claw
- Deals 150% * 2 damage to nearby enemies and knocks them back.
- Damage per hit increased to 170%.
- Damage per hit increased to 200%.
Howling
- Deals 130% damage to nearby enemies. Has a 30% chance to stun for 1.5 seconds.
- Damage increased to 150%.
- Also gives Rai 10% damage reduction for 3 seconds.
Persistent
- Max HP increased by 5%.
- Bonus increased to 10%.
- Bonus increased to 15%.
Recovery
- Normal attacks have 3% life steal.
- Life steal increased to 4%.
- Life steal increased to 6%.
Not only does Rai not have a defensive or aggro-drawing ultimate, but his stun is conditional at a 30% proc rate. His life steal only works off normal attacks which aren’t that great to begin with. Even his damage mitigation abilities are only active when he does his howl. But hey, at least Rai is consistent with the other lycanthropes – they’re all really bad! So congratulations, Rai.
Supporter Tier List
S-Tier
Diogoram

Armor Type: Cloth
Skills:
Power: At the start of combat, gives all allies a shield equal to 40% of Diogoram’s max HP which lasts 5 seconds. Gives 50 mana to the ally with the highest HP every 5 seconds. Allies passively take 10% less damage.
(Ultimate) Blessing of Nature
- Removes all debuffs from all allies. Increases attack speed, move speed, and mana recovery speed by 25% for all allies for 4 seconds.
- Duration increased to 6 seconds.
- All allies also become immune to status ailments for 5 seconds.
Energy of Life
- Heals the ally with the lowest HP for 20% of their max HP. 10 second cooldown.
- Also gives the target a 10% DEF buff.
- Healing now scales to 30% of target’s max HP.
Entrapping Roots
- Binds an enemy for 3 seconds, disabling their actions and causing them to take 10% damage per second. Has 20% life steal. 10 second cooldown.
- Damage increased to 20%.
- Duration increased to 4 seconds.
Natural Recovery
- Diogoram passively heals for 1% of her max HP per second. If her health is full, this will heal the ally with the lowest HP, but at half the rate that it would heal Diogoram.
- Healing now scales to 2% of Diogoram’s max HP.
- Healing now scales to 3% of Diogoram’s max HP.
She heals, she buffs, she controls the crowds. The green dragon Diogoram does not disappoint, and she’ll be your go-to gal for virtually the whole game, if you have her. Not only does she have those neat tricks up her sleeve, but she also has (and shares!) a passive regen buff, while developing her unique skill also gives her a slowing aura.
Note that her heal scales with the target’s HP, not her own, not with her ATK. This makes her a great partner for hefty tanks like Hrachas, but less useful in the early game where flat healing is more important.
Tomie

Armor Type: Cloth
Skills:
(Ultimate) Marionette
- Heals allies for 6% of their max HP per second 5 seconds and gives them a 10% ATK buff for 5 seconds. Also resummons any lost dolls.
- Healing duration increased to 7 seconds.
- ATK buff increased to 15%.
Remote Control
- Controls a random enemy for 2 seconds, dealing 190% damage to it in the process. Controlled enemies will fight for Tomie’s team, cannot use skills, and have 10% increased attack speed. 9 second cooldown.
- Damage increased to 220%.
- Duration increased to 4 seconds.
Summon Doll
- Tomie is accompanied by 2 dolls. The dolls deal 100% of Tomie’s damage, and heal her for 1% of the damage they inflict. The dolls are invulnerable, but die if Tomie’s HP is reduced to 70% and 40%, respectively. Dolls can be resummoned via the Marionette skill.
- Dolls now deal 130% damage.
- Dolls now heal Tomie for 3% of their damage.
Doll Explosion
- Attaches an exploding doll to one enemy, dealing 180% damage and burning 50 mana.
- Damage increased to 200%.
- Damage increased to 230%.
Tomie is an unconventional supporter that manages to shine in spite of her weird loadout. Unlike Marilyn, Tomie comes with 2 dolls at the beginning of battle that will chip in, essentially serving as 2 extra heroes. Since these dolls are invulnerable, they’ll be doing damage and can’t be stopped by any means unles Tomie herself is hurt.
Apart from this, her Marionette skill is a huge heal/buff for her team, letting her allies stay in the fight longer while improving the longevity of her own dolls. Remote Control also gains special mention for being disruptive, though unlike Narfume, it only targets one enemy at a time. Tomie’s definitely worth a shot if you have her.
A-Tier
Kueno
Armor Type: Cloth
Skills:
(Ultimate) Geistraza’s Blessing
- Heals all allies for 5% of their max HP per second for 5 seconds. Gives all allies a 10% DEF buff for 5 seconds.
- DEF buff increased to 20%.
- HP regeneration increased to 7.5% of max HP per second.
Geistraza’s Touch
- Heals nearby allies for 120% of Kueno’s ATK. Allies healed by this gain a 15% attack speed buff for 5 seconds. 9 second cooldown.
- Healing increased to 140%.
- Healing increased to 170%.
Shield of Faith
- 30% Kueno’s overheals are converted to a 5 second shield for the ally that received healing.
- If an ally has a Shield of Faith shield, they heal an extra 20% from all incoming healing.
- Shields now use 40% of overheal value.
Healing Hand
- Heals the ally with the lowest HP for 10% of their max HP. 7 second cooldown.
- Healing increased to 15% of max HP.
- Healing increased to 20% of max HP.
Kueno is who you get when you decide a character’s entire shtick is healing. Literally everything Kueno does heals his allies in one way or another. That’s not a bad thing since Kueno’s heals also come paired with buffs and he also converts overheals into shields. While his set of heals may seem like overkill, they also make Kueno a dependable healer who’ll handily keep your team topped up in a fight.
Won

Armor Type: Cloth
Skills:
(Ultimate) Intensive Healing
- Links to the ally with the lowest HP for 4 seconds. Linked ally is healed for 60% of Won’s ATK and gains 50 mana per second.
- Linked ally also gains a 20% ATK buff while link is active.
- Mana recovery per second increased to 60%.
Meditation
- Heals in an area for 70% of Won’s ATK.
- Healing increased to 90%.
- Healing increased to 110%.
Walchevo’s Pilgrim
- When debuffed, Won sheds 10% of his HP to immediately remove all ailments on him. 5 second cooldown.
- HP consumption reduced to 7.5%.
- HP consumption reduced to 5%.
Bright Light
- Deals 150% damage to nearby enemies. Decreases their accuracy by 20% for 5 seconds. 8 second cooldown.
- Damage increased to 180%.
- Accuracy debuff increased to -30%.
Where Kueno goes wide, Won goes tall. Won’s ultimate Intensive Healing grants a massive dose of both HP and mana to an ally, not only keeping them in the fight but also allowing them to turn the tables by granting them mana. I took the wording from the game itself, so I’m not sure if it increases mana by 50 per second or increases mana recovery speed by 50%, but regardless, it’ll provide the linked ally with energy to activate their own ultimate.
Further investing in Won’s unique abilities gives this skill the ability to reduce incoming damage and gain a shield! Won’s not entirely lacking in the area heals department either, with Meditation scaling off his own ATK, and a debuff removal skill that ensures he can’t be shut down so easily.
So who do you use:Kueno or Won? That depends on how you like to play. Kueno is great at healing entire teams while providing buffs, while Won focuses on amplifying a single target and debuffing enemies.
Petnak

Armor Type: Cloth
Skills:
(Ultimate) High Priest of Time
- All allies gain 10% ATK, 20% attack speed, and 20% move speed for 5 seconds.
- ATK buff increased to 15%.
- Also gives all allies 150 mana.
Priest’s Power
- Heals the ally with the least health for 170% of Petnak’s ATK.
- Healing increased to 200%.
- Also gives the healed ally 50 mana.
Rulus’ Priest
- If Petnak loses more than 10% of her max HP from a single attack, she heals for 20% of her max HP per second for 5 seconds. 15 second cooldown.
- Healing increased to 30% max HP.
- Healing increased to 40% max HP.
Rulus’ Realm
- Petnak is surrounded by an aura; enemies caught in the aura have 30% reduced ATK, while allies have 10% damage reduction.
- Ally damage reduction increased to 15%.
- Enemy ATK debuff increased to 40%.
No, that’s not a typo:Petnak punishes high ATK heroes hard. While it is possible to power through her aura’s debuff, she also gives allies up to 15% damage reduction for an even greater defense. Building Petnak will further reinforce this aura to also lower move speed and attack speed.
Everything else is really just icing on the cake, really. However, of note is Petnak’s ability to generate mana with her ultimate and her auto-heal, allowing her to serve as a battery for mana-intensive teams.
Muzel
Armor Type: Cloth
Skills:
(Ultimate) Angel’s Power
- Gives all allies a shield with health equal to 160% of Muzel’s ATK for 5 seconds.
- Shield health scaling increased to 210% of Muzel’s ATK.
- Also increased DEF of all allies by 25% for 5 seconds.
Chain of Balance
- Links the closest enemy with another random enemy. When a linked unit takes damage, the unit it’s linked to also takes 70% of that damage. 10 second cooldown.
- Linked enemies take 110% damage.
- Links one additional random target.
Angel of Balance
- If there are more enemies than allies on the battlefield, Muzel has 15% damage reduction.
- Damage reduction increased to 20%.
- Angel of Balance now also triggers if there is an equal amount of enemies and allies.
Angel’s Protection
- Shields the ally with the least health. The shield has health equal to 180% of Muzel’s ATK. 7 second cooldown.
- Shield health scaling increased to 200% of Muzel’s ATK.
- Shield health scaling increased to 230% of Muzel’s ATK.
Tactic
Muzel’s approach to healing is “If my allies don’t take damage, I don’t need to heal them”. This small angel is a dedicated shielder who excels at protecting her allies while another healer can keep their HP topped up.
Her unique ability is also a great clutch skill, giving a dying ally invulnerability for 3 seconds – combine her with Hrachas to make him effectively immortal. All in all, the only thing you need to worry about is enemies that get stronger against shields, like Gallistos.
Charles

Armor Type: Cloth
Skills:
(Ultimate) Jack’s Bubble Peas
- Fires projectiles that knock enemies around, dealing 230% damage.
- Damage increased to 250%.
- Damage increased to 280%.
Alice ’s Wonderland
- One nearby enemy receives a 15% move speed debuff and a 10% attack speed and DEF debuff for 5 seconds. 9 second cooldown.
- DEF debuff increased to 15%.
- Debuff duration increased to 7 seconds.
The Shield That Blocks Everything
- Charles shields the ally with the lowest HP for 5 seconds. The shield’s health is equal to 15% of the shielded hero’s max HP. 8 second cooldown.
- Shield max HP scaling increased to 20%.
- Shield also gives a 15% DEF buff for 5 seconds.
Somewhere Over The Rainbow
- Traps a random enemy in a magical vortex for 2 seconds. 10 second cooldown.
- Trap time increased to 3 seconds.
- Trap time increased to 6 seconds.
Charles is an offensive supporter that messes up his enemies by disrupting formations, inflicting debuffs, and trapping enemies. That’s not all he can do though – when his unique ability is unlocked, Jack’s Bubble Peas gains a chance to strip enemies of all buffs, with a 100% chance at max level! This makes Charles a potent threat to any buff-centric composition, and takes pressure off his allies.
B-Tier
Bono

Armor Type: Cloth
Skills:
(Ultimate) Rulus’ Pilgrim
- Gives 30 mana per second to nearby allies for 4 seconds, and stuns nearby enemies for 3 seconds.
- Stun time increased to 4 seconds.
- Mana regen increased to 50 per second.
Help!
- Allies below a certain HP threshold are healed for 10% of their max HP. 8 second cooldown.
- Healing increased to 15%.
- Cooldown reduced by 2 seconds.
Coward
- Mana recovery increased by 10%.
- Bonus increased to 15%.
- Bonus increased to 20%.
Rulus’ Blessing
- When combat starts, creates a shield that fully blocks the next instance of damage. When the shield is destroyed, Bono will recreate it for 60 mana. 6 second cooldown.
- Mana cost decreased to 40.
- Cooldown reduced by 2 seconds.
While Petnak and Won can generate mana for your other heroes, they’re healers and supporters first and batteries second. The opposite is true for Bono, who gives a lot of mana but barely provides anything else. His mana regeneration is very nice, but let’s face it:more mana is rarely going to be what decides if a battle is won or lost.
Brien

Armor Type: Cloth
Skills:
(Ultimate) Angel’s Grace
- Heals allies around Brien for 150% ATK.
- Allies healed by this skill also gain a 10% DEF buff for 3 seconds.
- Healing increased to 180%.
God’s Blessing
- Heals the ally with the least health for 200% ATK.
- Healing increased to 220%.
- Healing increased to 250%.
Blessing
- Max HP increased by 5%.
- Bonus increased to 10%.
- Bonus increased to 15%.
Weakening
- DEF increased by 5%.
- Bonus increased to 10%.
- Bonus increased to 15%.
Brien is like Kueno without his coffee – heals that aren’t overkill, but lack the oomph that Kueno has with his overheal shields. That’s not to say Brien is bad; he (she? I can never tell with angelic types) is a standard healer who does a good job of keeping your team alive. Again though, Brien lacks that special something that separates an okay healer from an excellent healer.
C-Tier
Female Angel

Armor Type: Cloth
Skills:
(Ultimate) Prayer of Healing
- Deals 200% damage to a nearby enemy.
- Damage increased to 220%.
- Damage increased to 250%.
Heal
- Heals the ally with the lowest HP for 50% of Female Angel’s ATK. 9 second cooldown.
- ATK heal scaling increased to 60%.
- ATK heal scaling increased to 70%.
God’s Apostle
- Max HP increased by 5%.
- Bonus increased to 10%.
- Bonus increased to 15%.
Blessing
- DEF increased by 5%.
- Bonus increased to 10%.
- Bonus increased to 15%.
When the skill called Prayer of Healing doesn’t actually do any healing, you know it’s going to be a downhill slide going forward. Female Angel’s Heal isn’t too effective – it fires automatically, won’t save a hero that’s being pummeled since its multipliers are low, and has specific targeting requirements.
Why she couldn’t have a support ultimate is something I’ll keep asking. Her passives don’t make sense either. Since her ultimate is a nuke and her heal scales off ATK, you’d think she would get an ATK passive. But no, she gets HP and DEF. Female Angel is an absolute last resort “healer”.
Priest
Armor Type: Cloth
Skills:
(Ultimate) God’s Blessing
- Heals nearby allies for 100% ATK.
- Healing increased to 120%.
- Healing increased to 150%.
Heal
- Heals the ally with the lowest health for 150% ATK. 9 second cooldown.
- Healing increased to 170%.
- Healing increased to 200%.
Apprentice Priest
- Passively reduces incoming damage by 2.5%.
- Bonus increased to 5%.
- Bonus increased to 7.5%.
Prayer
- ATK increased by 5%.
- Bonus increased to 10%.
- Bonus increased to 15%.
Another family member of the mage named Mage, the priest named Priest is a surprisingly decent pick for a starting supporter. His ultimate and second skill both heal your units, and they scale off his own ATK which makes him decent in the early game. With the lack of any major scaling though, Priest will have a hard time keeping up with better healers who can also do buff duty. At least he’s better than Female Angel, though that’s not saying much.
Handpick Your Heroes
That concludes our ZIO and the Magic Scrolls tier list, and hopefully we’ve helped you find interesting and worthwhile heroes for you to pull for or invest in. Unfortunately, Zio and the Magic Scrolls doesn’t have a trial mode for heroes you don’t own, so much of the decisions will need to be made with the data that’s given by the game and compiled here. If you have any suggestions or tips of your own, let us know in the comment section!