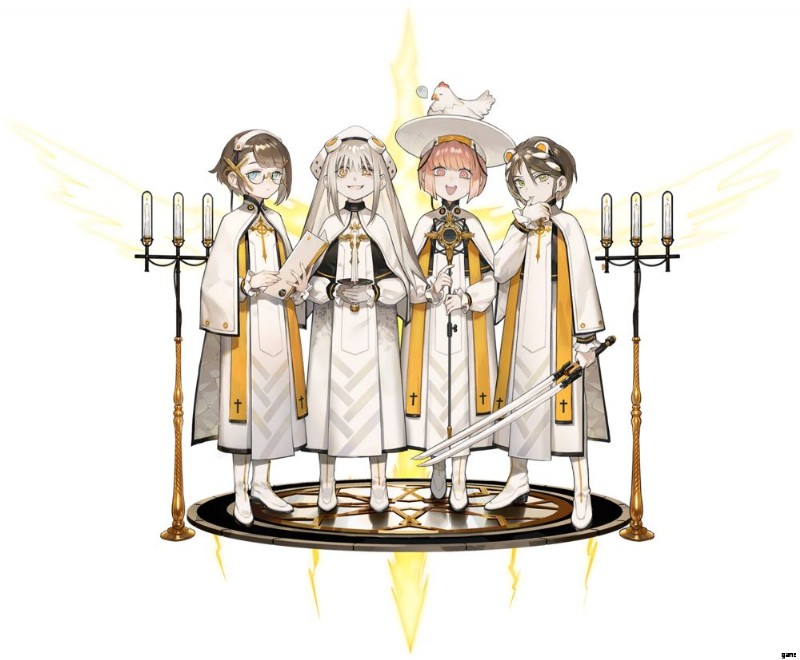
アルケミー スター ティア リスト:ベスト 6 スターおよび 5 スター キャラクターの完全ガイド
Alchemy Stars は、Tourdog Studio によって作成され、Tencent Games によって公開されたタクティカル ターン制ガチャ ゲームです。ゲームでは、チーム全体がタイルを占有し、色付きのタイルの列に沿って移動し、通り過ぎる敵を攻撃します。チームメイトが特定の距離、タイルの色を歩くときに特殊能力を使用できるようにするチェーンコンボシステム、多くの敵の種類、タイルペインティングチームメイトの戦略的な使用、および追跡する他の多くのものに入るまでは簡単に聞こえます.
ゴージャスなアートワークと PVP コンポーネントの完全な欠如に恵まれた、古代の雄叫び「ワイフ オーバー メタ!」アズールレーンやアークナイツのような他のガチャゲームと比べても、アルケミースターズは本格的です。しかし、実際のお気に入りのキャラクターが誰であるかに関係なく、誰がより強いキャラクターであるかを知ることは依然として価値があります.大きなヒントとして、通常、タイルペインティングのコンバーターの 1 つを中心にチームを編成していることに気付くので、これらのコンバーターは常にこれらのリストの上位にあります。
このアルケミー スター ティア リストでは、チームを編成する際にターゲットにすべき最高の 6 つ星と 5 つ星のオーロリアンを紹介します。
アルケミー スターの最高の 6 つ星キャラクター
6つ星のオーロリアンから始めましょう。正直に言うと、彼らはあなたが長期的に狙っているものであり、長期的なグラインドのために常に前もって計画する必要があります.コンバーターは、彼らを中心にチームを編成するため、一般的に上位層です。つまり、通常、コンバーターが最初に必要になります。
関連: Alchemy Stars 初心者向けガイド:強力なチームを編成して敵を制圧するためのヒント、チート、戦略
タイルをペイントするための優れたコンバーターがなければ、チームの他の全員がどれだけ優れていても苦戦し、サブエレメントの攻撃は通常非常に弱いため、とにかく常にメインエレメントを狙おうとします.星 6 と星 5 の主な違いは、非コンバーター タイルのリセッターが豊富にあることであり、それらはほとんど奇妙な疑似コンバーターになっています。
Sティアキャラクター
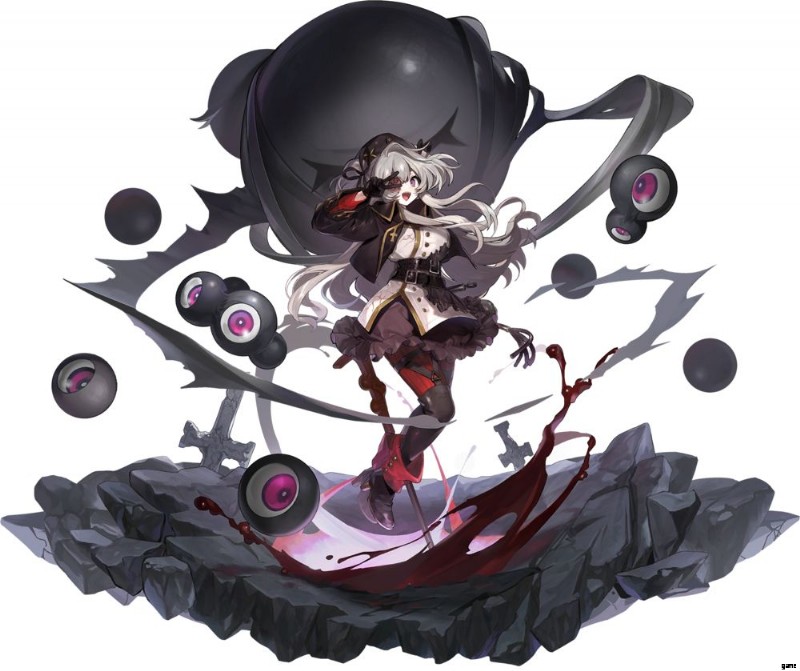
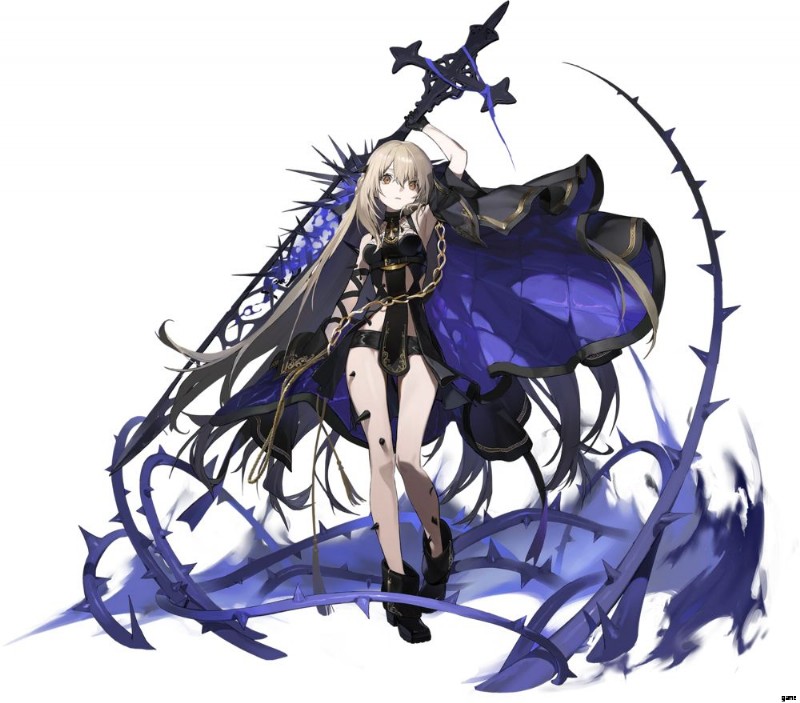
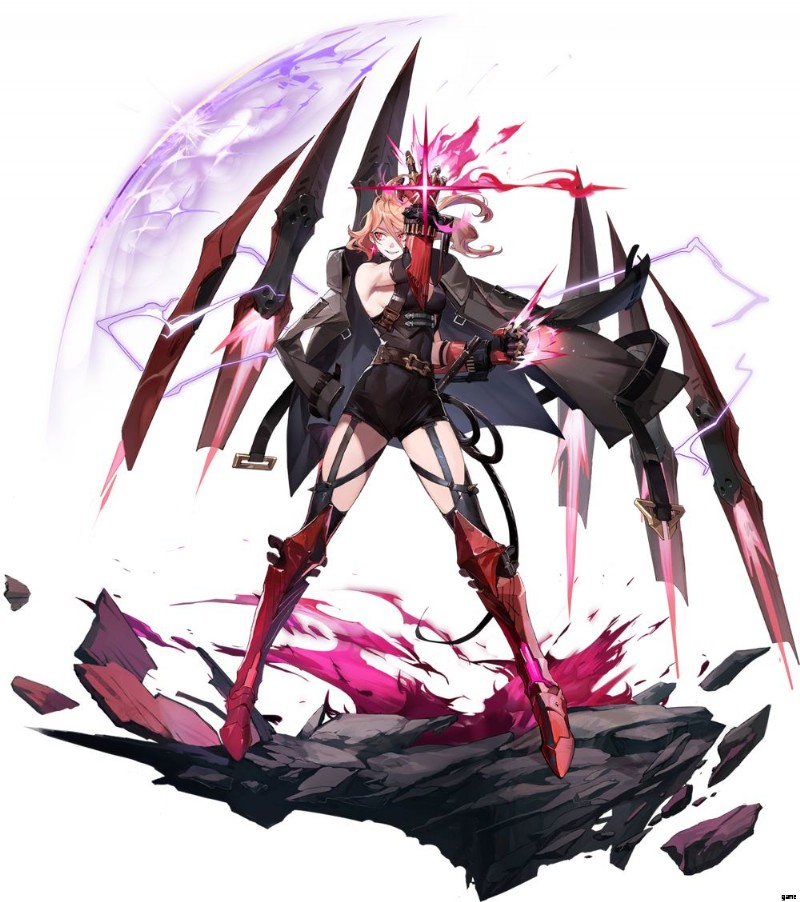
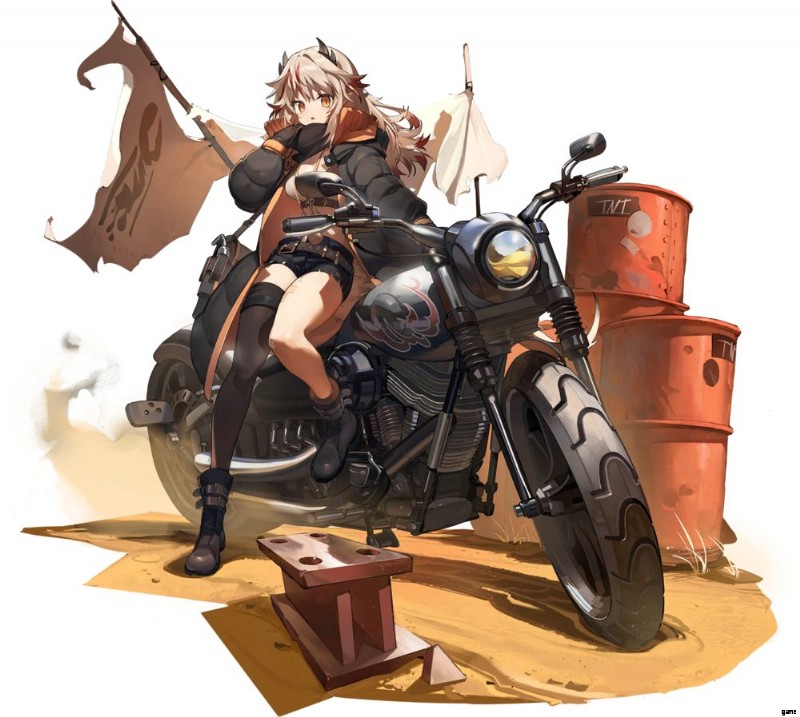
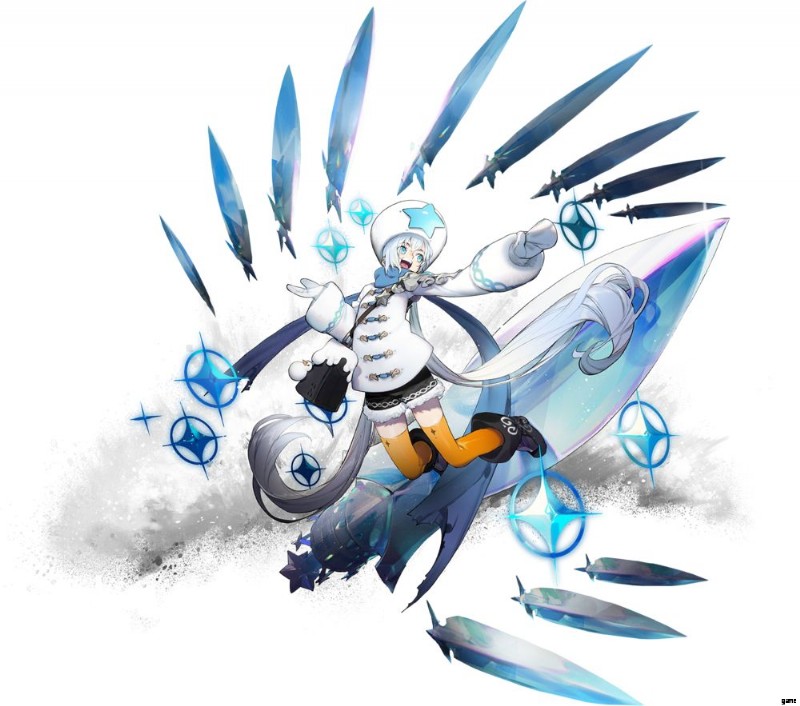
シンサ

レッド/イエロー、デトネーター、コーン AOE ダメージ、AOE ダメージ
このレンチを持ったレッカーには奇妙なアクティブ スキルが付属しており、マップの端まで到達する一方向に円錐状のダメージを与えることができます。ダメージはあたりです
ブレイクスルーに応じて 180 ~ 200% のダメージを与えますが、ターゲットに近づくほど増加し、彼の顔にぶつかるほど愚かな人には 2.5 倍のダメージを与えます。
2 Ascensions を使用すると、このスキルは 2 マスのキャスト範囲を取得します。これにより、彼はキャスト位置に向かって移動することができます。賢いプレイヤーは、より良い位置に到達するために使用できます。彼のチェーン攻撃は、小さな 12 タイルのひし形からマップ全体に広がるアスタリスクまで変化し、160 ~ 165% のダメージを与えます。彼が Rediesel Wrench を入手すると、通常の打撃で人々を斜めに叩くことができます。
斜めのストライクは、Shatter を合計 5 回までスタックするようになりました。各スタックには、Sinsa の防御力の 5% に基づく防御力低下が伴います。これは1ラウンド続きます。 3つのアセンションで、アクティブとチェーンコンボは敵を粉砕することもできます.彼の前にあるすべてのものにとって非常に危険です。
ラファエル
ブルー、サポート、ヒーラー、タイル リセット、タイル ペインター、コラム ダメージ
優れたアクティブ スキルを持つ単純な (悪いと混同しないでください) ヒーラー。ラファエルは攻撃力の 200% だけチームの HP を回復し、マップ上のすべてのタイル (彼女がアセンドしていない場合は 3 タイルの範囲内) で青以外のタイルをリセットします。
ブレークスルーが 3 回になると、青のタイルを生成するわずかなチャンスがあり、最大で先制攻撃を行うことができます。彼女のチェイン コンボは、他のほとんどの縦列嫌いのキャラクターが持つ通常の縦列攻撃で、1 タイルから 3 タイルの幅で始まり、コンボ ウォークの長さに応じて 125 ~ 140% のダメージを与えます。
彼女がベネディクションの柱を手に入れると、彼女がペイントしたすべての青いタイルは、ラファエルの HP の 1.5% だけチームの HP を回復します。完全なブルーチームに最適で、彼女のヒーリング能力は必要に応じて強くなります.その 4 ラウンドのクールダウンを念頭に置いて、適切なブルー タイル ペインターを連れてきてください。彼女自身のタイル ペインティングは少し当てにならないからです。
イリドン
イエロー/ブルー、タイル ペインター、AOE ダメージ
少しこぼれたタイルペインター。 Irridon は、マップ上の任意の 2 つのタイルをイエロー プリズム タイルに変換できます。イエロー プリズム タイルは、歩いたときに接続された方向に 2 つのイエロー タイルを作成します。 3回のブレイクスルーの後、これらは強化されたプリズムタイルに変わり、通常のタイルの通常の接続ダメージの2倍になり、ブレイクスルー6で試合の開始時にドロップできます.彼女のチェーンコンボは、これまでにない2-12タイルコストAOE 攻撃。
光沢のあるルーセント スタッフと授与されたブレードを取得すると、プリズム タイルを通過するたびにゴールド マーシュ マークを取得します。各マークは彼女のチェイン コンボ ダメージに 5% を追加します。 Ascension が最大になると、通常攻撃に 3% が追加され、Aurora Time が始まると開始タイルが Prism Tile に変わります。 Prism Tiles は歩き方に基づいて即席のパスを作成できるため、Chain を長くするのに非常に役立ちます.
マイケル
イエロー、「テレポーテーション」、直線/斜めダメージ、AOE ダメージ
タイルの上を歩くことに関するゲームのルールを完全に無視して、悪者を突き破るほどテレポートしないかなり致命的な女性。彼女のアクティブ スキルは、彼女をマップ上の任意の場所に移動させることができます。彼女とそのスポットの間のすべて、およびその線の隣にあるすべてのものは、320% のダメージを与え、さらに現在の HP の 5% をさらにダメージを受けます。
Breakthrough 6 では、これも通常の歩行としてカウントされ、チェーン コンボを唱えることができます!彼女のチェーン コンボは、160 ~ 170% のダメージを与える古き良き AOE であり、コンボが進むほど AOE が増加します。寡黙の刃を見つけると、毎ターンサイレントサンダーマークを獲得する。彼女が通常攻撃を行うと、スタックが 1 つ消費され、敵の現在の HP の 2.5% の追加ダメージをターゲットに与えます。
フロストファイア
射撃、スナイパー、大砲、ゲーム後半のスパム
戦術ゲームのスノーボールの定義。 Frostfire の Active Skill は、彼女の Chain Combo によってチャージされます。チェイン コンボ スキルを使用するとき、彼女は近くの 3 つのターゲットを選択して 180% の平手打ちを行い、ボンクするターゲットごとに 1 ヴィスを与えます。彼女のアクティブ スキルを使用するには 10 Vis が必要です。このアクティブ スキルは、180% のダメージを与える炎のスペース ロックを 1 つのタイルに投げ、その周囲に 50% のスプラッシュ ダメージを与え、4 タイルの長さの十字形を作ります。
最初はこれは弱くて充電が遅いように見えますが、彼女の Ember Laurel を手に入れると、試合が進むにつれてどんどん激しく連打することができます。各ラウンドの開始時と、彼女がメテオで倒した愚か者ごとに5Visを与えます。試合が終わりに近づいていて、画面に負傷した敵がたくさんいる場合、彼女は驚くほどの速さで全員を 1 人ずつ倒すことができます。
アイシー
赤/青、コンバーター、タイルペインター、対戦車、ライフスティール
変な目で見た人を爆発させないように力をコントロールする派手な眼帯をつけた女の子。彼女のアクティブ スキルは、最も近い青または緑のタイルを取得して赤く塗りつぶすため、主に赤のチームで役立ちます。
これは 4 ~ 5 個のタイルしかペイントできませんが (このスキルを 1 ラウンド使用している場合はさらに 1 個)、2 ターンのクールダウンにより、黄色以外の床を赤く塗りつぶすのにそれほど時間はかかりません。彼女のチェイン コンボは、近くの 2 ~ 3 個のクラスターから 2 つのターゲットを選び、彼女の歩行時間に応じて 170 ~ 190% のダメージを与えます。
ランダム ターゲティングは、純粋な AOE チェーンに比べて常に悪臭を放ちますが、少なくとも打撃は大きくなります。彼女の装備は彼女をヒーラーとタンクバスターに変え、3ラウンドごとにホロウを回す能力を与えます.彼女のチェーン コンボでは、防御を無視して敵から HP を奪い始めます。彼女の他のスキルと同様に、彼女のスパムタスティックなアクティブ ペイントブラシは、彼女がハイスター レッド チームにとって重要であるという理由だけで、彼女をここに置いています。
シャローナ
ブルー/レッド、デトネーター、クロス AOE、テレポーター
信じられないほど危険なテレポート爆弾であるシャローナのアクティブ スキルは、特定の位置にテレポートし、25 タイルの正方形内にいるすべての敵を彼女の上に飛ばして、まったくばかげた 300% のダメージを与えることです。 Ascensions では、これを行うことで Dragontooth Marks の 2 つのスタックを取得し、スプラッシュ テレポートで敵の 1 人が倒された場合、これらを敵に適用して、さらに多くのダメージを与えます。彼女のチェーン コンボには照準が必要ですが、8 タイルのクロス (2 タイルの範囲) から始まり、彼女の隣にいる誰かと一緒にマップの最後に到達するクロスで終わります。
ダメージに関しては、彼女のコンボウォークに応じて 160 ~ 170% になります。彼女の剣、カタナ:紺碧の炎は、ドラゴン トゥース マークを最大 4 回の通常攻撃でスタックするだけでなく、ドラゴン トゥース マークのチェーン コンボ ダメージをマークごとに 5% 強化します。強烈で、率直で、陽気です。
ガブリエル
グリーン、AOE、タイル ペインター、タイル エンハンサー、チェーン スパマー
ガブリエルは、タイル ペインティングのターゲットを色で選ぶという奇妙な人物です。緑以外の 1 つの要素全体を選択すると、その色のすべてのタイルが別の要素に変更され、できれば緑またはその近くのタイルと同じ色に変更されてパスが作成されます。ランダムではありますが、ここで良いロールを取得すると、本当に戦いを好転させることができます.
完全に上昇すると、彼女がペイントする 10 個のタイルごとに強化されたタイルが作成されます。これは非常に迅速に行われるはずです。彼女のチェイン コンボは安く、2 ~ 12 タイルで、完全に歩くと 25 平方の AOE があり、165% のダメージがあります。
彼女のフロストライト オーブにより、彼女は 1 ラウンドでロールオーバーした緑のタイル 6 つごとに強化されたタイルを作成できます。アセンションが最大の場合、強化のために緑のタイルを優先します。運が悪くて希望の色が得られなかったとしても、彼女は少なくとも 1 トンのタイルを強化してくれるので、与えられた色でやり遂げることができます!
カロン
レッド/グリーン、デトネーター、リニア ダメージ、タイル リセット
ハムが大好きな赤と緑のトロッコ。アクティブ スキルは、3 タイル幅の線に 300% のダメージを与える鉄道災害を発生させ、敵をノックバックします。中央の線は 1.5 倍のダメージを受け、赤以外のすべてのタイルは AOE に沿ってリセットされます。
最終的に赤タイルを生成する機会を得ます。彼のチェイン コンボは、実際のスクリーン ワイプ ホラーに比べて AOE が少し不足していますが、信頼できる 160 ~ 165% のダメージを与え、2 つのわずかなタイルを歩くとすぐにトリガーされます。彼らの装備は防御無視のダメージとしてATKのパーセンテージを追加し、タンクをクリーンアップできるようにします.全体として、床が少し赤く見える限り、常に信頼できる非常に堅実なダメージ ディーラーです。
カーリーン
ブルー、コンバーター、テレポーテーション、柱状ダメージ、タイル ペインター
テレポートする青のユニット。彼女の能力は、あなたの分隊を範囲内の任意の 1 つの場所にテレポートさせ、縦列を青くしながら縦列にダメージを与えることです。彼女のギアを使って青いタイルの上を歩くと彼女は強くなり、タイルごとにそのラウンドの ATK がわずかに増加します。
彼女がタイルをペイントし、それらのタイルが彼女を強くするという事実は、彼女の 4 ~ 3 ターンのクールダウンを念頭に置いておいても、すぐに大量のダメージを追加します。彼女を使用して、適切な攻撃位置に到達 (または作成) します。悪い位置で立ち往生していることに気付いた場合は、彼女を使用して、たとえば、適切なカラーパスの範囲内に入る、カラーパスを作成する、または死にたい敵の範囲内に入る.
ミガード

緑/赤、中距離テレポート スパム、AOE ダメージ、マルチターゲット ダメージ、いじめ
Migard は 3 タイル範囲の急速充電テレポートを持っており、敵の隣にテレポートすると、すべての敵が 250% のダメージを受けます。対象が 1 人だけの場合、ダメージは 2 倍になります。それに加えて、ブレイクスルーとアセンションが最大になると、敵を倒すごとに最終ダメージが 15% 増加し、ターゲットを倒すとスキルのクールダウンがすぐに解除されます。ターゲットが豊富な環境では、これはアニメ スタイルのテレポート スパムになります。
これを使用して、単一のターゲットを削除するか、密集した群衆を台無しにすることができます.彼女のチェイン コンボは 4 タイルで開始し、13 で終了し、3 ~ 4 人のターゲットに 165 ~ 180% のダメージを与え、彼女が歩くほど範囲が広がります。
スパイナル ブレードを取得すると、瀕死の (HP が 30% まで) 敵をいじめることができ、チェーン コンボまたはアクティブ スキルを使用すると、100% のダメージでもう一度攻撃します。そして、すでにほぼ確実なキルをさらに保証するかのように、ミガードの ATK 統計よりも少ない HP でこの攻撃を生き延びたターゲットは、とにかく真っ直ぐに死にます.
グロンル
イエロー/グリーン、コンバーター、タイルペインター、コラム AOE、ディスエイブラー
イエロー チームにとって便利な味方である Gronru のアクティブ スキルは、ブレークスルー レベルに応じて、最も近い青と赤のタイルの 4 ~ 5 個をイエローに変えます。アクティブ スキルが 1 ラウンド保存されていれば、少なくとも 3 回ブレークスルーすると、別のタイルが追加されます。彼女のチェーン コンボは、彼女が歩く時間に応じて、最大 3 つの列に 130-140% のダメージを与えます。
スティール フィスト アンド メカ スローンを取得すると、彼女のチェイン コンボは AOE で不運な愚か者を 1 人選び、50% の追加ダメージを与えることができます。
ニキニス
緑/青、コンバーター、タイルペインター、列ダメージ
グリーンチームで活躍するタイルペインター。 Ascensions と Breakthroughs が最大になると、彼女のスキルは最も近い 5 つの赤または黄のタイルを緑のタイルに変え、最大 2 つの強化されたタイルを生成する可能性があります。スキルが最後のラウンドに残っていた場合、追加のタイルもペイントされます。
彼女のチェイン コンボは最初はかなり弱く、1 列に 135% のダメージしか与えませんが、さらに歩くと 3 列に追加され、マップの立派なスラブを 145% のダメージでカバーします。彼女の Northland and Lake Mirror は彼女に Mirror Mark を付与し、戦闘中に彼女が受けた最初のヒットに対して追加の 100% の防御を与えます。アセンデッドすると、アクティブ スキルを使用するたびにこのマークがリチャージされます。彼女を緑のチームに連れて行き、野菜に肉をつけてもらいましょう。
ティアのキャラクター
コノリー
ブルー/グリーン、デトネーター、マップレンジ ヌーカー
赤と黒の衣装からはわかりませんが、クラリネットを演奏するのが好きな恥ずかしがり屋の青緑の女の子です。彼女のアクティブ スキルは、画面全体に 250 ~ 300% のダメージを与えることです。彼女のチェインは少し精彩を欠いており、周囲のランダムな敵セットに 155 ~ 165% のダメージを与えます。最初は 2 人から始まり、散歩の長さに応じて最大 4 人のターゲットになります。彼女の装備により、このチェインは彼女のアクティブ スキルを強化します。
チェーン コンボにより、シバー マークのスタックを最大 5 つまで獲得できます。これにより、アクティブ スキルのダメージが増加するだけでなく、核のトゥースを落とすと、シバー マークと同じ数のターゲットに恐怖を与えます。
イブ
イエロー/レッド、デトネーター、単一ターゲット ダメージ、長距離、スパム奨励
完全に焦点を絞った単一ターゲットの削除ボタン。 Eve の主なスキルは、最も近いターゲットに 20 回もの打撃を与えることで、敵 1 体を完全に破壊することです。
そして犠牲者が途中で死亡した場合、彼女は残りのヒットを十字線の次の貧しい吸盤に費やします。彼女のチェイン コンボは特に遠距離で、最初はプラス シェイプの攻撃で始まり、完全に突破するとボードの端に到達できるアスタリスク シェイプの攻撃で終わります。
彼女がEye Of The Stormのパワーフィストを手に入れると、あなたの分隊が与えるあらゆる種類の攻撃からの10回の打撃ごとに、最も近い敵に100%のダメージを与えます。彼女は、アクティブ スキルの 4 ターンのクールダウンと距離ベースのターゲティングにより、少し使いづらくなっていますが、クールダウンが短い、またはチェインが安価な人なら誰とでもうまく機能します。彼女が攻撃中にターゲットを切り替えたとしても、役に立たないもので彼女のアクティブを無駄にしたくはありません.
ヒイロ
緑/黄、コンバーター、AOE ダメージ
ピンクと赤をこよなく愛する緑/黄のキャラクターで、彼女のアクティブ スキルは真紅の桜と呼ばれています。真紅の桜では、2 つのタイルを選択して緑にペイントできます。これにより、強化されたタイルにも強化されます。これにより、各タイルでマップ範囲のクロス AOE 攻撃も発生し、そのエリア内の敵に 200 ~ 240% のダメージを与えます。これを使用して、より良い歩行パターンを作成したり、たまたま都合の良い列に並んでいる敵を攻撃したりすることができます。できれば両方を行うことができます。
彼女のチェーン コンボは、1 タイルの範囲から 2 タイルの範囲の平均的な小さな AOE 攻撃で、ダメージは 160 ~ 170% です。彼女の剣、カタナ:サカエは、各ラウンドの開始時にデュエルスタンスに入ることを可能にします.彼女の次の通常攻撃は、160% の直接ダメージと 80% のスプラッシュ ダメージを与える 4 タイルのクロスを飛ばすので、彼女が最初に遭遇するのは密集した群衆であることを確認してください。
彼女がアセンションを取得すると、強化されたタイルの上を歩くたびにデュエル スタンスに入り、より頻繁にスプラッシュできるようになり、3 回目のアセンションで ATK がパワーアップし、これは 20% までスタックできます。
ジョナ
レッド/イエロー、大ダメージ、セルフバッファ
かなり単純なガンスリンガーであるジョナは、真昼のスキルで自分自身をバフし、通常攻撃を 15% 強化し、チェーン コンボを 30% パワーアップし、チェーン コンボのために歩く必要があるタイルを減らします (および昇格した場合は他のレッド オーロリアン)。 2.
彼女のチェイン コンボは 3 ~ 4 体の敵に 155 ~ 175% のダメージを与え、彼女が歩いたタイルの数に応じて範囲が広がります。彼女がリボルバーを手に入れると、彼女の通常攻撃は、正午を使用しているときに彼女が撃った相手の周りにある 4 つのタイルに 50% のスプラッシュ ダメージを与え始め、2 つの Ascensions で最初のターゲットに追加の 20% のダメージを与えます。
Bティアキャラクター
ビクトリア
レッド/ブルー、サポート、AOE ダメージ、ヒーラー
禁じられた知識の提供者であり、攻撃的なヒーラーです。彼女は自分の 3 タイル以内 (または 6 回のブレークスルーの場合はマップ全体) にいる不運なターゲットを最大 3 つ拾い、250% のダメージで叩きつけます。範囲内にターゲットが 1 つしかない場合、ダメージは防御を無視します。彼女はブレイクスルーに応じて、与えるダメージの 25 ~ 35% でチームメイトを回復します。
彼女のスキルは、チェーン コンボが与える敵の出血スタックごとにダメージが増加するため、チェーン コンボを行った後に行うのが最適です。チェーン コンボに関しては、160 ~ 180% のダメージを持つ通常の小さな AOE タイプ (12 タイルのダイヤモンドから自分の 2 タイル以内のすべてのものまで) ですが、2 ラウンドの出血スタックを引き起こす能力があります。彼女のブラック トームは、彼女がチェーン コンボで出血している敵を攻撃するたびに、敵が持っている出血スタックごとに敵の HP の 5% を飲み干すことができます。
リーガル
ブルー、デトネーター、ダメージ ディーラー、AOE ダメージ
自己バフ ダメージ ディーラーであるリーガルは、Vis を 10 消費して、通常攻撃とチェーン コンボ攻撃の両方を 20% パワーアップできます。このアクティブ スキルは、通常攻撃を斜めに使用することも可能にし、より多くの悪者を攻撃できるようにします。 3 回のブレイクスルーの後、バフ中に彼が実行するキルごとに、Vis が 2 与えられます。彼のチェーン コンボは、ほとんどの AOE チェーン コンボよりも AOE が小さいですが、160-180% のダメージでより強力にヒットします。
ダークキャスケットの大剣を手に入れると、戦闘開始時にVisを10獲得し、バフなしでラウンドを終了すると、さらに5Visを獲得し、HPの20%が失われるごとに1が追加されます。ブレイクスルーが 6 の場合、クロスで彼の隣にいるすべての敵がそれぞれ 1 ヴィスを与えます。彼は非常にアグレッシブに戦うときに最もうまく機能し、泡立つ狂人のように群衆の中に身を投じます.
フルール
ブルー/イエロー、スナイパー、デスマーカー、大砲
「Good-natuRed Reddiesel Wrench テクニシャン」私のお尻!フルールはアクティブ スキルでターゲットを選び出し、ブレークスルーに基づいて 200 ~ 240% のダメージを与える敵を 1 体だけ引き寄せます。 Fleur's Chain Combo は Active の犠牲者を 2 回攻撃するため、これはいじめの対象でもあります。 2 回のアセンションにより、使用前に少なくとも 1 ラウンド保存すると、ダメージを 35% 増加させることができます。
彼のチェイン コンボは、いじめとは別に、かなり通常のマルチ ターゲット スプラッシュであり、近くにいる 2 人の敵を選択して 145-180% のダメージ攻撃を食らわせます。
アレン レンチを手に入れると、アセンションに基づいて HP が 40 ~ 50% 未満の人に対してダメージが 6% 増加し、アセンション 3 ではこのボーナスが 30 未満の敵に対しては 2 倍になるため、人々をさらに激しくいじめます。残りHP%。 6 つ星のように非常に広い範囲の攻撃がないため、彼は低くなりますが、特にボス戦に使用できる可能性があります。
サリエル
青/緑、コンバーター、ランダム タイル ペインター、ランダム ターゲット ダメージ
頭脳明晰なファイターであるサリエルのチェイン コンボは、複数のランダムなターゲットを選択し、彼女が歩く距離に応じて最大 4 ~ 5 回の攻撃を行います。ターゲットが複数回ヒットした場合、最初の打撃と比較して、後続の打撃のダメージが大幅に減少します (コンボの長さに応じて、最大で半分、最悪で 1/4 に減少します)。
コンバーターとしての彼女のアクティブ スキルは、最も近い 4 ~ 5 個の赤または緑のタイル (ブレークスルーに応じて) を青にペイントすることであり、アセンションを使用すると、最大 2 つの強化されたタイルを生成することもできます。彼女がMurky Wheelを手に入れると、Sariel Marksを最大8スタックまでスタックできるようになり、スタックごとに防御力が12%増加します。彼女はラウンドの終わりにスタックの半分を失うので、打撃を受けられるようにそれらをストックし続けます.恐るべきチェーン コンボとまあまあのペイント スキルが組み合わさって、彼女はここにいます。
ベリル
レッド/グリーン、スクリーンクリーニング、エリア拒否
地雷は戦争犯罪だと誰かがベリルに話すべきだ。彼女の能力は、画面上のすべてのものに一度に 250% のダメージを与えることであり、ボード上の敵が少ないほど強くなります。彼女が装備を持っている場合、彼女のかなり平均的な AOE チェーン コンボは、チェーンを実行するときにクラスター内のクリスタル マインも投げます。
これらのクリスタルは防御を無視し、ベリルの ATK の 40% をダメージとして与えます。特に地雷は敵が移動する直前に生成されるため、ターン フェーズで敵が攻撃できる (そしてつま先を吹き飛ばす!) 位置に意図的に遭遇した場合に非常に役立ちます。 .
Cティアキャラクター
アレイア
緑/青、起爆装置、自己緩衝
かなり使いにくいソードウーマンであるアレイアのアクティブ スキルは、ブレイクスルーに基づいてラウンド 20 ~ 25% の攻撃バフで自身をパワーアップします。次のラウンドまでは、彼女は疲れ果て、そのラウンドの ATK と DEF の 50% の減少という苦痛に苦しみます。 Ascensions を使用すると、バフがアクティブな間、彼女は ATK と DEF 減少の影響を受けなくなります。そのため、とにかくスキルを使用していないラウンドごとにデバフがかけられるため、デバフが彼女を攻撃している場合は、彼女を前進させるのに役立つ可能性があります.
彼女は通常の小さな AOE チェーン コンボを持っており、9 タイルの正方形から 25 タイルの正方形の範囲に移動し、160-170% のダメージを与えます。 Spectral Moon Sword を取得すると、通常攻撃がターゲットの後ろのタイルにも命中し、100% のダメージを与えます。その 50% の一般的な削減は、お尻の大きな痛みです.
神話
グリーン、リニア AOE、単一ターゲット ダメージ
アップグレードの邪魔にならない線形ダメージ ディーラーである彼女のアクティブ スキルは 1 レベルしかありません。 Mythos はすべての Vis (最低 10) をダンプして、選択した任意の方向のターゲットの列を切り裂くことができます。 Vis を消費するほど、消費する Vis ごとに 8% のダメージが増加します。これをチャージするには、彼女のチェーン コンボを使用します。これは 1 つのターゲットにのみ命中しますが、Vis が増加し、彼女が歩くほどダメージが増加し、最大 3 Vis になります。
ダメージは 210 ~ 260% のダメージですが、Vis が 10 タイル歩くたびに 1% の確率で追加の 50% のダメージを与えることができます (最低 30% の確率)。彼女のインターセプター スタッフは、各ラウンドの開始時に 5 ヴィスを獲得し、3 回突破すると、そのラウンドの最初の通常攻撃でさらに 1 ヴィスを獲得し、その 1 回の攻撃で 100% の追加ダメージを与えます。彼女の星のレベルを考えると、悪くはないです。
レクイエム
イエロー、デトネーター、マップ ダメージ、AOE ダメージ
アクティブ スキルがマップ全体に、Vis サプライ全体に対して最小 10 のダメージを与える Vis ユーザー。Vis が 10 を超えるたびに、このスキルに 15% の追加ダメージが与えられます。 6回の突破で、これは敵の防御力の1%を無視します。 Requiem には、典型的な小規模 AOE チェーン コンボ攻撃のより良いバージョンもあります。ダメージ値は通常の 160 ~ 180% ですが、今回はそれで何かを攻撃できた場合、彼女から最も離れた敵が稲妻を食べて、同じダメージを与えます。
規律の槍旗は、各ラウンドの開始時に 5 ヴィスを与え、通常攻撃では 30% の確率で彼女から最も離れた敵をザッピングします。ブレークスルーが 3 の場合、彼女はアクティブ スキルで敵を倒すたびに 2 ヴィスを獲得します。
ウリエル
レッド、コンバーター、カラム バーン、バッファー
ウリエルはオールレッドチームで役に立ちますが、マップ内のすべてのタイルをリセットし、何か良い結果が得られることを期待することで、タイルの構成が悪い場合に他の色を助けることもできます.彼女は赤いタイルを生成するチャンスがあり、少なくとも 1 つの敵タイルを赤く塗ります。彼女のチェイン コンボは通常の種類の縦列攻撃で、1 ~ 3 縦列の厚さで 130 ~ 140% のダメージを与えますが、今回は最大 5 回スタックでき、2 ラウンド持続する燃焼効果が追加されています。
ただし、彼女がリング オブ ファイアを手に入れたら、すべて赤のチームに入れるのが最善です。リング オブ ファイアを使用すると、レッド タイル上の敵に受動的に火を放つだけでなく、フィールド内のバーン アクティブのスタックごとに、仲間のファイア ユニットのダメージが 1 増加します。 .
怒り
イエロー/レッド、スナイパー、砲兵
攻撃力はそこまで高くないですが、かなり使いやすいキャラです。彼女のチェイン コンボは、彼女の近くにいる最大 3 体の敵を拾い上げ、それらに 4 タイルのクロス スプラッシュ ダメージ攻撃を放ちます。ブレイクスルーに応じて、中央に 110-120% のダメージを与え、スプラッシュで 30-50% のダメージを与えます。アセンション 2 では、彼女がアクティブ スキルを使用すると、水しぶきが十字から正方形全体に変化し、斜めにも物を当てることができます。彼女のアクティブ スキルはオーバーロード バフで、2 ラウンドの間、チェーン コンボが最も近い敵に 2 回命中します。
レッドバロンとエースのグローブを手に入れたら、弾丸の予約を開始できます。これにより、使用時にチェイン コンボの最終ダメージを 30% 増加させることができます。彼女はラウンドを開始することで弾丸を予約でき、アクティブ スキルを使用するための 2 つの弾丸と、Fire または Thunder ユニットが Actives を投げるたびに別の弾丸を予約できます。これを使用して、彼女の精彩を欠いたチェーン攻撃をより苦痛なものに変えることができます.
アルケミー スターの最高の 5 つ星キャラクター
6つ星のキャラクターは常に最終目標ですが、ゲームの大部分では5つ星のキャラクターがパンとバターになる傾向があります.いつものように、コンバーターはリストの上位にあることがよくあります。これは、必要な色のタイルが増える =より多くのダメージ、チェーン、チームの他の全員の移動の自由が得られるためです。
特に、いくつかのマップ範囲のクロス ペインターは、6 スター タイル ペインターの中でも誇らしげに立つことができます。彼らは、5 スター ペインターの一部が優れている完全なタイル数ではなく、タイルの強化と戦術的な配置に重点を置いていることがよくあります。強調することはできません。チームにペイント ローラーを配置することの重要性を十分に理解してください。 5 つ星には非常に多くのタイル ペインターが含まれているため、S はプレイヤーにとってありがたいことに最も幅が広いです。
Sティアキャラクター
オディ
グリーン、サポート、マップ範囲範囲の AOE とデバフ、コラム ダメージと毒
400% のダメージとスローを伴う 49 タイルの AOE で始まる AOE アクティブ スキルを備えた特に無差別なデバフ スリンガー。 5回のブレークスルー以降、攻撃はマップ全体をカバーします.彼女のチェーン コンボでさえ毒を与え、1 ~ 3 行に 120 ~ 140% のダメージを与えます。
彼女の Modified Cable を使用すると、特に 70% の確率で通常攻撃を行うと、敵にさらに多くの毒を詰め込むことができます。 Ascension 3 では、彼女は斜めに攻撃できます。つまり、ターゲットの周りを走り回ると、ターゲットは完全に病気になります。結局のところ、毒はパーセンテージベースのダメージのおかげでボスも溶かすので、そのような戦いのために彼女を特別に連れてくることができます.ただし、明らかな理由で免疫がある人は除きます。
Pact
Green/Red, Converter, Tile Painter
A bad friend to Red teammates in spite of her sub-element, though Greens love her. Her Active paints the nearest 4 Red tiles Green. At Breakthrough 5 this adds another tile and lets her paint one last tile if she sat on her skill for a round, going up to a total of 6 tiles. With Ascension 3, she can also put down a pair of enhanced tiles.
Her Chain Combo is rather wonky, with an X-shaped AOE starting at 8 tiles total and ending with reaching the edge of the map. It also deals 155-180% damage and slows everyone sitting on Green tiles for two rounds. When her Ever-Returning Ring eventually comes back to her, she starts eating 3% of a slow-marked enemy’s max HP after she kills them. At Ascension 2, there is also a chance a tile next to the enemy that just got eaten is enhanced.
Mia
Yellow/Red, Sniper, Map-range Bullying, Multi-Target Damage, Spammer
Crazy, crazy, crazy! Too bad keeping Mia at arm’s length is easier said than done, considering her Active Skill is a map-covering 200-250% damage (depending on Breakthrough) AOE attack that also hits harder the more badly injured her victims are, up to an extra 100%. This also charges frightfully fast at 2 rounds. Her Chain Combo on the other hand is a bit more boring, dealing 150% damage to 2-4 nearby enemies depending on how long her combo is.
Her Black Spider’s Heart allows her to gain a Soul stack everytime someone dies from her Active nuke, maxing out at 5 stacks. She can use those stacks to explode people for 100% damage. With Ascension 3, her normal attacks hit 3% harder, and her Chain combos for 5% extra, for each stack.
Maggie
Red, Converter, Chain Spammer
Mixing shy, timid and clumsy with explosions tends to mean an unhappy surprise for both the enemy and Maggie herself when they fight each other. Her Active is a map-spanning cross that not only causes 450% damage to enemies caught in the area, but also paints the tiles it hits Red. As for her Chain Combo, it’s a small 145-165% damage AOE starting with an 8 tile cross and ending in a 16 tile asterisk.
Her Leather Bomb Bag is a simple piece of kit, allowing her to increase her Chain Combo Damage by 5% after every 8-10 combos depending on Ascension level, and at Ascension 3, lets her trigger combos 1 tile sooner. Explosions are an easy solution to loads of difficult problems, and Maggie users know this.
Barbara
Red, Support, Nuker, Disabler
A tiny idol singer who plays the giant buzzsaw. For a support, her skills are extremely biased towards murdering loads and loads of enemies at once. Her slow-to-charge Active Skill hits the entire board for a whopping 550% damage (though do take into account her statline as a support), stuns everyone on a Red tile, and with Ascension 2 has a 35% chance to stun everyone on any other tile.
Pair her with a Red tile painter and laugh. Her Chain Combo is a normal medium AOE attack, with 145-160% damage reaching from a 12 tile diamond all the way to a 25 tile square. She starts being a support only after she gets her Modified Buzzsaw and Ascension 3, as she can now give everyone 5% extra damage against enemies sitting on Red tiles. Without the Ascension though, Barbara is the only one affected.
Barton
Blue/Yellow, Converter, Cross AOE Damage
War! What is it good for? To Barton, everything! This war-thirsty maniac’s Active Skill deals knockback and 450% damage to enemies within a cross AOE reaching the map edge, and every tile in that cross gets turned Blue too. This takes a slow 5 turns to charge, but Breakthroughs can Reduce that to 4 turns with a pre-charge.
His 155-160% damage Chain Combo starts out with a puny 9 tile square AOE, but a map-range cross gets added to it with a longer combo. Once he gets his Sherman SMG and Barton Knife, he can now inflict 80% damage diagonal normal attacks. With Ascensions, his attacks can deal extra damage to those hit by his diagonal normal strikes, which slap a Firepower Mark on them for two rounds.
Beverly
Yellow, Converter, Cross Damage, Tile Painter
A useful ally to all Yellow characters, and a good-for-nothing snooty rich snob to all Red characters. Her Active Skill takes the nearest 4-5 Red tiles and paints them Yellow. With Ascensions this also lets her generate up to 2 enhanced tiles, and with Breakthroughs allows her to pump out one more Yellow tile if she sits on this skill for a turn. Her Chain Combo starts out with damage to a row and ends with a map-spanning cross, the damage going up from 130-135%.
Her Thunder Spear lets her Chain combo explode any target it hits, dealing damage to any two (only one if not levelled) random enemies next to the victim. With Ascension 2, this explosion gets a range of 2 tiles, but still only hits two targets. The level of this skill affects damage Reduction per explosion, being completely negated at max level.
Faust
Red/Blue, Converter, Tile Painter, AOE Damage
An intellectual and charismatic man, and just like any sufficiently charismatic leader, probably should not be trusted. His Active Skill is exactly the same as Beverly’s, except instead of turning Red tiles to Yellow, it turns Yellow tiles to Red. He turns the nearest 4-5 Yellow tiles to Red, and at Ascension 3 can also add up to 2 enhanced tiles. At Breakthrough 2, sitting on this ability for a turn lets him paint another Yellow tile Red.
His Chain Combo deals 150-165% damage from a 12-tile diamond to a map-spanning asterisk. His Nameless White Suitcase lets him inflict Fright on enemies with a 12% chance per enemy each start of the round, and at Ascension 2, causes Frightened enemies to go pop in a 9 tile square when killed, dealing 10% max HP as splash damage.
Kleken
Blue, Converter, Tile Painter, Asterisk AOE
A relatively simple tile painter, at least before he gets his gear. Kleken’s Active turns 4-5 of the nearest Green tiles to Blue depending on Breakthrough count, and with Breakthrough 2 lets him paint another Green tile Blue if he sits on his ready skill for a turn. At Ascension 3, this can also generate a pair of enhanced tiles.
Their Chain Combo is a 155-165% damage AOE attack starting from an 8 tile cross to a map-range asterisk depending on combo length. He gets a bit more complex after getting his Illusory Tentacle, which allows his Chain Combo to inflict Fright for a round against any enemy at 80% or below HP right next to him in a 4 tile cross. With Ascension 2, killing a Frightened enemy also scares the heck out of their buddies, inflicting fight on them too in a small cross pattern. Few things are scarier than getting scammed into a wall of tentacles.
Corax
Blue/Green, Detonator, AOE, Heavy Damage, Teleporter
A rather icy assassin who once was a surgeon, it’s no wonder he knows where to hit people for a sure kill. His Active Skill allows him to teleport anywhere, and anything in a rectangle between him and the destination takes a hit. A smaller rectangle made by a shorter distance teleport means more damage, up to 600% with 3 Breakthroughs. You have the option to either hit lots of enemies at once, single out a nearby enemy for deletion, or just use it to get yourself in a better position and take the damage you cause as a happy bonus.
His Chain Combo has a small AOE, from a 9-tile square to a 17-tile asterisk, with 155-175% damage. His Arctic Scalpel turns his normal attacks into 2 strikes with 60% damage each, with a 20% chance to deal another 50% damage per blow. The more combos, the bigger bonus chance, going up from a pathetic .5% to a decent 50%.
Nemesis
Yellow, Converter, Tile Painter
Another one with a map-ranged cross tile painting Active Skill, this time turning tiles Yellow and dealing 450% damage and some knockback. Her Chain Combo is pretty much the same as Mia’s, dealing 150% damage to 2-4 enemies depending on her walk.
With her Blade of Judgement:Justice weapon, her attacks give her Judgement Marks that increase her defense by 10% each. Initialyy, they vanish at the end of the round, but after Ascension 3 she gets to keep half her stacks and they increase ATK by 3% to boot.
Sikare
Green/Red, Converter, Tile Painter, Multi-Target Attack
It seems a lot of 5-star converters like painting crosses. For Sikare, she paints hers Green with the usual 450% damage and knockback. Her Chain Combo is a bit meh, dealing 120% damage to 2-4 nearby enemies. You have to be a bit careful using her Faria the Black Box item, as it triggers the first time she attacks.
She deals an extra 100% damage and at Ascension 3, adds a defense ignoring 5% based on the target’s current HP. Try to make sure you hit something important with that. Other than that, use her for the big tile painting coverage.
A TIER CHARACTERS
Philyshy
Blue/Red, Support, Teleporter, Healer
While having very little to show for in terms of murder power, Philyshy is an extremely dedicated healer. Her Active Skill can teleport her to anywhere you want while healing the team for 250% of her own ATK. Teleporting into a crowd also gives additional healing, 10% for every bad guy within a 25 tile square of her.
At Ascension 2, she also gets a shield equal to a third of her HP and Breakthrough 5 increases the tile range to 49 tiles square and plops an extra 5% healing per nearby enemy. When she gets the rather bombastically named Darkchaser the Rapier, she immediately heals the team for 40% of her ATK plus 4% of their lost HP at the start of every round.
At Ascension 3, she gets angrier and angrier the more her teammates are dinged up, with her ATK going up by 1% for every 5% her teammates’ HP is missing. This absolute devotion to healing means you’re giving up damage power if you use her, but sometimes you just need a specialist.
Dawn
Green/Yellow, Sniper, Map-Range Attack, Multi-Target Attack, Healer
Another sniper whose Active Skill isn’t particularly snipy, though if you were blind like her and put into a fight you probably need some kind of attack that doesn’t need aiming anyway. She just straight up deals 200% damage to everyone on the map, though at Ascension 2 she hits twice if she hits only a maximum of two foes.
Her Chain Combo hits for 155-165% damage, and hits 2 to absolutely everyone within a 49 tile square. Her Chime Staff lets her mark targets with her Active, and once marked, hitting them with Dawn’s Active or Chain heals the team for 10% of the damage she caused, eating the mark. At Ascension 3, the attack increases by 25% instead if the whole team is at full HP. A whole load of indiscriminate AOE puts her up here.
Cuscuta
Green, Sniper, Multi-Target Heavy Damage, AOE Damage, Enemy Teleport
A multipurpose character capable of doing decent AOE and displacing specific threats. Her Active Skill lets you pick one enemy from anywhere (Or within three tiles of her without Breakthrough 5) and slam them with 450% damage. If the enemy only sits on one tile and isn’t immune to knockback, you can also choose where to push them to.
You can either push them within your murdering range to finish them off, or away from you if they’re too much of a threat to deal with at the moment. At Ascension 3, this skill also makes a marked target explode when killed for 40% DEF-ignoring splash based on Cuscuta’s ATK, within a 9 tile square, though you also need her gear to make it work. Her admittedly expensive Chain Combo has extremely wide range, dealing 130-150% damage, with longer walks increasing the target size from a measely 3 enemies to every poor idiot within a 49 tile square.
Her gear, the WitheRed Flower, allows her to throw Dismember Marks at any enemy she hits with her Chain combo, up to 5 marks. The 5% extra damage per mark is nice, since her natural Chain percentage is a bit low to make up for the big coverage. At Ascension 2, normal attacks have a 30% chance to mark enemies too.
Noah
Blue, Support, Shield, Row Damage, Healer
Noah does well with Blue tile-painters with an emphasis on tile count instead of tactical color placement, as her Active Skill gives 8-10% (based on Breakthroughs) of her HP as shields for every Blue tile currently on the field for 1 round. At Ascension 2, her defense also goes up for a round by 50%.
She has a very simple but wide-reaching Chain Combo, damaging 1-3 rows of bad guys for 130-145% damage. Her gear also turns her into a proper healer, with her Hope and Frozen Shards converting 30% of any remaining shields to HP when they vanish. With Ascension 3, any currently existing shields also make Noah’s defense go up by another 50%.
Schwartz
Yellow, Sniper, Map-range Damage, Asterisk AOE Damage
This old man lived this long for a reason. His Active Skill covers the entire map with a 300% damage attack, with an extra 10% damage based the HP the enemy has at the moment. At Breakthrough 2, this instantly kills anything that isn’t a boss and has less than 10% of their max HP. At Ascension 2, he also hits harder, with an extra 5% of his defense calculated as damage.
His Chain Combo is simple, hitting for 155-165% damage towards an AOE starting at an 8 tile cross to a map-range asterisk. When he pulls out his Sovereign’s Blade, his defense goes up by 6% for every character you deployed belonging to the nation of Lumopolis, or anyone Yellow for that matter. At Ascension 3, this also gives out 6% ATK.
Hydrad
Blue/Red, Support, Team Buffer, AOE Damage
A fairly straightforward buffer for Blue teams, Hydrad’s Active Skill allows Blue element teammates to trigger their Chain Combos twice on the round it is activated in. The second Chain combo uses 70-85% of Hydrad’s ATK as damage rather than the teammate’s own ATK stat based on Ascension. The Chain combo is a fairly normal medium AOE, doing 155-165% damage and going from a 9 tile square to a 25 tile square depending on combo length.
His Shadow Wolf Elixir gives him one Wolf Mark at the start of every round. This allows him to act like a cactus, slapping his first attacker for the round with a 100% damage def-ignoring counterblow. Normally, all marks are cleaRed at the end of the round, but with Ascension 2, this gets negated and he can store these marks.
Istvan
Red/Blue, Support, Asterisk AOE Damage
Istvan’s Active Skill is a lot like Hydrad’s but for Red teams, doing the same double Chain Combo buff for any Red characters on the team. Even the damage numbers are similar, with the second Chain Combo proc doing from 70-85% of Istvan’s ATK stat as damage rather than the teammate doing it.
Similarities end here, with his Chain Combo having a decent AOE starting from a 12 tile diamond to a map-range asterisk, with 150-165% damage. His Shepherd’s Staff also allows him to cause a 5% ATK debuff to enemies with his Chain Combo, albeit with a different AOE of a 9 tile to 25 tile square depending on Ascensions.
Louise
Green, Support, Buffer, AOE Damage
Little Blue Riding Hood has Green eyes and that’s good enough to set her to Green element. Her Active Skill lets all her Green element teammates trigger their Chain combos twice, with the damage of the second Chain combo being based on 70-85% of Louise’s ATK rather than the attacker’s own stats, based on Ascensions. Her Chain combo is a simple small-AOE attack with 150-170% damage in an area from 9 tiles square to a 16 tile asterisk.
Getting her Prophecy and Fairy Tale turns her into a healer too, allwing her to heal the team for 60% worth of her own max HP and increasing her DEF by 100% everytime you trigger Aurora Time. Upgrading to Ascension 2 Reduces the DEF buff by 50%, but makes it last 2 rounds. Keep her in a Green team for maximum catharsis.
B TIER CHARACTERS
Taki
Red/Green, Detonator, Artillery, Row Damage
A detonator who seems to act a bit more like a sniper in terms of ability. Their Active Skill throws fire at a tile, exploding in a cross and dealing 400% damage to the center, and 80% damage with the splash. At Breakthrough 2, it paints the tile Red and enhances it, and at Ascension 2 it Burns its victims.
The Chain Combo is a basic row attack, from 1-3 rows thick and dealing 130-145% damage. His Serrated Blade:Ender For All applies a Burn mark at whoever has the highest HP percentage left at the start of a round, and this lets Taki hit them for an extra 10% damage. With Ascension 3, every kill on a Burn marked target increases his ATK by 3%, maxing out at 15%.
Bonacie
Yellow/Blue, Support, Cross AOE Damage, Row Damage
Bonacie’s Active Skill lets her aim an attack in a certain direction and every single tile mook gets shoved in that direction, and the whole board eats 250% damage. She doublecasts this if there are only two enemies left to hit, at least at Ascension 3. Her Chain is a basic row attack, from 1-3 tiles thick and dealing 130-145% damage, and is expensive.
She only really starts being a proper support after getting her Celestial Band, which gets her a Divine mark on battle start or when using an Active. This increases her DEF by 120% for a single blow, then it vanishes when she takes a hit. At Ascension 2, this mark also gives Yellow teammates a 10% damage increase.
Benny and Curo
Red/Green, AOE Damage, Heavy Damage
A pair of buddies so tightly knit they count as a single character for the purposes of gameplay. Their Active Skill lets you mark a tile. Make sure you take the Chain Combo’s AOE into account when doing this, as walking for twice the amount of tiles needed for a Chain Combo lets the Chain Combo drop not just where you land, but also on the marked tile.
The Chain combo itself has smaller AOE than normal to go with its short walk distance requirement, starting with a 9 tile square and ending with a 17 tile asterisk, with damage going from 140-155%. Getting Benny her Firelash guns and Curo her Lightspeed sword allows their normal attacks to do a fat 60% extra damage to enemies sitting on Red tiles. Rather difficult to use, but can hit hard in the right circumstances.
Keating (And her buddies)
Yellow, Support, Taunt, Debuffer
These four are living proof that kids are a cruel bunch. Most of Keating and her friends’ attacks revolve around making fun of people. Their Active Skill is to put a clone of themselves on a tile and have them laugh at the enemy maliciously, drawing aggro in a 49 tile square around it. They get slowed for 2 rounds if they have 5 Laughter Marks on them.
At Breakthrough 5, it only takes 4 marks to slow the enemy, and 6 marks paralyze them outright for a round. You get Laughter Marks via their Chain Combo, which inflicts them on the targets. They pick up to 3 targets within a 49 tile square and hit them for 120-155% damage, and slap 1-3 Laughter marks on them up to a max of 8 per target.
With Ascension 2, the Laughter Marks also increase the damage of their Chain combo. Once they get the Scroll of Chanting, they allow other Yellow units to hit for 1 extra damage with their normal attacks for every mark on the target.
With 3 Ascensions, killing a target who has a mark slaps 1 extra mark on every enemy on the map. Pair these jokesters with a targeted AOE damage dealer (or anyone with a hard-hitting AOE Chain Combo) for a good laugh.
Vivian
Yellow/Blue, Sniper, AOE Damage, Multi-Target Damage, Buffer
A rather indiscriminate sniper whose Active Skill has no right being called Defensive Counterstrike. It’s a 320% damage AOE attack that starts off with a 49 tile square, but at Breakthrough 5 covers the whole map.
At Ascension 2, this also makes Yellow units’ Chain combos cheaper by a tile. She also paints one enemy tile Yellow, but there are far better options for tile painting. Her Chain Combo hits 3-5 enemies for 140-170% damage, and she picks within a 49 tile square.
For some reason she thinks she doesn’t need a lead apron for her Radium Rapier, though it does allow her to buff her Yellow teammates for 6% of her own ATK for a round whenever her Chains hit all enemies. Mixed with her expensive Chain, this makes it difficult to get the buff unless the enemy force is rather tiny.
At Ascension 3, she also applies this to Blue units and anyone from the Illumina Federation, and it lasts for 2 rounds.
C TIER CHARACTERS
Dayna
Yellow/Green, Detonator, Columnar AOE Damage, Tile Painter
A girl whose proficiency is in facilitating back-alley backstabbing and electrocution. Her quick-charging Active Skill carries a fairly tiny AOE, about on par with those of Chain Combos, starting with a 9 tile square and maxxing out at a 13 tile diamond depending on Ascensions. The damage is 250%, and at Breakthrough 2 paints an enemy tile Yellow.
Her Chain Combo is a columnar attack, dealing 130-145% damage to a column 1-3 tiles wide. Her Razor’s Edge knives allow her to support the team at Ascension 3, turning its self buff to a team buff that lets the whole team do an extra 5% damage to all enemies sitting on Yellow tiles. A support, tile painter and AOE damage dealer all at once, she’s flexible in many situations but you might be better off with a more specialized character. After all, that’s why you have 5 slots in your team.
Leona
Red, Sniper, Random Multi Target Attack, Asterisk AOE
A hard hitting damage dealer who doesn’t like people sitting next to Red tiles, though she needs to aim better. Her Active Skill hits random enemies 5 times for 90% damage per blow, and she hits them more for every Red tile next to them. Useful when paiRed with a Red tile painter, but that random targeting puts her down considering there are so many characters with proper AOE attacks.
Her Chain Combo is a simple affair with very small AOE, starting from a 9 tile square to a 16 tile asterisk, with damage from 150-170%. Even her gear is simple, the Nibelung’s Ring gives her normal attacks more pepper, adding a 75% chance to do a Red Dragon Attack for 50% of her normal attack’s damage. At Ascension 2, this also slaps a Burning stack on the victim for 2 rounds.
Regina
Red/Yellow, Detonator, Map-range Damage, Column Damage
A rocker who likes making a flashy show, but sometimes too much flash and not enough speed can cause headaches. Her Active Skill is a good ol’ map-spanning kaboom dealing 350% damage and knockback to absolutely everyone, though chargeup is very slow. She also only has two levels of Chain combo instead of the usual 3, dealing 105-110% damage to 1-3 columns. For something that starts at a 5 tile cost, this is just plain abysmal.
Once she gets her Electric Guitar, her Chain Combos deal up to another 100% damage, hitting harder against closer targets, though it doesn’t give any bonus at all past 3 tiles. At Ascension 2, the range of the bonus is slightly increased, as this turns into a 49 tile square. Sounds like a lot, but remember that she only gets a 3 column wide attack so at most this adds 6 extra tiles to her bonus range. Very weak without her gear, and even then she’s a bit hard to use.
Robyn
Green/Yellow, Detonator, Artillery, AOE Damage
Her Active Skill lets her reach out and touch anyone across the map, selecting an area to bombard with 250% damage to an area 9 tiles square to 13 tiles in a diamond depending on Ascension. At Breakthrough 2, it also enhances an enemy tile. Average cooldown and lackluster coverage, and there are better tile enhancers around.
She gets a fairly standard Chain Combo, dealing 150-175% damage to an area, starting with a 12 tile diamond and ending in a 25 tile square depending on combo length. Robyn’s Straight Pipe increases her damage by 5% against any bad guys sitting on Green tiles. At Ascension 2, this applies to everyone.
Vice

Blue/Yellow, Sniper, Multi-Target Attack
Ah Vice, the face of Alchemy Stars and the tutorial girl. An archer with a thing for pray and spray, you’re praying she’d spray something important most of the time. Her Active Skill hits a random set of enemies 5 times for 80% damage, and shoots them once more for every Blue tile next to the target. Her Chain Combo deals 140% damage to 2-4 nearby foes, simple enough.
Once she gets her Longbow:Focused Rain, she gets Locking Marks everytime she hits someone. Her damage goes up by 2% for every stack, but this is cleaRed at the end of the round so it’s usually her last blow that hits hardest. At Ascension 3, these stacks also increase her Chain Combo’s damage by 4%. If only she let us pick her targets.
And this ends our tier lists for 6 and 5-star Aurorians. We hope this helps you make picks for your team (definitely get a Converter and teammates that use their tile color). Don’t hesitate to leave a comment below!