Among Gods Tier List (2022 年 11 月):ベスト ヒーローの完全ガイド
おかえりなさい、ヒーロー!
神々の間 にはたくさんのヒーローがいて (執筆時点で全部で 71 人)、それぞれに役割があります。そして必然的に、一部のヒーローは特定の役割で他の人よりも優れています.そのため、このティア リストのスラッシュ キャラクターの内訳を思いついたのは、誰を使用するかを判断するのに役立つだけでなく、各ヒーローの個人的なランキングも同様です.
注意事項と制限事項
始める前に注意すべき点がいくつかあります。
Bレアリティのヒーローはここに含まれません。 Among Gods のようなヒーロー コレクターの経験則として、一般的な名前のヒーローはまったく使用する価値がありません。彼らの唯一の本当の役割は、他のヒーローの餌食になることです.

ヒーローは主な役割によってのみ分けられます (戦士/戦車/暗殺者/レンジャー/賢者/魔道士)、専門ではありません。これはあまりにも多くの分裂を生み、おそらく誰もが*何か*で最高であるというシナリオにつながり、それらをランク付けする目的を無効にします.
すべてのヒーロー スキルには 3 ~ 4 のレベルがあり、数値の増分は 1 / 2 / 3 / 4 として示され、各括弧はそのレベルを表します。たとえば、レベル 1 で 100% のダメージを与え、レベルごとに 10% 増加するスキルは、100% / 110% / 120% / 130% として示されます。アップグレードが直線的でない場合は、個別に示されます。スキルの進行にばらつきがある場合 (つまり、レベル 2 と 4 でダメージが増加し、レベル 3 で持続時間が増加する)、各レベルを個別に示します。スキルは、レイジ、1、2、および 3 スキルとも呼ばれます。
関連: Among Gods ビギナーズ ガイド:伝説のヒーローの中で自分の地位を獲得するためのヒント、コツ、戦略
スキルを使用するヒーロー自身を指すスキルの場合、キャスターという用語を使用します。 例えば、「緑の森のジョーの攻撃力が20%アップ」ではなく、「キャスターの攻撃力が20%アップ」と言います。キャスターという言葉を使わないのは、攻撃を受けたターゲットがバフを得るような印象を与えるなど、スキルに関するあいまいな表現を避けるためです。
統計をプレビューする方法がないため (いいえ、基本統計でさえありません)私が知っていることですが、このティアリストはヒーローのスキルのみを念頭に置いて作成されます. ヒーローをプレビューする方法もありません いくつかのあいまいな言葉のスキルを理解しようとするため、常識を使っていくつかのスキルを最大限に理解しようとしました.これらに間違いがあれば、あらかじめお詫び申し上げます。

最後に、すべての階層リストと同様に、これは主観的なものです。 あなた自身の経験は異なる可能性があり、おそらく異なるでしょう。使いたい人を使うのを止めるものは何もありません (コレクター タイプのゲームでは、これがおそらく唯一の最善のアドバイスです)。
そうは言っても、これがAmong GodsのBレアリティ以外のすべてのヒーローのティアリストです.
ウォリアーティアリスト
| S | エドワード |
| A | ブーディカ、アーサー、スパルタクス、宮本武蔵 |
| B | シャン・ユー、クー・フーリン、ツタンカーテン、アルフレッド |
| C | ツタンカーメン、森吉成 |
S ティア
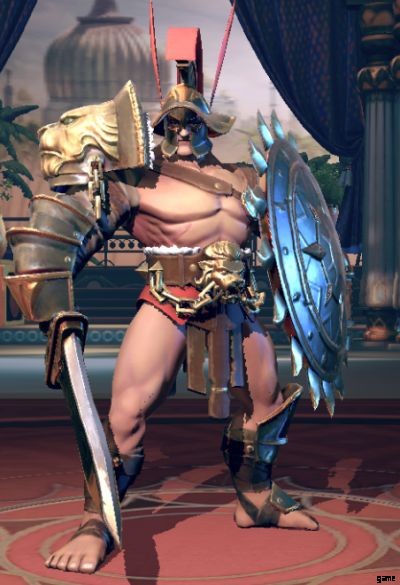
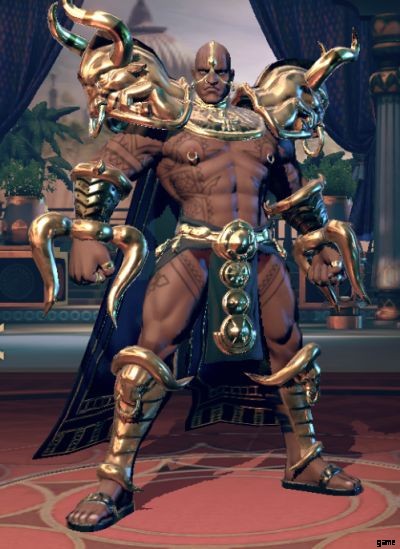
エドワード

SS コラプト ウォリアー/AOE
| 大規模な抑圧 | 血の盾を獲得 、ダメージ抵抗が 30% 増加し、クラウド コントロールに対する耐性が付与されます。詠唱者の攻撃力とリーチ レーティングを 8 秒間 25% 増加させ、敵に 252% の物理ダメージを与えます。 レベル 2: それぞれ 呪われた ターゲットはキャスターに5%のATKとリーチレーティングを与える。 レベル 3: 最も遠い呪われた 敵はキャスターの前にテレポートします。 レベル 4: ダメージが 297% に増加。 |
| レーキ | 呪われた敵を無効化して沈黙させる または最大 HP が 5 秒間 35% / 40% / 45% / 50% 未満。ヒーローは レーキ の影響を受けません 12 秒に 1 回以上。 |
| 血の盾 | 呪い ランダムな敵に8秒間、205%の物理ダメージを与え、ヘイストを30%減少させ、毎秒20%の攻撃力をダメージとして与える。キャスターは血の盾を獲得 5秒間。 レベル 2: それぞれ 呪われた 敵はエドワードのダメージ耐性を 5% 増加させました。 レベル 3: キャストすると、この効果の持続時間は、それを持つすべての敵に対して更新されます。 レベル 4: 初期ダメージが 243% に増加。 |
| 戦争の枷 | 呪い 戦闘開始時に最も攻撃力の高い敵に 141% の物理ダメージを与え、詠唱者のヘイストを 8 秒間 30% 増加させます。 レベル 2:呪い 追加のターゲット。 レベル 3: ヘイスト効果が戦闘中持続するようになりました。 レベル 4: ダメージが 170% に増加。 |
実在のエドワード・ザ・ブラック・プリンスがこの装備を持っていたとしたら、彼が百年戦争中に多くの成功を収めたのも不思議ではありません.
神々のバージョンのエドワードは戦場の巨人であり、彼の呪いで敵の階級の間に不和の種をまきます それは彼の敵を弱め、彼に力を与えます。これらの呪いは、エドワードにその場しのぎの AOE 効果と、強制テレポートを介して高 ATK/低 DEF の敵を狙撃する方法の両方をもたらします。メイジ、私はあなたを見ています。
戦闘が長引けば長引くほど、そしてエドワードを生かしておくことができる時間が長ければ長いほど、エドワードは強くなります。十分なサポートがあれば、理論的にはすべての敵ユニットに呪いをかけることができ、エドワードになんと25%のパッシブダメージ耐性を与えることができることに注意することが重要です.呪われた敵は、黒太子の猛攻撃の前に萎縮してスキルを使用できなくなり、さらに弱体化します。
Aティア
ブーディッカ

S ジャスティス ウォリアー/タンク
| ケルトの怒り | 敵に 5 回ヒット:4 回のヒットで 102% の物理ダメージを与え、最後のヒットで 229% の物理ダメージを与え、ターゲットを 2 秒間ノックダウンします。このスキルを使用すると、 ビジョン も指揮されます それを使用する。 レベル 2: このスキルを使用すると、キャスターの最大 HP の 5% も回復します。 レベル 3: 4 ヒット コンボ ダメージが 1 ヒットあたり 117% に増加。最終攻撃ダメージが 270% に増加。 レベル 4: このスキルを使用すると、キャスターの最大 HP の 10% も回復します。 |
| 流血 | キャスターは2回の通常攻撃ごとに280+35% ATK / 1800+45% ATK / 2400+55% ATK / 4000+60% ATKで回復します. |
| 復讐心 | ビジョンを召喚 最も遠い敵の位置で戦闘が開始され、着弾時に AOE で 61% の物理ダメージを与えます。 ビジョン ブーディカのステータスの 60% を持ち、336% のダメージを受けます。アクティブなビジョンがあるときにリキャストしたとき 、現在アクティブな ビジョン が消費され、術者は別の ビジョン を召喚する前に 300 レイジを獲得します。 ビジョン Boudicca のスキルを使用できますが、自分で怒りを得ることができません。 レベル 2:ビジョン 264% のダメージを受けるようになりました。初期ダメージが 75% に増加。 レベル 3:ビジョン 216% のダメージを受けるようになりました。 レベル 4: 初期ダメージが 94% に増加。 |
| 防御の壁 | 体力が50%以上の間、術者は15%のボーナス物理耐性を得る。 レベル 2: ビジョン 死ぬと、詠唱者は最大 HP の 5% を回復します。 レベル 3: 物理耐性バフが 35% に増加しました。 レベル 4: ビジョン 死ぬと、詠唱者は最大 HP の 10% を回復します。 |
はい、このゲームの Boudicca は 2 つの C で綴られています。それが、彼女の名前がいくつかの歴史書でつづられた方法です。しかし今回は、スタンドも持っています。 ビジョン。
Boudicca のキットは彼女の Vision を中心に展開しています。彼女がそれを使用すると、彼女のレイジ スキルが複製され、ダメージ出力が大幅に向上します。ブーディカに他の攻撃スキルがあればビジョンが壊れてしまうが、それはそれでとてもいい。レイジ スキルの複製がなくても、彼女のビジョンは追加のターゲットと気晴らしとして機能します。十分に長く生きていれば、彼女がスキルをアクティブにするための最後の激怒として機能します。
アーサー

S ジャスティス ウォリアー/タンク
| 王の旋風 | 周囲の敵に 92% の物理ダメージを 6 回与える。キャスターは、ヒットごとに与えられたダメージの 50% を回復します。 レベル 2: ダメージが 105% に増加。 レベル 3: キャスターはスキルの持続時間中、クラウド コントロールの影響を受けません。 レベル 4: ダメージが 105% に増加。 |
| 流血 | キャスターは2回の通常攻撃ごとに280+35% ATK / 1800+45% ATK / 2400+55% ATK / 4000+60% ATKで回復します. |
| エクスカリバーの力 | 82% の物理ダメージの 3 ヒットを与え、その後 132% の物理ダメージの最終ヒットを与え、ヒットしたターゲットの攻撃速度を 5 秒間 25% 低下させます。 レベル 2: 3 ヒット コンボのダメージが 92% に増加。最終攻撃のダメージが 153% に増加。 レベル 3: 攻撃速度デバフの持続時間が 7 秒に増加。 レベル 4: 3 ヒット コンボのダメージが 107% に増加。最終攻撃ダメージが 179% に増加。 |
| アバロンの光 | アーサーは戦闘開始時に 10 秒間、40% / 60% / 80% / 90% のダメージ耐性を獲得します。 |
アーサー王は、彼の希少性と、ほぼすべての状況で彼が輝くことを可能にする単純でナンセンスなキットによる堅実な統計の利点を持っています.彼のレイジ スキルには、ダメージを与えることと、与えられたダメージのかなりの部分を回復するという 2 つの目的があり、彼の 90% のダメージ耐性は、フロントロードされた攻撃が彼の前で確実に崩壊することをほぼ確実にします。
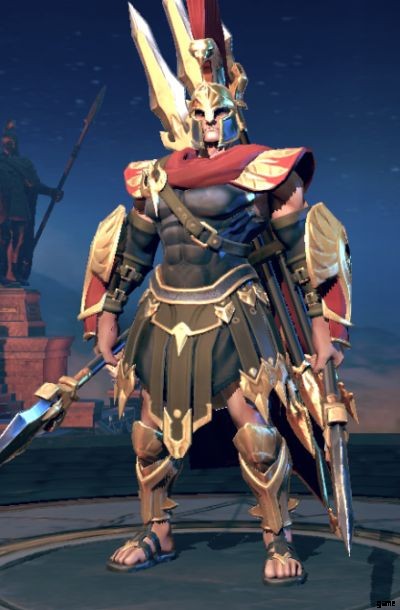
スパルタクス
S ジャスティス ウォリアー/タンク
| 永遠の抵抗 | 近くの敵に 182% の物理ダメージを与え、スパルタカスに 耐性 を与えます 15秒間バフ。 抵抗 20%のクリティカル率とクリティカルダメージを与える。 レベル 2: キルまたはアシストを獲得すると、レジスタンス バフの持続時間がさらに 10 秒長くなります。 レベル 3: バフが 25% のクリティカル率とクリティカル ダメージを与えるようになりました。 レベル 4: バフは 30% のクリティカル率とクリティカル ダメージを与えるようになりました。 |
| 流血 | キャスターは2回の通常攻撃ごとに280+35% ATK / 1800+45% ATK / 2400+55% ATK / 4000+60% ATKで回復します. |
| 止められない | 前方に突進し、敵に体当たりして 121% の物理ダメージを与え、敵をノックバックして 2 秒間の気絶を与えます。 レベル 2: ダメージが 136% に増加。 レベル 3: スタンの持続時間が 3 秒に増加。 レベル 4: ダメージが 152% に増加。 |
| 不屈の闘志 | スパルタカスが初めて戦闘で死ぬと、代わりに不屈のbを得る 4 / 5 / 6 / 8 秒間 uff し、最小 HP を 1 に設定し、受ける回復を 150% 増加させます。バフが有効な間に受けたダメージは、バフが切れたときに体力として回復します。 |
スパルタカスは、ウォリアーとタンク ツリーの両方を最大限に活用する近接戦闘機の傾向を続けています。スパルタクスの場合、それは彼の 3 スキルにあり、これにより彼は実質的に戦場でセカンド ライフを得ることができます。これにより、敵を集中させた敵はスパルタカスをターゲットにしてもまったく何も得られないため、彼は信じられないほど破壊的になります.
彼のキットの残りの部分は特に注目に値するものではありませんが、悪くもありません。
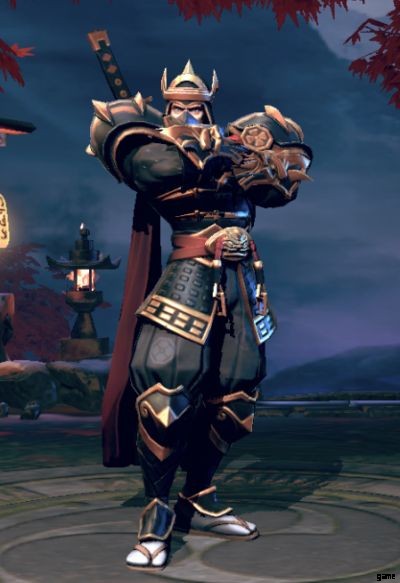
宮本武蔵

中立戦士/AOE
| ブラッドシェイクオフ | ターゲットを直線的に攻撃し、77%、77%、112% の物理ダメージを与えます。命中したターゲットから出血スタックを取り除き、100% * 取り除かれたスタックの数で爆破します。 レベル 2: コンボ ヒットのダメージが 87%、87%、130% に増加。 レベル 3: 各コンボ ヒットは 1 秒間スタンします。爆発の影響を受けたターゲットも 1 秒間ノックダウンされます。 レベル 4: 出血スタック除去ダメージ ボーナスは 140% * スタックが除去されました。 |
| 流血 | キャスターは2回の通常攻撃ごとに280+35% ATK / 1800+45% ATK / 2400+55% ATK / 4000+60% ATKで回復します. |
| リーフカット | 周囲の敵を4回攻撃。各ヒットは 43% のダメージを与え、30% の確率で出血を引き起こします。出血しているヒーローは、8 秒間、毎秒キャスターの攻撃力の 8% を吸収します。 レベル 2: 出血の可能性が 50% に増加。 レベル 3: 流血ダメージが詠唱者の攻撃力の 12% に増加。 レベル 4: このスキルが再び使用されるまで、出血している各敵はキャスターに 10% の追加ダメージを与えます。 |
| 居合 | 正面から扇形の範囲攻撃を行い、命中したターゲットに 121% の物理ダメージを与え、1 スタックの出血を追加します。 レベル 2: 2スタックの出血を追加します。 レベル 3: ダメージが 160% に増加。 レベル 4: 出血しているターゲットを攻撃すると、キャスターは与えられたダメージの 30% 回復します。 |
宮本武蔵の見事な剣術はまれで嬉しい驚きです。彼はオフタンクを使わず、代わりにスキルと出血ステータス効果の両方を介してダメージを与えることを選択する戦士です。そして、これは彼が非常にうまくできることです.出血はそれ自体でスタックし、彼が怒りのスキルをトリガーすると、出血の各スタックは大きなバーストダメージを引き起こします.全体的に、非常に堅実なキャラクターです。
B ティア
項羽
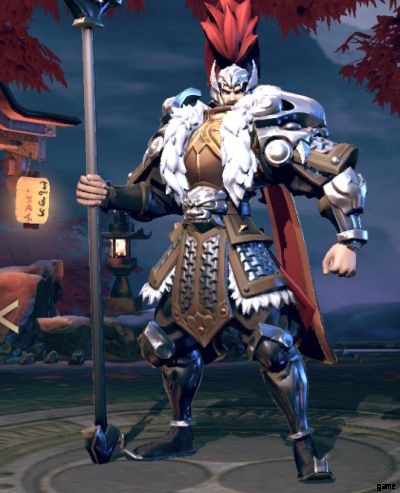
悪の戦士/AOE
| 指揮のオーラ | 直線で244%の物理ダメージを与える。ターゲットヒットはノックダウンされます。 50% の確率で槍をキャッチし、命中したターゲットに貫通効果を与え、物理耐性を 10 秒間 20% 低下させます。 レベル 2: 槍をキャッチすると、詠唱者に 300 の怒りが与えられます。 レベル 3: 287% のダメージを与える。 レベル 4: 340% のダメージを与える。 |
| 流血 | キャスターは2回の通常攻撃ごとに280+35% ATK / 1800+45% ATK / 2400+55% ATK / 4000+60% ATKで回復します. |
| オーバーロード スピア | 3 連続攻撃で 102%、102%、145% の物理ダメージを与え、キャスターを 150% の攻撃力で回復します。詠唱者の体力が 30% 未満の場合、ターゲットを 10 秒間遅くし、攻撃速度を 15% 低下させます。 レベル 2: 詠唱者は攻撃力が 250% 回復します。 レベル 3: 最終攻撃は 228% のダメージを与える。 レベル 4: ファイナル ヒットは 297% のダメージを与えます。 |
| 無敵 | キャスターがオーバーロード状態になる。この状態で攻撃またはスキルを使用すると、ATKが8秒間5%増加します。 レベル 2: バフは10秒間持続します。 レベル 3: 攻撃力上昇率が8%に上昇 レベル 4: ATKの増加が10%に上昇。 |
Xiang Yuはほとんど、ほとんど良いキャラクターです。彼は堅実なキットを持っていますが、A-Tier のウォリアーとは異なり、十分に機能しないことが問題です。彼の防御力の減少はチャンスに基づいており、彼のスローは敵をより速く殺すわけではありません.理論的には、彼の ATK ランプ スキルは優れていますが、Xiang Yu はコントロール耐性や無敵をパックしていないため、シャットダウンするのは非常に簡単です。
クー・フーリン

悪の戦士/AOE
| 影の呪い | キャスターが遠吠えをして、近くの敵を怖がらせ、1.5 秒間逃げさせます。その後、キャスターは 20 秒間ウェアウルフに変身します。人狼形態では、詠唱者と召喚獣の攻撃力が20%アップ。また、キャスターは通常攻撃のみを使用でき、扇形の範囲で命中し、15% の確率でノックダウンします。このモードでの通常攻撃の基本クリティカル率は 40% です。 レベル 2: 恐怖効果も 1.5 秒間敵を貫通し、物防を 50% 減少させます。 レベル 3: 詠唱者と召喚獣の攻撃バフが30%に増加。 レベル 4: 詠唱者と召喚獣の攻撃バフが 30% に増加。 |
| 流血 | キャスターは2回の通常攻撃ごとに280+35% ATK / 1800+45% ATK / 2400+55% ATK / 4000+60% ATKで回復します. |
| 慈悲の誓約 | 5 ヒット コンボで攻撃し、1 ヒットあたり 66% の物理ダメージを正面アークで与えます。最後の一撃は、命中したターゲットを遅くし、攻撃速度を 10 秒間 10% 低下させます。また、弱いスノー ウルフのミニオンを召喚します。弱いスノー ウルフはサモナーのために戦いますが、通常の攻撃しか使用できず、時間の経過とともに体力を失います。 レベル 2: ヒットあたりのダメージが 72% に増加。 レベル 3: 代わりに強力なスノー ウルフを召喚します。これはスキルを使用し、攻撃時にノックダウンする可能性があります。 レベル 4: ヒットあたりのダメージが 79% に増加。 |
| 血の誘惑 | 味方全員に 150 のリーチ レーティングを与えます。 レベル 2: キャスターとサモンは、150 のベースに追加の 200 リーチ レーティングがあります。 レベル 3: 味方全員に 250 のリーチ レーティングを与えます。 レベル 4: キャスターとサモンには、250 のベースに加えて 300 のリーチ レーティングがあります。 |
クー・フーリン (ほとんどクーカレンに似ています) は別の仕掛けのあるキャラクターであり、その攻撃は彼の召喚に依存してダメージを与えます。彼はまた、視覚的にはきちんとしているが、ゲームプレイに関してはまあまあの変換を行っています.彼のTemptation of Bloodを支持してオオカミを完全に無視することができます 、これにより、全員にライフスティールを与えることで、チームに少し余分な持続力を与えます。しかし、それだけではこのヒーローを救えるわけではありません。
ツタンカートン
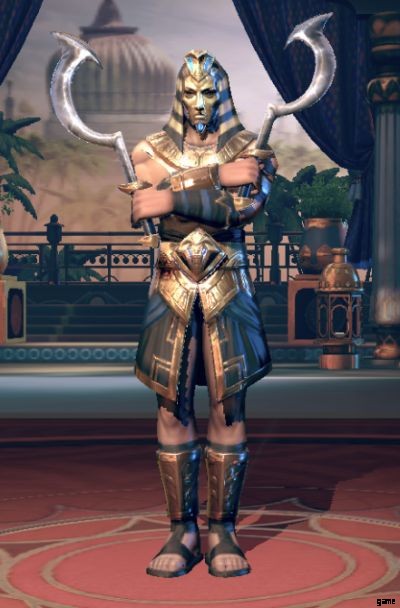
正義の戦士/AOE
| エコーザップ | 前方アーク範囲内で 179% の物理ダメージを与え、命中したターゲットを 1 秒間スタンさせます。シールドされた敵に与えるダメージが 18% 増加します。 レベル 2: ダメージが 193% に増加。 レベル 3: シールドされた敵へのダメージが 25% 増加。 レベル 4: ダメージが 234% に増加。 |
| 流血 | キャスターは2回の通常攻撃ごとに280+35% ATK / 1800+45% ATK / 2400+55% ATK / 4000+60% ATKで回復します. |
| 致命的な切断 | 範囲内の 4 ヒット コンボで攻撃し、ヒットごとに 65% の物理ダメージを与えます。命中したターゲットは出血も獲得し、詠唱者の ATK の 4% を毎秒 6 秒間ダメージとして受けます。 レベル 2: 攻撃ダメージが 76% に増加。 レベル 3: 流血デバフは、影響を受けた敵がスキルを使用するたびに 1 秒増加します。 レベル 4: 攻撃ダメージが 93% に増加。 |
| 砂嵐 | キャスターは 7 秒間砂嵐に包まれます。ストームがアクティブな間、キャスターの攻撃は物理防御力と魔法防御力の 20% / 30% / 40% / 50% を無視します |
ツタンカーテンは、レアリティ A のヒーローであるため、本質的に低いステータスにがっかりしている、まあまあの戦士です。彼のキットは驚くほどしっかりしていますが、シールドへのボーナス ダメージと DOT の小さな乗数は非常に魅力的ではありません。それにもかかわらず、ツタンカーテンは率直で使いやすいヒーローであり、彼の代わりが見つかるまではあなたに仕えます.
アルフレッド
堕落した戦士/AOE
| バーニング ソウル ストライク | 使用者の現在の HP の 10% を消費して、使用者の周囲に 298% / 326% / 356% / 389% の物理ダメージを与えます。詠唱者の攻撃力を 10 秒間 10% 増加させます。 |
| 流血 | キャスターは2回の通常攻撃ごとに280+35% ATK / 1800+45% ATK / 2400+55% ATK / 4000+60% ATKで回復します. |
| ソウルスマッシャー | 対象1体に189%の物理ダメージを与え、10秒間貫通し、物理防御を25%減少させる。 レベル 2: ダメージが 205% に増加。 レベル 3: 物理防御デバフが 50% に増加。 |
| ダーク インフェルノ アーマー | 詠唱者の体力が 50% 未満の場合、50% / 60% / 70% の物理防御力を得る。 |
間抜けな名前はさておき、アルフレッドはかなりまともです。彼のレイジ スキルの 10% の HP 損失は奇妙に場違いです (おそらく、彼の 3 スキルをトリガーするためでしょうか?) が、優れた乗数があります。 ソウルスマッシャー 防御デバフは強力で保証されているため、敵を打ち負かす良い方法でもあります.
C ティア
ツタンカーメン
ニュートラル ウォリアー/AOE
| エコーザップ | 前方アーク範囲内で 179% の物理ダメージを与え、命中したターゲットを 1 秒間スタンさせます。体力が35%以下の敵に与えるダメージが18%増加する。 レベル 2: ダメージが 193% に増加。 レベル 3: 体力が 35% 未満の敵へのダメージが 30% 増加。 レベル 4: ダメージが 221% に増加。 |
| 流血 | キャスターは2回の通常攻撃ごとに280+35% ATK / 1800+45% ATK / 2400+55% ATK / 4000+60% ATKで回復します. |
| 致命的な切断 | 範囲内の 4 ヒット コンボで攻撃し、ヒットごとに 65% の物理ダメージを与えます。与えたダメージの 10% のキャスターを回復します。 レベル 2: 攻撃ダメージが 76% に増加。 レベル 3: 与えたダメージの 18% のキャスターを回復します。 レベル 4: 攻撃ダメージが 93% に増加。 |
| 砂嵐 | キャスターは 7 秒間砂嵐に包まれます。ストームがアクティブな間、攻撃を受けるとキャスターの物防が 5% / 10% / 15% / 20% 増加します。 |
ツタンカーメンのリカラーであるにもかかわらず、ツタンカーメンはなんとなく悪いです。彼の乗数は、何らかの理由で、ツタンカーテンよりも低い.彼はまた、この奇妙なオフタンクのことを行っていますが、それはうまくいきません。そして彼のダスト ストーム 彼がより速く殺すのを助けるために何もしないので、客観的に悪いです。少なくともツタンカーテンは、ストームに対して 50% の防御デバフをかなり持っていました.
森吉成

悪の戦士/AOE
| バトルライン突破 | 詠唱者の目の前のターゲットに 195% の物理ダメージを与えます。 アーマー減少の影響下にあるターゲットの物理防御力を 10% 無視します。 レベル 2: ダメージが220%に増加。 レベル 3: アーマー減少中のターゲットの物理防御力を 20% 無視する。 レベル 4: アーマー減少中のターゲットの物理防御力を 30% 無視する。 |
| 流血 | キャスターは2回の通常攻撃ごとに280+35% ATK / 1800+45% ATK / 2400+55% ATK / 4000+60% ATKで回復します. |
| 一撃 | 術者の目の前の対象に100%の物理ダメージを3回与える。各ヒットは 20% / 25% / 30% の確率で アーマー減少 を与えます 、これにより、物理防御が 5 秒間 20% 減少します。 |
| 重要な先見性 | 8 / 6 / 5 回の通常攻撃ごとに、164% の物理ダメージを与え、物理防御の 20% を無視するボーナス攻撃をトリガーします。 |
森吉成は一人でやりすぎない。彼はサポートの役割で優れています...しかし、彼のデバフは彼の 2 スキルに関連付けられた 30% の低い proc チャンスに依存しているため、それでさえ不安定です。彼は大丈夫です。機会があれば交換する以外に、彼について言うことはあまりありません。
車輌 Tier リスト
| S | ハラルド、ローランド |
| A | エリック |
| B | ラ・イレ、バヤード、ダリウス、前田圭司、ルクルス |
| D | ルシウス |
S ティア
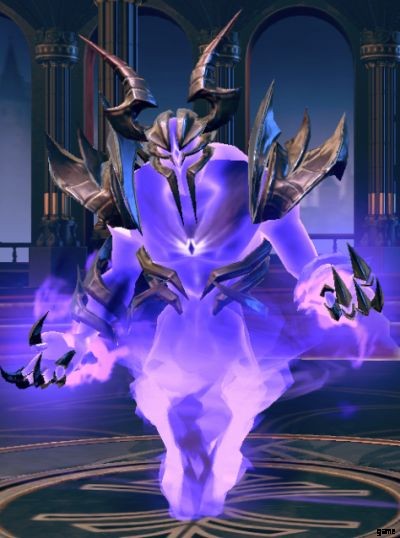
ハラルド

SS コラプト タンク/コントロール
| 無限の拷問 | キャスターの最大 HP の 10% に等しいシールドを獲得し、キャスターが最大 HP の 50% 以下の場合、50% 強化されます。 3 メートル以内にいる最も遠い敵をノックダウンし、キャスターに引き寄せて、6 秒間で攻撃力 72% の物理ダメージを 13 回与えます。このスキル中、キャスターはノックダウンとスタンの影響を受けません。 レベル 2: このスキルをキャストしている間、キャスターは 40% の物理耐性を持ちます。 レベル 3: シールドの基本ヘルスがキャスターの最大 HP の 15% に増加しました。 レベル 4: シールドの基本ヘルスがキャスターの最大 HP の 20% に増加。 |
| 死の契約 | 戦闘開始時またはレイジスキル使用時、8/8/10/10秒間、ダメージ耐性が30%/40%/40%/50%上昇。敵が倒されると、キャスターは最大 HP の 10% 回復します。 |
| 地獄の影 | 前方アーク範囲攻撃で 122% の物理ダメージを与え、ヘル シャドウを召喚します。 そのエリアで12秒間。 地獄の影 毎秒ハラルドの攻撃力の 10% の範囲で敵を炎上させ、敵の攻撃力を 20% 減少させます。 レベル 2: 地獄の影に立っている各敵につき、ハラルドは 2 秒ごとに最大 HP の 1% を回復します。 AOE。 レベル 3: 攻撃デバフが30%に上昇。 レベル 4: ハラルドは、地獄の影に立っている敵ごとに、2 秒ごとに最大 HP の 2% を回復します。 AOE. |
| 死後の葬式 | 正面AOEで102%の物理ダメージを与える。ヒットした敵は 8 秒間レイジを獲得できません。 レベル 2: また、ヒットしたターゲットの物理耐性を 10 秒間 10% 減少させます。 レベル 3: 物理耐性デバフが20%に増加。 レベル 4: ダメージが 118% に増加。 |
ここで警告:Harald のスキルの多くは非常にあいまいな言葉で表現されているため、メカニクス的に最もよく理解できるように努めました。
SSレアリティのヒーローに関する限り、ハラルドは最も印象的ではありません.彼はまだゲーム内の戦車ヒーローに影を落としているので、それは彼を悪くするものではなく、(彼にとっては良いことですが) Angel Joan は戦車として分類されていません.
ハラルドのレイジ スキルは、厄介なレンジャーやメイジをチームの近接攻撃の範囲内に引き寄せるために特別に作られています。これにより、ハラルドは疑似暗殺者になります。ダメージを軽減し、敵のATKを減らす彼の複数の方法と相まって、この巨人で敵の後列を狙撃するのに問題はないはずです.戦闘開始時のダメージ耐性 (少なくとも、それはダメージ耐性だと思います...) バフと相まって、ハラルドの固有のバルクは、彼が彼を集中させようとする努力に耐えられることを意味します。彼が倒れる前に、後列の敵を数人倒す可能性があります。敵がそれを管理できる場合.
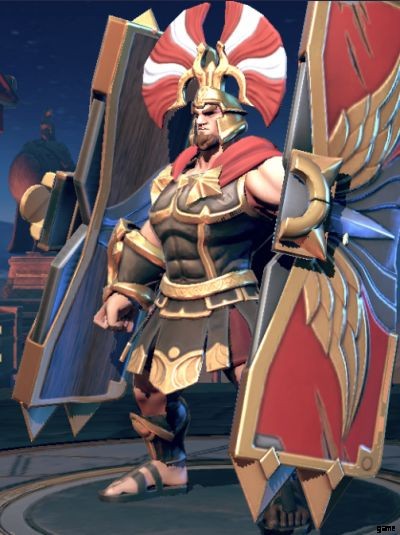
ローランド

S ジャスティス タンク/タンク
| 天使の賛美 | 自身と味方全員に詠唱者の攻撃力の200%相当のシールドを付与。シールドは魔法ダメージに対する免疫を付与し、6 秒間持続します。 レベル 2: シールドのヘルスがキャスターの攻撃力の 300% に増加。 レベル 3: シールドは7秒間持続します。 レベル 4: シールドは適用時にすべてのデバフを取り除きます。 |
| アーミング | 戦闘開始時、術者は 1400 + 8% / 8000 + 10% / 14000 + 12% / 20000 + 最大 HP の 14% に等しいヘルスを持つシールドを獲得します。 |
| セイクリッド バリア | 詠唱者の周囲に攻撃力 380% / 440% / 500% / 550% に相当するシールドを生成します。 |
| 天の正義 | ハンマーを召喚してターゲット エリアを粉砕し、163% の魔法ダメージを与え、命中したターゲットを 1.8 秒間スタンさせます。キャスト中、キャスターはクラウド コントロールの影響を受けません。 レベル 2: ヒットしたターゲットは、バトル終了まで攻撃力が 3% 低下します。 レベル 3: スタン時間が2.8秒に増加。 レベル 4: 命中したターゲットは、戦闘終了まで 6% の攻撃力を失います。 |
ローランドは飾り気もギミックもない珍しい戦車です。彼が持ち込むのは、純粋でシンプルなダメージ軽減です。それは彼を悪くしますか?絶対違う。それどころか、この種の一貫性は驚くほど非常にまれであり、信頼できるダメージ軽減とシールドがすべての人に必要な場合、このパラディンは間違いなく役に立ちます.
ローランドの盾には複数の目的があります。ダメージを吸収し、魔法のダメージを完全に消し去ります。そして 彼に十分な投資をすれば、デバフをクリアします。それだけでは不十分であるかのように、彼は永続的な攻撃デバフを伴う信頼できるスタンにもアクセスできます!ああ、そしてこの気絶は魔法のダメージを与えます
Aティア
エリック

悪の戦車/戦車
| ブラッドアックス ワールウィンド | ぐるぐると回転し、詠唱者の周囲に 25% の物理ダメージを 5 回与える。術者を最大HPの30%回復。 Each spin consumes 2% max HP, which also deals 2% max HP damage to targets hit. Level 2: The first hit also interrupts targets hit and cause them to move towards the caster. Level 3: Heals caster for 40% max HP when cast. Level 4: Each hit has a 50% chance to inflict -15% ATK for 7 seconds on targets hit. This effect stacks with itself. |
| Arming | At the start of combat, caster gains a shield with health equal to 1400 + 8% / 8000 + 10% / 14000 + 12% / 20000 + 14% of max HP. |
| Nordic Bash | Deals 179% physical damage in a small frontal AOE. Stuns targets hit for 1 second. Level 2: Penetrates hit targets, reducing their physical resistance by 40% for 10 seconds. Level 3: Stun maximum time now scales with target’s missing health and can stun for up to 2.5 seconds. Level 4: Deals up to 40% more damage based on target’s missing health. |
| Champion of North Wind | The first time the caster’s health dips below 30%, triggers a regeneration buff that heals 8% max HP per second for 7 seconds. Level 2: Also increases P.Def and M.Def by 300% for the duration of the buff. Level 3: Now heals for 11% max HP. Level 4: Also increases block rate by 50% for the duration of the buff. |
He’s big, he’s disruptive, he gets in the way of enemies and he’s great at keeping himself alive. Eric the Bloodaxe is a highway decent tank who has some extra baggage attached to him, but doesn’t cause him to forget his primary role of shielding allies.
Getting the most out of Eric requires you to level up his rage skill to level 2, as that’s his primary means of disruption. But there’s more:while the damage isn’t necessary, the fact that it scales off max HP means that Eric can chip in when it comes to dealing damage. He can further protect his allies if his rage skill is maxed out, for a potential -75% ATK debuff on foes!
B-Tier
La Hire

A Justice Tank/Tank
| Wrath of Glory | Deals 99% Physical damage in an AOE and stuns for 1 second. Targets that have Aftershock are stunned for an extra 0.25/0.5/0.75/1 second per stack, and lose all stacks of Aftershock . |
| Arming | At the start of combat, caster gains a shield with health equal to 1400 + 8% / 8000 + 10% / 14000 + 12% / 20000 + 14% of max HP. |
| Punishing Blow | Deals 70% / 76% / 84% Physical damage in a forward arc three times. The last hit has a 40% chance to inflict Aftershock and knock down enemies hit. |
| Force of Deterrence | Every 6 normal attack has a 20% / 30% / 40% chance to knock the target down, and a 10% / 15% / 20% chance to apply one stack of Aftershock 彼らへ。 Aftershock reduces attack and movement speed by 10% per stack. Stacks up to 3 times. |
La Hire is the first unit you actually get, and he serves as your main tank for most of the game until you can pull a better one. Tank-wise, La Hire is adequate; his Arming passive skill nets him a large amount of both flat and scaling HP, and his Wrath of Glory rage skill has a guaranteed stun.
La Hire’s main problem is consistency:his Aftershock debuffs are nice to have, but they’re dependent on RNG with his 2 and 3 skills. If I was looking for debuffs, I’d rather have someone with a guaranteed infliction rate as 30% attack and movement speed reduction is nothing to scoff at. Shame.
Bayard

S Justice Tank/Tank
| Unstoppable Sweep | Passively reduces the damage of enemies at least 4 meters away from Bayard by 70%. Stabs an enemy for 57% Physical damage, then rushes across the field dealing 72% Physical damage to targets hit and knocking them back by 3 meters. Creates a 5.6 meter area which reduces incoming damage to allies by 25%, for 4 seconds. Level 2: Damage increased to 68% and 108%. Level 3: Field duration increased to 5 seconds. Level 4: While the field is active, Bayard cannot take damage from enemies outside of it. |
| Arming | At the start of combat, caster gains a shield with health equal to 1400 + 8% / 8000 + 10% / 14000 + 12% / 20000 + 14% of max HP. |
| Decisive Blow | Deals 85% physical damage to an enemy, and reduces its ATK by 30% for 6 seconds. If this hits at least one penetrated target, caster also gains 10% damage resistance for 10 seconds. Level 2: Now hits in a rectangular AOE. Level 3: ATK reduction increased to 40%. Level 4: ATK reduction now lasts 8 seconds. |
| Challenge of the Knight | Stabs an enemy twice for 45% Physical damage per hit, then follows up with a hit that deals 83% Physical damage, knocks the target back by 3.5 meters, and heals caster for 120% of that damage. Level 2: Damage increased to 54%, 54%, and 111%. Self-heal increased to 160%. Level 3: Damage increased to 64%, 64%, and 200%. Self-heal increased to 200%. Level 4: Self-heal increased to 230%. |
Knight Bayard is the knight of super ambiguous wording. If you don’t believe me, pull up the game right now and read his skills. I’ll wait.
Going off basic game sense and the fact that he isn’t an SS hero, I’m going to assume that Bayard’s passives actually only reduce the damage he takes, rather than applying a 70% damage debuff to every enemy. While this does give him great survivability, part of a tank’s kit is also about directing damage to themselves or grabbing aggro, and Bayard’s incredible traveling circus of a rage skill displaces him. While it does provide a damage mitigation field, placing it is a bit iffy, and benefits other melee heroes more than squishy backrow heroes who’ll probably need it more.
Overall, Bayard is an okay, if gimmicky tank.
Darius
S Neutral Tank/Tank
| Rule With Majesty | Pulls nearby enemies towards the caster, then creates a shockwave that pushes them back and deals damage equal to 6% of the caster’s max HP but not exceeding 200% ATK. This also heals the caster for 100% ATK. Also deals bonus damage equal to 1% of max HP to soul drained enemies, and heals caster for 1% max HP. Level 2: Caster has 50% resist while casting. Level 3: Each soul also grants 1% resist for 6 seconds. Level 4: Damage increased to 9% of caster’s max HP. |
| Arming | At the start of combat, caster gains a shield with health equal to 1400 + 8% / 8000 + 10% / 14000 + 12% / 20000 + 14% of max HP. |
| Soul Shock | Deals 136% physical damage in an AOE. Knocks nearby foes back and drains 1 soul from them. Increases caster’s max HP by 2% and generates a shield equal to 175% ATK. Level 2: Damage increased to 158%. Level 3: Shield strength increased to 205% damage dealt. Level 4: Damage increased to 184%. |
| Pulse of Devourer | Hypnotizes enemies in a straight line for 2.2 seconds, dealing 95% ATK as physical damage per second for the duration. Drains 1 soul from each enemy hit. Each soul increases caster’s max HP by 2%. Level 2: Hypnosis duration increased to 2.6 seconds. Level 3: Damage increased to 109%. Level 4: Souls now increase caster’s max HP by 3.5%. |
If you thought Bayard was gimmicky, meet Darius. No matter how I try to make sense of his kit, the end result is the same. Max HP damage is theoretically good if it wasn’t so piddling. Assuming Darius can drain 1 soul per enemy, that’s a cap of 5 souls; and if the heal/max HP damage is per soul, that’s a whopping (no not really) 5% max HP damage. Hoo-rah.
What we have here is a tank that tries to use dark knight-esque mechanics, using HP as a tool to deal damage. The problem with this is that the cap on this damage is absurdly low and actually scales off ATK, not HP. HP is about the only thing Darius can do right – his damage mitigation benefits him and him alone, and he’s trying to prove himself worthy of everyone else’s job.
While warriors that do off-tank duty are acceptable, the opposite is rarely true, and it’s really only thanks to his rarity that Darius gets a higher spot on this list – owing to the fact that rarity more often than not dictates stats. The fact that his skill translations are weird (seriously, Soul Shock first says it generates shield based on ATK, then damage dealt?) and his unique mechanic has zero explanation really doesn’t help his case. Go sit on the bench, Darius.
Maeda Keiji

S Neutral Tank/Tank
| Incendi | Jumps to the densest cluster of enemies, dealing 193% physical damage within 4 meters and taunting foes for 5 seconds. Level 2: Caster’s max HP is increased by 10% per taunted enemy for 10 seconds. Level 3: Enemies attacking the caster have a 30% chance to burn for 10% damage per second for 5 seconds. <強い> Level 4: While there are taunted enemies, incoming healing is increased by 50%. |
| Arming | At the start of combat, caster gains a shield with health equal to 1400 + 8% / 8000 + 10% / 14000 + 12% / 20000 + 14% of max HP. |
| Heart Flame | Caster gains a 40% max HP buff for 10 seconds, and burns away 1.5% current HP per second to deal 56% physical damage to nearby enemies. Caster heals for 10% of damage inflicted. Level 2: Buff and burn time increased to 15 seconds. Level 3: Burn self damage reduced to 0.75% of current HP. Level 4: Caster heals for 20% of damage dealt by burning to enemies. |
| Born of Fire | Deals 20% current HP damage to self. Stores damage taken for 5 seconds, and at the end of this period, 100% of that damage is restored as health. Level 2: 120% of damage taken is restored as health. Level 3: 140% of damage taken is restored as health. Level 4: Duration increased to 6.25 seconds. |
As if weird “tanks” like Darius weren’t enough, we now have a tank that is actively trying to kill himself. Meet Maeda Keiji, pyromaniac.
To be fair, Maeda Keiji has a slew of ways to recover or boost his own health, and his rage skill is very disruptive, which is fantastic for a tank. The bad thing is that Maeda Keiji doesn’t focus on tank duty:most of his self-damaging skills deal damage instead of boosting his own survivability, or better yet, that of his allies.
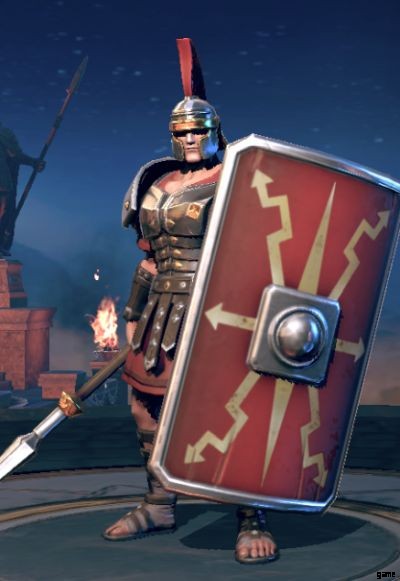
Lucullus
S Neutral Tank/Tank
| Victorious General | Passively takes 5% less damage from burning enemies. Strikes at the enemy’s front row for 5 hits of 63% physical damage, and disarms enemies hit for 5 seconds. Block rate of allies in caster’s row is increased by 20% for 10 seconds. Level 2: Damage increased to 79%. Level 3: Last hit also inflicts a 2 second stun. Level 4: Block rate buff increased to 30%. |
| Arming | At the start of combat, caster gains a shield with health equal to 1400 + 8% / 8000 + 10% / 14000 + 12% / 20000 + 14% of max HP. |
| Legion’s Might | Deals 204% physical damage in a straight line. Targets hit suffer -25% ATK for 6 seconds. Level 2: ATK debuff increased to 40%. Level 3: Damage increased to 204%. Level 4: Enemies hit also lose 200 rage. |
| Shield of Rome | Deals 136% physical damage in a frontal fan AOE. Knocks down enemies hit, and gives caster 30% block rate for 5 seconds. Level 2: Block rate buff increased to 40% and duration increased to 6 seconds. Level 3: Block rate buff increased to 50% and duration increased to 7 seconds. Level 4: Damage increased to 158%. Block rate buff increased to 60% and duration increased to 8 seconds. |
As a tank, Lucullus has some solid foundations only to be let down as the rest of his kit unfolds. His rage skill is pretty great, and I’ll never say no to an AOE disarm that also stuns, as well as a hefty 40% ATK debuff in a line. The trouble with Lucullus is staying power. I’m really not a fan of chance-based defenses, which is what block is. While he’s not bad per se, it’s well worth looking into a more consistent tank.
D-Tier
Lucius
A Evil Tank/AOE
| Legion Assault | Deals 135% / 151% / 170% / 192% physical damage in a straight line. This skill is guaranteed to crit. |
| Arming | At the start of combat, caster gains a shield with health equal to 1400 + 8% / 8000 + 10% / 14000 + 12% / 20000 + 14% of max HP. |
| Shield Breaking | Deals 73% physical damage in a frontal arc AOE twice and reduces their accuracy by 10% while increasing caster’s dodge by 5% / 7% / 10% for 5 seconds. |
| Battlefield Courage | Each dodge also increases caster’s crit damage by 10% / 15% / 20% for 10 seconds. |
If you haven’t picked up on it yet, I don’t like dodge or block-based tanks, as the longer the battle goes on, the more likely RNG will roll against you. Lucius is the epitome of these, skipping C-tier to go straight to D-tier. He has a passive that heals him when he dodges, which makes it seem like he’s got good dodge, right? No, he only has one way to help him avoid damage.
But Lucius does have 100% dodge rate on one thing:being in my formations. Seriously, you get La Hire for free. Why switch to this bozo?
Assassin Tier List
| S | Mata Hari, Chevalier d’Eon |
| A | Guy Fawkes, Hattori Hanzo |
| B | Ashoka the Great |
| C | Gareth |
S-Tier
Mata Hari

S Justice Assassin/Reap
| Lethal Kiss | Attacks the foe with the lowest health twice for 198% then 285% Physical damage. Adds a Death Mark to targets hit. Targets that die while Death Mark is active give Mata Hari 30% ATK and max HP for 10 seconds. Level 2: Mata Hari does 30% more damage to targets with Death Mark. Level 3: Damage increased to 233% and 337%, respectively. Level 4: Mata Hari has 30% more crit and crit damage against Death Marked targets with more than 50% HP. |
| Strangling | Enemies with less than 40% HP give all allies 20% / 25% / 30% / 35% more crit and suffer an 80 / 600 /1300 / 1700 physical and magical defense reduction. |
| Raid of the Spy | Jumps to a random target, leaving behind mist that decreases enemy accuracy by 20% for 5 seconds. Initial target then takes 3 hits of physical damage at 116%, 76%, and 76% respectively, and 70% of this damage is dealt in an arc. Level 2: Damage dealt to primary target has Cleave, dealing its damage in a small AOE. Also adds Death Mark to primary target. Level 3: 3-hit combo damage raised to 120%, 80%, 80%. Level 4: Last hit of the 3-hit combo also stuns initial target for 1 second. |
| Bloody Storm | Deals 46% damage 6 times to enemies within range. Caster’s dodge is increased by 60% while casting this skill. Level 2: Dodge buff persists for 2 seconds after skill cast. Level 3: Each successful dodge during this skill heals caster for 20% ATK. Level 4: Caster gains 10 rage per enemy hit. |
Mata Hari, despite her real-life fame (or infamy), has a very simple, no-nonsense kit in Among Gods. As befitting her assassin role, Mata Hari can single out a foe with her rage skill, further rewarding her if she lands a kill. Her Strangling passive helps greatly with this, decreasing the DEF and M.DEF of low-health foes and increasing crit rate for both herself and allies. Overall, Mata Hari rocks consistent performance with a solid kit.
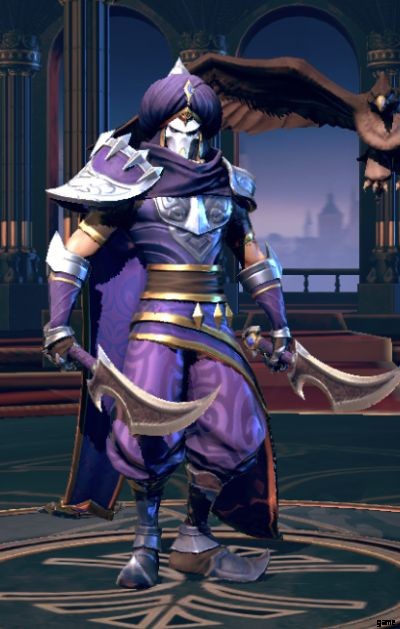
Chevalier d’Eon

S Justice Assassin/AOE
| Six-light Sword Formation | Blasts the area with the most enemy heroes , dealing 3 hits of 81% Physical damage and a final blow with 101% Physical damage. The last hit also silences enemies for 3 seconds. Level 2: Last hit also reduces ATK of targets hit by 10% for 8 seconds. Level 3: 3-hit combo now deals 98% per hit; finisher now deals 123%. Level 4: 3-hit combo now deals 120% per hit; finisher now deals 153%. |
| Strangling | Enemies with less than 40% HP give all allies 20% / 25% / 30% / 35% more crit and suffer an 80 / 600 /1300 / 1700 physical and magical defense reduction. |
| Blade Strike | Deals 74% Physical damage 4 times in a frontal arc. Level 2: Also increases caster’s crit rate by 10% for 10 seconds. Level 3: Damage increased to 89%. Level 4: Also increases caster’s crit rate by 25% for 10 seconds. |
| Dragon Thrust | Sends a tornado forward in a straight line, dealing 150% Physical damage and slowing targets hit for 10 seconds. Slow reduces attack speed by 10%. Level 2: Slow duration increased to 15 seconds. Level 3: Damage increased to 174%. Level 4: Slow reduces attack speed by 15%. |
Thankfully the Chevalier d’Eon was knighted, because I can see how saying Charles-Geneviève-Louis-Auguste-André-Timothée d’Eon de Beaumont could get really old really fast.
The Chevalier d’Eon was, at many points of their life, a fighter, a knight, a diplomat, a spy, and a hero. Fortunately, their role in Among Gods isn’t as complicated. What they excel in is damage, and lots of it. It’s important to note how their approach to damage is in combo hits, meaning that they’ll benefit more from crit rate boosts and damage than other heroes. Thankfully, Blade Strike by itself provides a hefty 25% crit rate buff.
The Chevalier’s swordplay comes to a head in their rage skill, which – thanks to its unique targeting – is guaranteed to hit where it’ll likely hurt the most. That by itself is already great, but it also silences and debuffs ATK. This not only paves the way for them to attack with impunity, but also opens up the enemy team to focused assault by your heroes.
A-Tier
Guy Fawkes
S Neutral Assassin/Reap
| Phantom of Death | Hits target and nearby enemies with 3 hits of 118% physical damage. Caster is invulnerable for the duration of the skill. Level 2: Deals 5% bonus damage per 100 rage that the target has, to a maximum of 40% bonus damage. Level 3: Hits 4 times. Level 4: Damage increased to 137%. |
| Strangling | Enemies with less than 40% HP give all allies 20% / 25% / 30% / 35% more crit and suffer an 80 / 600 /1300 / 1700 physical and magical defense reduction. |
| Blinding Falcon | Deals 151% physical damage in a line and steals 80 rage from each target hit. Level 2: Targets hit take 20% more physical damage for 6 seconds. Level 3: Damage increased to 170%. Level 4: Steals 160 rage from each target hit. |
| Gaze of Death | Teleports behind the enemy with the highest ATK and attacks 3 times for 65% physical damage per hit. Caster gains 25% dodge for 5 seconds. Level 2: Dodge buff increased to 40%. Level 3: Each swing now deals 75% damage. Level 4: Dodges during this skill grant 10% crit rate for 5 seconds. |
Guy Fawkes is a pretty conventional assassin, though I have to say I’m surprised his character design both looks Middle Eastern and does not incorporate explosives in any way. That aside, he’s got a solid kit:guaranteed AOE damage on his rage skill, sniping capabilities with his 3 skill, and defense peeling and most importantly rage steal. While he’s not as flashy as other assassins like Mata Hari or Ashoka, Guy Fawkes does what an assassin does best – picking off targets swiftly and effectively.
Hattori Hanzo
S Evil Assassin/Reap
| Ninja – Starburst | Deals 231% physical damage to targets, then shoots a shuriken that deals 277% physical damage and has a 50% chance to penetrate target for 8 seconds, reducing physical defense by 30%. Level 2: Initial hit deals 286% damage, shuriken deals 344% damage. Level 3: Initial hit deals 262% damage, shuriken deals 315% damage. Level 4: If this skill does not kill the target, caster gains 20% damage resist until the end of battle. |
| Strangling | Enemies with less than 40% HP give all allies 20% / 25% / 30% / 35% more crit and suffer an 80 / 600 /1300 / 1700 physical and magical defense reduction. |
| Ninja – Flashing | Jumps behind an enemy and deals 389% physial damage to them, while gaining 15% physical pierce for 8 seconds. Level 2: Pierce buff increased to 20%. Level 3: Also increases crit rate by 20%. Level 4: Pierce buff increased to 25%. |
| Ninja – Hidden Fury | Taking damage causes caster gain 10% attack speed and Evasion for 5 seconds. Can only happen once every 18 seconds. Level 2: Lasts 6 seconds. Level 3: 20% more rage generation while buff is active. Level 4: Lasts 7 seconds. |
Hattori Hanzo is the person you think about when you say “ninja”. This master of assassination excels at dealing great burst damage to individual targets and capitalizing on the results of these attempts. Hanzo not only has great damage tools at his disposal, but also has self-sustain and snowball potential, thanks to his rage skill triggering permanent stat gains whether or not he kills with it. He’s also surprisingly slippery and reliable for a dodge-based character thanks to his Evasion buff, though you should still take caution as it has a long cooldown between procs.
B-Tier
Ashoka the Great

S Justice Assassin/Debuff
| Heaven-Scorching Flames | Passively causes enemies to receive the Phoenix Fire debuff the first time they are burned in combat. Phoenix Fire reduces damage resistance by 20%. Deals 276% Physical damage in a frontal circular AOE, and amplifies Phoenix Fire’s damage resistance debuff to 30% for 10 seconds. This debuff’s timer is reset if enemies are burned while they have Phoenix Fire. Level 2: Caster uses Blazing Peacock immediately when this skill is cast. Level 3:Phoenix Fire debuff amplification raised to 40% damage resistance reduction for 10 seconds. Level 4: Deals 120% Physical damage to all enemies with Phoenix Fire. |
| Strangling | Enemies with less than 40% HP give all allies 20% / 25% / 30% / 35% more crit and suffer an 80 / 600 /1300 / 1700 physical and magical defense reduction. |
| Blazing Peacock | Deals 3 instances of Physical damage for 46%, 67%, and 67% ATK. The last hit burns enemies hit for 10 seconds. Caster gains a shield equal to 300% ATK. The first time Blazing Peacock is used in battle, caster also gains a shield equal to 10% max HP. Level 2: 3-hit combo damage increased to 48%, 71%, and 71%. Level 3: Caster now gains shield equal to 400% ATK. Level 4: 3-hit combo damage increased to 53%, 80%, and 80%. |
| Wrath of Indra | Deals 114% Physical damage in a straight line and stuns targets hit for 1 second. Caster’s next 3 normal attacks deal extra damage equal to 30% ATK, give 30 rage, and have a 50% chance of burning targets hit for 8 seconds. Level 2: Extra damage raised to 60% of ATK. Level 3: Initial damage raised to 131%. Level 4: Targets struck by the initial hit are stunned for 2 seconds instead if they have Phoenix Fire. |
Ashoka is an inconventional assassin who plays more of a supporting role in combat. His unique Phoenix Fire debuff forms the center of his kit.
This debuff inflicts a powerful 20% damage resistance debuff to all enemies, which is incredibly potent and always welcome. This is further amplified by his rage skill, which boosts the damage resistance debuff to 40%:that’s almost a full 50% of extra damage!
In a vacuum, Ashoka isn’t particularly strong. However, he shines when paired with a team – especially other warriors and assassins who can focus down a tough enemy when his Phoenix Fire burns their defenses down, or characters who can reliably inflict burn on their own.
C-Tier
Gareth

A Justice Assassin/Reap
| Victorious Sword | Deals 482% Physical damage in a frontal AOE. Increases Block Rate by 25% for 5 / 6 / 8 / 10 seconds. |
| Strangling | Enemies with less than 40% HP give all allies 20% / 25% / 30% / 35% more crit and suffer an 80 / 600 /1300 / 1700 physical and magical defense reduction. |
| Guardian Sword | Deals 2 hits of 140% Physical damage to 1 target. Increases Block Rate by 10% / 15% / 20% for 5 seconds. |
| Road to Victory | Successful blocks heal Gareth for 1% / 1.5% / 2% max HP. |
Gareth’s got a ho-hum kit that’s perfect with his perfectly generic character design. There’s not much to say about him other than he’s free. He’s theoretically a sturdy assassin thanks to his block buffs, but let’s not mince words:chance-based defenses always lose out to consistent tactics. Besides, an assassin should be killing foes first and protecting themselves second.
Ranger Tier List
| S | Robin Hood, Temujin, Oda Nobunaga |
| A | Tomyris, Agrippa |
| B | Nasu no Yoichi |
| D | Duke William |
S-Tier
Robin Hood

S Justice Ranger/Debuff
| Rain of Arrows | Passively causes attacks that inflict Poison to inflict an extra stack if hitting a slowed target. Deals 60% Physical damage per hit for 10 hits. Each hit of this skill increases the next hit’s damage by 10%. Level 2: Damage increased to 65%. Level 3: Damage amplification per hit increased to 15%. Level 4: Damage increased to 71%. |
| Sniping | Normal attacks have 240 / 600 / 1200 / 1800 extra ATK. Normal attacks also have up to 20% / 24% / 28% / 30% extra damage, based on how far the projectile travels. |
| Sniping | Deals 267% Physical damage to the enemy with the highest ATK. Level 2: Also inflicts Poison on targets hit. Poison deals Physical damage equal to 10% of caster’s ATK per second for 10 seconds. Level 3 :Damage increased to 303%. Level 4: Damage increased to 345%. |
| Split Shot | Deals 133% Physical damage to 2 enemies and gives them one stack of Poison. Level 2: Hits an additional target. Level 3: Damage increased to 187%. Level 4:Poison damage increased to 15% ATK. |
The lack of a trial mode in this game really hurts, as I’d like to run some experiments with our friend from Sherwood Forest. And in usual roguish fashion, he’s left a lot for us to decipher (yes, he has two skills called Sniping). But no matter how you slice it, Robin Hood is an incredible ranger who takes top slot in his class category as there’s no SS ranger (yet).
Rain of Arrows :homing or not, this skill hurts. If it hits an area, you’ll ideally want to pair Robin Hood with someone who can stun, knockdown or lock enemies in place so that they stay in the danger zone longer. And that’s not a typo:the more an enemy gets hit by the rain, the more it’ll hurt.
This skill by itself already makes Robin Hood great, but he had to go and add poison damage to his arsenal, as well as a way to pseudo-AOE by splitting shots and inflicting all his foes with poison. Just like with his rage skill (probably), you’ll want to pair Robin Hood with a merry man (or woman) who can inflict slow as Robin Hood inflicts 2 stacks per hit instead of 1 on a slowed target.
Temujin
S Evil Ranger/AOE
| Hunting Posture | Deals 3 hits of 85%, 85%, and 104% physical damage in a straight line. The last hit also burns targets for 10 seconds, dealing 10% of caster’s ATK as damage per second. Afterwards, switches to Hunting Posture stance for 8 seconds, where caster gains 60% attack speed and 20% more physical damage but can only use normal attacks. Both the 3-hit combo and Hunting Posture shots deal 100% of ATK as bonus damage to shielded targets. Deals 60% Physical damage per hit for 10 hits. Each hit of this skill increases the next hit’s damage by 10%. Level 2:Hunting Posture duration increased to 12 seconds. Level 3: 3-hit combo damage increased to 91%, 91%, 112%. Level 4: 3-hit combo damage increased to 97%, 97%, 121%. |
| Sniping | Normal attacks have 240 / 600 / 1200 / 1800 extra ATK. Normal attacks also have up to 20% / 24% / 28% / 30% extra damage, based on how far the projectile travels. |
| Stamping Arrow | Deals 65% physical damage in a frontal fan-shaped AOE, and marks targets hit. After a marked target is hit by Temujin, they explode after 8 seconds for 85% physical damage. Level 2: Explosion deals 145% physical damage. Level 3 :Damage increased to 113%. Each target that explodes heals caster for 25% ATK. Level 4: Damage increased to 183%. Each target that explodes heals caster for 50% ATK. |
| Weakness Revelation | Deals 97% physical damage in a straight line. This skill has bonus 50% crit rate, which also applies to the explosion caused by Stamping Arrow. Level 2: First target hit is knocked down for 2 seconds. Level 3: Damage increased to 133%. Level 4: Damage increased to 187%. |
Where Robin Hood takes the route of a stacking AOE and debuffs, Temujin prefers the more direct approach. The khan uses his arrows to deal impressive amounts of physical damage to his foes, picking them off with ease while his allies are busy on the frontlines. Temujin has a special hatred for shielded targets, so you can leave them to him as he does a ton of bonus damage to them.
As he goes into machine gun mode after his rage skill, it’s a good idea to pair Temujin with someone who can buff his attack or crit rate/damage even more to maximize his damage output.
Oda Nobunaga

S Evil Ranger/AOE
| World Conqueror | Blasts the enemy with the least health for 558% physical damage and burns them, causing them to take 10% of the caster’s ATK as damage per second for 10 seconds. This attack cannot miss. Level 2: If this skill kills a non-summoned unit, caster gains 300 rage. Level 3: Damage increased to 622%. Level 4: If this skill kills a non-summoned unit, caster gains 400 rage. |
| Sniping | Normal attacks have 240 / 600 / 1200 / 1800 extra ATK. Normal attacks also have up to 20% / 24% / 28% / 30% extra damage, based on how far the projectile travels. |
| Demon Daimyo | Deals 212% physical damage in a straight line. Level 2: Caster gains 100 rage and 10% crit rate for 10 seconds. Level 3 :Damage increased to 240%. Level 4: Damage increased to 269%. |
| Iron Cannon Barrage | Strafes and fires in a frontal arc, dealing 10 instances of 42% physical damage. Level 2: Last hit slows enemies for 10 seconds, reducing their attack speed by 8%. Level 3: Damage increased to 45%. Level 4: AOE size increased. |
He has a shotgun. 10/10.
Once you’re done admiring the firearms, you can have a realistic look at his kit. And it does not disappoint. Where Robin Hood is the status archer and Temujin the constant DPS, Nobunaga is the sniper, with a whopping 622% damage on his rage skill that can’t be avoided. As if that wasn’t enough, he also has some rage generation buffs and a way to deal with multiple enemies at once, though it’s not as impressive as his rage skill.
A-Tier
Tomyris

S Justice Ranger/AOE
| Vengeance Strike | Hits the enemy with the highest ATK for 173% Physical damage, then hits them with a spirit for 371% Physical damage. Causes Tomyris to focus fire on that hero for 10 seconds and gain 30% Leech Rating and 25% defense penetration. Level 2: The second hit disarms targets hit for 2.5 seconds. Level 3: Damage increased to 203%/440%. Level 4: Damage increased to 239%/523%. |
| Sniping | Normal attacks have 240 / 600 / 1200 / 1800 extra ATK. Normal attacks also have up to 20% / 24% / 28% / 30% extra damage, based on how far the projectile travels. |
| Flying Axes | Hits frontline enemies for 105% Physical Attack twice. Each hit adds one stack of Wound, increasing damage taken by 8%. Level 2: Damage increased to 121%. Level 3 :Wound extra damage increased to 12%. Level 4: Damage increased to 140%. |
| Parasitic Totem | Summons a totem that has 30% of caster’s stats. Each ally within the totem’s radius increases Tomyris’ attack speed by 12%. The totem also grants 35 rage every second for 8 seconds to allies in its radius. Level 2: Each time Tomyris lands a hit, allies within the totem’s AOE gain 15 rage. Level 3: Attack speed boost increased to 16%. Level 4: Rage regeneration per second increased to 50. |
Tomyris is an above-average ranger that serves as both DPS and as support. Her rage skill allows her to deal a hefty chunk of damage to the most dangerous foe on the field while also disarming them, which is more than enough to give her a slot in the upper tiers of rangers.
Apart from this, Tomyris boasts a solid kit that, most prominently, helps her allies out by giving them range while fueling Tomyris’ own attack speed. All in all, she’s a good hero with no particular weaknesses.
Agrippa
S Neutral Ranger/AOE
| Expedition | Gives caster the Expedition buff, which increases caster’s attack speed by 20% and crit by 100%, but isables rage regeneration for 8 seconds. Level 2: Also increases ATK by 20% for the duration of the buff. Level 3: Buff duration increased to 12 seconds. Level 4: Also increases ATK by 20% for the duration of the buff. |
| Sniping | Normal attacks have 240 / 600 / 1200 / 1800 extra ATK. Normal attacks also have up to 20% / 24% / 28% / 30% extra damage, based on how far the projectile travels. |
| Vampiric Strike | Every 3 normal attacks, caster deals 110% physical damage twice to its target. Automatically used at the beginning of combat. Level 2: Now triggers every 2 normal attacks. Level 3 :If caster’s Expedition buff is active, this skill has 25% lifesteal. Level 4: Damage increased to 119%. |
| Skyfall | Deals 133% physical damage in a straight line. Level 2: Slows targets hit, reducing their attack speed by 10% for 10 seconds. Level 3: Damage increased to 143%. Level 4: Damage increased to 155%. |
Agrippa is a by-the-books DPS ranger:steroids for boosting his damage (at the cost of removing his own rage regen), augments to his normal attacks, and a fast support AOE. As with other normal attack boosted heroes, Agrippa works best when paired with supports that increase his attack speed, allowing him to proc Vampiric Strike almost constantly. Just watch out for the no rage regen:that can get nasty fast.
B-Tier
Nasu no Yoichi
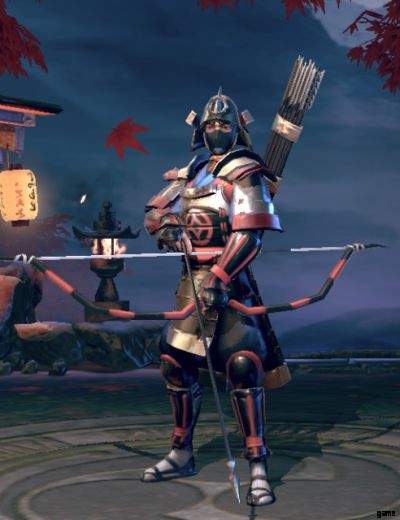
A Neutral Ranger/AOE
| Locked and Loaded | Deals 458% / 501% / 549% / 601% physical damage to target. If this damage is not blocked, knocks down and stuns target hit for 2 seconds. |
| Sniping | Normal attacks have 240 / 600 / 1200 / 1800 extra ATK. Normal attacks also have up to 20% / 24% / 28% / 30% extra damage, based on how far the projectile travels. |
| Penetrating Arrows | Deals 284% physical damage to target. Increases Break Rate by 25% for 10 seconds. Level 2: Damage increased to 309%. Level 3 :Break Rate buff increased to 50%. |
| Willful Berserk | Killing an enemy or assisting in a kill gives caster 5% / 7.5% / 10% increased Break Rate for the duration of combat. |
I honestly have no idea what Break Rate is, and Nasu no Yoichi is the only character in the game that mentions it. Ignoring all that stuff, what we have here is a great sniper. There are very few heroes, even among S and SS-rarity ones, that have such a huge multiplier on their rage skill. Use this to your advantage:buff Nasu no Yoichi, let loose with a big shot. Rinse and repeat.
D-Tier
Duke William

A Evil Ranger/AOE
| Eagle Eye | Fires a piercing shot at the furthest foe, dealing 163% / 177% / 192% / 208% physical damage to it and enemies in the bolt’s path. The target also receives a guaranteed critical hit that deals 80% / 100% / 120% / 140% physical damage. |
| Sniping | Normal attacks have 240 / 600 / 1200 / 1800 extra ATK. Normal attacks also have up to 20% / 24% / 28% / 30% extra damage, based on how far the projectile travels. |
| Eagle Wings | Deals 111% / 120% / 129% damage to enemies in a straight line. Increases caster’s crit rate by 15% for 6 seconds. |
| Eagle Claw | Landing a critical hit gives caster 5% / 7.5% / 10% ATK for the rest of the battle. |
Snowballing damage is good, but the way Duke William goes about it is incredibly lame. His crit buff barely raises the chance – 15% that doesn’t increase at all, and the only guaranteed crit he lands is his explosion via rage skill. Which, by the way, is dependent on enemies being lined up in a row to maximize damage.
Just use Nasu no Yoichi.
Sage Tier List
| S | Joan of Arc (Angel) |
| A | Caesar, Shizuka Gozen, Galenus, Nostradamus |
| B | Joan of Arc, Julia Vipsania Agrippina |
S-Tier
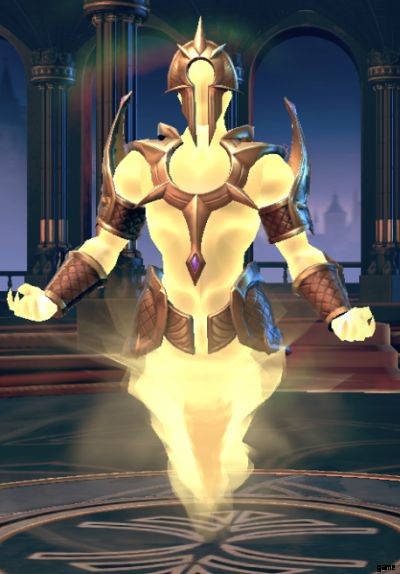
Joan of Arc (Angel)

SS Holy Sage/Heal
| Exaltation of Light | Gains high damage resistance for 5 seconds. When this buff expires, 150% of damage taken while the buff was up is converted to healing for caster. Level 2: 200% of damage taken to healing. Level 3: 50% of the healing amount heals allies over 10 seconds. Level 4: Effect lasts 7 seconds. |
| Mark of the Saint | Passively gains 1 stack of Mark of the Saint when the battle begins. Every time caster loses 55% / 50% / 45% / 40% of their max HP, consumes 1 Mark of the Saint and automatically uses Exaltation of Light for free. Marks of the Saint grant 24% / 28% / 32% / 36% damage resistance. |
| Realm of Refuge | Diverts 25% of all damage taken by allies to caster. When caster loses 20% max HP, heals the 2 allies with the lowest health for 70% of caster’s ATK. Level 2: Diverts 40% of all damage taken by allies to caster. Level 3: Heals 3 allies instead of 2. Level 4: Healed allies also gain 15% damage resistance for 5 seconds. |
| Judgment Day | Deals 103% damage in an AOE, which then explodes for 141% damage and reduces the damage resistance of enemies hit by 20% for 6 seconds. The enemies with the highest ATK and the lowest health are marked with Arbitrament. When a unit with Arbitrament kills or is killed, caster gains one stack of Mark of the Saint. Level 2: Heals all allies for 20% of damage inflicted. Level 3: Initial damage increased to 134%, explosion damage increaed to 188%. Level 4: Caster’s health regeneration is increased by 15% for each enemy hit by this skill. |
Did I mention that SS characters are utterly bonkers? Because here’s a great example. Angel Joan is literally too holy to die. While her role is marked as sage/healer, she pulls extra duty as a super durable tank thanks to her ridiculous array of damage reduction abilities. She even passively pulls damage towards herself, allowing you to field squishier allies in Joan’s formation. And to top it all off, she has so many ways to heal both herself and her allies. You probably won’t even need to run a secondary healer in her party.
A-Tier
Caesar

S Neutral Sage/Buff
| King’s Sacred Wind | Passively gives Caesar 100% rage regen for 6 seconds when the battle begins. Inspires three random allies, giving them 60 rage per second for 6 seconds. The first time this skill is cast, it has a 150% effect. Level 2: Rage per second increased to 75. Level 3: Also gives Caesar 35 rage per second. Level 4: Rage per second increased to 90. |
| Encouraging | At the start of combat, all allies except caster and other Sages gain 4% / 6% / 8% / 10% block rate and 55 / 250 / 400 / 600 physical and magic defense for 12 / 13 / 14 / 15 seconds. |
| Emperor’s Glance | Fires a beam that deals 100% magic damage, reducing the accuracy of enemies hit by 15% for 3 seconds, and giving allies hit 15% damage amplification for 3 seconds. After the beam passes, the path it crossed explodes, dealing 146% magic damage to enemies caught in the blast, and healing allies for 50% of caster’s ATK. Level 2: Damage increased to 114% and 171%. Level 3: Accuracy debuff increased to -22%, damage amplification buff increased to 22%. Level 4: 30% chance to cast this skill again when used. |
| Grace of War | Two random allies gain a 10% ATK buff. Successfully buffing allies with this skill heals caster for 2% of missing HP per second for 6 seconds. Level 2: Attack buff increased to 15%. Level 3: Targets another ally. Level 4: Attack buff increased to 20%. |
Good emperors know how to delegate tasks to those below them, and that’s exactly what Caesar does. As a dedicated support, Caesar inspires his allies to glory and victory while chipping in with some damage and heals from time to time. By spurring his comrades to heroic deeds by feeding them rage and powerful (and potentially permanent) ATK buffs, Caesar can rest on his laurels knowing that he’s welcome in any team.
Shizuka Gozen

S Neutral Sage/Buff
| Divine Dance | Deals 258% magic damage to 3 random enemies. Heals a random ally (except caster) by 30% of caster’s ATK every 2 seconds for 8 seconds, and adds Falling Flowers to the battlefield. During Falling Flowers , caster also receives buffs and healing that they give to an ally. Level 2:Falling Flowers duration increased to 12 seconds. Level 3: Triggers Falling Flowers for 8 seconds at the start of the battle. This does not trigger the magic damage nor the ally heal. Level 4: Damage increased to 304%. |
| Encouraging | At the start of combat, all allies except caster and other Sages gain 4% / 6% / 8% / 10% block rate and 55 / 250 / 400 / 600 physical and magic defense for 12 / 13 / 14 / 15 seconds. |
| Peace of Sleep | Hits a random for with pollen for 10 seconds, dealing 284% magic damage. Random ally (except caster) gains 30% physical resistance for 10 seconds. Level 2: Pollen reduces physical resistance by 30%. Level 3: Ally physical resistance buff increased to 40%. Pollen reduces physical resistance by 40%. Level 4: Damage increased to 322%. |
| Nostalgia | Random ally (except caster) gains 3 petals. A hero with petals consumes 1 petal per normal attack to deal extra damage equal to 40% of their ATK. Level 2: Targets an additional ally. Level 3: Petal count increased to 5. Level 4: Bonus damage is now 60% of ATK. |
I hate random buffs, but the ones that Shizuka Gozen offers are way too good to pass up on. Continuous healing, damage mitigation, and boosted normal attack damage? Yes please. What really seals the deal is Shizuka’s Falling Flowers , which essentially doubles the value of her heals and buffs as they’ll always affect her too while the flowers are up.
Galenus

S Neutral Sage/Heal
| Struggle of the Pharmacist | Chucks 2 potions at the targeted area, healing allies for 8% of their max HP per potion. Level 2: Chucks 3 potions. Level 3: Heals for 12% max HP. Level 4: Allies hit directly by a potion gain a 10% ATK buff. |
| Encouraging | At the start of combat, all allies except caster and other Sages gain 4% / 6% / 8% / 10% block rate and 55 / 250 / 400 / 600 physical and magic defense for 12 / 13 / 14 / 15 seconds. |
| Hymn of Life | Gives the ally with the least HP a regeneration buff, healing them for 80% of caster’s ATK per second for 8 seconds. Level 2: Targets an additional ally. Level 3: Healing increased to 90% of caster’s ATK. Level 4: Healing increased to 100% of caster’s ATK. |
| Rejuvenation | Heals all nearby allies for 160% of caster’s ATK. Level 2: Affected allies also gain 10% P.Def and M.Def for 10 seconds. Level 3: Healing increased to 200% of caster’s ATK. Level 4: Healing increased to 240% of caster’s ATK. |
Galenus is one of two dedicated healers in the game. Because of this, he’s automatically placed pretty high on this tier list. A trial mode would have been really nice for him, but I’m going to assume that each potion that his rage skill throws heals for the amount listed. The alternative is that he heals 12% max HP which is probably not the case as that’s an incredibly piddling amount.
There’s not much to say about Galenus, other than he keeps your other guys alive. He does give a 10% (permanent?) ATK buff, as well as a temporary DEF buff, but that’s about it.
Nostradamus

S Evil Sage/Debuff
| Spiritual Fog | Detonates a censer in an area, which spreads fog that deals 51% magic damage to enemies every second and lowers their attack speed by 15%. Allies in the fog gain 30% attack speed. Level 2: Fog lasts 9 seconds. Level 3: Attack speed buff increased to 40%. Level 4: Attack speed debuff increased to 25%. |
| Encouraging | At the start of combat, all allies except caster and other Sages gain 4% / 6% / 8% / 10% block rate and 55 / 250 / 400 / 600 physical and magic defense for 12 / 13 / 14 / 15 seconds. |
| Adrenaline | Gives the ally with the least HP a regeneration buff, healing them for 20% of caster’s ATK per second, as well as 15% ATK, for 8 seconds. Level 2: Heals for 30% of caster’s ATK. Attack buff increased to 20%. Level 3: Lasts 10 seconds. Level 4: Attack buff increased to 30%. |
| Rain of Weakness | Chucks three potions which explode for 63% magic damage and weakening them for 8 seconds. Weakened enemies lose 10% ATK for 3 seconds if they move, and take damage equal to 2% of their max HP but not exceeding 500% of caster’s ATK. Level 2: Duration increased to 10 seconds. Level 3: Movement damage increased to 3% max HP. Level 4: Duration increased to 12 seconds. |
Yes, Nostradamus was a doctor. No, he did not throw explosive potions and censers in real life, but who cares – it’s cool. Know what else is cool? His rage skill. That stuff not only deals respectable damage on its own (totalling to just above 400% for its full duration), but it also serves as both a hefty debuff AND a powerful buff. That alone makes Nostradamus worth using, but no, he also serves as an off-healer and can do some crazy shenanigans with his Rain of Weakness. Pair him either with someone who can lock enemies in place to maximize his rage skill, or someone who seriously displaces enemies to maximize his movement to damage gimmick.
B-Tier
Joan of Arc

A Justice Sage/Buff
| Victory Flag | Deals 163% Physical damage in a frontal arc. Targets hit are also knocked down. Level 2: Targets hit lose 200 rage. Level 3: Damage increased to 184%. Level 4: Rage drain increased to 300. |
| Encouraging | At the start of combat, all allies except caster and other Sages gain 4% / 6% / 8% / 10% block rate and 55 / 250 / 400 / 600 physical and magic defense for 12 / 13 / 14 / 15 seconds. |
| Power of Freedom | Deals 77% Physical damage in a frontal arc in 3 waves. Level 2: Caster has 10% damage resistance while casting this skill. Level 3: Damage increased to 82%. |
| Advent of the Saint | The two allies with the least rage gain 150 rage. Level 2: They also gain 5% ATK for 10 seconds. Level 3: Rage gain increased to 200. |
Like La Hire, Joan of Arc is one of the first characters you get. And like La Hire, Joan is pretty adequate until you get somebody better.
Her knockdown on rage is particularly nice as it gives you a reliable pseudo-stun that works even well into the game. Joan of Arc’s problem is that despite being a buffer, her buffs are neither particularly impactful nor long-lasting. Extra defense is nice, but other supports come with that skill too. Extra rage in a vacuum isn’t particularly useful either, except on specific heroes – which means that it’s not universally applicable to any team, and the ATK buff is insultingly low.
Julia Vipsania Agrippina

A Neutral Sage/Heal
| Lunar Tear | Heals nearby allies for 115% / 129% / 144% / 162% ATK twice. Increases P.Def and M.Def for healed allies by 10% for 5 seconds. |
| Encouraging | At the start of combat, all allies except caster and other Sages gain 4% / 6% / 8% / 10% block rate and 55 / 250 / 400 / 600 physical and magic defense for 12 / 13 / 14 / 15 seconds. |
| Lunar Wrath | Deals 237% magic damage to one enemy and heals caster for 10% / 15% / 20% max HP. |
| Moonlight | When health is below 50%, caster gains 20% / 30% / 50% P.Def and M.Def. |
There are very few dedicated healers in Among Gods, and you’re guaranteed to get one of them – Julia Vipsania Agrippina – just by playing through the campaign. Despite not having a very flashy kit, she’ll provide adequate healing for your party throughout the campaign. Though replace her with Galenus if you get him.
Mage Tier List
| S | Charlemagne |
| A | Abe no Seimei, Merlin, Nero |
| B | Wang Zhaojun, Gilles de Rais, Morgan le Fay |
| C | Mary I, Cleopatra, Queen Akinny, Ellie |
S-Tier
Charlemagne

SS Holy Mage/AOE
| Divine Power | Summons 5 / 6 / 7 / 8 rays of light which deal 187% Magic damage to a random target per beam. Intimidated enemies also take 106% Magic damage from each beam. The same enemy can be targeted by multiple beams. Charlemagne also gains a shield equal to 20% of his max HP, and is immune to control skills while casting this skill. |
| Glory of Truth | At the start of combat, Charlemagne’s skill damage is increased by 3% / 5% / 8% / 12%. |
| Gazing Down | Intimidates a random foe, dealing 47% Magic damage per second, draining 50 rage, and reducing their ATK by 30% for 10 seconds. Intimidated enemies take damage from Divine Power , even if the beams don’t target them. Level 2: DOT damage increased to 53% per second. Level 3: Rage drain increased to 50 per second. Level 4: DOT damage increased to 59% per second. |
| Majestic Sword | Deals 283% Magic damage to the enemy’s frontline. Enemies hit are silenced for 5 seconds. Level 2: Silence duration increased to 7 seconds. Level 3: Damage increased to 348%. Level 4: Damage increased to 428%. |
Of course, the rarest heroes have the best toys to play with. Charlemagne is no exception here:his rage skill is a nuke that’s hard to predict but always hits hard owing to its random targeting, and can be further augmented by his Intimidate mechanic. Charlemagne further augments his nuking abilities with a passive that raises his already respectable skill damage even further, as well as a frontline-hitting nuke that not only has a big multiplier, but also silences.
A-Tier
Abe no Seimei

S Neutral Mage/AOE
| Shikigami:Stray Birds | Passively gains 3 talismans at the start of combat. Deals 174% magic damage to one target, then consumes all talismans to deal 140% magic damage and drain 160 rage from a random enemy per talisman. Level 2: Talismans do 170% damage. Level 3: If this skill burns at least 3 talismans, also inflicts -15% incoming healing for 5 seconds to targets hit. Level 4: Talismans do 200% damage. |
| Foreseeing | Gains 150 / 225 / 300 / 325 rage when battle begins. Gains 150 / 600 / 1100 / 1600 ATK the first time this hero’s rage skill is used. |
| Shikigami:Raid | Deals 189% magic damage to one target and reduces its rage by 160. Also generates 1 talisman. Level 2: 50% chance to generate 2 talismans. Level 3: Damage increased to 243%. Level 4: Stuns enemies for base 0.8 seconds. The less rage a hit enemy has, the longer this stun, to a maximum of 2.4 seconds. |
| Shikigami:Divine Dust | Generates 1 talisman every 8 seconds. Each talisman increases caster’s ATK by 8%, to a maximum of 30%. Level 2: Each talisman increases caster’s ATK by 11%, to a maximum of 40%. Level 3: If caster would take more than 10% of max HP as damage from a single hit, consume 1 talisman to block that damage and gain 10% damage resistance for 4 seconds. Can only trigger once every 4 seconds. Level 4: Generates 2 talismans every 8 seconds. |
This astrologer and spiritualist is certainly a powerful addition to any team in Among Gods. Abe no Seimei presents a constant threat throughout the entire battle:either deal with him quickly, or fall prey to his snowballing rage skill. The longer you keep him alive, the more talismans he can generate – and the more deadly his rage skill becomes. While the random targeting nature of his rage skill can be iffy, it can hit the same target more than once, and the rage drain, while not the primary point of the skill, is a very nice bonus.
Merlin

S Neutral Mage/AOE
| Meteor Fire | Casts 4 waves of meteors, dealing 91% magic damage in an AOE. Burning targets hit receive damage equal to 150% ATK. Level 2: Meteors do 124% damage. Level 3: Now fires 5 waves Level 4: Targets hit are penetrated, losing 20% magic resistance for 10 seconds. |
| Foreseeing | Gains 150 / 225 / 300 / 325 rage when battle begins. Gains 150 / 600 / 1100 / 1600 ATK the first time this hero’s rage skill is used. |
| Flame of Purgatory | Deals 182% magic damage in an area. Level 2: Targets hit have -30% crit rate for 5 seconds. Level 3: Damage increased to 245%. Level 4: Crit rate debuff increased to -50%. |
| Flame Imprisonment | Imprisons an enemy, rendering it unable to move or act for 3 seconds. Level 2: Duration increased to 4 seconds. Level 3: Duration increased to 5 seconds. Level 4: Imprisoned targets can neither regenerate health nor be healed. |
The mighty Merlin proves that his magical prowess is still incredibly formidable. His rage skill, Meteor Fire , isn’t too strong on paper – but it’s 4-5 hits, and at maximum level, spearheads the rest of your team’s magical attacks by shredding 20% magic resistance. The rest of his kit is short and sweet – a fireball that does respectable nuke damage in an area with a crit debuff, and a heavy, long-lasting disable.
Nero

S Evil Mage/AOE
| Song of Loneliness | Deals 385% magic damage to all enemies. Each stack of Nature on an enemy causes it to take 5% more damage from this skill. Randomly paralyzes enemies with Nature stacks, causing them to be unable to act for 0.8 seconds. Level 2: Each Nature stack increases damage taken by 8%. Level 3: Each Nature stack increases damage taken by 12%. Level 4: Paralyze duration increased to 1 second; each Nature stack further increases this by 0.2 seconds. |
| Foreseeing | Gains 150 / 225 / 300 / 325 rage when battle begins. Gains 150 / 600 / 1100 / 1600 ATK the first time this hero’s rage skill is used. |
| Requiem | Deals 268% damage to one target and inflicts one stack of Nature. Level 2: Also penetrates the target, reducing its M.Def and ATK by 20% for 20 seconds. Level 3: Inflicts 2 stacks of Nature. Level 4: Also penetrates the target, reducing its M.Def and ATK by 40% for 20 seconds. |
| Third Sunset | Deals 71% magic damage 3 times in a frontal rectangular AOE. Each hit has a 20% chance to apply one stack of Nature for 20 seconds. Nature stacks up to 10 times. Level 2: Damage increased to 78%. Level 3: Damage increased to 110%. Level 4: Inflicts 2 stacks of Nature . Chance to apply stacks increased to 50%. |
Nero brings respectable AOE damage to the table (it’s not really AOE, it just happens to hit everybody), but that’s not all that the ex-emperor offers. His kit revolves around his unique Nature debuff, which both augments the damage he does and gives his rage skill random micro-stuns. While you shouldn’t be using Nero solely for these stuns – and you should have a dedicated stunner – they are nonetheless incredibly potent in battle.
B-Tier
Wang Zhaojun

S Justice Mage/Control
| Prideful Plum | Summons a blizzard that deals 100% Magic damage to targets within range up to 4 times. The first hit has a 25% chance to freeze targets for 5 seconds, increased to 30% if the target is slowed. Freeze removes 300 rage once its timer runs down. Level 2: Damage per hit increased to 111%. Level 3: Unslowed freeze chance increased to 35%; slowed freeze chance increased to 40%. <強い> Level 4: Damage per hit increased to 124%. |
| Foreseeing | Gains 150 / 225 / 300 / 325 rage when battle begins. Gains 150 / 600 / 1100 / 1600 ATK the first time this hero’s rage skill is used. |
| Winter’s Herald | Gives caster the Ice and Snow Buff for 6 seconds. While this buff is active, the closest ally within 3 meters gains 100 rage every 2 seconds, and the next instance of damage from the caster reduces magic resistance of targets hit by 10%. Level 2: Ice and Snow lasts 10 seconds. Level 3: Rage generation increased to 150. Level 4: Magic resistance debuff increased to 20%. |
| Bone Freezing | Deals 159% Magic damage in a frontal fan-shaped area via 3 icicles. Targets hit lose 200 rage; enemies that are frozen or slowed lose 250 rage instead. Level 2: Also reduces accuracy of targets hit by 10% for 7 seconds. Level 3: Damage increased to 218%. Level 4: Also reduces accuracy of targets hit by 20% for 7 seconds. |
Wang Zhaojun is a debuffer. The problem with her is that while her debuffs are unquestionably good, they’re not universally useful. Sure, rage down is great for disabling enemies, but supposing the enemy team runs a rage-generating composition, what do we do? All in all, I’d rather hit the enemy’s stats directly – at least those are always useful.
Gilles de Rais

S Evil Mage/Control
| Hell of the Blood Pool | Summons a pool of blood which pulls all enemies into it, dealing 292% magic damage and interrupting their movement. This skill has 30% lifesteal. Level 2: Lifesteal increased to 40%. Level 3: Damage increased to 332%. <強い> Level 4: Damage increased to 378%. |
| Foreseeing | Gains 150 / 225 / 300 / 325 rage when battle begins. Gains 150 / 600 / 1100 / 1600 ATK the first time this hero’s rage skill is used. |
| Kins of Blood | Summons bats which last for 10 seconds. Bats attack once per second for 56% magic damage with 100% lifesteal. Hit targets also have -3% incoming healing for 8 seconds when hit, which stacks with itself. Level 2: Damage increased to 66%. Level 3: Bats attack 12 times. Level 4: Bats attack 15 times. |
| Nightmare Assault | Teleports the farthest foe to the front of the caster and penetrates them, reducing their magic resistance by 30% for 10 seconds. Level 2: Also reduces physical resistance by 35%. Level 3: Magic resistance reduction increased to 50%. Level 4: Physical resistance reduction increased to 55%. |
I guess all that murder paid off for Among Gods’ version of Gilles de Rais, as he’s somehow become a demonologist? Vampire? Demon vampire.
As a mage, Gilles de Rais has a respectable damage output with his blood pools and bats. But the main reason you’ll be using him is because of his displacement abilities. Both his rage skill and his 3 skill make Gilles de Rais incredibly disruptive – though the 3 skill may also lead to his swift demise, and you have little control over when and where he uses it, which can be a very big liability.
Do note that while his forced teleport is iffy, it also inflicts a huge damage reduction penalty to its target. It’s a good idea to have someone on standby to capitalize on this, as bluebeard himself is ill-suited to take advantage of it.
Morgan le Fay

A Evil Mage/AOE
| Waterspout | Summons a waterspout in the rearmost enemy row, which deals 175% magic damage when it appears, then 43% magic damage every 0.3 seconds until it fades. Level 2: 60% chance to stun for 1 second when activated. Level 3: Initial damage increased to 200%. Damage on secondary hits increased to 46%. <強い> Level 4: Initial damage increased to 225%. Damage on secondary hits increased to 49%. |
| Foreseeing | Gains 150 / 225 / 300 / 325 rage when battle begins. Gains 150 / 600 / 1100 / 1600 ATK the first time this hero’s rage skill is used. |
| Rapid Cooling | Fires a projectile in a straight line, dealing 81% magic damage to enemies it touches. At the end of its path, the projectile explodes, dealing 129% magic damage. Enemies hit are slowed, reducing their attack speed by 10% for 6 seconds. Level 2: Travel damage increased to 87%, explosion damage increased to 139%. Level 3: Travel damage increased to 93%, explosion damage increased to 150%. Level 4: Slow duration increased to 9 seconds. |
| Power Gyre | Summons a water elemental. When the elemental scores a hit, 50% chance to increase ATK by 8% for 7 seconds. Level 2: ATK buff increased to 11%. Level 3: ATK buff increased to 13%. Level 4: Duration increased to 9 seconds. |
You get Morgan le Fay for free, and she’s an okay unit. Her Waterspout rage skill is pretty decent, and becomes much better once you unlock her stun. The rest of her kit is also pretty good at dealing AOE damage, and while she’s outperformed by higher rarity heroes, she’ll work just fine until you can get a rarer hero to replace her.
And no, there’s no indication whether it’s her or her elemental that gains the attack buff for her 3 skill.
C-Tier
Mary I

S Neutral Mage/AOE
| Evil Spirit Release | Passively gains 1 stack of Thirst for Blood per normal attack or skill use. At 5 stacks, caster loses all stacks and gains 30% attack speed and leech rating for 4 seconds. Caster teleports behind the rearmost ally and becomes untargetable. Summons a spirit to attack foes every 0.15 seconds for 62% magic damage and healing for 20% of the damage dealt. Level 2: Each attack also stuns for 0.1 seconds. Level 3: Damage increased to 69%. <強い> Level 4: Damage increased to 78%. |
| Foreseeing | Gains 150 / 225 / 300 / 325 rage when battle begins. Gains 150 / 600 / 1100 / 1600 ATK the first time this hero’s rage skill is used. |
| Abstinent Bound | Every 3 seconds, caster binds nearby enemies for 3 seconds, dealing 0.7% max HP damage per second and healing caster for 0.7% max HP. A unit can only be affected by Abstinent Bound once every 8 seconds. Level 2: Binds last 4 seconds. Level 3: Damage and health regeneration increased to 1% max HP. Level 4: Bound enemies also lose 20% magic resistance. |
| Thorns of Blood | Creates a path of thorns which deals 1% max HP damage to targets hit and every 2.5 seconds. Enemies in the path take 33% magic damage per second and lose 25% attack speed. Level 2: Thorn damage increased to 1.5% max HP. Level 3: Damage increased to 37%. Level 4: Thorn damage increased to 2% max HP. |
Once again we run into heroes dealing max HP damage (which is good) held back by pathetic amounts of it. Damage-wise, Mary isn’t going to be doing anything worthwhile. She’s better in a support role as micro-stuns can be surprisingly potent, but the lack of targeting options makes even this iffy. All in all, just try to use somebody else.
Cleopatra

S Neutral Mage/AOE
| Pharaoh’s Curse | Summons a portal behind enemy lines, which spawns one mummy every 5 seconds. Mummies have 20% of caster’s ATK and max HP. When a mummy’s health dips below 20%, it explodes, dealing 3% of caster’s max HP as damage in an AOE. Up to 3 mummies can be active at once. Level 2: Up to 4 mummies can be active at once. Level 3: Explosion damage deals 5% of caster’s max HP. <強い> Level 4: Explosion damage deals 7% of caster’s max HP. |
| Foreseeing | Gains 150 / 225 / 300 / 325 rage when battle begins. Gains 150 / 600 / 1100 / 1600 ATK the first time this hero’s rage skill is used. |
| Demonic Beauty | Charms the nearest enemy unit, causing them to fight their allies for 4 seconds. Charmed units can only use normal attacks. Level 2: Charmed enemy both deals and takes 20% more damage for the duration. Level 3: Lasts 6 seconds. Level 4: Lasts 8 seconds. |
| Rage of Skygod | Deals 175% magic damage in an AOE. Reduces rage regeneration for targets hit by 50% for 5 seconds. Level 2: Deals 198% damage. Level 3: Debuff lasts 6 seconds. Level 4: Debuff lasts 8 seconds. |
Cleopatra is free for new players. Normally, the free unit you get is an all-rounder unit. Not in this case.
What Cleopatra does well, she does very, very well. Demonic Beauty is a really potent control skill that not only strips your opponent of an ally, but gains you a new friend for a short while. But apart from that, the rest of her kit is lackluster. Her mummies have woefully low ATK and health, and the fact they scale off Cleopatra’s own meh HP doesn’t help their case. While her stats are higher than the A-rarity heroes you’ve been pulling, and she’s a decent nuker, it’s also advised to replace Cleopatra as soon as you can.
Queen Akinny

A Neutral Mage/AOE
| Holy Light | Deals 237% / 268% / 305% / 347% magic damage in a straight line. Caster gains 100% M.Def buff for the rest of the battle if this skill kills. |
| Foreseeing | Gains 150 / 225 / 300 / 325 rage when battle begins. Gains 150 / 600 / 1100 / 1600 ATK the first time this hero’s rage skill is used. |
| Divine Judgment | Deals 144% magic damage thrice to one target. Each hit has a 20% chance to penetrate the target, reducing their M.Def by 20% / 25% / 30%. |
| Holy Sermon | Magic Pierce is increased by 8% / 12% / 16% whenever an ally dies. |
Queen Akinny is…okay. She’s got some questionable things in her kit:the magic defense buff from her rage skill doesn’t help her kill faster, and her comeback mechanic is hilariously bad. While her nuke is pretty good, the rest of her kit doesn’t synergize into what you would deem a “good mage”.
Ellie
A Holy Mage/Debuff
| Light Cannon | Deals 210% magic damage to target and an area around it. Heals caster for 10% of max HP. Primary target loses 5% accuracy for 8 seconds. Level 2: Damage increased to 228%. Level 3: Accuracy debuff increased to 10%. Level 4: Damage increased to 248%. |
| Foreseeing | Gains 150 / 225 / 300 / 325 rage when battle begins. Gains 150 / 600 / 1100 / 1600 ATK the first time this hero’s rage skill is used. |
| Holy Lightball | Deals 206% magic damage to one enemy and reduces its crit rate by 15% for 10 seconds. Level 2: Crit rate debuff increased to 25%. Level 3: Damage increased to 224%. |
| Light Core | If caster’s HP is above 50%, gain 30% / 50% / 70% M.Def. |
For a debuffer, Ellie has really lousy debuffs. At least her rage skill is an AOE, but if it’s a choice of AOE, you have better same-rarity heroes like Akinny (even if the rest of her kit is bad) or Morgan le Fay, who is free.
Make Your Own Judgment Calls
As I mentioned when we started, this list is subjective and based on my own experience. It’s ultimately up to you to pick which heroes you want to use, and if you believe in them enough, I’m certain you can find a way to make them work!