Switchcraft ビギナーズ ガイド:パズルを簡単に完成させ、リディアを取り巻くミステリーを解明するためのヒント、コツ、戦略
マッチ 3 ゲームは、Google Play ストアと App Store の両方で不足することはありません。このカテゴリのゲームを始めようとしているプレーヤーは、ますます多くの選択肢に直面しています。広大なマッチ 3 タイトルから、Woonga がデザインした新しいゲームが登場 これはスイッチクラフトと呼ばれます。 2018 年にモバイル ゲーム大手の Playtika に買収されたこのデベロッパー は、パズル ゲームを専門とし、June's Journey や Pearl's Peril などのタイトルにも携わっています。
Switchcraft に関して言えば、この新人は魅力的なビジュアルと没入型のストーリーでマッチ 3 の世界に新鮮な空気を吹き込み、間違いなくプレイヤーを夢中にさせます。プロットは、マサチューセッツ州の小さな町で魔女になるために勉強しているベイリー・ワードという名前の若い女性を中心に展開しています。彼女は親友のリディアと同じ魔法学校に通っていますが、リディアはある日予期せず不思議なことに行方不明になります。

ベイリーは、リディアがただ逃げ出しただけだと周りの人が思っているように見えるという事実に悩まされ、怒り、友人を連れ戻すための魔法の旅に出ます。途中で、彼女はアカデミーの他の学生、教授、その他の奇妙だがユニークなキャラクターを含む多くの相棒とチームを組む.
Switchcraft でのあなたの最終的な目標は、リディアを見つけて、彼女が人間の領域に戻るのを助けることです。そのためには、いわゆるマジカ クリスタルを集めて、ストーリーの章をアンロックする必要があります。 Switchcraft がこのジャンルの他のゲームから際立っているもう 1 つの点は、プレイヤーが物語に影響を与える選択を行うことができることです (たとえば、誰に敵対するか、誰に対して友好的になるか)。 /P>
Magicka Crystals を獲得し、物語を前進させるには、プレイヤーはマッチ 3 パズル レベルに参加し、成功裏にクリアする必要があります。後で、最初の試行からレベルを完了するには少しスキルが必要になる場合があります。これについては、Switchcraft 初心者向けガイドをご覧ください。 重宝するかもしれません。リディアの失踪の真相を解明するために必要なすべてのクリスタルを入手できるよう、役立つヒントと戦略のリストを掲載しています。
1.動きを無駄にしない
Switchcraft のマッチ 3 レベルは、古典的なパターンに従います。それぞれに達成すべき特定の目標があり、その目標を達成するために自由に使える多くの動きがあります。そうしないと、レベルを再起動する必要があり、その過程で 5 つのライフのうちの 1 つを失います。
レベルの目標に向かって作業するには、プレイフィールドで同じ色の 3 つ以上のタイルを一致させる必要があります。常により大きなマッチを目指すことをお勧めします。ブースターが作成されるためです。これは、多くの場合、レベルの目標を達成するのに役立つツールです。

最初の試みから勝ちたい場合は、ボード上で行うすべての動きが重要です。だからこそ、あなたは本当にそれらを熟考する必要があります.急いではいけません。これらのパズルにはタイマーがありませんので、次に何をすべきかを理解するのに好きなだけ時間をかけることができます。移動するのに数秒以上待つと、ゲームは支援するための提案を行います。ただし、それを取り上げる義務があるとは思わないでください。実際には、他にももっと優れたオプションが散らばっている可能性があります。それらを探す必要があります。
どの試合に行くべきかどうやってわかりますか?さて、レベル目標を見てください。ディスプレイの左側に表示されるので、細心の注意を払う必要があります。
このようにして、マッチングのためだけにランダムにマッチングすることを避けることができます。代わりに、レベルの目標を達成するのに役立つマッチを作成することに力を注ぐ必要があります。たとえば、目標が 17 個の蝶を集めることである場合、蝶が描かれているピースを見て、それらを適切なフォーメーションに一致させようとする必要があります。
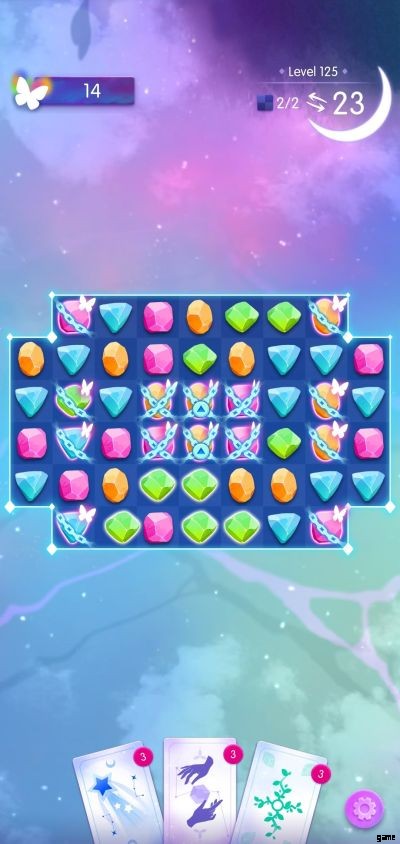
また、蝶のタイルを含むマッチの作成がすぐに利用できない場合があることも事実です。次に、バタフライ タイルとのマッチを作成する際に邪魔になるタイルを取り除くことは理にかなっています。これを自問しながら、事前にいくつかの動きを考えてみてください。「どのタイルを削除すると、有用なマッチを作成できるでしょうか?」
この戦術が複雑すぎると思われる場合は、下部にあるマッチングの古典的な戦略にいつでも頼ることができます。ディスプレイの下部に障害物がない場合にのみ行うことができるため、常に選択できるとは限りません.ただし、そうである場合、下部でのマッチングは通常、タイルのカスケードを上部からもたらします。これらは多くの場合、自発的なマッチングにつながります。運が良ければ、ボード上に予想外のブースターがいくつかあります。
結論として、マッチングのためだけでなく、常に目的を持ってマッチングするようにしてください。試合に参加する前にレベルの目標を確認して、移動を無駄にしないようにします。そうすることで、好きなだけプレイできるように命を守ることもできます。
2.ブースターまたはスーパージェムを最も効果的に使用する方法
上で説明したように、より大きなマッチではブースターまたはスーパー ジェムが作成されます – Switchcraft で呼ばれるように。ブースターをダブルタップするか、隣接するタイルと交換することでブースターをアクティブ化できる主流のマッチ 3 ゲームとは異なり、Wooga の最新ゲームでは、これらのパワーアップを設定するために、これらのパワーアップのいくつかを使用して別のマッチを作成する必要があります。オフ。マッチには、ブースターと同じ色のタイルが含まれている必要があります。レベルのプレイ中にボード上で作成できるパワーアップは次のとおりです。
- Frog Gem – created when you match 4 gems in a square pattern. Once activated, the Super Gem will explode and destroy tiles in a “+” shape and then randomly jump to an objective and smash one last tile too.
- Line Gem – you can make one by matching 4 gems in either a row or column. When activated, the Super Gem will destroy a row or a column of tiles, depending on its direction.
- Bomb Gem – created by matching 5 gems in a T or L shape. Upon activation, the Super Gem will clear all nearby tiles and obstacle in a 3×3 tile radius.
- Rainbow Pearl – made by matching in either a straight vertical or horizontal line. Activate this Gem by swapping it with any tile on the board, no need to match it with other tiles. The effect will be that all gems of the same color as the tile you’ve swapped it with, will be destroyed.
- Coloring Potion – made by creating 6 gems in a T shape. Activate this Gem by matching it with any tile on the board, just like in the case of the Rainbow Pearl. When activated, it turns all the tiles of the same color as the one you swapped it with, the color of the Coloring Potion.
As you can see there are two Gems which don’t require matching to be activated. These are the most powerful of the bunch, so make sure you use them wisely. For instance, if you need to remove a tile of a certain color (let’s say orange) from the board as to allow a Fox to slide off the board and you have a Rainbow Pearl at your disposal, then try to swipe the Booster with a tile of that particular color (orange). It might not be possible immediately, and so you’ll need to get rid of a few tiles before getting the one you need next to your Booster.
At the same time, mixing Boosters is highly encouraged in this game. Doing so doesn’t require an additional match, so if you notice two power-ups next to each other you can quickly combine them for a strengthened effect. The good news is that you can just swap them together, no other step involved.
Effects vary, and some are stronger than others. For instance, the combination between a Bomb and Line Gem will eradicate three lines or column of tiles (depending on the Line’s direction) from the playfield. A double Bomb combo creates a larger explosion that will destroy a big number of tiles.
You can also mix the Rainbow Pearl with the other Boosters. This is another practical combination as the Pearl will multiply the Booster across the board replacing all the tiles the same color as the Booster with the said power-up.
Switchcraft levels are quite acceptable in terms of difficulty, and up until level 250 or so you shouldn’t have many troubles beating challenges without extra help. Then, things get a bit more complicated and you might have to replay certain levels a few times before finally besting them.
Don’t get discouraged if you can’t get things right from the first time around. Go ahead and replay it a few times, chances are you will be able to solve it sooner or later, without the aid of extra helpers. The Boosters you can make on the board should be enough to stir you in the right direction.
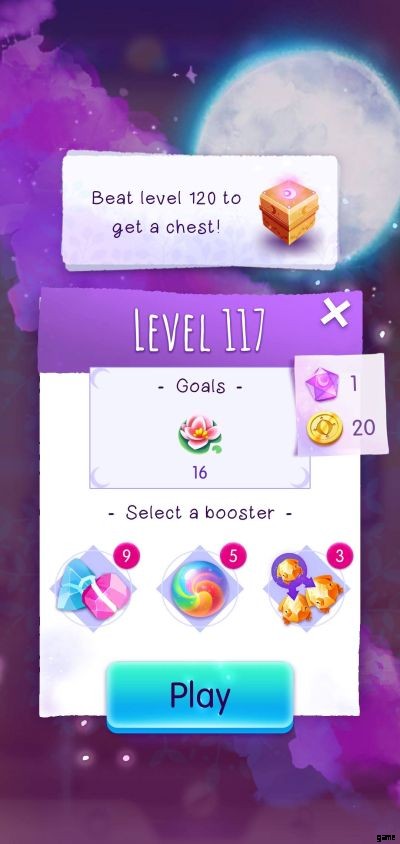
If you need more assistance later on, you can turn to the additional aids the game puts at your disposal. For starters, you also have the so-called pre-level Boosters which are power-ups that have to be equipped before a level starts. These include Double Frogs, Rainbow Pearl and Line + Bomb combo. We advise you to abstain from equipping these power-ups as you head into a level for the first time.
Try and see if you can beat the level on your own first and then come back if you failed and activate them. Pre-level Boosters ensure that you can start a level with one or more Boosters already formed and waiting for you on the board or they will offer a special perk. For instance, Double Frogs gives you two frogs for each Frog Gem.
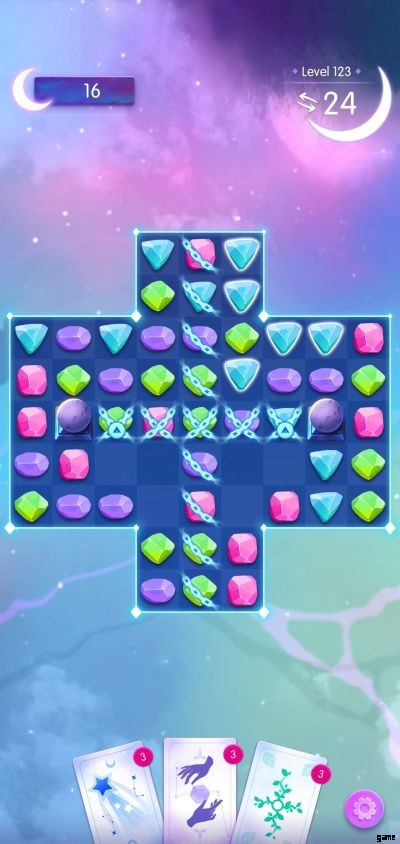
Last but not least, players can also turn to Spells to get an extra advantage while playing. All they have to do is tap one of the cards located in the lower part of the display to unleash their effects.
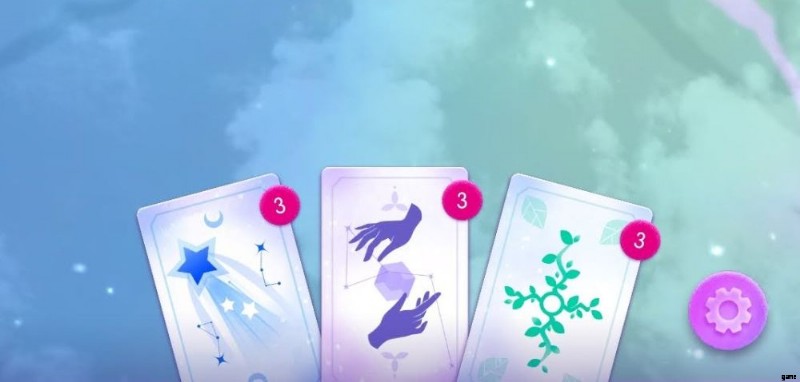
- Enchanted Ivy – spreads across the board starting from a tile of your choice and destroys all tiles in a cross-shaped explosion.
- Magical Hand – swaps two adjacent tiles.
- Shooting Star – destroys a single tile or an obstacle of your choice.
None of these spells waste a move when cast, and our advice is to use them only when you’re super close to completing the level task, but need an extra push to finish the job. In this sense, these power-ups should be used as a last resort.
You can win Boosters like these by playing the game and unlocking the reward at the end of each chapter. At the same time, you can use coins to pay for extra power-ups, although we don’t recommend this course of action, as they are best spent somewhere else.
3. Be Active During Events
Speaking of getting more Boosters, sometimes an event will become available in Swithcraft. Unlike most match-3 games we’ve played so far, this one is not swarming with events of all kinds. Here, they are rather rare occurrences, and so it would be in your best interest if you could make the time to play whenever such an event is unfolding.

Events are excellent opportunities to grab more free Boosters. For instance, during “Focus Meditation” players are challenged to beat a level from the first try to maintain a win streak and then start the next level with Special Gems on the board. The amount increases from one to a total of 3, as you continue to be on a streak.
Having the extra Boosters on the board as you start the level, will maximize your chances of success. Therefore, we strongly encourage you to log into the game and play as much as possible during events. This might accelerate your progress and bring you closer to finding out what happened to Lydia.
4. Check Bailey’s Dorm For Extra Prizes
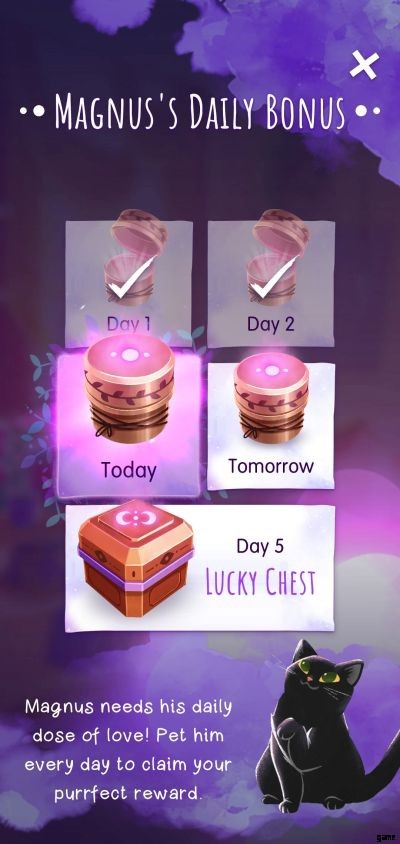
You can get your hands on more goodies by checking Bailey’s room regularly. To access her dorm, tap on the Dorm button at the bottom of the display while you’re visiting the game’s main menu. Here make sure you press on the black kitty lounging on the floor to get a daily gift bonus. This can consist of Boosters, cards or coins.
Speaking of cards, tap on the blue chest with a crest moon symbol on its lid to view Bailey’s card collections. Every time you complete one you’ll be rewarded with a nice chest filled with all sorts of goodies which obviously includes more power-ups. You can win cards by playing the game and unlocking progress rewards as you advance in the storyline.
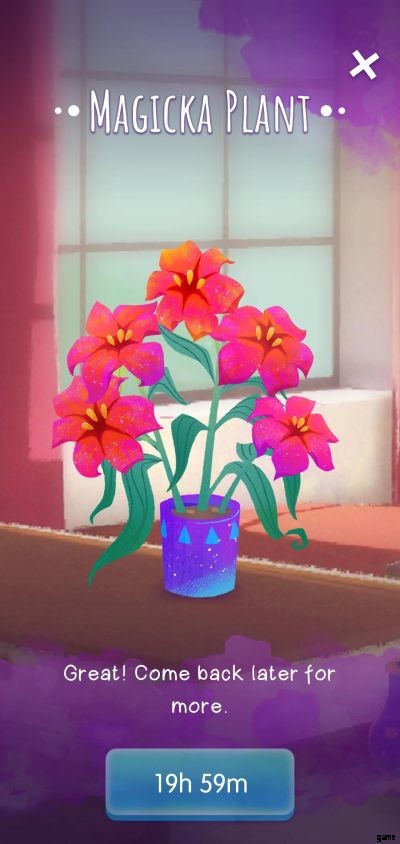
Additionally, make sure you tap on the various items scattered around the room too. Some might offer the opportunity to win some additional prizes if you’re willing to watch a series of ads. For instance, the Magicka Plants yields various rewards each day including coins as well as Magicka Crystals (!).
Make sure you exhaust these opportunities every day. More and more items you can interact with will become available in Bailey’s dorm as you make progress in the game
5. Only Spend Coins On Extra Moves
Apart from the all-important Magicka Crystals, at the end of each level you also gain a sum of coins. What are these for you might be wondering? Well, as we explained in a previous section these can be used to buy things such as pre-level Boosters, but we certainly don’t encourage you to follow this path. Instead, you should save the money up as best you can.
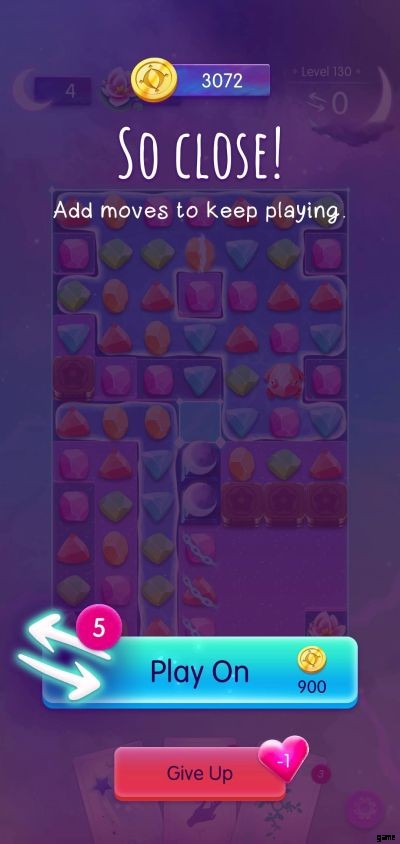
While beating levels seems like a walk in the park at first, things become a lot more convoluted later on. It won’t be so easy to win anymore, and so you might be forced to resort to extra help. One of these options is paying for 5 extra moves at the end of a level. This costs 900 coins, which is pretty expensive, but if you saved up diligently since the beginning of the game you should have plenty to spare when the time comes.
Just make sure that you’re absolutely sure you can complete the level within 5 moves. If you’re not, or if you still have a lot to go before completing the level objective, it’s best that you opt to just restart the level. Yes, you’ll lose a life, but hopefully the next time around the outcome will be more favorable in your direction.
You shouldn’t worry all that much about lives though, you can buy more of those too using coins. Or you can wait until they get refilled automatically. You’ll have to take a time out from playing in the meanwhile, though. On the other hand, you can win countless free lives by making progress in the game and unlocking chests, so for the most part you should be okay in this department.
6. How To Deal With Special Elements / Obstacles
In this section we’re going to talk about some of the most common special elements you’ll encounter while playing Switchcraft. These tiles are usually part of the level objective and so you should always focus on removing them first from the board.
One rule applies for most of these elements – matching in their vicinity will remove them from the board which is what you want. But as we will see in what follows, not all function according to this pattern of behavior.
- Butterflies – these are perhaps the most common special element in Switchcraft. Butterflies will sit on top of some gems and it is your job to collect them. You can do so by creating matches using those tiles that have been visited by insects. Make sure to check the level objective constantly, while playing such levels, to see how many butterflies you have left on the playfield.
Sometimes they can hide behind other elements, so you’ll need to get rid of those first to reveal the insect-bearing tile. Once they are out in the open, strive to create matches using these tiles. If you can use a Booster or two on them, the collection process will go a lot faster.
- Moonstones – sometimes you’ll encounter levels which feature one or more Moonstones on the board. Match next to them until they are fully charged to reveal Moon Gems, which are collectable items (most of the times). When playing one of these levels, make sure not to ignore the Moonstone.
It’s easy to focus on the other elements included in the objective, and forget that you need to charge the Moonstone first to be able to release the Moon Gems. Booster use is encouraged since it will help you charge the Moonstone faster.
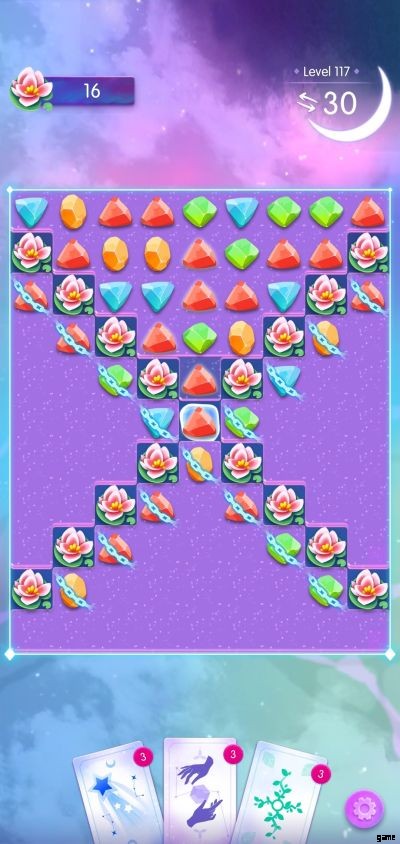
- Flowers – flowers are elements which need to be touched by water in order to be collected. On the other hand, water is an element that spreads. In order to carve a path for the water to reach the flowers, you’ll have to match next to a water tile to help it spread throughout the board.
Concentrate on flooding the board with water and don’t leave that tasks for later in the level. Employ the use of Boosters, which greatly helps with spreading the liquid.
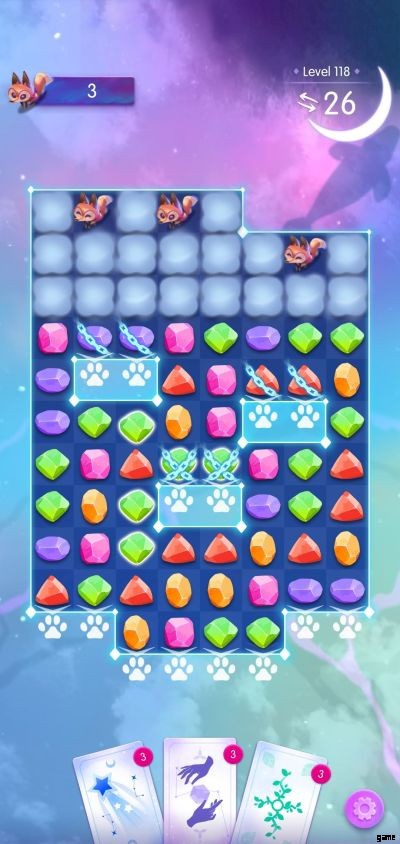
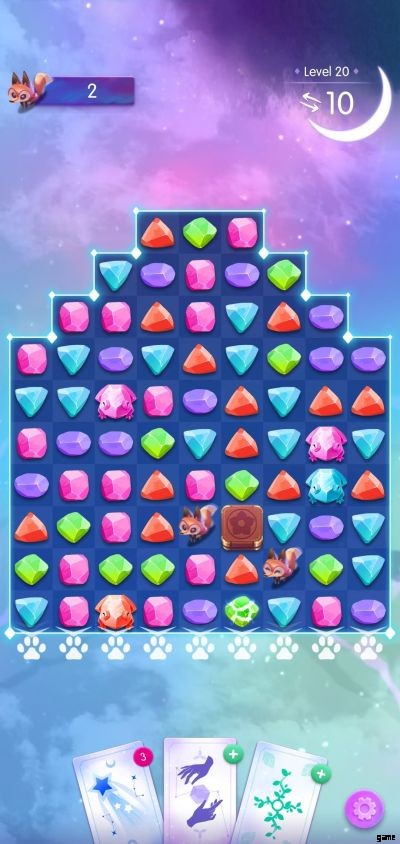
- Foxes – represent another unique element. When they appear in a level, they need to be removed from the board. Depending on the orientation of the board, you’ll have to carve a path for them, until they fall off.
If the exit is blocked by several other elements, you should focus your efforts on removing them first or carve a path for them so that they can fall all the way to the bottom. Boosters such as Lines and Bombs are quite useful in this scenario, because they can clear a direct path for them.
- Clouds – clouds are elements which can be removed by creating matches next to them. These elements can hide other items underneath and so it’s recommended that you remove them as fast as possible. Use Boosters if you have to, it will speed things up considerably.
- Chains – chains keep pieces in one place. To free them, players have to match the gems inside the chains with other similar tiles. Chains act as blockades, so the sooner you can get them out of the way the better, as they can hinder access to some parts of the playfield. Throw in a Booster or two to clear the away, especially Frogs and Lines.
This wraps up our collection of tips and strategies that we have for you at this moment regarding Switchcraft . We hope that you’ve picked up a lot of useful tricks from this guide which will allow you to go through the match-3 levels with far more ease. If you have knowledge of any strategies we haven’t discussed in this guide, feel free to share it with us via the comment section below!