Candy Manor 初心者向けガイド:より多くのレベルをクリアして邸宅を復元するためのヒント、コツ、戦略
マッチ 3 ゲームといえば、広く人気のある Candy Crush Saga や Bejeweled シリーズのゲームを聞いたことがあるでしょう。いずれにせよ、おそらくテトリス以来、マッチ 3 ゲームが時代遅れになったことはないようです。 2012 年の Candy Crush のリリースとその結果としての注目度は、リラックスと挑戦の中間に位置するこのジャンルに再訪する人をさらに引き付けたと言っても過言ではありません。
とはいえ、最近はマッチ 3 ゲームがたくさんあるのも不思議ではありません。原則は一般的にそれらの間で同じままです:ボードをクリアするか、目的を達成するために、3 つの同一のタイルを連続して一致させます。しかし、表面上は単純なパズル ゲームにひねりを加えた多数のバリエーションがあることは間違いありません。そのようなゲームの 1 つは、Tengame19 によって開発された基本プレイ無料のマッチ 3 タイトルである Candy Manor – Home Design です。

おそらく、Candy Manor が他のマッチ 3 ゲームと比べて際立っている理由は 2 つあります。1 つ目は、ライフ システムやエネルギー システムがないことです。すでにマッチ 3 ゲームに慣れている場合は、ほとんどのマッチ 3 では、ライフまたはエネルギー レベルが完全に回復するまで一定時間待たなければならない前に、少なくとも 5 つのゲームをプレイできることを知っているでしょう。この制限は、Candy Manor では実質的に存在しません。実際、ラウンドに負けてもライフを失うことはありません。勝つまでステージを最初からやり直す必要があります。
Candy Manor を典型的なマッチ 3 ゲームよりも少しユニークにするもう 1 つの点は、レベルを進めるだけでなく、プレイして装飾を取得して設定し、独自のバージョンの Candy Manor を美しくすることができることです。物語の前提は、あなたが祖父の巨大だが荒廃したキャンディーマナーを復元したいと考えている女性、メアリーを助けるということです.

Candy Manor をプレイしている場合は、初心者向けガイドで、ゲームプレイ体験を向上させ、各ラウンドを簡単に勝ち取り、装飾を楽しむために必要なヒントとコツを提供します。始めましょう!
キャンディー マナーを整える

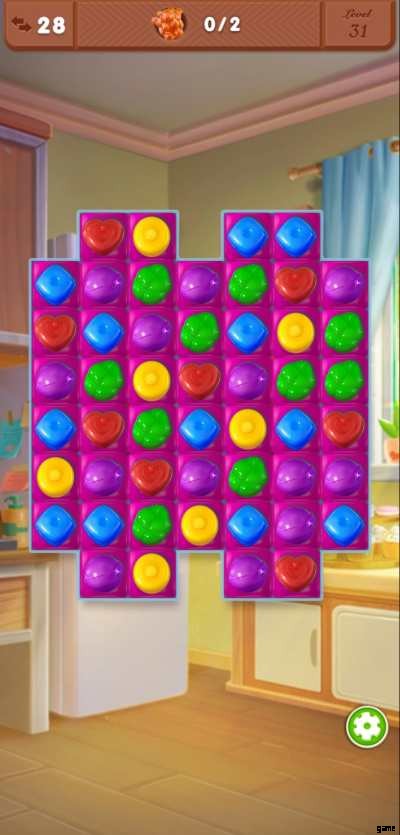
戦略を詳しく説明する前に、ゲームで何が期待できるかについて詳しく説明しましょう。邸宅をざっと見てみると、家だけでおよそ 10 室以上の部屋があることがわかります。これには、簡単に森になりそうな広大な屋外エリアのように見えるものは含まれていません。
これはおそらく、プレイヤーがカバーする必要がある多くの地面があるため、ゲームがライフやエネルギーの制限を課さないことが適切であると判断した理由です.実際、レベル 200 までに、せいぜい 4 つまたは 5 つの部屋を片付けて装飾したことになります。各部屋には、設定する必要がある装飾が少なくとも 10 個あります。また、最初にがれきや壊れた家具を片付ける必要があり、それ自体がレベルとしてカウントされます。
全体として、1 つの部屋だけを完全に復元するには、少なくとも 15 のゲームをプレイする必要がある場合があります。幸いなことに、各ラウンドはかなり速く、他の長いマッチ 3 ゲームをプレイしたことがある人にとっては、少し短く感じるかもしれません.
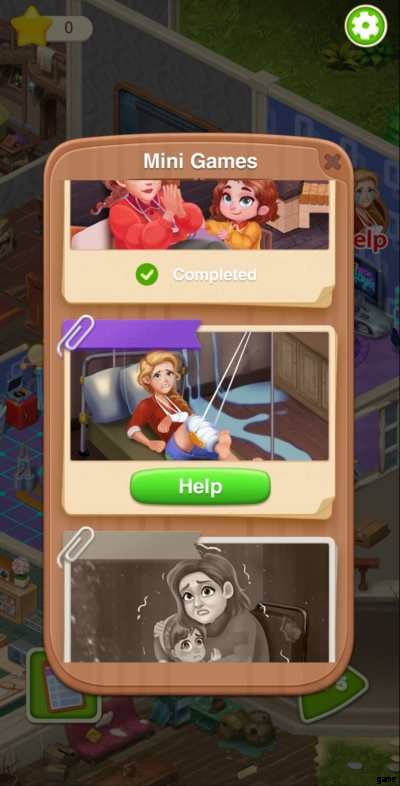
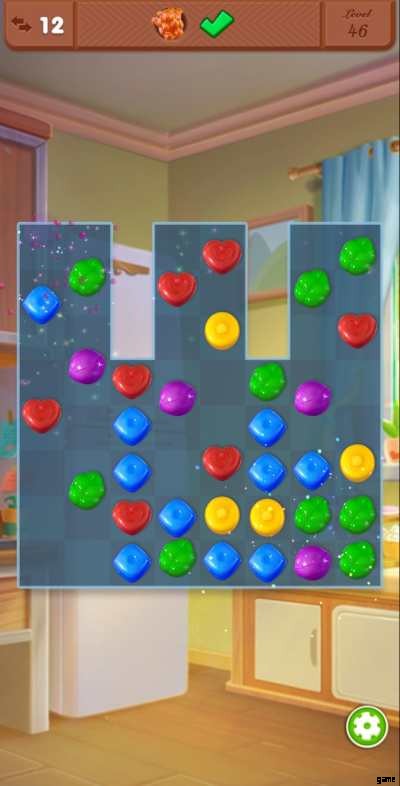
不思議なことに、Candy Manor はゲーム本体ではなく、ミニゲームから始まります。各ミニゲームは、ステージごとに 3 つのラウンドで構成されます。各ラウンドでは、特定のアイテムを組み合わせて収集する必要があります。すべてのステージを完了すると、スターを獲得できます。
ミニゲーム終了後、本編ゲーム開始。最初の 6 つのレベルは、ゲームによってプロンプトが表示されるチュートリアル レベルと見なされ、ゲームプレイの仕組み、直面する目標と障害、作成できるパワーアップを紹介します (これについては後で説明します)。
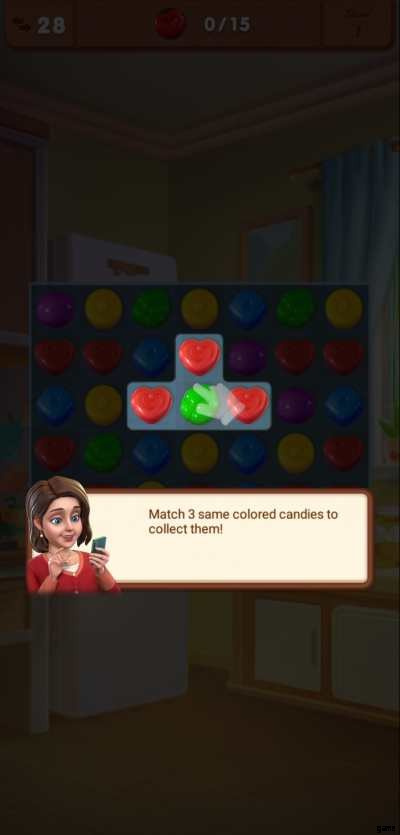
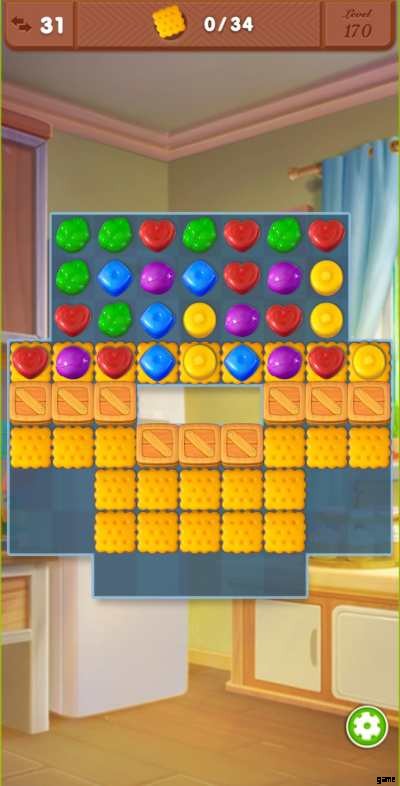
各ラウンドに勝つには、設定された手数以内に目標を達成する必要があります。各ラウンドには、毎回達成する必要がある異なる目標があります。ほとんどのマッチ 3 ゲームでは、同じ色の特定の数のキャンディーを一致させるよう求められますが、これはキャンディー マナーでも行われます。
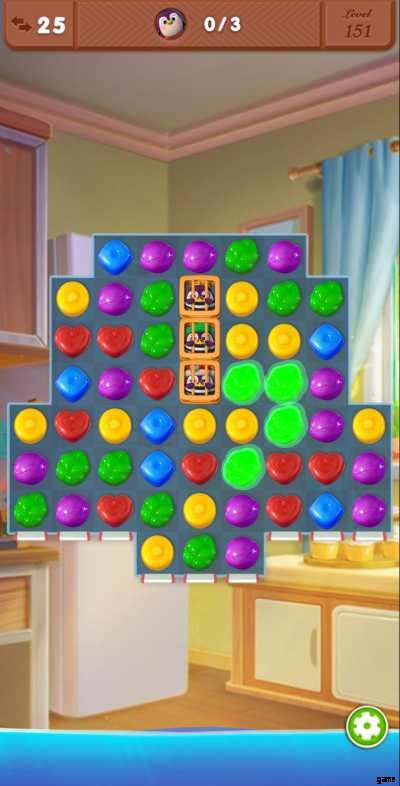
ただし、この目標はほとんどありません。Candy Manor では、通常、プレーヤーが箱などの障害物をボードからクリアしたり、クラッカーやグミベアなどのアイテムを収集したり、ペンギンをボードの最後に到達させたりする必要があるためです。ラウンドに勝つと、通常、星を 1 つ獲得できます。

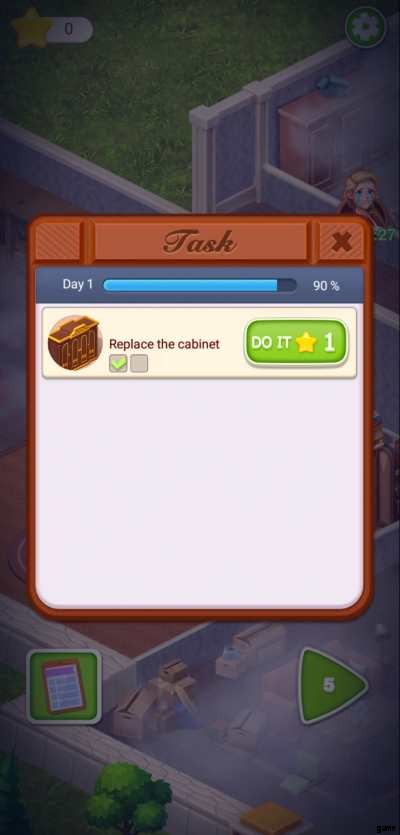
スターは 1 つのタスクを達成するために使用され、各タスクは特定の数のスターに相当します。通常、1 ラウンドは 1 つのスターに相当します。タスクによっては、星が 1 つだけ必要な場合もあれば、星が 1 つ以上必要な場合もあります。場合によっては、リストからそのタスクにチェックを入れて次のタスクに移る前に、2 つ以上のステップが必要になることがあります。各ステップは一定数の星に相当します。未処理のタスクを完了するまで、他のタスクは表示されません。
簡単に言うと、Candy Manor – Home Design では、次のことを行う必要があります:
- ラウンドに勝利してスターを獲得する
- 星を使って、部屋の片付けや装飾のセットアップなどのタスクを達成してください。
- 現在の部屋のタスクがすべて完了したら、別の部屋に移動します。
装飾のセットアップ
このゲームはキャンディー マナーの設計に関するものなので、各部屋に設置する必要がある装飾のほとんどは選択可能ですが、他の部屋は選択できないことに注意してください。テーマを持っているように見える装飾の 3 つの選択肢が与えられます。

1つは、さまざまな木製のオブジェクトや家具を使用した、よりリラックスした、半素朴な、または自然にインスパイアされたテーマです。 Another is a more elegant theme where most furniture have gold trimmings, with a white and aquamarine color scheme. The last is a more zany, outlandish theme that will make you think of Willy Wonka’s chocolate factory.
Of course, not all furniture and decor follow these themes, but they’re what you will generally encounter. Picking certain types of decoration won’t have any bearing on your gameplay, though. You may choose to follow a certain theme or go completely wild with your choices. But you won’t get bonuses and it’s purely for your own entertainment or aesthetic satisfaction.
In other cases, you might not be able to pick a specific decor item as some are preset. This includes the mini fridge, the robot in the game room, the family photos on the wall, and others.
Naturally, the question in your mind might be, “Can I still change the decor once I’ve picked one?”絶対! All you need to do is long press on a particular decor item you want to change and a yellow arrow will flash on the screen. After this, you will be given the same three decor choices and you can pick a new one. This action won’t cost you any stars and is totally free. You can change the decor as many times as you want. Keep in mind that preset decor will remain as is.

Now that you have an idea of what the game is all about, it’s time to get into the exciting part of our Candy Manor beginner’s guide:tips and tricks to help you win each round!
1. Observe the Board
Match-3 games are relatively relaxing by nature. As we said before, these types of games are comfortably nestled between something more laid-back yet challenging all the same. While there is a set number of moves you can only make to reach your objective, there’s no time limit when you play a round of Candy Manor. This means you can take as much time as you want to contemplate your approach for each stage.
With the absence of a time limit, it’s important to keenly observe the board for each round. Most match-3 games will typically have a square board, though their orientation and layout may vary. The same is true for Candy Manor. Even during the first few levels, a board in Candy Manor will have at least one obstacle you need to clear out.
Tiles that need to be collected may also be placed in areas that can only be cleared by using power-ups, which can be gained by matching four or more candies in a certain pattern. An initial observation of the board can give you an idea of the kind of strategy you may want to apply later.
In observing the board, you’ll also see which candies can be initially matched and whether it’s more prudent to make one choice over another. Will matching to gain a potential power-up be more appropriate, or should you just match those three candies that are right beside an obstacle even if you don’t gain a boost? Taking a good look at your board before making any sudden match-ups will clarify your approach and may even save those precious moves in the long run.
2. Focus on the Objective
Some boards in Candy Manor can be tricky. One good example is when you encounter a board with pink jellies. These pink jellies are usually paired with the objective of collecting a certain number of gummy bears.
However, you will not initially see where these gummy bears are because they’re hidden underneath the pink jellies and can only be seen and collected when these jellies are cleared out. What’s tricky about this setup is that you may sometimes fall into the trap of thinking you need to clear out all the pink jellies when your primary objective is to actually collect the gummy bears hidden beneath them.
That said, focus on your objective. You might occasionally forget to do this when faced with a tricky board. Fortunately, your objective for the round can be easily seen just right at the top of the screen. Give it a glance to remind you of what you really need to do to win.
3. Don’t Always Follow the Hints
When faced with the chaos of a match-3 board, you might sometimes think you’ve run out of options and the game will give you a hint. In Candy Manor, hints come in the form of potential matches wherein certain candies are highlighted by a faint glow. In some cases, when you’ve left the board idle for several seconds, the game will also offer a hint.
While hints can be helpful, don’t feel obliged to follow them all the time. Hints don’t necessarily give you the best option to win a round. Go back to the first tip we’ve recommended:observe the board.
Take your time to find matches that are more aligned with the completion of your objective. Only follow a hint when, after you’ve observed the board, you’re certain that there are absolutely no alternative moves left, or this hint is what you believe may be the best move to make.
4. Start Matching from the Bottom
Most stories of success tend to begin by working your way up. The same principle of starting from the bottom also applies to Candy Manor:as much as possible, try to match candies from the bottom of the board.
While it’s not entirely wrong to match candies that are located somewhere in the middle or at the top, matching from the bottom gives you a greater chance of changing the contents of the board to your advantage.
This is especially true if you successfully match candies vertically. Matching from the top will only bring a new set of candies in that very limited area. Meanwhile, matching from the bottom may affect all other candies and clear more tiles, thus letting more new candies enter the board.
Additionally, most obstacles that you will find in Candy Manor are located at the bottom, which is why this is the best place to start matching. You get to clear obstacles while replenishing the board with new candies. It’s hitting two birds with one stone.
5. Make as Many Power-Ups as You Can
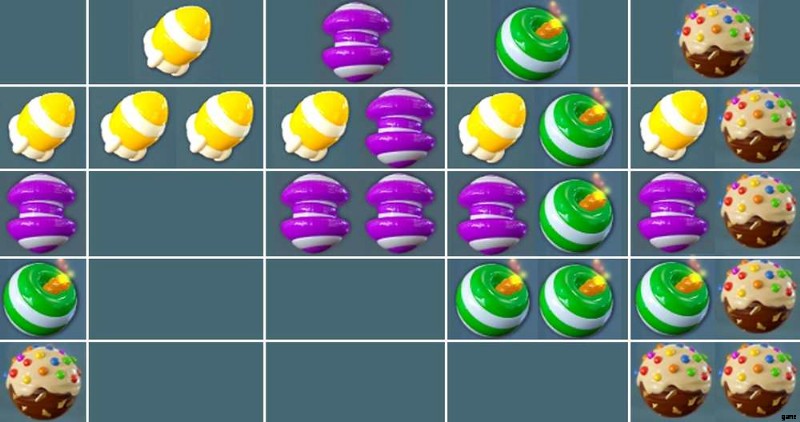
As with most match-3 games, power-ups or boosters can be gained by matching more than three candies in a certain pattern. In Candy Manor, you have four power-ups that can be created:

Plane
You can get a Plane when you match four candies of the same color in a square pattern. Planes can be activated when matched with at least two candies of the same color. When activated, Planes will fly anywhere on the board, targeting one tile typically related to the stage’s objective. For instance, if your goal is to get 10 red candies, activating a Plane will cause it to collect one red candy.
On the other hand, if your goal is to, say, collect a cracker, a Plane will fly to a tile with a cracker to collect it. Take note that this is considered one move and some objects may need two or more moves to be cleared or collected.


Rocket
Rockets can be obtained when you match four candies of the same color either horizontally or vertically. To activate rockets, you need to match it with at least two other candies of the same color. When activated, Rockets will clear the board in a straight horizontal or vertical line. A Rocket’s direction when activated will depend on which direction you’ve matched the four tiles to obtain this power-up.

ボム
You can get a Bomb by matching five candies of the same color to form an “L” shape. Activating a Bomb will require you to match it with at least two candies of the same color. Upon activation, a bomb will clear the area up to a certain radius, with the Bomb acting as the center.

Rainbow
Rainbows are made by matching five candies of the same color in a straight horizontal or vertical line. Unlike the three previous power-ups, all you need to do to activate a Rainbow is to match it with one candy of any color. When matched with a regular candy, a Rainbow will clear the board of all candies of that color.
Rainbows can also be matched with other power-ups. For instance, if you match a Rainbow with a green Bomb, all the green candies on the board will become bombs and will be automatically activated. Rainbows will not be activated or detonated by other power-ups unless paired with them.
Power-ups themselves can be matched together, leading to 10 combinations. Each combination has a different effect that can help you achieve your objective for the round. Two power-ups can be combined regardless of what color they might have. Let’s go through each pair in detail, from left to right, moving downward based on the table above:

Plane x Plane: You’ll activate three Planes that will fly to three different tiles related to your objective. Best used for collecting unobstructed objects or candies.

Plane x Rocket: One Plane flies to one tile to clear it, then it will clear the rest of the area either vertically or horizontally, depending on which Rocket you’ve matched the Plane with. Best used for collecting unobstructed objects or candies. May also be used for clearing unobstructed tiles.

Plane x Bomb: One Plane flies to one tile, clearing it. This cleared tile will be treated as the center of the Bomb’s radius. Thus, the area around it will be cleared as well. Best used for collecting one item and removing obstacles or blockades. May also be used to spread tiles like turf grass in a wider area.

Plane x Rainbow: All tiles of the same color of the Plane will become Planes and will be automatically activated. Best used for collecting multiple objects or candies.

Rocket x Rocket: Clears a cross path (one vertical line and one horizontal line) spanning the width and length of the entire board. Best used for collecting objects or candies, and clearing obstacles.

Rocket x Bomb: Combining these two will clear three vertical or horizontal lines depending on the direction of the Rocket the Bomb was paired with. This spans the width and length of the entire board. Best used for clearing obstacles.

Rocket x Rainbow: All tiles of the same color of the Rocket will turn into Rockets and are automatically activated. The direction of the Rockets will be at random. Existing Rockets on the board will retain their current direction but will still be activated. Best used for both clearing obstacles and collecting multiple objects or candies.

Bomb x Bomb: Combining two Bombs will trigger three explosions with a radius bigger than a single activated Bomb. Best used for clearing obstacles.

Bomb x Rainbow :All candies of the same color of the Bomb will turn into Bombs and will be automatically activated. Best used for clearing obstacles or spreading tiles like turf grass.

Rainbow x Rainbow: This pair will clear the entire board. Existing power-ups on the board will also be activated. Best used for collecting multiple objects or candies.
While there are certainly instances when matching three candies in a row may prove to be the wiser approach, it also pays to match candies that result in power-ups. Do this as much as possible. Having numerous power-ups on your board can definitely turn the tide when you find yourself in a bind.
Matching in threes will affect the board only to a certain extent, but having numerous power-ups waiting to be activated at the right time can spell the difference between success and failure. This is especially true if you manage to activate numerous power-ups in one move. Keeping power-ups close to each other will also open up a chance wherein you can combine two for a greater area of effect.
You don’t necessarily have to activate power-ups as soon as you get them, but it’s better to keep them around and not need them instead of not having them at all. However, this isn’t to say that you should “hoard” power-ups either. At one point or another, you will have to activate them. Otherwise, the changing contents of the board will trigger their activation by accident, especially if you’ve managed to accumulate more than a handful sitting on your board.
Moreover, though it’s also a good idea to try and get two power-ups next to each other to trigger a combination, don’t stress yourself out with this tactic. The chances of you getting two Rainbows right next to each other may be rare even though it sounds like an awesome scenario. Weigh your options wisely and remain focused on your objective to ensure victory.
6. Keep at Least One Plane Handy

Further to power-ups, there’s one that you should never do without:Planes! This is because one of the most frustrating predicaments in a match-3 game is when you have that one tile you can’t seem to clear or collect an item from. There are no matches around it and, try as you might, you can’t seem to get a good arrangement of candies near it. You’re running out of moves and it’s the last tile hindering you from a sure win.
This kind of scenario, which can be pretty common, is exactly why it’s always good to keep at least one Plane present on your board. Planes, as you know, can fly anywhere on the board and target one tile related to your objective. If you find yourself unable to clear that last corner tile or a tile that’s placed in an odd, unreachable position, activating a Plane can be your key to victory.
7. Know Your Obstacles
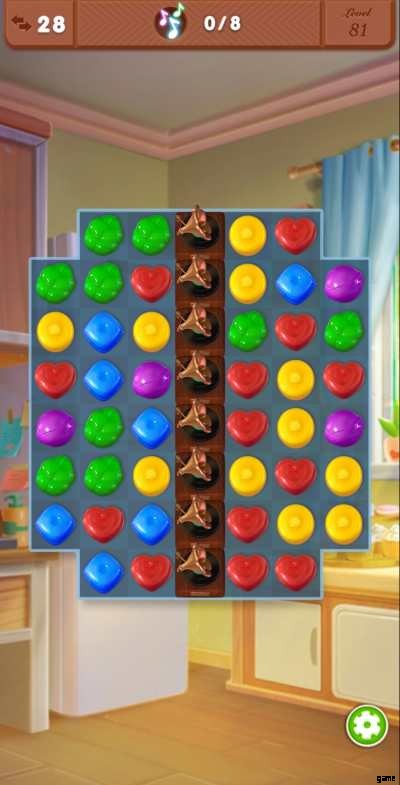
Aside from knowing which items can be to your advantage, knowing the obstacles you’re facing will also help you choose the best moves to take. Candy Manor lets you encounter various obstacles that can come in the form of different items. You’ll see at least three types of crates, frozen candies, grass, flower bushes, turntables, a mini fridge with soda bottles inside, and many more.
Clearing obstacles will typically require you to match three or more candies right beside each obstacle. There are many other items you will encounter but they are typically just variations of the following obstacles:
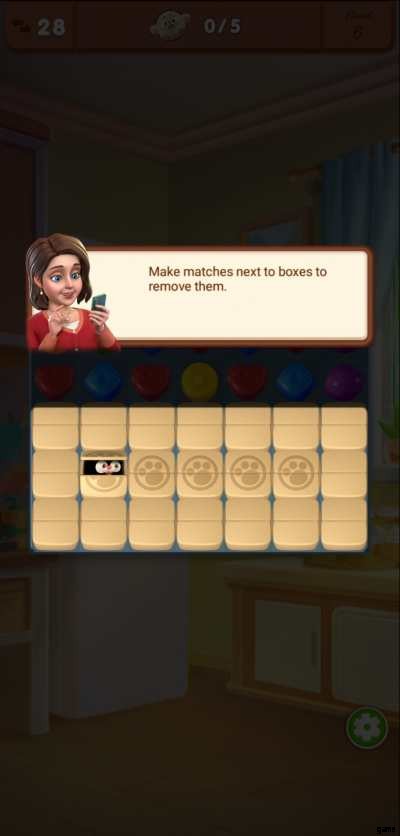
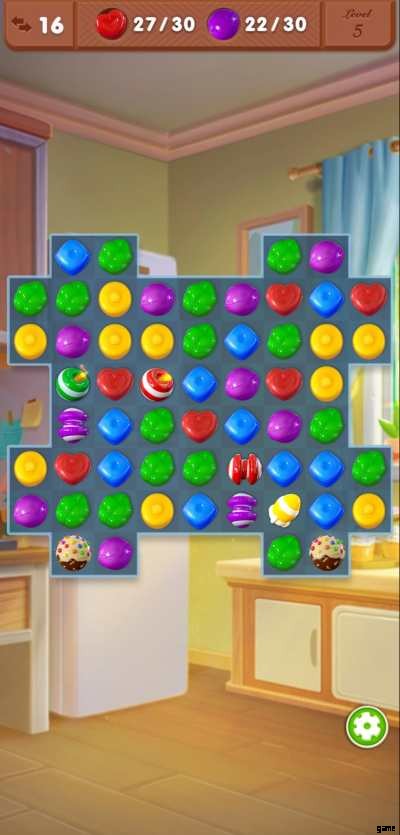
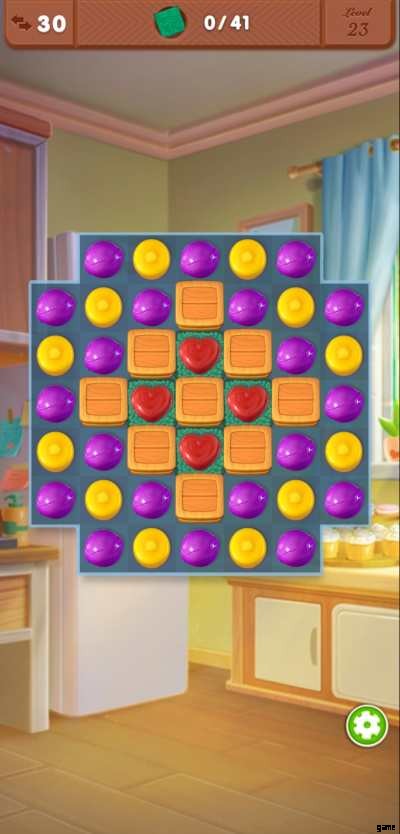
- Items that must be cleared or collected: These are probably the most common obstacles you will encounter. Items such as crates or boxes can be cleared when you match three or more candies next to them. These obstacles also serve as blockades that you need to clear to free up more space on the board. Some obstacles have more than one layer and you will need to match candies next to them repeatedly to collect them or clear them from the board.
For instance, regular crackers only have one layer and will be cleared after matching three candies in a row once. A cracker with a spread on top means it has two layers and you need to match three candies in a row twice to clear them from the board. Some obstacles, like pearls, may be moved while others, like boxes or mini fridges, are stationary.
- Items that yield your objective: Some items – like boxes, flower bushes, and turntables – must be cleared or activated so you can collect certain items for your objective. For instance, flower bushes hide rabbits and turntables contain musical notes that you need to collect.
These items may also have more than one layer to clear before you can collect the object hidden inside them. Specifically for turntables, these items cannot be removed from the board but can only be activated so you can collect their musical notes.

- Items that must fill up the board: In some rounds, you need to fill the board with a certain tile instead of clearing them out. This is particularly the case for turf grass (not to be confused with flower bushes). You can fill the board with turf grass by matching at least one candy on a grass tile with two others on a regular tile. Matching three candies on regular tiles will not spread the turf grass.
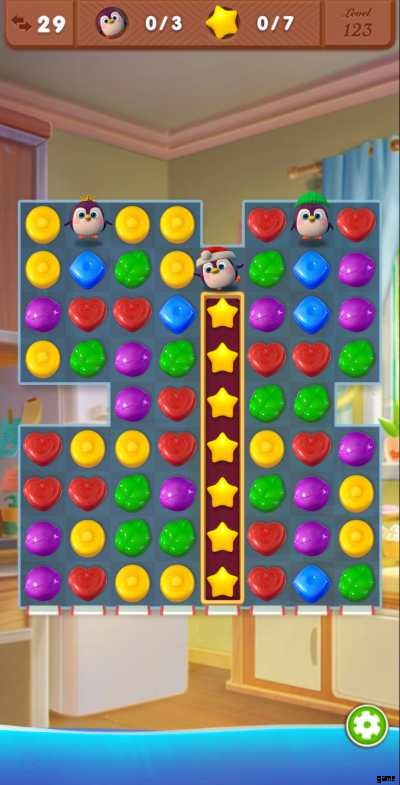
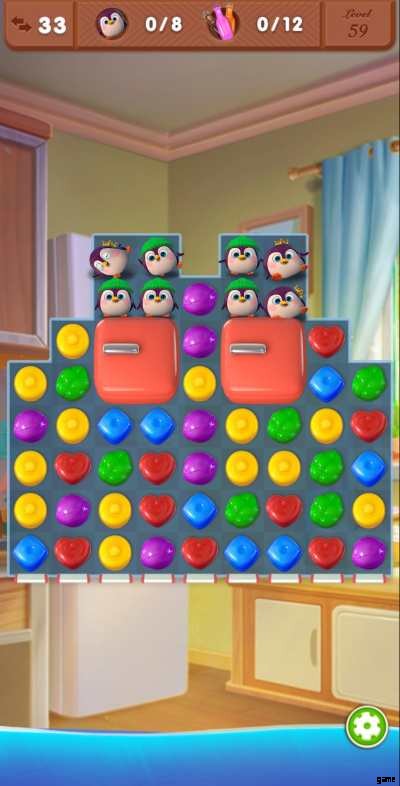
- Items that must be brought to the end of the board: One good example for this is the penguin. Collecting penguins means you have to bring them to the very end of the board, where they will use a springboard to jump into the water below.
In some cases, succeeding penguins will not appear on the board unless you’ve collected the previous one. You will typically see a dispenser at the very top of the board, which indicates the direction where penguins can potentially appear.
There’s no doubt that obstacles will get more challenging as the game progresses. Fortunately, the progression of difficulty isn’t that fast as the game largely retains its relaxing nature. Having an idea of what obstacles you’ll be facing can prepare you for their more difficult versions as you continue restoring Candy Manor.
8. Take Risks
Let’s face it—match-3 games are also a bit about luck since candies that appear on the board are at random. That said, taking some (calculated) risks may be in order. If you feel that you’re having a bit of a hard time with the current contents of the board, you may deliberately make moves to force yourself into a no-match board so it can rearrange itself and work better to your advantage. But keep in mind that you will have to spend moves for this so use this tactic sparingly.
9. Time It Right
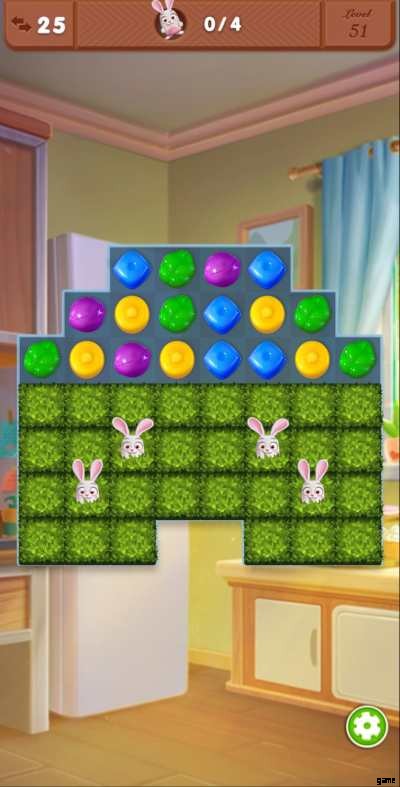
This tip specifically applies to collecting rabbits (or similar obstacles you may encounter further into the game). Collecting rabbits can be tricky as they can hide under flower bushes and move from one bush tile to the next.
When attempting to collect these critters, timing is key. What’s challenging about rabbits is that by the time you match candies next to them, they would have already hidden themselves underneath the bush and moved to another tile.
To avoid wasting moves, you either need to think fast or clear out more bush tiles to lessen where rabbits can hide and transfer. Only match tiles next to a rabbit when it clearly rears its head above the bush. This window of opportunity will only last for a few seconds.
Otherwise, you’re better off simply clearing more bush tiles. When there are no more bush tiles they could use to move and hide under, rabbits will keep their heads above a bush until you collect them. It may be prudent to use a combination of Bombs for clearing bushes and Planes to collect these wily creatures, especially when they’re out of the way.
10. Watch the Ads
We know, we know—ads can be annoying and intrusive. However, since Candy Manor is free-to-play, getting ads can seem like a foregone conclusion. Finished a round? There’s an ad after that. Reopened the game after exiting? There’s an ad for that. Need extra moves? There’s an ad for that. Want a booster pre-game? There’s an ad for that. They’re virtually inescapable.

That said, you might as well take advantage of ads that will reward you with something useful. Case in point are pre-game power-ups. Upon reaching Level 7, you are offered a pre-game power-up, which you can obtain by watching a short ad, usually one that lasts for five seconds.
After watching this short ad, you can unlock a pre-game power-up by clicking on the treasure chest just before you enter a round. You can get one or two power-ups (except for the Rainbow) present on your board at the beginning of the round.

Similarly, when you lose a round, the game also offers you to watch an ad for five extra moves. Ads for these usually last 30 seconds or more. You will be given five seconds to decide whether you want to avail of the extra moves or not. Since there’s no life or energy system in Candy Manor, you can always refuse to avail of the extra moves, but that would mean you have to start the round all over again.
Watching the 30-second ad will be handy when you’re just one or two moves short of winning. If you lose a second time after using your five extra moves, you would have to repeat the entire round.
11. Play the Mini Games
Consider this tip somewhat of a bonus since mini games in Candy Manor can only get you one star. As previously mentioned, mini games consist of four rounds each stage. Each round applies the same principle as the game proper, though you would need to match items such as doors, windows, jackets, or even burgers to collect them. Unlike candies, these items don’t yield power-ups when more than three are matched. You also can’t match these non-candy items with Rainbows.
The premise of the mini games are a bit unclear, only that you need to help people repair items in their home, provide them with clothes, or help them with their injuries or illness. Once you’ve completed all the stages, you will be rewarded with one star that you can add to other stars you’ve accumulated to complete outstanding tasks in the game proper.
Though this can seem like a trifle, mini games are more of a break from the rather repetitive nature of the game proper itself. Since mini games don’t apply a limited number of moves, you’re sure to get that one star at the end.
The only caveat about playing mini games is that the waiting time increases before you can unlock another mini game. Waiting times can be at least 12 hours, which will be longer as you progress through succeeding mini games.
With this, we come to the end of our beginner’s guide for Candy Manor. We hope that you enjoyed reading this article and found our tips useful so you can restore Candy Manor to its former glory while having fun along the way. If you have tips of your own that we missed mentioning in this guide, feel free to share them in the comment section below! Happy decorating!