すごい:シャドウランズ - 最初の者たちの墓所レイドボスガイド
ワールド オブ ウォークラフト:シャドウランズ 最新の襲撃は最初のものの墓所です 、プレイヤーは The Shadowlands の壮大なフィナーレを目撃します 話。さまざまな仕組みがあるため、この襲撃は厄介なものになる可能性があります. The Sepulcher of the First Ones レイドに不慣れで、生き残る方法を学びたい人、または 100 回目の実行で知識を磨きたい人にとって、あなたは正しい場所にいます.
11 人のボスと対決します。ボスの中には、他のボスよりも難しいメカニズムを備えたものもあります。最後のボスは看守 そして彼の物語の壮大な結末。 The Sepulcher of the First Ones の難易度ノーマルとヒロイックで生き残る方法を見ていきましょう。
用心深いガーディアン
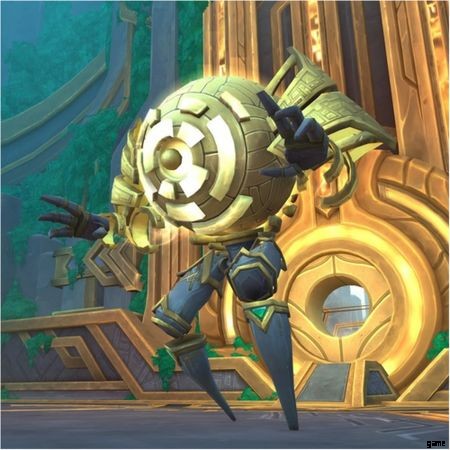
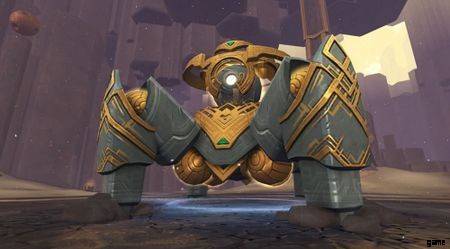
Sepulcher of the First Ones の最初のボスでは、3 つのフェーズで作業する必要があります。メインボスは門の壁の内側から始まり、最初は攻撃できません。
フェーズ 1 - パーティは、自動防御マトリックスの近くにあるアドを破壊する必要があります 敵をパワーアップします。パワーアップすると、エクスポーズド コアをキャストします 、パーティーはフォースフィールドに避難したいと思うでしょう 追加の周り。フォース フィールドが落ちると、不安定なコア がドロップし、これをゲートで冬眠しているボスに実行して、メインのボス戦フェーズを開始する必要があります。メインボスとの戦いを開始するには、ドアのボスに 3 つの不安定なコアを実行する必要があります。
組み立て済みセントリー あなたが直面する追加の大半になります。 崩壊の波に注意 ライン攻撃は短時間で爆発し、タンクは Dissonance に注意する必要があります。 タンクは、これを 1 ~ 2 スタックした後に交換したくなるでしょう。
ポイントディフェンスドローン あらゆる機会に中断する必要があります。ランダムなプレイヤーをターゲットにして、灼熱のアブレーションをキャストします。 、プレイヤーにテレポートしてダメージを与えます。これらの追加は、この戦いを容易にするために切断して CC することができます。
揮発性材料 グループでスポーンし、切断することができます。 適応サブルーチンをキャストします 長くいるほど、ダメージとスピードが増加します。
プレイヤーは、地面に現れるあらゆる地面効果をかわし、放射性コア、屈折爆風、 に気をつけたいと思うでしょう。 そして脱解像度。 放射性コアは、戦闘中にレイド全体に少量のダメージを与えます。 Refracted Blast はランダムなプレイヤーを対象とし、かわすことができます。デレゾリューションもランダムなプレイヤーをターゲットにして戦場を横切ります。ターゲットにされたプレイヤーはパーティーから逃げ出したいので、回避する時間があります。
フェーズ 2 - HP が 40% になると、ボスがドアから出てきます。即死の原因となるため、進路に立たないように注意してください。屈折した爆発はこのフェーズでもメカニズムのままであり、放射性コアは壊れたコアになります。 これは同じメカニズムですが、より多くのダメージを与えます。 物質溶解 ランダムなパーティ メンバーにキャストされ、反物質を生成します オーブ。これらのオーブのいずれかに触れると、大きなダメージを受け、次に触れるとダメージが増加するデバフに苦しむので、絶対に避けてください. 分割解決 地面にバッドが出現し、短時間で爆発します。これらは何としてでも避けてください。 空気圧の影響 キャストごとにタンクが交換されます。 2 倍に増加する厄介なデバフを適用します。
フェーズ 3 - ヘルスが 15% になると、ボスは コア オーバーロード をキャストし始めます .戦闘が終了するまで、ボスはレイドパーティに増加したダメージを与えるため、これは DPS チェックになります。ここでクールダウンと防御スキルを使用すると、スムーズに進めることができます。
ヒロイック - ヒロイックでの唯一の追加は、フォース フィールド メカニックへのわずかな変更です。タンクは、ダメージ軽減効果が存在するため、追加がフォース フィールド内に入らないようにする必要があります。
貪欲な鴉、スコレックス
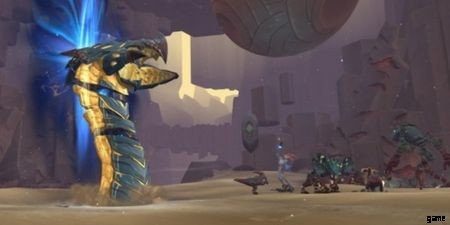
このレイドの 2 番目のボスのメイン メカニズムは エフェメラ ダスト です 、ボスの能力のいくつかは、このスタック可能なデバフをプレイヤーに適用し、ボスにRavening Burrowをキャストさせることによって削除する必要があります. これに当たったプレイヤーはスタックが削除され、これがこの戦いを終わらせる鍵となりますが、穴を掘るたびに 5% のダメージ増加バフが得られることに注意してください。
| メカニック名 | 説明と戦略 |
| むさぼる血 | ボスはパーティー メンバーに向けて血を撃ちます。 This will cause damage and a Haste reduction debuff. This can be dispelled. |
| Dust Flail | Afflicting all players will a stack of Ephemera Dust and cause damage. |
| Retch | A random player will be the target of this attack, it is a cone and deals a huge amount of damage and afflicts players who are hit with Warp Sickness disorienting the hit players. |
| Wormhole Jaws | The two tanks will need to be close together for this fight. Skolex will auto-attack the focused tank and the next closest player within 10 yards, which should be the other tank. Everyone else should not be within 10 yards of the tanks. |
| Ravening Burrow | When the entire raiding party is standing together, Skolex will go underground and strike with Ravening Burrow. This will remove all stacks of Ephemera Dust and gain Insatiable , a five percent damage increase stackable buff. Removing Ephemera Dust stacks when the party members average about five stacks is a good time to start this mechanic. |
| Destroy | If no players are within melee range, the party will receive raid-wide damage. |
| Riftmaw &Rend | The boss's energy will reach 100 and he will cast Riftmaw and Rend combos. Tanks will want to stand apart to not be cleaved by Riftmaw and will want to tank swap after each stack of Rend. |
Heroic - The additional mechanics in heroic are Collapsing Emptiness and Dust Blast. Each Ravening Burrow will leave a ground-effect pool of Collapsing Emptiness. Make sure to spread out Ravening Burrows around the encounter space to get the boss away from these pools. Dust Blast will target the three farthest party members and give out a stack of Ephemera Dust. Ranged players need to rotate, so you don't have three Ranged players taking the brunt of these stacks at any given point. They should also stand a decent distance apart to not receive splash damage.
Artificer Xy'mox
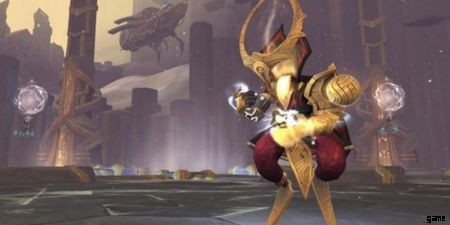
This version of Artificer Xy'mox is reminiscent of the Castle Nathria version of the fight. Dimensional Tears will want to be placed in the center of the encounter space and at the edge to make the most use of the Genesis Rings mechanic.
Phase One -
| Mechanic Name | Description and Strategy |
| Dimensional Tears | Two random players will be targeted with this debuff. One player needs to run it to the edge of the room and the other to the center. Once the debuff timer runs its course a portal will be placed in each spot, creating a teleporter. |
| Genesis Rings | Throughout the encounter Genesis Rings will activate either expanding from the center to the periphery or the reverse. The party will want to use the Dimensional Tear portals to avoid getting hit with this mechanic as it causes a whole lot of damage (probably an insta-kill for most) and a DoT. |
| Glyph of Relocation | The focused tank will be targeted with Glyph of Relocation. Which deals fall-off damage and pulls the raid to the tank. The affected tank will want to run a distance from the raid to prevent a ton of damage, tanks will need to place themselves strategically. On heroic, placement is very important, since Continuum Stasis Traps are a thing you don't want players falling into. |
| Hyperlight Supernova | When this is cast, everyone needs to spread out to avoid cleave damage. |
| Gunship Barrage | The boss room will be hit with a barrage, players need to dodge the markers on the ground to avoid taking damage. |
Phase Two -
At 75 and 50 percent health the boss will spawn adds and obtain Genesis Bulwark , reducing damage almost completely. The Xy Acolyte adds need to be downed quickly, if they reach 100 energy it will end in a raid wipe. They will also cast a cone that deals damage and gives out a debuff increasing arcane damage for one minute. Avoid this if you can. Xy Spellslinger adds will channel Debilitating Ray which deals damage and reduces mobility. While these adds are alive the center of the encounter area will cast Genesis Supernova which deals damage and increases the damage of Genesis Supernova by ten percent, so DPS those adds down fast!
Heroic -
Continuum Stasis Trap is the additional mechanic to heroic difficulty. These will spawn on random players and anyone who steps in them will be stunned, take damage, and will be stuck until fellow players destroy the trap. They can be cleared using immunities or stun break abilities.
Dausegne, The Fallen Oracle
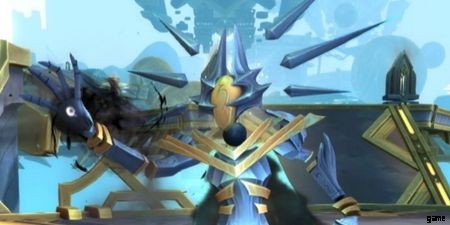
Each time the boss casts an ability she will use mana. When her mana reaches zero, will move to a Reservoir of the First Ones and pull out energy. Moving the boss around the room to make sure untapped Reservoirs do not have Enroaching Dominion pools around them. Moving her clockwise or counterclock wise around the room is your best bet.
| Mechanic Name | Description and Strategy |
| Disintegration Halo | Disintegration Halos will spawn from tapped reservoirs and cross the whole room. Crossing these rings will deal damage and grant a five-second debuff increasing damage of the next ring hit by five times. As the fight goes on these will spawn regularly and in the order the reservoirs were tapped. You will have enough time for the debuff to fall off before hit with the next ring. Once the boss casts Total Domination the rings will show up rapidly. |
| Inevitable Dominion | Once out of mana the boss will move to a reservoir. Siphon Reservoir will start to cause her mana to regenerate, once full she will channel Inevitable Dominion. Once the channel starts a Siphoned Barrier will spawn, this can be destroyed before the channel is over, causing ten percent damage to the boss over ten seconds. |
| Domination Core | An add will occasionally spawn called, Domination Core. It will drop Encroaching Dominion on the ground and cast Domination Bolt . Encroaching Dominion will stay around for the whole fight and take up space with a damaging pool. Each cast of Inevitable Dominion will cause these puddles to expand. These Domination Core adds need to downed as quickly as possible. |
| Infused Strikes | The Boss' melee attacks apply stacks of Infused Strikes . This is a stackable DoT that will deal raid-wide damage when the debuff timer expires. Tank swap between four and seven stacks, since more stacks mean more raid-wide damage. |
| Staggering Barrage | This will be cast on a random player and attempt to push them back. Fellow party members need to stack in front of the targeted player to split the damage and push-back effect. If pointed to the center of the room, it is less likely things can go wrong. |
| Obliteration Arc | A frontal cone attack that deals dealing some significant damage to those hit. Don't stand in the way of this one! |
Heroic -
In heroic Staggering Barrage has an additional mechanic to take note of. Players who soak this to prevent the pushback and damage will need to alternate since previous players who soaked, if they soak again, will probably die.
Halondrus, The Reclaimer
This is a three-phase fight, the first and third phases resemble one another. Players will need to make sure Ephemeral Motes do not reach the boss and avoid some pretty fun mechanics. Overall isn't too daunting, but there are a lot of mechanics to know, so let's get into it.
Phase One - 100 to 80 Percent and 80 to 50 Percent
| Mechanic Name | Description and Strategy |
| Reclaim | The boss will put on a shield that will take two percent of its max Hp, and it will send out raid-wide damage as long as the shield is up as well as pull Ephemera to it. Destroy the shield quickly to prevent damage and Ephemera Pulls. |
| Seismic Tremors | Tremors will spawn in the room and will deal damage to players within six yards. The eruption will cause an Ephemeral Fissure to open. Ephemeral Motes will spawn from these fissures and move to the boss. These can be touched and will drop to the ground and can be hit away from the boss. These need to be prevented from reaching the boss at all costs, otherwise, massive damage will occur. |
| Earthbreaker Missiles | The party will be targeted with this mechanic. It will deal some damage but nothing significant to the targeted player and those within six yards. Spread out of this. Once they hit, Aftershock will appear on the floor. After three seconds they will explode and deal huge damage. Make sure to be clear of the impact craters. |
| Crushing Prism | A handful of players will be afflicted with a debuff that deals damage and slows movement. This can and should be dispelled immediately. |
| Reclamation Form | The boss will dig into the ground and not move. While like this, raid-wide damage will occur each time one of his legs strikes the ground. Eternity Engine will also be present here causing a small amount of raid-wide damage as well. |
| Lightshatter Beam | Targeting the tank, the boss will do a front-line attack dealing a lot of damage. The rest of the party should not be in this line and tanks should swap after each time this mechanic is cast. |
Phase Two - 80 and 50 Percent
The boss will start to move and Earthbreaker Missiles will still be present in this phase.
| Mechanic Name | Description and Strategy |
| Relocation Form | The boss will start to make its way toward the next part of the fight. Quaking Steps will occur with each step dealing raid-wide damage. |
| Shatter | Shatter will deal a lot of damage and push the raiding party away in the direction they are to the boss. Do not place yourself to the side of the boss facing the cliff, that is an easy way to get booted off the edge and be out of the fight. |
Phase Three - 50 to Zero Percent
| Mechanic Name | Description and Strategy |
| Planetcracker Beam | The boss will spawn a wall splitting the room in half from the boss' location. It will deal a lot of damage if you are hit so do your best to avoid it. The raiding party should be split in half for this mechanic, one half on each side to make sure no Ephemeral Motes hit the boss. |
| Shattered Prism | Players with Crushing Prism debuff will need it removed, this will leave a Shatter Prism on the ground which deals damage and slows players and Ephemeral Motes. If possible do your best to place the Shatter Prisms in front of the fissures. |
| Fractal Shell | Fractal Shells will encompass Ephemeral Motes, protecting them. Lightshatter Beam will need to be aimed at these protected motes so that the rest of the raid can push them back from reaching the boss. |
Prototype Pantheon
This boss fight will have you fighting enemies resembling the four covenant leaders. This will be a multi-boss fight, so you may want to prepare yourself for some chaos.
Phase One - Prototype of War and Prototype of Duty
You will want to DPS these bosses down evenly. When either reaches half health the next phase will initiate.
| Mechanic Name | Description and Strategy |
| Gloom Bolt (Prototype of War) | When cast will deal damage and afflict players with a healing absorb. This can and needs to be kicked. |
| Necrotic Ritual (Prototype of War) | Multiple adds, Necrotic Ritualists , will spawn. They will channel a cast of Necrosis. Players who find themselves in the Necrosis ground effect will take damage and have healing reduced completely. The Necrotic Ritualists need to be killed in order for the Necrosis on the ground to be removed entirely. |
| Runecarver's Deathtouch (Prototype of War) | Players will be targeted randomly with a debuff that deals damage for half a minute. When the debuff timer runs its course or is dispelled, it will deal AoE damage to party members in an eight-yard radius. Players with this debuff will need to stand in a Bastion's Ward when the timer runs out, to prevent it from hoping to fellow players before being dispelled. |
| Humbling Strikes (Prototype of Duty) | Tanks will need to swap after each time this is cast. It will deal raid-wide damage depending on how much damage the tank took and apply a debuff to the tank. |
| Pinning Volley (Prototype of Duty) | The boss will rise to the air and unleash an attack. Windswept Wings will push the raid back, you will need to move against this. Pinning Volley will stick players to the ground when struck, dealing damage and stunning. Dodge as best you can and if hit the spear pinning the player will need to be destroyed for them to get back in the fight. |
| Ascension's Call (Prototype of Duty) | Bastion's Ward will appear. Standing in it will reduce damage and healing completely. This will need to be utilized to prevent damage from Runecarver's Deathtouch and prevent it from transferring to other party members. |
Phase Two - Prototype of Renewal and Prototype of Absolution
When either boss reaches half health it will start the next phase, you will want to DPS them down evenly though.
| Mechanic Name | Description and Strategy |
| Anima Bolt (Prototype of Renewal) | Afflicts hit players with damage and a DoT. This can be kicked. |
| Wild Stampede (Prototype of Renewal) | Animals will run across the boss room, these need to be dodged if players do not want to take damage and knock back effect. |
| Animastorm (Prototype of Renewal) | Multiple slow-moving Spinning Vortex will spawn and deal damage and silence players who find themselves in it. Dodges these. |
| Withering Seeds (Prototype of Renewal) | If one of these dies it will cause damage and apply a DoT to all players. They can also be healed to full, starting Invigorating Bloom , increasing healing, and healing the party for a time. This is stackable, so do your best to heal them to full, or at least don't let them die. |
| Burden of Sin (Prototype of Absolution) | A raid-wide DoT that deals some good damage and stacks, will occur as long as this boss is alive and active. |
| Hand of Destruction (Prototype of Absolution) | This will pull the raiding party to the boss and everyone will want to run away after being pulled in or take a lot of damage. It is fall-off damage so the further away the less damage is taken. |
| Wracking Pain (Prototype of Absolution) | A frontal attack that deals damage to the tank and plays in the line attack. Players hit will receive a debuff, so avoid this. Tanks will want to swap after each cast. |
| Sinful Projection (Prototype of Absolution) | Players will want to spread out and dodge the red spirits that run around. If hit players will receive damage, a stun, and a stack of Burden of Sin. |
Phase Three - 50 to Zero Hp
The raiding party will now need to fight all the bosses at once. It will be a combination of the first two phases.
Heroic - Upon killing a boss in phase three, you will have 20 seconds to kill the other bosses before any remaining bosses are healed to full after the 20 seconds is up.
Lihuvim, Principle Architect

This boss is pretty straightforward, but players will want to keep space in mind for this fight. Dealing with the Unstable Motes mechanic is key to defeating this boss
| Mechanic Name | Description and Strategy |
| Manifest Mote | Random party members will be hit with the debuff, which will cause an Unstable Mote to appear when the debuff timer is done. Spread out, so the raid can maneuver between them, preferably placing them on the peripheries and when touched these will create an AoE ground effect that will cause damage to players standing in it. |
| Deconstructing Energy | A short DoT that will explode at the end of its timer and clear any Unstable Motes in the vicinity. It will apply a debuff increasing damage taken. |
| Cosmic Shift | Occasional raid-wide damage and a pushback. Avoid being pushed back into motes, making their placement important. |
| Protoform Cascade | A circle of Motes will encompass the boss and then explode. Avoid being in the explosion by standing on top of the boss or ten yards away. |
| Synthesize | At 100 energy, the boss will start to activate one of the four adds in the activation bays in the room. Raid-wide damage, as a DoT, will occur but being in the safe zone of an active bay will diminish this damage from players inside it. |
| Synthesized Automa | Destroy as many of the constructed Automa before they fully form. The raid should be on the Automa and ready to DPS it down fast once it activates. Once fully activated, Degeneration Automa will spawn small groups of adds that apply DoTs. Acquisitions Automa will radiate damage every couple of seconds and explode upon death, dealing large damage to all players within 40 yards. Guardian Automa will attack random players with Sentry Fire. Acquisitions Automa are the worst, so if these are spawning make them the priority. |
Heroic - The addition to Heroic is the mechanic Resonance and Defense Matrix Automa . The tanks will have to deal with a combination of Kinetic Resonance and Sundering Resonance . The former will cause physical damage and cosmic damage vulnerability. The latter will cause comic damage and physical damage vulnerability. Players need to stay clear, and tanks will want to keep in mind what they have been hit with, to know what's coming next in case they need to swap since those vulnerabilities will wreak havoc. The Defense Matrix Automa will cast a barrier reducing the damage done to Automa close by. These guys need to be DPS'd down to make the other adds easier.
Anduin Wrynn
This fight is chaotic, timed, and has a few phases. Get ready for a punishing fight if the mechanics aren't done right and quickly.
| Mechanic Name | Description and Strategy |
| Willpower | Players will want to kill Anduin's Despair, Hope, and Doubt to replenish his Willpower. The party will receive Force of Will, helping with damage output and damage reduction. This is dependent upon Anduin's Willpower. Getting his Willpower to 100 is paramount as it will be required to live through this fight. The Despairs will need to die and must be the top priority. Healing the Hope and killing the Doubt will replenish the rest of his Willpower. |
| Kingsmourne Hungers | Anduin will cast a black frontal cone. Players in the frontal cone will be banished and will fight adds in the other realm. The raiding party should be split in half for this, half going into the banished realm and the other half staying. Alternating each time this is cast. Once in the banished realm, the party there will need to kill Anduin's Despair as a top priority, heal Anduin's hope and kill additional Anduin's Doubt. Make sure to CC the Doubts. |
| Blasphemy | Random players will be marked with either Overconfidence or Hopelessness . Afflicted players will need to touch other plays with the opposite buff, otherwise devastating damage will occur. It could prove useful to order one type to stand still while the other finds them. You will have eight seconds before mass damage occurs. Don't touch unmarked players or players with the same color since that will cause damage as well. |
| Befouled Barrier | A ring effect on the ground that absorbs healing from all who are in it. Healing players in the ring will shrink it, so get ready to heal up! After the timer runs out, healing absorbs will go out and that absorption will depend on how much of the barrier was left before it expired. |
| Domination Word:Pain | Random party members will be targeted with a debuff DoT. |
| Wicked Star | Random Players will be targeted and if hit will cause damage and a short silence. Placing the raid on one side of Anduin and targeted players moving to the other could prove useful for dealing with this mechanic. |
| Dark Zeal | When the boss attacks the same target his attack speed will increase. Tanks will want to swap at 20 stacks or before Kingsmourne Hungers is cast. |
| Hopebreaker | This will cause raid-wide damage to increase till Anduin's Willpower reaches 100. |
Phase Two - Intermission
| Mechanic Name | Description and Strategy |
| The Fallen King | A Remnant of a Fallen King will spawn, its health is tied to Anduin's. Tanks will want to swap after each cast of Soul Reaper. Make sure to let out the big damage here. |
| Remorseless Winter | A DoT that will increase as long as the Remnant of a Fallen King is around. |
| Army of the Dead | Fiendish Souls appear, hopping on party members at random and applying a stackable healing reduction. |
Phase Three - Grim Reflections is now used in place of Blasphemy.
Grim Reflections will spawn and cast Psychic Terror , which is a heavy DoT. The adds can be CC'd and killed pretty fast. Psychic Terror needs to be kicked and if there are any Grim Reflections left when the next intermission rolls around they will become empowered
Phase Four - Intermission .
March of the Damned will occur on top of the previous intermission mechanics. Avoid the marching undead or take an absolute ton of damage probably ending in an insta-kill.
Phase Five - Hopelessness now takes the mechanic of Grim Reflections, and Beacon of Hope will now appear on the field. Players with Hopelessness will want to cleanse it in the Beacon of Hope, but make sure to spread out the clears of Hopelessness in small groups as it causes a DoT and can be a pain. Make sure players with the debuff don't touch other players or it will explode and players without it should stand clear of the Beacon of Hope.
Heroic- There are a few additions to the Heroic difficulty of this fight. Anduin's Hope will now have Gloom , this will need to be dispelled. Wicked Star will now heal Grim reflections if hit and cause immunity to CCs and interrupts. Monstrous Soul will be added to the intermissions and will need to be killed before it lets off Necrotic Detonation . The longer it is alive the more damage it deals, these are a priority. Fiendish Souls will now release a four-yard explosion when they die, so avoid this as best you can.
Lords of Dread

You will be fighting two bosses at once, and you will want to kill them around the same time. Kiting the bosses around the edge of the room to make the mechanics easier will help this battle move along smoothly. This fight has a fun, but chaotic, pick-out-the-imposter mechanic to it. Let's get into it!
Mal'Ganis
| Mechanic Name | Description and Strategy |
| Unto Darkness | Once the energy reaches 100, the bosses will become Swarms of Decay and Swarm of Darkness. This will deal raid-wide damage for a time, tanks will take 100 percent more damage of AoEs. The use of cooldowns and stacking together will make this mechanic easier. |
| Cloud of Carrion | Party members at random will be hit with a clouded ring of insects. This is a AoE DoT that will increase its damage with time, players caught in the AoE will have it transferred to them. Plays who just had the debuff should avoid taking it again as they will receive increased damage from it. This can be removed via Bursting Dread. Once removed, a small cloud of insects will make its way from the dispelled player and anyone hit will be afflicted with Cloud of Carrion. |
| Manifest Shadow | An Inchoate Shadow will spawn and cast Ravenous Hunger repeatedly, this will cause raid-wide damage and heal it for 15 percent. It cannot be damaged till it reaches full health. Let it cast this about six times then destroy it. The spell can be kicked, so if the raid-wide damage is too much, kick it. |
| Leeching Claws | Mal'Ganis will deal a lot of damage with this to anyone in front of him, DPS will not want to stand in front. It will apply Opened Veins , causing reduced healing for 20 seconds, and will heal Mal'Ganis for 10 percent if struck with this again. Tanks will want to tank swap after each cast. |
| Rampaging Swarm | When one of the two bosses dies, they will turn into a swarm and deal raid-wide damage that increases with time. This will continue till the party or the boss is left alive. |
Kin'tessa
| Mechanic Name | Description and Strategy |
| Infiltration of Dread | Once 100 energy is hit, Kin'tessa will cast Paranoia on the raiding party. This is the imposter mechanic. Only three party members will see who the imposters are and once identified they will need to die to move on. The players can be identified because a feint dreadlord will be above the imposter person's back. If this isn't done it will end in a raid wipe. |
| Fear Trepidation | Party members will be hit with a debuff, when its timer is done it will cause an exploding of Bursting Dread. Players hit by this will be feared and players with Cloud of Carrion will have its effects removed. |
| Slumber Cloud | These will spawn and move subtly. If you are hit with this you will be put to sleep for eight seconds. If possible, this can be dispelled. |
| Anguishing Strike | An attack to the tank afflicting them with a stackable DoT. Tanks will want to swap bosses after two or three stacks, depending on how it's going. |
Heroic - Shadow Mastery and Decay Mastery are the additional mechanics to heroic. When each boss casts Infiltration of Dread and Unto Darkness they will increase in power. This will amplify their damage and increase the range of Cloud of Carrion and Bursting Dread.
Rygelon
This boss fight will have the raiding party phasing between the Normal and Singularity Realms. Whenever the boss' energy hits 100, Massive Bang will be cast and the raid will need to enter The Singularity .
Normal Realm
| Mechanic Name | Description and Strategy |
| Dark Eclipse | Multiple party members will receive this debuff that will deal a lot of raid-wide damage when its timer runs out or the afflicted player dies. Players will need to dispel this by stepping into a Collapsing Quasar Field , which drops after killing a Collapsing Quasar. |
| Celestial Collapse | Six Collapsing Quasars will spawn and make their way to Rygelon. Do not let these reach the boss as they will cause mass raid-wide damage and increase the boss' damage output. These all need to be killed to make Collapsing Quasar Fields which Dark Eclipse debuff can be dispelled in. Once dispelled, a five-yard AoE explosion will occur. So, stand clear. |
| Celestial Terminator | Lines will appear, do not stand in the wake of these. These will also appear in the Singularity Realm. |
| Radiant Plasma | If not attacking anyone, the boss will deal damage to the whole raiding team. |
| Corrupted Strikes | Most likely targeting one of the tanks, the boss will deal physical and cosmic damage to his target. When Corrupted Wound reaches too many stacks, tanks will want to tank swap. This is a nasty DoT, using the unmitigated damaged from Corrupted Strikes as its damage over time. |
| Massive Bang | This will kill anyone in the normal realm, to dodge this enter The Singularity. |
| Unstable Matter | Unstable Matter will spawn in three locations at the edges of the room. Once it reaches zero health, it will break up for ten seconds. Killing these and letting their timer run before the boss casts Massive Bang will cause them to heal. Kill this quickly as the boss is casting Massive Bang. Each party member needs to stand in a separate circle to enter the Singularity. |
The Singularity
Corrupted Strikes and Radiant Plasma continue in this realm. Eternal Radiation will cause the raiding party to take damage as long as they are in The Singularity. Shatter Sphere will be cast and take the raid back to the normal realm, as well as destroy the Unstable Matter used to get to The Singularity.
Heroic - A few additional mechanics in this difficulty. Celestial Collapse will cause Collapsing Quasar Fields to disappear after clearing Dark Eclipse debuff with it. Collapsing Quasars will obtain Accretion, which stacks. This will cause them to move faster and prevent movement below 15 percent of their usual movement speed. When Manifest Cosmos is cast, a Cosmic Core will shoot to whoever is closest. The closest player will take a lot of damage, receive a DoT, and it can splash to friends who are five yards or closer. It will also give a stacking snare debuff. The boss needs to be moved away from this and players can either alternate soaking this or if one party member has an immunity they can solo soak this. The leftovers of these Cosmic Cores will turn into Unstable Cores . These will radiate damage to anyone within five yards. The party needs to stack on these to destroy them since any damage done to the players will also be done to the Unstable Core. Upon death, it will cast Gravitational Collapse dealing a lot of damage to anyone within eight yards, but if no one soaks this it will deal raid-wide damage. One tank should soak this to prevent that from occurring.
The Jailer
The final boss in The Sepulcher of the First Ones raid, The Jailer will have you fighting three phases. This is a really fun fight with some pretty cool and unique mechanics. Touching the center of the boss room will kill you as well as dropping into one of the many holes in the room unless otherwise suggested for mechanic purposes. Let's go over what you'll need to do to finish this raid with ease.
| Mechanic Name | Description and Strategy |
| Rune of Damnation | A handful of players will obtain a rune, which will explode after a short time. Once these explode expect a knockback effect and raid-wide damage. Players afflicted with this rune will need to jump into the gold holes around the map once there is about one to two seconds remaining on the rune timer, this will prevent the raid-wide damage from occurring but jump in carefully as you will be shot out and pushed back a bit after jumping in. You don't want to fly into another hole. Jumping into a hole with a rune will create a pillar for later mechanics, so place them wisely. |
| Torment | Multiple party members will be afflicted with a debuff, which will explode and damage the afflicted person and any players within five yards. Everyone will need to spread out for this one. |
| Relentless Domination | This one is straightforward but a doozy if you miss it. The jailer will start to cast this and the raiding party will need to hide behind the pillars that arise from the holes where players with the Rune of Domination jumped into. If not behind a pillar and hit, you will receive a debuff of Domination , which will increase the debuffed players' health and damage and be a puppet of The Jailer. They will be a nuisance and will need to be killed. |
| Chains of Oppression | The boss will bring the party to him and cast Oppression . Which does fall-off damage around the boss, using any mobility cooldowns here can be quite effective. |
| Martyrdom | This is a four-part combo. The boss will root the current tank with Imprisonment , hit them for a good amount of damage with Persecution , cast a raid-wide damage and raid-wide bleed effect with Suffering , and lastly will attack with Misery . Misery does an absolute ton of damage, so the raid will want to stand within ten yards of the tank to help soak the damage. Tanks will want to tank swap after each cast of Martyrdom, and party members will be hit with a knockback effect after Misery is cast, so watch your backs and don't fall into open holes. |
Phase Two - After three minutes phase two starts, there is a rhythm to this fight so if it is your second or one-hundredth time running it you'll find the rhythm of the mechanics. There will be no more holes in this phase and no more pillars to hide behind.
| Mechanic Name | Description and Strategy |
| Unholy Attunement | This will cause raid damage and he will place pylons from the peripherie of the encounter room, and try to line them up to the center of the room. Unholy Eruption will raise the pylons, whereas Unholy Ground will be an AoE that spreads. Do your best to make use of the encounter room's space. These pylons will need to be destroyed with Shattering Blast. If three pylons connect to the center of the room, phase three starts. |
| Shattering Blast | One of the Tanks will be targeted with this and it will deal damage and have an AoE that will deal damage to players and destroy pylons. Tanks will want to place this near a pylon to destroy it. Tanking the boss by pylons is a good idea for this mechanic. |
| Rune of Corruption | A mind control effect that will cause afflicted players to run to the edge of the encounter space and leap to their death. The mind control effect is applied via a shield and this can be DPS'd down so stack near the center of the encounter room and cleave those shields down. Crowd Control abilities will work on the afflicted players to help keep them in place to get rid of the shields. |
| Decimator | Throwing his weapon, The Jailer will deal a lot of damage and knock players away who find themselves within 13 yards from where the weapon hits. This is indicated by a ground effect swirl on the floor. |
| Torment | Like the Torment in Phase One, but now there will be swirls on the floor that need to be avoided as well. These swirls will spawn with Tormenting Echo once the Torment detonates. |
Phase Three - This phase will retain Torment and Decimator and add a few new mechanics.
| Mechanic Name | Description and Strategy |
| Desolation | The boss will aim a frontal line attack toward the middle of the room and the raiding party needs to soak this. Healing cooldowns can prove effective for this. |
| Rune of Domination | Marking players with rings, after six seconds, a healing absorb will go out and split between any fellow party members in the rings and apply Dominating Will . If the entire shield is not healed, Domination will occur on anyone who still has the Dominating Will debuff. Sectioning the team, to stand next to afflicted players with Dominating Will, will help the healers heal through the shield. Healing cooldowns will help with this mechanic. |
| Chains of Anguish | A few players, including one of the tanks, will be chained together and need to run apart to break the chains while The Jailer tries to pull them to him. Tanks will want to tank swap after each time this is cast. |
| Falling Debris | Debris will fall, do not stand within 25 yards of impact, or take a lot of damage. |
Heroic - Heroic has a few additional mechanics but shouldn't be too tricky.
In Phase One, Relentless Domination is the additional mechanic. This will cause dominated pythons to cast Tyranny . This will cause multiple orbs to head in the marked party members' location. If hit, expect to take damage and receive a DoT. Targeted players will leave a line, other players should avoid this.
Phase Three has two additional mechanics. During the Torment mechanic, Tormenting Echo will cause Incarnation of Torment . This will cause an add to spawn that will deal raid-wide damage, DPS this down fast to kill it and get it out of the way. Defile is the other mechanic. This will cause a pool at a random player's location. Do not stand in this as it will deal damage and grow in size. Spread out when this is cast to make it easier for everyone to avoid. It can take up the whole encounter zone so make sure to avoid this at all costs.
With that, you should have everything you need to know to defeat the Sepulcher of the First Ones raid on normal and heroic difficulty.
NEXT:World Of Warcraft:Brewfest Guide