ゴッド オブ ウォー ラグナロク:ヴァナハイムの放棄された村のチュートリアル
ゴッド オブ ウォー ラグナロク の The Reckoning クエストラインは大成功で終わりに近づいています。ゲームの放棄された村のセクションには、パズル、宝物、戦闘の健全な供給があるだけでなく、2 つのボス戦も含まれています!
このガイドは、ツルのパズルをナビゲートし、有毒な霧が立ち込める森のセクションを横断し、Einherjar と戦い、すべての隠された財宝を手に入れ、次元を飛び回る巨大な生き物をその場所に配置するのに役立ちます。カバーすることがたくさんあります!
廃墟の村
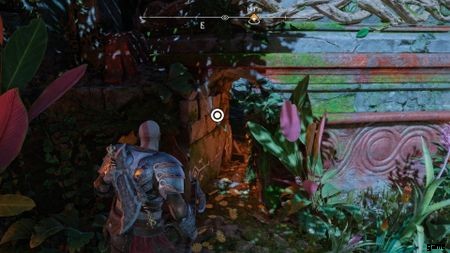
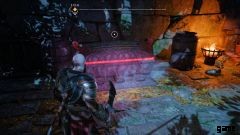
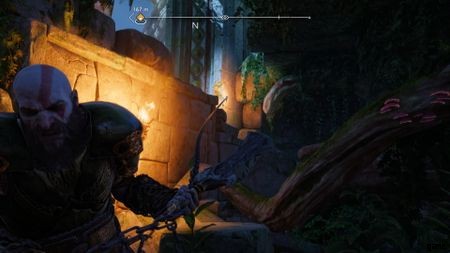
別のドラウグル ホールを一掃するという悲惨な経験をした後、放棄された村のこのセクションから移動します。 巨大で華麗な壁を探してください。左下隅に登れるほどの大きさの穴があります。 これはあなたが行く必要がある場所です!
これは、Einherjar で満たされた巨大なアリーナにつながります。このアリーナについて知っておくべきことは、それがループだということです。したがって、最善の策は、ユニットと交戦し、1 つか 2 つを倒してから、ループに沿って位置を変えて有利な位置を維持することです。あなたは敵の上にいます。 すぐにそれらを一掃します。
地面をよじ登るほうが、スイングして横切るよりも危険であることを覚えておいてください。 これにより、脆弱性が高まります。
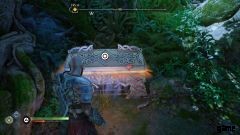
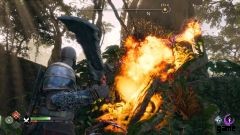
Einherjar を一掃すると、アリーナに収集するものは何もなくなります。 ゲートを上げて、右に曲がります。いばらを燃やし、よじ登って宝箱をつかみましょう。
 2 画像
2 画像 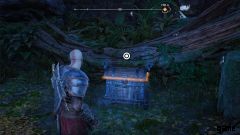
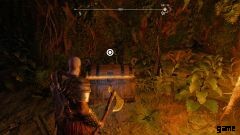
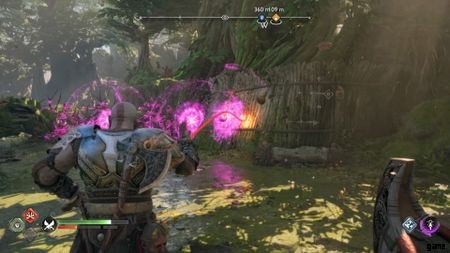
今、あなたが毒の壁にぶつかるまで飛び降りてまっすぐ向かいます.右側には、毒の流れを止めるために斧で打つ必要がある花があります。凍結したら、近くのチェストを空にします。 次に、上を見上げてイバラを燃やし (近くの球根毒植物を斧で叩きながら)、鎖を登って次のエリアに向かいます。

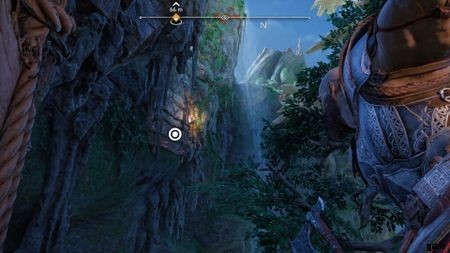
頂上に着くと、右側に有毒ガスが充満しているエリアが見えます。右側の花を凍らせて下に飛び降りて、伝説の宝箱を手に入れましょう。 さて、メインルートに戻ります。チェーンを引っ張り、ロープをぴんと張ってから、ロープを滑り降ります。
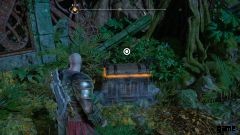
いくつかのクライミングに参加し、いくつかのグラップリング ポイントの間をスイングし、最終的にガゼボのような構造に登ります。このセクションでは、グッズや隠された貴重品はありません。 ただし、遺跡に着いたら左に曲がります。これでチェストに移動します。
 2 画像
2 画像 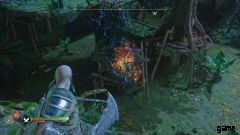
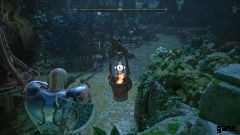
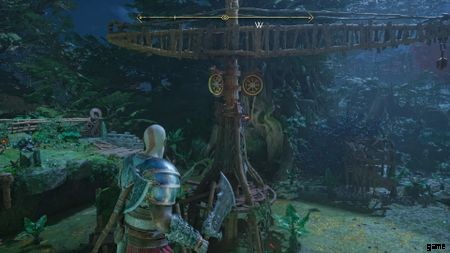
さて、巨大クレーンに到着です。このパズルは少しトリッキーかもしれませんが、順を追って説明します。まず、左側の棚に行き、途中でブランブルを燃やします。これにより、バケツが解放されます。次に、右側のターゲットを攻撃し、クレーンを回転させます。左の出っ張りに立って、Blades of Chaos でバケツをつかみ、自分の方に引き寄せます (あなたの下にある火鉢に火をつけます。これは少し後で効果を発揮します)。
クレーンの後端にあるグラップル ポイントを使用して、左側の島に向かってスイングします。さて、あなたが島にいる間に、クレーンを回して (上のターゲットを斧で叩いて) バケツがあなたと反対側のイバラの間にあるようにします。 あとは、ブレードでバケツを手前に引き、手放します .それはブランブルに向かって右にスイングし、それらに火をつけます。棚に戻り、クレーンを回して、グラップルポイントがあなたと途中のドックの間にあるようにして、グラップルを渡ります.しかし、クレーンはまだ完成していません。橋を渡ったら右に曲がり、ノルニルの宝箱に向かいます。
 2 画像
2 画像 

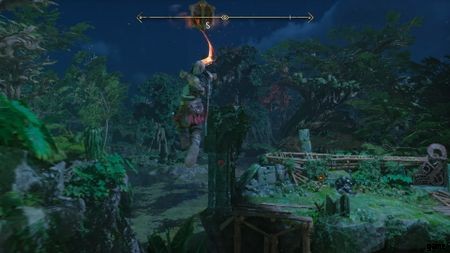
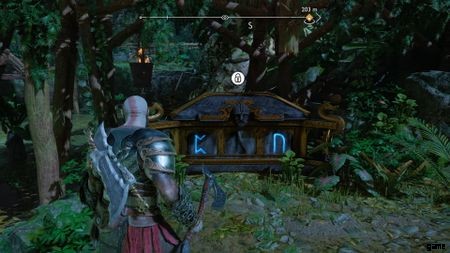
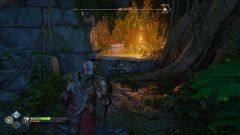
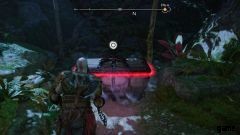
Nornir チェストの最初のルーンは左側にあります。 Blades of Chaos で火鉢に点火するだけです。 2 つ目のルーンは、バケツを自分の方に引っ張ったときにすでに取得していたものです (そうしなかった場合は、戻って、左側の棚に立っている間にバケツを自分の方に引っ張ってください)。 3 番目のルーンは、茨を一掃した橋の右側の木に挟まれています。バケツが木の前にぶら下がるようにクレーンを動かし、木に向かって引っ張って火鉢に火をつけます。 それで十分です。チェストから Idunn Apple を取りに行きましょう!
さて、本道を下ります。宝の邪魔になるものは何もないので、壁の隙間を這って進み、ボスと対決する準備をしてください。
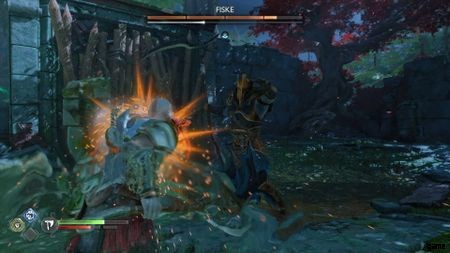
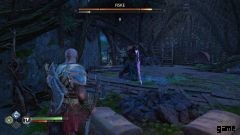
ボス戦:フィスク
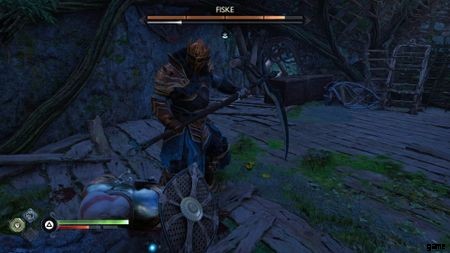
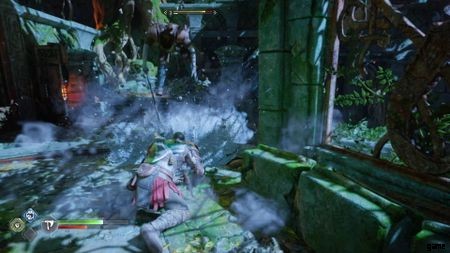
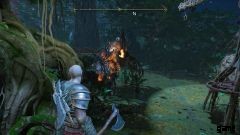
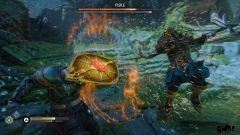
私たちはあなたと同じレベルになります。探しているものがわかれば、Fiske はかなり扱いやすいボスです。手始めに、彼はパリーベイト攻撃でいっぱいです.彼のゆっくりとしたリズミカルな水平方向のスラッシュは受け流し可能であり、準備するのに十分な時間を与えてくれます。ですから、それらを受け流してみてください。
Fiske が 3 スラッシュ コンボを実行している場合、Fiske は 3 回目のスラッシュの前に少しスタッター ステップを実行します。ですから、そのことに注意してください。
フィスクは時々、ブロック不能な水平スイングでコンボを終わらせることがあります。この動きについて知っておくべきことは次のとおりです。横に寄れば問題ありません。転がるとタグ付けされます。 立ち去りたいと思うのは、彼が防御不能のビフロスト爆発攻撃を行っているときだけです。ありがたいことに、これは非常に遅く、反応するのに十分な時間が与えられます。 Fiske が剣を上げて地面に突き刺そうとしているのを見たら、その場を離れましょう。それ以外の場合、すべてのブロックできない攻撃は、サイド ロールでより適切に処理されます。
 2 画像
2 画像 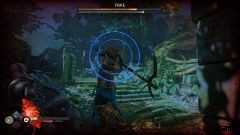
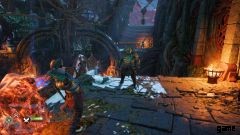
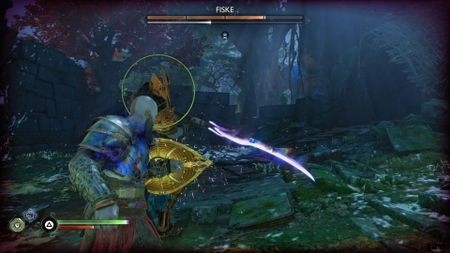
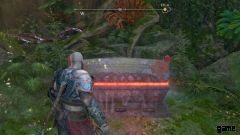
Fiske がこれまでで最も危険にさらされたのは、突き刺すような槍攻撃を使用したときです。 これらはかなり速く来ます。 できます それらをブロックしますが、ビフロストのダメージを受けます。理想的には、これらの攻撃をかわします。 Fiske の武器の中で唯一の他の攻撃は、周囲に美しい青いリングがある大きなスイング攻撃です。だから、彼をシールド バッシュして大量の気絶ダメージを与える。
ヘルスストーンはビフロストの病気を取り除くことに注意してください.ですから、そのうちの 1 つをポップして、ビフロスト効果を浄化してください。
2 画像 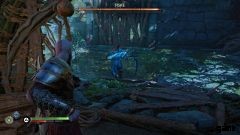

Fiske がゆっくりとあなたに向かって歩いてきたら、彼に向かって斧を投げます。次に、彼があなたに向かってスイングし始めたら、攻撃のタイミングを計って受け流します。 各パリーは、コンボを着陸させる機会を与えてくれます。 その間、あなたはその証拠となる赤いリングを探しています。あなたがそれを見るとき、あなたは横に転がります. そうでない場合、彼は剣を上げて地面に突き刺そうとしています。彼が突き刺すようなスタンス (槍を頭上に上げ、先端をあなたに向ける) をとったら、できるだけ突き刺し攻撃をかわす準備をします。あなたならすぐにフィスケを倒せると確信しています。
フィスクはたくさん受け流されるから 斧を突き刺したまま拳で叩くのも悪くない。彼は気絶ダメージをすばやく蓄積するため、複数回の処刑攻撃を確実に受けることができます。
廃村に戻る
3 画像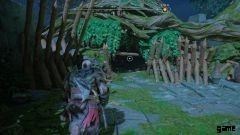
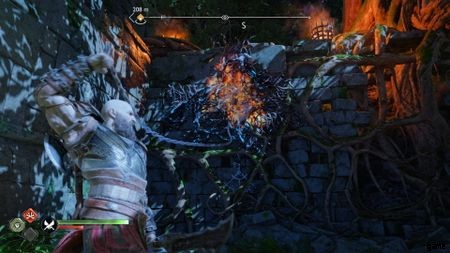
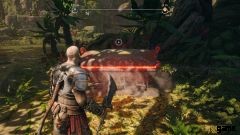
フィスケのボス アリーナを出たら、左に曲がって小屋に入ります。 ここに赤いチェストがあります。次のセクションでは、道の向こうにレジェンダリー チェストが表示されます。必要なのは、クレーンを引っ張って渡ることができるようにすることだけです。残念ながら、列がブロックしています。心配しないでください、私たちはそれを修正できます。飛び降りて、宝箱のある近くの建造物に入ります。

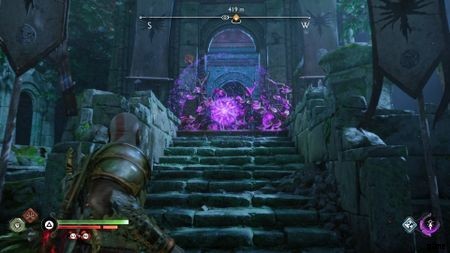
その建物にいる間、壁に巨大なひび割れがないか探してください。ここからブレード オブ カオスで柱を下ろすことができます .その後、飛び跳ねてギャップを越えて取り組み、レジェンダリー チェストを開きます。さぁ、石垣をよじ登って次のエリアへ。ここには、必要に応じて壊すボックスがいくつかありますが、収集するのに本当に重要なものは何もありません.準備ができたら、巨大な金属製のドアを開けてください。根の結び目が見えます。戦いに備えましょう。フィスケはただの前菜でした!
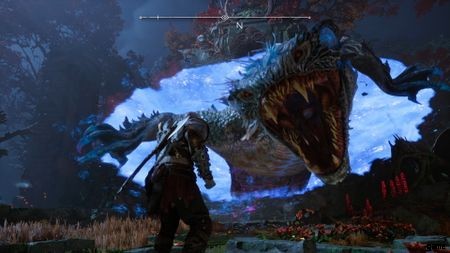
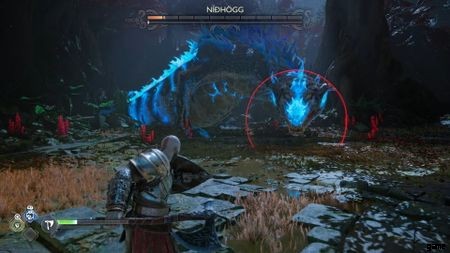
Boss Battle:Nidhogg
 3 Images
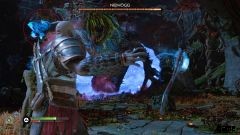
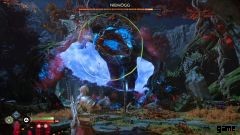
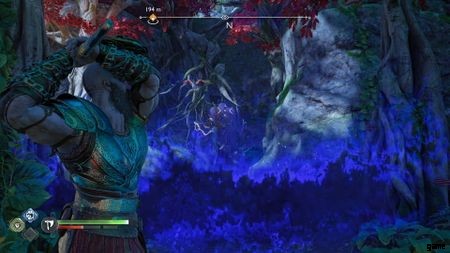
In his first form, Nidhogg has three attacks:An unblockable fireball, a claw slam, and a bite attack. You get a ton of notice with all those attacks. The fireball is what Nidhogg goes to the majority of the time. All you need to do is roll to the side. In between attacks, just keep tossing your axe at Nidhogg's head. If you see a yellow indicator for his slam or bite attacks, parry it, and you will be rewarded. Eventually, you will take a bar of health and yank him out of the portal.
Nidhogg's Second Phase
In this phase, Nidhogg has a lot of the same attacks, but they definitely come out much faster. He will also string them together now. Nidhogg will occasionally swipe at you with his claw in his second form as well. His big new move is his tail plunge. He will stick it into the ground, and after a period of time, it will erupt. However, this is a blue indicator attack, so you can shield bash it, and stagger him. You will want to get up close and personal with this phase. Beyond that, it is more of the same, really. You likely won't struggle too much against him here.
Nidhogg's Third Phase
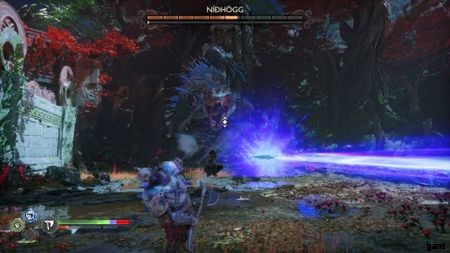
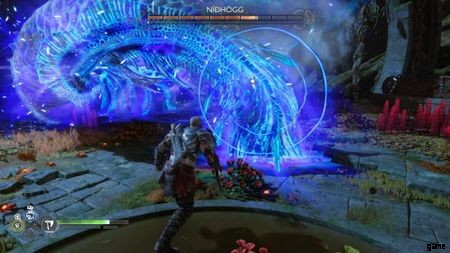
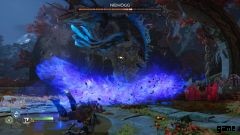
This is where the boss battle gets real . You will now have Freya aiding you, but Nidhogg will be far more dangerous now. Nidhogg will go to one of three spots on the screen. Whether he is coiled around a stone pillar, or perched on the edge of the arena will dictate his moveset. When he is wrapped around either of the stone pillars, it will fire a beam of Bifrost energy from its tail. It will sweep its beam firing tail across the screen, back and forth. You just need to roll through it. Beyond that, it will create rifts in space and time which it will use to stab you with its tail. Just stay mobile and roll away from the tail attack. If Nidhogg raises its tail and a yellow indicator ring appears around it, a projectile is about to be shot at you. Just parry it or dodge it; either way, these projectiles are slow.
 2 Images
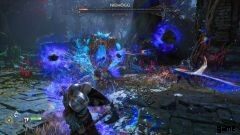

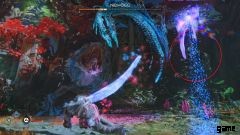
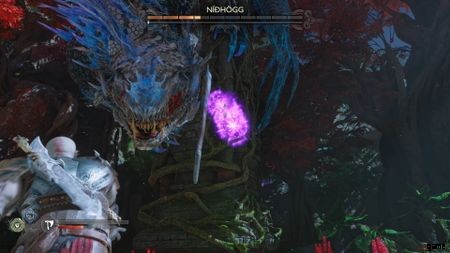
When Nidhogg is perched on the ledge, it will open up its belly, sucking in debris. After it does this, it will do one of two things. If the red indicator appears, that means it will fire a powerful projectile at you, at which point you need to roll away. Otherwise, it will spit all the debris back out in a huge, unavoidable scattershot. However, while it isn't avoidable, it is blockable. So, if you see a red ring, dodge. If there is no indicator ring, block. It is as easy as that! Nidhogg will also use that tail plunge attack from the second phase. So, make sure to shield bash it when it does.
In between attacks, Nidhogg will often take large pauses. That will be your time to land hits. After a while, you will be assisted by Freya, who will give you targets to hit with your axe or blades (it depends on which column Nidhogg is clinging to). Once she does, you will be able to topple the giant creature and really lay into it. It won't take long for the mighty Nidhogg to fall after you start pulling those columns down.
The Western Barri Woods
 3 Images
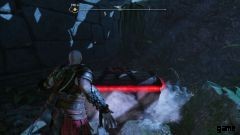
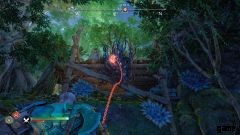
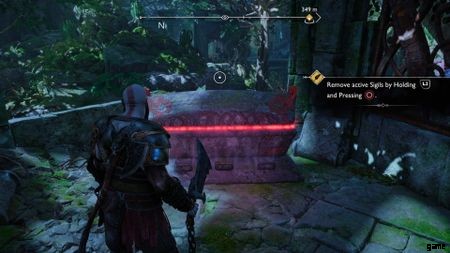
This section exists almost exclusively to teach you how to use Freya's tools. It starts with you clearing a set of vines by hitting one of her hexes with your axe. You will then do the same in the next screen to gain access to a chest. From there you will fight a few Einherjar, where the game will tell you how to use Freya's hexes to weaken enemies. Once you clear out the Einherjar you will enter into the Western Barri Woods proper. Take the first right, clear out the vines and grab the chest. Then head back to the main path. You will encounter another poison plant puzzle. This time there are two plants! You just need to put a hex on one, then freeze it. Now, remove your axe, and then freeze the other. The hex holds the freezing effect.
 3 Images
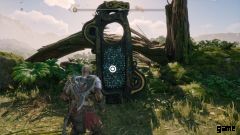
Once you clear out the poison, take your next left, destroy the vines, and open another chest. Head back to the main path, fight a few Wisps (you can only damage them after hitting them with Freya's arrows), and then head into the next area. You will watch a brief cutscene. Now go interact with the Lore Tablet and move on to the next area. Here you will find a chest that is being protected by a plant. Set the bulbous section of the plant on fire, and you will be able to get to the treasure chest.
 2 Images
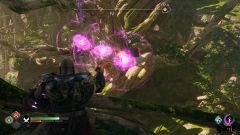
Next, you will fight another small group of Einherjar. Then you will find yourself on a bridge made from a tree branch. There will be another one of those living plants guarding a chest on your left. You won't be able to reach it, unfortunately. What you need to do is lay down a line of hexes from Freya, that leads from where you can reach and goes all the way to the bulb. Light these on fire, and they will start a chain reaction. You can now swing across and claim your prize.
 2 Images
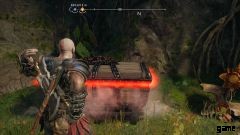
You will now arrive back at Freyr's camp. From here, you will leave the camp, collect one more treasure entangled in vines (it will be on your left), and open up a path to a canoe. The last puzzle of this section of the game is pretty similar to the puzzle we just solved. Create a path of hexes that leads to the vines covering the obstruction, light it on fire , and now all there will be left is a log that needs to be destroyed with sonic arrows. Press up on the d-pad and that will switch Freya's arrow type. Now fire at it, break the log, and take a pleasant boat ride all the way to the end. There'll be one more chest waiting at the end.
If you don't have the ability to switch arrow types, you need to buy sonic arrows from Brok.
NEXT:God Of War Ragnarok:The Runaway Walkthrough