ポーンバリアン – ショーグン ガイド (すべてのチェーン)
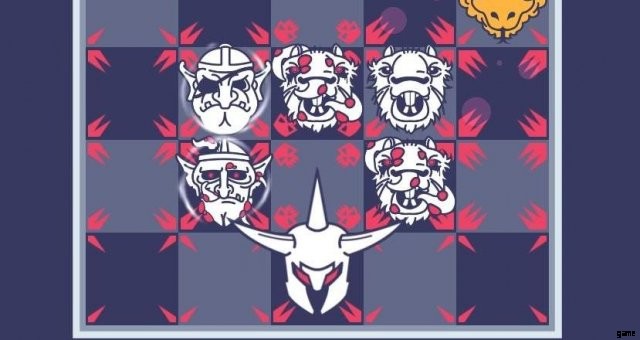
ファンキーな日本のボードゲーム ベースのキャラクターのガイド。アップグレード、ダンジョン、戦略的な動きに関するヒントが含まれています。
すべての将軍の鎖へのガイド
将軍の基本
ご存知かもしれませんが、Shogun は将棋と呼ばれる日本古来のチェスをテーマにしています。ゲームの背景知識があると、このキャラクターの学習が少し楽になると思いますが、絶対に必要というわけではありません (私自身、将棋を一度もプレイしたことがありません 笑)。
ショーグンには、他のキャラクターとは異なる 2 つの主な特徴があります。駒の昇格とドラゴン ドロップ能力です。
ピースプロモーション
毎ターン最初の一手で、手札の右端の適格な駒を自動的に昇格させます (これはランダムではないことに注意してください!)。特定のピースは昇格できません。これらは、キング、ゴールド ジェネラル、およびすでに昇格されたその他のピースです。昇格した曲をプレイすると、通常の降格状態に戻ります。
注意すべき重要な点の 1 つは、作品を宣伝しても必ずしも作品が良くなるとは限らないということです。これは一部のピースには当てはまりませんが、他のピース (ランス、ナイト、シルバー ジェネラル) は以前に利用できた移動オプションの一部を失います。これらの駒の 1 つに本当に必要な特定の移動オプションがある場合は、このことを覚えておいてください。
ドラゴンドロップ
自分の番では、駒を動かす代わりに、代わりにドラゴン ドロップ アビリティをクリックできます。蓄えたチャージ数によって効果が異なります。以下は、考えられるすべての効果のリストです:
- 0 チャージ:+1 シールドとカード 1 枚の昇格 (右端の適格なカード、移動時と同じ)
- 1 回のチャージ:Shogun の周囲に斜めのスプラッシュを放つ
- 2 回のチャージ:ショーグンの周りにカーディナル スプラッシュを放つ
- 3 チャージ:キャントリップ (アクションを保持し、手札が 3 未満の場合は追加のカードを 1 枚引く)
- 4 回以上のチャージ:3 回を超える追加チャージごとに +1 シールド。
この能力は、将軍が他の 2 人のキャラクターよりも強いと考える理由の大きな部分を占めています。キルごとに1回充電され、保存できる充電数に制限はありません.これの非常に強力な用途は、一度に多くの敵を倒してから、逃げるための安全な正方形を必要とする代わりに、残りのダメージをブロックする能力を使用することです.
この能力は、チャージなしでも大いに活用できます。移動せずに最大 2 つのシールドをスタックできることは、悪いターン中に自分自身を安全に保つのに非常に役立ちます。通常、ピースの昇格も役立ちます.
駒と動き
一般的に、Shogun には移動に関して大きな弱点が 1 つあります。彼の駒の多くは後方に移動できないか、小さなステップでしか後方に移動できません。したがって、トラップに陥らないように、ボードのできるだけ下の方でターンを終了するようにしてください。
以下は、すべての駒の動きのリストと、それらを最大限に活用するためのヒントです。
ポーン
1マス前進します。昇進すると、ゴールドジェネラルの動きと一致します。
これらのうちの 3 つから始めて、それらはすべてキャントリップです!
チェスとの大きな違いの 1 つは、これらの駒は (昇格しない限り) 前方にしか移動および攻撃できないことです。ポーンは、盤面の一番下から攻撃チェーンを開始するのに最適ですが (特にすべてキャントリップであるため)、盤面の一番上にいるときはあまり役に立ちません。そこに閉じ込められないように注意してください (ただし、閉じ込められた場合、Dragon Drop がポーンを昇格させて、悪い状況から抜け出すのに役立つことがあります)。アーマーのアップグレードは、長いキル チェーンの後に追加の保護を提供するために非常に役立ちます。斜めスプラッシュも多少役に立ちます。
ランス
任意の数の正方形を前方に移動します。昇進すると、ゴールドジェネラルの動きと一致します。
これらのいずれかから始めますが、個人的には通常の形式をあまり頻繁に使用していません。ただし、このピースは昇格してもかなり役立つ可能性があるため、完全に無視しないでください。キャントリップのアップグレードはかなり役に立ちますし、アーマーもいいです。
ナイト
横に 1 マス、次に前に 2 マス、一度に移動します。敵の駒を飛び越えることができます。昇進すると、ゴールドジェネラルの動きと一致します。
チェスの騎士と比べると、この作品はかなり物足りなく、通常、アップグレードの優先順位の一番下にあります。私は通常、他に選択肢がない場合にのみ、通常の形式を使用してタイトなクラスターをエスケープします。昇格したフォームは便利ですが、通常、この部分のアップグレードに集中するには十分ではありません。アーマーはこれに最適です。その最適な用途は逃げるためです。キャントリップも問題ありません。
シルバージェネラル
斜めまたは前方に1マス移動します。昇進すると、ゴールドジェネラルの動きと一致します。
これらは、先に進みすぎたときにバックアップするのに非常に役立ちます.これらのプロモーションには注意してください。斜め後ろに移動する能力が失われます。キャントリップ、アーマー、対角スプラッシュはすべてこれらに非常に役立ちます。
ゴールドジェネラル
前方または斜め前方に 1 マス移動します。促進しません。
これらは後方への移動には問題ありませんが、Brawler の敵によって簡単にブロックされる可能性があります。彼らの前方および横方向の動きは、ほとんどの場合、私がより便利だと思うものです.キャントリップとアーマーのアップグレードから多くの恩恵を受け、斜めのスプラッシュのターゲットとしても受け入れられます
ビショップ
任意の数の正方形を斜めに移動します。昇格するとドラゴン ホースになり、基本的に 1 マス移動する能力も獲得します。
これは、複数のスペースを後方に移動できる武器庫の 2 つのピースの 1 つであるため、非常に便利です。 The promotion can give it some extra utility, but I usually just use it for the diagonals. Cantrip and armor are very strong on this. Diagonal splash can also help take out Nimble enemies.
Rook
Moves any number of squares cardinally. When promoted it becomes the Dragon King and gains the ability to move 1 square diagonally as well.
Your other flexible backwards moving piece, the Rook is great for running all the way back to the bottom after a long forwards attack chain. The promotion can also help a little for some enemies with the Brawler trait. Armor is very strong and cantrip is also pretty good. You could also take a cardinal splash on this if you’re really struggling with Nimble enemies (but there’s probably better things to be bought).
King
Moves 1 square in any direction. Does not promote.
The King is a pretty flexible piece, giving you the movement of the Gold General with the Silver General’s extra backward diagonal options. While not great for running away, the King is a useful attacker and repositioner. Cantrip and armor are quite nice, diagonal splash may also help out a little.
How to Best Handle Each Dungeon
Because the dungeons have different enemies and mechanics, a different strategy is needed to handle each one. In this next section I will go over upgrades and small gameplay tips for each of the 3 dungeons.
Goblin Caves
- High Priority:Armor, Cantrip
- Medium Priority:Diagonal Splash
- Low Priority:Heart, Cardinal Splash
The first dungeon is probably the easiest of the 3 for the Shogun. There are quite a few Goblin enemies with the Nimble effect, many cantrips or some diagonal splash are good for handling them. You’ll also want a fair amount of armor for the final boss as the board will quickly fill up with Blight. However, the Shogun can partially counter this with his ability, after finishing a long kill chain (particularly on Blightsacks) you’ll have a lot of stacks on Dragon Drop, this can help you build up enough defense to handle all the extra Blight on the ground.
Pro tip:Blight Matrons can spawn many Blightsacks that can ordinarily take extra turns and be annoying to deal with. However the Shogun can make quick work of them all by using Dragon Drop to diagonally blast them. This is best done as the last move of a board to save extra gold.
Golem Fortress
- High Priority:Armor, Diagonal Splash
- Medium Priority:Heart
- Low Priority:Cardinal Splash
- Do not get ever:Cantrip
Although I consider this the easiest dungeon overall, the Shogun does have a little harder of a time with it than the other 2, as he starts with 3 cantrips. However, the final boss of this dungeon is by far the easiest, as it has a wider blind spot and doesn’t spread tons of Blight all over the board like the other 2 (unless you let the Spewer Golems get out of hand, don’t do that lol). Cantrip upgrades should be entirely avoided here as every cantrip use will make the floor 5 “boss” and floor 7 boss spawn an extra unit and be immune.
Pro tip:You usually don’t want Dragon Drop to go past 2 charges here, as the Cantrip on the 3rd charge can activate Spark abilities. You’re much better off using it for some protection or to take out Brawler or Vigilant enemies.
Foul Shrine
- High Priority:Cantrip
- Medium Priority:Armor, Heart
- Low Priority:Diagonal Splash
- Not Needed:Cardinal Splash
The last dungeon, and by far the toughest one. While you will want some armor to keep yourself safe, the final boss of this dungeon is ruthless. Your best bet to take it out will be getting many cantrips (5, preferably 6 if possible) in order to chain kills and stack Dragon Drop charges in order to get extra kills off while tanking Void Grasp damage with the extra armor it gives you. While diagonal splash may be useful in dealing with some of the Brawler enemies. I didn’t find it to be super necessary here (I rarely got more than 1). Cardinal Splash can be entirely skipped here, its too much money lost for basically no value on the final boss. You’d be better off buying a Heart or diagonal splash if you have no cantrips or armor available.
Pro tip:While taking out multiple enemies with Void Grasp causes damage to you, this effect is ignored if there are no enemies remaining after the attack. Keep this in mind if you notice you’re able to sweep the rest of the board with Dragon Drop.
Chains
As Sariiger mentioned in their guide, the odd numbered chains simply increase floor difficulty slightly and usually don’t feel too different from the chain before them. The even chains however, do need to be adapted to. Let’s a take a look at each of them.
Chain 2:Leave Blight on the floor while moving.
This one is definitely kinda scary at first. At this point in the game you’ll usually want to avoid making extra moves to reposition, as doing so will further spread Blight to more tiles. This is especially important for the Shogun as many of his pieces only move 1 space at a time. Remember that on poor turns you can use Dragon Drop to gain armor while not moving, this will help reduce the spread of Blight.
Chain 4:Upgrades are more expensive.
I didn’t find this one super impactful since it only increases all prices by 1 gold. However if you are struggling to afford what you want, try considering how you could save a turn or 2 on the earlier floors (*cough cough* Dragon Drop).
Chain 6:Start with only 2 full hearts.
Since you’ll want to have as much HP as possible before fighting the final boss, it’s important for you to try and clear 2 of the floors leading up to it without taking damage. Early armor upgrades and smart use of Dragon Drop can help with this. Especially try and go damageless on Floor 1, as it’s often not too hard to do so (and if you get a bad bunch of enemies or unlucky draws you can always quickly reset).
Chain 8:Edge columns start with Blight.
This is definitely the most impactful of all the chains, as now 2/5 of the board is unsafe at the beginning. Shogun is able to work around this difficulty more easily than the other 2, as Dragon Drop with 1 charge can give you some armor while also skewering enemies diagonally. Early armor upgrades are also now even more useful.
Chain 10:Final bosses deal double damage.
The only one I found this to be tough for was the Foul Shrine boss. Make sure you have enough armor after a kill chain to accommodate for the extra hit, or else you might wind up just short of a win.