ELDEN RING – 初心者向けガイド (ゲームプレイの仕組み、クラス、記念品)

クラスの選択、基本的なゲームプレイの仕組み、励ましの言葉をカバーするネタバレなしの初心者向けガイド。
はじめに
FROM Software が Demon's Souls で大きな成功を収めてから約 10 年が経ちました。多くのジャンキーだが有名なゲームの後、彼らは最終的にそれらすべてを支配する 1 つの完璧なゲーム、Elden Ring を作成するのに時間をかけました。
このガイドは、ゲームの基本を順を追って説明することを目的としており、Souls シリーズやエルデン リング全般に精通していることを前提としていませんが、FROM の以前のゲームに精通している場合でも、いくつかの高度なゲームプレイのトリックとSouls ゲームとの顕著な違いを取り上げます。
絶望しないでください!エルデン リングを倒すのに電光石火の反射神経や超人的な痛みのしきい値は必要ありません。決意と心を開いてください。
良い血があなたの道を導きますように、そして太陽を賛美することを忘れないでください!ウンバサ。
警告:セーブファイルのセキュリティ
Elden Ring は Steam Cloud をサポートしていません!
コンピュータを変更すると (または Windows が必然的に壊れてから再インストールする必要がある場合)、保存ファイルが失われます。
セーブファイルは C:\Users(your username)\AppData\Roaming\EldenRing (乱数と文字の混乱) にあります。すべてのキャラクター用の単一のファイルがあります。
このファイルを定期的にバックアップし、ときどき自分自身か何かに郵送することを強くお勧めします。
PC のクラッシュのリスクは別として、これまでのすべての Souls ゲームには、見知らぬ人にグリッチ アイテムを強制してゲームを中断させたり、オンライン マッチメイキングから禁止させたりする「ハッカー」という悪意のあるプレイヤーの問題がありました。おそらく、新しいアンチチートにより、Elden Ring でのこの問題は大幅に軽減されるはずですが、万が一に備えてバックアップを取っておくことは問題ありません。
また、補足:このガイドは、ゲームのリリース前に、さまざまなネットワーク テストの映像と一般的なシリーズの知識に基づいて作成されました。情報が不正確である可能性があります。何か間違っているところを見つけたら大声で言ってください。修正します。
ゲームプレイの仕組み (基本)
以前の Souls ゲームをプレイしたことがある場合は、この章をスキップしても問題ありません。あなたはすでにこのことを知っています.
基本的なコントロール
- 左スティックで動き回り、右スティックでカメラを操作します。 (基本的に他のすべてのゲームと同様)
- 左スティックを押して、ステルス モードを開始/終了します。背の高い草の中で、あなたを見つけることはほとんど不可能であり、全体的に騒音がはるかに少なくなります.
- 右スティックを押して、最も近い敵にカメラをロックします。ロックオンできる敵がいない場合は、現在移動している方向にカメラを向けます。
- D-Pad:装備している武器を切り替えます。下で消耗品、上でスペル、右でメインハンド武器、左でオフハンド武器に変更します。方向を数秒間保持すると、すぐに最初のスロットに変わります。これは、多くの消耗品を装備している場合に、ヒーリング フラスコをすばやく選択するのに特に役立ちます。
- A ボタン:ジャンプ。騎乗中は2段ジャンプが可能。ジャンプするとドッジロールと同じように無敵枠が発生するので、攻撃を飛び越えることも回避の1つの方法です。 (横にかわすと死に至るリスクがある狭いプラットフォームで特に役立ちます)
- B ボタン:かわす。装備負荷が重くなると、回避距離が短くなります。 (インベントリ全体ではなく、装備されたアイテムのみがカウントされます)。ボタンを長押しして実行します。走ったり回避したりすることはスタミナを消費し、攻撃と同様にスタミナが枯渇している間は実行できません。
- Y ボタン:対話します。ボタンを押し続けると、ツールベルトのアイテムにアクセスしたり、武器を両手で持つことができます (Y + R1 でメインの武器を両手で持ち、Y + L1 でオフハンドの武器を両手で持ちます)。
- X ボタン:装備している消耗品を使用します。消耗品の使用を妨げている場合、消耗品のアイコンはグレー表示されます。
- R1:弱攻撃。繰り返し押すと、コンボが実行されます。
- R2:強攻撃。強攻撃をチャージして、より多くのパワーを得ることができます。
- L1:長押しでブロック
- L2:装備している武器のウェポン アートを実行します。アクティブなウェポン アートは、装備したギアの上にある HUD に表示されます。
- 開始:メニューを開き、ギアやクラフトなどを変更できます。これはゲームを一時停止するものではないため、敵が近くにいるときは行わないでください。
- 選択:ジェスチャーを実行します。これにはゲームプレイの目的はありませんが、マルチプレイヤーで他のプレイヤーと通信するために使用できます。
ルーンと死
ルーンは、レベルアップ、アイテムの購入、ギアのアップグレードに使用される通貨です。それらは殺された敵から取得され、通常は敵が強いほど取得されます。
(最初はレベルアップできませんが、ゲームの早い段階でこの能力を与えるキャラクターに出会います)
あなたが死ぬと、持っていたすべてのルーンを落とします。 (彼らは黄金の苗木の形をとります)。この場所に戻ってルーンとやり取りできれば、それらを取り戻すことができますが、これより前に再び死ぬと、それらを永久に失います.
ルーンを永久に失う可能性があるため、ルーンをたくさん持っている場合は、先に進むのではなく、安全な場所に戻ってそれらを消費することを検討する価値があります.
プレイヤーによって口語的に「クランチ」と呼ばれるルーン消耗品 (「フリンジフォークのルーン」など) が見つかることがあります。レベルアップや購入が少し足りない場合 (または、死亡してすべてのルーンを落とした後に消耗品を買いだめする必要がある場合)、これを使用する必要があります。死んでもクランチはドロップしないので、必要なときのために取っておきます。
輝く金色の目をした敵は通常よりも難しくなりますが、追加のルーンを落とします。これらの敵は、最近別のプレイヤーが倒された場合に強化されます。
金色に輝く目を持つ頭蓋骨を見つけることがあります。それらを粉砕して無料のルーンを入手してください。
涙のフラスコ
あなたは涙のフラスコから始めます.4つのチャージはクリムゾン(HP)とセルリアン(FP)の涙に分けられます.これは、休むたびに完全に回復し、特定の強い敵を倒すと回復する回復ポーションです。
フラスコのチャージを管理することは、探索とボス戦の両方の重要な部分です。チップのダメージを受けるたびに飲むと、最後に回復できなくなります。 P>
飲むと動きが遅くなり、回避やブロックができなくなります。すぐに再び攻撃を受けて、回復したばかりの HP をすべて失いたくない場合は、開始を待つことが重要です。
サイト オブ グレイスで休んでいるときは、HP 涙と FP 涙の間でフラスコ チャージを分配できます。魔法を使用しない場合は、すべてのチャージを HP に分配し、セルリアン フラスコを完全に装備解除することをお勧めします。
攻撃、防御、呪文発動
R1/R2/L1/L2 を押したときに何が起こるかは、対応する手に何を持っているかによって異なります。武器なら攻撃します。盾ならブロックする。それが呪文触媒の場合、装備した呪文を唱えます。
あなたの性格は右利きです。左手に装備した武器は基本的に防御を優先します。右手に装備した盾で攻撃可能。魔法の触媒とクロスボウなどの遠隔武器は、両手で同じように機能します。
武器を両手で持つ (Y を押しながら R1 または L1 を押す) と、そのムーブセットが変更されます。このスタンスでは、L1 は常にブロックし、L2 は武器に関連付けられたウェポン アート (FP を使用する強力なスキル) を使用します。
武器を両手で持つと、有効な強度がわずかに増加します。これにより、統計要件を満たさなくても特定の重い武器を装備できます。
ステータス要件と装備負荷
武器、防具、呪文にはステータス要件がある場合があります。条件を満たしていなくても装備できますが、効果が大幅に低下します。要件を満たさない場合、呪文を唱えることはできません。
装備されているすべてのギアは、装備負荷を増加させます。 (インベントリ内の他のアイテムは効果がなく、装備されているアイテムのみ)。特定のしきい値 (30%、70%、100%) では、機動性が低下します。
防御より回避を好む場合は、装備負荷を 30% 未満に維持して、回避効果を高めてください。
装備負荷が 100% を超えると、走ったり回避したりできなくなり、生存率が大幅に低下します。通常、その価値はありません。
フォーカス ポイント (FP)
FP は、ヘルスバーの下にある青いメーターです。呪文を唱えたり、友好的な精霊を召喚したり、ウェポン アーツを実行したりするために使用されます。
十分な FP がないと、呪文と召喚を実行できません。
十分な FP がなくてもウェポン アーツを実行できますが、速度が遅くなり、はるかに弱くなり、発射物などの魔法の効果は発生しません。
スタミナ
スタミナは、ヘルスバーと FP バーの下にある緑色のメーターです。スタミナは、攻撃やブロックを含む基本的にすべてのアクションを実行するために必要ですが、非戦闘中はスタミナが無制限です。
スタミナがなくなると、走ることができないワインド状態になり、攻撃が遅くなり、弱くなります。巻いたときのキャラクターの姿勢の変化に気づくことができます。十分なスタミナが回復すると、この状態は終了します。
ブロック中にスタミナがなくなると、バランスが崩れ、敵が反撃攻撃を実行して大規模なダメージを与えることができます。シールドの安定性評価は、防御時に失うスタミナの量に影響します (高いほど良い)。
武器のアップグレード
以前の Souls ゲームと同様に、武器は基本的にサイドグレードです。最初の剣でさえエンドゲーム レベルで実行可能であり、武器はすべて大まかに威力が同等であり、代わりにムーブセットや重量などの点で異なります。代わりに、武器をアップグレードしてパワーアップします。
武器は金床で鍛冶の破片を消費することでアップグレードされます。完全にアップグレードされた (+10) 武器は、+0 武器の 2 倍の威力になります。ただし、異なるティアのシャードを使用するアップグレードにはいくつかのティアがあり、より高いティアでは鍛冶屋の助けが必要になります。
鍛冶の破片は序盤はめったに見つかりませんが、難易度の高いエリアに進むにつれて見つけやすくなります。何をアップグレードするかを選択するときは、好きな武器を優先してください!通常、武器の本来の攻撃力よりも、ムーブセットの多様性、範囲、攻撃速度の方が重要です。
パワースタンス
一度に 2 つの武器を装備すると、同じタイプの武器であれば「パワースタンス」が可能になります。このスタンスでは、L1 は両方の武器を同時に使用する特別な組み合わせ攻撃を行いますが、R1/R2 は右手の武器でのみ攻撃します。
パワースタンシングは攻撃力と汎用性を高めますが、防御の選択肢がなくなります。これは非常に高度なプレイスタイルです。
(パワースタンシングの対象外の武器を二刀流にすることは可能です。特殊な組み合わせ攻撃を実行することはできません。)
呪文詠唱
呪文を唱えるには、その手に装備された触媒で軽い攻撃を行います。スペルスクールが異なれば、使用する触媒も異なります。触媒のフレーバー テキストには、それが使用できる呪文が示されています:聖職者の呪文の神聖な封印、ソーサリーの杖など。
スペルはFP、フォーカスポイントを消費します。 FP が低すぎると、呪文を唱えることができません。
多くの呪文や武器術は、攻撃ボタンを長押ししてから放すことでチャージできます。これにより、追加の FP コストなしでダメージまたは補助効果が増加するため、できる限り実行してください!
サイト オブ グレイスで休んでいる間のみ、呪文を装備できます。最初は限られた数のメモリ スロットを使用して呪文を調整しますが、特定のレアな収集品を使用すると、さらに多くのメモリ スロットが得られます。以前の Souls ゲームとは異なり、スペル スロットの数を増やす統計はありません。
ゲームプレイの仕組み (上級)
ドロップアイテム
敵は材料や装備などのアイテムをドロップすることがあります。
敵が死亡時にアイテムをドロップすると、死体から 5 つの光線が爆発する特殊なパーティクル エフェクトが発生します。何も見逃さないように、これに気をつけてください!
敵は実際に使用している装備しかドロップできません。特定のギアを探している場合は、賢明に戦いを選んでください。
アルケインのステータスが上がると、アイテムのドロップ率が上がります。
ボスやスカラベなどの特殊な敵は、死亡時に常にアイテムを落とします。失敗する可能性はありません。
ハブ ワールド
ゲームを一定量進めると、サイト オブ グレイスにファスト トラベルできるように、いつでもハブ ワールドにワープできるようになります。これは、鍛冶屋、呪文のチューター、冒険を通じて出会うその他の役立つ NPC を見つける場所です。
マリカのステークス
ボス部屋、敵のキャンプ、その他の困難な遭遇には、チェックポイントとして機能するマリカのステークが近くにあることがよくあります。死亡時に最後の恩寵の地ではなく、そこで復活することを選択できるため、すぐに戦いをやり直すことができます。
Stake of Marika の範囲内にいるときはいつでも、ヘルスバーの下に小さな、ほとんど目立たない穏やかな顔のアイコンがあります。
ルーンはサイト オブ グレースでのみ使用できることに注意してください。そのため、失う余裕がないほど多くのルーンを持っている場合は、近くに敵がいるかどうかにかかわらず、明らかに困難な戦いに入る前にバックトラックを検討することをお勧めします。賭けるかどうか。
馬
ゲームを一定量進めると、スピリチュアル ホースにアクセスできるようになります。
騎乗中は移動速度が速くなり、弱い敵の集団と戦いやすくなります。しかし、馬から引き落とされると、長時間気絶し、すぐに致命的となる可能性があります。さらに、騎乗中は無敵で回避移動ができないため、代わりに移動に頼らなければなりません。
騎乗中は攻撃が変化する:L1/L2は左側、R1/R2は右側を攻撃する。あなたのオフハンド武器にはアクセスできません。
武器を構えるスタンス (大剣を地面に引きずる、槍を構えるなど) は、攻撃していなくても敵にダメージを与えます。これは、敵を攻撃しやすくし、スタミナを節約するのに役立ちます。
あなたの馬は HP が限られており、敵の攻撃によって殺される可能性があります。霊的であるため、彼は永久に死んでいるわけではありませんが、彼を再び召喚するにはクリムゾン フラスコを消費する必要があります。適切なクックブックがあれば、特定のヒーリング アイテムを作成して戦闘中に彼を癒すことができ、これを回避できます。
あなたの馬は二段跳びを持っているので、徒歩では行けない場所に行くことができます。ただし、ダブル ジャンプは落下ダメージをキャンセルしません。
特定の地域では、馬に乗ったまま長距離をジャンプできる上昇気流であるスピリット スプリングを見つけることができます。ジャンプの方向に影響を与えることができるため、他の方法ではアクセスできないエリアに到達できます。さらに、上から上昇気流に飛び込むと、落下ダメージが相殺されます。この場合、風の効果に包まれます。
ダンジョンやその他の狭い場所では馬に乗ることができません。さらに、侵略されている場合を含め、マルチプレイヤーに乗ることはできません。
戦争の灰
Ashes of War は、休憩中に武器に割り当てることができる装備の一種です。彼らは武器のデフォルトの武器アートをある種の高度な動きや呪文に置き換え、オプションで要素効果やスケーリングを置き換えることもできます.通常、下級ボスを倒すことでこれらを獲得できます。
Ashes of War はいつでも変更できます (Site of Grace で休んでいるとき) ので、直面している課題に適応するためにそれらを試してみてください!
アッシュを装備すると、武器と統合されることに注意してください。各灰は一度に 1 つの武器にのみ使用できます。
特定のユニークな武器はアッシュ オブ ウォーを使用できません。武器が Ashes of War メニューにリストされていない場合、これが理由です。
精霊の灰
これらを戦争の灰と混同しないでください!召喚の灰は、死んだモンスターの精神を含む使用可能なアイテムです。無限に再利用できる消耗品ですが、使用するとFPを大量に消費します。召喚の灰を使用するにはキューブ ベルが必要ですが、かなり早い段階で入手できます。
スピリットは最初は弱いですが、ハブ世界の特定の NPC によってアップグレードできます。
召喚の灰を使用するには、召喚の碑の近くにいる必要があります。これらは通常、大規模な敵グループの近くやボス部屋に配置されます。召喚が可能な場合、装備しているギア アイコンの上に、HUD に光る墓石アイコンが表示されます。
召喚された精霊のHPはHUDに表示されます。あなたのヒーリング スペルは、召喚されたスピリットも癒してくれます。
ほとんどの敵はあなたよりも精霊を優先するので、ピンチの気晴らしとしてそれらを使用できます.ただし、ダメージを与えるためにそれらに依存している場合は、敵をそれらから遠ざけ、すべての攻撃を自分で吸収する必要があります.
混合体格
とあるダンジョンに不思議な体格のフラスコが出現します。これは基本的に、Crystal Tears を装備することで効果を手動で変更できる Tear Flask です。フラスコは 1 回の充電で開始しますが、恩寵の地で休むたびに再充電されます。付属のデフォルトの効果は、ポーションを爆発させて、あなたと近くの敵にダメージを与えることです。プレイスタイルによっては、他の効果に置き換えたいと思うかもしれません.
体勢ダメージ
敵を攻撃すると、姿勢が低下します。それを完全に使い果たすと、敵を一時的に気絶させ、敵に反撃フィニッシャーを実行して大きなダメージを与えることができます.これが可能な場合、弱点は金色に光り、weka ポイントの近くで R1 を押すとフィニッシャーをトリガーできます。
強攻撃、ヘッドショット、ジャンプ攻撃はすべて、姿勢ダメージが増加します。敵の攻撃を受け流す (受け流しの武器アートとその親戚を使用) と、大量の姿勢ダメージが発生し、ボス以外のほとんどの敵の姿勢が即座に崩れます。
馬に乗った敵の体勢を崩すと落下する。もちろん、同じことがあなたにも当てはまります。
シールドカウンター
攻撃をブロックした直後に R2 を押すと、強力な反撃が開始されます。これを行うと、特別な効果音が鳴り、ムーブが成功したことを知らせます。
もちろん、この動きを行うときはガードを下げるので、敵がよろめいたり、攻撃コンボを終了した場合にのみトリガーするようにしてください.
敵もこれを行うことができるので、盾で敵と対峙するときは攻撃的になりすぎないように注意してください。
名前とは裏腹に、盾を装備していなくてもブロック後のカウンターができるぞ!ただし、ほとんどの武器のブロック率は非常に低いため、ブロックすると大きなチップ ダメージを受けることに注意してください。
時間と天気
時間帯と天候が物事に影響を与えます。夜の間、敵はあなたを発見するのが難しくなり、ステルスはより簡単になりますが、土地にはより強力なモンスターやエリートの敵もいます.特定のクラフト材料は、夜にしか見つからなかったり、暗闇で光ったりして見つけやすくなります。
あなたのような変色者は、夜中に完全に見えます。また、光る目をした他の生き物にも注意する必要があります。
濡れたターゲットは追加の電気ダメージを受け、火のダメージが減少します。これは雨の中での戦闘にも当てはまります。強風はあなたの動きを遅くしたり速くしたりします。また、雷に打たれる可能性があります。霧はステルスを容易にしますが、敵の発見を困難にします。
ほとんどの時間ベースの効果は地下では問題になりません。天候パターンは地域によって異なります。たとえば、ストームヒルの名前には理由があります。
クラフト
クラフトでは、フィールドでナイフや矢を投げたり、エレメンタルレジンなどの消耗品を作成したりできます。料理本を見つけたり購入したりすると、レパートリーが増えます。
爆弾などの特定のアイテムは、コンテナを作成する必要があります。コンテナは再利用可能ですが、そのアイテムを運ぶことができる最大容量は、取得したコンテナの数に基づいています。機会があればいつでも追加のコンテナを購入してみてください!
初期のゲームで特に注目すべきは、睡眠の矢と、トリナのリリーで作られた他の睡眠器具です。攻撃を受けたターゲットは即座に眠りに落ち、60 秒間無害になるため、確実にトドメを刺して大ダメージを与えることができます! (または、敵が警報を発する前に、あなたを発見した敵をすばやく倒します)。
指先が器用なら、複数の敵がガードを上げる前に、すばやく眠らせることができます。これは、たとえば次の場合に役立ちます。 2 人の精鋭騎士が門を守っています。
ボスには効果がありませんが、トロールのような巨大な通常の敵にはうまく機能します!ただし、それらは生物であるターゲットに対してのみ機能するため、ストーン ゴーレム、蘇生したアンデッドなどは期待外れの結果になる傾向があることに注意してください。
ほとんどのクラフト材料は簡単に見つけることができるので、消耗品の使用について心配する必要はありません!ただし、「非常に希少」であると明示的に言及されている材料 (トリナのユリなど) を見つけた場合はいつでも、マップ上のスポットをマークすることをお勧めします.
ほとんどのクラフト材料は、サイト オブ グレイスで休むか死ぬたびにリスポーンします。
ステルス
左スティックを押してステルスモードに入る。しゃがんでいると音が小さくなり、背の高い草むらに隠れることができます。 (金属製の防具は騒音を発し、この効果を大幅に低下させます。動き回って防具の音を聞くことで影響を判断できます)
まだあなたに気付いていない敵は、攻撃から受けるダメージが増加します。これは、ヘッドショットやバックスタブなど、ダメージを増加させる他のソースとも相乗効果を発揮します。
敵は、夜間やその他の暗闇の中であなたを検出するのが難しくなります.ただし、コウモリのような夜行性の敵は、日中に直面する敵よりも強力で、通常は夜間視力を持っている傾向があります.
カウンター攻撃とクリティカル攻撃
攻撃中や走りながら攻撃を受けると追加ダメージを与える。これはあなたと敵の両方に適用されます。これを「反撃」といいます。この場合、攻撃の衝撃音が通常よりも深くなります。
姿勢を崩した後、受け流された後、馬から落ちた後など、特定の脆弱な状態で通常の攻撃を受けると、反撃よりも大きな追加ダメージを与えます。これを「クリティカル攻撃」と呼びます。このとき、特殊な衝撃音が鳴ります。
とどめの一撃は通常、一連のクリティカル攻撃よりもダメージが少なくなりますが、スタミナの消費が少なくなり、アニメーションの間、一時的に無敵になります。通常、機会があればクリティカル攻撃よりもとどめを刺す方が安全ですが、遠距離攻撃者には選択肢がない傾向があります。
さらに、敵の弱点 (人間の頭を撃つなど) に投射物を当てると、ダメージが増加し、姿勢ダメージが大幅に増加します。
キャラバンと敵キャンプ
敵の大規模な陣営や、宝箱を積んだワゴンを護衛するグループに直面することがあります。グッズのために彼らと戦うのはオプションですが、彼らは通常、本当に素晴らしいものを守っています…
近くの敵を殺さずにキャラバン チェストを略奪することは可能ですが、開けるのに時間がかかり、このアニメーション中は無敵ではありません。これを行う場合は、ステルスが最適なオプションです。 (さらに、荷馬車が静止しているときにのみチェストを開くことができるため、キャラバンが移動している場合は、トロールについて何かをする必要があります)。
敵の陣営やキャラバンには通常、トランペットを持った偵察隊がいます。彼らがあなたを見つけた場合、彼らはグループ内のすべての敵にあなたを攻撃するように合図するので、これらの人に注意して最初にそれらを取り除くようにしてください.
ダンジョン
ダンジョンは、遺跡、鉱山、自然の洞窟など、さまざまな場所にあります。彼らは通常、ワールドボス/ストーリーボスよりも簡単で、戦利品のある単一の部屋である場合もあり、通常、最後を守る通常のボスの代わりにミニボスがいます.見つけたらチェックしてみてください!
(ほとんどのダンジョンには入口にサイト オブ グレイスもあるので、見つけるだけで休息とレベルアップができます)
ダンジョンには、通常は開けられない大きな扉が存在することがあります。ダンジョンのどこかに、これらを開く隠しレバーがあります。
一部のダンジョンには複数の入り口があり、他の方法ではアクセスできないエリアに接続したり、さまざまな方法でそれらに取り組むことができます.
ワールドボス
ワールド ボスは、チュートリアル ゾーンのすぐ外にいる Tree Sentinel など、ワールドを歩き回る単純なボスです。彼らは通常の敵よりもかなり手ごわいですが、倒されると必ず何か素晴らしいものをドロップし、その後永久に消えてしまいます。
ワールドボスはボスなので、戦うつもりなら準備をしてください。探索中に新しいボスを見つけてリソースがほとんどなくなった場合は、逃げて後で戻ってくることを検討してください。
ワールドボスは徘徊しているので、通常は最初に見つけた場所から誘い出すことができます。環境を有利に利用してください!
マルチプレイヤー
Furlcalling Finger Remedy を使用すると、別のプレイヤーを召喚して助けてもらうことができます。地面に召喚サインがあったり、光る召喚プールの杭があったりします。一般的に、ダンジョンの入り口やボス部屋の前室は、マルチプレイヤーにとって最も活気のある場所です。あなたが死ぬと、救済効果は終了します。
ただし、助けを求めると、敵対的なプレイヤーによる侵略に対して世界が開かれます。
召喚されたスピリットとして死ぬとき、あなたは持っているルーンをドロップしません。自分で挑戦する前にそのエリアを練習したい場合は、召喚サインを残し、他の誰かを助けることを検討してください。これは完全に安全です!
プレイヤーはお互いにメッセージを残すことができます。表示されるすべてのメッセージを信用しないでください。誰が正直な意図を持って書いたかはわかりません。特に、「ジャンプしてみてください」と書かれた底なしの穴の近くにあるほとんどのメッセージは、あなたを荒らすためにそこにいます.
ファストトラベル
戦闘中でないときはいつでも、発見した恵みのサイトにワープできます。これにより、ベンダー、ダンジョン、その他の興味のある場所にすばやく戻ることができます。
ただし、世界には多くの秘密があり、常にファストトラベルを使用していると、それらに遭遇する機会が奪われることに注意してください.
クラスガイド
まとめ
クラス専用のアイテムや能力はなく、すべてが純粋にステータスと装備に基づいています。したがって、開始クラスはゲームの最初の数時間にのみ影響します。あまり心配しないでください。
スケーリング効果はアップグレード レベルの影響を受けます。したがって、メインの攻撃統計を早い段階でポンピングしても、効果は少なくなります。 Souls ゲームに慣れていない場合は、代わりに生存可能性に焦点を当てる必要があります。必要に応じてマナとスタミナを使用して、健康を平準化します。これらの統計のレベルに慣れてきたら、試してみたいクールな武器を使用するために必要な統計を取得することに集中できます。ロードアウトとプレイスタイルに落ち着いたら、攻撃的な統計をポンピングし始めます。 .
最初の実行ではどのような課題に直面するかわからないため、通常は専門的であるよりも多才である方がよいでしょう。
ゲームの早い段階で治癒は非常に限られているため、予言者または告白者として開始して治癒魔法にアクセスすることは、おそらく初心者にとって最も簡単です. (詠唱は遅いので、戦いの合間に魔法を使い、涙のフラスコを使って戦いの途中で回復してください)
より高度な装備を使用できるようにするには、装備に示されているステータスを平準化します。ほとんどの近接武器には、強さと器用さの組み合わせが必要であり、生来の要素ダメージがある場合は、魔法のステータスが散りばめられていることがあります.
より重い鎧を着用できるようにするには、強度をレベルアップして最大装備負荷を増やします。
より強力な魔法を調整できるようにするには、選択した魔法学校 (知性、信仰、または秘術) に対応する統計をレベルアップします。以前の Souls ゲームとは異なり、アチューンメント スロットの数を増やす統計はありません。特定のレア コレクションを見つけると、追加のスペル スロットを獲得できます。
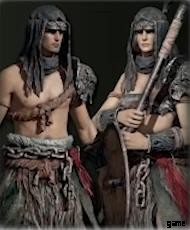
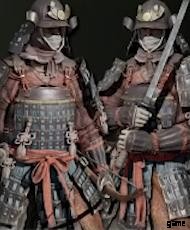
バガボンド

あらゆる武器に精通した高貴な旅人。すべての取引のジャック、なしの達人…
重鎧、ハルバード、ソード、シールドをはじめとするバランスのとれたクラス。そして、私が「重装甲」と言うとき、「重すぎて負担がかかりすぎて、回避ロールが劣っている」という意味です。防御よりも回避を好む場合は、装備負荷を 70% 未満にするために、装備の一部を装備解除する必要があります。
最初の剣の射程は驚くほど長く、特に突き攻撃で使用する場合はそうですが、都合の良いときはいつでも (つまり、速い敵に群がっていないときや、狭い廊下で戦っていないときなど) ハルバードに固執したいと思うでしょう。 )。軽攻撃は射程の長い突き、大ヒットできる重攻撃は身の回りにある。ハルバードを両手に持つと、攻撃の速度が上がり、リーチが広がりますが、もちろん、シールドでブロックする能力を放棄していることを意味します.デフォルトの武器アートは、敵を気絶させ、シールドされた敵のガードを簡単に破ることができるランニング攻撃です。
斧と槍タイプの灰の戦争の両方を使用できるため、後でハルバードに多くのカスタマイズ可能性が与えられますが、そのデフォルトの武器アートはすぐに爆発的なダメージを与えることができます.
また、馬に乗っているときの薙刀のリーチが長いことにも注意してください。重い攻撃の準備をするためにそれを保持するだけで、通り過ぎるときに多くの小さな敵を殺すのに十分強力であり、これは初期のキャンプや隊商を一掃する優れた方法です.
バランスの取れたステータスを持ち、どのプレイスタイルにも比較的簡単に移行できますが、もちろん、他のクラスに比べて大きな利点がないことも意味します.
- アーキタイプ:戦車、なんでも屋
- Beginner-friendliness:Excellent
Warrior
Seasoned mercenary and war veteran. Surely, war never changes?
Has the highest dexterity, and dual-wields curved swords.
Wielding two weapons of matching type allows you to enter the “power stance”, which lets you attack with both weapons at once for increased attack power at great expense to stamina. To use power-stanced attacks, use the left-hand attack buttons; to attack with just your primary weapon, use the right-hand buttons.
Starts with a parrying shield which is unsuitable for regular blocking, so if you’re a beginner and not comfortable in your ability to parry and dodgeroll every attack, you might want to pick another class.
The perfect class for fancy, dexterity-based playstyles taking advantage of the dual-wield moveset.
Dexterity also speeds up spellcasting speed, and they start with above-average intelligence, so mixing in some magic in your playstyle will be easy.
- Archetypes:Swashbuckler, dual wielder, spellsword
- Beginner-friendliness:Low
Hero
The heir to a barbarian chieftain, driven out by the Golden Order. Free wills will always be ridiculed by the powers that be.
Has the highest strength, starting with a large axe. You’ll have an easy time breaking enemies’ guard, but attacks leave you open to enemy attacks, so be careful about large groups of enemies. Doubly so for the default weapon art, which is a sustained combo attack that can stunlock lesser foes, but which is slower and locks you into the combo until it finishes.
One of the earliest caravans you can find in Western Limgrave guards a Greataxe, and if you enjoy the battleaxe you start with, you’re sure to love the Greataxe even more. Whether you want to explore further away or not, consider nabbing this axe before you leave.
The optimal class if you like oversized, heavy weapons.
Also has the second lowest magic stat investment, making this a good choice if you don’t intend to ever use magic and want to avoid “wasted” stat points.
- Archetypes:Barbarian, heavy weapons guy
- Beginner-friendliness:Average
Bandit
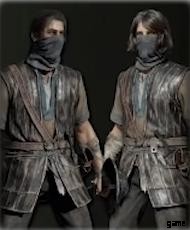
Highwayman hoping to profit from the civil war. Whatever this golden order is, it sure sounds like it’d fetch a high price…
Has high Dexterity and the highest Arcane, starting with a dagger, buckler, and shortbow.
Not terribly strong in a direct encounter, relying instead on backstabs and cheesing enemies at a distance with arrows.
The dagger has a very high critical damage multiplier, which applies to ripostes and backstabs. Fishing for backstabs and ripostes (special finishers usable after you poise-break, guard-break or parry an enemy) is considerably more effective than just stabbing your foes repeatedly.
Holding the off-hand attack button allows you to aim a bow in first person, which is useful when fighting enemies at so long ranges you can’t lock on to them. Pestering an enemy with bow attacks from a long range allows you to draw them out one at a time instead of fighting them all at once, or even outright kill them before they pose a threat! Of course, the shortbow has a pretty short attack range and low power, but it makes up for it with speed. With a little training and some sleep arrows, you can end many encounters before they have a chance to begin.
Arcane is used for some spells, but also influences item drop rate. The perfect class if you intend to focus on crafting or looking for rare items early on. But if you’re not, this is an advanced class for players that are comfortable learning parrying timings and enemy patterns, and probably not particularly easy to play if you’re completely new to the Souls series.
Starts at the lowest level other than Wretch.
- Archetypes:Rogue, ninja
- Beginner-friendliness:Very low
Astrologer
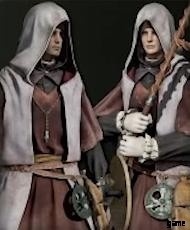
Scholar of the once-forbidden arts of precognition, now laid bare for anyone to study. Where books burn, people are soon to follow…
Sorcerer class. Starts with the highest Intelligence and Mind, allowing them to cast powerful spells, and a lot of them. Also starts off with a powerful mix of area-of-effect and DPS spells allowing them to deal reliable damage right away.
Since mana is also used to call upon Summoning Ashes, it’s also a solid starting choice for a summoner build, though the clerical classes probably are a better choice for that since they can heal their summons.
Too physically weak to use many early weapons other than daggers and short swords. But magic has many advantages in both range and power, and being able to fight tougher enemies at a distance makes many encounters considerably easier.
You will be reliant on magic attacks to deal damage, but don’t forget that elemental Ashes of War gives your melee weapons scaling with your magical stats.
There are many different sorceries, and since your spell slots are limited, it’s important to attune the ones most suitable for the task at hand.
- Archetypes:Sorcerer, summoner
- Beginner-friendliness:Good
Prophet
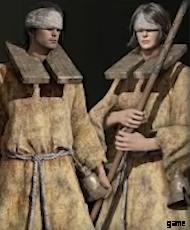
Once ridiculed as a doomsayer, then all the visions came to pass… but the people didn’t flock to your side, they ran in fear.
Cleric class. Starts with the highest Faith. Uses miracle spells to heal and support, and a spear for offense.
The spear is ineffective against groups due to its narrow attacks. For the best effect, use the range to your advantage and wield it two-handed.
Unlike almost every other weapon, spears can be used to attack while blocking. Be aware that this is both slower and weaker than regular attacks. And of course, like most mage classes, the Prophet doesn’t start with a particularly good shield. Since you have decent Strength, you might want to replace it with a larger shield as soon as possible.
Offensive miracles have a wild, unpredictable nature to them that lends themselves well for fighting groups of weaker enemies.
Healing is very limited early on, so having access to healing spells makes the early game easier.
- Archetypes:Healer, summoner, pyromancer
- Beginner-friendliness:Good
Samurai
Blood has been a common sight, but these lands yet know their inner peace… you can only hope they don’t forget.
Has high Dexterity and the highest starting stamina, fighting with a katana that induces bleeding and a bow for ranged attacks, but doesn’t use a shield. Even with access to a shield, the two-handed moveset of a katana is generally preferrable with faster attacks and greater posture damage, and of course you need both hands to use a bow.
More attuned to dodging than damage mitigation.
Bleed damage is proportional to enemy health, so the uchigatana gives you an edge against larger enemies. Of course, only enemies with blood can bleed.
The weapon art is an iaido slash, which takes some time to prepare but comes out very quickly once you actually start the attack. Best used when an enemy is playing defensively, unleashed the moment they drop their guard.
The longbow is a slow but powerful bow, most useful for sniping enemies from a distance instead of engaging them directly. Holding the off-hand attack button allows you to aim a bow in first person, which is useful when fighting enemies at so long ranges you can’t lock on to them. Pestering an enemy with bow attacks from a long range allows you to draw them out one at a time instead of fighting them all at once, or even outright kill them before they pose a threat!
Hitting an enemy’s weak point (such as the head for humanoids) will deal critical damage and stun them, this is usually only possible when manually aiming the bow.
Starts with the lowest magic stat allotment, making them the perfect choice if you have no intent to use magic and want to avoid wasting stat points.
- Archetypes:Samurai, ranger
- Beginner-friendliness:Good
Prisoner
A once-noble heretic, imprisoned for unsavory experiments with the arcane. But without challenge, how are we to improve?
A hybrid sorcerer/melee class, with access to both physical damage and glintstone sorceries. Starts without the powerful sorceries of the Astrologer, so you will rely on them mostly for situational support.
Magic Glintblade is a homing spell with decent power, but the projectile doesn’t fire until a few seconds after you deploy it. This has its uses, though:it gives you just enough time to break an enemy’s guard with a melee attack to make sure they don’t dodge out of the way of the projectile!
Starts with an estoc, a hybrid sword which has light thrusting attacks as well as heavy slashing attacks. Mastery of this weapon requires getting comfortable with varying your moves to fit the situation, and it’s particularly difficult to use against groups of smaller enemies.
Their starting shield is a buckler, a parrying shield with very generous window of timing. If you want to learn parry timings, this is probably the easiest class to start with. Additionally, the shield slightly boosts some ailment resistances, but only when held in an active hand.
The iron mask has surprisingly good defenses, but you might want to replace your starting rags with some proper armor as soon as possible to compliment it.
- Archetypes:Spellsword, ninja
- Beginner-friendliness:Low
Confessor
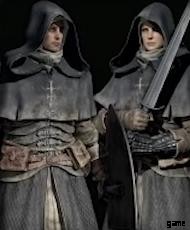
A seeker of sinners, sword always at the ready. Blind faith is dangerous, so you will be Our eyes.
A paladin-style hybrid cleric/melee class with solid weaponry to compliment their miracle-based spells. Also starts with a metal kite shield, which is a reliable defensive tool for most early-game enemies.
The broadsword lacks thrusting attacks and only has wide swings, which makes it easy to use against groups of enemies, but which leaves you open to counterattacks from faster enemies. You should get into a habit of using jumping attacks when using this weapon, both to leave yourself less open for counterattacks, and taking advantage of its higher-than-average posture breaking ability.
An excellent choice for beginners, with access to both reliable melee damage, reliable defenses, and healing. Also starts at the highest level out of all classes.
Urgent Heal is a very fast healing spell which can even be cast while moving, but it only heals a miniscule amount of HP. It does not heal allies, only yourself.
Assassin’s Approach is a spell that makes your movement inaudible, allowing you to sneak up on enemies more easily, including running at full speed. It makes stealth much easier, as long as you don’t let yourself get seen.
- Archetypes:Paladin, healer, jack-of-all-trades
- Beginner-friendliness:Excellent
Wretch

Outcast deprived of everything but their humanity. Some say, for good reason.
A joke class intended for challenge runs, starting with no armor, the lowest starting level, and only a wooden club for offense. You probably don’t want to pick it for your first run.
Their main saving grace is perfectly balanced stats, allowing you to dabble in all playstyles without a large investment, and they start out at level 1, making levelling up cheap and easy compared to the other classes. Of course, it also means they don’t start out particularly good at anything…
Keepsakes
Keepsakes are a starting item that gives you a little extra boost early in the game. They’re not terribly powerful, and the items can be found later on in the world, so don’t fret too much over your choice. It mostly affects your playstyle in the first few hours.
Crimson Amber Medallion
A talisman that slightly increases Max HP while equipped.
The boring default choice, but there’s very few situations where 10% more health isn’t going to help.
You start out with a single talisman slot, and of course only equipped talismans will provide any benefits.
Lands-Between Rune
A consumable that gives a bunch of runes (levelup/shopping currency) when used. Depending on class, it will give you enough for 2-4 levelups. Of course, you can use it to buy starting gear from merchants as well.
Make sure to not use it until you reach the NPC you intend to spend the runes at, since the consumable will not be lost on death, but the runes it grants when eaten will be.
Golden Seed
An upgrade material that increases your Flask of Tears (estus flask) uses, essentially allowing you to start the game off with 5 flask charges instead of 4.
Unlike in previous Souls games, you need an increasing number of these for each new flask capacity tier.
Gives more benefits than the life talisman early on since the flask heals way more than 10% of your health, and since you can distribute flask charges between health and mana, it could be especially useful if you intend to rely on magic damage.
Fanged Imp’s Ashes
A summoning ash, which can be used to summon a friendly spirit that will help you in battle. Infinitely reusable, but consumes Focus (the mana bar) when used.
(You need to obtain the Cube Bell before you can use summoning ashes, but fortunately you can get it very early on:head to the Church of Elleh directly ahead as soon as you set foot in the first area of the Lands Between to find the NPC who will grant you this item.)
Also note that summoning is usually only possible in boss rooms and encampments. There is a special tombstone icon in the HUD when summoning is possible.
The imps aren’t terribly powerful, but a distraction is always welcome when you fight groups of enemies. Plus, they’re kinda cute!
Cracked Pot x3
A special crafting material used to craft bombs. The pots are magical and can be reused, so this essentially acts as a capacity upgrade for your maximal bomb carrying capacity, and lets you start out crafting bombs immediately instead of having to find some Cracked Pots first.
Perfect for crafting-focused builds, or to add elemental damage to a melee-focused class.
Stonesword Key x2
Consumable master keys, working pretty much the same way as the Pharros Lockstones from Dark Souls 2.
When you find an area sealed by a blue fog you can’t pass through, you can spend these keys to unlock them. Typically these areas are either major shortcuts, or treasuries hiding some special weapon or armor.
There’s one such area right at the start of the game, but you might want to save your keys for later… partially because said area is very difficult compared to the intended path, and perhaps not the most enjoyable place to start your adventure.
Bewitching Branch x5
Consumables that will temporarily sway an enemy to your side, similar to the Rapport pyromancy. Can allow for a panicked escape from a botched encounter, or a distraction when you attempt to stealth past enemies.
Of course, they only work on weaker enemies, so there’s only so much you can achieve with these.
If you’re good at the game, you won’t need these, and if you’re bad at the game, you probably need more of these than you can reasonably find, so you probably should pick a more permanent gift.
Boiled Prawn x5
Consumable that temporarily buffs physical defense, similar to the Brightbugs from Dark Souls 2.
The effect isn’t too pronounced, but they last a relatively long time.
Do note that they only affect physical damage, and not elemental damage like fire or holy attacks.
If you’re good at the game, you won’t need these, and if you’re bad at the game, you probably need more of these than you can reasonably find, so you probably should pick a more permanent gift.
Shabriri’s Woe
Talisman. Increases the rate which you inflict Madness on enemies. Madness is a rare ailment, and it’s just as lethal to enemies as it is to you, but you don’t start out with any reliable means to inflict it.
Mostly useful for speedrunners, I suppose.
None
If you really want that extra bit of challenge, you can just opt out of picking a keepsake altogether. I wouldn’t recommend it for your first playthrough.
よくある質問
I can see something cool off in the distance. Can I go there?
Yes.
It might not be as easy as it seems, the direct route might be blocked, and it might be a really bad idea to go there, but there are very few places you can’t explore if you want to.
What should I level up first?
Focus on HP. Weapon scaling is unimportant early on (it increases as you upgrade weapons) and you should worry about survival before you start worrying about increasing your DPS.
(Though keep in mind, Strength increases your equip load so if you rely on high-defense armor you will need a bit of this too)
How do I beat the Tree Sentinel?
Speed is the key here. Come back when you get a horse, and then fight him by jousting (run past him at high speeds and stab him when passing by)
Beating him rewards you with an Ash of War for shields that lets you create a temporary healing zone. If you never use parries, it’s a solid choice for beginners to help deal with the limited early-game healing.
How do I level up?
You need to team up with Melina, the Finger Maiden. After meeting her, you can select “Level Up” at any grace you rest at.
After finding three Sites of Grace, she will approach you the next time you rest. Ones found in dungeons does not count towards this, only the ones on the overworld. The easiest way to find additional Sites of Grace is to follow the guiding light from the Graces you ignite.
When do I get the horse?
When you first meet the level-up maiden Melina, she will give you the whistle that lets you summon him. Follow the guiding light from the Graces you ignite and you should find the one she hangs out at. (She should show up at the third grace you ignite, but there are exceptions to this rule).
I’m using a shield, but I still take a lot of damage!
Check the shield’s stats. Smaller shields like bucklers don’t block a lot of damage, they’re intended to parry (deflect) enemy attacks instead. Larger shields typically block more damage (sometimes even 100% of damage!) but they require more Strength to equip. If you don’t meet stat requirements, the effect of the shield also is greatly diminished.
Also keep in mind, a lot of metal shields (which block the most physical damage) don’t block magic damage very good, so if you’re fighting something hurling arcane projectiles or lightning at you, you might want to change to a wooden shield instead.
What’s the best early-game weapon?
The Twinblade, found in the a certain dragon-burnt ruin early on, is a solid choice. It hits in a wide area around you when one-handed, and when twohanded it can quickly deliver a series of hits that stunlocks lesser enemies. Additionally it has access to a large number of Ashes of War, allowing you to supplement its basic attacks with a lot of skills that compliments its moveset.
The Lance is another great choice. Slow but powerful, and with great range. It’s the most useful on horseback, where you can compensate for its slow speed and take full advantage of its long range. Combine with the Repeating Thrust Ash of War for some insane burst damage and you’re good to go.
Can I make a fistfighting build?
You can fight with no weapon equipped, but both raw damage and scaling are pitiful, and you lose out on the ability to use Ashes of War. However, there are a fist weapon class in the game, such as the ancient roman boxing glove, the Caestus, which is available early on.
How do I swim over to the dragon island?
You don’t. For some reason “just swim over to that island lol” has become a meme among Souls content creators. Don’t be fooled; you can only reach that island by going through a certain dungeon at the beach.
How do I beat Flying Dragon Agheel?
Bring some horse-healing items (e.g. craft raisins using Rowa Fruit) and equip a lightning-elemental Ash of War on a long weapon, like a lance or greatsword.
Stay on horseback, stay mobile, and circle around Agheel at a safe distance, taking some stabs at their feet whenever you get an opening. (A safe distance doesn’t necessarily mean a LONG distance, Agheel’s breath has a pretty big area of effect – aim for far away that you won’t get stomped on or bitten, but not in fire breath range).
Make sure to keep your horse alive using the raisins, because you’re pretty screwed if he dies.
For some reason Agheel takes massive fall damage and can be oneshot by walking off a reasonable-sized ledge, but it’s very tricky to set up this cheese and it probably will be patched out soon…
How Do I beat the Demi-Human Chief x2?
Use stealth. One of the chieftains is sleeping initially and will only wake up if you fight nearby. You can also pick off a lot of the regular demihumans without being spotted if you take the right approach, making the fight much easier. If you are spotted, fire bombs are your friend to deal with the groups of enemies. Summoned spirits just risks drawing all the aggro in the entire room, so use with caution.
How Do I beat the Bloodhound Knight Darriwil? He ignores my dodges!
Darriwil’s attacks are delayed, so if you dodge on instinct, your dodge ends prematurely and you’ll get hit. Stay cool and wait until the last moment before you dodge. (Many other bosses also do this)
Where do I find Smithing Stone Shards?
They’re scattered all over the place in small numbers, often dropped by certain tougher enemies like the trolls on Stormhill. But your best bet to get them quickly is exploring mine-type dungeons, which usually have both dedicated treasure piles of them and enemies that commonly drop them. Bring some means of elemental damage, since enemies with stone skin are very resistant to physical damage.
Throwing knives deal like no damage, why should I bother with crafting?
Throwing knives are mostly meant to aggro a single enemy without alerting their buddies, letting you separate a group and take them on one at a time. For more damage, try the Fire Pots (they can even hit multiple enemies at once!)
Is there a crafting-focused build?
Arcane boosts your item discovery rate (there’s also spells and gear that scales with Arcane, but they’re rare early on) and most thrown projectiles scale with strength and/or dexterity.
If you don’t want to fight directly yourself, consider focusing on spirit summons and healing spells, suppleanted with ailment-inducing weapons like the Coiled Snake Shield.
How do I beat Margit the Fell Omen?
Margit is the first “git gud” boss of the game and a massive leap in difficulty from previous first-area bosses like Iudex Gundyr and the Dragonrider.
If you immediately ran here instead of exploring Limgrave, and you’re bad enough at the game to need this guide, you probably should hold off a bit and explore other places first – upgrade some weapons, get some stats, get comfortable with dodgerolling and blocking timings, and get yourself equipped with some War Ashes you’re comfortable with. Grinding is by no means necessary for success, but it does make things easier.
Some general pointers:
- Heavy attacks and jump attacks deal greatly increased posture damage. Use these whenever you can, and you will occasionally stagger Margit, creating an opening for critical attacks or healing.
- A lot of Margit’s attacks have a delay to them that makes it hard to dodge them on instinct. Try to keep your cool and dodge at the very last second.
- Being a beast, Margit is weak to fire damage and hemmorhaging/lacerating damage. Incantations, Ashes of War and consumables that add fire damage will all give you an easier time, as does anything that causes the bleeding status ailment.
- Using a large shield and Guard Countering is a simple strategy, but it’s not super effective against Margit’s long combos. Try to dodge primarily and make sure you don’t do a Guard Counter until the last attack of Margit’s combos, so you don’t eat up eating a follow-up attack to the face. Also keep in mind that Margit’s jump attack cannot be blocked.
- Margit cannot fall into the bottomless pits to the side of the arena. However, YOU can, especially when he starts using the hammer attack which has massive knockback. Try to stay in the middle of the arena.
- Margit’s attacks have a large area of effect that easily kills weaker summons, and like most bosses he will focus on summons first. A melee-focused tank like the Mercenary is your best bet here (though with a little luck the Wolves might also survive since they jump around a lot).
- Having the high ground (being further up the slope than Margit) makes it easier to hit him with jump attacks, which deals additional posture damage.
- There might be a certain key item that weakens Margit, if you can find it…
- If you’re extremely stuck and don’t want to bash your head against the wall for another hour, you CAN find an alternate way into the castle that doesn’t force you go get past Margit. Though the next boss you’ll need to fight is even harder…
- (Also, the reward for beating Margit is an additional talisman slot, so it’s well worth your time fighting him!)