Laruaville 13 – すべての M3 レベルのウォークスルー
すべての M3 レベルのウォークスルーと、ストーリーに対する私の見解。
M3 レベルのウォークスルーを完了する
一般的なゲームプレイ ノート
吸血鬼の幽霊が登場する暗いテーマの分割払いで再生される、いつもの陽気な Laruaville サウンドトラックから笑い声が聞こえてきます。幽霊があまりにも長い間アンデッドの吸血鬼になる方法を考えることはできません。それは過度に混乱しています。
M5 は小さな爆弾を与えます。 M6 以上でロケットを発射できます。
ミニゲームをプレイすると、シーンをより速く構築するのに役立つボーナス コインを獲得できます。いくつかの建物を配置した後、この Laruaville にボーナス コインの輝きが戻ってきたので、シーンを注意深く見てください。ただし、この機能を備えた以前のゲームほど頻繁に輝きが現れることはありません。
リプレイ レベル エリアは、シーン構築エリアの右側にある左向きの矢印の後ろにあります。カーソルを矢印の上に置くと、メニューが表示され、以前に完了したレベルまたはミニゲームが再生されます。
新しい障害: 連鎖したピースが入った緑色の四角形は、隣にあるそのタイル タイプのマッチを取り除くか、パワーアップで爆破する必要があります。
ほとんどのゲームは追加のパワーアップを行わなくても実行できますが、あちこちにパワーアップを必要とするレベルがあります。
ドラキュラ: 「いやー、外出が長すぎて、太陽が昇ってきました。それはまだ私を苦しめています!私が寝るのに使っていたあの箱はどこにあるの?
レベル1~10
レベル 1: 「なぜここの血液は貧血なのですか?食器を割る以外の何の役にも立たない。」花瓶をブロックしている鎖状の葉の四角形の隣にある葉を一致させて花瓶を解放し、花瓶を取り除きます。火を使って、もう一方の花瓶を塞いでいる凍ったコインを取り出して取り除きます。左側の障害物を通り抜け、大砲を発射して最後のコインを解放してください。
レベル 2: 緑色の四角は、削除する金塊、カラス、葉のそれぞれに一致する必要があります。ロックされたコインを取得し、その後ろにある爆弾を爆発させます。青いコインを一致させて通常のコインに変え、大砲を発射して左下の爆弾を爆発させます。赤い四角をつまずいて片付けてください。
「血、血!血が必要です!この池の魚だけが獲れる場所のようです。ダン、それらはすべて灰色で、岩のようです! [邪悪な緑の色合いで発煙するために背景の建物に向かいます]
レベル 3: これは見た目より難しいです。緑色の四角をすべて無視して、バーが動かないように上から作業する代わりに霧を通り抜けます。コインが届かない場所に落ちた場合は、再起動する方がよいでしょう。そうしないと、ロケットがたくさん必要になります。コインは上から取ります。次に、左から始めて、できるだけ多くの緑の宝石を必要とする緑の正方形の隣に緑の宝石を合わせて、底を空けます.それらをすべて削除する必要はありませんが、各隅の上に少なくとも1つのスペースが開いている必要があります.左のテレポートにキーをスクートして、下部にあるすべてのコインのロックを解除します.バーが邪魔になった場合は、バーの右側を合わせて右にスライドさせます。
レベル 4: 「ああ、あの緑色のもの!このプレイフィールドにも、トップに別のプレイフィールドがあります!」緑の四角をハートマッチで消したら、火を使って左側の雪を溶かします。火をテレポートに入れる左側の花瓶を取り外します。途中のコインを拾い、残りの花瓶を取り除きます。雪と凍ったコインをすべて溶かしてから、大砲を使ってコインを撃ち出してください。
「ヴラドを串刺しと呼んだのは誰だ?コインがヴラド・ドラクルとしての私のイメージにある場合、あなたは私を悪名高い息子と混同しています.それに、ここまで来るのに賭けに出たのは私じゃないの?」
レベル 5: 左側の障害物を通り抜けて、途中にある 3 つのテレポートに火を入れます (炎をテレポートするには、火が 1 つの隣にある間にテレポートを一致させる必要があります)。 3 つのテレポートすべてが使用された後に発生する連鎖反応により、コインが下に落ちて収集されます。
「私が意味したこと 質問するのは…なぜ私の地下室には青い照明と窓があるのですか?」
レベル 6: 左下の霧と鎖を通り抜け、バーを左にスライドさせて、右側の 2 つのドロップがスロットに落ち、3 つ目のテレポートが発生するようにします。次に、ロックされたコインを取得できるように、岩がなくなるまで一致させるか、爆破します(右上のドロップは、そこにいる間に別のコインのスロットに落ちます).赤い四角をつまずいて、残りのコインを集めてください。
レベル 7: 「血が貧血で、まだ喉が渇いている!」赤い宝石が必要な緑の四角とその後ろの花瓶を取り除き、キーを右端まで動かしてテレポートします。底からコインをすべて取り出し、バーを右にスライドさせて大砲を発射します。すべてのコインがなくなるまで、必要に応じて大砲を発射し、バーを動かし続けます。
レベル 8: 「また緑のものだ!次は白い匂いのするハーブの球根を手に入れますか?」バーを上にスライドさせて、すべてのコインの半分を結合できるようにします。プレイフィールドの下半分からすべてのコインを収集し、キーをテレポートします。バーを下にスライドさせて、キーをロックされたコインに移動し、大砲を発射できるようにします。右側のコインの半分の邪魔になる霧と木を片付ければ、残りはできます。
レベル 9: 青いコインの下にある赤い爆弾の邪魔になるものを十分に片付けて、それを爆発させます。下部にある緑色の四角をトリップします。ロックされたコインのキーを取得するための秘訣は、コインとキーの間で水平方向の一致が必要であるため、一致するとキーがコインまでスクートすることです。縦に合わせると、鍵がコインの間に隙間ができて動かなくなります。または、コインとキーの間に小さな爆弾を作成し、それを作動させて列全体をクリアします。
「窓越しに首をしゃぶる新しいソースがあれば、家からの私の視界は改善されるでしょう。」
レベル 10: 「私はそれらの箱に収まりますか?これはもっとそれに似ています。テレポートからドロップをブロックする障害物を取り除き、ドロップを輸送します。右上からコインを集め、鍵をテレポートします。ここからは簡単です。
レベル11~20
レベル 11: バーを左に動かして、ドロップを下のテレポートに入れることができるようにします。必要に応じてバーを再び動かし、ドロップを次のテレポートに入れます。上部に大量のドロップが得られるまで、次の 2 つのテレポートでこれを繰り返します。右下隅のドロップをブロックする障害物をクリアし、コインを取得してから、火を使用して左側の凍結したコインを解凍します。残りのコインを集めてください。
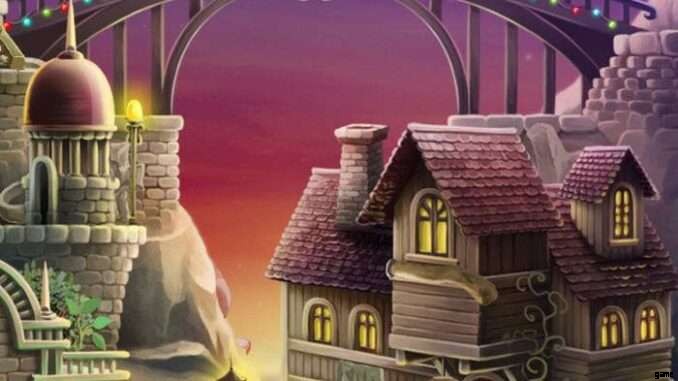
「橋が十分に照らされていれば、背景の太陽光を遮断できますか?」
レベル 12: 左側の霧と障害物を通り抜け、すべてのコインの半分に参加します。下部の赤い四角に向かう途中でコインを簡単に拾うことができるので、コインを赤い四角の隣に参加させようとすることを心配する必要はありません.赤い四角をトリップしてください。
レベル 13: 左側の緑色の四角形を取り除き、バーを左に動かして、テレポート、コイン スロット、火を明らかにします。コインを手に入れ、ドロップをテレポートし、右に向かって火を広げます.火を動かしながら別のコインを拾い、右側のテレポートを使用して火をテレポートします。ここから取得できます。
レベル 14: 左側のものを通り抜けて、すべての雪に火を広げます.それなら簡単です。
レベル 15: ロックされたコインを取得し、バーを塞いでいる葉を取り除きます。バーを下にスライドさせて、3 組のコインの半分を結合します。火を使って雪を解かし、背後にある氷 (結晶?) に包まれた破片に到達します。左端の列からすべての氷を取り除き、左上隅から落ちてきた 2 つのコインを取得し、最後のコインのためにバーを上にスライドさせます。
レベル 16: 左から右に作業して、緑色の四角形を壊し、下の爆弾を爆発させます。右側のチェーンを壊し、キーをロックされたコインまでずっと左にスクートします。残りはあなたができます。
レベル 17: 上部にある 2 つの凍ったコインを解凍し、下部にある障害物を取り除き、キーをテレポートできるようにします。ロックされたコインを取得して、最後の 2 コインを解放します。
「ああ、私の素敵なピンクのお化けさん…593年が古いと思うなら、あなたはそれほど長く死んでいないに違いありません.では、ボグでストーンフィッシュ以外の何かを手に入れることに取り組んでくれませんか?」
レベル 18: 右側の障害物を取り除き、青いコインを集めます。バーを右端までスライドさせます。真ん中のドロップがテレポートしなかった場合は、テレポートしていくつかのコインを上に作ります。キーの邪魔になっている岩を壊し、キーを右端まで動かしてテレポートします。残りはあなたができます。
レベル 19: バーを塞いでいる上部の粘土を壊すために、小さな爆弾を作ります。小さな爆弾が行/列から外れている場合は、隣接するプレイ中のタイルをドラッグして爆発を 1 行/列に移動することで再配置できます。小さな爆弾自体をドラッグしないでください。移動には機能しません。バーを左にスライドさせ、右下の葉を取り除き、ドロップを解放します。トーチが点灯するまで大砲を発射します。バーを右にスライドさせて、凍ったコインに火を広げて片付けます。
レベル 20: 大砲をふさいでいる障害物を通り抜けて発射します。火のついた松明を使って雪をすべて溶かし、コインを集めてください。
レベル21~30
レベル 21: 上部の青いコインとドロップはそのままにして、テレポートからキーをブロックしている 3 つの岩と葉を壊します。キーがテレポートを出ると、すべてのロックされたコインに対していくつかのキーが生成されます。それらを集めてから、凍ったコインに火をつけて、右上のすべての岩が空の穴に落ちるようにします.コインの収集を終了します。
レベル 22: ロックされたコインに合わせてキーをテレポートし、コインを集めます。木材のかなりの部分が落ちるように、バーを少なくとも 3 列左にスライドさせます。木材の周りのどこかを合わせて十分に割って、上部の鍵がロックされたコインへの自由な道を確保できるようにします。中央の石炭に火を広げて、シールドされたタイルが大砲の進路から落ちたら、大砲を発射します。残りはあなたができます。
「おい、私のハンモックのふたを忘れたぞ!」
レベル 23: 右下のすべての障害物を通り抜け、キーをテレポートします。ロックされたコインを集めて花瓶を取り外します。これにより、赤い四角がつまずきます。あとは簡単です。
レベル 24: 最初に花瓶を塞いでいる緑色の四角を取り除き、次に花瓶を取り除きます。火をふさいでいる緑色の四角を取り除き、凍ったコインを解凍します。大砲を発射して連鎖反応を起こし、すべての岩を落とします。右側のコインを拾い、右側の大砲の邪魔になっている岩を取り除きます。大砲を 3 回発射して、最後の緑色の四角形を取り除き、クリーンアップします。
「待って、これは ゲスト ですか? 家か幽霊 家?本物の血が入った本物の体が欲しかったからですよね?」
レベル 25: 右側の障害物を取り除き、キーをテレポートします。左側の障害物を取り除き、鍵がロックされたコインに移動できるようにします。両側で爆弾を爆発させます (プレイフィールドの各半分の右端のスペースに 1 つのスポット アクセスがあります)。
レベル 26: 両方の花瓶に手を伸ばして取り除きます。大砲を発射して片付けてください。
レベル 27: 左右両側の障害物を片付けます。右上にあるドロップをテレポートします。スロットに合わせて左上に移動します。コインを手に入れ、火を使って炭鉱を燃やします。火をつけた松明を使って、凍ったコイン3枚を溶かします。簡単なコインをすべて集めたら、バーを左にスライドさせて片付けてください。
「その絶え間ない太陽の光が本当に私に届いているか、そうでなければ私の血の渇きが私を狂わせ始めています.永遠に見渡せる屋外パビリオンが欲しいなんて、私は何を考えていたのですか?」
レベル 28: ドロップをスロットに入れ、コインを手に入れて、すべてのバーを十分にスライドさせて、その下にピースが滴り落ちるようにします.鍵のかかったコインの鍵を手に入れ、残りのコインを左下から集めてください。
レベル 29: バーを右に動かして、左上の 4 つのドロップをテレポートできるようにします。ドロップが右上に来たら、ドロップをスロットに入れます。キーを左にスクートし、必要に応じてバーを右に動かして、ロックされたコインまでずっとキーを移動できるようにします。底のコインを片付けてください。
「なぜ私の『空想観測所』は、とがった杭のような装飾をしているのですか?少なくとも、建物が日光の一部を遮り始めています。」
レベル 30: 「開発者は、数レベルごとに緑色のものを表示し続けるのは非常に残酷でした。」霧を通り抜け、パワーアップをして 2 つの粘土タイルを爆破し、バーを下にスライドさせます。大砲を発射し、連鎖反応が終わるのを待ちます。右下隅からドロップをテレポートすると、ここからドロップできます。
レベル31~40
レベル 31: 下から上に向かって右に向かって作業し、霧を通り抜け、通常のコインと青のコインを集めます。 2 つのバーを反対方向にスライドさせ (下のバーを左に、上のバーを右に動かしました)、ドロップをスロットに入れて片付けます。
レベル 32: 一番上の行のキーを左にスクートしてテレポートします。上部中央にある他のキーをブロックしている汚れタイルを取り除き、左側にあるロックされたコインを取得します.これにより、バーの 1 つが解放されます。一番上までスライドさせて、下のコインの半分の間の隙間を埋めます。半分に参加してコインを集めます。凍ったコインに火を広げ、雪をすべて溶かします。右側のバーを自由に上に移動できるようになったので、最後のコインに到達できます。
「私の吸血鬼への渇望と人間としての他の執着は、私の吸血鬼の自己が殺された後、私を幽霊に変えました.もちろん、以前に巨大な城を持っていたので、巨大な城が必要です。」
レベル 33: キーをブロックしている障害物を取り除き、テレポートに移動します。中央のシールドされたタイルは、大砲の邪魔にならないように下に移動する必要がありますが、十分に下がらない場合は、下のピースをシャッフルして、大砲のショットをブロックしないようにドロップします.ロックされたコインを手に入れて、すべての粘土タイルがなくなるまで大砲を発射します。これにより、コインを自由に集めることができます。
レベル 34: 土のタイルを取り除き、下にあるシールドされたタイルを取り除き、バーを左にスライドさせて残りのシールドされたタイルを取り除き、大砲の経路を解放します.大砲を発射し、連鎖反応が終わるのを待ちます。テレポートに入るまでキーを左にスクートします。底にある凍ったコインに火をつけて、その後ろにあった石炭を燃やしてください。残りはあなたができます。
レベル 35: テレポートするまでキーを右に動かします。ロックされたコインを 2 つ取得し、上部の石炭鉱脈に火を広げます。火がついた松明を使って残りの石炭を燃やし、最後の松明に火をつけます。最後の松明を使って凍ったコインを取り出せば、後は簡単です。
「いいえ、いいえ、いいえ...ガーゴイルはもっと小さく、上に行くはずです。 城!」
レベル 36: 右側のバーを左に動かして、上のドロップをテレポートできるようにします。ドロップをスロットに入れ、コインを取得して、左のバーを右に移動できるようにします。左下からすべてのコインを取得し、右にキーをスクートし始めます。コインの半分を所定の位置にとどめたいので、コインの半分の周りで一致させることは避けてください。キーを動かし続けることができるように、バーを左にスライドさせます。ロックされたコインを入手し、必要に応じて上部のバーをスライドさせて邪魔にならないようにして、花瓶を取り外すことができます.コインの半分が融合してクリーンアップしない場合は、それらに参加してください。
レベル 37: Move the key all the way left into the teleport. Get 2 locked coins from the keys that spawned. Slide both bars all the way up to reach the remaining coins.
Level 38: Move the key on the bottom to the left until it teleports. Get a locked coin in the top left, then explode the bombs and remove the vases. Move the key to the left and teleport it. Pick up the last locked coin and slide the bar left until all the rocks have dropped down. You can take it from here.
“*sigh* Why can’t I have some living beings here? The anemic blood over the vases still isn’t doing the trick.”
Level 39: Get through the obstacles on the left to teleport the drop. When the drop shifts to the right side, clear out the leaves blocking the next teleport and transport the drop again. It’s easy now.
Level 40: Remove the dirt and leaves from the bottom left and teleport the key. Get the easy coins from the top right, then unlock the coin and move the bar to the right. Gather the remaining coins.
“Great. Not only have I forgotten which grave was mine while desperately hoping that the other one would have a reasonably fresh body with some blood still in it, I also forgot that I wasn’t just staked, but beheaded too, so now my head’s just rolling around in the dirt. Oh, the horror!”
Levels 41-50
Level 41: Start with clearing the fog and break through the ice and breakable walls to get the locked coin and also have a pathway for the fire to get to the frozen coin on the left. The unlit torches will vanish once the coin is thawed, so you can then get through the rest of the fog and leaves to teleport the drop. You can do the rest.
Level 42: Avoid moving the bar at the start. Remove the dirt until you can get to the coins on the left and teleport the key. Unlock the 3 coins and join the 2 pairs of coin halves. Slide the bar to the left to gather the coins.
Level 43: Get rid of the column of green squares, then spread the fire to the coal on the far left. This lights a torch. Use it to spread the fire to the coal on the far right. Wait for all the fire to go out and clean up.
“If I use the huge bridge to walk over the buildings, won’t the sunlight fry me some more?”
Level 44: Collect 3 coins in the top center while clearing the green squares, removing the shielded tiles blocking the cannon’s path, and teleporting the key. When the key exits the teleport, get the locked coin and fire the cannon. Wait for the chain reaction to finish and get the remaining coins (don’t forget about the halves up top).
Level 45: Work through all the stuff blocking the vases and remove all the vases so the cannon isn’t blocked by the shielded tiles anymore. Fire the cannon and wait for the chain reaction to complete, which will thaw a few coins and light a torch. Thaw the remaining coins and clean up.
Level 46: Move the key left until it teleports. Get the 2 locked coins from the keys which spawned and trip the red and green squares. Collect the blue coins on the bottom, then join the coin halves and clean up.
Level 47: Clear the fog to reach the bomb at the bottom. Blow up the bomb and wait for the chain reaction to complete. Get the fire to the coal, which will light a torch. Use the torch to spread fire to the snow and frozen coins.
Pink ghost: “Dracula, just HOW big is your billiard table, anyway? And YOU can figure out how to bust out the rock underneath for your wine cellar!”
Level 48: Clear the obstacles blocking the drop from the teleport and teleport the drop so it spawns a bunch of drops elsewhere. Put all the drops into their slots and get the coins.
Level 49: Get rid of the obstacles on the top left and scoot the key left into the teleport. Pick up the locked coin and move the bar all the way up. Join all the coin halves and gather those coins, then get through the leaves until you can explode the bombs on the far right. Move the bar down if it hasn’t gone down by itself far enough and get the frozen coins.
Level 50: Break the destructible walls until you can explode the red bombs, which will set off a chain reaction dropping all the rocks down. Get the whole coins first, then the ones from the halves.
Levels 51-60
Level 51: Start with breaking at least some of the wood blocking the teleport in the bottom center before sliding the bar down. Move the bar down enough so the key can go to the left and reach a teleport there. The key comes out on the bottom left. Slide the bar back up and clear any wood still blocking the bottom center teleport; transport the key. Several keys spawn in the top right unlocking all the coins. Gather them all and remove the wood blocking the drop from the last teleport. When the drop exits the teleport as 3 new drops, the rest is easy.
“Wait, I’m a vampire. Which means I can see in the dark better than mortals can, so why is there a weird lamp hanging off the tree now? Never mind that I can’t figure out how the thing stays lit and it’s nowhere near bright enough to block out the sunlight. And won’t the books get damp and moldy sitting outside all the time?”
Level 52: Remove the green squares blocking the vase and get rid of the vase to trip the red square. Break through the ice (why the fire never melts it in these games is a mystery) and use the fire to thaw all the frozen coins on the left. Scoot the key all the way over to the locked coin on the right, then teleport the drop. You can do the rest.
Level 53: Get rid of the green square blocking the teleport and transport the drop. Put the 2 drops which appeared on the bottom right into their slots. Clear the dirt blocking the teleport on the bottom left and teleport the drop so it’s aligned with its slot. Pick up the coin blocking the bar and slide it up. Slide the other bar down so it’s out of the cannon’s way. Collect the coins which dropped down, then fire the cannon for the last coin behind the walls.
Level 54: Gather the 3 blue coins and clear out the leaves blocking the teleport so you can teleport the key. It will be aligned with the locked coin to collect next. Teleport the drop and get 2 more coins from the slots. Spread the fire around the small circular path which opens up to burn the coal. Wait for the chain reaction to complete, then finish thawing the coins.
Level 55: “Even though there’s all that anemic blood again, I’m still thirsty!” This level is a complete duplicate of level 7, except that instead of a red-gem requiring green square, it’s a heart piece-requiring green square! See the strategy for level 7. Yikes.
Level 56: Go through the fog and leaves to get the fire to the coal. You can figure the rest out.
Level 57: Dracula doesn’t like that cross in the top right corner of the playfield, so he made this level quite hard in revenge. Move the key all the way right into the teleport. Fire whichever of the cannons on the bottom you can until enough wood is gone in the top left for you to make a match to break more wood up top (getting the first match setup is hard, but once you make a match up top it gets a lot easier). Break out enough wood to get the key into the teleport in the top left. Get the locked coin the key aligns with and fire the cannon to drop the coins from the top right corner. Gather those coins and move the key to the last locked coin. Note:there is a space that goes empty with matches, so you can’t just scoot this key with matches only. Make a small bomb either in the same row as the key or in the row below and get the explosion to go off in the row with the key to move it all the way to the coin. The coins which fall after the locked coin is gone are easy.
Level 58: Remove the green squares and use a powerup to blast the clay tile blocking the bar from moving up. Make another powerup and blast one of the other clay tiles. Get rid of the dirt blocking the bar, then slide the bar up until the gap between the coin halves populates. Pick up the 4 coins from the halves and clear out the obstacles blocking the fire. Spread the fire all the way to the right to burn up the coal. Get 3 more coins from the top right, then slide the bar back down so the key can get to the teleport on the left. When it exits it becomes 3 keys unlocking all the coins and it’s easy.
Level 59: As with level 57, Dracula must be getting his revenge for all those crosses by making this one super hard too. It can be done sans powerups, but is fiendishly difficult to accomplish, so you’re a lot better off making some small bombs to blast chains or rocks as needed. Scoot the key on the bottom row to the teleport. Get the 2 coins blocking the cannons and fire the cannons repeatedly to remove some rocks from both top corners until the locked coin on the top left is accessible for the key and the coin halves in the top right can be joined. Drag the right coin half 1 space left so the coin ends up in the column adjacent to the cannon and keep firing the cannons on both sides until all the coins from both top corners have been obtained. Break the chains in the bottom section blocking the last coin halves and gather the coin.
Level 60: It’s the lower bar you want to slide first, so get through the huge pile of obstacles and move that bar to the left a good ways so the right side of the playfield is free for getting the coins which will drop down there later. Break the rocks up top and slide the upper bar to the left until the coins fall and clean up.
“The guest house is lit now, so will I finally get some real beings with blood?”
Levels 61-70
Level 61: Scoot the key to the right until it teleports. Clear the wood so the key can get to the locked coin, then remove the vase. Ignore those unlit torches right next to the flames because it’s the coal on the other side of the playfield you need to burn up instead. Now remove the obstacles on the top left and all the coins are easy to reach.
Level 62: Collect the locked coin, then remove the vase which was below it. The chain reaction will light the torch on the right, which you use to thaw the coins on the far right and burn the coal below them. Gather the 2 coins by the torch which lighted on the far left, and use those flames to burn the last coal at the top. Remove the vase.
Level 63: Get rid of the green square below the teleport exits in the top center. Scoot the key to its locked coin. Remove the other green square blocking the bar and slide it 1 space left to teleport the drop from the right. It will spawn 2 drops over the vase; remove the vase. The chain reaction will teleport another drop and give you 5 coins at the bottom. Pick those up and clear the obstacles on the bottom to reach the last coins.
Level 64: Break the rocks blocking the vases and remove all the vases. Collect a few coins on your way to reaching the cannon, but don’t fire the cannon until you’ve broken the rest of the rocks blocking the cannon’s firing path. Explode the bomb to fire the cannon and start a small chain reaction. Get the 3 coins by the cannon on the right and fire it to start another chain reaction. You can take it from here.
“The color of those glowing stones is amazing, like they’re alive. Now if I could just get some blood out of them…”
Level 65: Pick a side and remove the vase there. Repeat on the other side. Get the blue coin blocking the key from its locked coin and you can do the rest.
Level 66: Break the rocks blocking the red square and trip it to move the bar. Collect the coins which fell and break the rocks blocking the key. Trip the green square to drop the remaining coins from the top and get the blue coins at the bottom.
Level 67: Slide the bar right so the drops can go to the slots. Pick up the locked coin and slide the lower bar to the left. Finish gathering the coins.
Level 68: Work through the fog at the bottom and get the 2 blue coins. The 2 coins in the top right will fall down while you’re working on this part, so you can ignore the fog in the top. When the stack of shielded tiles has fallen down enough to where you have an access point to the top left, start breaking the wood and pick up the rest of the coins.
Level 69: Avoid tripping the red square on the far right for as long as possible. This requires more and more careful matching with breaking the obstacles as you get closer to the red square on the far right. Try to at least get all but the coin on the far right to drop down before setting off the red square. Any coins left behind after the red square goes off will have to be collected with rockets.
Level 70: “I want that drop of blood! Make it stop bouncing around!” Teleport the drop in the top right corner. It moves over to the other side of the “quadrant” where you’ll have to break the chains and clear the leaves to teleport it again. Now it’s a few columns to the right and has to be put in the next teleport below. It finally ends up aligned with the slot on the top left. Pick up the 3 coins and teleport the key. It will spawn several keys on the bottom right for the remaining coins.
Levels 71-80
Level 71: Get rid of the obstacles on the top right before moving the key to the locked coin. Explode the bombs to get 2 more coins. Trip the red square if it doesn’t go off by itself, then work through the fog and leaves for the last coins.
“Who cares about tools or the boat when there’s an awesome evil green glow coming from inside that building? It’s another place for me to hide while I fume over still not having any decent blood to drink.”
Level 72: Slide the bar to the left so all the coins start falling down and collect them all so they’re not blocking the keys. Teleport all the keys. Get rid of the green squares and dirt blocking the keys to pick up the last coins. Move the bar as needed.
Level 73: Break the destructible walls and teleport the key. Get the locked coin, then explode the bomb by sliding the left coin half out of the way. After the coal burns up, use the torch below for the frozen coins and clean up.
Level 74: Break some of the ice under the coin slot (the ice cube immediately below the slot goes empty and can’t be broken for now) and then clear out the wood on the bottom right so there’s a gap for the bar to slide. Move the bar 1 space right so the drop falls in the slot and the coin lands in the ice cube. Make a small bomb either in the row with the key, or in the row below it and explode the bomb in the key’s row so it moves into the teleport (you can’t scoot it with matches alone because of spaces going empty). Clear out the leaves blocking the key and teleport it again to unlock the 3 coins below. Collect the coins and teleport the drop to get the remaining coins up top.
Level 75: Remove the destructible walls, wood, and shielded tiles on the top right so the cannon has a free path. Fire the cannon to explode the bomb and start a chain reaction that burns up the coal. Use the torch on the frozen coins and teleport the drop. You can do the rest.
Level 76: Gather all the blue coins. Break the rocks blocking the key and teleport the key. Get the 2 locked coins from the keys which spawned and trip the green square on the right. Trip the red square on the left and fire the cannon to thaw the last 2 coins.
Level 77: Get the locked coin, then break the chains around the fire enough so that the fire can be spread underneath the water and back to the right for the frozen coins and snow. If you don’t thaw all the snow, the left side will not refill. Collect the coins in the bottom center. Clear out the obstacles on the bottom left so the cannon has a free pathway, then fire the cannon to trip the red square.
Level 78: Don’t make matches to the right of the key because you want the coins on the upper right to stay where they are. Scoot the key to the left and teleport it. Get the 4 locked coins from the keys which spawn. Without working anywhere to the right of the wood, match below the wood to lower the shielded tiles enough so the cannons have a free pathway to fire at the coins on the right. Some of the rocks will fall down, but as long as you don’t accidentally lower the coins you’re OK. Fire the cannons repeatedly until most of the coins are obtained. Once some more space opens up, you can match around the last few coins.
“Now you’ve done it, Pink, with the tacky lights on the bridge! Just you wait, you’ll be more than scared for this!”
Level 79: Teleport the key. Gather the 2 locked coins, then teleport the drop on the top right. Clear the leaves on the bottom left and get the coins from the halves so the drop can go into the next teleport. Slide the 3 bars out of the way of the last drop and clean up.
Level 80: Get through the dirt to get the coin from the drop. Slide the bar one space left to cause a chain reaction. Work past the obstacles on the left to reach the coins at the bottom and trip the green square. The rest is easy.
Levels 81-90
Level 81: Keep on clearing the fog and wood and the coins will drop down.
Level 82: Remove the green squares blocking the shielded tiles and clear the shielded tiles out so the cannon has a free path. Then get rid of the obstacles in the top right and fire the cannon. Trip both the red and green squares on the left and you can take it from there.
Level 83: Work along the bottom and break enough of the ice and chains to reach the bomb. While doing this, pay attention to when a gap opens up at the top left for the 2 coins there. Get the coin on the left after the bomb explosion thawed it and then get through the obstacles on the bottom right to lower the remaining coins.
Level 84: Get through the breakable walls and explode the bombs so the fire by each one teleports. You can do the rest.
“Now there’s a bridge with overly short chains that doesn’t come down and spans nowhere. You’re in for it, Pink!”
Level 85: Clear the obstacles blocking the key and gather the locked coin. Spread the fire to the right and put it in the teleport in the top center. Teleport the drop in the top left. Wait for the chain reaction to finish and then get the remaining coins.
Level 86: Move the key into the teleport to spawn several more keys. Pick up the reachable coins, then remove the green squares blocking the vase and get rid of the vase to slide one of the bars down. Move the other bar down 1 space to free the cannon. Fire the cannon until all the bombs in the top right have exploded.
Level 87: Remove the obstacles in the bottom right blocking the key and scoot it to the left enough for you to work on removing the wood. You can’t do anything with the key otherwise for now, so leave it in the middle of the playfield somewhere and teleport the drop. The chain reaction this produces will open up most of the pathway for the key. Get rid of the leaves blocking the teleport and transport the key through it. Start matching somewhere in the bottom middle and the coins will all come down for you.
Level 88: Break the wood on the bottom right and get the 3 coins. Scoot the right coin half leftwards enough to be left of the bar and leave it there for now. Slide the bar down as far as it will go. Break the wood on the top left, then collect the coins in the top right and scoot the key to its locked coin. Teleport the drop in the top left for a small chain reaction. When the vase disappears, join the coin halves for the last coin.
Level 89: Collect the blue coins. Move the key right into the first teleport. Keep dragging it one space over into the next teleport until you get 4 keys in the bottom left. You can do the rest.
Level 90: Clear the leaves blocking the 2 teleports and put the keys from both sides into them. The rocks will break while you’re working on this, but if any are still there, finish removing them and then get rid of the shielded tiles below to free the cannon. Get through the assorted stuff on the right and teleport the key located on the far right. Use both keys on the locked coins. Fire the cannon to light the torch and clean up.
Levels 91-100
Level 91: Slide the bar left 3 spaces so you can clear out the 2 shielded tiles blocking the cannon. Break enough of the ice to be able to slide the bar right enough to uncover the slot for the drop. Get the coin, then fire the cannon. If that’s not enough for you to start making matches to clear the dirt, keep firing the cannon until you can remove the dirt with matches enough to drop the coins.
Level 92: Teleport the drop in the top center. It will be aligned with its slot when it exits so get the coin. Slide the bar 1 space right, which causes a chain reaction teleporting another drop. Get the coin from that, then fire the top cannon to remove a patch of fog. Slide the bar left to uncover the other bombs and explode them to fire the lower cannon. Wait for the chain reaction to finish and you can do the rest.
Level 93: Spread the fire across and up around the water to thaw all the frozen coins. Clear the ice on the bottom right so the bar can be moved right enough to uncover the red square. Trip the red square to teleport the drop, spawning several in the top right. Fire the cannon to remove most of the rocks in a chain reaction and clean up.
Level 94: Just keep working through the obstacles going from right to left and the coins will come to you. There’s one point in the middle where it’s a bit tight with getting matches to keep going, but eventually the last coins will fall down.
Level 95: Clear the wood and leaves, picking up a coin along the way, and teleport the drop. Removing the vase and obstacles by the next teleport in the bottom left is a little sneaky at times, but doable even without powerups. Teleport the drop again and remove the vase in the top right. You can do the rest.
Level 96: Get through the dirt and leaves on the top right to teleport the drop. Gather the 4 coins which fall down on the bottom left and fire the cannons repeatedly until either the rest of the coins are reachable or have been shot out.
Level 97: Collect the 6 coins from the top middle before clearing out the obstacles around the halves.
Level 98: Break the chains blocking the locked coin. Get the locked coin, then the coin from the drop. The other key is now free to go to its locked coin. Trip the red square and wait for the (slow) chain reaction to remove all the wood from the left. Work through the remaining wood in the top center and explode the bombs. When the chain reaction finishes, the rest is easy.
Level 99: Remove the green squares blocking the drop on the center right and teleport the drop. Break the ice to get 2 coins from the drops and teleport the drop again. Work through the remaining obstacles on the bottom for the last coins.
Level 100: Dig through the dirt and all those leaves and get the higher of the 2 keys to its locked coin. Get rid of the shielded tile blocking the highest cannon. Fire the highest cannon and pick up 3 coins on the right. Go back to digging in the leaves until the last key can get to its locked coin. Explode the bomb to remove the shielded tile blocking the middle cannon. Fire the middle cannon to drop several coins on the right. Ignore the lowest cannon as you can reach all the coins and vases from matching in the bottom right section and clean up.
Levels 101-110
Level 101: Join the coin halves and pick up the coin. Remove the green square blocking the leaves and then clear out those leaves so the 2 drops fall down a little. You can’t do anything with them for now, so leave them in the column and scoot the key into the teleport on the left. When the key exits the teleport, collect the locked coin and the coin from the halves on the bottom left. Clear the block of leaves which you can reach from the bottom left quadrant. This teleports one of the drops in the middle. Next, break the wood on the bottom right so you can put one of the drops into a slot and get the coin. Teleport the other drop which was above the slot. Get rid of the leaves holding up the last drop in the bottom right and put it into the teleport. You can do the rest.
Level 102: Get through the green squares, leaves, and wood on the bottom left so the coins in the top left drop down. When you’re able to, clear the green squares blocking the drop in the top left corner and teleport the drop. Get rid of the obstacles in the top right so the drop there can be teleported. Put the drop in the top right into the vase to trip the red square and clean up.
Level 103: Remove the green square blocking the vase and get rid of the vase. Don’t worry, another drop will appear after the vase disappears to go into the coin slot. Break through the obstacles on the right to reach the other vase and remove it. Clear out the shielded tiles by matching from the top and get the 2 coins by the fire so you can burn up the coal. The rest is easy.
Level 104: Clear out all the shielded tiles in the top left section. The fire may spread itself over to the coal and teleport the drop for you, but if it hasn’t happened, get the fire over to the coal so the drop teleports. Put the drop into the slot when it exits the teleport and get the coin, then use the fire which was behind it to burn up the coal on the right. Clear out the dirt by the shielded tiles and match in between them to remove the tiles. Use the torch on the right to melt the snow and get a coin. Fire the cannon to set off a chain reaction which lights the last torch on the bottom left. Melt all the snow and frozen coins and you can do the rest.
Level 105: Collect the 2 locked coins, then break the wood which was behind them so the coins in the outer columns drop down to where you can reach them. This will cause the drops to teleport and set off a chain reaction. Break some more of the wood to reach the coins on the bottom and free the coin halves.
Level 106: Clear the leaves, then the wood, to reach the leftmost vase. When the vase disappears, you’ll get a coin at the bottom to pick up. Keep going to the next vase until all the vases are gone. You can do the rest.
Level 107: Remove the 3 dirt tiles. Teleport the key to spawn 2 keys and get the locked coins. Slide the bar on the right leftwards into the center to get all the coins from the top right. Slide the bar on the left rightwards into the center for the rest of the coins.
Level 108: Get rid of the obstacles in the center column holding up a coin and a drop and get the 2 coins. Clear the dirt on the left blocking the vase and remove the vase. This gives you a small access point to spread the fire past the water and downwards to the coal blocking the drop from its slot. Get the coin, then spread the fire again to the coal which was below the coin. Wait for all the coal to burn out, then clear the fog on the right and you can take it from there.
Level 109: Burn the coal blocking the key and teleport the key. Collect the locked coin, which frees up the pathway to get the fire to the remaining coal. Work past the remaining obstacles for the rest of the coins.
Level 110: Remove the leaves around the red square and trip it to drop all the rocks on the right down. Next, get rid of the leaves blocking the key on the bottom left and teleport it. Get the locked and other coins from the top right. Collect the coins from the bottom left and break the wood so the bar can be moved down out of the cannon’s way. Fire the cannon until either all the shielded tiles are gone or you get a match setup to break the shielded tiles. The rest is easy.
Levels 111-116, End Note
Level 111: Work from the bottom upwards through the fog, gathering a few coins along the way, until you can teleport the first drop (remove the green square in its way). Clear the leaves and put the drop into its slot, then keep going to teleport the other drop. Collect 2 more coins and slide the bar left to drop the rocks out of the way. Get rid of the obstacles still blocking the key and scoot it all the way left into the teleport for the last coins.
Level 112: Get through the fog on the bottom and scoot the key right until it teleports. Get the coin which appears in the bottom left corner. A drop is hiding in the fog if you can’t see it; remove the rest of the fog and teleport the drop. Put the drop into the slot when it exits the teleport and explode the bomb below the coin. Blow up the other bomb, then clear out the shielded tiles for the coins.
Level 113: Get rid of the green squares blocking the drops from their slots and collect the coins. Remove the 2 shielded tiles blocking the cannon which were below the coins. Go to the bottom right and break the ice for 3 coins. Fire the cannon to get the bottom left to populate. Pick up the blue coin and slide the bar down until the keys can get to the locked coins and clean up.
Level 114: Move the upper bar to the left so the drops fall atop the lower bar. Leave them there for now and scoot the key left until it teleports. Move the bar left some more so you have some working room to scoot the key right for the locked coin. Now you can slide the lower bar to the left to get the drops to the teleports. You can do the rest.
Level 115: Remove the leaves blocking the teleport and move the key into it. Slide the bars towards the center so the drops fall into the slots and allow the bottom to populate. Collect the 2 locked coins at the bottom, then use the fire from each corner to light the coal in both parts. Slide the bars back towards the outer edges to reach the coins.
Level 116: Break the chains and remove the shielded tiles which were underneath to free the cannons’ pathways. You can’t fire the cannons yet, so gather most of the coins (except the one from the halves) off the bottom and teleport the key. This spawns 2 keys up top for the locked coins. Fire the appropriate cannon until all the shielded tiles in the center column are gone and the drop falls into the slot. You can take it from here.
“Oh, my beautiful pink one…you never did solve the problem completely of getting around my allergy to sunlight. Nor did you ever get me a decent blood supply! So now, you’ll be one of my kind to see how it feels! Enjoy those fangs! Aren’t you hungry now? Mwahahahaha!”
The game goes to endless mode after level 116. But if you go to the level replay section and click on the M3 option, you can use the arrowheads at the top of the screen to scroll to any level you’d like on demand. The game will still give you a random level at the start, so how much you have to scroll around to find a particular level will vary.