Minecraft の醸造ガイド:独自のポーションの作り方
Minecraft では、好きなように世界を自由に探索できます。実際、空のインベントリでゲームのどこにでも行くことができます。ただし、それで冒険が安全で楽しいものになるわけではありません。より良い戦闘と資源収集を体験するには、ツールとポーションが必要です。前者は簡単に作成できますが、後者は Minecraft の醸造とレシピの知識が必要です。
何をすべきか、何が必要なのかわからない場合、Minecraft ポーションの醸造は複雑になる可能性があります。さらに、ゲーム内には錬金術の本やガイドがないため、プレイヤーは Web を探し回る必要があります。したがって、モバイル デバイスで最高のオープン ワールド ゲームのこのトップ候補をプレイし始めたばかりであるかどうかにかかわらず、ガイドが役立つことがわかります。基本から始めましょうか?
この記事の内容
<オール>
ポーションの種類 Minecraft の醸造収量

特に初心者の場合は、Minecraft の醸造によって生成されるポーションの種類を理解することが有利になります。詳しく言えば、ゲーム内の状況に応じて、ポーションを賢く使用するのに役立つノウハウです。
マインクラフトのポーションは、消費方法と効果に分類されます。タイプの詳細については、以下で詳しく説明します。
消費に基づく:
1. 飲めるポーション
飲むポーションは、ステータスのブーストやマイナスの効果を与えることができますが、それはあなたのキャラクターだけです.詳しく言うと、摂取しても近くの敵に直接影響はありません。激しい戦いの直前に摂取することで、力強くアクションに飛び込むことができます。
2.スプラッシュポーション
スプラッシュ ポーションを地面または敵に投げて、その効果を感じさせます。このタイプのポーションは、力をすばやく補充したり、戦闘を開始した後に敵対的なクリーチャーやプレイヤーをかわしたりするのに最適です。
3.残留ポーション
残留ポーションはスプラッシュ ポーションと同じように使用されますが、2 つのタイプには顕著な違いがあります。このポーションは、特定の場所と時間に効果が持続しないスプラッシュポーションと比較して、ステータス効果の霧として残ります.ポーションの影響を受けるには、あなたまたは敵がカバレッジエリアに足を踏み入れる必要があります.
効果に基づく:
1.ぎこちないポーション
厄介なポーションは、Minecraft の醸造から作成されたベース ポーションです。実際、次の醸造で副原料が加えられるまで、ボトルの中に水として残ります。さらに、弱化のポーションを除くすべてのポーションは、厄介なポーションに由来します。
2.濃厚ポーション
濃厚ポーションは、通常の変種よりも強力な調合です。また、元のポーションのバージョン 2 とも呼ばれます。たとえば、強さのポーション II や治癒のポーション II などです。それを使用することには 1 つの欠点があります。それは持続時間の面で効果が少なくなります。
3.ありふれたポーション
ありふれたポーションは、負の効果があるため、Minecraft で Potion of Weakness を作成するために必要な基本調合物です。さらに、水の入ったボトルと、レッドストーン ダスト、スパイダー ダスト、輝くメロン、マグマ クリーム、砂糖、ブレイズ パウダー、またはガスト ティアを組み合わせた結果です。
マインクラフトの醸造用の装備とアイテム
鍛冶の武器とツールには、ワークステーションと機器が必要です。同様に、Minecraft の醸造にもそれらが必要です。
ワークショップでは、リソース クレートで満たされた地下の部屋や、裏庭、池、または農場の近くの乱雑なスペースを設定して、機器を配置することで、創造性を発揮できます。実際、経験豊富なプレイヤーは、マインクラフトをすばやく醸造できるように、素材のソースの横にワークステーションを配置することを勧めています。
装備に関しては、次のものが揃っていることを確認してください:
1.醸造台
The brewing stand is the main equipment used for making potions in Minecraft. The easiest way to obtain it is to look for one in temples, igloos, or ships. Alternatively, it can be crafted from three cobblestones and one blaze rod you can gather from a perilous Nether Fortress.
2. Cauldon
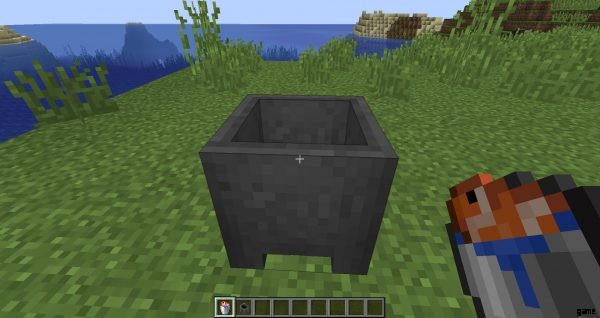
The cauldron was originally meant to be the brewing stand when the latter was not yet added to the game, per the game’s official website. Currently, the equipment serves as a holder for liquid or powder. You can scoop three times from it via glass bottles even if you do not have water, lava, or snow source nearby. Also, you can craft it from seven iron ingots. If you are close to a body of water, tundra, or the Nether, then the cauldron is just optional.
3. Glass Bottle

A glass bottle in Minecraft is as it is in the real world – a container for liquid. It can be reused or broken when you drink or throw a potion, respectively. Also, you can make a glass bottle from three pieces of glass from your crafting menu. Glass comes from smelted sand and coal in the game, in case you do not know.
4. Blaze Powder

Just like a stove, a brewing stand will not work without fire. In Minecraft, fire’s counterpart is blaze powder. But, it is quite challenging to obtain this because you need to defeat the Blaze, a hostile monster in the Nether that drops the blaze rod when slain. Blaze powder comes from blaze rods you break down in your crafting menu.
5. Nether Wart
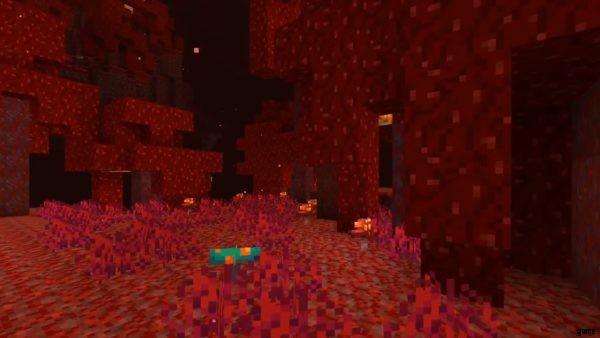
A Nether Wart is useful in brewing any potion, except the Potion of Weakness. It resembles red overgrown fungi, and you’ll find it thriving in Minecraft’s Nether realm, particularly in soul sand gardens of the fortresses. To elaborate, it can be harvested instantly like any shrub but you can opt to cultivate it elsewhere when you take home some soul sand from the Nether with you. Soul sand can be mined from a few blocks deep the ground in the Nether world.
How to Brew Potions in Minecraft
Now that you have everything on hand, you can experience Minecraft brewing. Let’s focus first on the generic way to make your potions. You can proceed to the next section about enhanced potions afterward.
 IMPORTANT TIP
 While you can process one potion at a time, it is more convenient to work on three bottles simultaneously to save time in Minecraft brewing.
Follow these instructions to brew basic potions in Minecraft:
1. Use three glass bottles to take water from a pond, container, or your cauldron.
2. Approach and click on your brewing stand to see its user interface.
3. Put some blaze powder on the top left slot of the UI.
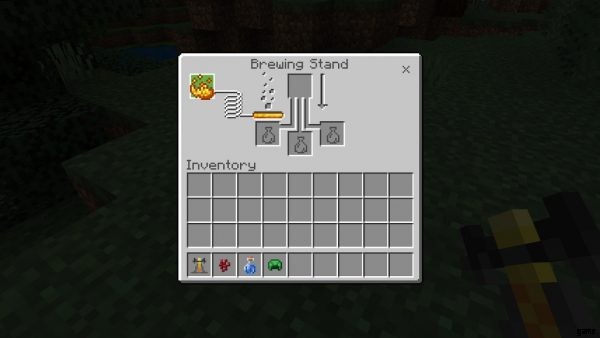
4. Place three water bottles on the three bottom slots of the UI.
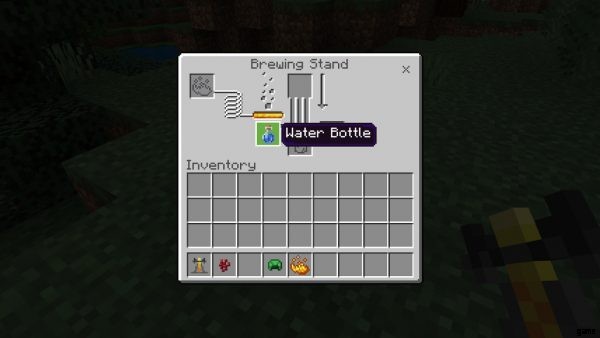
5. Drag the Nether Wart to the top central slot afterward.
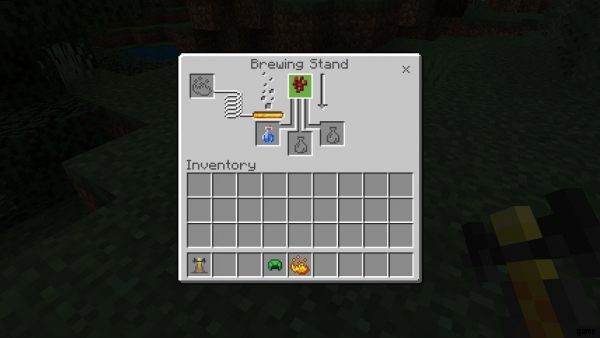
6. Wait for the arrow icon on the right to be filled; bottles turn into awkward potions once brewed.
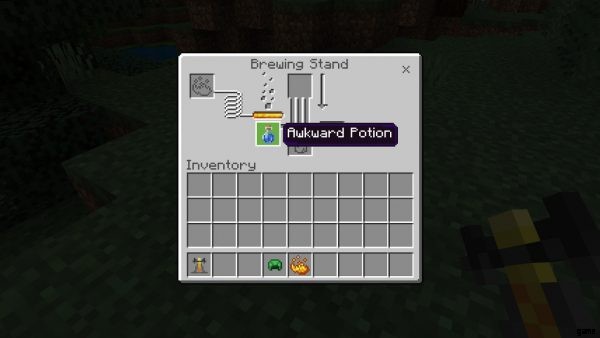
7. Put the secondary ingredient for the specific potion you’re making on the vacant top center slot (e.g., blaze powder for a Potion of Strength, golden carrot for a Potion of Night Vision, etc.)
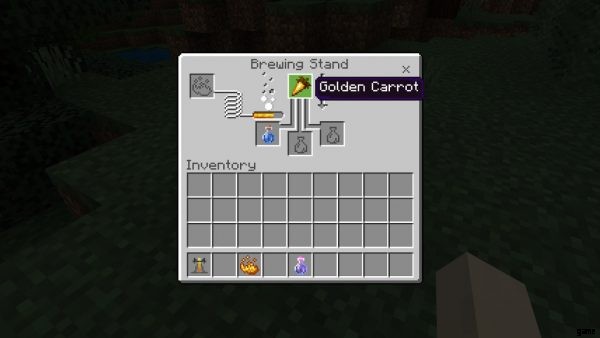
8. Wait for the arrow icon to be fully highlighted afterward.
9. Drag to your inventory the three potions, which now have an effect, or proceed to enhance them.
How to Use Minecraft Brewing Modifiers
Minecraft brewing can improve the existing potions you’ve crafted. Additionally, the essential ingredients for accomplishing that are called modifiers.
Modifiers can enhance a potion’s potency and working duration, or change its type and effect. They can also be used for further improving enhanced potions afterward. They come in the form of resources or enemy loot, which you can gather from all around the Minecraft world. Below is a table of Minecraft brewing modifiers, their effects, and other relevant information you need to know:
| Modifier | Source | Potion Type Result | Effect |
|---|---|---|---|
| Glowstone Dust | Glowstone block | Thick Potion | Makes potions stronger |
| Redstone Dust | Redstone ore | Mundane Potion | Makes potions last longer |
| Gunpowder | Creepers, Ghasts, Witches | Splash Potion | Potion bottles explode when thrown |
| Dragon’s Breath | Scoop Ender Dragon breath attack or fireball clouds via glass bottle | Lingering Potion | Potions emit a lingering fog when thrown |
| Fermented Spider Eye | Craft from Spider Eye and Mushroom | Potion of Weakness | Reversed potion effect |
To use any of the modifiers, you need to take off from the last step of the potion brewing guide we’ve discussed previously. That is when you’ve modified the base or awkward potions into potions with effect.
Follow these steps to enhance the potions afterward:
1. Place the three potions (e.g. Potions of Strength) on the bottom slots of the brewing stand UI.
2. Add new blaze powder on the left slot if it went empty.
3. Put the modifier ingredient on the top center slot.
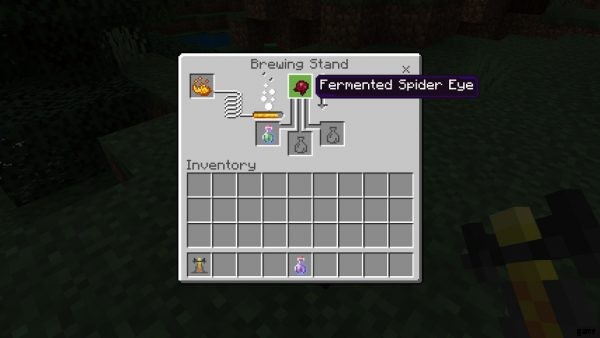
4. Wait for the arrow icon to be filled afterward.
5. Drag your enhanced potions to your inventory to store those.
Best Potions Made via Minecraft Brewing
Minecraft brewing is complex if you think of all the available ingredients and resulting potions. Also, there are so many combinations to mention, so let’s zero into the best Minecraft potions beginners and experts should brew:
| Potion | Effect | Ingredients | Ideal Modifiers &Results |
|---|---|---|---|
| Potion of Healing | Replenishes health | Awkward Potion + Glistering Melon | Glowstone dust (Potion of Healing II) Fermented Spider Eye (Potion of Harming I &II) |
| Potion of Regeneration | Replenishes health over 45 sec. | Awkward Potion + Ghast Tear | Glowstone dust (Potion of Regeneration II:Faster for 21 sec.) Redstone dust (1 min. 30 sec. effect) |
| Potion of Strength | Boosts attack power for 3 min. | Awkward Potion + Blaze Powder | Glowstone dust (Potion of Strength II:Stronger for 1 min. 30 sec.) Redstone dust (8 min. effect) |
| Potion of Night Vision | Enhances vision in the dark for 3 min. | Awkward Potion + Golden Carrot | Redstone dust (8 min. effect) |
| Potion of Poison | Damages health every 1.25 sec. for 40 sec. | Awkward Potion + Spider Eye | Glowstone dust (Potion of Poison II:More damage in 21 sec.) Redstone dust (1 min. 30 sec. effect) |
| Potion of Water Breathing | Prevents drowning for up to 3 min. | Awkward Potion + Pufferfish | Redstone dust (8 min. effect) |
| Potion of Fire Resistance | Gives immunity to burning for 3 min. | Awkward Potion + Magma Cream | Redstone dust (8 min. effect) |
A Special Potion to Brew
The table below contains everything you need to know about the unique Potion of Weakness that can only be made when you have a Mundane Potion. We’ve already mentioned previously the exact ingredients for brewing that base potion, so feel free to go back to the Potion Types section of this article in case you forgot.
| Special Potion | Effect | Ingredients | Ideal Modifiers &Results |
|---|---|---|---|
| Potion of Weakness | Makes the attack weaker by 0.5 points for 1 min. 30 secs. | Mundane Potion + Fermented Spider Eye | Redstone dust (4 min. effect) |
Minecraft Brewing Is Fun
Minecraft brewing makes the game enjoyable and dynamic because you can make any potion that matches your play style. For instance, if you are more of a fighter than an explorer, you can brew Potions of Strength to enhance your chances of winning against hostile creatures or mobs anytime. If the other way around, you might want the Potion of Night Vision or Water Breathing because you can navigate to more places with those. Additionally, brewing is more convenient compared to scouring places for potions or randomly waiting for those to drop as loot from fallen enemies.
Do you want to enjoy Minecraft even more? Try the best Minecraft shaders for enhancing your sandbox world on your mobile device.