Them &Us – ストーリーを完了するためのガイド / ウォークスルー (すべてのエンディング)
物資の活用方法やパズルの解決方法に関するアドバイスを含む、ゲーム全体の段階的なウォークスルー。
このガイドについて
このガイドを書くことにしたのは、このゲームを自分でプレイするのに何度も行き詰まったためです。攻略方法を詳しく説明した包括的なガイドやビデオを見つけることができませんでしたが、これは私が最近見た中で最もエキサイティングなアーリー アクセス ゲームの 1 つなので、すべてを見たい人のためにここで作成することにしました。ゲームは提供する必要がありますが、特定のステップまたは別のステップでスタックしています。
このガイドは、読者の最初のプレイを支援することを目的としているため、より高い難易度に固有の違いはここには反映されていない場合があります.ゲームでの私の経験のほとんどは固定カメラの視点でもあったため、肩越しの視点に固有の課題はここではカバーされない場合があります (ただし、OTS の視点でプレイしたことから、課題のほとんどはゲームはまだ開発中であるため、時間の経過とともに一部の詳細が変更される可能性があることにも注意してください。言うまでもなく、このガイドにはネタバレが含まれます。
新しいゲームの開始
ゲームを開始する前に、難易度とカメラ モードを選択する必要があります。新規プレイヤーとして利用できる難易度は、イージーとノーマルのみです。モードはよく似ています。唯一の違いは次のようです:
- イージーでは、ゾンビの体力がわずかに少なくなります。ごくわずかな違い
- イージーでは、敵のダメージが大幅に減少します。
- イージーでは、敵の動きが平均的に遅くなります。
- イージーでは、ビニールを使用しても消費されないため、無限に保存できます。
サバイバル ホラー ゲームに慣れていないプレイヤーは、ゲームの開始が非常に厳しいものになる可能性があるため、簡単に選択することをお勧めします。このジャンルで経験のあるプレイヤーは、初期の RE ゲームと同様のシステムでゾンビを回避するのがどれだけ得意かを検討する必要があります。これは、プレイヤーがこれをうまく行うことが絶対に重要であるように思われるからです。経験豊富なサバイバル ホラー プレイヤーの中には、Easy から始めたいと思う人もいるかもしれません。
難易度を選択したら、カメラ アングルを選択する必要があります。新規プレイヤーでも、固定カメラ視点をお勧めします。順応するのは非常に奇妙で、多くの人が時代遅れまたは不格好だと感じていますが、私の意見では、はるかに優れたサバイバル ホラー体験を提供します。そうは言っても、多くの人がこのゲームを肩越しの視点でプレイし、大いに楽しんでいるので、固定カメラ アングルに完全に抵抗している場合は、そのオプションを選択する必要があります。
決定したら、ゲームを開始します。
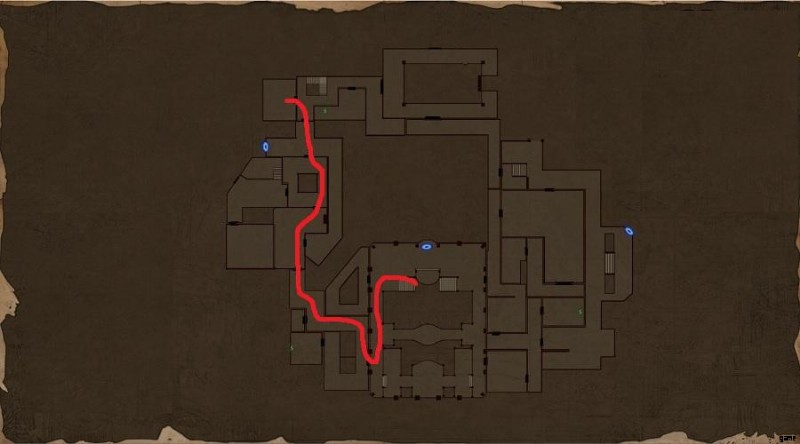
1.はじめに
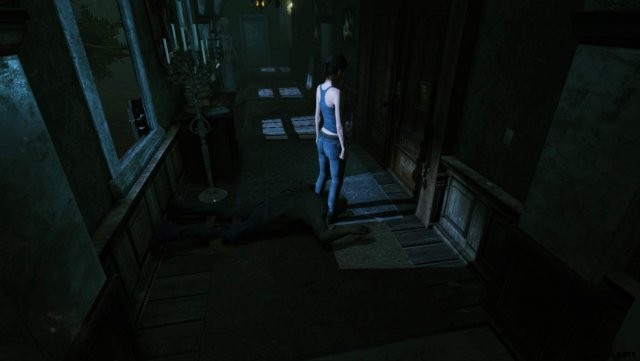
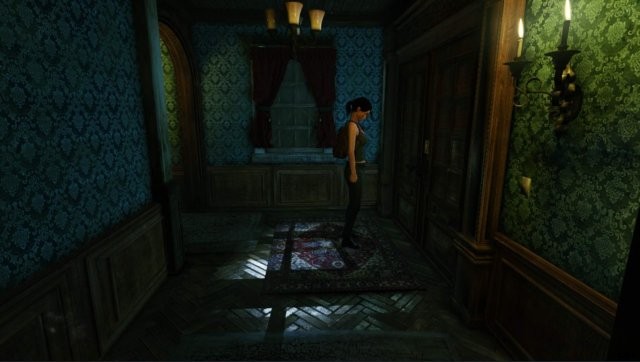
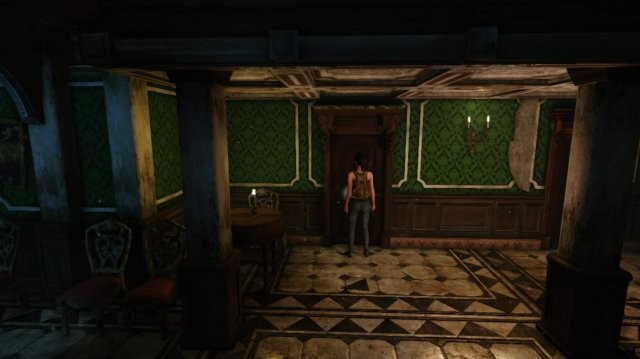
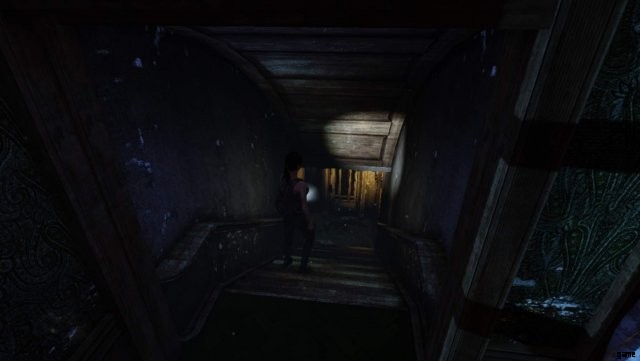
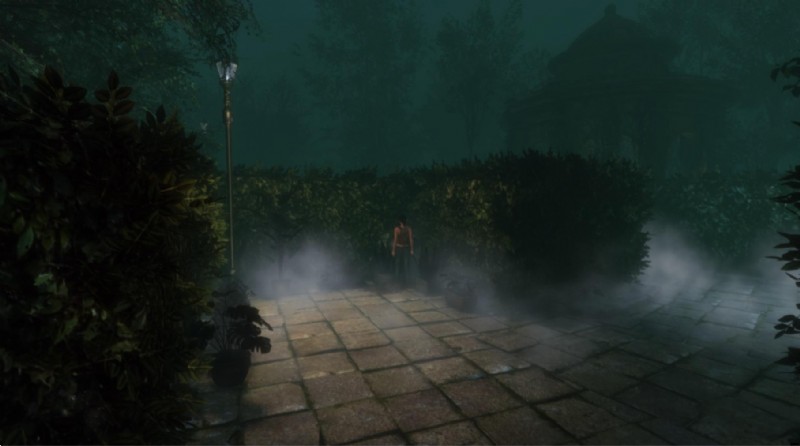
ゲームは、主人公のアリシアの芸術的なレンダリングで始まり、そこで彼女のバックストーリーについて少し学びます。これは、私たちを運ぶバスが道路から外れて衝突することで終わります。私たちのゲームプレイは、車が散らばる霧の多い道で始まります。この道の先まで歩くと、アリシアは倒れてしまう。次に、別のカットシーンが表示され、再び気絶する前に、ある種のボートに乗っていることがわかります。今回はベッドルームで目を覚ますと、ここからゲームが実際に始まります。
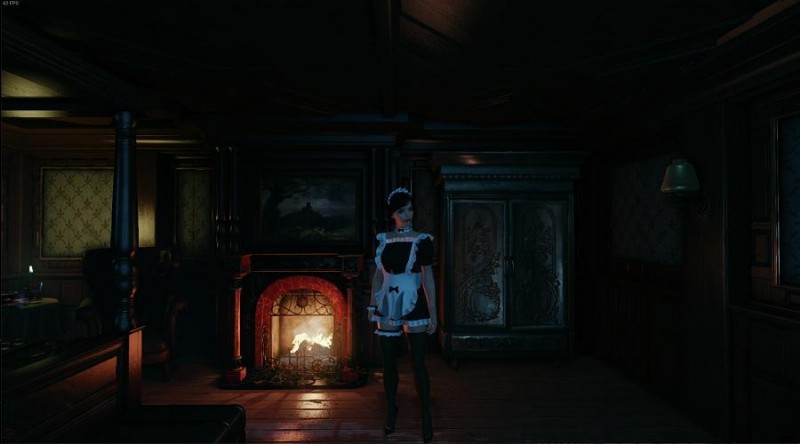
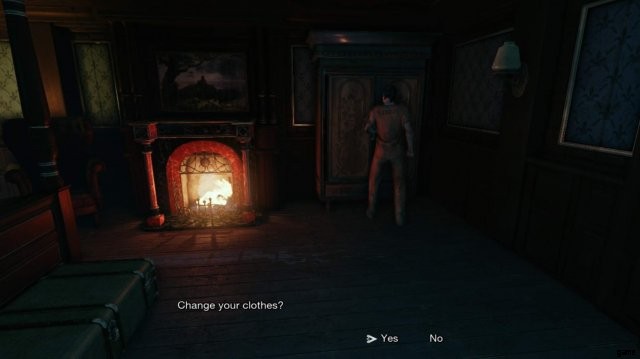
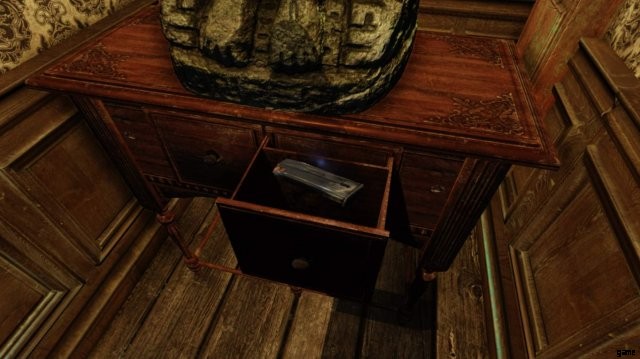
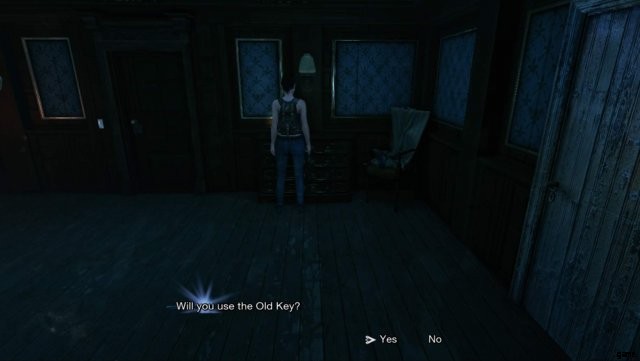
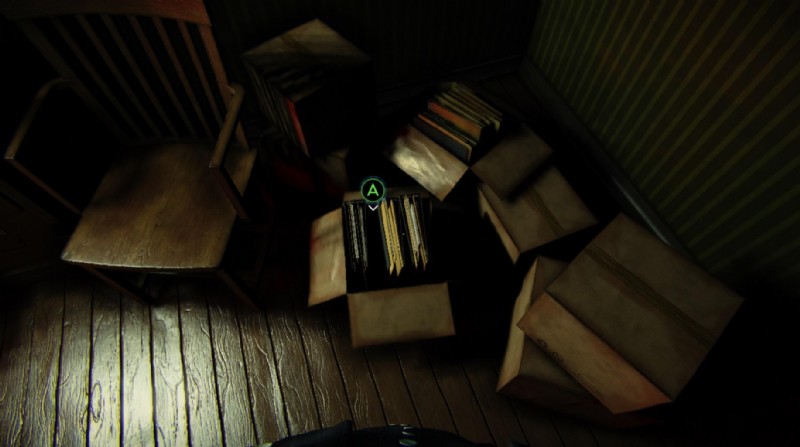
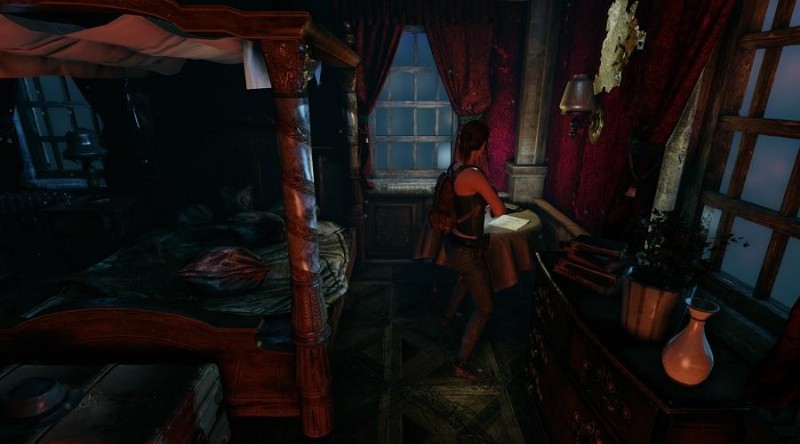
私たちがいる部屋にはドアが 2 つありますが、出る前に着替える必要があります (刑務所のオレンジ色の服を着たままです)。施錠されたドアの隣の隅にワードローブがあり、それを操作すると別の服に着替えることができます。
次に、ワードローブの反対側のドアのロックを解除する必要があります。これを行うには、ベッドのワードローブと同じ側のナイトスタンドにあるナイフを手に取り、ドアに使用します.
イージーでプレイしていて、早い段階でゾンビを追い越したくない場合は、ナイフを武器として使用できますが、在庫の半分を占め、どの難易度モードでもゾンビと戦うのは非常に困難です。ダメージを受けている場合は、通常は放置するのが最善です。あなたがそれを取ることを選択した場合、最初に入る屋内廊下(このガイドの次のセクション)でのみゾンビと戦うことをお勧めします.初めて。
ロックされたドアの隣には、まだロックを解除できないドライバーの刃があるので、これを手に取ります。包帯もいくつかあります。あなたが経験豊富なサバイバル ホラー プレイヤーである場合は、後で使用するために包帯を取っておくことができます (後でより効果的にするために使用できるアイテムがあります)。終わったら、鍵のかかっていないドアを通り抜けてください。
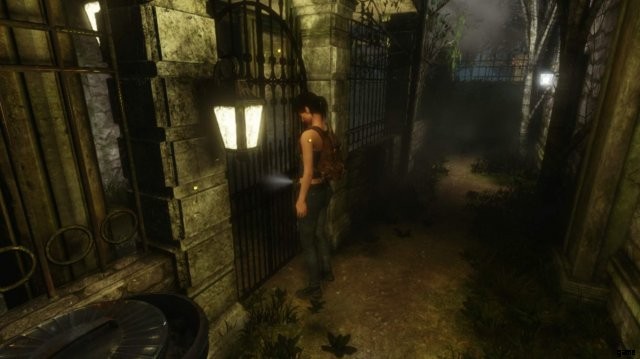
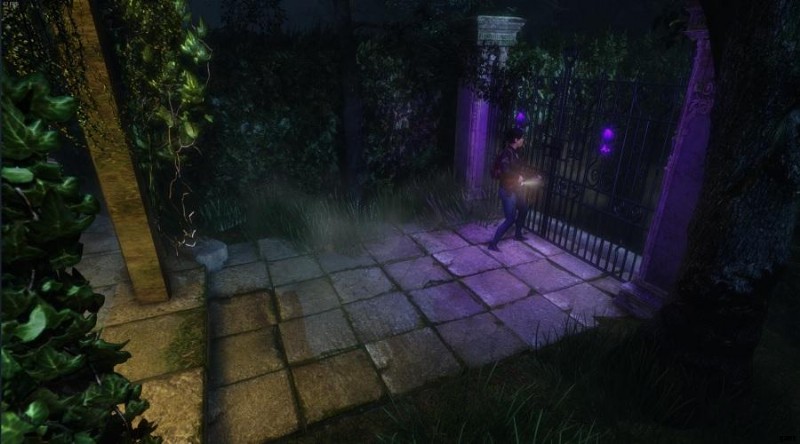
高いフェンスに囲まれた小さな屋外の廊下にいることに気付くはずです。 2 番目の領域の唯一のアイテムは、ゴミ箱の上にあるドライバーのハンドルです。
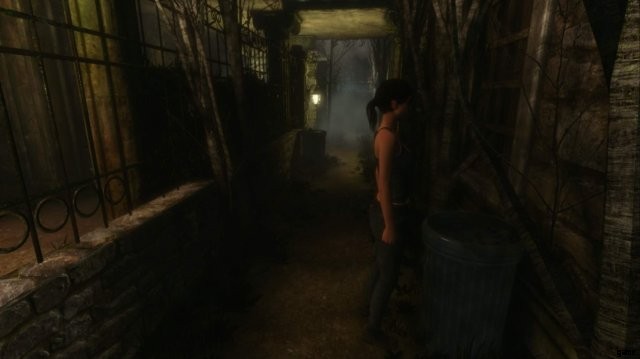
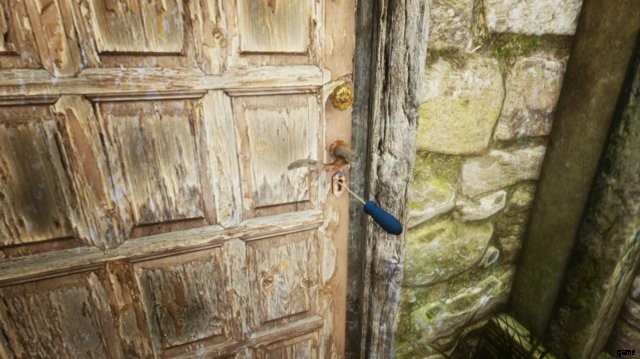
これを拾い(必要に応じて2番目のインベントリスロットにあるものをドロップします)、ドライバーの刃と組み合わせます(その後、ドロップしたものを必ず拾います).ドライバーを使って廊下の端にあるドアを開けることができます。
このドアを通過する前に、これらの最初の 2 つのエリアから必要なものがすべて揃っていることを確認してください。このエリアに戻って通過できるようになるまでにはしばらく時間がかかります。
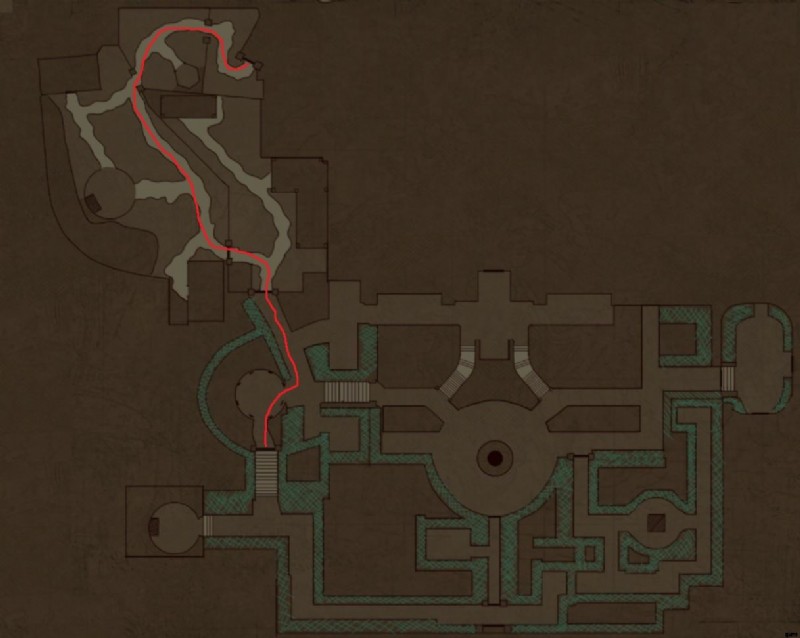
2.最初のゾンビとの遭遇とライターの入手
寝室側廊下 F1 の真ん中にいるはずです。非常に長い廊下で、たくさんのドアがありますが、そのほとんどはまだ開くことができません。左に曲がり、階段が上がるまで少し下ります。頭を上げて、階段の上のテーブルからビニール ディスク (ゲームの保存に使用) をつかみます。右側の最初の 2 つのドアは無視して、階段を上った後、右側の 3 番目のドアに入ります (ゾンビが噛んでいるのが聞こえる場合は、おそらく行き過ぎです)。これが最初のセーブ ルームです。
部屋を保存:
最初のゾンビに遭遇しようとしているので、ゾンビ回避スキルに自信がない限り、今拾ったビニールでここに保存することをお勧めします (これは、包帯を使用しなかったプレイヤーの場合は 2 倍になります)最初の部屋)。ディスクがインベントリにある間、部屋の奥にある蓄音機を操作することでセーブできます。この部屋には拳銃の弾薬とメモもあります。銃も在庫スペースもほとんどないので、今は弾薬を残して、プロット関連の情報についてのメモを読んで、来たときと同じ方法で出発してください。
廊下をさらに進むと、ゾンビが体を食べているのが見えます。ゾンビが後ろを向いて彼女を追いかけるショートカットシーンがあります。ゾンビが噛んでいる体には必要なアイテムがありますが、ゾンビを殺す効果的な方法がまだないため、ゾンビを追い越す必要があります。
これには主に 2 つの方法があります:
- ゾンビを開けた場所に追い込み(廊下では難しいですが、ここで試すなら階段の上をお勧めします)、ゾンビの周りを走り回ります。または
- 慎重にゾンビに近づき、ゾンビが前方に突進してあなたをつかもうとしたら、すぐに引き戻してジュークします。攻撃の後 (命中するかどうかにかかわらず)、ゾンビは少し遅れて突進できなくなり、安全に通り過ぎるための短い時間枠が与えられます。ゾンビに直接出くわした場合、このウィンドウがアクティブであっても、ゾンビはあなたを攻撃することに注意してください。
何度かやりたくなるので、今のうちに慣れておくとよいでしょう。つかまれても大丈夫です。ゾンビがあなたをかみ終わった後、ゾンビを通り過ぎてください。ただし、現実的には、死ぬことなくライターを使用する前に数回ヒットするだけです (より多くの回復アイテムにアクセスできます)。彼を一度通り過ぎて体からライターをつかみ、もう一度それを行って廊下の前のセクションに戻ります。
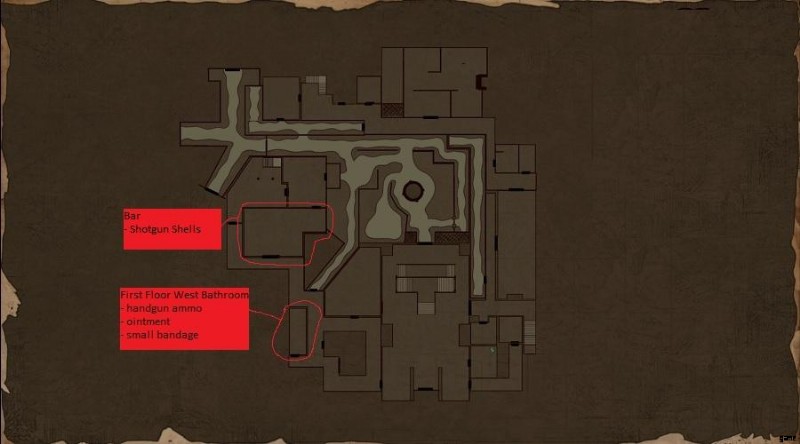
階下に戻り、最初に 1 階の廊下に入った場所を通り過ぎます。頭を下げると、右側のテーブルに包帯がいくつかあります。これらをつかみます。廊下を右に曲がるとすぐ左手にドアがあり、そこから F1 バスルームに行くことができます。先ほどつかんだ包帯を外して中に入ってください。
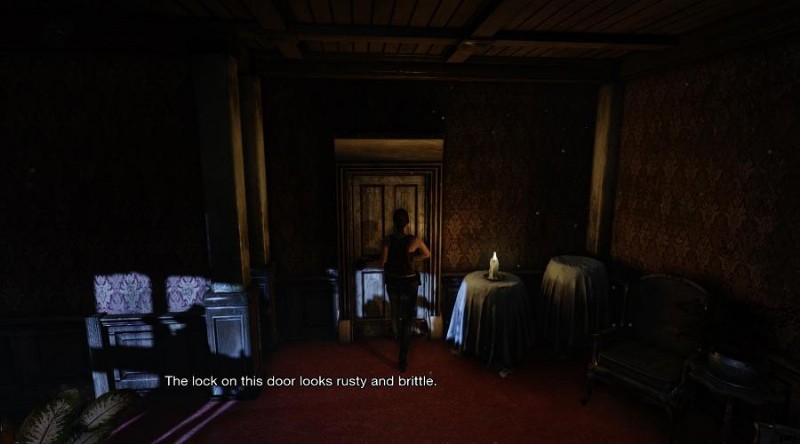
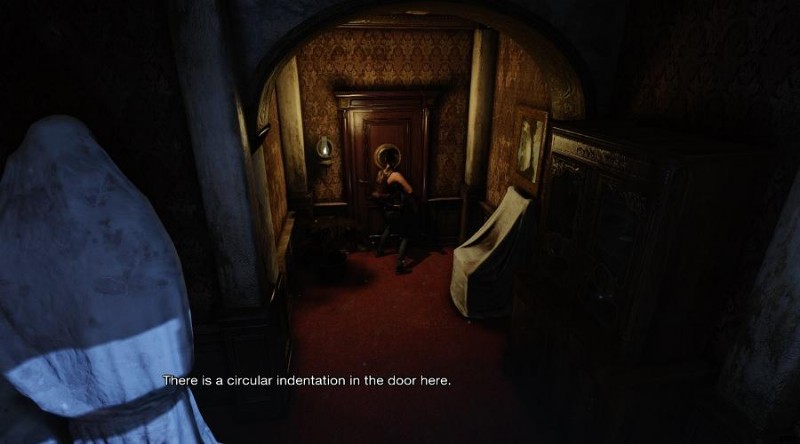
バスルームのドア:
3.アンチモン キーとバックパックを入手
入ると、ろうそくが消えるショートカットシーンが表示されます。部屋の向こう側に向かい、点滅するろうそくを見つけます。ここでライターを使用して部屋を照らし、内部のオブジェクトを操作できるようにしますが、まだバスタブ カーテンには触れないでください。この時点で、外に出て、在庫のすべてを廊下に落としてから、バスルームに戻り、壁から医療キットをつかみ、カウンターから軟膏を取り出してから、ホールに戻ってこれらのいずれかを落とします.少なくとも 1 つのインベントリ スロットが開いていることを確認し、バスルームに戻ります。浴槽のカーテンを操作すると、別のショートカット シーンが再生され、ゾンビが浴槽から落ちて立ち上がる様子が見られます。このゾンビをジュークして浴槽からアンチモンの鍵を取り出し、出口まで走り、必要に応じてもう一度ジュークします。これは非常に難しいジュークの 1 つであり、この時点でいくつかの回復オプションがあるため、ここで攻撃を受けても気にしないでください。
まだ有効にしたくない窓からゾンビが衝突する準備ができているため、廊下を元の方向に進みすぎないように注意してください。軟膏を手に入れたので、このオブジェクトを包帯と組み合わせて効果を高めることができます.ちょっと待ってください (現在入手した包帯と未使用の包帯はすべてこのバスルームの周りにあるはずなので)、軟膏を手に取り、すべての包帯と混ぜ合わせてください。最初の 2 体のゾンビを避けながら攻撃を受けた場合は、回復アイテムを使用する良い機会でもあります。小さな包帯と軟膏で十分ですが、本当にひどい怪我をしている場合 (アリシアが足を引きずっています) は、代わりに医療キットを使用してください。次に、アンチモン キー以外のすべてをドロップし、元の方向に戻ります。
前述のように、ゾンビは廊下に向かうときに窓を突き破りますが、目的のドアはこの窓のすぐ隣にあり、ゾンビが立ち上がるまでに時間がかかるため、両開きのドアを通り抜けることができるはずです彼が何かをする前に私たちの権利。これで F1 ライブラリに移動します。
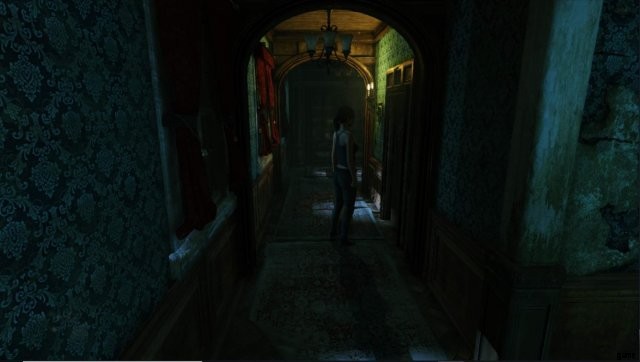
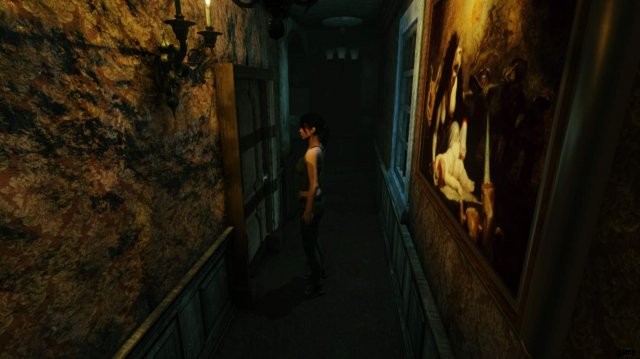
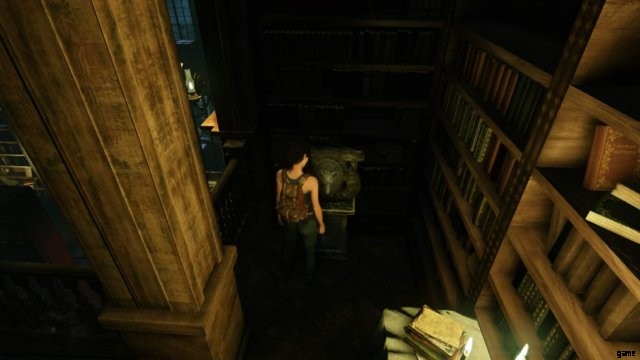
図書館 F1 入口:
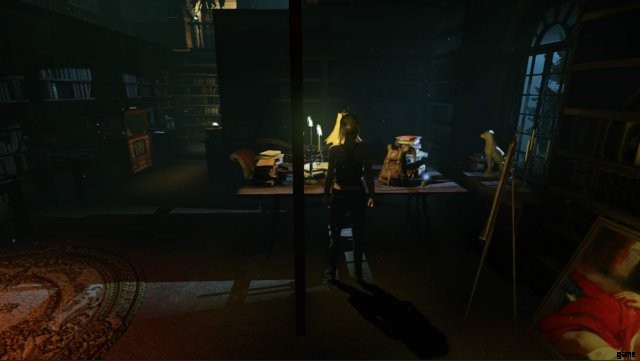
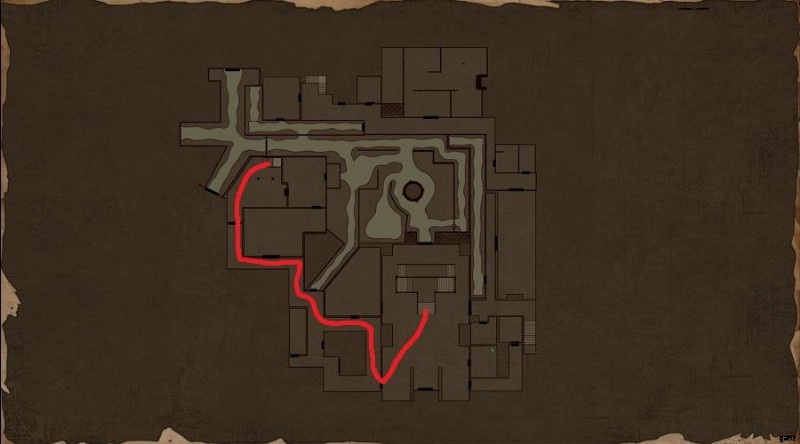
ゾンビが音を立てているのが聞こえるかもしれませんが、ここでは届かないので心配はいりません。その上に大きな肖像画のある暖炉が見えるまで、図書館に向かいます。左に曲がると壊れたはしごの後ろにテーブルがあり、ドアノブとバックパックがあります。バックパックには、ゲームチェンジャーである 2 つではなく 6 つのアイテムを保持できます。これらをつかみ、暖炉の右側に行き、ピストルを保持している陳列ケースを見つけます.まだ開くことはできませんが、対話して、前述の壊れたはしごの下に押し込むことができます。今ここでできることはこれだけです。来た道を戻りましょう。
バックパック/ガンケース:
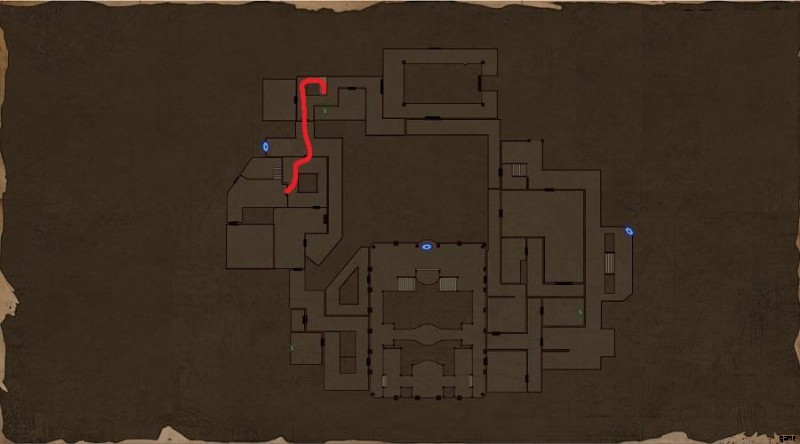
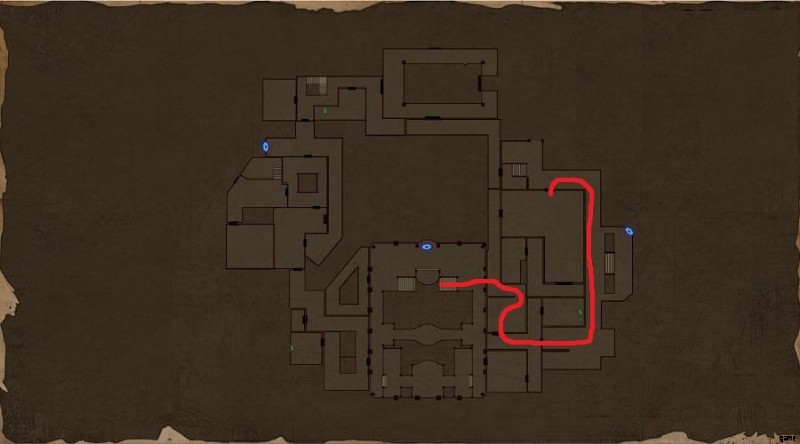
4.海王星の鍵、金星の鍵、ピストルを入手
次に、2 階に戻る必要があります。ドアノブとアンチモン キーの両方を持ってくるようにしてください (ただし、現時点では在庫スペースに苦労する必要はありません)。現在、この廊下には 2 つのゾンビがいます。特定の場所は、ホールに入るたびに異なりますが、通常、1 つは安全な部屋の入り口の 2 階にあり、もう 1 つは現在の位置と階段の間にあります。ゾンビがいる場合はジュークして、2 階に戻ります。今度は右の壁に沿って 2 番目のドアに行くと、ハンドルが壊れていることがわかります。図書館で見つけたドアノブを使って、ドアを通り抜けてください。
ドアノブの修理:

これにより、2 階の屋外通路に移動します。目の前にロックされたドアがあり、右側にゾンビがいます。ゾンビがあなたの道を塞いでいる狭い通路に左に向かいます。このゾンビをジュークして、ドアまで降りてください。あなたのアンチモンキーはこれのロックを解除することができ、その後自動的に破棄されます.これにより、オフィス F2 に移動します。ここにはたくさんのアイテムがあります (合計:ビニール ディスク、ハンドガンの弾薬、古い鍵、ネプチューンの鍵、中程度の包帯)。スペースが不足しています。この部屋にはイースターエッグも含まれており、テレビとやり取りすることでいくつかの異なるビジュアルフィルターをオンにすることができます.終わったら、テレビの隣のドアに向かいます。
次の部屋は、ゾンビがいる円形の廊下です。反対側のドアは、あなたの側からロックを解除することができ、ちょうど入っていた 2 階の屋外エリアへのショートカットとして機能します。廊下の明るい側から懐中電灯をつかむようにしてください。在庫スペースを必要とせず、視認性を向上させるために使用してから、ロックされていないドアから出てください。外に戻ったら、F2 ベッドルーム側の廊下をまっすぐ横切って戻ってください。
懐中電灯:
安全な部屋に向かって進み、最初のゾンビに遭遇した方向にそれを通り過ぎます.彼は通常、安全な部屋のドアの横にぶらぶらしているので、おそらく彼をジュークする必要があります.海王星の鍵は、安全な部屋のすぐ先にある両開きドアのロックを解除し、その後破棄されます.これにより、ライブラリ F2 に移動します。
図書館 F2 入口:
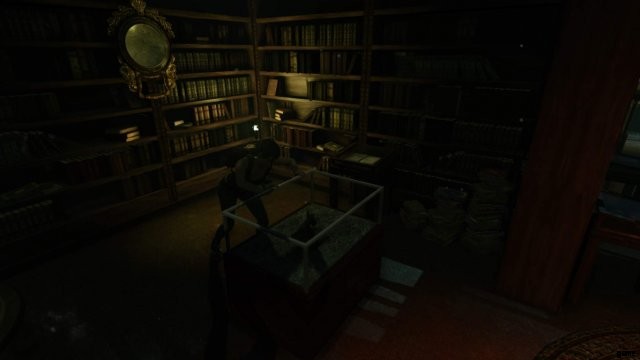
中に入ると、先ほどの図書館 F1 を見下ろすバルコニーに出ます。右に行くのは避けてください (カメラの右ではなく、アリシアの右です)。近づきすぎない限りアクティブにならないゾンビがそこにいるため、部屋のその側はまだ必要ありません。代わりに左に向かうと、いくつかの彫像が見えます。 2 番目のもの (アイテムが上にある) を操作して押すと、以前の壊れたはしごの上部に座っていることがわかります。前のセクションでガラスケースを押した限り、下の F1 ライブラリで利用可能な銃と彫像のアイテムの両方を残して、棚からそれを押し出すことができるはずです.ここにいる間に、はしごの上の隣の窓辺にある古い鍵を手に取り、元の廊下に戻ってください。
図書館の彫像を押す:
F1 ライブラリーに戻りたいと思っていますが、まず安全な部屋に立ち寄って、そこに残したピストルの弾薬を拾ってください。また、4 つ以上のアイテムを持っている場合 (おそらくそうなります)、F1 廊下の端 (前のセクションで残りの回復アイテムが配置された場所の近く) にいくつかドロップすることをお勧めします。ゾンビが窓を叩いていることを心配する必要はありません。まだ入ってくるわけではありません。次に、F1 ライブラリーに向かい、ヴィーナス キーと (最後に) ピストルを受け取ります。
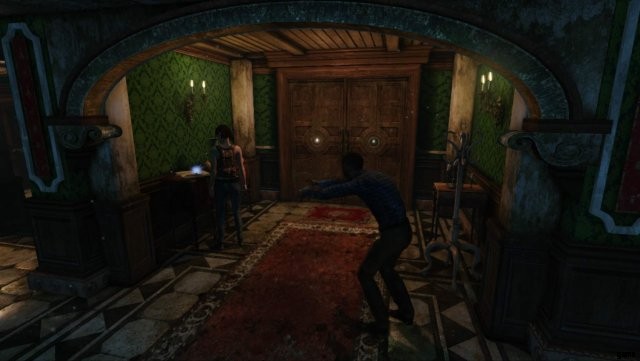
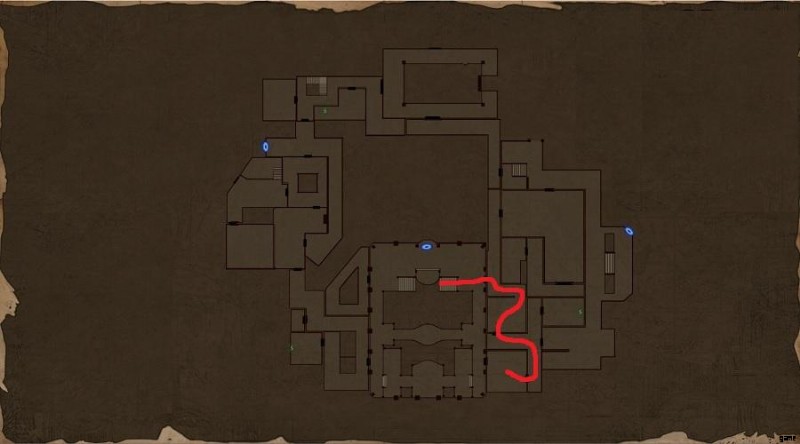
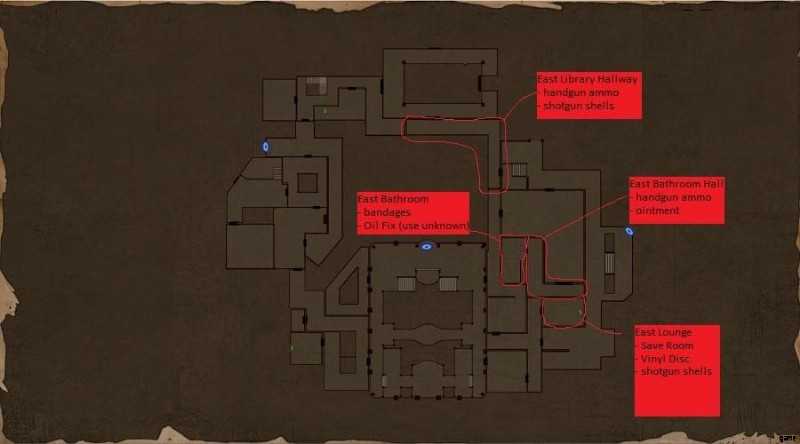
5.メインホールのセーフルームに到着
廊下に戻る前に、必ずピストルを装備してください。入るとすぐに、窓を叩いているすべてのゾンビが侵入し、現在限られたピストルの弾薬を考えると数が多すぎます.幸いなことに、私たちはこのエリアでしばらく作業を終えたので、すぐにバスルームに向かって(階段から離れて)走り去り、廊下の一番端近くにある両開きドア(金星の鍵でロック解除)を通ってダイニングルームに入ります. .怪我をした場合は、回復アイテム (バスルームのドアの外にある必要があります) をつかむために2倍になりますが、最初にダイニングルームに出入りするようにしてください。そうしないと、アイテムの管理が完了する前にゾンビに追い越される可能性があります。廊下に再び入った後は、それらのほとんどをバスルームのドアから遠くに配置する必要があります。先に進む前に、トイレの近くにライターを置いた場合は必ず手に取ってください。
ダイニングルームに入ったら、テーブルの右側 (入ったときはアリシアの右側) にいるようにしてください。左側に行くとそこに必要なものが何もない場合、窓から余分なゾンビが入ってくるからです。テーブルの右側にいるゾンビを倒し、右側の壁にあるハンドガンの弾薬をつかみます。近くの両開きドアを通過する前に、もう少し下のメモを読んでプロット情報を確認することもできます。
ここから本堂側廊下に出ます。入り口のすぐ右に、ゾンビが壁に向かっているのが見えます。彼の注意を引き、彼をジュークしてから、彼の後ろのドレッサーにライターを使用してください.これにより、医療キットが明らかになります。それをつかんで、もう一度ジュークしてホールを反対方向に駆け下ります。途中、アリシアの右側に金属製の扉があるので、古い鍵で開けて中に入る。これにより、2 つのゾンビ、いくつかの拳銃の弾薬、およびその端に彫像の頭がある屋外の廊下に移動します。この 2 体のゾンビをジュークします (殺すことはできますが、弾薬がかなりきつくなります) 彫像の頭をつかみ、入ってきた道を離れます。
ゾンビ ガーディング メディキット:
古い鍵のドア/像の頭:
Main Hall Side Hallway に戻って、以前に遭遇したゾンビ (壁を見つめているはずです) から離れて、右側に両開きドア、左側にゾンビがある垂直な廊下に入ります (固定視点のカメラから少し離れています)。 ):
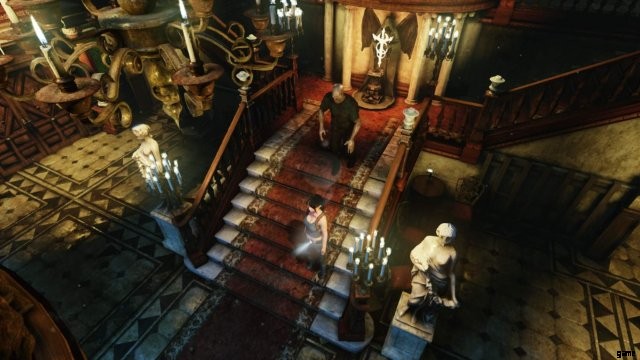
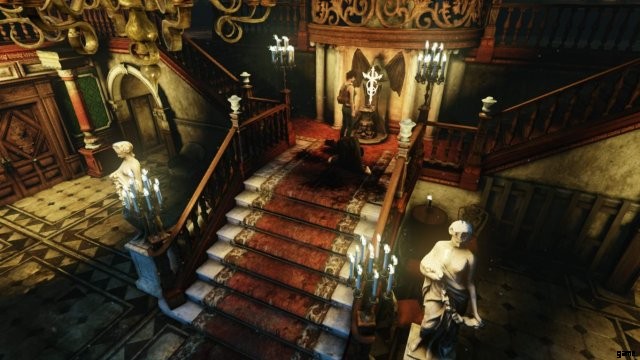
ゾンビを倒してから、両開きドアを通ってメインホールに向かいます。メインホールには大量のゾンビがいますが、ゾンビを殺す必要はありません。代わりに、入ってきたドアをすぐに左に向かい、左側の壁にある最初のドアに入り、2 番目の安全な部屋に入ります。
メインホールセーフルーム入口:
6.月と金の鍵を手に入れる
ライター、ビニール ディスク、スタチュー ヘッド、その他の回復アイテムを安全な部屋に置いておき、椅子に座っている拳銃の弾薬を手に取り、メイン ホールに戻ります。
(オプション) この時点で、戻って軟膏/回復アイテムをバスルームエリアから安全な部屋に移動できます.これは必須ではありませんが、多くの回復アイテムを使用している場合は時間を節約できます。
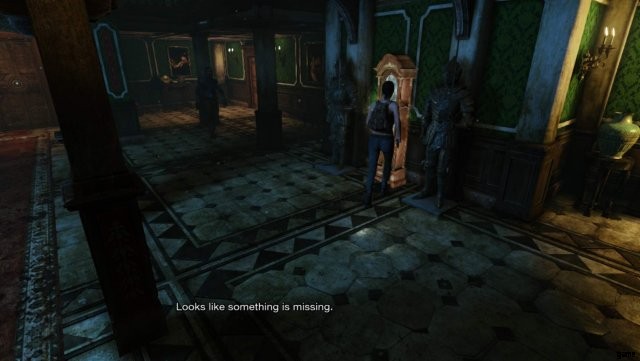
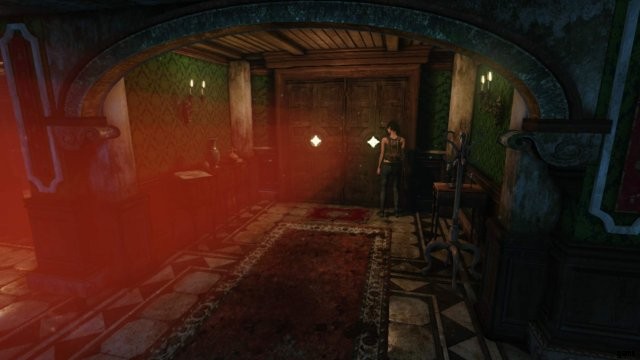
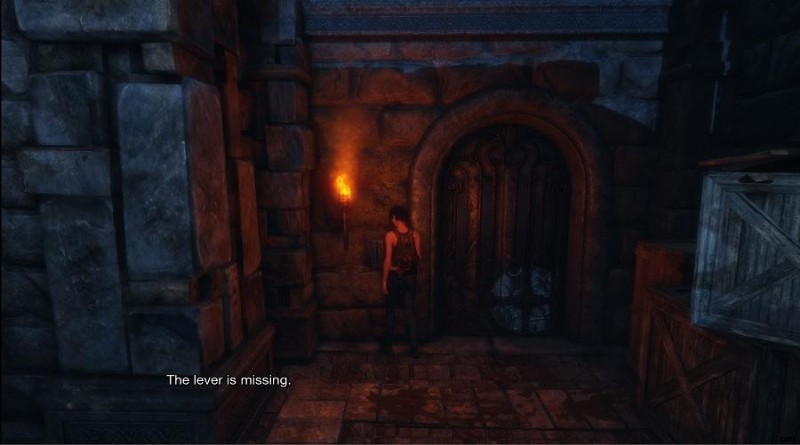
素早く左に曲がって包帯を見つけ、その壁に沿って進み、2 つの大きなユニークなドアのそばにある月の鍵を見つけます。これらのドアは大邸宅に通じていますが、最初にドアを開けるためにさらに多くの作業を行う必要があります。
月の鍵/邸宅の扉:
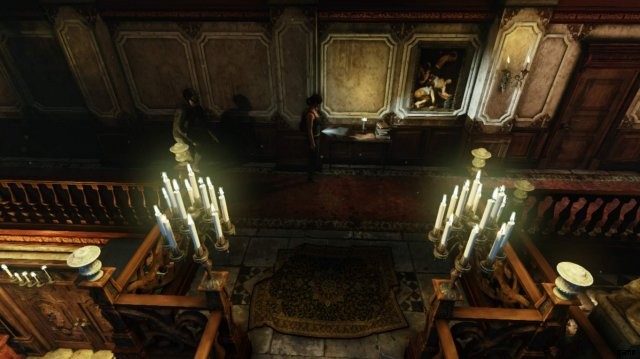
この時点で、時計パズルを行うために 2 階からメモを取得する必要があるため、ホールの 2 階に通じる階段の上部にある祭壇を見つめているゾンビをジュークし、右に向かいます。
奥の隅にあるテーブルからビニール ディスクをつかみ、部屋の右側を抱きしめながらバルコニーを下ります (道に迷い込んだゾンビを攻撃します)。途中で、キッチンの時計を操作する前に、メモをつかむ必要がある別のテーブルがあります。このメモを持って、1 階に戻り、空きインベントリ スロットがいくつかあることを確認したら、メイン ホール側の廊下に出てください。
時計パズルの注意:
入ったときに向いていた方向にホールをまっすぐ進みます(行くときにテーブルから包帯をつかみます)。下に続く階段に到達するはずです.月の鍵で下のドアのロックが解除され、キッチンに入ることができます。
中に入ると、ゾンビに変わるので、目の前の体を略奪しないでください.代わりに、すぐに左に曲がり、部屋の端からあなたに向かって移動しているゾンビを殺します.ゾンビが出てきた部屋の横 (あなたが入ってきたドアの近くの真ん中のテーブルの横) に向かい、最後の古い鍵を手に取り、次にテーブルの反対側に向かい、懐中電灯を使って見つけます。小さな卓上時計。
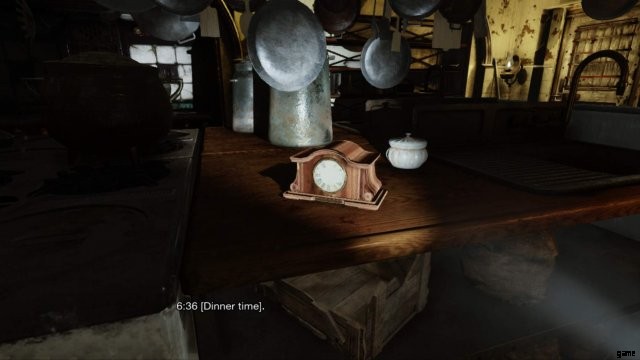
懐中電灯がオンになっていることを確認し、時計を操作して壊れていることを確認しますが、移動するかどうかを尋ねられます.はいを選択すると、時計の下に小さな紙が表示され、もう一度操作します。 「ディナータイム」になるとメッセージが表示されます。これは、このパズルを行うたびに 6:00 から 7:00 の間のランダムな時間なので、覚えておくか書き留めておいてください。調べ終わるとすぐに、ゾンビがあなたの後ろに立ち始めます。彼が攻撃する前に入ってきたドアに向かって走り、ドアの近くの体から追加のハンドガンの弾薬を手に入れてから出てください.その後、前の廊下を通ってダイニング ルームに戻ります。
両開きドアの近くのおじいさん時計に行き、それを操作してください。
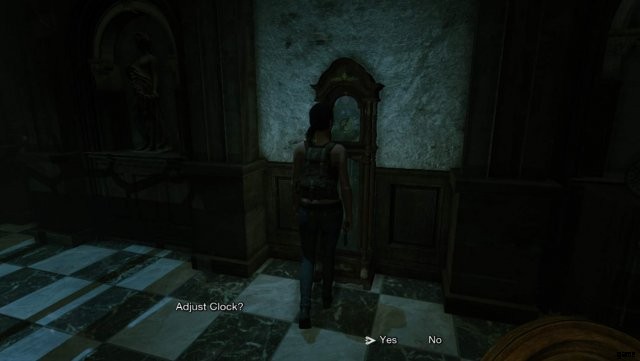
時間設定ができるようになったので、キッチンの時計で指定された「ディナータイム」に合わせます。正しく行うと、時計が開き、時計の歯車をつかむことができます。 (注:おじいさん時計はランダムに「鳴り」ます。鳴ると、終了するまで 20 ~ 30 秒かかることがあります。) メインホールに戻り、おじいさん時計に移動します。セーフルームの反対側の壁。歯車を使用すると時計が回転し、金の鍵が表示されます (完全に回転するまでに時間がかかるため、回転中に近くのゾンビを凧で追い払う必要がある場合があります)。
安全な部屋に向かい、ゾンビをリセットしてください。
7.中庭と寝室側の廊下を片付ける
この時点で、4 つの鍵 (Gold、Moon、および 2 つの古い鍵) と、ピストルと弾薬が必要です。本堂側廊下とダイニングルームを通り、寝室側廊下に戻ります。弾薬はかなりあるはずなので、寝室側の廊下の 1 階にいるすべてのゾンビを倒します。これを行った後、弾丸が少なくとも 20 個 (またはそれくらい) 残っていることを確認する必要があります。そのため、弾が足りなくなったら、後ろの廊下にあるロックされていない部屋の 1 つに入り、出て 2 階のゾンビをリセットします。 1階の残りのゾンビをジュークし、月の鍵を使って廊下の階段の下の隣のドアを開けます.これにより、ゲームを開始したベッドルームに戻ります。ナイフを手に取り(後で弾丸を節約します)、最初にドライバーハンドルを見つけた場所の横にあるドレッサーと対話するようにしてください.屋外の通路に通じるドア。
最後の古い鍵を使用して、中庭に通じる金属製のゲートのロックを解除し、それを通過してください。
この部分はトリッキーです。すぐ右にゾンビがいて、近くにゾンビ犬がいます。私の戦略は、問題が発生した場合の損傷を避けるために、門の隣に立って出入りし、できるだけ早くゾンビを殺そうとすることです.ゾンビが死んだら、2 匹の犬を 1 つずつ処理します (2 匹とも出て行って戻ってきた場合)。打たれずに犬を殺すのは難しいので、必要に応じて回復アイテムを取りに行くことを恐れないでください.
死体の上にあるアイテムは拾わないでください。拾うとすぐにゾンビに変わります。代わりに、ゾンビとアイテムで行き止まりに到達するまで、左の壁を抱きしめて頭を下げます.ゾンビを倒してハサミを手に入れよう。
この時点で弾薬がかなり少ないはずなので、遭遇した他のゾンビをジュークして、近くのベンチで噴水と大きな包帯を見つけてください。
噴水の近くの樽のそばにゾンビが立っているのが見えるはずです。このゾンビを凧で追い払い、ナイフを装備してバレルを壊し、必要なハンドガンの弾薬を見つけてください。また、噴水の近くに両開きのドアがあり、メインホールに戻ります (2 階に通じる階段の後ろ)。立ち去る前に、中庭にいる 2 つの死体から弾薬を素早く手に取り、これを使って安全な部屋に戻り、ハサミとナイフを降ろしてください。
8.光の結晶、天使のメダリオン、悪のメダリオンを入手
安全な部屋で、ピストル、弾薬、金の鍵以外のすべてを降ろし、像の頭をつかみます.その後、メインホールに戻り、以前と同じように階段でゾンビをジュークして、メインホールF2に到達します.マンションのメインドアの真上にある壁に到達するには、右側または左側のいずれかを下ります。ガラスのケースが表示され、金の鍵を使用して開くと、赤い本を入手できます。
また、2 階の奥に通じる左右の通路をつなぐ橋の真ん中にあるボディから、ハンドガンの弾薬を増やすこともできます (これによりメインホールにゾンビが追加されますが、彼は回避可能です)。
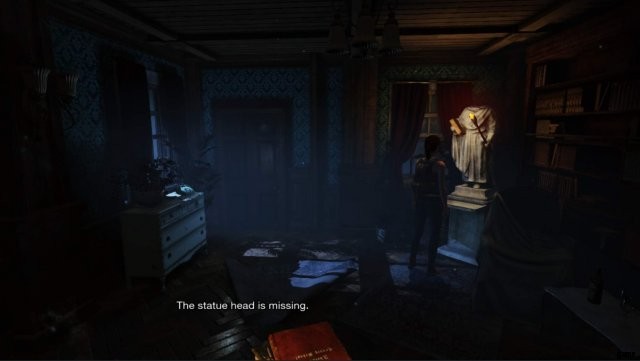
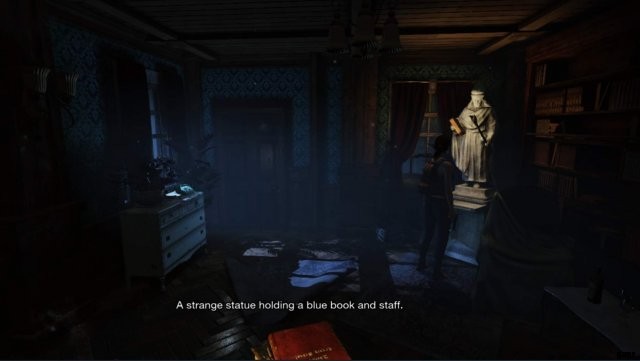
ダイニング ルームとベッドルーム側の廊下を通ってオフィス F2 に戻ります (このガイドのセクション 3 にあるイースターエッグ テレビのある部屋です)。ここを数回行き来するので、寝室側の廊下であなたの道を塞いでいるゾンビを殺してください.オフィスには、本と杖を持った頭のない像があります。最初にレッド ブックを使用してブルー ブックを取得し、像の頭を使用してライト クリスタルを取得します。
図書館F1に向かいます。ブルーブックを使用して模造ライオンズヘッドを取得できるようになりました:
壊れたはしごの後ろには、オオカミの頭が入った別の金のキー ケースもあります。
今度はハサミが必要なので、メインホールのセーフルームに戻ってそれらを回収してから、コートヤードに向かいます.必要に応じてライト クリスタルを降ろしてインベントリに空きを作ることができますが、ハサミと両方の動物の頭があることを確認してください。噴水には、イミテーション ライオンズ ヘッドを置くことができるスポットがあります。
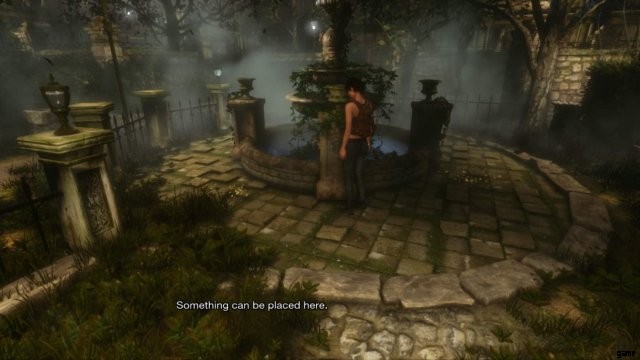
これにより、実際のライオンズ ヘッドが噴水の反対側で地面に落ちる様子を示すショートカット シーンが発生します。
それをつかんで、寝室につながる屋外エリアに向かいます。このエリアの生け垣の奥まで行くと、そのうちの 1 つの後ろから光が差し込んでいるのが見えます。
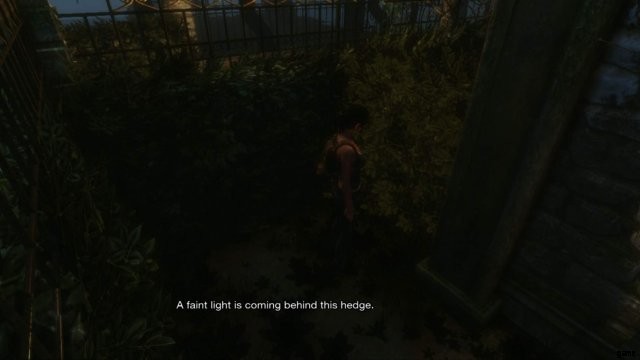
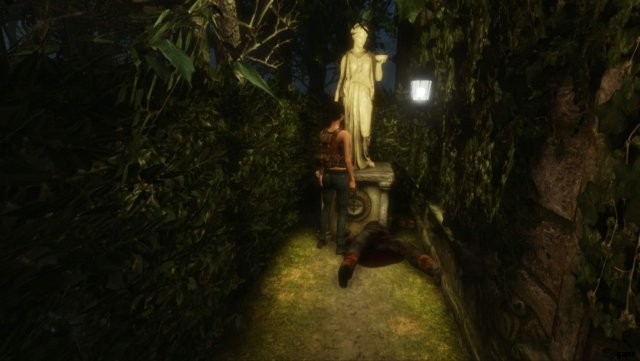
ハサミを使って垣根を取り除き、天使のメダリオンで彫像を守っているゾンビを見つけます。ゾンビを殺して(またはジュークして)、それを取ります。次に図書館F2に向かいます。到着したら、右に向かってゾンビを倒し、オオカミの頭を置くことができる台座に行きます.その後、戻って左の道をたどり、ライオン ヘッドを配置できる同じ台座を見つけます。
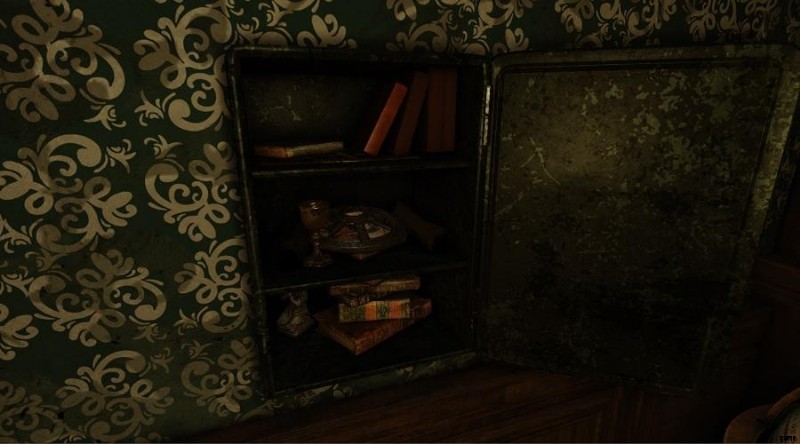
これにより、ライブラリ F1 で秘密のドアが開くのを見ることができるショートカット シーンがトリガーされます。そこに向かい、秘密の部屋に行き、プロット情報、ハンドガンの弾薬、邪悪なメダリオンが書かれたメモを見つけます.壊れたレコード プレーヤーのレコードも見つかります。

これでマンションから出るのに必要なものはすべてそろいました!メインホールに戻り、セーフルームからライトクリスタルを入手してください。弾薬がある場合は、階段 (邪悪な祭壇のそば) とドアのそばにいるゾンビをキル/ジュークします。次に、祭壇のライト クリスタルとメイン マンションのドアのメダリオンを使用します。
インベントリに空きスペースがいくつかあることを確認してから、邸宅のドアを通り抜けてください。
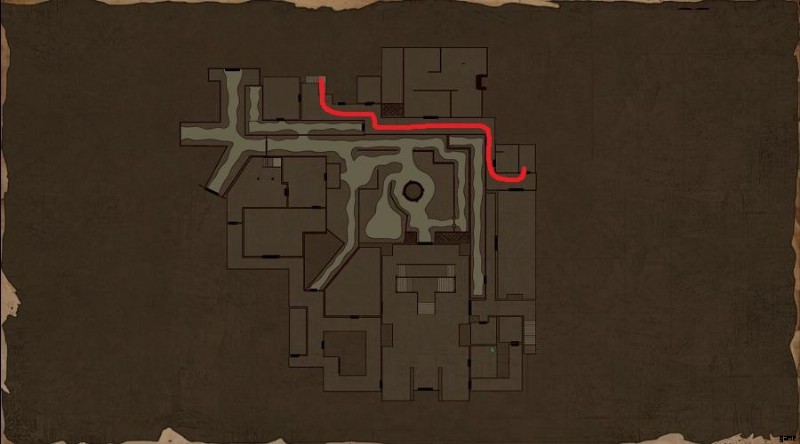
9.グリーンエメラルドの鍵を入手
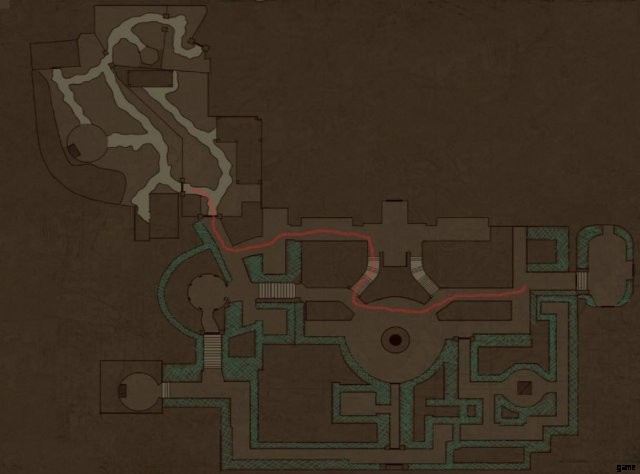
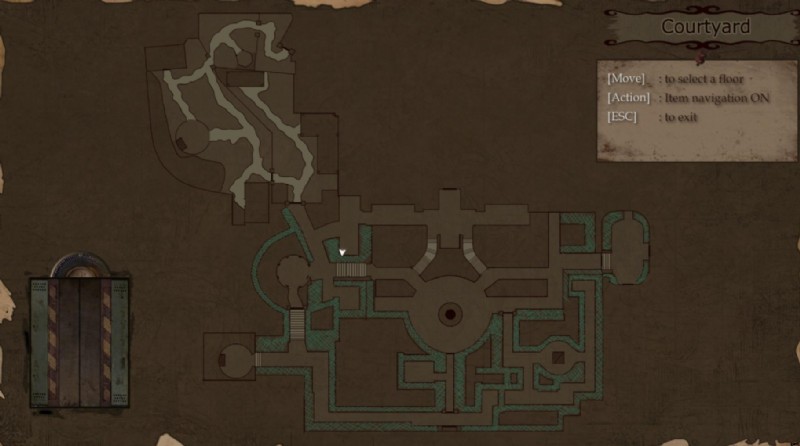
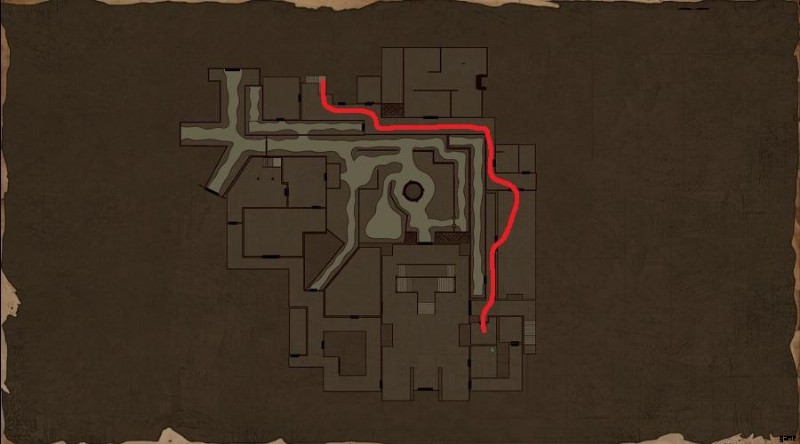
邸宅のドアは私たちを中庭に連れて行きます。これは、多くの曲がりくねった小道と大量のゾンビがいる広いエリアです。ここには内部よりも移動する余地があります。弾薬はたくさんありますが、ここにはさらに多くの敵がいるので、できるだけ多くのゾンビをジュークしたいと思うでしょう.
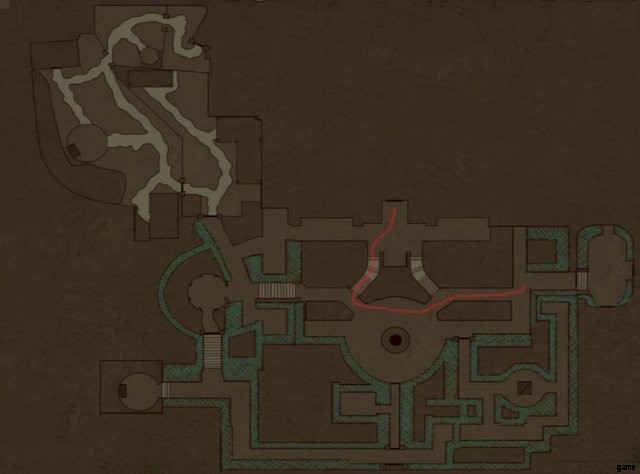
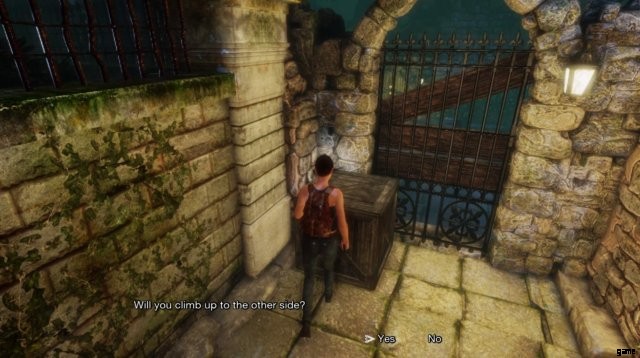
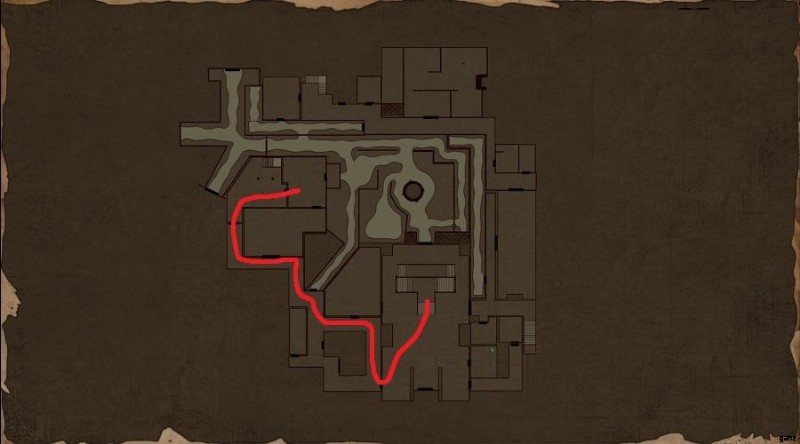
邸宅のドアのすぐ前と右側にある階段を降りることから始めます。一番下を左折し、中央に噴水があるメインの円形エリアに入ります。 Grab the bandages off the bench on the north side of this circle and then head east via either of the two eastern paths. Keep on this path until you reach a boarded up gate.
Interacting with it will hint that you might be able to climb over it. Double back to the previous intersection and head to the dead end north of you. Break the barrel at the very back to find some ammo, then inspect the wooden crate separated from the others. You will have a prompt to push it. Do this twice and you will push it all the way up to the boarded up door. Interact with the box a third time to climb over into a small oval area. Grab the Blue Emerald Key off the body in the North-East side of the area, break a barrel in the South-East side for some handgun ammo, and return to the boarded up door to open it from this side.
Boarded up door:
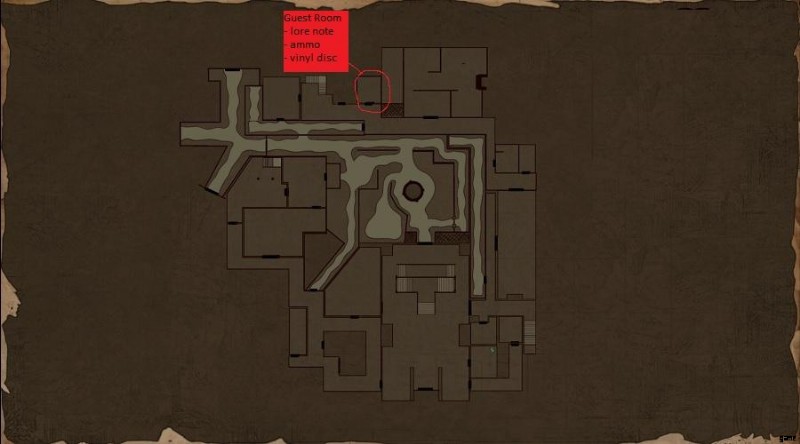
Next, return to the mansion entrance the way you came. You need at least one free inventory slot so if you’re full swing by the safe room just inside the mansion to drop off extra supplies. From the mansion door, head west. After passing a zombie (feel free to kill this guy, we’ll head this way a few times) skip picking up the handgun ammo on a corpse (we don’t want it to stand up yet) and keep going west until the path branches north and south. Head north into an open grassy area.
Nearby is a blue door which we can’t unlock yet, but we can explore the rest of this area to find a medical kit, some handgun ammo, a note, and a vinyl (as well as a small bandage in the barrel next to the Vinyl). Take any of these supplies that you’re low on, and then head back towards the mansion main door. With the Hidden Key Note we grabbed off the mini boss earlier you can now claim the Green emerald key from an inconspicuous flower bed near the body with handgun ammo on it we passed earlier on our way to this grassy area of the courtyard (back towards the mansion front door).
Green Emerald Key:
Once you have the key, head to the center of the courtyard (dropping off supplies first if you’re low on inventory space) and on the south side you’ll find a green gate which we can open with our green emerald key.
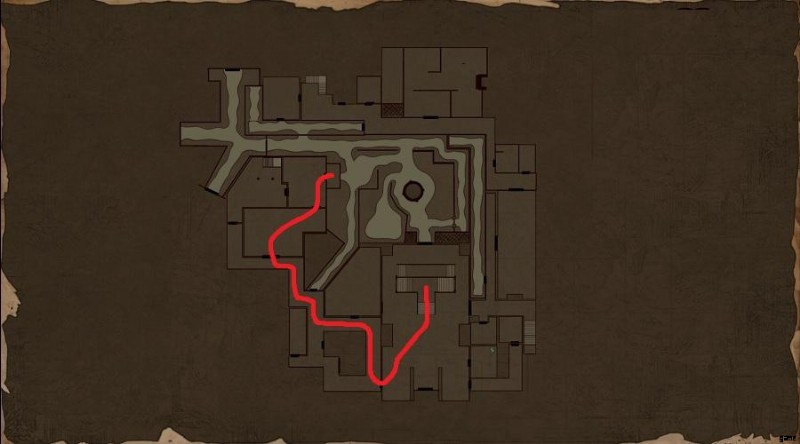
10. Getting the Burning Oil, Antique Mirror and Unlocking Portals and the Ruins
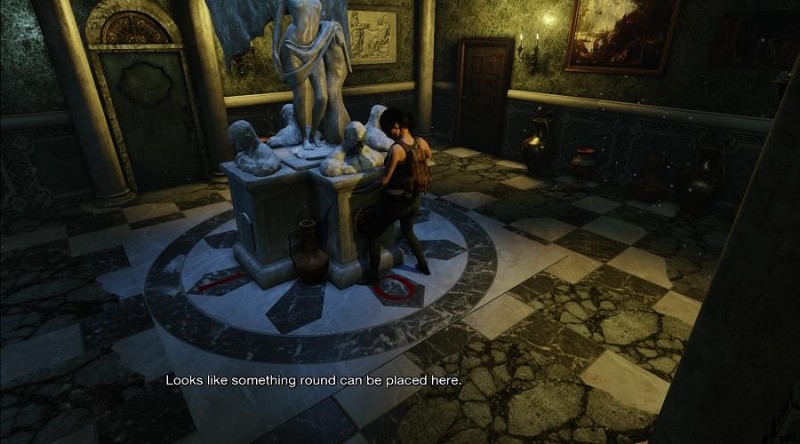
Head down the narrow path beyond the Green Emerald Door we unlocked killing a zombie who blocks the way if you need. The large door at the end is sealed with Dark Magic, so take your first right, killing or Juking the two zombies in that area, to find a small clearing with the Burning Oil on the table. Take this and head left at the magic door to find a small square clearing at the end of the path where a Zombie guards a statue. Juke or kill the zombie and interact with the statue to acquire the antique mirror, then head back to the main door to the mansion.
Burning Oil/Antique Mirror:

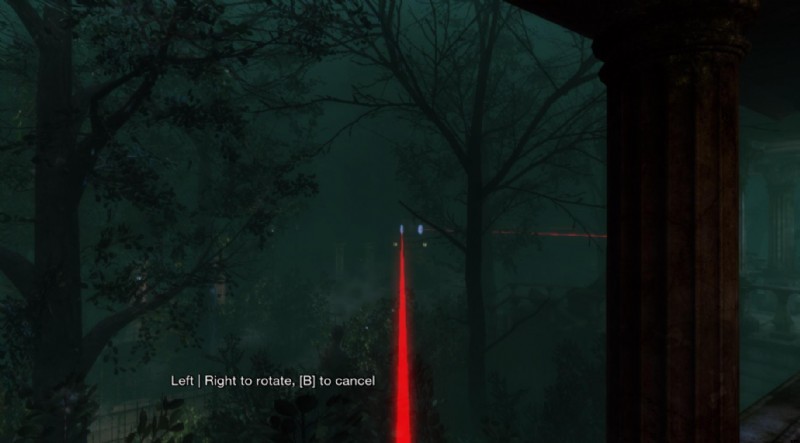
Directly in front of it is a statue facing away from the door off the balcony overlooking the courtyard. Approach it and use the Antique Mirror to activate a red beam firing from the front end of the statue towards the fixture in the middle of the courtyard. There are two similar statues both to the east and west of this one on this balcony which are also shooting beams and can be aimed by interacting with them. Be careful of the zombie guarding the east statue but grab the bandages and check out the lore note nearby before interacting with the statues. Aim the west statue towards the fixture in the middle – you should see a stone light up as the beam passes across it when its in the right spot. Before doing the same for the east, aim it off to the left until you hear a sound queue – then release the statue to open a chest you can access later in the game. After the chest is open, you can aim the beam at the statue in the middle the same as the west one.
Placing mirror/Aiming statues:
Once you have both statues in place a portal will appear near the fixture and Alicia will approach it automatically. Interact with it to enter and you’ll be taken to a small safe room which contains an item box!
(Optional) Take this opportunity to move all your supplies from the mansion to the item box as this location will be more accessible to you going forward and you wont have to organize your stuff on the floor.
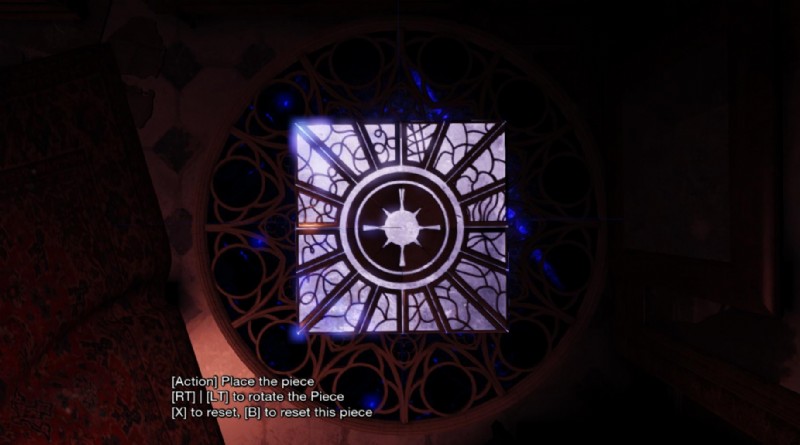
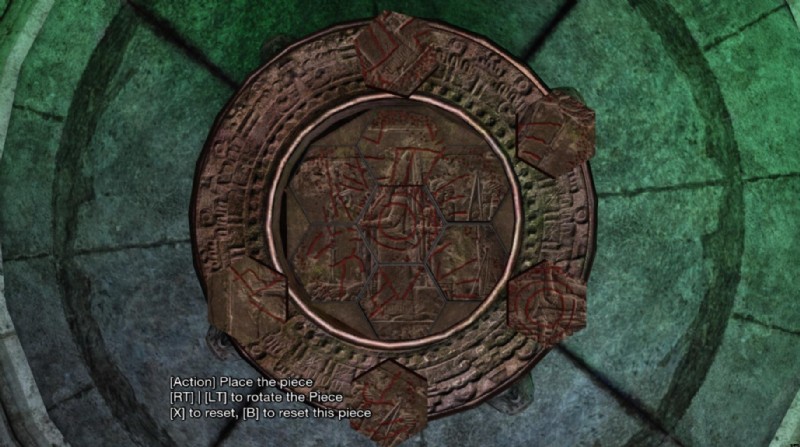
(Optional) There is also a device in this room called a Box of Ploutus which can be used to retrieve items left on the ground in specific places. It’s not terribly useful at this stage of the game and you don’t need it to progress but if you want to unlock it all you have to do is place 4 pieces in the correct spots to form a pattern. There is a note on a table nearby but it’s incomplete. The solution to this puzzle is shown in the image bellow. On lower difficulties the box will be unlocked by default.
Box of Ploutus soltuion:
Once you are finished, return to the portal and interact with it to exit back to the Courtyard. Head back through the path that was opened up when we used the Green Emerald Key
11. Exploring the Ruins and Unlocking the Sewers
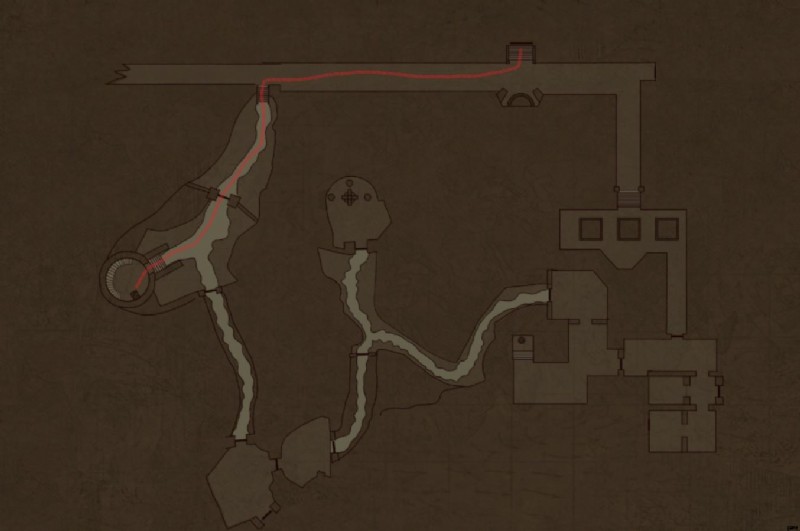
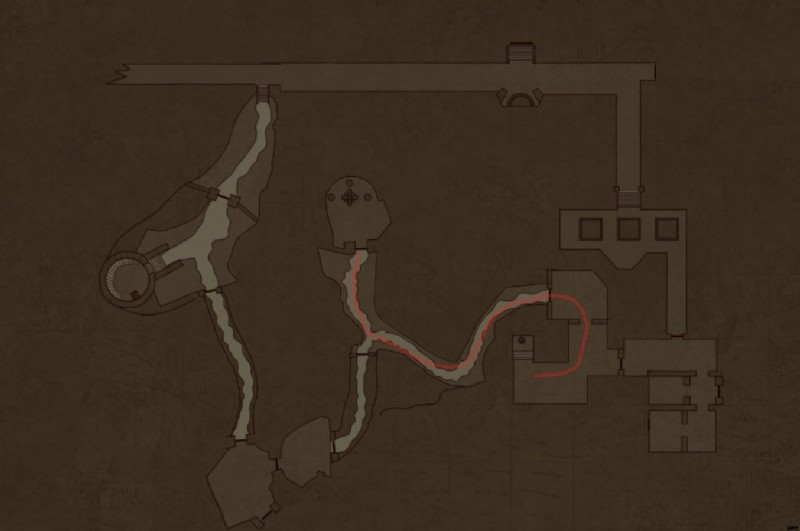
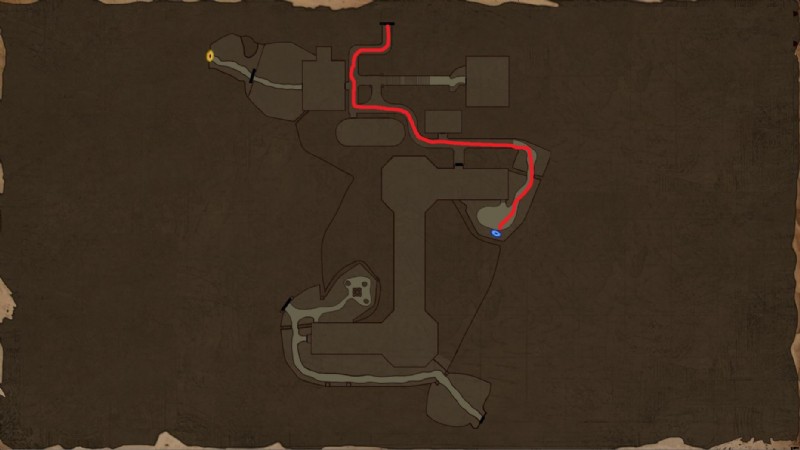
You’ll find yourself in a long corridor running east to west. Grab the shotgun ammo directly in front of you, then head west along the path shown in the image to the right.
There are a lot of enemies here, but you have a great deal of space to move and can easily run past all the zombies. There is a dog near the grassy area before heading through the door at the end of the path which is worth killing if you can’t easily get around him, but save as much ammo as you can unless you have extra. Once you reach the end of the path you’ll find yourself in front of a ruined tower. Take a big upgrade to your firepower in the form of a shotgun from the corpse (Note:The bodies will all turn into zombies when you pick this up) next to the gate nearby and head into the tower. Climbing the staircase you’ll find a door handle which you should grab, and a bandage. On the bottom floor of the tower there is a trapdoor (shown on the map as a black square). Go down it to find a secret basement room with some handgun ammo and a zombie with an item around his neck. Kill him and take the Antique Paper off his body, then head back to the Courtyard. You may have to make two trips to get all of this stuff but if you have to leave some things behind make sure you get the Shotgun and the Paper.
Tower Trapdoor/Greenhouse Key Zombie:

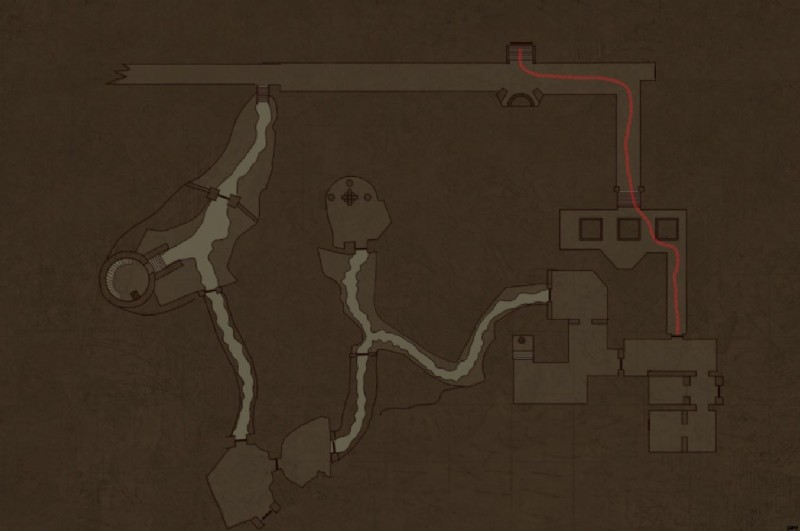
Next, return to the door we entered the ruins from originally and use this opportunity to head back to the portal and drop off supplies. You’ll want to make sure to grab your Burning Oil and Lighter in addition to the shotgun and some ammo, then go back to the ruins and head east following the marked path in the image to the right. Once again there will be many dodgable zombies and two dogs. It’s a good idea to run past these enemies as you wont have much inventory space for handgun ammo and shotgun ammo is precious, but you might have to use a little to take care of the multiple dogs you’ll encounter as they are difficult to dodge on stairs.
When you reach the door at the end you’ll find yourself in a large set of rooms which act as a safe room. There’s a vinyl here as well as some handgun ammo. Save the vinyl for now and head towards the farthest room from the entrance to find a door covered in old dry rope. Use the Burning Oil on the door, followed by the lighter to burn away the rope and unlock it, but don’t go through just yet.
Door covered in dry rope:
The next section is going to isolate us from previously explored areas as well as introduce a new enemy so take this opportunity to go manage your inventory first. You’ll want the shotgun and all the ammo you’ve collected. I don’t recommend bringing the pistol as you wont have much inventory space to work with. An extra healing item helps although you may have to leave it behind if you don’t use it early on in the next section. Make sure to save here if you can, then go through the door to the sewers.
12. Exploring the Sewers and the Other World
In the first room of the sewer there are a few supply’s. Ignore the handgun ammo unless you brought the handgun and grab the healing item before moving on. When you try to move through the following room, gates will drop and trap you in with a new monster:
This monster moves quickly and has a very fast recovery time after getting hit. It’s weakness is it’s recovery time after attacking and it’s attack range. If you keep moving it will have a hard time hitting you and if you get lots of distance after it attacks before shooting it you’ll be able to move again before it reaches you. 3-6 shots from the shotgun should end the fight depending on difficulty. Once the fight ends, the monster will push you through the portal and you’ll be taken to another world.
After the cutscene ends, move in the only direction available to you until you reach a blue fountain. Another cutscene will play in which a monster runs away from you while you’re near the water, revealing their weakness. Continue down this path until you see another fountain, two portals (one active, one inactive) and a Box of Ploutus. Grab the Divine Chalice (blue) from the base of the Box of Ploubus and head through the active portal (the blue one).
The area this takes us to has 3 of the monsters in their ethereal form (green or blue highlight). In this form their invulnerable, so just run past them. There should be another blue fountain in this room and interacting with it will allow us to fill up our chalice, so grab that and then head to the portal on the opposite end from where you entered. This takes us to another room with a green fountain, another chalice (green) and a lighter. Take both these items (drop a healing item if you have to) and interact with the pedestal to start this area’s first puzzle.
The goal of this puzzle is to arrange 7 of the 12 pieces on the pedestal into the proper image. The key is an image representing the red markings on the pieces that can be found in a nearby room. The images bellow shows the solution:
Once the pieces are in place you can hit the lever nearby to fill the green fountain and fill up your new green chalice. Once this is done, head back the way you came to the room containing the box of Ploutus. Approach the red (inactive) portal and interact with it to activate it using the full blue chalice. Pass through that portal and run past the monsters in the next two rooms. Unlock the last portal by interacting with it while holding your full green chalice, then pass through it to reach the next puzzle area.
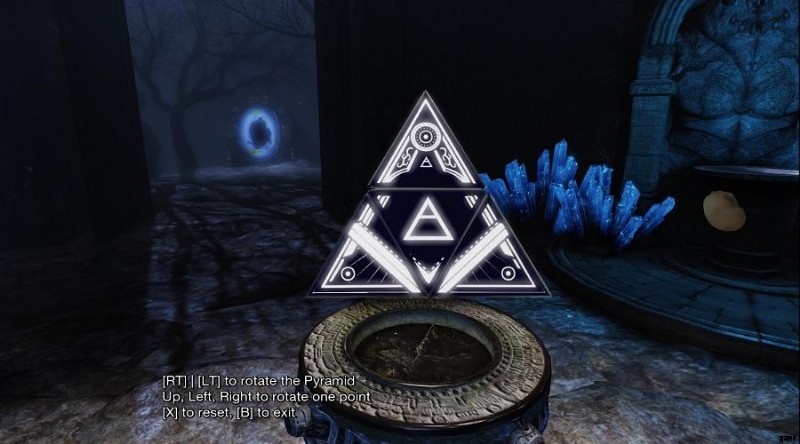
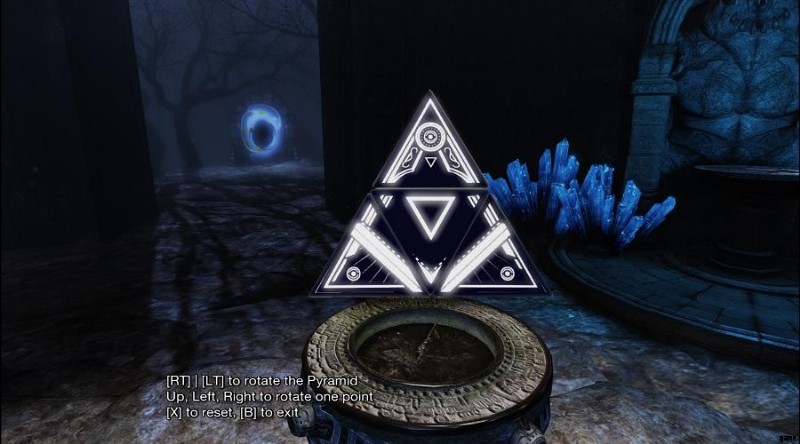
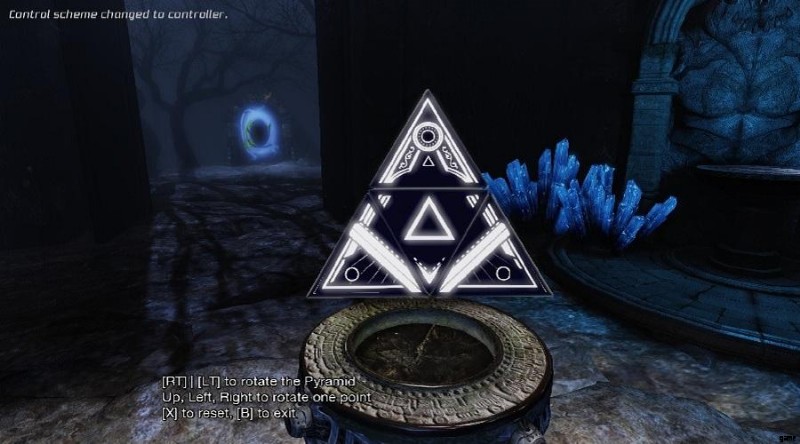
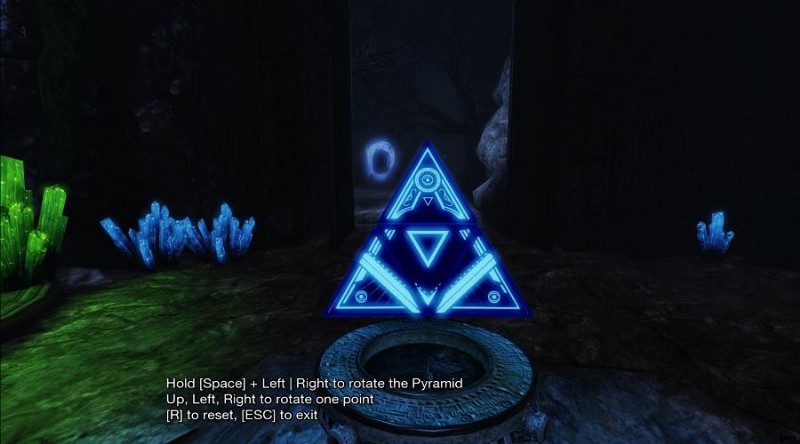
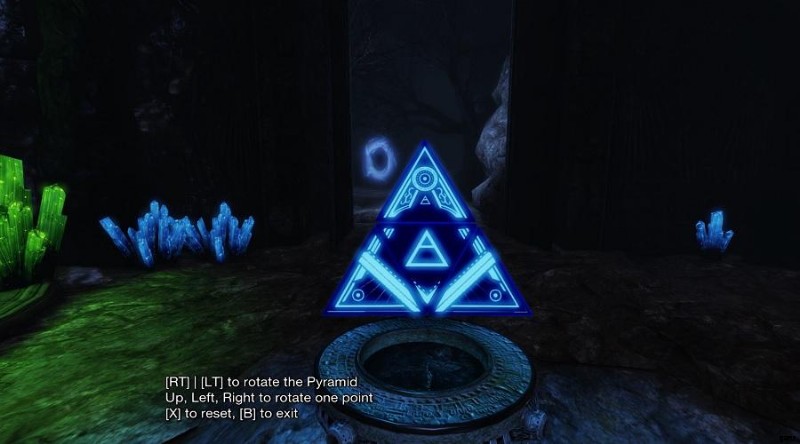
Cut sharply to the right and head towards a stone pillar which has a lever you can pull. Return to the area where the entrance to this platform was and the door in front of you should now be open. Head inside to see a number of colorful glowing pyramids and a magical book. Approach the book and interact with it twice – the first time to activate it and the second time to see the puzzle hint. After this, interact with the red pyramid to begin the puzzle.
Secret Lever/Magic book:
The goal of this puzzle is to get the dots on each corner of the triangle to match on each of it’s 3 upward facing sides (with the corner pieces that have no circle facing downward) and the face with the empty circle facing the player (not filled in with color or dots). You’ll know when you have the right configuration because a sound effect will play. Below you can see the proper configuration for each side of the triangle:
Back sides of the triangle:
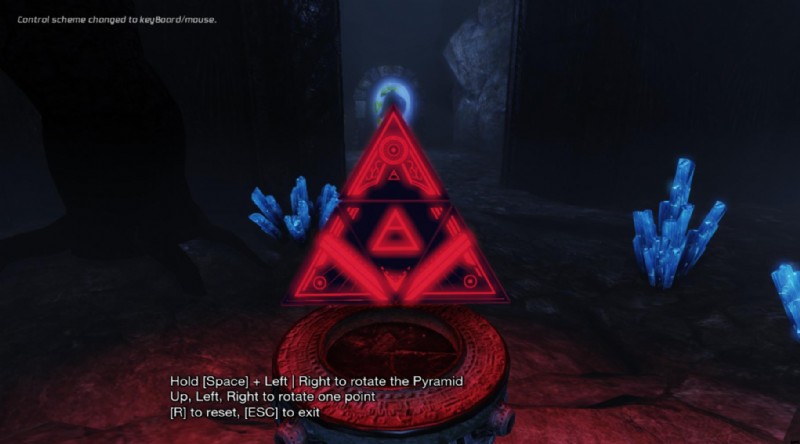
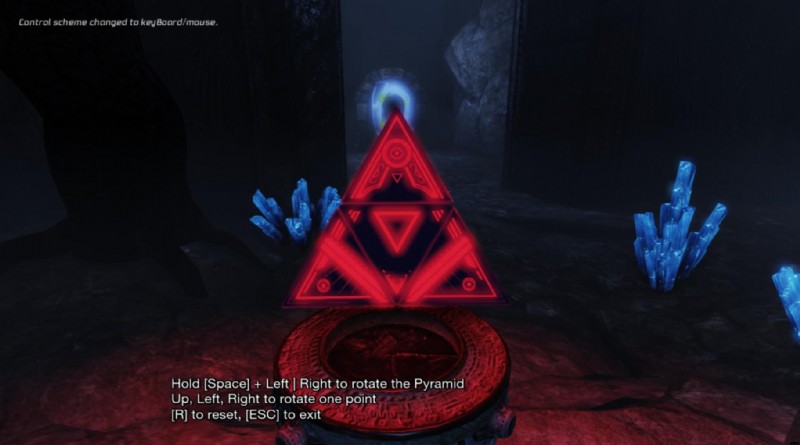
Front side of the triangle (Must Be Facing The Player When You Exit The Puzzle):
After exiting the pyramid interface immediately use the lighter on the pyramid to finish the puzzle and unlock a portal back to the sewers back where we originally entered the other world. Run back to the beginning of this area and go through the portal to return to the room where we fought the first new monster. The gate onward will be open, so just run through the door and up the ladder.
13. Return to the Ruins and Meet Paul
The ladder from the sewers will take us back to the ruins on the other side of that locked door in the safe room. There’s a portal here which will take us to our item box, use this now to resupply ammo and healing items as well as to drop off the lighter. We can’t drop off the chalices or our weapon make sure you have some ammo and head back out.
Follow the path marked on the image to the left. Make sure you have enough ammo left to take out at least one of the new monsters. At the end of the marked path we’ll find a save room with a Vinyl inside, and given all the puzzles we just solved we should take this opportunity to save. Grab the handgun ammo if you need it and have room, otherwise head back out the way we came in and head to the south archway. Juke another zombie on the path and then head through the door.
Once in this room we see a cutscene where another survivor squares off against some of the new monsters:
One of the monsters breaks off to fight us. It’s basically the same fight as the beginning of section 14, except this time when the monster becomes translucent interact with it to douse it with water and kill it for good. This will trigger a cutscene where Alicia and her new friend Paul have a chat. This is followed by a flashback segment where we control Paul in his office.
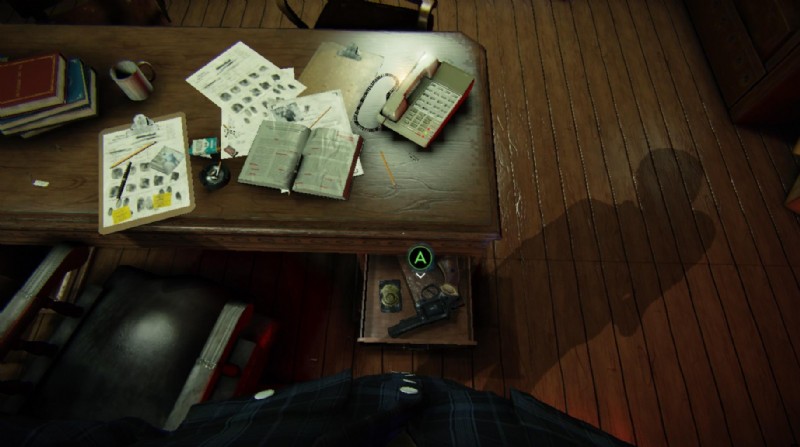
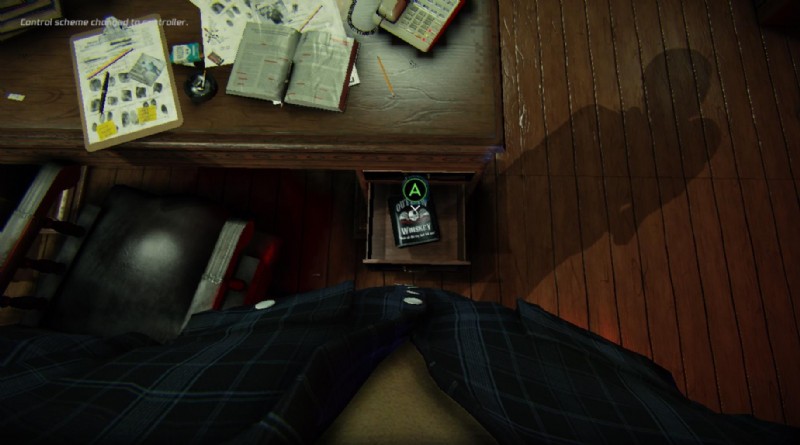
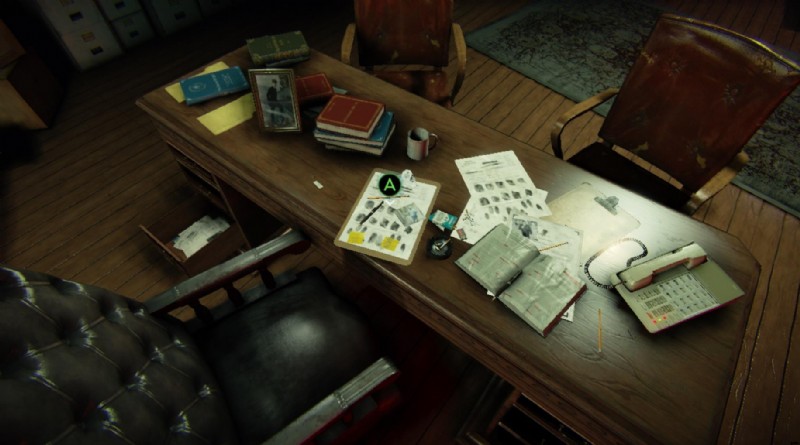
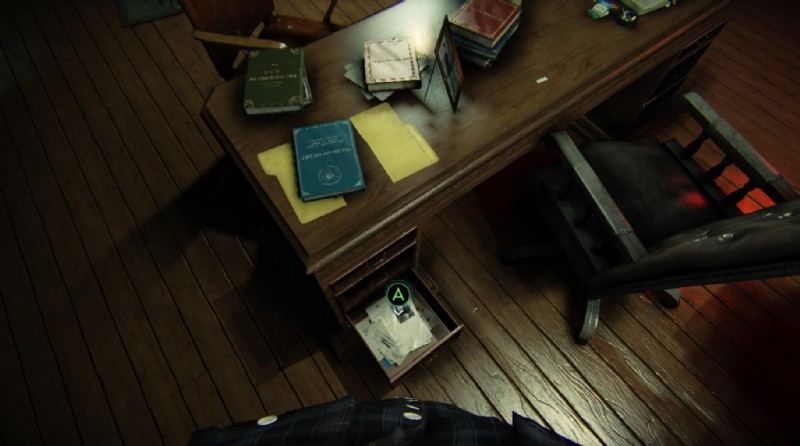
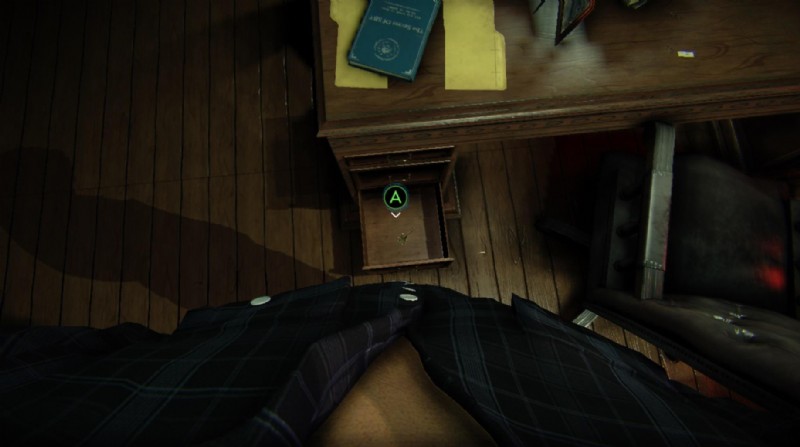
Our first job as Paul is to find whiskey. It’s in the right side drawer in his desk, although you’ll have to open the drawer containing his gun first to get to it.
Gun/Whisky:
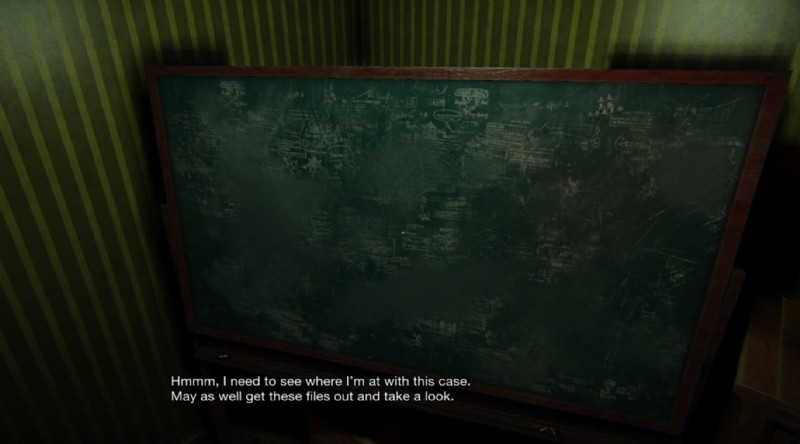
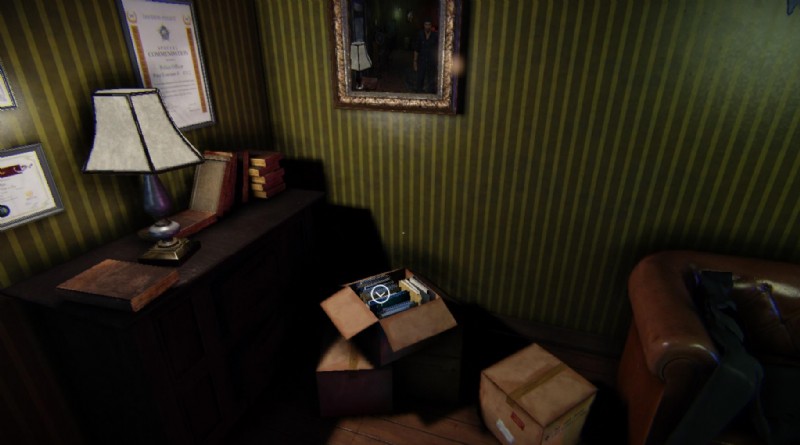
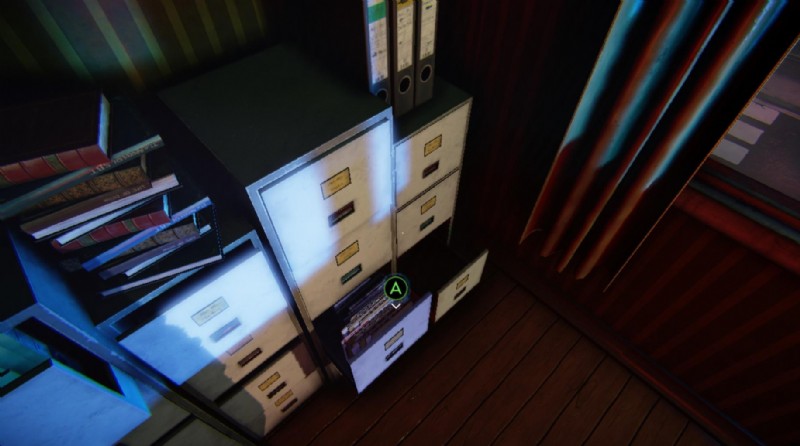
Next, approach the Chalkboard to prompt a hunt for 5 different files.
Each one must be collected in order then placed on the chalkboard to proceed. The 4th file is in a locked drawer which requires a key. Here are the locations of the items in order:
File 1/File 2:
File 3/File 4 Key:
File 4/ File 5:
Once you’ve collected all these files and brought them to the chalkboard, Paul will determine he needs to go to Fog Island. To progress the game, exit the office through the only door. It’s worth noting that you can turn on a radio which yields some world building so if it’s your first playthrough it’s probably worth looking around the office while listening to it.
14. Exploring the Garden (A)
After exiting pauls office we are returned to Alicia who is in the same place we left her at the end of the last section. We only have one of our holy waters (the blue one) but we have unlocked two new inventory spaces (thanks Paul!). Grab the Lever PIece from the ground nearby and head back the way we came in (if you didn’t do so before the encounter with the otherworldly monsters make sure to save at the ruined tower). Go back to the portal and drop off extra supplies – make sure you bring your handgun and some ammo, your holy water bottle (which is now compatible with storage – but we need it at the moment) and the lever piece. If you’re on higher difficulties you may want to bring your loaded shotgun as well – but you shouldn’t need ammo. Just outside the portal, break all the barrels if you didn’t already for some extra ammo and then head over to the door on the east side of this area and use the lever piece with the mechanism to the left of the door to open it.
Lever Piece/Door Mechanism:

Hit the lever again to unlock the door and head through to return to the room we accessed the sewers from earlier. From here we want to head north back to the Courtyard. All the enemies that were here previously are now gone but as you move around otherworldly monsters will appear and chase you. As before, just run past them to the Courtyard door. Once you re-enter the courtyard a short cutscene will play showing that strange noises is coming from the yellow door leading to the Garden. All the enemies have been removed from the courtyard too so if you want to grab some extra supplies, make sure you have the door handle on you and head to the east side of the courtyard to go through it.
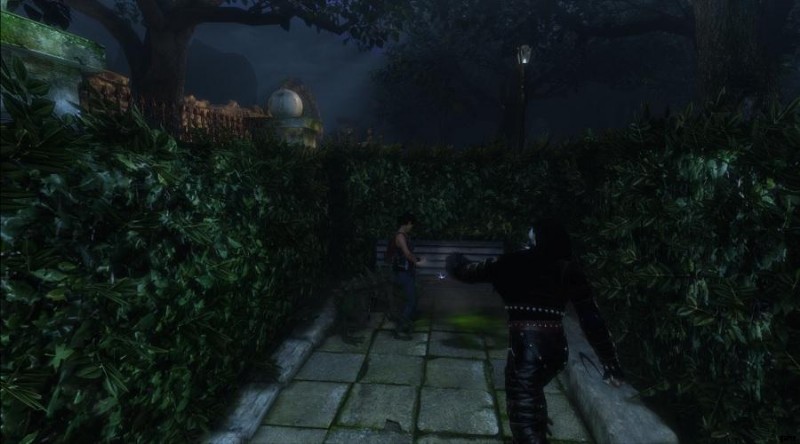
The Garden is a more difficult area which introduces three ‘new’ enemy types:
- A Tough Zombie similar to the boss we fought earlier to get the Blue Emerald Key that moves fast, hits hard, and stands back up when you exit and enter the area. Never run past them without a plan to reset them as they will keep up with you as you run into enemies further down the path, but try not to spend too much ammo fighting them as they will stand back up if you leave and come back.
- Crawlers which are small enemies that appear to be covered in spores of some kind. They move fairly quick and have health similar to a regular zombie but their attacks have a larger arc making them harder to juke and sometimes they will do a leap attack that has good range and will usually kill you in one hit. Best to keep your distance and if you have to, use shotgun ammo to ensure a safe kill.
- Bloated Zombies which are large zombies that can spit bile at a medium range. They have a lot less health than a normal zombie but they explode when they die so kill them at range with a few pistol shots.
The area is more linear and like the courtyard has a LOT of enemies spread throughout it. Running past enemies is still easy, but because of it’s linear nature, the fact that you’ll be in tight spaces as you get further into it, and the significant danger the enemies here pose becomes very dangerous so I recommend killing most of the enemies on the main path rather than running past them.
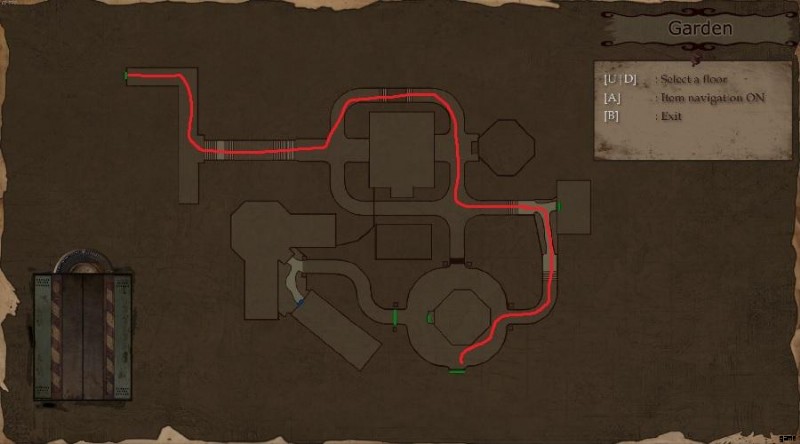
Follow the path marked in the image above. There’s plenty of ammo and healing items on the side paths There’s a building here that acts as a save room with a vinyl inside so save here if you need to, grab the handgun ammo next to the phonograph and continue south along the marked path.
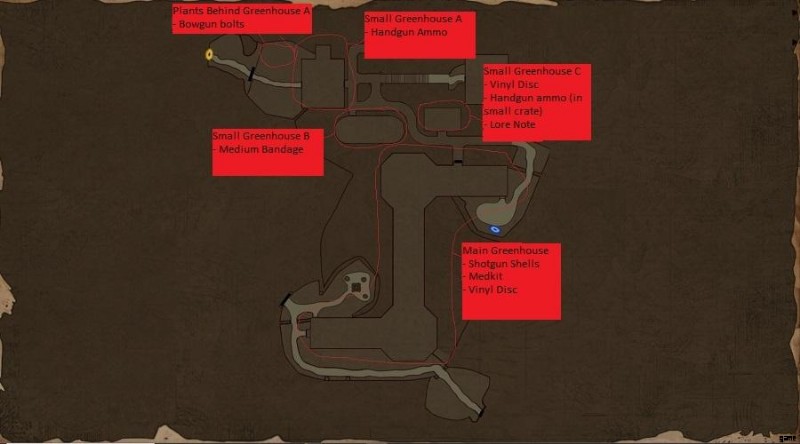
(Optional)
When you reach the end you should now be in a small circular area with a greenhouse in the center of it. To progress you need to take the door leading south to the Garden B – but first you can gather a lot of supplies here. Avoid the north side of this area as an annoying Otherworldly Monster will spawn if you go up there. Kill the bloated zombie on the west side and head into the greenhouse at the center to pick up more ointment and a medium bandage. Then head down the path going West towards the other two big greenhouse buildings. There are lots of enemies here including a Tough Zombie, several Bloated Zombies, a Crawler, and several Otherworldly monsters. This is way too much to fight – especially at once. Run past them and grab the shotgun shells and healing item from the big greenhouse and then use the doorhandle to open the little greenhouse to grab more healing items and ammo before booking it out. Remember you can use the door to the little greenhouse once you use the handle on it to reset the position of enemies you may have rounded up.
Once you have everything, head back to the southern exit marked in the original image to travel to the Garden B.
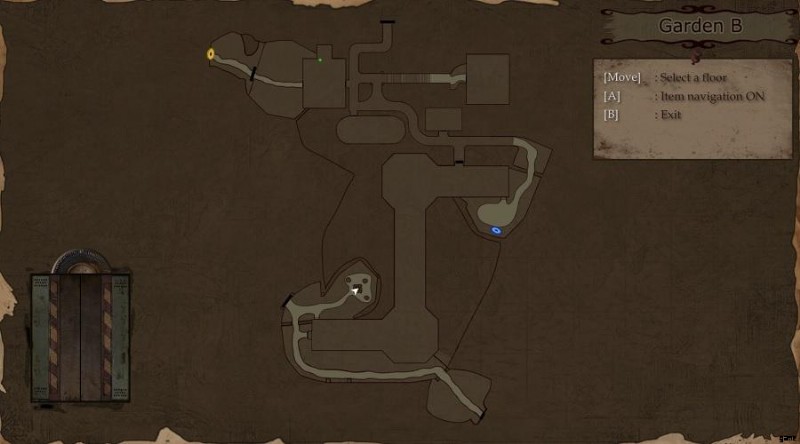
15. Exploring the Garden (B) and Getting the GateKeeper Key
Break the barrels right in front of you as you enter to grab some handgun ammo and a Vinyl, then head south along the path marked in the image below. Avoid entering the small greenhouses just off this path – all of them contain enemies that we would ideally skip and supplies we probably don’t have inventory space for at the moment. You’ll encounter a few Bloated Zombies along the path you can kill easily with your pistol and grab a few bandages sitting on barrels at the end before heading into the Portal to drop off extra supplies.
Path to Garden B portal:
Drop off your holy water and grab your shotgun if you didn’t already have it. You want to make sure you have at least 10 shells (it might take more on higher difficulties) and also make sure you have your handgun and some spare ammo then head back out. There’s a ladder up against the greenhouse near the portal entrance – take it to reach the greenhouse roof. Use your handgun to kill the enemies that block your path (although you can leave the ones on the circular platforms alive as they’re easy to avoid) as we’ll come this way multiple times. You can also grab some extra handgun ammo on the first platform and some shotgun ammo on the second platform. In addition there is a Vinyl on a small barrel next to the ladder down on the far end of the roof.
Greenhouse Ladder/Greenhouse Roof:

Near the bottom of the ladder is a small gate, take this to reach the Courtyard B area. This area is a small, mostly linear path with a few branching exits. Break the barrel right in front of the door for a small bandage and grab the lore note nearby to learn about the foe we’re about to encounter. Walking a bit further down the path we trigger a short cutscene in which we see a new enemy – a dark humanoid figure carrying a Sickle (I call him Sickle guy). Head down the path to confront him with your shotgun. Shotgun fire staggers him, but not for as long as the recovery animation for firing it, so make sure you have a little distance before shooting. After a handful of hit’s he’ll take a knee, but he’s not dead yet so wait for him to stand up and keep going. A few shots later and he’ll go down – dropping us the GateKeeper key.
Courtyard B/Sickle Guy:
This area mostly functions as a shortcut connecting the far side of the gardens to the ruins and the Courtyard, the other 3 exits all take us back to other area’s and they need to be unlocked from this side. Run along the path unlocking each door (except the one the monster came out of – that one is already unlocked) and using your pistol to break the barrels you find for a significant amount of bandages and ammo, in addition to a Vinyl. Be careful not to actually go through any of the doors – otherworldy monsters will spawn in this area upon leaving and returning and they make opening the barrels pretty annoying. Once you’ve finished, head back out the way we originally came in to the Garden.
16. Gathering Garden Supplies and Unlocking the Earth Pyramid
Once you’re back in the gardens you’re going to need more shotgun ammo (5-10 depending on difficulty) and plenty of inventory space. Head back to the portal via the roof if you need to and then return to the area right in front of the gate leading to the Courtyard B. There is a path which heads south from this gate around the south edge of the big greenhouse. A short way down this path is a special enemy – a large green bloated Zombie with some kind of metal weapon. If he gets close to you, he’ll vomit and it’s pretty hard to dodge but the shotgun staggers him pretty reliably so use it to take him out. Sometimes enemies from inside the greenhouse will notice you fighting and come outside – if this happens run away and reset the enemies by entering the Courtyard B and coming back. Grab the medium bandage he drops on death and head back to the south door to the big greenhouse.
Big Garden Zombie:

At this point in the game we want to save as much ammo as we can. There are a number of enemies in this greenhouse and a few useful items (shotgun shells, healing items, etc). This is the only time we ever have to enter this building and there’s quite a bit of space to move, so run from the south end of the greenhouse to the north exit and grab all the items as you go through. You’ll encounter another new enemy here – plant dogs. They move at a pretty slow speed and have a fast swipe attack which does medium damage at a close range. They’re not very common and usually you can just avoid them. You should be able to carry everything as long as you have 2-4 free inventory slots depending on what Ammo you’re currently carrying. Once you unlock and leave the building via the north exit the enemies will disengage, leaving you free to walk over to the portal and drop off supplies. This is also a good time to pop into the other three smaller greenhouses nearby to grab healing items, ammo, and a vinyl from within. Below is an image marking all the useful items worth grabbing in this area.
Useful items in greenhouses:
(Optional) The rest of this section pertains to a set of puzzles that isn’t required to beat the game and can only be completed on NG+.
Head to the grassy area east of Greenhouse A to reach a yellow portal (similar to the one we used in the sewers). Run past an otherworldy monster to go through this portal and go to a new section of the other world. Similar to the last time we were here, we have a serious of floating ‘rooms’ that contain otherworldy monsters connected by portals. The path is pretty much linear, just run across each room and through the next portal until you reach a massive gate. Off to the right there is a lever which opens the gate to the room with the glowing pyramids/floating book that we solved the fire pyramid puzzle for back in Section 12.
This time we can interact with the Earth Pyramid. The puzzle works the same way as the fire one – just set up the pyramid so that all 3 sides have the correct visuals as shown in the images below. When everything is in position just rotate the Pyramid so that it’s facing the correct direction – no need to use an item this time. Once you’ve done this the Pyramid will be solved and glowing – head back out the way you came in and head back to the portal to get back to the garden.
Earth Pyramid Front side:

Earth Pyramid Back sides:
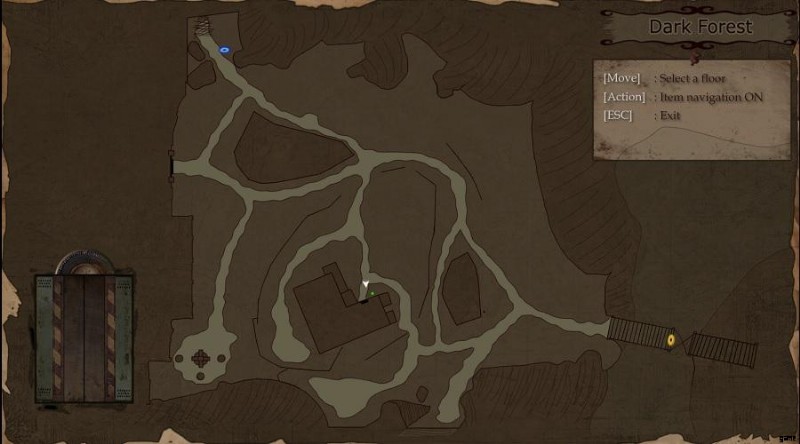
17. Crossing the Graveyard, Exploring the Dark Forest, and Unlocking the Air Pyramid
Head to the portal and manage your inventory before you continue. You want to make sure you have your handgun and plenty of ammo – you can bring the shotgun too if you’re worried about ammo for your pistol. Also make sure you have the GateKeeper key and a few free inventory spaces. Head back to the south side of the large greenhouse by crossing the roof and follow the path south past where you killed the Big Garden Zombie. You’ll have to run past an otherworldy monster to get to a door which takes you to the graveyard. The following area is somewhat different for Fixed Camera mode VS OTS mode:
Fixed Camera:
You’ll immediately see a fountain which has some bandages and handgun ammo sitting on the edge for you to take. Just past it there’s a gate which we can open with the GateKeeper key. This leads on to a long narrow path with several branching side paths. For now, ignore the side paths and stick to the main path as most of these enemies will dissapear later allowing you to get much of the side stuff without killing anything. I recommend killing most of the zombies on the main path with the handgun for safety. At the end there are a few dogs you can run past if you feel confident enough in your juking ability (otherwise just kill them with the handgun). The gate at the end of this path will take you on to the Dark Forest.
Initial graveyard path:
OTS:
Head north past a small fountain to reach a gate which you can open with your GateKeeper key. This opens up to a very large area with tons of Zombies and TONS of ammo. There are breakable barrels all over this place – most of which contain handgun ammo. Take this time now to run around and collect as much of it as you can find (seriously there is a LOT) as this area will get more chaotic later. The zombies should be very easy to avoid in an area this large and open. Don’t worry about going into either of the underground areas (stairs descending into crypts) yet as the items down there will only take up inventory space for now. Once you’ve finished exploring/gathering exit this area to the east via a gate.
The Dark Forest is the same for both camera modes again. Take a left right away to access a portal for inventory management. Make sure you leave with your handgun, holy water and plenty of ammo as well as lots of free inventory space for gathering supplies. While exploring this area you might run into a new enemy type – a big hunched figure with a coffin on their back (I call them grave keepers). They’re not too difficult to avoid in open area’s so if you run into it, just run away. Head towards the cabin and kill any zombies you encounter on your way there. Heading around the right side of the cabin you’ll encounter an otherwordly monster followed by some dogs which can really mess you up on difficulties past easy so I would recommend killing them. Behind them are some shotgun shells sitting on a small cage. Going back around the left side of the cabin you’ll find two zombies guarding some barrels which contain more ammo so kill or juke them and grab it. You can see the location of these items in the image below:

(Optional) The rest of this section pertains to a set of puzzles that isn’t required to beat the game and can only be completed on NG+.
Before going into the cabin, head for the yellow portal on the east side of the map. This will take us once again to the other world. Just like with the Earth Pyramid, run through a few rooms containing otherworldly monsters via portals until you reach a big gate. The lever will be on a small pylon just to the right of the door. This time you’ll be able to interact with the Air Pyramid and it has a similar solution to the others which is shown below. Once you’ve finished, head back out the way you came in and head for the portal back to the Dark Forest.
Air Pyramid front side:
Air Pyramid sack sides:
18. Getting the Bow Gun and Riddle Note
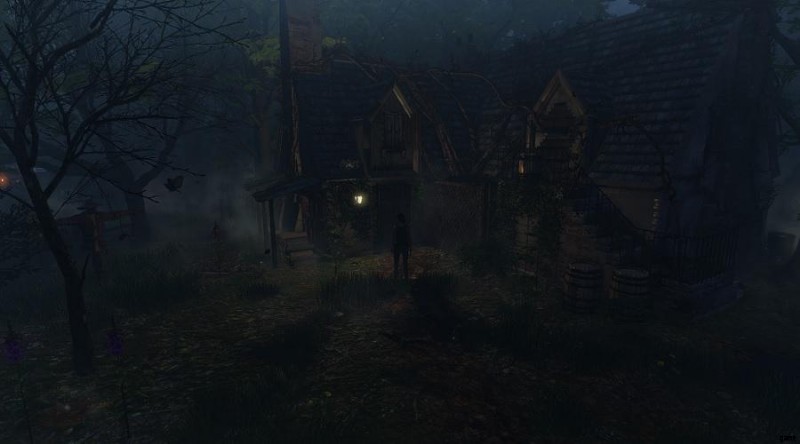
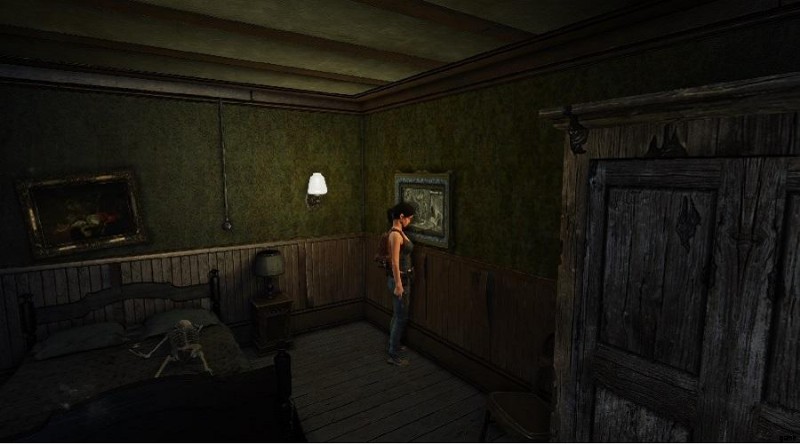
Head back to the portal and drop off your extra supplies as well as your holy water (if you were carrying it). Make sure to pick up the Antique Paper (grabbed from the top of the tower back in section 12) and if you’re on a higher difficulty you might want the shotgun. Then head back to the Dark Forest and enter the cabin through the front door.
Cabin Location:
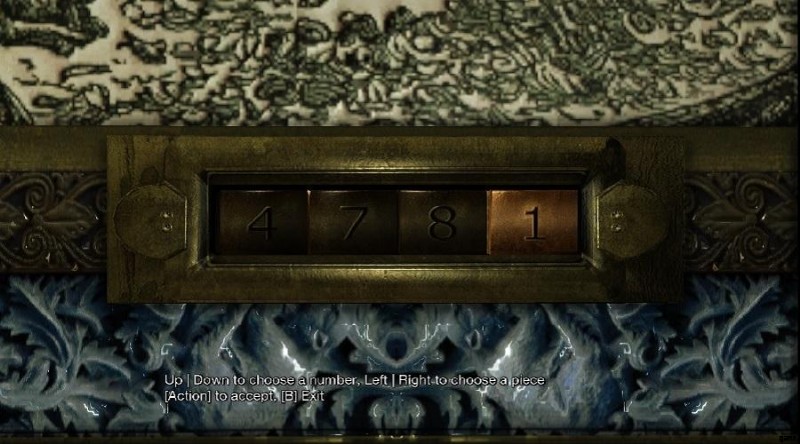
There aren’t any enemies in the house right away, so no need to be cautious yet. Immediately to your left is a safe room with a save point and a bandage. This is a good point to save (since it will have been quite awhile unless you’ve been backtracking to save) and if you need a Vinyl you can find one in the main room immediately to the right. On the wall of the main room is a new weapon – the Bowgun. A mechanism is holding it in place, so head to the back room to find a lore note, shotgun shells, and a paining you can interact with. Interact with the painting to get a hint about years, 4 strange symbols, and the ability to enter a 4 digit number. The code can be obtained by referencing two different notes – Page 11/11 of Dr Arnold Howards Journal and Page 3/11 of Dr Arnold Howards Journal. Page 11 is written in code, but it’s dated 1981 like all the others. You can use this as the last two digits in the code because the final two digits in the code on the painting are the same as the note. In page 3 of the Journal you’ll learn that most of the art is older than 4000 BC. Combining these two clues we know the number must be 4X81 and can guess the final digit fairly quickly (or you can just go read it off the wall of the store room in the Cabin but that’s less fun). Set the number to 4781 and confirm to see a small cutscene where the Bowgun unlocks in the other room, then run back to claim your prize.
Painting/Painting code:
Bowgun location:
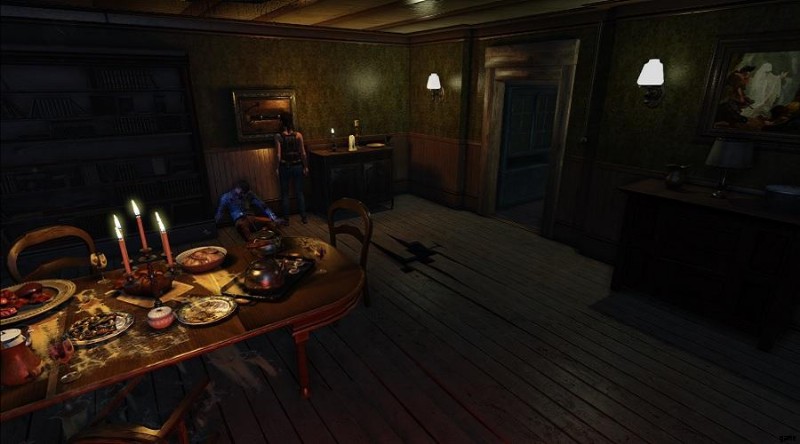
After looting everything in the cabin, head to the blue fireplace in the back room and use the Empty Antique Paper. This will turn the paper into a document you can pick back up from the fireplace that contains hints for how to solve an upcoming puzzle and unlocks the ability to interact with said puzzle. When you pick up the paper, a zombie will burst out of the wardrobe behind you and all the corpses in the building will stand up. We’ve gathered all the items here, so kill only what you can’t avoid and exit the house the way we came in.
19A. (Fixed Camera) Getting the Darkness Medallion and unlocking the Catacombs
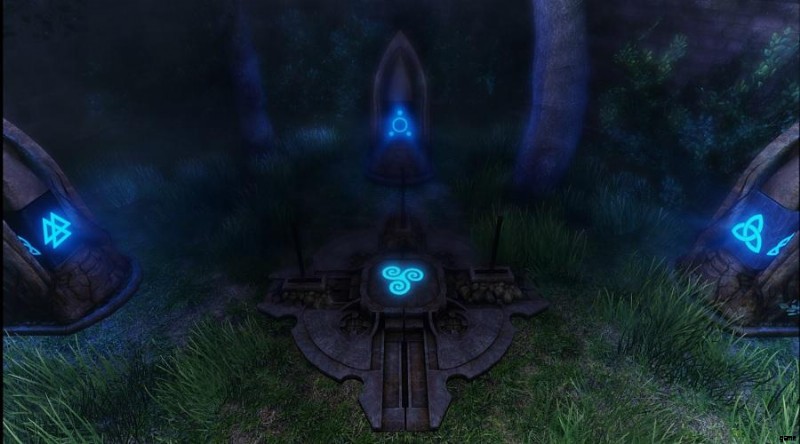
After leaving the Gatekeepers House, head back to the portal to store your bowgun and other extra supplies. Grab your shotgun, a good amount of shells, and a healing item, and make sure you have a few extra inventory slots before heading back out to the Dark Forest. Head to the clearing in the south-west corner of the Dark forest, juking any zombies in your way, to find a group of glowing stones with levers. Use the levers to change the icons on the stone to match the pattern shown below (based off the hints from the note we acquired in the Gatekeepers House). When you have it set correctly the rune in the center will light up and you’ll see a short cutscene of a rune lighting up above the door to the catacombs elsewhere.
Dark Forest Runed Stones location/solution:
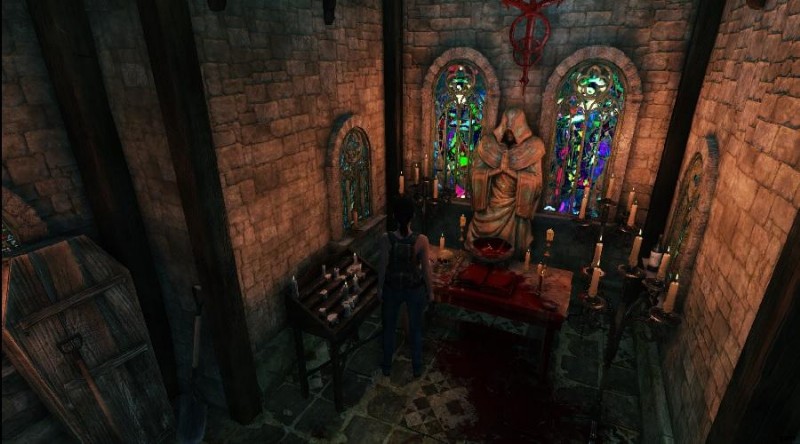
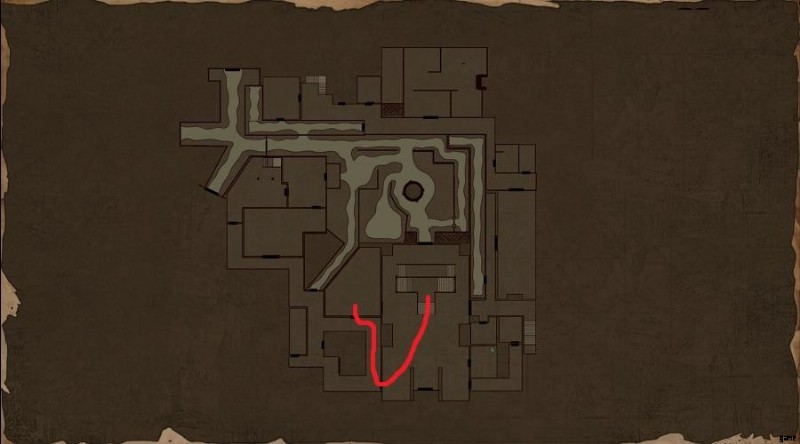
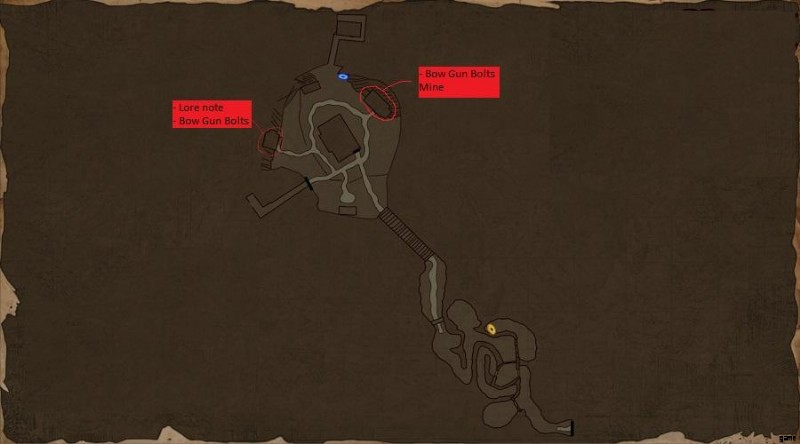
Next make sure you have plenty of shotgun ammo then head back to the Graveyard. Keep in mind that if you didn’t kill the dogs in Section 17 they’ll be right next to you when you enter. You want to run quickly to the door immediately to the right of the entrance from the forest. Once inside, follow the linear path down to the bottom of the tomb to pick up some handgun ammo and a lore note. Upon trying to leave a short cutscene will play in which a gate traps us inside and the body in the sarcophagus on the far side of the room stands up. This is a boss fight and this guy has quite a bit of health. Juke his attacks and use the shotgun to stagger him when you get enough distance to safely fire. After he dies, pick up the “half of a key” he drops and head back out of the tomb. You’ll see a short cutscene of the church bell ringing and the enemies that were previously here are now gone. Some of them have been replaced by Gravediggers or otherworldly monsters, but ultimately there are fewer monsters now. Next head to Tomb B as shown in the image below to find a second tomb. Again follow the linear path to find a lore note and another “half of a key”. Combine the two halfs to form the Church Key, and head back outside. Head straight along the path to the south to the Church and use the Church Key to unlock the door. You can also grab some handgun ammo on the side of the path and shotgun shells from a side path just south of the church door (although you may need to kite/juke Gravekeepers to get them).
The inside of the church is a small room. Head to the altar at the back to find a lore note and the Darkness Medallion. Before leaving, open the back door to the Church with the church key and head out into a small outdoor area with two gravekeepers. You can loot a medical kit and Vinyl record and then kite the gravekeepers away to loot some Bow Gun bolts, handgun ammo, and explosive Bow Gun bolts. Then head back through the church. This is a good time to save, as there’s a save point in the church and you have access to a Vinyl from the backyard. Once you’re done, leave the church and head west through the graveyard back towards the Garden running past any of the Gravekeepers or otherworldly monsters that pop up in your way.
Dark Medallion Location:
Once you’re back in the Garden, head back to the door leading to the Courtyard B (just down the path from where you come in from the Graveyard). Just north of the gate is a small clearing similar to the one in the Dark Forest with 3 more glowing stones. Similar to the puzzle there, use the levers to set the stone icons to the solution shown below, then head through the gate to Courtyard B.
Garden Puzzle Location/Solution:
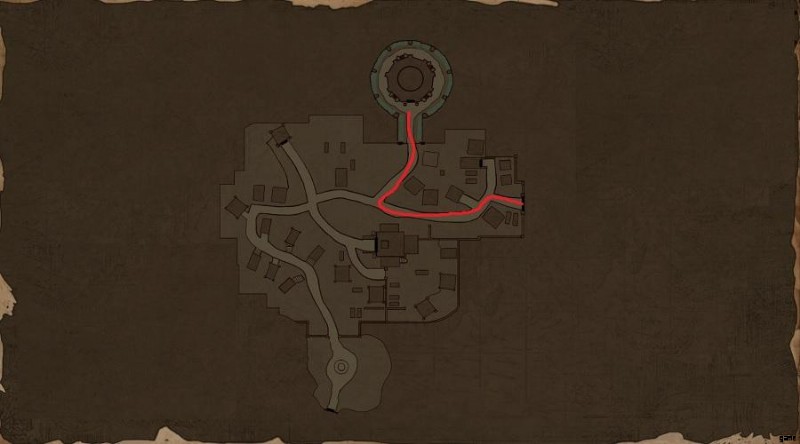
Next we need to head back to the ruins, near where we met Paul. The fastest way to get there is to go through courtyard B and take the first turn on the left side of the path which puts us back in the room where we first entered the sewers. Then head through the door we activated with the lever after helping Paul and down the path to the save room on the north side. It’s a good idea to stop at the portal in the room where we exited the sewers to drop off supplies and the Darkness Medallion on the way. In the save room are 3 more stones. Set these three stones to the solution shown below and you should get a cutscene which shows the door to the Catacombs unlocking.
Ruins Puzzle Location/Solution:


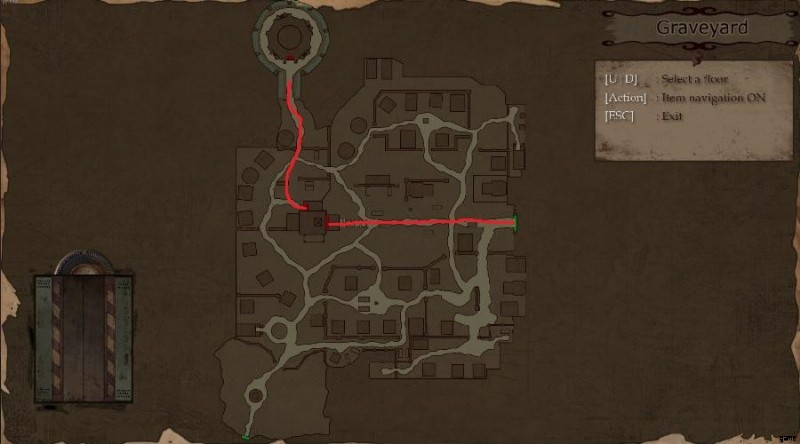
Follow the path shown in the image below to get back to the door to the Catacombs. You’ll be ambushed in the last area by Sickle Guy. You can either kill him with the shotgun or run past him to get to the trapdoor in the tower and he wont follow you downstairs. If you kill him you’ll get the Researcher Key which will give you access to some supplies and lore later on. Once inside head through the door into the Catacombs.

19B. (OTS) Getting the Darkness Medallion and Unlocking the Catacombs
After leaving the Gatekeepers House, head to the clearing in the south-west corner of the Dark forest, juking any zombies in your way, to find a group of glowing stones with levers. Use the levers to change the icons on the stone to match the pattern shown below (based off the hints from the note we acquired in the Gatekeepers House). When you have it set correctly the rune in the center will light up and you’ll see a short cutscene of a rune lighting up above the door to the catacombs elsewhere. Now run back to the portal to store your bowgun and any extra supplies you’re still carrying. You’ll need your shotgun and plenty of ammo for it and if you’re not confident in your ability to juke Zombies you’ll want to bring your handgun too in case you get cornered back in the graveyard. It’s also a good idea to grab a healing item. Make sure that you have at least 2-3 inventory slots available and then head out of the portal and back to the Graveyard.
Immediately as you enter, a short cutscene will play in which the church bells ring and more zombies spawn from nearby graves. They’re still not much threat with how much room you have to move out here. The exits to the Cemetary will also lock so you’ll be forced to finish this next challenge before you can leave. Just north of the East gate you came in from is a crypt and in this Crypt are 6 large statues.
North Crypt/Large Statues:
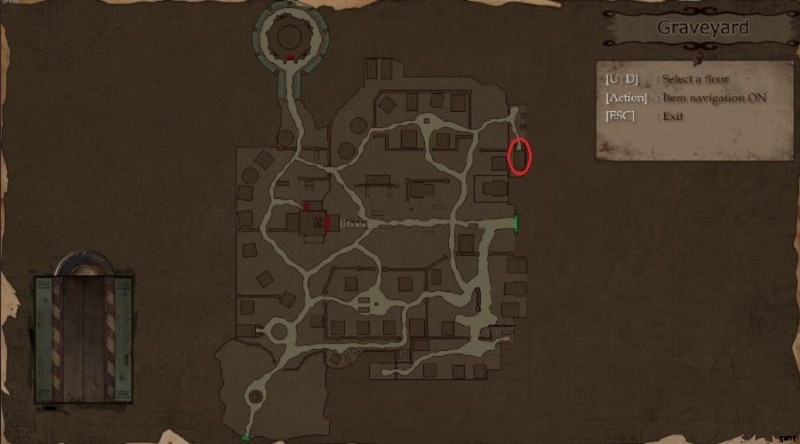

You have to find 6 small statue items that specific Zombies in the Graveyard drop and bring them to these statues – using one small statue on each large one in the crypt. These zombies have a visible glowing medallion around their neck that can be seen from pretty far away as long as they’re facing you and each one will always start in a specific spot. The map below shows the rough starting position of each Zombie that you need to kill, but keep in mind that they do move around even before you get close so some of them may wander away from their starting point before you get to them. It will probably take you 2-3 trips to get all 6 statues down to the Crypt depending on how much inventory space you have available so don’t be afraid to kite zombies away from it if you need to prevent them from cornering you inside.
Zombie with Statue/Special Zombie starting locations:
Once you have all 6 in place a gate will close and lock you in and a sarcophagus will open at the far side of the crypt which contains a corpse, a lore note, and some handgun ammo. Take these and walk back towards the entrance to trigger a cutscene where the corpse stands up. This is a boss fight similar to the one back in the courtyard except this time we have a shotgun. Kite the boss and fire when he slows down for an easy kill, then pick up the Half of a Key up off his body. To get the other half, head across the graveyard as shown below. More Zombies have spawned and there are some Grave Diggers here now, but it should still be pretty easy to get through without taking damage or using ammo.
Path to South Crypt:
At the bottom of the short stairs you’ll find the other key half, a lore note, and a Vinyl. Grab these and combine the two parts of the key to form the Church Key and head back out to the Graveyard. Go to the Church at the center of the area and use the Church Key to go inside. Resist the urge to inspect the corpse hanging from the bell (it will fall and turn into a Zombie) and grab the lore note and Darkness Medallion from the Altar across the room. Make sure to unlock the back door and if you have inventory space you can go through it to grab a few supplies from barrels outside (although we’ll be back here later if you don’t). Once you’re done, leave the church and head south through the graveyard back towards the Garden.
Dark Medallion Location:

Once you’re back in the Garden, head back to the door leading to the Courtyard B (just down the path from where you come in from the Graveyard). Just north of the gate is a small clearing similar to the one in the Dark Forest with 3 more glowing stones. Similar to the puzzle there, use the levers to set the stone icons to the solution shown below, then head through the gate to Courtyard B.
Garden Puzzle Location/Solution:


Next we need to head back to the ruins, near where we met Paul. The fastest way to get there is to go through courtyard B and take the first turn on the left side of the path which puts us back in the room where we first entered the sewers. Then head through the door we activated with the lever after helping Paul and down the path to the save room on the north side. It’s a good idea to stop at the portal in the room where we exited the sewers to drop off supplies and the Darkness Medallion on the way. In the save room are 3 more stones. Set these three stones to the solution shown below and you should get a cutscene which shows the door to the Catacombs unlocking.
Ruins Puzzle Location/Solution:
Follow the path shown in the image below to get back to the door to the Catacombs. You’ll be ambushed in the last area by Sickle Guy. You can either kill him with the shotgun or run past him to get to the trapdoor in the tower and he wont follow you downstairs. If you kill him you’ll get the Researcher Key which will give you access to some supplies and lore later on. Once inside head through the door into the Catacombs.
20. Exploring the Catacombs
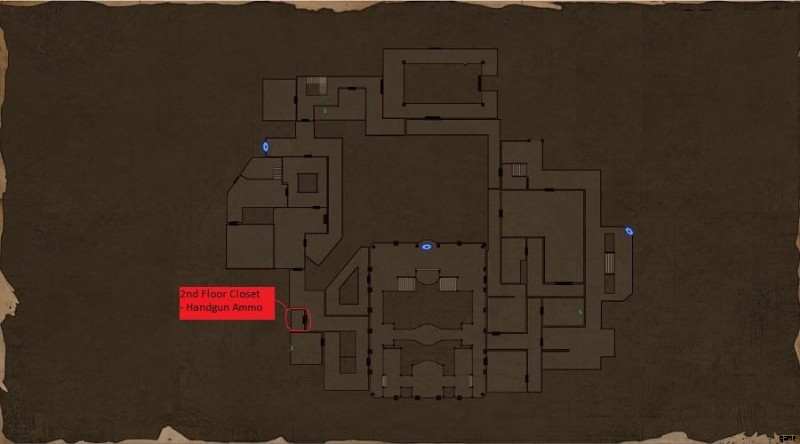
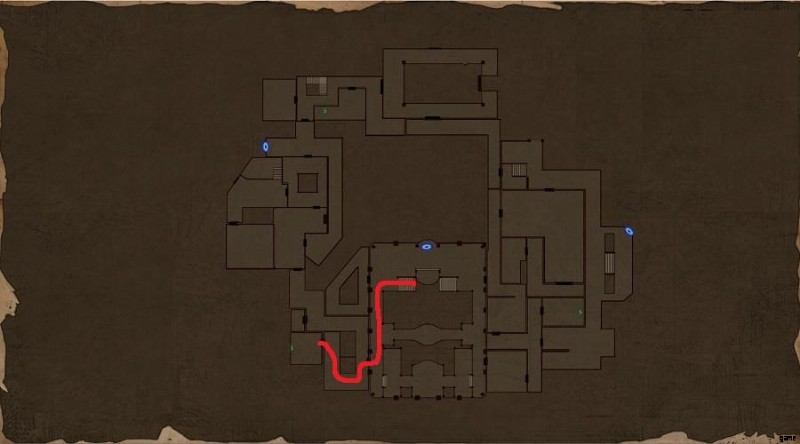
We’re now in a small underground area. A short cutscene will play after you enter, then head forward down the hall grabbing the ointment on the right hand side shortly after the first turn. In the room at the end of this hall, you can find a lore note, some shotgun shells, and an Elevator Gear. Make sure you grab the gear off the table in the middle of the room – you’ll need it in a bit. Once you’re done in here, head through the door on the south side of the room.

In the next room, ignore the bandages on the other side of the room unless you really need healing items as that will bring an otherworldly monster into the room. Head down the hall to the east and grab the Bow Gun bolts on the left side as you go down. Grab a lore note from a cell on your left and turn left at the intersection ahead to enter another room which has a few items and a portal. Take all the supplies in this room and store excess items in your box via the portal. Next return to the hall south of the portal room and continue east to grab the medium banadge you skipped a moment ago if you’re low on healing and run from the ambush. If your inventory is full again, store supplies and then head out the door on the east side of the portal room.
(Optional) At the end of the hall leading towards the portal there is a door guarded by a Grave Keeper. If you killed Sickle Guy in the previous section you can use the researcher key you picked up from his body to open this door. Inside there is a Lore Note as well as some MAC Ammo for a gun you can acquire later on. There’s also an Otherworldly Monster in here so grab everything and get out quick.
The next hallway has a Gravekeeper at the beginning and end as well as an otherwordly monster ambush in the center. If you’re good on your juking you can get past all 3 without using any ammo, but if you’re worried about dying you can kill some of them with the shotgun. I don’t recommend killing all 3 because 12-16 shotgun shells is a lot of ammo. Get to the very end of the hall and take the door to reach the elevator room. This room has some explosive Bow Gun bolts and a small bandage on the table in the center as well as a Vinyl. Grab these and then use your elevator gear on the mechanism to the right of the elevator door on the south side of the room. The elevator will come down to your floor and you can use the elevator buttons on the left side of the elevator to get back into the mansion. Keep in mind that you wont be able to leave again for awhile after taking the elevator so make sure that you take care of anything you need outside the mansion before taking this.
Elevator Mechanism:
21. Clearing the West Mansion, Getting the Dark Room Key and the Pluto Key
The elevator takes us up to the Main hall of the mansion. The doors leading to the inner courtyard and East hallway on the first floor are now locked, but some of the doors previously locked are now open to us. There’s a portal on the second floor of the main room – use it to store supplies. Put away your shotgun for now – we’re only going to deal with zombies for awhile – and get out either your pistol or Bow Gun (regular bolts).
Head to the first floor and follow the path:
You can juke or kill the zombie in the hall depending on your ammo. In the supply room at the end of the hall, make sure to grab the bow gun bolts by the door first, then grab the pluto key from the back of the room. A zombie will stand up behind you, juke him and head back to the main hall.
Our next objective will be taking us to the West Wing of the Mansion. This area is seriously full of Zombies – mostly regular Zombies with a few Bloated Zombies here and there. You’ll want to kill most of these on both the first and second floor as you’ll be moving through these areas a lot in the upcoming sections and you wont want to have to repeatedly juke past them. While doing this, you can path to various optional rooms to gather supplies, which are shown below:
22. Unlocking the Back Half of the Mansion and the Earth Key
Head back through the main hall – stopping at the portal to drop off/replenish supplies as needed – and back to the second floor. Follow the path shown below to reach the 2nd floor guest room.
in this room you can find some shotgun shells, a lore note, and Nebra Moon (half of a key item that will unlock a room for us later) sitting out in the open. You can also interact with a small blue bag sitting on a chair in the far corner to receive two more items including a vinyl. This is a good time to save if you haven’t in awhile as there is a save point in this room. Either way, head back to the main hall at this point and drop off the Nebra Moon in your storage. We’re heading towards more dangerous enemies, so grab your shotgun and bring plenty of shells and at least one healing item, then head down to the first floor and follow the path shown below:
There are a few items in this multi story room – grab them and head to the second floor. On the north wall there is a door which gives a warning when you interact with it that the lock is broken. This means that once you go through, you wont be able to come back this way – not a big deal as we’ll have another way back soon. Go through the door and you’ll find yourself in a small intermediary room from the beginning of the game.
At this point you’re going to start encountering a new type of enemy I call the cultists. They’re quite fast, hit fairly hard, and have great range on their attacks. They’re also able to change direction mid attack at a rate faster than most enemy attacks. This makes juking them very difficult – although it is still possible. There are also versions which carry axes that have more health and a ranged attack, as well as version in red robes with even more health. I recommend killing the ones in your path and avoiding any that you don’t have to get past. The shotgun is by far the most effective weapon against them as it staggers them, allowing you to keep them away from you.
Follow the path shown below – you will encounter many cultists:
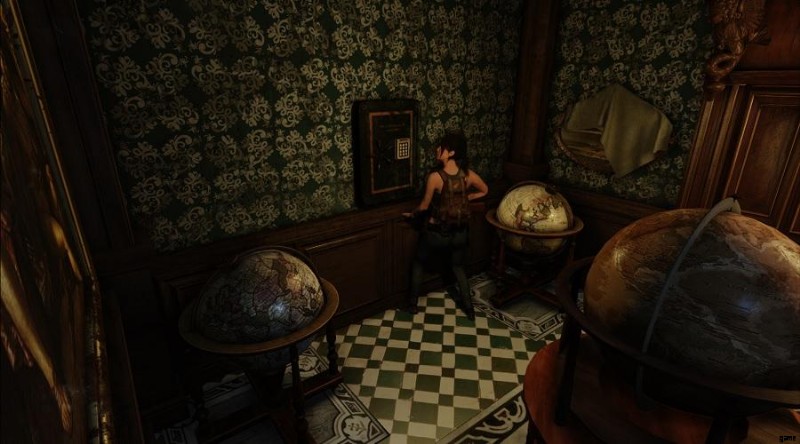
Once you reach your destination you will find yourself in a small room full of globes and paintings. Grab a bandage off the floor in the corner and then interact with a safe on the west wall. The safe code is based off the 4 numbers on the floor next to the Athena statue – although their order is unclear there are not many possible combinations given that the digit 1 repeats. Enter the code ‘1701’ and hit enter. The safe will open and you’ll find the Shield of Faith inside. Take it, and head back out the way you came.
Follow the same path you took to get here back to the room with the statue head and book. Unlock the door marked in the image below and use it to head back to the second floor west hallway, then follow that back to the main hall and use the path marked in the next image to reach the west side art room. Be careful as the room right before the marked destination now has a cultist in it (previously it was empty).

In the center of the room there are a few statues. Two of these have a riddle written on them, and another has a circular space for an object. Use the Shield of Faith on the circular space and the statue on the opposite side will drop the earth key on the ground for you. Break the barrel on the north side of the room for some bowgun bolts and grab the key and head to the south side of the room. Unlock the door to open up a small shortcut through the bar and head back to the main hall to drop off supplies and restock on shotgun ammo before moving on.
(Optional) During this section there are a few rooms you have access to which you don’t need to enter to complete the game, but contain supplies which you might need. These rooms are shown below:
23. Getting the Minerva Key and Angel Medallion
Make sure you still have shotgun ammo and healing as needed, then take the earth key and head to the second floor. Follow the path in the image below. Try to collect as much ammo as you can while you travel.
In the room at the end of that path you’ll find two zombies as well as a few supplies and a Nebra Sun. Kill the zombies, take everything and then unlock the door on the west side of the room and head through it to return to the main hall. Head back to the portal store your Earth Key (we wont need it after this) and grab your Nebra Moon out of storage. Combine it with the Nebra Sun to create the Nebra MoonSun and then follow the path in the image below.

Keep in mind that a zombie will be at the top of the stairs when you reach the end of the path. Kill or juke him and head to the south end of the room to find a door with a circular indentation. Use the Nebra MoonSun to unlock the door and head inside. In the small study you’ll find a Vinyl disc, a lore note, and the Minerva key sitting on the desk. Take the key and head for the door. You’ll get a short cutscene when you get near the door where the phone rings, and after it ends you can leave and head back to the main hall the same way you came.
Next, head back to the east side on the second floor and out to the balcony by following the path in the image below. Make sure to bring plenty of shotgun ammo and a healing item, as you have a big fight coming up. As you move through the balcony you’ll have room to dodge the zombies, but if you have bow gun/handgun ammo to spare you can also kill them to make moving around this area easier. When you’re ready – enter the door at the end of the path.
Now we’re in a large room with 3 cultists, 1 regular cultist, 1 red robed cultist, and one axe throwing cultist. You only need to kill the red robed cultist, but as he has the most health and is in the back you’ll probably have to kill all 3. Don’t be afraid to retreat from the room and grab more supplies from the portal on the balcony if you get into trouble as they can kill your rather quickly if they catch you in a corner without a healing item and their health does not reset when you leave the area. Once you kill them, pick up the Angel Medallion, unlock the door on the west side of the room and use it as a shortcut to head back to the main hall so you can store it in your box.
(Optional) During this section there are a few rooms you have access to which you don’t need to enter to complete the game, but contain supplies which you might need. These rooms are shown below:
24. Getting the Vesta Key, Wire Cutters, Red Emerald Key and the Evil Medallion
Back in the main hall, make sure you have the Minerva Key and follow the path in the image below to reach the electricians bedroom. Here you’ll find a lore note, some ammo and the Vesta Key.
Head back out of the room and down the stairs, then follow the path in the image to the right to the dinning side supply closet. Inside there is a zombie, some handgun ammo, some bow gun bolts, and wire clippers. Grab whatever you can carry, but make sure to get the wire clippers – then head back to the main hall to store them (and any extra supplies you’re carrying). Make sure you have plenty of shotgun ammo (as usual at this point) as well as a few free inventory spots and head back to the west side art room (path shown below). Use the Vesta key to unlock the stone door on the east side of the room to exit into a small fenced area in the inner courtyard.
In this small area you can loot some shotgun ammo, a lore note with a clue for a future puzzle, and another Immitation Lions head. Hit the lever immediately to the left of the door you came in from to unlock the gate and allow you access to the inner courtyard again – then go through the gate. Head over to the fountain in the center of the courtyard and use the imitation lions head on the point where the original Lions head came off earlier in the game. This will cause the fountain to spit out the Red Emerald Key. Grab the key, and then head to the gate down the path on the west side of the courtyard (near where you entered the courtyard from the bedroom side).
Door Lever/Imitation Head placement:
Be careful when going through the gate as there are 2 cultists in this area – 1 regular and 1 red. If you take a few steps forward they will engage. Kill them and loot the Evil Medallion off the Red Robed Cultist. At this point, if you didn’t bring the Angel Medallion or if you’re out of inventory space – backtrack to a portal to store extra stuff and/or pick up the Angel Medallion then come back to begin the next Section.
25. Getting the Nautical Rope, Light Medallion, and Signet Ring
Make sure you have the Angel Medallion and the Red Emerald Key and head to the south side of the small clearing that you kill the Red Cultist in for the Evil Medallion at the end of the last section. The door is locked but there’s a small circular indent on the wall to the right of the door. Use the Angel Medallion on this indent to unlock the door. You’ll find yourself in the Courtyard A, near where we found the hidden key note right after leaving the mansion the first time. The enemies in most of this area have been removed, but Sickle Guy is here now to pursue us. Follow the path marked below to find the Red Emerald Door and use your Red Emerald Key to unlock it.
Medallion slot location/Path to Red Emerald door:
(Optional) You can kill Sickle Guy like before to get an optional key that unlocks access to extra supplies/lore. This one also gives you access to story elements that effect your ending. He takes quite a bit of shotgun ammo to bring down, but if you kill him you’ll get the Purple Emerald Key. Follow the path below to reach the purple emerald door nearby and continue down that path to find a small gazebo with a corpse, a few supplies, and a new weapon – the MAC submachine gun. This thing has some serious power but ammo for it is extremely rare so save it for a special occasion.
After approaching the corpse a short cutscene will play where Alicia inspects it. Leaving this area and returning will cause the corpse to animate. It has more health than a normal Zombie but isn’t very dangerous so make sure to come back and kill it for the Ceres key which can unlock a secret room in the mansion. You can also head down the path opposite the gazebo for some extra ammo although you’ll have to avoid some monsters. After this, return to the path heading to the Red Emerald door.
Once in the small maze-like area, head down to the south-west corner to find the Nautical Rope on a small bench. There are a few plant-dogs here, if you can avoid them – great but if Sickle Guy is nearby and they’re in your way it might be better to kill them with the shotgun for safety. Once you have it, head all the way back the direction you came to get back inside the mansion by where you used your angel medallion – which you can reclaim from it’s position. Take the Angel Medallion and the rope and head back to the main hall.
Nautical Rope Location:

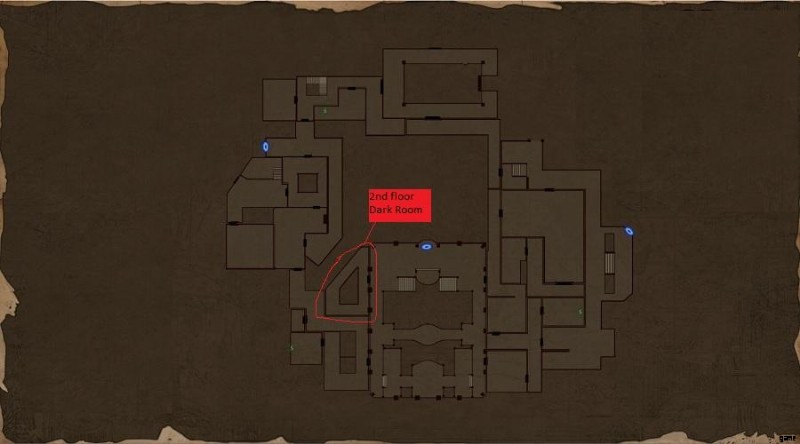
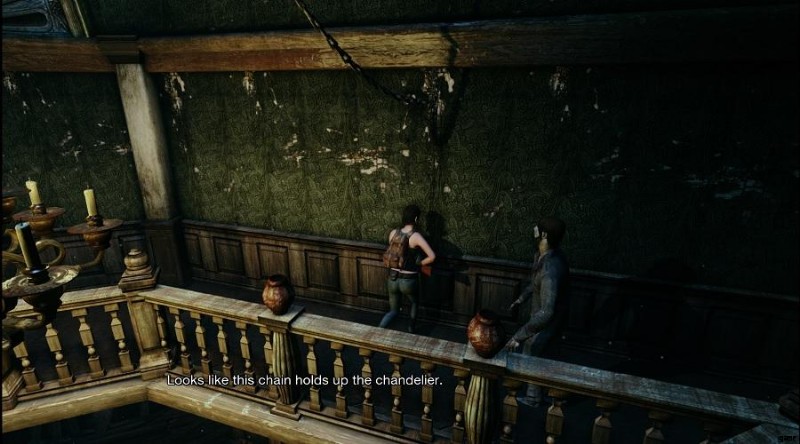
Drop off your Angel Medallion and grab your Bolt Cutters out of the box. Once again, make sure you have shotgun ammo (or explosive bow gun bolts) and then head to the 2nd floor Dark Room marked in the image below. Kite the zombie away from the far side and use the bolt cutters on the chain hanging on the far wall to release the chandelier which will then smash a hole in the floor on the first floor of this room.
2nd floor Dark Room/Chandelier chain:
Next follow the path marked below to head down to the first floor dark room. Be careful as once you cut the chain above, a red robed cultist and two zombies spawn in this relatively small area. Kite them in circles and use your shotgun to take them out.
This Red Cultist doesn’t drop anything, but once you’ve killed them, use the rope on the hole in the floor create a path down, then interact with the hole again to climb down into a previously inaccessible part of the catacombs. Around the corner from here is the Light Medallion resting on a sarcophagus. Take this Medallion and head through the door at the end of the short hallway, then take a left and head to the catacombs portal room and head inside to drop off extra supplies and pick up all four medallions (Light, Darkness, Evil, Angel). It’s also a good idea to make sure you’re stocked up on shotgun/explosive bow gun ammo for what’s coming up next.
Light Medallion:

With all of the Medallions in our possession we now need to head back to the graveyard. The quickest way to get there is to use the trapdoor which connects the elevator room of the catacombs with the cabin in the Dark Forest. The elevator room now has a miniboss wielding a chainsaw. Killing him will allow us to reactivate the elevator but we don’t actually need to do that and he has a lot of health so simply run past him to the trapdoor on the far side of the room from where you came in.
Once you’re in the graveyard, follow the path appropriate for your camera mode
Fixed Camera:
OTS:
This will take you to some kind of mausoleum. The door is locked but there are 4 circular slots on various parts of the structure that you can socket your medallions into. Each slot has a text hint for which Medallion it’s for. Going clockwise around the building, the Medallion order is:Darkness, Angel, Evil, Light. You might have to avoid an otherworldly monster as you place them, but you should be able to kite him around the circle if you need. Once all 4 are in place the front door of the building will unlock and you can head in.
Inside the building there’s a coffin on the far side of the room containing a skeleton and an item. Take the Signet Ring from the coffin and then use the same route to travel back to the catacombs and use the rope to ascend back into the Mansion to avoid having to kill the miniboss in the elevator room.
26. Exploring the Swamp and Unlocking the Water Pyramid
(Optional) Before we leave the Mansion for the last time, take the time to go use the Ceres key if you retrieved it in the previous section. Travel on the path marked in the image below to a small room containing a few supplies and a Letter to Paul. This letter will effect the ending you get at the end of the game, but all you need to do is pick it up.
Stop by the portal room and prepare to head to a new area. You’ll want to kill a lot of zombies so bring your handgun or bow gun with regular bolts. Also make sure you bring both the Signet Ring, the Lighter, and your holy water bottle with you. Follow the path below back to the outdoor area where we acquired the Evil Medallion and take the north exit.
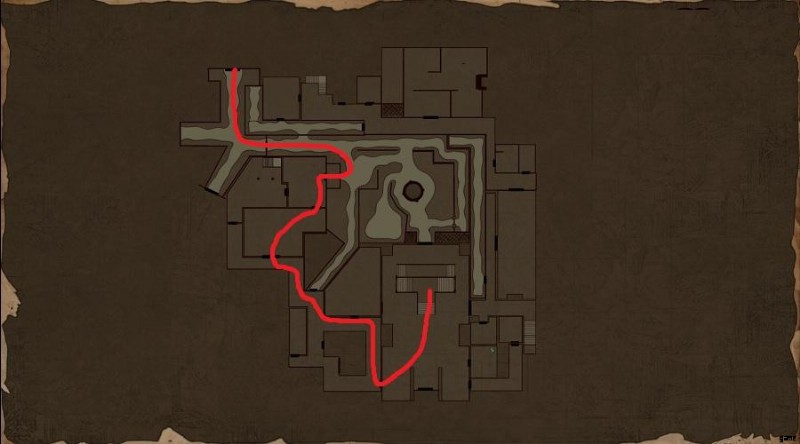
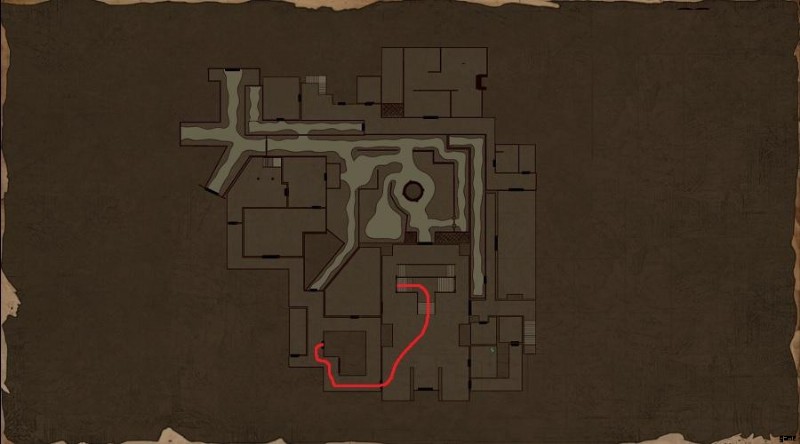
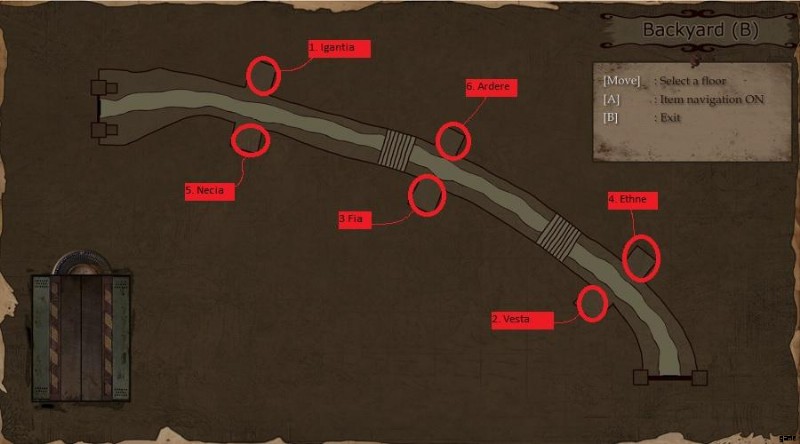
This brings us to a new area, the backyard. It’s a small linear path which connects the Mansion to the swamp. There’s a locked gate at the far side and 6 fires, each labeled with a name. You need to use the lighter to light the fires in the correct order which is:Igantia, Vesta, Fia, Ethne, Necia, and Ardere. The image below shows the fires locations named and numbered. If you light a fire in the wrong order, you’ll have to light all of them at which point they will all go out and you can start over. Once you activate them in the right order the door at the west end of the path will unlock and you can head through it to enter the swamp.
The swamp is a mostly linear path with a few branching side paths. Most of the treck is full of zombies and a new enemy type – frog zombies. They have a special acid spit attack that has much greater range than bloated zombies and they move faster than a regular zombie as well. Make your way forward into the water, killing or juking zombies as you go, and shortly down the path north you’ll find a small circular room which has two bloated zombies inside. At the north end of this room is a gate which has a small panel to it’s right. Use the signet ring on the panel and it will open – but don’t go through just yet – this gate will close behind us after we go through. There are two sidepaths in this first area – one directly west of the gate and another along the path we came up from the south. Both contain ammo and are guarded by 1-2 zombies so kill/juke the zombies and grab the supplies before going through.
(Optional) The rest of this section pertains to a set of puzzles that isn’t required to beat the game. The purpose of these puzzles is still unknown but It seems very likely they tie in to an ending that hasn’t been found yet. If you don’t want to bother with it you can just skip straight to the next section.
Immediately after passing through the gate cut through a gate to the right. Kill or juke the zombies in your way and make you way to the yellow portal behind them. This otherworldly platform has two paths, one leading up the hill to the left and another going off to a portal to the right. Head through the portal on the right and then keep going just like the other area’s until you reach a gate. Hit the lever on the pylon to the open the gate to the Pyramid room. Arrange the Water Pyramid based on the images below and it should be solved similarly to the others – then head back out to the swamp.
Water Pyramid Front Side:
Water Pyarmid Back Sides:

27. Unlocking the Cabin
Once back outside, return to the gate you opened with the signet ring and continue down the path to the north. Kill enemies as you come across them (which will be zombies, frog zombies, and bloated zombies) until you reach the large clearing on the north end of the map. We need to get in the cabin in the center, but it’s locked up tight. To open it we need to head to the small dock on the north end of this clearing, but first we should run around and grab supplies. The image below shows where you can find items in this clearing and you can use the portal to store items if your inventory fills up (we don’t need the ligher or holy water anymore).
Once you’ve taken what you need, head to the dock on the north side of the clearing. Inside the small cabin you’ll find some ammo, a lore note, and a Cabin Key. You can also go around back to find another zombie guarding some shotgun shells. Take what you can but make sure to grab the key and then head south back to the clearing. As soon as you get close to the Cabin Door, a cutscene will play and Alicia will be ambushed by Sickle Guy. She’ll run inside the Cabin and block the door. After you regain control, head to the back of the small room and through the door, then down the short hallway to trigger another cutscene. Alicia finds a child in a cage and it turns out to be her daughter. She tells us to run, but before we can do anything we see outside a huge mob of cultists and zombies are approaching the Cabin.
We are tasked with finding a key to the cage and given 1 minuite to do so. Head downstairs and start interacting with all the items against the wall (desks, boxes, dresser, etc). The key will be in a random object so just start on one wall and go clockwise and you should find it in time. Once you find it, Alicia will run back upstairs but her daughter is gone so she’ll sneak out through a trapdoor in the basement.
28. Exploring Ailfrydtown as Paul
When the screen fades back in we’ll see a short scene of Paul walking through the forest looking for his partner. We get to play as Paul now as well as use his two new weapons – the Revolver which is a 6 shot pistol that does more damage than a normal handgun a Silver Falcon which is a 6 shot Magnum that does an extremely high degree of damage. He also has a knife, some extra revolver ammo and a Medkit.
Continue down the dirt path until you reach a sign that reads Welcome to Ailfrydtown. Continue down a linear path past some buildings until you reach a cutscene in which alarms start going off and enemies spawn around the area. There are two ways to progress from this point – either wait 8 minutes for the miniboss to spawn, or kill all enemies which causes him to spawn early. Ailfrydtown starts with the linear path leading from the entrance with a few side branches up to a large building with the words “Join Us” written on the door. From here you can go right or left and this forms a big loop you can use to kite enemies.
At the start you only have a handful of Zombies and one dog to deal with. Kill the dog since it will be very difficult to kite and then either start killing zombies or run away. After a certain amount of time 4 dogs and a chainsaw wielding enemy will spawn no matter how much killing or running you have done – these are fast and will chase you down, so whether your plan is to kill them all or not, kill these. There’s a lot of revolver ammo all around this area and a few bandages/ointment. Feel free to run around and pick these items up while you fight/kit. Especially on higher difficulties you want to make sure you find the two Silver Falcon round items – one in a building immediately down the left path from the main building, and the other next to the windmill all the way at the back of the area.
SF Round Locations:
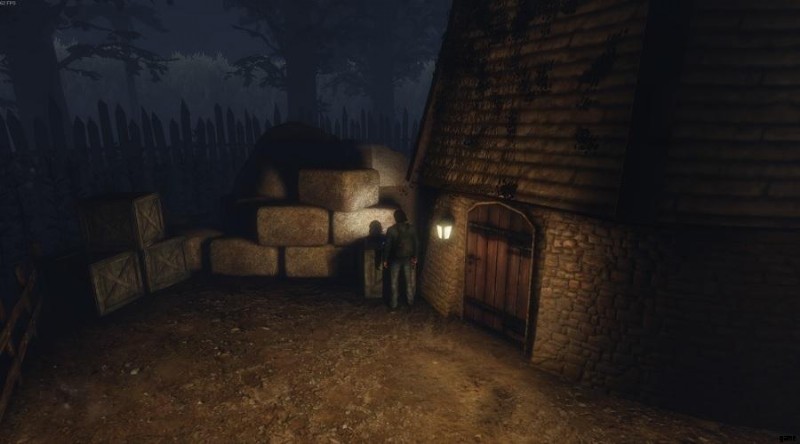
When the Chainsaw guy finally spawns, he’ll appear on a short side branch back towards the beginning of the area before you reached the “Join Us” door and the loop. You can backtrack to find him, but he’ll know where you are and head towards you either way. Switch to the Silver Falcon and use 6-10 bullets to kill him and take the Padlock key he drops. Head to the farm area at the back of the loop and take a left down a side path before reaching the windmill all the way at the back to reach a small storage shed. The padlock key will open it and inside there is a lore note that gives Paul a lead to Skull Island. This will end the Paul segment and return us to Alicia.
Storage Shed location:
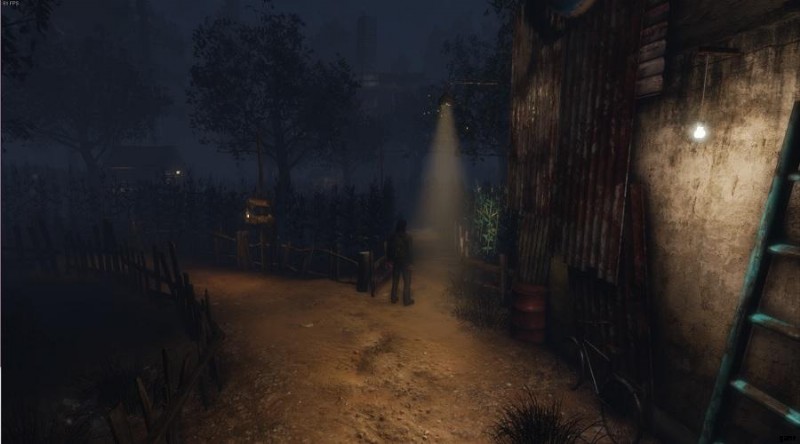

29. Return to the Ruins and the Short Endings
We return to Alicia getting off her boat on a small dock in a previously inaccessible part of the Ruins area. If you head down the path leading away from the dock, you’ll find yourself in the area we first saw Paul fighting Otherworldly Monsters – except this time we’re on the far side of the gate. Take the door to our right as we enter to reach another path. Head a short distance down this path and you’ll see a small tower on the right. At this point, you’ll have to decide which ending you want to go for:For the shorter endings (Very Bad, Bad and Neutral) continue straight from here to Pauls Helicopter, or to get the Longer Ending (Good) take a right into the tower.
Good:
Inside the tower you’ll see a bandage on a body and next to it a table with a lore note and a map to Skull Island. If you interact with it Alicia will comment that it’s not far from here and now you can head back to the boat to continue to the next section.
Skull Island Map:
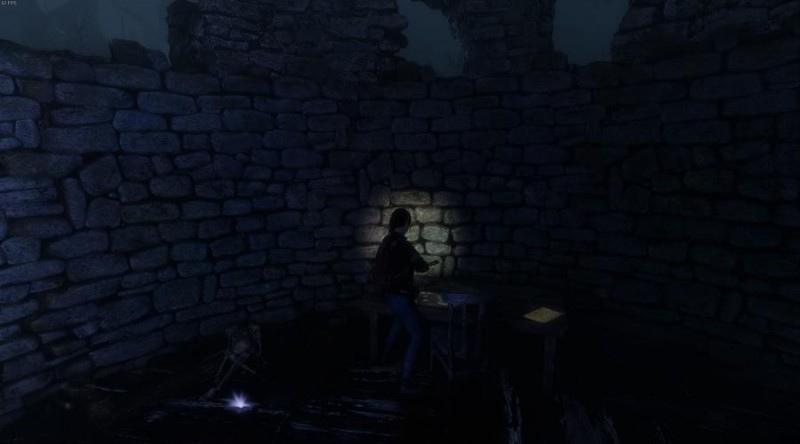
Very Bad/Neutral:
Continue down the linear path until it forks. If you want a bit of extra handgun ammo you can take a right and break some barrels at the end of the side path, otherwise take a left and keep going until you reach a small clearing with a Helicopter. Approach the door and interact with it to use the radio to contact Paul and ask him to return and escape. He’ll agree but he has to head back to you and while you talk 2 Cultists and an Axe Cultist will emerge from the ruins and attack you. Kill these 3 enemies and Paul will arrive and it will trigger a cutscene where you escape in the Helicopter. This will trigger the end credits after which you’ll get an Epilogue for either the Very Bad ending or the Neutral ending depending on whether or not you found the letter for Paul in the Ceres key room as described in Section 26.
Helicopter Ending:
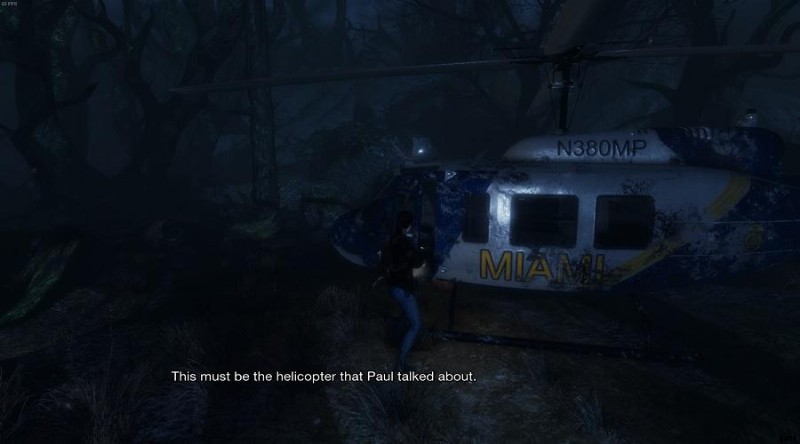
Bad Ending:
Do NOT go into the tower and inspect the skull island map or you will be unable to get this ending without reloading a save. Instead, go to the helicopter and interact with it, but select no when asked if you want to radio Paul. Head back the way you came and when you enter the small room with the green fountain you’ll be trapped inside with our good friend the Gatekeeper. This fight is much like the 3rd encounter where he has a Sickle throw and chain whip attack but in a much smaller space. I recommend using the shotgun or bowgun for this fight as he’s pretty fast and the arena is pretty small. Once he’s defeated the exits to the room are unblocked and you can head back to the boat we originally arrived to this area on. Using it will transition us to another first person segment, this time as Alicia. Like in the previous one we need to interact with a series of objects in a specific order.
First inspect the sink across from the bed, then a security camera on the ceiling to the right (you will have to get fairly close to it to interact with it) and beneath the security camera is a table with a pot of flowers on it to inspect as well. Walk around a bit after doing this and Alicia will turn the face the window after hearing a noise. Approach the window and interact with it to look outside then resume walking around until Alicia hears fighting and looks at the wall by her bed. Walk over to the wall and inspect it then interact with the medicine tray sitting on the cart immediately to your right. After that, walk around a bit more until Alicia gets distracted by another noise at the door. Inspect the door and then approach the medicine tray again and interact with it to be given an option to take the pills. Choose yes and then go interact with the bed to go to sleep and earn the Bad ending.
Sink/Security Camera/Flower Pot:
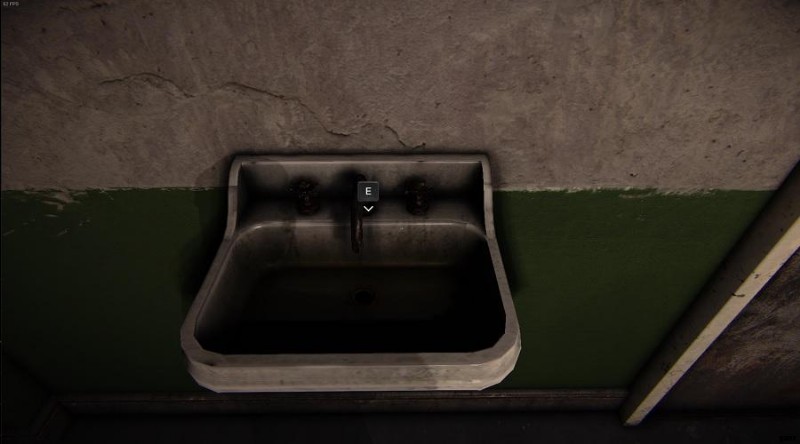
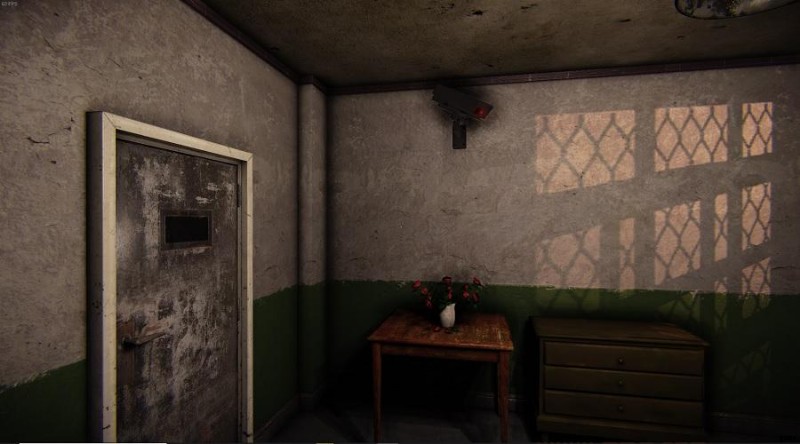
Window/Door:
30. Exploring the Cathedral and Getting the Plaque Piece
Upon arriving on skull island you’ll quckly see a Phonograph and Vinyl nearby on the dock. Use this to save if you haven’t in awhile and then head up the linear path leading to the Cathedral. As you go you’ll encounter a cutscene giving us a closer view of the massive structure at the end of the path and further on you’ll find a portal next to a skeletal effigy which has some shotgun ammo on it. Grab the ammo and use the portal to store any excess supplies. Make sure you have some potent weapons on you (shotgun, bowgun with special ammo) and head up the path and into the building.
A cutscene will play that shows the cult leader giving some kind of speech. Alicia tries to spy on him but he notices her and leaves. The cutscene ends and we are trapped in the room and surrounded by 5 cultists! Fortunately, we’re only attacked by the few that are closest to us, so if you don’t move around the room too much you can engage them 1-2 at a time and take them out with your shotgun/bowgun. The barriers that block the door will disappear when you kill 4 of the 5, so you can either kill the 5th to explore the room safely or kite him around while you grab the ammo and bandages along the edge of the room. When you’re done – head through the door against the far wall of the room to proceed.
After passing through a short intermediary hallway you’ll find yourself in the Cathedrals central room. 3 bridges connect a central platform to the outer wall, each with a door leading to a different part of the Cathedral. You’ll enter from one of these platforms and will need to head to the bridge on your left first to reach the mess hall. Take a quick right after you enter and then keep straight – passing through a door and heading into a another hallway. Head straight down this new hall and take a left at the end – killing or juking the cultist at the end to grab shotgun shells off the chair next to him before heading through the doors nearby. These doors actually take us to the room we’ve been accessing via a portal all this time so take this opportunity to drop off/pick up supplies and head back out into the hall. Go back to the intersection you came from and head the opposite direction and take the door on your right before the hall turns away. This will take you to a safe room which contains a Vinyl, some ammo, a sneaky lore note wedged between a bed/nightstand, and on the far end of the room is the Cathedral Key. Grab these supplies and head back out into the hall. If you’re not confidnet about your ability to juke Cultists, pop around the corner from the safe room and kill the cultist there as we’ll come this way from the other direction later. You can also grab the medkit on the bench nearby, drop off supplies at the box if you need and then head back out of this hall the way we originally entered.
Safe Room Door/Cathdral Key:
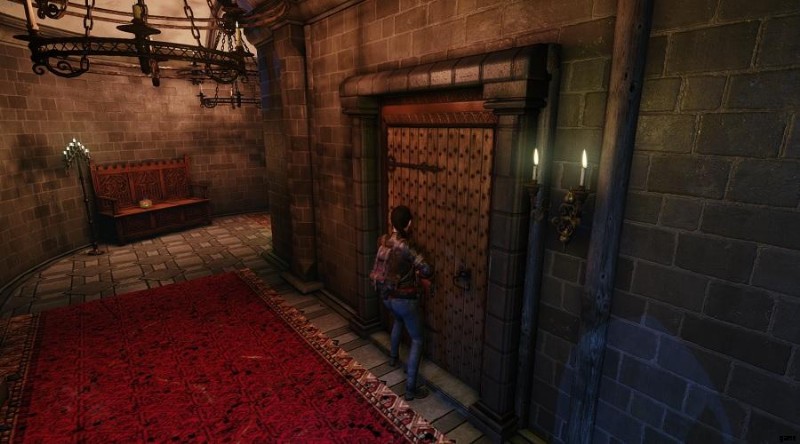
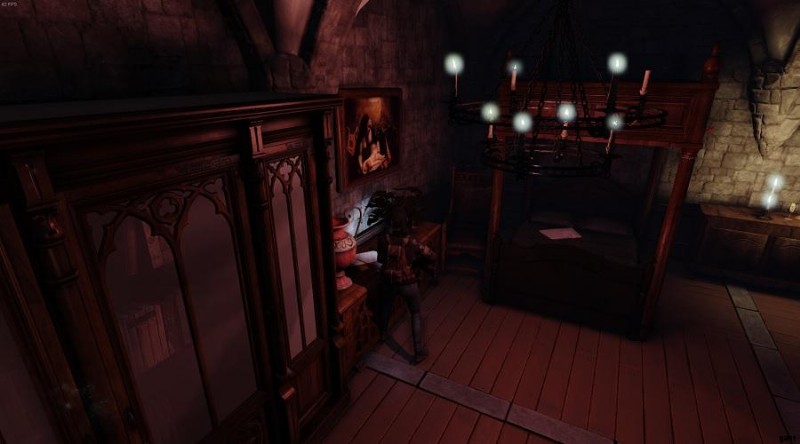
Once you’re back in the mess hall, take your first right to enter a large room with many tables. Be careful not to get grabbed by the Zombie near the door. Straight away from the door there is another zombie and an axe cultist – juke or kill these to grab some shotgun ammo near the far wall. There’s some handgun ammo off to the left as well, but you have to aggro a number of zombies to get it. Once you’ve gathered the items you want, the exit to this room is on the same wall we entered from to the left of the entrance. Make sure you aren’t being followed by any enemies before going through. Going through the arch you’ll reach a spiral ramp and halfway down this ramp you’ll encounter a cultist – kill/juke him and keep going. This takes us to a basement room with many casks and caskets. There is a long passage leading to another similar room a considerable ways away. Go down this passage and on the other side you’ll see a statue between two ornate coffins. Approach the statue and interact with it to pick up the Plaque Piece A.
Long Passage/Plaque Piece A:
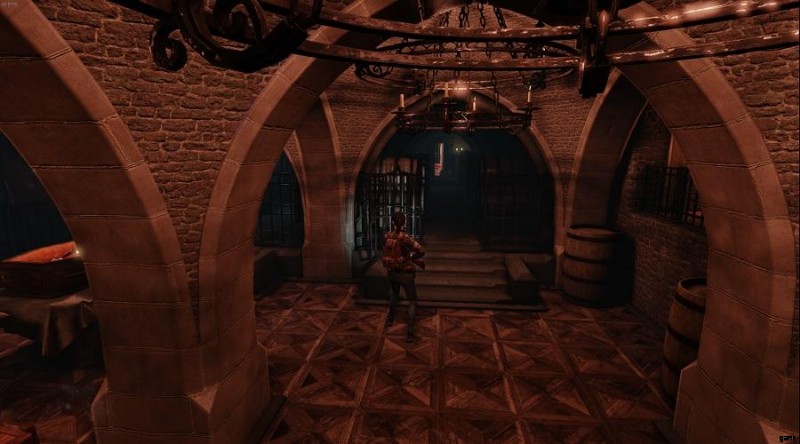
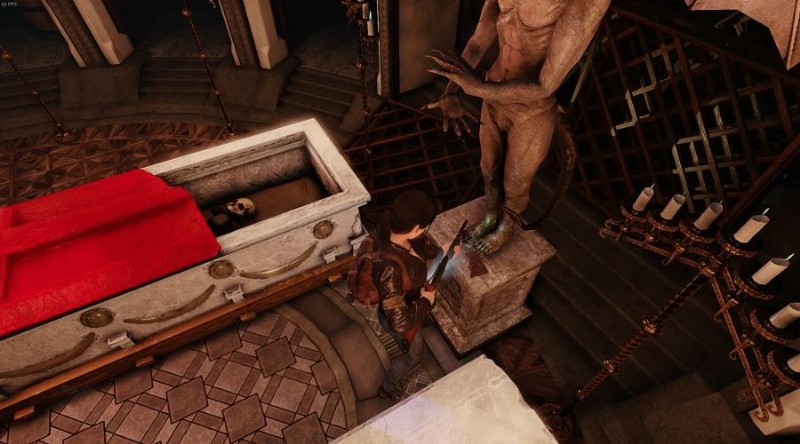
Picking this item up will activate enemies in the room on the other side of the dark hallway. Depending on difficulty/camera mode you may just get a Red Robed Cultist or may get a Red Cultist along with a regular one. You can’t really get past them in the thin hallway – so kill them and head back to the box room described earlier in this section to drop off items before returning all the way to the central chamber with your Cathedral Key. Head down the third path (to the left of the one we’re currently coming from) and you’ll find yourself in another large room. On the far side of this room is a group of cultists (3 regular, 2 axe) surrounding a pedestal. You can pull the normal cultists from the center of the room 1-2 at a time without engaging the axe cultists – then run in and grab the plaque piece B off the pedestal before running back the way you came to the central chamber once again. Combine the two Plaque Pieces into the Elevator Plaque and use it on the device next to the elevator in the center to activate the elevator. The elevator is now active and you now have access to the final encounter.
31. Defeating the Final Boss
At the top of the elevator we will see a cutscene where it’s revealed that the woman with Ailfryd is Emily, as well as some flashbacks that will reveal Alicia’s relationship to this cult as well as how Emily fits into these events and how Alicia wound up in a psychiatric facility. Towards the end of the cutscene Alicia is incapacitated and upon waking up we see that a HUGE monster is coming out of a nearby portal. The cutscene ends and a timer begins with around 7 minutes on the clock. If the timer runs out, the boss instantly kills us but if you have decent weapons he should be dead long before you run out of time.
Final Boss/Supply Barrels:
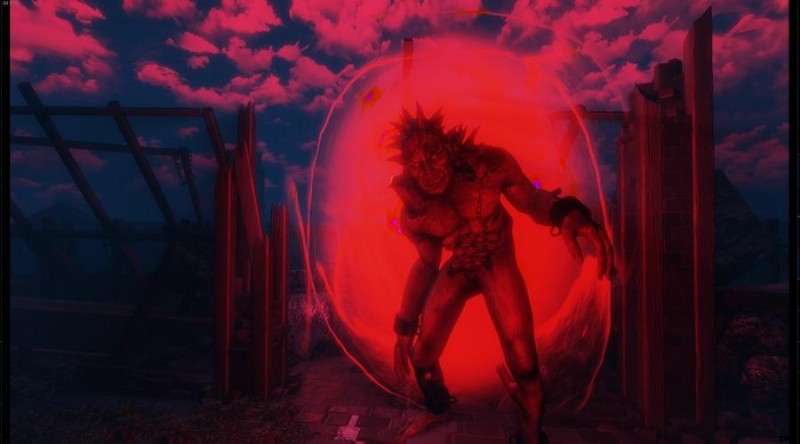
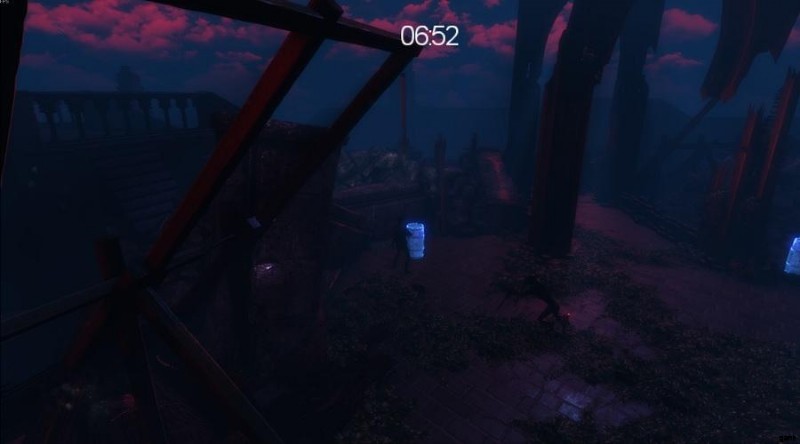
The Cathedral rooftop is a large round area with plenty of room to kite/run. There are barrels which contain supplies, although most of them are fairly weak for this encounter (small amounts of pistol ammo, a small bandage, etc). The bosses main attack is an AoE slam attack that hits a very large range. If you’re anywhere near him when he uses it then you’ll likely get hit, but the damage seems to fall off the farther you are away, so if you run away from him you should take next to no damage even if it connects. The second source of danger is that this boss summons enemies to help him – namely Otherworldly Monsters. He’ll summon these 2 at a time at the start of the fight, but as his health gets low he’ll start summoning them 3 at a time instead. His final ability of note is the ability to phase himself out – preventing damage for a duration. When this effect ends he’ll fall to the ground for a short time with the effect ending halfway through the long animation. This gives you a good time to dump as much damage into him as possible.
The best strategy I’ve found for this fight revolves around controlling the adds as quickly as possible. The boss will usually be invulnerable when he summons the monsters and drops his invulnerability a short time after they spawn. If you can kill them before he becomes vulnerable then you’ll be safe to dump a ton of damage into him before he puts his invulnerability back up. If you take too long to kill the extra monsters he will already have his invulnerability up so if you find that you can’t take out the little monsters quickly enough you should try to shoot the boss while he’s vulnerable before cleaning up the other enemies – however this is pretty difficult to do safely especially on Fixed Camera mode. The Otherworldly Monsters are pretty easy to take out quickly using Explosive or Mine Bowgun Bolts, then use whatever else you have to attack the boss. The Sub Machine gunor either of the previously mentioned Bolts do good work against his life, although if you don’t have those available due to needing them for the adds you can use the shotgun as well.
Once you’ve dealt enough damage to the boss, Paul will throw a new weapon “The Cannon of Hope” into the arena off to the right of where we originally came in. Run over and grab it (making room in your inventory if needed) and fire it at the boss to blast him right back through the portal. The portal then deactivates, spitting Aifryd and Emily back out. Paul hops off the nearby wall to come join you and Aifryd says some Villain things before passing out. Paul will suggest that you leave and you will regain control on a ledge near the boss arena. At this point you can either walk forward to trigger the final cutscene for the Good ending, or you can return to the boss arena and follow the instructions in the next section to receive the secret ending.
32. Obtaining the 5th Element and the Secret Ending
Triggering the secret ending has several requirements:
<オール>To complete requirement #3 you’ll have to do a bit more exploring in the Cathedral so head back to the area where we acquired the Plaque Piece B. Run down to the section of the room where we got the plaque piece from, but instead of going into the room, head to the right to find a door leading to the staircase along the near wall. Head up this staircase and at the top you’ll reach a forking path. To the left is a jammed door, a cultist, and someshotgun shells. Grab the shells if you need, then head to Alicia’s right. Juke or kill the cultist and head through the door behind him.
Head down the curved hallway and halfway down take the passage to your left to reach a barracks area with an axe cultist. There’s some bandages and ammo here as well as an axe cultist and a zombie hanging out in one of the rooms. Dodge the cultist if you can, but make sure to kill the zombie and take the old key off his corpse, then head back to the original curved hallway and follow it past another cultist to the end.
Stairs/Room With Special Zombie:
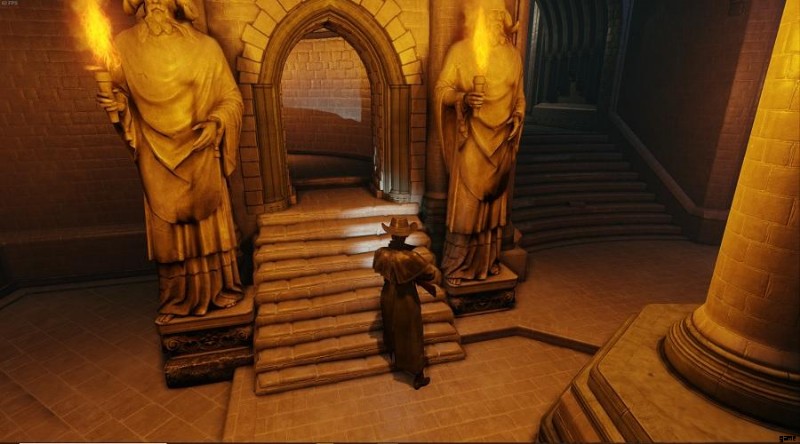
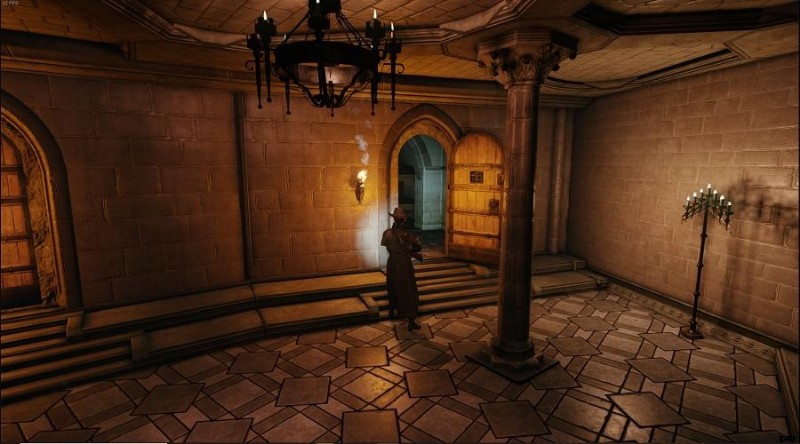
Go through the door and you’ll be back in the hallway that had doors leading to the portal/box room and the room in which we found the Cathedral key. Head down towards the portal room but turn left down the hallway before reaching it. When you get to the end you’ll find a small wooden door on the right side. Use the old key to unlock it and inside you will find some supplies, 3 zombies, a lore note, and a ‘strange device’ on one of the shelves in the back. Interact with the strange device 5 times and it will decode your notes that were written in mysterious symbols (mainly the final page of the researchers notes and the Unknown Source Diary). This will satisfy the 3rd requirement for the secret ending, and from here you can continue to the final boss as normal.
Old Key Door/Strange Device:
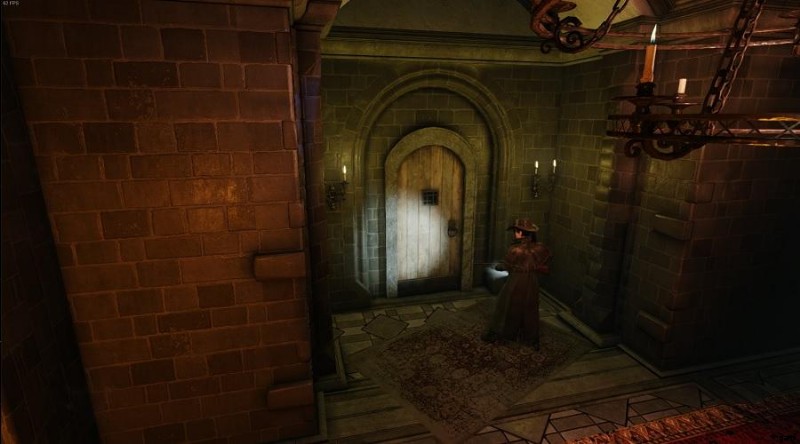
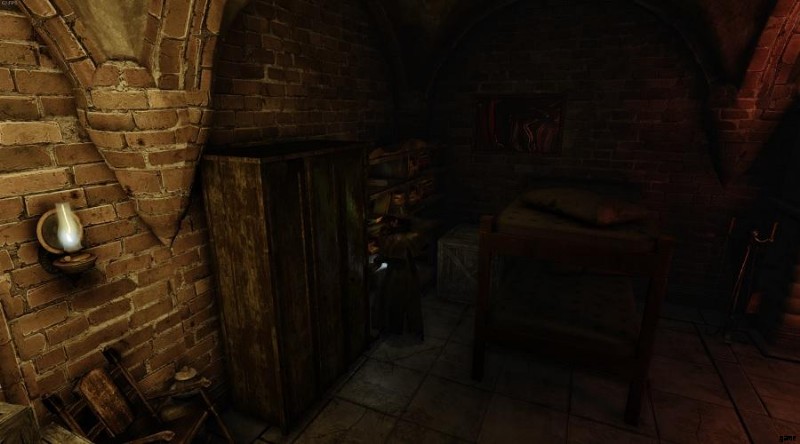
After defeating the final boss, head to the left up the stairs rather than forward and over to where Ailfryd’s body landed. On his body is a note called “The Lore of the Architect” and if you have satisfied all the criteria for the secret ending you will see a orange portal appear in the center of the boss arena after you read it.
Ailfryd Corpse Note/Fifth Element Portal:
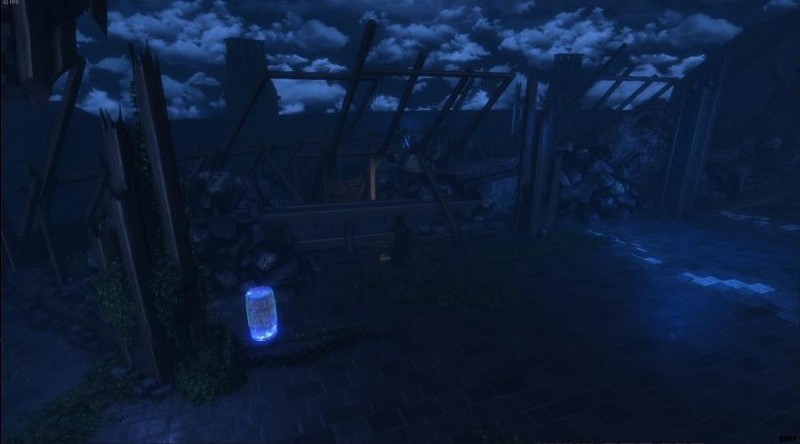
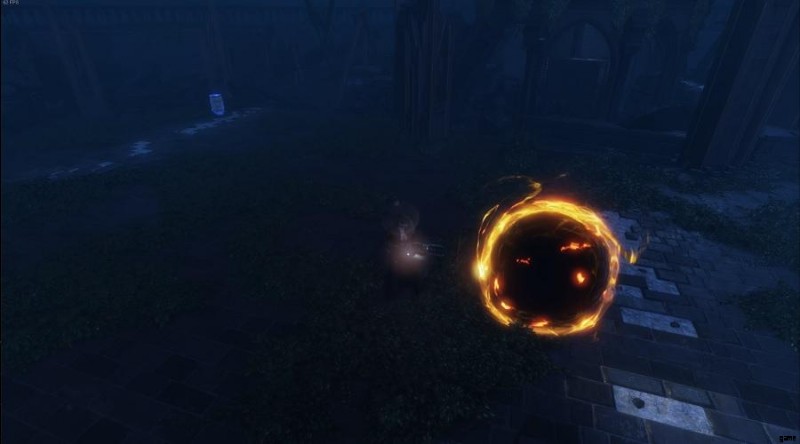
Go through this portal to return to the other world and run through a series of portals to return to the pyramid room – hitting a nearby lever to gain entry just like before. Approach the Fifth Pyramid and align the sides to the configuration shown in the images below.
Fifth Pyramid Front:
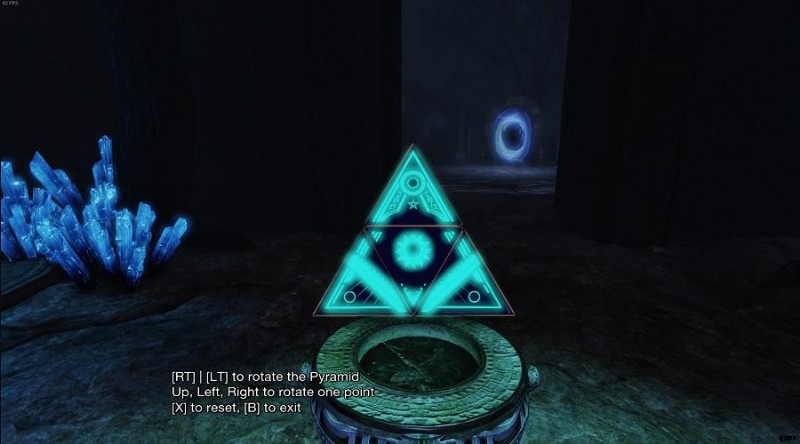
Fifth Pyramid Back Sides:
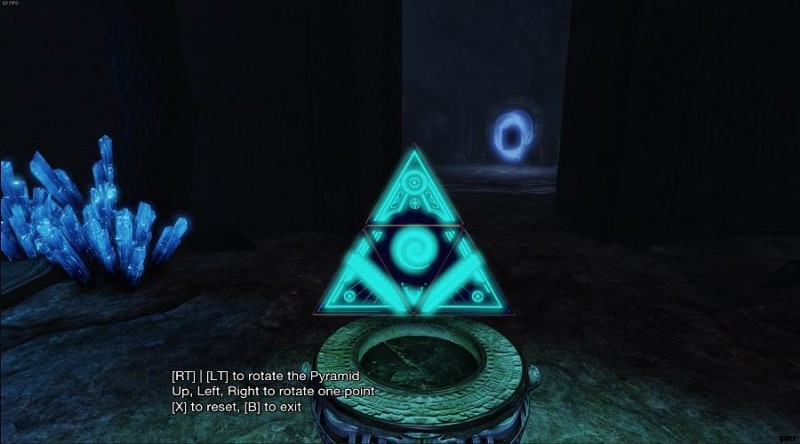
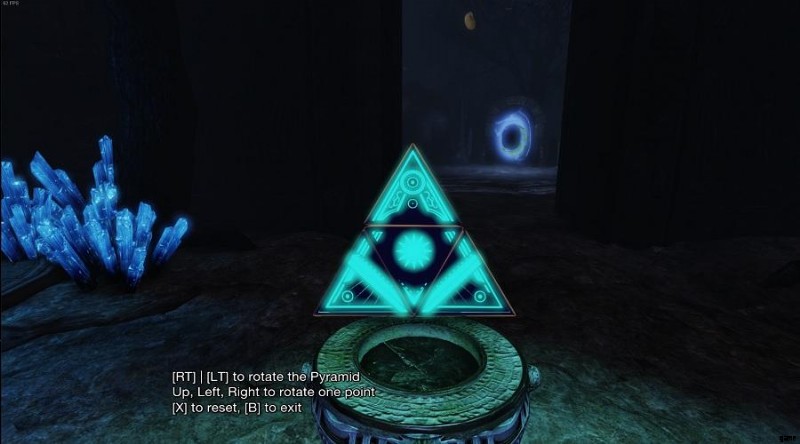
Just like the previous pyramids, make sure the sides all match the images and that the correct side is facing forward and the puzzle will respond by making the floating book over by the fire pyramid fall on the pedestal it floated above. Go retrieve the book and you can read the Nameless One Journal to learn a bit more about the otherworldly entities at play in the story.
Once you close this note, another portal will appear in the center of the platform. Take this portal and you will trigger a very nostalgic cutscene which I wont spoil here, followed by an Epilogue. This completes the longest and most complex ending in the game!
Nameless One Journal/Final Portal:
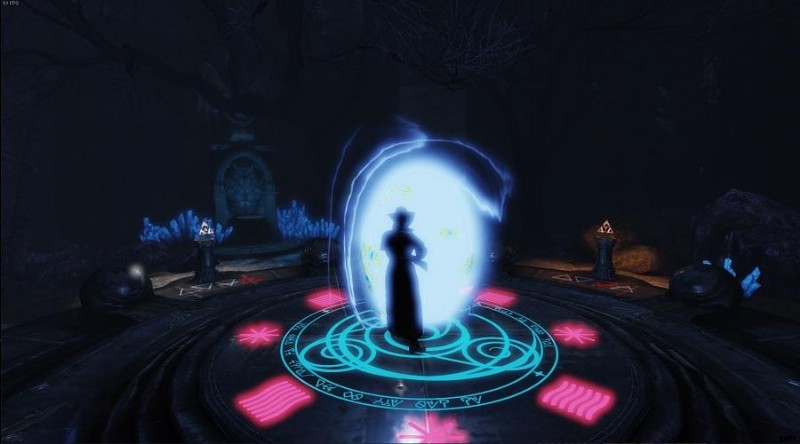
33. List of Notes
There are many notes and files found in the game that the player can collect. These files give more information about the story/setting and are added to a journal. There is an achievement for collecting all of these and some of them are needed for the secret ending so I wanted to add a complete list of them here as well as where they are located. The following list is ordered roughly in the order you are likely to encounter them as you go through the story:
- Playing Manual – On a table in the Starting Bedroom (See Section 1)
- Stranger Note – On a nightstand in the Guest Bedroom A (See Section 2)
- The Gathering Call – On the wall of the Dinning Room near the Clock (See Section 5)
- Geralds Note to staff – On a bench in the outdoor walkway with the Statue Head (See Section 5)
- Chef James Note to Staff – On a table on the west side of the Main Hall F2 (See Section 6)
- Ancient Symbol Drawing – Drops on the floor near the statue in the F2 Back Office when you use the Red Book (See Section 8)
- Journal of Dr Arnold Howard Page 1/11 – On the desk in the secret room in the Library (See Section 8)
- Strange Disappearances Note – On a table just before the Blue Emerald Door (See Section 9)
- Gate Keeper Note Page 1/6 – On a table in the small greenhouse just beyond the Blue Emerald Door (See Section 9)
- Hidden Key Note – In a small Gazeebo on the north side of the Blue Emerald Door area (See Section 9)
- Box of Plotus Note – On the desk across from the Box of Plotus in the Portal Room (See Section 10)
- Corpse Note – On a body against the wall on the path between the Courtyard and the Sewer (See Section 11)
- Journal of Dr Arnold Howard Page 2/11 – On the table next to the phonograph outside the Sewer (See Section 11)
- Five Elements of Nature – Automatically acquired when picking up the lighter in the ‘other world’ (See Section 12)
- Gardener Note – In the small greenhouse unlocked with the Door Handle (See Section 14)
- Strange Phenomenon Note – In the small greenhouse just off the main path through Garden B (See Section 15)
- Gate Keeper Note Page 3/6, 4/6 – On the fence next to the Garden entrance in Courtyard B (See Section 15)
- Holy Water Note – In the Cemetary Crypt closer to the Garden Entrace next to a body (See Section 19)
- Gatekeeper Journal Page 1/3, 2/3 – In the Dark Forest Cabin next to the blue fire (See Section 18)
- Gatekeeper Note Page 2/6 – On the fence next to the Dark Forest rune puzzle (See Section 19)
- Journal of Dr Arnold Howard Page 11/11 – In the tomb of the Cemetery Crypt Boss (See Section 19)
- Note about the Dark Ones – On the ground in front of the altar in the Church (See Section 19)
- Journal of Doctor Arnold Howard Page 6/11, 7/11 – Next to the gramaphone in the Catacombs (See Section 20)
- Prisoners Note – In an open cell on the side of the Catacombs hallway leading to the portal (See Section 20)
- Journal of Doctor Arnold Howard Page 8/11 – In the Catacombs room opened with the Research Key (See Section 20)
- Guest Note – On the desk of a small room in the back side hallway in the mansion that is opened when we arrive from the catacombs (See Section 22)
- Journal of Doctor Arnold Howard 3/11 – On a table in the F2 hallway connected to the east side of the Main Hall (See Section 23)
- Guest Diary – On a dresser across from the bed in the F2 bedroom which contains the Nebra Moon (See Section 22)
- Unknown Source Diary – On the desk of the Main Office unlocked with the Nebra Moon/Sun (See Section 23)
- Worker Diary – On a chest at the foot of the bed in the room with the Vesta Key (See Section 24)
- Kid Drawing – In a small room off the hallway we start the game near that is opened with the Vesta Key (See Section 24)
- Divine Fire Note – In the small caged area of the inner courtyard unlocked with the Vesta Key (See Section 25)
- Letter to Paul – In the room unlocked with the Ceres Key (See Section 25/26)
- Gatekeeper Journal Page 3/3 – On the stone slab in the center of the Mausoleum (See Section 25)
- Gatekeeper Note Page 6/6 – In a small destroyed shack on the edge of the swamp clearing (See Section 26)
- Fog Machine Note – Behind the structure containing the cabin key in the swam clearing (See Section 26)
- Journal of Dr Arnold Howard Page 9/11, 10/11 – On the table next to the Skull Island map in the final ruins section (See Section 29)
- Journal of Doctor Arnold Howard Page 5/11 – In between a bed and nightstand in the room with the Cathedral Key (See Section 30)
- Journal of Dr Arnold Howard Page 4/11 – On a small dresser in the Cathedral room unlocked with the Old Key (See Section 32)
- The Lore of the Architect – Next to Ailfryd’s body in the final boss arena after completing the fight (See Section 32)
- Nameless One Journal – Book in the pyramid room of the other world (only with secret ending – See Section 32)
34. Enemies and Strategies for Combat (A)
Zombies/Infected:
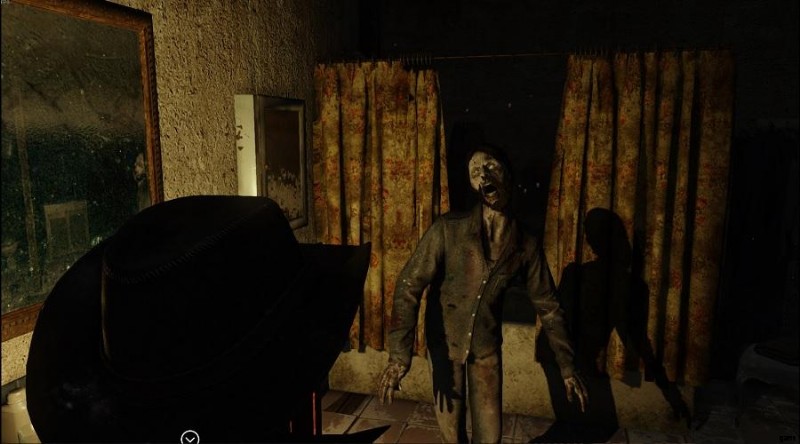
Your standard survival horror zombie – just a raggedy looking humanoid with decaying skin which shambles around clumsily and likes to bite. You’ll encounter right away and present in nearly every area of the game. Generally they often aren’t very fast – although their speed can be extremely variable and like most enemies in the game their speed will change dynamically during combat. Their life tends to be a bit variable as well. Unless you’re confined to close quarters they’re mostly harmless even if they’re moving faster and can be easily killed using the pistol or in some cases even the knife.
Attacks:
Zombies have two attacks – a lunging attack and a vomit attack. The lunge attack is the most common – zombies will lunge forward at maximum speed (regardless of what their previous speed was) across a short distance and if they touch the player they will grab and bite for a moderate amount of damage.This bite will also trigger automatically if the player makes contact with the zombies model UNLESS the zombie has just attacked and is in it’s recovery animation. The vomit attack is less dangerous – the zombie launches a projectile of bile in a straight line that only goes a few feet. You can easily avoid it by walking in any direction that isn’t directly towards or away from the zombie and if it does connect it does significantly less damage. Zombies will prefer the lunge attack most of the time but it’s worth noting that zombies cannot use their grab attack on stairs – they will always use the vomit attack.
Special Qualities/Abilities:
Zombies have a special mechanic that most enemies don’t have – dismemberment. You can shoot (or cut) body parts off a zombie while fighting it to weaken it by targeting specific body parts with your attacks. It seems to work that each time you hit a zombies body part (arms, legs, or head) with an attack there is a chance for that part to be dismembered and dismembering seems to have the following effects:
- Arms – (Both arms only) Zombies will be unable to use their lunge attack and will only vomit.
- Legs – Taking off either leg will cause a zombie to fall and force them to crawl reduing their movement speed to the minimum and taking away their attacks. A crawling zombie can only seem to deal damage if you make direct contact with them and the damage is completely negligible even on the hardest difficulties.
- Head – Dismembering a Zombies head will kill them instantly.
Strategy:
The vast majority of zombies can be easily avoided and it’s possible to play the entire game without killing a single one (outside of the two ‘zombie’ like bosses). In open spaces (Courtyard A, Ruins, OTS Graveyard) you can just walk around them without getting anywhere close to their grab range. In confined spaces they are more dangerous (Hallways/small rooms) but even if you have to walk close to them there are two ways to get around them without using any ammo or getting hit. The first is to run straight past them immediately to their right or left. You have to be close enough that they start the lunge to grab you while you’re approaching them as they will lunge too far towards the direction you’re coming from and miss while you run right past them. Sometimes this isn’t possible as there are a few halls in this game that are just too small to walk past a zombie without colliding with it’s model. In these cases, approach the Zombie until it lunges towards you then immediately run the other way to avoid getting hit. Once the lunge has ended the zombie will enter a recovery animation for a few seconds and you can walk by it safely during that time. If you want to kill zombies so you can fully explore an area in which you will want to go back and forth you can do this easily with pretty much any weapon – just keep a bit of distance and you’ll be completely safe from their grab attacks. Avoid wasting any valuable ammo on them. If you’re playing OTS you should aim either for the leg to disable them (which is almost as good as killing them honestly) or aim for the head for a faster kill on average.
Dogs:
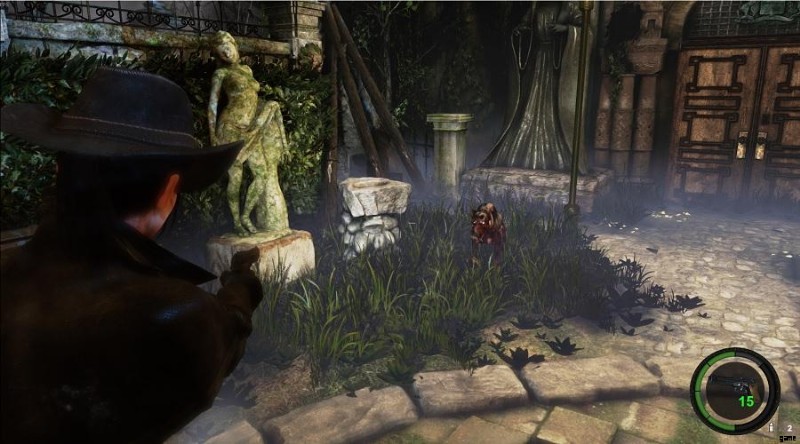
Another survival horror staple – dogs are one of the most annoying enemy types in the entire game. They’re smaller and faster than any other enemy and can be hard to hit while moving in both camera modes. You encounter them pretty early in the game before leaving the mansion the first time, and frequently in the early sections of the game, but they aren’t feature in any of the areas towards the end of the game. They have less health than a zombie but because of their speed they’re a lot more dangerous to fight.
Attacks:
Dogs only really have one attack which is to run at the character and upon contact they will jump up and claw at you dealing a moderate amount of damage. This attack will also trigger if the player walks into the dogs model while it’s not in a recovery animation. If the attack misses the dog will stop a short distance after missing and either bark at the player or start running around randomly.
Strategy:
The best time to hit dogs is after they miss their charge. They can’t turn very fast while charging at you to attack (although if they don’t have line of sight on you they can take sharp corners) so step to the side and they’ll fly past you. After missing sometimes they’ll freak out and start running around. This frenzy can turn into another attack at any time so it’s not a good idea to try and get shots off while the dog is doing this unless you’re using a weapon that will kill them in one shot (shotgun, explosive bolts, trap/mine bolts) and it’s usually better just to wait for the next charge. When the dog starts barking is a good time to attack but keep in mind that attacking the dog will immediately end it’s idle animation and it will usually start another attack so it’s best to get 1-2 shots off quickly and then dodge again.
If you find yourself engaged with several dogs at once, you’re usually better off running away. Dodging 2-3 dogs is manageable as long as you can stay moving but you’re unlikely to get a window where all the dogs are idle so you’ll end up taking hits when you try to attack. If you’re on lower difficulties you can kill multiple dogs by allowing the other dog(s) to hit you and trading attacks but even this stops being viable if you get too many dogs at once.
One final tip is that if you’re using OTS mode, you can shoot enemies through fences or from elevated platforms. This is useful as most of the areas in which dogs are present there are fences that they can’t cross so in many cases you’ll be able to pick dogs off while they can’t reach you which is much easier.
35. Enemies and Strategies for Combat (B)
Super Zombies:
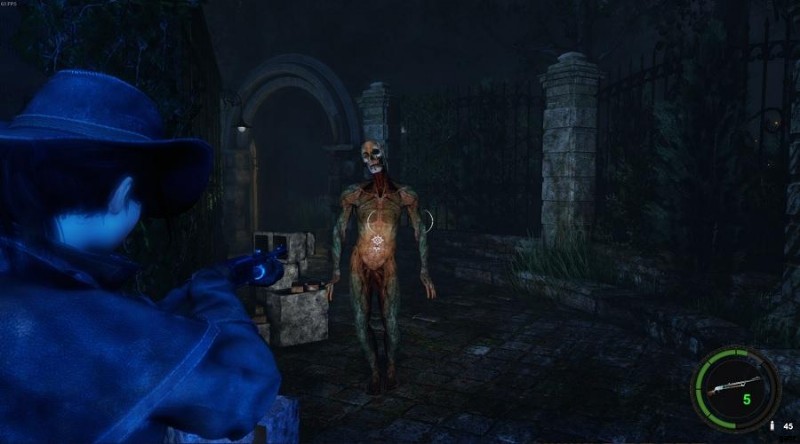
The Super Zombies enemy looks and behaves exactly like the Super Zombie boss except with slightly less health. It’s very similar to the zombie except that generally it moves much faster at all times and has significantly more life. It is immune to the dismemberment mechanic although you can still stagger it more reliably shooting it in the head than in the body. As basic enemies you wont encounter these much and wont see them at all until you reach the gardens around halfway through the game, although your first encounter will be as a boss fight just after leaving the mansion.
Attacks/Special Abilities:
The Super Zombie keeps the Zombies basic lunge/grab attack but trades it’s vomit attack for a wide swing. This attack has much better turning speed than the zombies grab if you’re trying to run around and a better range than the lunge in any direction that isn’t a straight line. The Super Zombie also has two traits no other enemy has. The first is that it’s the only enemy type which will randomly wander the entire area no matter where it spawns. This means that you could encounter these enemies in literally any positioning (whereas most enemies don’t move until they are aware of you or follow a strict patrol route). The second special trait is that when you leave the area and return these enemies seem to come back to life with a significant portion of (if not all of) their life. Based on statements by the developers this may be an unintended trait removed at a later time, but for the moment you may see them do this.
Strategy:
Ultimately the way to deal with these attacks is the same as the zombie, either try to run just past the Super Zombies right or left to provoke an attack or get just barely in range and then back up out of it and use the recovery animation to get distance to either run away or retaliate. They can be dispatched pretty easily with the pistol if you have room to back peddle or kite them around and in a pinch you can take them out without using too much ammo from a more valuable weapon.
Otherworldly Monsters:
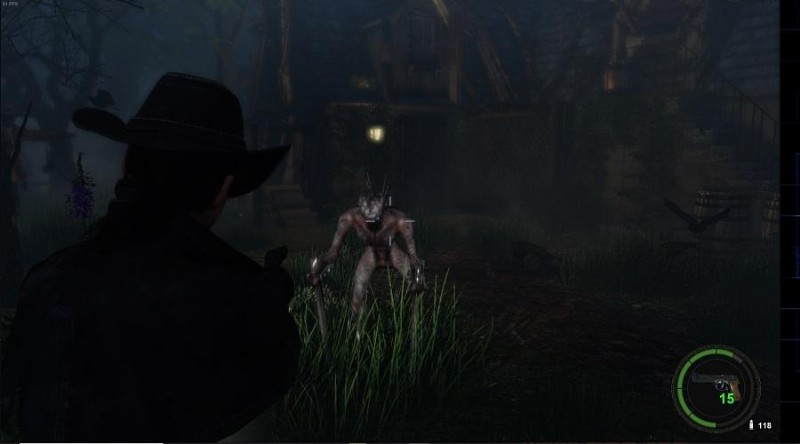
Otherworldly Monsters are encountered shortly after finishing the Courtyard area just outside the mansion. The first one you’ll encounter will be in a boss fight in the small sewers section and is one of the harder bosses to avoid taking damage in because of how small the room is. These enemies move fairly fast and attack quickly as well. They have about three times a zombies life and are featured in nearly every area outside of the mansion once you first encounter them.
Attacks/Special Traits:
Otherworldly Monsters have 2-3 different attack animations but they all have similar qualities – fast attacks with short range that deal significant damage but (usually) have a long recovery time. The more notable aspect of them is their phasing ability. When an Otherworldly Monster is dealt enough damage it falls down and enters a ‘phased’ state. In this state it is immune to damage and if left alone for 5-10 seconds it will regain some health and stand back up. To defeat it for good you have to use the appropriately colored Holy Water (blue or green) to destroy them. When you’re in the ‘other world’ areas these monsters will also start out phased and you’ll have to hit them with the holy water while fighting them in order to deal damage. All of the otherworldly monsters in the normal world are blue as you don’t have your green holy water for the majority of the game, but in the other world you will encounter many green ones after losing your green holy water so you wont be able to kill these. One additional trait these monsters have is that outside of the ‘other world’ most of them spawn in via a portal when you get close to their spawn point rather than being visible on the map as you approach. This means that often when you encounter them they ambush you.
Strategy:
Honestly, fighting these is a bad idea unless you have to. They’re fast, but not as fast as dogs such that you can’t run away, and since most of them are encountered in open areas or spawn in via a portal with a longer spawn animation you can usually get past them before they’re able to attack you. There are two of them in the game you HAVE to kill – the first one you encounter is a boss fight and there’s no way to avoid it, and when you first meet Paul you’ll be attacked by one you have to kill to trigger the first Paul section of the game. These are both fought in small arenas and due to the monsters speed I recommend using the shotgun for both of these fights to avoid taking unnecessary hits. If you do fight others later I recommend using either the shotgun or the bowgun to ensure shorter and safer combat. Similar to other enemies you can bait an attack from them to trigger a recovery animation and attack them from a safe distance (make sure to get a decent ways away from them as they can move really fast after getting hit).
Crawlers:
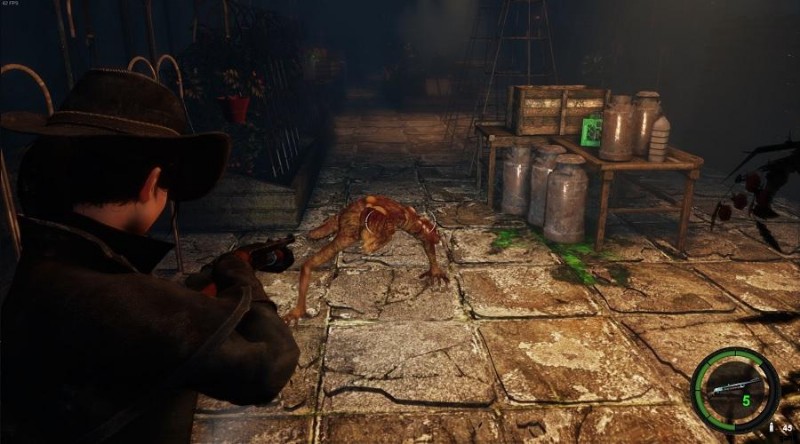
Crawlers are a deceptively dangerous enemy that is only really found in the Gardens section of the game. They move at a pretty consistent speed – faster than slow Zombies but with a top speed much slower than Dogs or Otherworldly Monsters and have slightly more health than a normal Zombie. They sit low to the ground and this can make them a bit tricky to hit with fixed camera if they’re moving.
Attacks/Special Traits:
Crawlers have two attacks – a basic swipe attack and a leap attack. The swipe attack has a short range but a wide arc. If you try to run past them similar to how you can with Zombies you’ll probably get hit by it, but if you run in very close and immediately run away you’ll be able to easily get out of it’s range and then run past during the recovery animation. The far more dangerous attack is the leap – it has no turning radius at all, is slow, and only a slightly longer range than the swipe attack but it deals devastating damage. Seriously – this attack might be a guaranteed one shot kill on any difficulty.
Strategy:
Fighting these is mostly about avoiding the leap. They don’t use it that often and you can easily side step it to the left or right, but try to avoid running directly away from it unless you’re already pretty far away and while fighting these things avoid standing just outside of their melee range as this will usually prompt them to use it. Their life is low so you can kill them with any weapon but either keep your distance from them entirely or get in close enough to trigger their swipe attack.
Plant Dogs:
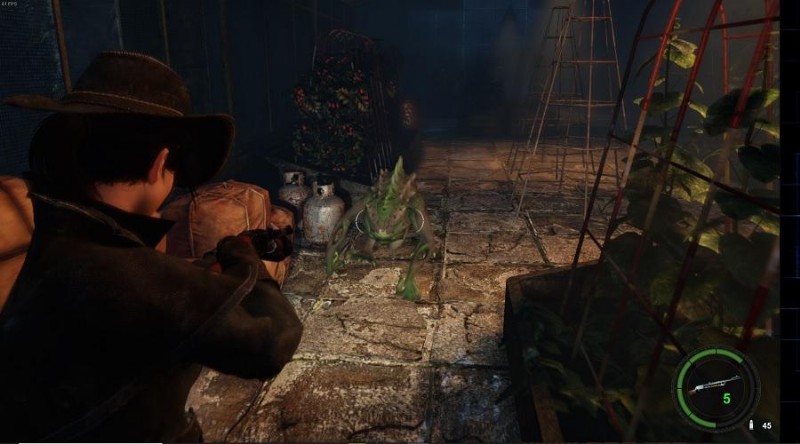
The Plant Dog is an enemy not seen in many places. It’s basically a less threatening version of the crawler. It has the same swipe attack and slightly more health but lacks the devastating leap attack and is pretty much the same in every other regard. You can usually just bait these things into attacking and run past them and there’s probably only 4-5 of them in the entire game.
Bloated Zombies:
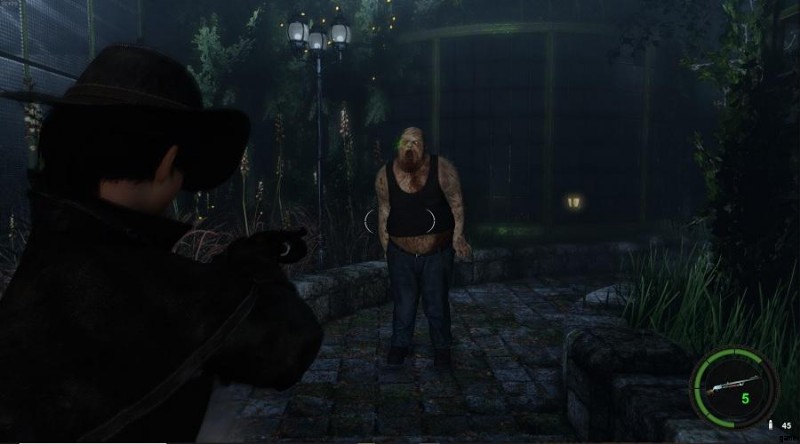
Bloated Zombies are pretty one-trick relying entirely on their special attacks. They are one of the slowest enemies in the game and have the lowest health too.
Attacks/Special Traits:
The bloated Zombie is a dedicated ranged enemy. It has a medium ranged projectile vomit attack that has pretty good tracking from side to side although it has a bit of a windup. It also explodes when it dies, dealing damage to the player if they are too close.
Strategy:
You can kill these with the pistol or bowgun from beyond their attack range very easily. If don’t want to kill them, just run slightly in range of their attack and then back out to create a window in which you can run past (you’ll have a ton of time).
36. Enemies and Strategies for Combat (C)
Grave Diggers:
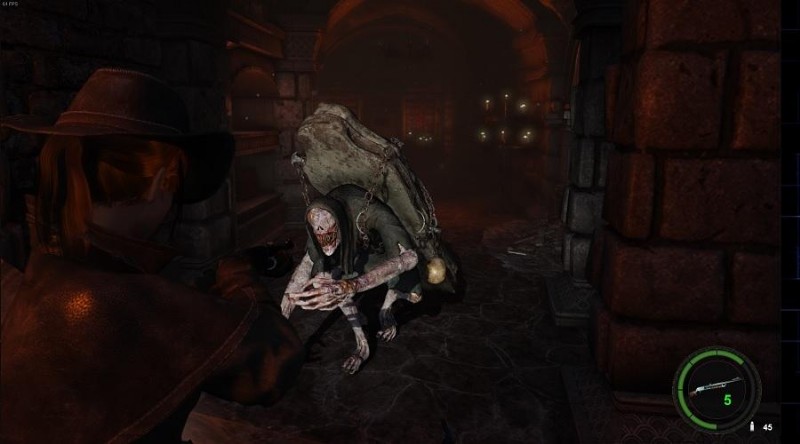
Grave Diggers are encountered in the graveyard after completing the Crypt Zombie boss fight and the catacombs. They look scary but aren’t very threatening unless you’re in tight spaces. They move pretty slow and have quite a bit of health but their only attack is a short range swipe. It’ll hit you most of the time if you try to run past them in close quarters but like the Plant Dogs and Crawlers you it has a pretty short range and you can pretty easily step backwards out of it.
Strategy:
You’re honestly better off not killing these things. There are a few in the catacombs that are in a hallway where you’ll have to juke them and if you’re going fast you’ll probably take unnecessary damage but many of them appear in fairly open areas or optional side paths. Because they have so much health it takes a lot of ammo to kill them that would be better spent somewhere else – just back peddle out of their attacks and run by.
Cultists:
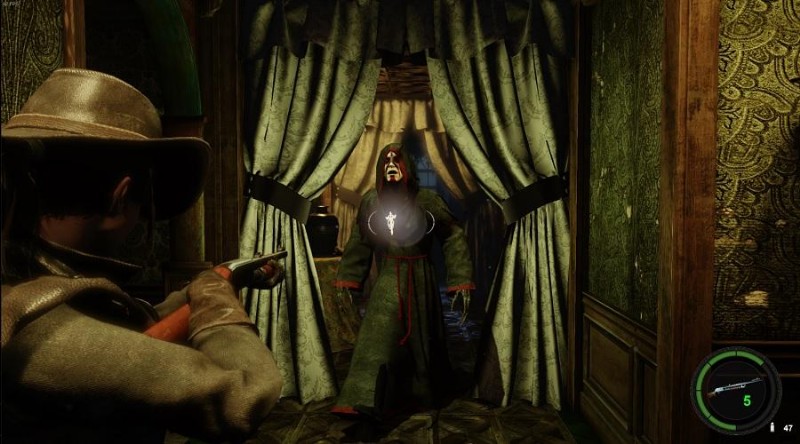
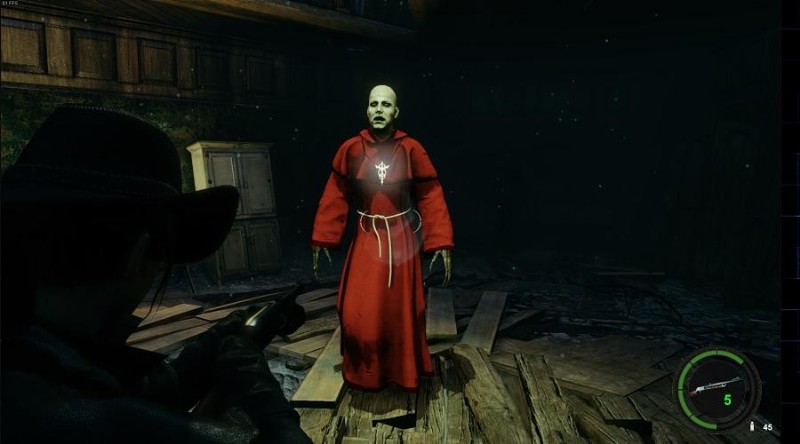
Cultists become one of the main enemies after you reach the mansion the second time. They have significantly more life than a zombie, walk at a consistently brisk pace, and have an attack that is much harder to avoid simply running past them. Normal cultists come in two different types – Cultists and Red Cultists. Red Cultists are pretty much the same but they have almost twice as much life and a tendency to drop key items.
Attacks:
The cultists basically only have one attack which is an arced swipe with claws. They can turn very fast while attacking and the attack has a decent range. You can avoid it by running around them in a large arc or stepping backwards out of their attacks but the timing on these two dodge mechanics is much smaller than that of many previous enemies.
Strategy:
You’re usually better off killing these or avoiding them entirely. Some of them are in open areas or areas you have no reason to enter (like rooms in the mansion you’ve already fully explored before the second time when cultists appear). When you do encounter one in a confined hallway you can kill them pretty easily with either the shotgun or bowgun. I don’t recommend using the pistol for Fixed Camera as you wont stagger them very much with inconsistent headshots and you will quickly run out of room to kite them in many of the tight mansion/cathedral areas. The cultist is one of the only enemies in the game with reliable stagger animations with the shotgun – as long as you don’t fire during the previous stagger animation they will get knocked back 100% of the time. That makes the shotgun my preferred weapon for this enemy. In a few places, you will have to fight them in groups of 2-3. In those cases I strongly recommend the shotgun for stagger or explosive bowgun bolts to quickly cleave all enemies down. Keep in mind you need to be at a safe distance to use explosive bolts without hurting yourself and in Fixed Camera this can be very difficult in many of the small places you encounter cultists.
Axe Cultists:
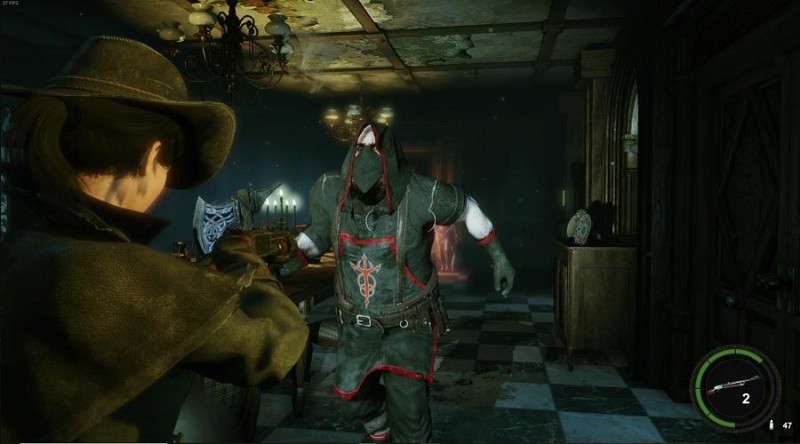
Axe cultists are a special cultist variant that wields one handed axes. They move at about the same speed as a normal cultist but their health lies somewhere between a normal cultist and a red cultist.
Attacks/Special Traits:
Their close range attack is less dangerous than the regular cultist because they are not as good at tracking moving targets as you move past them and their range is not as long. They trade the melee threat for a ranged attack where they throw an axe at you. It has a long range and does a decent amount of damage, but has a distinct sound effect and animation, as well as enough travel time for the player to move.
Strategy:
These cultists are almost exclusively encountered alongside other cultist enemies. If you make sure they have line of sight on you and keep your distance they will only use their axe throw attack which can be easily avoided as long as you’re aware of them and paying attention. This will allow you to focus on killing their teammates. Once the other cultists are dead you can either kill the axe cultists or just leave, as they’re significantly easier to avoid than their normal counterparts. If you do fight them, keep in mind they don’t stagger nearly as well as the other cultist enemies so you’re better off keeping your distance and dodging axes in between shots instead of getting close to bait melee attacks.
Frog Zombies:
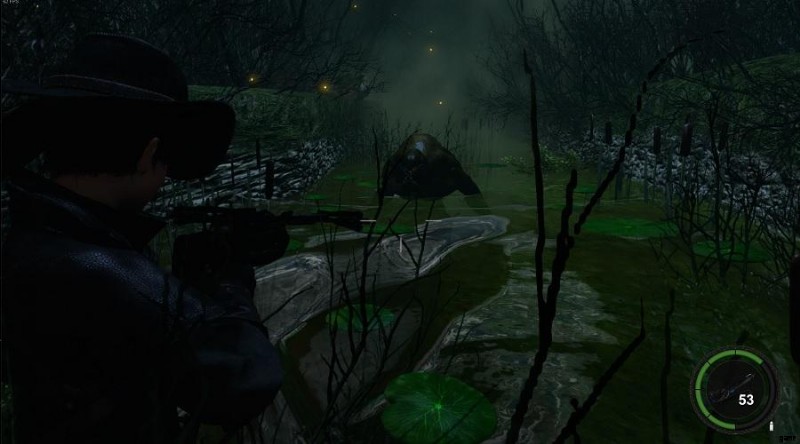
This enemy type is only found toward the end of the already small swamp section of the game. There aren’t very many of them and they aren’t very dangerous, so I don’t recommend using ammo on them.
Attacks/Special Traits:
This enemy has two different types of melee attacks – a fast swipe and a slow swipe. It’s impossible to tell if an attack will be the fast one until it’s too late so if you try to run past one and it’s a fast swipe you’re probably getting hit. There’s also a ranged variant of this enemy which spits a long range poison projectile after being activated by the player getting fairly close.
Strategy:
Just ignore these for the most part. The first one you encounter is in a choke point so either kill it or try for the juke accepting it might hit you with the swipe and after that just don’t get close to the others and they’re harmless as they move quite slow. If you activate a ranged one (they stand up when activated) just don’t run straight at or straight away from them and their attacks will always miss.
Swamp Crawlers:
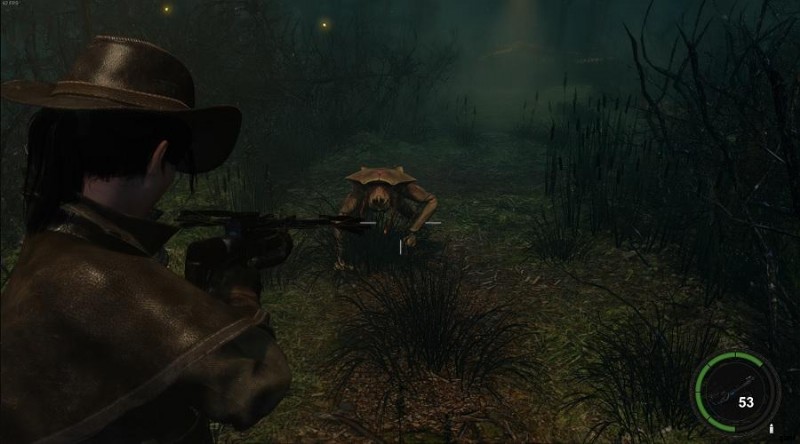
Like the previous enemy this one is only found at the very end of the swamp but it’s only found in large open areas. Mechanically it works very similar to the plant dog enemy with short range swipe attacks and a moderate movement speed. They can be a bit hard to see in the foliage and water of the swamp but you should be able to hear them and see them move so just keep your distance and these will never pose a threat.
37. Endings and How to Get Them
Very Bad:
The fastest and easiest ending to get – this ending can be reached when using the helicopter to leave the island by radioing Paul after arriving in the final ruins area Alicia lands in following the final Paul section in Ailfrydtown (as described in Section 29). You will not get this ending if you have collected the letter to Paul from the room locked with the Ceres Key in the mansion as this will trigger the Neutral ending instead (as described in the optional portion of Sections 25 and 26).
Bad:
Hard to find but not much longer than the Very Bad/Neutral endings – this can be reached by interacting with the helicopter but choosing not to radio Paul and then heading back to the boat. This will involve a boss fight followed by a second first person segment (as described in Section 29).
Neutral:
One of the easier endings to get – this ending can be reached when using the helicopter to leave the island by radioing Paul after arriving in the final ruins area Alicia lands in following the final Paul section in Ailfrydtown (as described in Section 29) if you have collected the letter to Paul from the room locked with the Ceres Key in the mansion as this will trigger the Neutral ending instead (as described in the optional portion of Sections 25 and 26). If you have not collected this letter you will instead get the Very Bad ending instead.
Good:
The ‘true’ ending of the game – this ending is found by following the main story to the end with or without any secrets or specific notes, but without taking the helicopter encountered in the final ruins area. Instead, read the Skull Island map found in the nearby ruins and head back to the boat Alicia entered the area with( as described in Section 29). This will take you to the final area of the game and upon completing it and killing the boss at the end you will be awarded with the Good ending (as described in Section 30 and Section 31).
Secret:
The Secret ending is obtained by completing the Cathedral and it’s boss fight just like the good ending after fulfilling a few requirements regarding a secret in the Cathedral and gathering specific lore notes. Once you’ve completed the boss fight and read the note nearby on Ailfryds body you a new portal will appear in the center of the boss arena that will take you to the 5th pyramid. This Pyramid is solved similar to the others and after solving it and looting the book nearby you’ll be able to enter the portal that appears to trigger a very nostalgic ending (as described in Section 32).
38. Costumes and How to Unlock Them
There are many costumes for the main character in this game. A few of them are unlocked by default while others are either unlocked by accomplishing certain things in game or purchased as DLC. The following list will show you every skin currently available as well as what you have to do to unlock them.
Normal Outfit 1:
- How to unlock:Available by default
Normal Outfit 2:
- How to unlock:Available by default
Survivor Outfit:
- How to unlock:Available by default
Western Costume:
- How to unlock:Complete the game with a ‘good’ ending on any difficulty
Classic Nurse Costume:
- How to unlock:Complete the game with a ‘bad’ ending on any difficulty (not ‘very bad’)
Hitwoman Costume:
- How to unlock:Complete the game on ‘hard’ difficulty or higher
Sci-Fi Commando Costume:
- How to unlock:Complete the game with a ‘secret’ ending on any difficulty
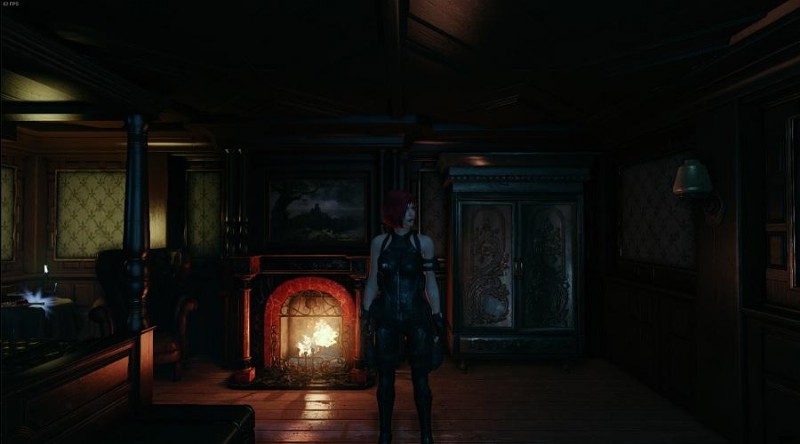
Police Officer Costume:
- How to unlock:DLC
Modern Nurse Costume:
- How to unlock:DLC
House Maid Costume:
- How to unlock:DLC