テイルズ オブ グローリー 2 – 報復 – 生き残ったシリア ガイド
損失を減らすためのグリーンホーンのガイド:正直なところ、私よりも優れた誰かが良いガイドを書いてくれることを願っています.しかし、そこには何も見つからなかったので、他のコントロールポイントスタイルのマップを打ち負かすことができたにもかかわらず、長い間それを打ち負かすことができなかったので、最初のマップで人々を助けるかもしれないいくつかの観察を書き留めることにしました.
シリアを生き抜く方法
私が間違っていたことと、それを改善する方法
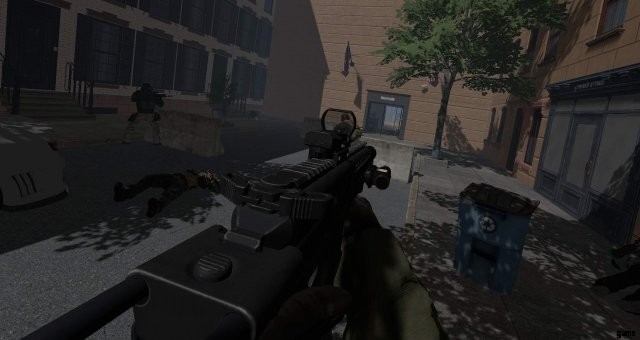
基本的に、私は自分の分隊と会社の残りの部隊の両方に関して、ゲームを十分な戦略で扱っていませんでした。まず、私はこのゲームの専門家ではないので、これをすべて塩で取る必要があると言いましょう。あなたの分隊の各メンバーは、通常の兵士の 10 倍の価値があるようです。さらに…それらを効果的に使用すれば。状況によっては、私よりも優れているように見えることもあります。
また、他の分隊の最善の用途は、エリアを支配し続けることだと思われます.兵士を失うとチケットを失い、敵の兵士と同じくらい速く、頻繁に死ぬため、私はそれらを攻撃に使用しません(敵よりも頻繁に死ぬように見える場合があります).個人的に、または分隊と一緒に取るコントロールポイントにそれらを送ることができますが、私はそれらを「後部を育てる」と考えています.基本的には、いくつかの火力支援を証明し、敵が前進する最前線を通り過ぎるのを防ぐだけです.
また、自分の分隊メンバーをコントロール ポイント (主に村のコントロール ポイント) に置き去りにして、チョークポイントを封鎖するのを支援することも考えていませんでした。分隊員全員がこれに長けているようですが、私はこの目的のためにタイラー (AR+MG) とザック (LMG) を使用することを好みます。エリアを見守るカバーポイントにそれらを注文し、あなたの主な目的に展開します.それらは進入路を封鎖するのに非常に効果的です。防御側の 2 人で、彼らがカバーしているエントリー ポイントをほぼ無視できます。
失敗した試みでは、私は常にチーム全体(または防御していない2つ)を「フォロー」モードに保ちました.彼らはあなたの後ろにいるだけでキルを獲得しますが、常にあなたに遅れをとっており、できる限り多くの火を放っていません.代わりに、ルイス (スナイパー) とナタリア (SMG/メディック) に「バウンディング オーバーウォッチ」戦略を使用してもらいます。あなたと他の分隊員が彼らの前進をカバーしている間、前方ポイントで1つをカバーするように命じます。次に、相手をカバーしながらさらに上のポイントまで注文します。分隊員は、ターゲットを捕捉して発砲を開始するためのエイムボット レベルの能力を持っているため、あなたの後ろを監視するのは素晴らしいことです。最初の成功した実行の最後の部分では、ビーズを取得できず、試行するたびに体力を減らし続けた少数の敵兵士がいました.だから彼らを始末するために、私は分隊全体に捜索と破壊を命じました。時々、彼らはあなたよりも優れています (または、とにかく私よりも優れています)。
まだ完全にマスターしていないことの 1 つは、実際に分隊コマンドを使用することです。これまでのところ、カバー オーダーを使用するだけで済みました (Oculus では、X キーを押したまま、カバー スポットをポイントし、トリガーを押したままにし、ジョイスティックを使用して分隊メンバーを選択します)。時々、自分の位置でエリア コマンドを使用して、回復を求めます。しかし、射撃の抑制、エリアスナイプ、またはグレネードなどのエリアコマンドを使用することはないようです。火を鎮圧しても実際には何も起こらないようですが、私はまだ十分に試していません.
シリアの段階的 (多かれ少なかれ)
だから、私が言い続けるように、私はこのゲームの初心者ですが、これはこのマップで私にとってうまくいくものです:
- ロードアウトを選択したら、敵に向かって前進する前に、PDA を取り出し、マップを使用してアルファ、ブラボー、チャーリーの分隊を村の北、西、南の境界にある建物に向かわせます。村のはずれにある防御可能な建物を選んでください。
- 分隊にあなたに従うように命令し、完全に支配できるまで村を一掃します (緑)。競合している間は立ち去らないでください (黄色)。ゲーム全体を通して村を支配し続けることは非常に重要です。さもなければ、あなたの軍隊はどこからでも出撃することができなくなります.
- タイラーとザックが村の北と西のアプローチをカバーするように設定し、それぞれが素敵なキル ボックスを設定できるようにします。南に向かおうとしているので、そこに誰かを配置する必要はありません。マップの目的に応じて、南の FOB は敵に追加の増援を与えます。それがゲーム内でどのように現れるかはわかりませんが、その知識のおかげで毎回最初のターゲットになります.
- ここで選択肢があります。 If you are competent at the squad commands and a good fighter yourself, you can leave all three allied squads in the village on defense. If you are fairly quick, this is a good idea, because you won’t be losing many tickets from casualties. But if you are pretty slow, you’ll lose a ton of tickets just getting to the south objective (FOB). Option two:Send Charlie squad (or any squad, just picking one arbitrarily here) to a defensible building just outside of the FOB. They will provide extra fire support on your way down, making the approach easier and faster. However, you need to stay ahead of them so they don’t take the brunt of the enemy fire.
- Use bounding cover with Louis and Natalya, generally keeping Natalya up front, and Louis in good sniping positions until you have the FOB under control. Usually when you take it, it immediately becomes contested because of one or two lingering enemies. Make sure you finish off the enemy forces before you leave, or they will take it back and enemies will start spawning from the south again. If you keep full control of the village, you can largely leave the other control points undefended once you have them green.
- If, at any point, the village becomes contested, you have to make a judgement call as to whether to head back and defend it (this usually doesn’t happen with Tyler and Zach as your guard dogs) or hope it will be fine contested until you are done with the FOB. This is safer to do if you have the FOB contested with Charlie’s help, because (as far as I am aware) control points can’t spawn new soldiers while contested.
- Once the FOB is yours (green), head back with Louis, Natalya, and Charlie (if you brought them). At this point, you can relax a little, because your ticket loss will be roughly equivalent with the enemies’, not accounting for soldier deaths. That said, you probably have about half the tickets the enemy does, so you’re still on the clock.
- Now you can either head west or north. West will unlock artillery strikes, and north will unlock air strikes. Both are awesome, but I can’t say how effective they are, haven’t used them enough. I definitely think air strikes are cooler though. Same as the FOB, you can have Charlie come with, or take it on your own. The same strategies apply here. But this time you can bring Tyler or Zach, whichever was defending the path you are about to go down. I feel like Zach is the best defender, but I prefer having him in my squad on the second push anyway.
- Always remember to lean on your squad and not try to go rambo. I’m not positive of this but it seems like, though the enemy loses places they can spawn at as you take control points, they don’t lose spawn rate which means each new control point will be harder to take. But, with the strategy I use, you can bring one more squadmate for each push, and they’re all force multipliers.
- Once you have the second point (again, make sure it’s green before heading back), you have to once again make the call on whether to have Charlie assist on this push. Your tickets are probably getting very low at this point, so taking them with you is a liability because the enemy will be thicker than the last two control points. Without their help it will be slow going, but that may be offset by the fact that the enemy will be losing tickets much faster than you now. I like to leave Alpha, Bravo, and Charlie at the village and push forward with my full squad, making sure everyone is using cover points so they can unleash hell.
- Since you have access to artillery or airstrikes for this push, and they seem to recharge pretty fast, it’s a good option when you feel pinned down. Not sure how effective it is, but it sure is fun. It’s extra important to be using cover points for your squad as you move up on the last push, cause you need your teammates on their feet and laying down as much fire as they can.
Random Tips/References
Just wanted to add a small section for one-off tips for the game as well as some info to reference at a glance:
Tyler
Carries an assault rifle with underslung grenade launcher. Area command is to launch a grenade. I haven’t tried it much yet, but my guess is it would be best used against a group of enemies really entrenched in some cover. He’s my second choice for defending a zone while I’m gone.
Zach
Carries an LMG. Area command is to suppress with the LMG. Not actually sure what use this command would be over just having him post up behind some cover and do his thing. He’s also my first choice for defending an area.
Louis
Carries a sniper rifle. Area command is to “area snipe” but haven’t tried it yet. I’m assuming it would be a useful command for dealing with enemies really stuck into cover you’re having a hard time with, similar to using Tyler’s GL, but useful at greater ranges, perhaps? I like to post Louis on a rooftop that has a good view if possible.
Natalya
Carries an SMG and is your squad medic. Her area command is to heal a target in the area. In practice, my health regeneration has usually done the job by the time Natalya gets to me. I think she could also revive a downed squad mate, but haven’t tried it yet. I’m assuming its probably better to do that yourself, since you can drag your squadmate into cover before healing them. She’s actually great as a point-man with Louis bringing up the rear, thanks to that SMG going brr.
Tickets
In any control point-type map, getting half the objectives under your control ASAP is your first priority. After that, you are on even footing with the enemy as far as ticket loss.
Weapon Offset
It was important for me to figure out how to use the weapon offset feature, since I use a VR gun stock (highly recommended for this game, cause aim is very shaky without). The in-game instructions say to grip your weapon in both hands, hold down both triggers, and press button 1. I took this to mean (on Oculus) do all the above, and press the A button. That didn’t work, though. So I took to mashing all the face buttons while holding grips and triggers, and that worked. I think what you actually need to do is hold “button 1” on both controllers. So for Oculus, that would A and X.
Map Usage
You can target a spot on the map with trigger and if you press A (Oculus), the map will zoom in on that spot making precision placement easier.
Grabbing Mags
I have a hard time grabbing magazines when carrying my secondary weapon. I always end up grabbing my primary weapon instead. I find if you grab from your left hip, you’re more likely to grab a magazine instead of your primary weapon. Though sometimes that just leads to you grabbing a medical kit. I hope the developer gives an option to grab certain items with trigger, or at least mags.