ダンジョン オブ エンドレス – メンバー限定アチーブメント ガイド (ソロ)

メンバー限定の実績をソロで達成した方法を詳しく説明するガイド。
会員限定アチーブメントの入手方法
はじめに
私はこのゲームが大好きですが、まだガイドを作成していません!メンバー限定の実績を達成したばかりなので、誰かが問題を抱えている場合に備えて、どのように達成したかをお見せしようと思いました.すでに少し遊んでいて、基本を理解していると仮定します。難易度「Too Easy」でこの実績を完了しました。これは、実績ではどの難易度を選択してもかまわないためですが、この戦略は難易度「Easy」でも機能するはずです。
ご存知ない方のために説明すると、「メンバー限定」の実績は、「追加のヒーローを募集せずに脱出ポッドでゲームに勝つ」ところです。つまり、基本的に、最初の 2 人のヒーローを取得するだけです。通常、2人から始めて途中で見つけたヒーローを雇って、最大4人のヒーローを操作するため、これは異例です。また、最初のヒーローの 1 人が死亡した場合、別のヒーローを雇ってその代わりにすることはできません。
この実績をソロで取得するのはそれほど難しくないと思いますが、この実績を取得する別の方法は、4 人のプレーヤーでマルチプレイヤーをプレイすることです。このようにして、完全な 4 人のヒーローから始めて、誰も募集しない限り、成果を得ることができます。このガイドは、ソロ (または 2 プレイヤー) でプレイすることを前提としています。
これは私の最終フロアのスクリーンショットです。戦略が非常に効果的だったことがわかります.
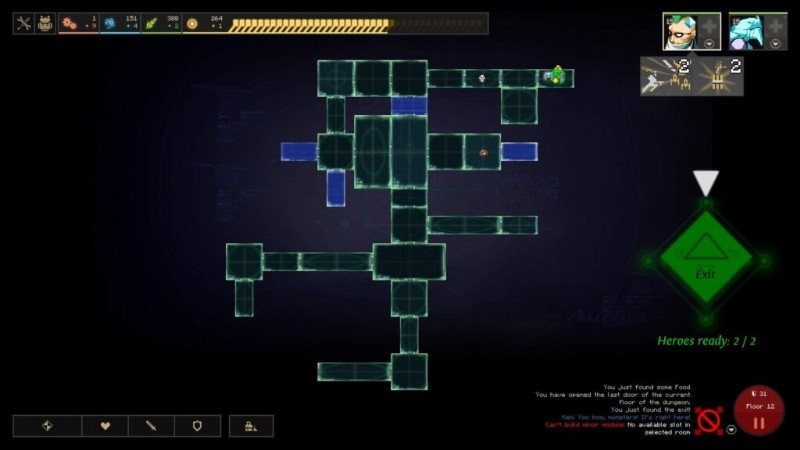
264 個のほこりがあることに注意してください。すべての部屋には予備のほこりがあり、両方のヒーローが最大レベルであり、残りの食べ物と科学がたくさんあります。残りの産業が少ないことは気にしないでください。退屈だったので、終了する前に大量のマイナー MOD を作成しました。
ヒーローの選択
ヒーローについては、Ken Massoqui と Kreyang を使用します。
ケン
ケンにはたくさんの強みがあります。まず第一に彼のDPSです。彼はまともなベースライン DPS を持っており、彼のアクティブな能力である Sado-Selfish と Sacrifice を使用すると、ゲームで最高の DPS の 1 つになります。 Sado はレベル 2 でアンロックされ、2 ドアのクールダウンがあります。それは彼に +50 の攻撃力を部屋のヒーローで割った値を与えます。この能力は、早期に取得でき、クールダウンが短く、合計 2 人のヒーロー (Ken 以外の他のヒーロー 1 人) しかいないため、この実績に最適です。攻撃力+25です。あなたの 2 人のヒーローはおそらくマップ上に散らばっているので、通常は最大限の利益を得ることができます.
Ken の 2 番目のアクティブな能力である Sacrifice は、レベル 7 でアンロックされ、2 ドアのクールダウンがあり、Ken に +130% の攻撃力を与えますが、毎秒 20 ダメージを与えます。マイナス面は苦痛に聞こえるかもしれませんが、実際にはほとんど目立たず、MOD、アイテム、または食べ物で癒すことで簡単に軽減できます. Sado と Sacrifice は相性が良く、必要に応じて大きなダメージを与えることができますが、多くの場合、ウェーブごとにどちらか一方を使用する必要があります。それらを交互に使用すると、それぞれに 2 ドアのクールダウンしかないため、常に 1 つのクールダウンがあります。
DPS だけが Ken の強みではありません。基本速度が 37 と優れているため、マップをすばやく移動できます。そのため、彼は私たちのクリスタル キャリアになるでしょう。また、重要なことに、彼はレベル 5 で修理パッシブを学習します。つまり、波の後、彼は走り回ってモジュールを修理することができ、私たちが修理パッシブを持つアイテムを見つける必要はありません。
Ken のもう 1 つのパッシブである Danger Junkie は、この実績には優れていますが、特筆すべきものではありません。レベル 4 から開始すると、単独での速度と攻撃力が向上し、ソロでの戦闘やクリスタル ランニングに役立ちます。
ケンにはいくつかの欠点があります。主に彼の健康状態が低いことと、彼がクルー派閥の一員であることです。乗組員の派閥はレベルアップの食料コストが最も高く、高価ですが、2 番目のヒーローをレベルアップのコストが最も安いネイティブ派閥の一部にすることでそれを補います。また、ケンはレベル 7 に到達するだけで修理と両方のアクティブを取得できるため、しばらくの間レベル 7 に座っていても、スクイーズではありますが効果的で有用なままにすることができます。ケンは体力が低いため、戦闘中は死なないように細心の注意を払う必要がありますが、彼はゲームで最も不機嫌なヒーローとはほど遠いので、モジュールとアイテムを使用して彼を健康に保つことができます。
クレヤン
クレヤンは私たちの 2 番目のヒーローであり、ケンのように、優れたユーティリティを備えたかなりタンキーなヒーローとして多くのことをテーブルにもたらします。まず、前述のように、クレヤンはネイティブ派閥の一員であるため、レベルアップに必要な食料が少なくて済みます。これは私たちの初期の経済を助けます。第二に、クレヤンはレベル 4 で操作を学習し、平均以上の機知を持っているため、早期に操作を開始して環境を強化することができます。
クレヤンは平均以上のオペレーターに過ぎないかもしれませんが、彼女のアクティブ アビリティ「Winter Just Came」は、私たちのチーム構成を本当に機能させる素晴らしいアビリティです。 WJC はレベル 3 で習得し、フロア全体のすべての敵を 40% 遅くし、3 ドアのクールダウンがあります。これは基本的にすべての部屋に Neurostun 効果を適用しますが、既存の Neurostuns とスタックすることもできます。波全体を遅くすることは、クリスタルを動かすときに非常に役立ちます。また、科学を使用してクールダウンから解放し、すべてを遅くすることができます.危険な脱出には大いに役立ちますが、別のレーンからやってくる暴徒に対処するために 2 人のヒーローに位置を変える時間を与えるために、床を片付けているときにも役立ちます。
Kreyang の他のアクティブは有用ですが、控えめに使用する必要があり、頻繁に必要とされないことを願っています。 Hold the Line はレベル 8 までロック解除されませんが、必要に応じて非常に便利なボタンです。部屋内のすべてのヒーローの防御力を +100 増加させますが、ダストの戦利品確率を -40% 低下させます。このアビリティはプレイスルーで 1 回しか使用しませんでしたが、WJC は各フロアで何度も使用し、ケンのアビリティは常に使用していました。ダストのドロップ率を下げたくないので、できるだけ使用しないようにしたいのは明らかです。
クレヤンはまた、レベル 6 からエンドレス エキスパートを獲得し、ボーナス科学を与えます。決して必要なパッシブではありませんが、ゲーム中盤で初期の研究を取得し、ゲーム後半で能力をリフレッシュするのに十分な科学を確保するのに役立ちます.
欠点に関して言えば、Kreyang の唯一の問題は、DPS が低いことです。私のプレイスルーでは、適切なモジュールを使用して、彼女が生き続けるのに苦労することはめったにありませんでしたが、多くの敵、特に彼女のモジュールを殺す前にモジュールを殺す可能性のあるモジュールを攻撃するモブに対処するのに苦労しました.彼女のデバイス スロットには機知に富んだアイテムが入っている可能性が高いので、より多くの DPS を得るために彼女に素敵な槍を持たせたいと思うでしょう。
ヒーローのレベルアップ
私が選択したレベルアップ パスとその理由は次のとおりです。
<オール>この実績を達成することの良い点は、ヒーローが 2 人しかいないため、彼らが直面しているモブに対してオーバーレベルになり、最終フロアの前に両方のヒーローが最大レベルになることが保証されることです。覚えておいてください:モジュールは各フロアの後ろに置き去りにされますが、あなたのヒーローは付いてくるので、マイナーなモジュールよりも供給されたヒーローに頼る方が良いです。ヒーローをすばやくレベルアップすることは、主要な目標の 1 つです。
テクノロジー
以下は、私が使用したテクノロジーの一部であり、大まかに階層別にグループ化されています。機能するさまざまな実行可能な戦略があるため、以下はそれを行う唯一の方法ではなく、私が行った方法です:
S ティア
- フード レプリケーター - レベリングとヒーリングのために、食べ物はとても重要です。できるだけ早くレベル 4 を取得してください。
- 産業ジェネレーター – インダストリーはゲーム後半であなたを運ぶものです。また、できるだけ早くレベル 4 を取得してください。
- ニューロスタン – いわば「暴徒の皮を剥ぐ」方法はたくさんありますが、これが彼らを遅くする唯一の良い方法です.少なくともレベル 1 の Neurostun が必要です。レベル 1 の Neurostun を持っていない場合は、上記の mod よりもこれを研究することを優先してください。この mod を最大にする必要はありませんが、それでも十分です。
ティア
- 買い物 – これは序盤のゲームでは優先度が高くありませんが、終盤のゲームの前にこれを拾う必要があります.これは、後のフロアでほこりを集めるために不可欠です。
- 緊急発電機 – この主要なモッドは高価ですが、ほこりがまばらな後の階で完全に節約できます.序盤は必要ありませんが、終盤には絶対に必要です。
- 催涙ガス – これらは主な攻撃モジュールです。敵を大幅に弱体化させ、部屋内のすべてのモンスターに範囲ダメージを与えます。
- ダスト フィールド ジェネレーター – これにより、ヒーローを非常に頑丈にすることができます。特に、多くのアンチヒーロー モブに直面した場合に役立ちます。
- Autodoc Shards – These are good on the frontline as well as at fallback points for extra healing. Its important to unlock this mod in case you have to deal with a Chimera Keeper.
- Mechanical Pal – This is important to get in conjunction with the Shop. Low priority, but you’ll want at least level 1 before the late game.
B Tier
- Prisoner Prod – You will build a ton of these. For that reason alone its worth it to level them up when you don’t have any better options.
- LAN Module – I do recommend picking this up, though it is low priority. Wait to see the first few waves of enemies and only build this if you see they have module-targeting mobs (like silic dozers and zoners).
- Pepper Spray – This is essentially like a Tesla, single-target Neuro and Prisoner Prod all in one. In unsupported rooms I usually build one of these and a Prisoner Prod.
C Tier
- Suppressive Firebot – On normal runs, with turrets like Misha or Gork, these are high priority. But since Kreyang is low DPS and Ken will be running all over, I think this is a bad mod for this team.
- KIP Cannon – I didn’t build any of these, and I usually don’t think they’re worth it, BUT since you only need to level up 2 heroes, you don’t need as much food, which means your economy will be able to start stockpiling science in the mid-late game. I could see these being useful while hunting this achievement. I had between 150-300 science during my last few floors, so these could’ve been valuable.
F Tier
- Tactical HUD – Since we only have 2 heroes, this mod’s value is diminished. It is a late-game major mod that consumes a valuable major mod slot. Do not recommend analyzing.
- Field Medic – Similar to Tac HUD, we only have 2 heroes, so this mod’s value is diminished. In the late game we will have max-level heroes already, so all of our food will be saved just for healing, so we don’t really need to reduce the heal cost since we’ll be floating food.
The following minor modules are totally unnecessary, but feel free to use them if you want (I didn’t build a single one on my run):Viral Injector, Bio-organic Transference, Holohero, Smoking Gun, Seblaster, Claymoar, Biomass Cannery, Biomass Factory.
Items
For items, you’ve got a couple things you’re looking for. I won’t list all the items, just the traits you want for each hero.
Ken
- Weapon – Highest DPS possible. It’s okay to sacrifice a little bit of speed to get higher DPS. Ken’s role is to run around and kill waves, he needs to kill them fast.
- Armor – Ideally you want an armor that will give speed as well as protection. Ken needs speed for running the crystal. Don’t take any of the armor that drastically reduces speed.
- Device (room clearing) – There are two different devices you want for Ken. While you’re kicking doors, you want an item with Pilfer like Third Eye. This gives you more dust when opening dust rooms, which is hugely important. If you can’t find that, then you want something that increases your DPS or speed.
- Device (crystal running) – Ideally you’ll use an item with Scamper like Photon Decelerator. Scamper makes it so monsters don’t slow you down, which could be useful depending on your crystal running route. If you can’t get Scamper, then any high-speed device will do. Defense is not worth it on Ken, no amount of defense that can be provided by a device item will be enough to save him.
Kreyang
- Weapon – Any old spear will do, just pick the one that yields the highest DPS.
- Armor – Ideally, Kreyang will be staying stationary and operating. I recommend really tanky armor, even if it has big speed debuffs. Her speed is not important, however her DPS and wit is important, so don’t pick any armor that lowers DPS or wit. Space Suit is nice because it provides nice defensive stats and wit.
- Device – You mainly want whatever item gives her the most wit possible, to help your economy. In the late game you may find she has to fill dark rooms and isn’t operating much, in which case you might swap it out for a combat item.
A noteworthy item that is always useful is Dust Box which gives whoever you equip it to the Secret Compartment[dungeon-of-the-endless.fandom.com] passive ability. If you find this item, you should pick it up, and equip it to Kreyang before you pick up the crystal as it will really help, especially on the later floors.
Early, Mid &Late Game
Early Game (F1-F4)
Honestly, my first 2 floors were really bad on this run and I thought I would lose because I did not have enough major mod slots or dust. Luckily with good strategy I turned it around.
For the first few floors I normally start with food, then industry, then science. Until Kreyang is able to operate, use her to fill dark rooms as necessary. Remember that Ken does more damage solo (when not in a room with Kreyang). As soon as Kreyang has Operate, I get her on a food mod to farm extra food so we can get some early levels. Make sure not to over-build major mods on early levels when the max door count is low because the majors won’t pay for themselves. On floor one the door count is about 11-12, increasing by 1-3 doors per floor.
Throughout the early and mid game you’re playing a guessing game, where you’re trying to guess where the exit is and open every door except the door to the exit room. Remember, once you have opened the door to the exit room and discovered the exit, the mobs will be much more difficult:more will spawn and they will spawn more often. So in the early floors you’re usually trying to open the exit last in order to farm resources safely. That said, if you’ve got some terrible room setups, don’t be afraid to hunt for the exit and ditch the floor early; farmed resources are no good if you’re dead.
Prioritize leveling-up and researching upgrades for your food and industry modules, as well as picking up the various high-priority minor mods. However, if an artifact is in your way and you haven’t gotten your FIDS-producing major mods down yet, don’t be afraid to destroy an artifact to make room for a major mod.
Mid Game (F5-F8)
You need to balance farming resources with going for the exit if the floor is looking rough due to RNG. You should try to save as many expensive items as possible to save them for when you find a dust merchant. Getting dust for items is much more valuable than some food or industry. Going into late game you want to have spare items to sell to dust merchants if possible.
In the mid game is when you should start getting the late-game techs that you’ll need such as Emergency Generator, Mechanical Pal, Shop, LAN Module, etc. By the end of mid game or start of late game, your heroes should be max level, but don’t get a level-up if it will leave you with no food for healing.
Late Game (F9-F12)
You still want to get your resource production major mods down early, but once your heroes are both maxed, you will only build 1 food, and all the rest will be industry. Never underestimate how much industry you may need in the later floors:Emergency Generators are expensive, destroying old major mods to build a Shop or LAN Module, building tons of minor-modules, rebuilding sacrificed prisoner prods, etc. You want to be floating in the triple digits for industry at all times. You shouldn’t need to build any science, but if you’re having to spend it to refresh your abilities you might need to build 1 science.
Your highest priority now is to generate as much industry and dust as possible while hunting for the exit. You are no longer trying to farm resources- and thus find the exit last- like you were in the early game. Dust and major mod slots are rare on these floors, so you’ll want to get out and go to the next floor ASAP.
If you find a merchant, you must build a shop, get the merchant to safety, and build 1 mechanical pal by the shop before continuing. A shop can be operated (by mech pals or heroes) to generate dust at a rate of 1 dust per 10 wit, rounding up. The rounding up part is important because a shop with 1 level 1 mech pal will yield 1 dust per door, which is absolutely massive. It is not worth it to build multiple mech pals unless you are also operating with Kreyang or if you have 5 minor mod slots and can build 5 level 4 mech pals to get to a wit of over 10.
You should be saving items to sell at dust merchants. You can buy items you don’t need from non-dust merchants to sell them at dust merchants if you have spare inventory space.
In the late game you should also stop researching, unless you are still missing some critical modules. Make sure you always have at least 50 science banked so you can refresh your abilities if necessary. Likewise, your food situation should be great because your characters should be max level, so your only food expense is for healing and food merchants.
If you’re struggling for dust, always remember you can bulldoze major mods or the research artifacts to replace them with Emergency Generators. While expensive, an EG light up dark rooms that used to contain artifacts, power rooms to turn on useful minor mods, and allows you to reallocate dust to other dark rooms. WARNING:don’t be a moron like me and accidentally build an EG in a self-powered room… always make sure to un-power the room first (to make sure its not self-powered), then build the EG. Also, another trick with EGs, EG cost scales with the production major mods, so if you can’t afford an EG, you can destroy an industry generator or food processor to reduce the cost of the EG, then build the production mod back if you really need it.
Depending on how well you’re handling the waves, you may need to take Kreyang off of operating to fill dark rooms. On my run, on the last 2 floors, Kreyang operated twice, the rest of the time she was filling dark rooms and running around fighting.
一般的なヒント
Here’s a few more random tips to help you out that didn’t really fit anywhere else:
- The Rule of Three: avoid creating groups of 3 adjacent dark rooms. This rule of thumb keeps mob waves manageable. It is worth it to reallocate dust, build an Emergency Gen, or take Kreyang off of operating to break up a block of 3 dark rooms. Otherwise you’ll need some major defensive investments.
- Destroy Artifacts: Okay, you don’t and shouldn’t destroy all of them, but Kreyang’s passive that buffs her when an artifact is actively researching something is far less important than getting a major mod down. If you don’t need to research anymore, destroy it and build. Likewise, if you have discovered 2-3 artifacts, and you don’t have enough science to keep them all going, don’t be afraid to destroy the extras. Silic dozers won’t target inactive artifacts, but will target active ones. You can use this in an emergency mid-wave to distract dozers by buying a cheap research you don’t need. This has the added benefit of buffing Kreyang through her passive.
- Don’t Illuminate All Rooms: Mobs have a chance to drop dust when you kill them, therefore, you want mobs to spawn. On early floors if I have enough dust to power all rooms, I will often intentionally leave small, manageable 1 or 2 room clusters of dark rooms unlit, so that mobs have somewhere to spawn, so I can farm dust off of them. Obviously there is a balance to be struck between farming mobs and being overwhelmed by mobs. Typically, Kreyang operating with a couple defensive minors and 1 dark room adjacent is the perfect setup. If Kreyang doesn’t have enough DPS to kill the dozers before they kill her major, build a LAN Module somewhere.
- Hotkeys: Its definitely worth it to look the the controls and learn the hotkeys for heal, refresh, character swapping, etc.
- Map View: When you scroll out to the map view, you can see where heroes and mobs are, as well as which rooms are powered and lit. This is often my main view when microing both of my heroes while fighting. I just zoom in to see specific interactions.
- Cheeky Doors: If you accidentally find the exit early, and you want to leave because you have a lot of dark rooms, but you just build your majors and you want to get some more resources before leaving, you can open some cheeky doors. Basically, just set things up as best you can, and have 1 or both of your heroes open some nearby doors in quick succession, before popping the crystal and running away. You don’t need to clear all the waves before you open the next door. You can do some pretty risky stuff this way, including opening some doors then quickly redirecting the power before lifting the crystal. Just remember once the crystal is on the move you cannot power any rooms.
- Safe Doors: Any door between two rooms you’ve already discovered is a safe door. It can be opened and no mobs will spawn, no matter how many dark rooms you have, though you will still get resources and cooldown and research progress.