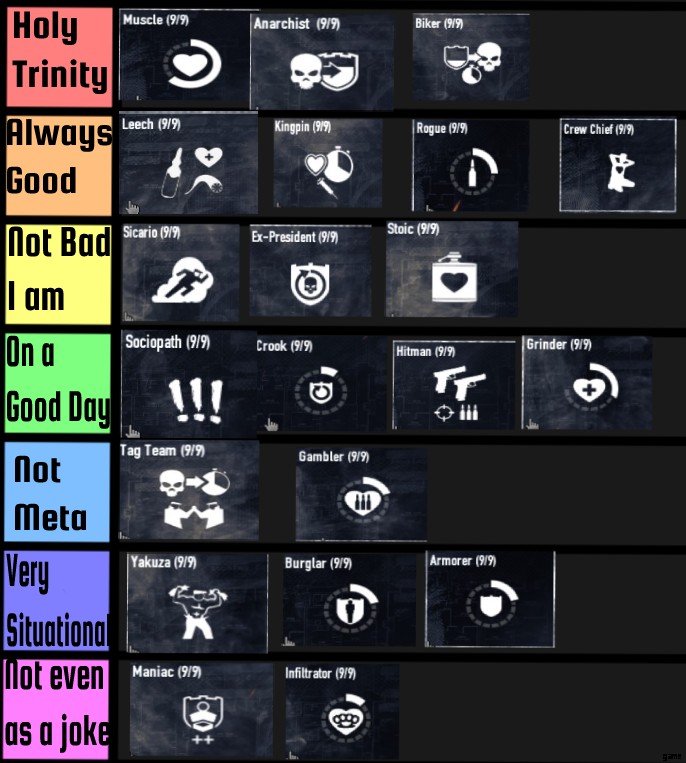
PAYDAY 2 – Perk Deck のヒントとコツ!
ここでは、一般的な使用例と戦略のヒントを示しながら、各特典デッキの隠れた統計について説明します。
このガイドには正確なビルドは含まれていません。各デッキを実行するのが最適であるか、場合によっては実行しないかについて、提案と一般的なアイデアを提供するだけです.
クルーチーフ
<オール>クルーチーフは素晴らしいです。このデッキを使用するだけで、チーム全体が素晴らしいヘルス再生とその他の素晴らしいボーナスを得ることができます。しかし、それをコントローラー ツリーの人質取りスキルとエンフォーサーのタンク スキルの一部と組み合わせると、あなたは神になります。
悲しいことに、重くて特定のポイントへの投資がなければ、クルーチーフはそれを使用する人にはあまり役に立ちません。ヘルスアーマーとダメージ抵抗が少し増えます。しかし、特別なことはありません。
クルー チーフは、強盗に関する十分な知識がある場合に最適です。人質を隠す場所を知っていると時間を節約できます。モールクラッシャー、バンク ヘイスト、ゴー バンク、ビッグ バンク、ノー マーシー、グリーン ブリッジなど、多くの民間人がいる強盗で実行するのが最適です。 .
パニック ルーム、ヒート ストリート、Birth of Sky、Henry's rock、Beneath the Mountain など、民間人がほとんどいない強盗や移動が多い強盗は避けてください。
はい、もちろん警官を人質に使うことはできますが、民間人よりも信頼性が低くなります.
強盗の知識については、チームとコミュニケーションを取ってください!
警官がスポーンしない場所や目標がない場所に人質をプールします。あなたが何をしているのかを彼らが知っていることを確認してください。すべての人質は、チーフが縛り付けなかったものであっても、クルーチーフと人質状況/テイカーにとって重要です.
クルーチーフを実行している間、あなたはサポートです。チームメイトがベストを尽くせるように、応急処置キット/ドクターバッグ、ジョーカーなどに投資してください。
Marathon Man にはタイプミスがあり、実際には 6% ではなく 8% のダメージ耐性を付与します。
アンダードッグエースと重ねて、耐久性を最大限に高めましょう。
強制された友情のエースは、人質が最大数であっても、追加の抵抗が2ポイント程度のダメージを与えるとしても、まったく価値がありません.
まったく価値がありません。
余分な結束バンドと結束速度が速いため、基本は問題ありません。
Berzerker スキルは、実際にはサポート特典になる可能性があります。これは、体力が 50% 未満の間、ブルート ストレングスの防御ボーナスが 8% から 16% に 2 倍になるためです。永続的なビルド。
グレネードランチャーやスナイパーなど、人質を簡単に殺せる武器は避けてください。
特に、自分のボーナスを常に台無しにしたい場合を除き、このデッキでグレイズを取ることは避けてください。
武器に関してはクルーチーフが苦しんでいます。
人質、ジョーカー、アーマーに多くのポイントを入れて、それを最大限に活用する必要があります。
ショットガンは安価で非常に強力で、簡単に私の一番のピックです。オーバーキルを達成したら、邪魔になるものは何もありません。本当に何でもうまくいきます。警察の人質を取るのをより簡単にするために、抑制されていない武器を使って最大の脅威を手に入れることを忘れないでください.
筋肉
一見、バフが必要なように見えます。
数秒ごとに 3% の HP 回復は哀れに聞こえます。グラインダーはそれを大幅に凌駕し、クルーチーフはサポートデッキとして優れています。あなたのチームよりも撃たれる可能性が高いことは、彼らにとっては良いことですが、あなたにとってはひどいことです.パニックはひどいものです。それはあなたの目的を台無しにします。そうです、ソシオパスもパニックを広めますが、そのデッキの私のセクションを読めば、なぜそこで機能するのかがわかります.
覚えておくべき小さなことは、あなたの再生はパーセンテージに基づいているということです。そのため、他のスキルや他の誰かの特典デッキであなたの健康を上げれば、その量はスケールアップします.
再生量が固定されているグラインダーやバイカーとは異なります。
ゲーム内で 2 番目に大きなヘルス プールがあるにもかかわらず、優れたアーマー ゲーティングはマッスルで大いに役立ちます。少なくともヘビー バリスティック ベストは必要です。
人質取りは、ネイティブの再生をほぼ 2 倍にする、追加の再生の優れたレイヤーを追加します。これを途中で獲得しなければならない変換スキルと積み重ねれば、最大のタンクになるための道を順調に進むことができます.
アンダードッグは、ダメージと耐性を高める優れたスキルであり、ゲームで最高の武器の 1 つであるショットガン スキルへの道も示してくれます。レイヴンをメインに、ナメクジ/サボット ジャッジをサブとしてつかめば、ほぼすべての脅威に対処するための十分な準備が整います。
ブルドーザーに対処したい場合は、スラッグを爆発ラウンドに交換することもできます.
賢明なサポート マッスル ユーザーは、回避ユーザーと緊密に協力するのが最善です。考えてみると、15% の攻撃の減少は、基本的に、マッスルを装備したチームメイトの視界内に立っているだけで 15% の回避ボーナスを意味します。
運が良ければ、クルーチーフやリーチを走らせている誰かがいれば、マッスルはほとんど止められなくなります。あなたの友人がクルーチーフのメインである場合、これは理想的なデッキです。
パニックはひどいもので、本当の防御策はありません。警察がつまずくと、警官は耳をふさぎ、かがみ込んで狙いを定め、リズムを完全に打ち砕きます。
あなたの最善の策は、ショットガンを使用して、パニックを広める前に常に一発のヘッドショットを取得することです.
展開可能なものについては、コントローラーがいっぱいになったらドクターバッグをつかんでください。結果として得られる再生は応急処置キットを無効にするのに十分です。
しかし、あなたが本当のゲームの道を歩みたいのなら.次に、私の「聖なる三位一体の C4 ビルド」に参加し、Controller を捨てて、代わりにそれらのポイントを Technician's Breacher スキル ツリーに入れます。
C4 はドリル スキルの前に強盗を丸々 1 分削ることができ、エンフォーサーのタンク ツリーを使用すると、銃撃戦の内外でサポートできる頑丈なビルドが得られます。
甲冑師
ゲーム内では「アーマー」の綴りが間違っています
Armourer は、ゲームで最も単純なデッキの候補です。このデッキを装備すると、合計アーマーが大幅に増加し、アーマーの回復速度が大幅に速くなります。アーマーゲートに得られる少量のアーマーに焦点を当てたアナキストとは異なり、アーマーラーは一度にすべてのアーマーを取り戻すことに完全に焦点を当てています。 Hitman に似ていますが、はるかに遅いです。
Armourer を使用するには、ICTV を使用する必要があります。タンク ツリーの頂点にたどり着くときは、Die Hard Aced が ICTV に影響を与えないことに注意してください。ショックと畏怖のインスタンスは 1 つしか乗組員でアクティブにできないことに注意してください。そのため、ポイントを節約して別の場所に投資できることをチームメイトに知らせることを検討してください。これはアーマラーの最終段階にも適用され、自分と乗組員に追加の 10% のアーマー回復率を付与します。また、ゴースト セクションからパルクール、ダック アンド カバー、セカンド ウィンドの基本バージョンを取得することを検討してください。これらの合計コストはわずか 4 ポイントですが、ICTV の遅い移動速度を大幅に相殺するために機能します。
Armourer を実行している間にポイントを投資することを検討すべき、さらに 2 つの重要なスキルは、Frenzy Aced と Bullseye Basic です。フレンジーは、受けるダメージを 25% 減らしますが、体力は 30% に制限されます。健康被害を受けることはめったにないため、これは良いトレードオフです。アーマラーは、アーマーが壊れたときにアナキストの 2 秒間の無敵を共有します。フレンジーに向かう途中でバーサーカーをつかんで、武器からより多くのダメージを与えることもできます。これは常に高く評価されています.一方、ブルズアイ ベーシックはアーマーゲートを可能にすることで生存率を大幅に向上させます。
詳細についてはアナキストを参照してください。
Frenzy または Berzerker に投資する予定がない場合は、コントローラー ツリーにある Joker スキルに投資することを検討してください。最上部にある人質取りを介して、移動速度と体力の再生とともに、合計体力のボーナスを得ることができます。
輝かしい 280 ポイントの比較的急速に再生するアーマーを獲得することとのトレードオフは、「アーマー サプレッション」と呼ばれるゲーム内で言及されていないメカニズムの形で、ある種のアキレス腱が残ることです。簡単に言えば、敵があなたに向かって発砲している場合、敵があなたを攻撃できるかどうかに関係なく、あなたの鎧は再生できません.これを回避する唯一の方法は、それらを殺すか、あなたと加害者の間にかなりのカバーを置くことです.この効果は、SWAT タレットで最も顕著です。狙撃兵やナメクジから地表貫通弾を発射するか、可能であればタレットを完全に回避することで軽減できます。
武器用。 「フル コンバット ビルド」を選択して、スナイパー、ショットガン、LMG、またはその他の好きなものを使用できます。隠蔽は、ICTV が装備されている場合は絶対に無意味であり、クリティカルを獲得しようとすることを知っておいてください.多額の投資を必要としない武器を使用する場合は、なんでも屋やインスパイアなどのチームメイトを支援するスキルを使用することを検討してください。チームの能力に応じて、よりダメージの高い武器を使用したり、自分とチームをサポートするために弾薬バッグを持参したりすることも検討してください。
強盗に遭ったときに実際に Armourer をプレイするためのヒント。再生が遅いため、できる限り開けた場所を避け、常にターゲットを隔離できるように移動するようにしてください。
開けた場所を横断する必要がある場合は、チームと協力して、外に出る前にできる限りその場所を片付けてください。
スナイパーはアーマラーにとって真の天の恵みです。多くの場合、自分のカバーを貫通して非常に安全に敵を倒すことができるからです。それ以外の場合は、必殺技をマークし、カバーの上に頭を突き出してヘッドショットし、安全な場所に身をかがめることに慣れてください。
Tl;dr:ストップ アンド ポップ。
ローグ
坊や、ローグ。
この特典デッキについて言及することさえ、このガイドがまだつま先を踏んでいなければ、フレーム戦争が始まるでしょう.
ローグは多くのプレイヤーに嫌われているデッキであり、デスウィッシュが最も難しいデッキだった時代には、これが間違いなく最高のデッキでした。存在するだけでダメージの50%を回避できるのは非常に強力です。最近では、嫌いな人が多すぎます。はい、ハッカーにはサポート ヒーリングがあり、クルックとヒットマンにはアーマーがあり、リーチは壊れています。しかし、Rogue は依然として非常に優れています。
Rogue が回避の学習に最適な理由を 3 つ提出します。
第一に、ローグは最も用途が広いです。
- ローグは、AP ピストル、アキンボ、グレネード ランチャー、ショットガン、スナイパーをすべて同じように簡単に操作できます。
- アーマーのためにヘッドショットを取得する必要はありません。 Rogue はドラゴンのブレスやオートマチックを恐れることなく実行できるため、1 日中ヘッドショットを叩き続ける筋肉の記憶がない新規プレイヤーに最適です。
- Artful Dodger スキルを取得すると、ローグは静止している間に 60% のフラット回避チャンスを獲得します。はい、ハッカーはそれを 10% 打ち負かします ポケット ECM を使用している場合のみ しかし、ローグは 100 秒のクールダウンがないスプリントだけで、同じ 70% の回避チャンスを得ることができます。
Rogue の主な焦点はもちろん、Artful Dodger と Silent Killer のツリーです。これらを手に入れたら、もう終わりです。
Technicians Lock n’ Load basic は非常に大きく、70% の回避率を維持しながら全力疾走しながらあらゆる武器を発射できます。それだけで、必要なときにいつでもコマンドでハッカーの回避を行うことができ、それを取るのに十分な理由になりますが、抑制された武器が 100% の安定性/精度を得ることはめったにないため、隠蔽を維持するのに非常に役立つステディ グリップとファイア コントロールを取得することもできます。最後に、オートマチックを実行したい場合は、身体の専門知識につながります.
Shotgunner から Close By basic を試すこともできますが、Shotguns のみです。
160% 高速な武器の交換を許可できるオーバーキルにつながるため、これには独自の利点があります。詳細は以下をご覧ください!
ローグのティア 9 カード「Killer Instinct」は、80% 速い武器交換速度のボーナスを与えます。
これをイクイリブリアム ベーシックと組み合わせると、武器の交換が 113% 高速になり、セカンダリ ピストルが安価で非常に効果的になります。プライマリ ピストルがシールドを貫通できない場合、5/7 AP は最適です。スナイパーをつかむと、STRYK 18c や Federales DLC ピストルなどの自動ピストルを実行し、SMG のようにスワップ速度を上げて使用できます。ガン ナットを使用すると、ブルドーザーの GGEZ スタイルを溶かすことができます。
ピストルを使用したくない場合でも、GL40 は、特にコンカッション グレネードを投擲できる場合に、スワップ スピード ブーストの恩恵を受ける優れた主要な選択肢です。通常の投擲武器を使用するように、グレネードを使用して短時間敵を気絶させ、GL40 を使用して部屋を片付けることができます。
ブラザーズ グリムのアキンボは、ドラゴンのブレス シェルを備えたローグの古典的な選択肢であり、分隊全体を溶かすことができる素晴らしいプライマリを作成します。
ただし、Contractor 308 や Grom などのクリティカル スナイパーや、M14 や CAR 4 などの DMRS を実行することもできます。
狙撃兵を走らせると、強力な防御上のアドバンテージが得られます。必殺技をマークして壁を撃ち抜くだけです。撃ち抜くことができるものとできないものを理解するのは難しいかもしれませんが、学ぶことは可能です.
問題がある場合は、壁の角/端を狙ってみてください。
回避に頼ると、狙撃兵の攻撃を受けやすくなり、ローグは、たくさんのバッグを移動する必要がある強盗には適していません.できれば、スローターハウスやアフターショックのような強盗は避けてください。
それでもスプリントを続ければ、うまくいくはずです。
展開可能なものとして、私はドクター バッグを取るのが好きです。
Rogue は利己的な perk デッキであり、チームを少しでもサポートできるのは素晴らしいことです。
クルック
クルックは奇妙なアヒルの子です。完全な回避よりも生き残りやすいですが、マジック 3 の隠蔽を達成しようとして、よりタイトなロープを歩きます。
クルックの全体的なポイントは、全体的に回避率が低くなりますが、軽量弾道ベストを使用できるため、サバイバルの信頼性が大幅に向上するということです。
はい、移動速度が低下しますが、これは PAYDAY です。あなたは逃げますが、あなたの場所を取り囲む 50 の SWAT タレットから隠れることはできません。
クルックで覚えておくべき最も重要なことは、ローブローとスニーキーバスタードの検出レーティングのブレークポイントです。ベーシックは 5、エースは 25。
これらは厳しい制限であり、特に LWB とエーシングはどちらも非常に高価であり、個人的には価値がありません。したがって、最高の武器を手に入れるためにできることをすることが重要です。
錯視と内部ポケットは、検出を抑えるのに大いに役立ちます。必ず 32 隠蔽近接武器を手に入れてください。
ゴースト スキル ツリーの Artful Dodger は、Crook の生存力の主な源です。ただし、一部のスキルは他のスキルよりも優れています。
パルクールは素晴らしいスキルです。ダックとカバーとうまく機能します。必須なので良いことです。実行中のリロードは非常に重要な要素であり、できる限りすべてのビルドに組み込むようにしています.
回避をしていない場合でも、D&C からの余分なスプリント速度とより速いクールダウンは素晴らしいものです。
残念なことに、Artful Dodger ツリーの残りの部分については同じことが言えません。
ダイア ニードは、ヘッドショットを難しくする筋肉の記憶を発達させたらスキップする必要があります。
Shock Proof は以前は使用できませんでしたが、Taser を見ているときにプロンプトが表示されるようになり、状況に応じてより便利になりました。
少なくとも Sneaky Bastard の基本を取得したら、非常に状況に応じた Unseen Strike をスキップして、Enforcer's Tank ツリーに移動します。
ダイ ハード、ブルズアイ、ショック + 畏怖、そしてアイアンマン ベーシックだけで、最大限の生存が可能です。
低い検出と高い回避を目指すことは、当然、脅威が低いことを意味します。これにより、特に銃が抑制されている場合、Mastermind のコントローラー ツリーの有用性が低下します。
武器の選択はまばらです。
少なくとも 28 ~ 30 の隠蔽性を持つ銃を目指してください。
また、フルオートの武器を使用してください。ショットが多いほど、クリティカルが発生する可能性が高くなります。 Technician の Oppressor ツリーに多額の投資を行うことで、抑制されたオートマチックの低いダメージと低い安定性を補うことができます。ただし、Mastermind の Sharpshooter ツリーの Stable Shot と Rifleman は、武器がフル オートかセミ オートかに関係なく機能することを忘れないでください。
Melee は、選択範囲が最も薄い場所です。
しかし、これはソシオパスではないので問題ありません。32 の隠蔽性を持つ武器を使用してください。
Surefire と Body Expertise を取得すれば、SMG のセカンダリはプライマリの優れた代替品になる可能性があります。私のお気に入りは、Jacket's Piece と Micro Uzi です。
シールドを通過できるものが必要な場合は、5/7 AP と USR-12 もあります。
ショットガンを忘れないでください。Dragons Breath を備えた Brothers Grim だけでなく、Sabot/Slugs または High Explosive を備えた Judge は、スキルがなくても挑戦する価値があります。
プライマリーはよりタフで、Brothers Grim のような Akimbo は魅力的ですが、個人的には Hitman の方が優れていると思います。なぜなら、すべての Akimbo にボーナスが与えられ、隠蔽を心配することなく好きなようにカスタマイズできるからです.
完全にカットされた GL40 は、隠蔽のカットオフを行い、非常に必要な範囲の効果パンチを提供し、シールドを切り裂き、ブルドーザーのフェイス プレートをノックして開くことができます。
M308 や CAR/AK ファミリー全体のようなアサルト ライフルにはたくさんの選択肢がありますが、もちろん、グロム スナイパー ライフルの重要性について言及しなければ、私は引きつって四つ裂きになってしまうでしょう。
ヒットマン
トバイアス・リーパーかな?
ヒットマンは奇妙なデッキです。これは、アキンボ ガンに直接ボーナスを提供する唯一のデッキであり、再生の代わりにアーマー回復を早めることや、より多くのアーマー ポイントがユニークであることを重視しています。
しかし、このデッキが真価を発揮するのは、最後のパーク「歯と爪」までではありません。
トゥース アンド クローは、「アーマー サプレッション」と呼ばれる隠されたメカニックのおかげで優れています。
基本的に、警察があなたの近くで発砲している場合でも、あなたの鎧のクールダウンは停止するまで開始されません. (SWAT タレットで最も顕著です。)
防具の回復に記載されている時間よりも時間がかかることが多いのは、制圧のためです。
しかし、Tooth and Claw タイマーはアーマーが壊れた瞬間に開始されるため、これは問題ではなく、ほとんどのアーマー回復時間スキルが不要になります。より重要なことのためにポイントを解放します。
ヒットマンを実行する最善の方法は、できる限り重いアーマーをつかむことです。 ICTV を実行するか、他のベストの 1 つを実行するかについてはいくつかの議論がありますが、自分がどのような THICC になりたいかを自分で決めることができると信じています.
明らかに、Akimbo プライマリを実行する必要があります。これらの武器は通常、弾薬を大量に消費し、射程が短く、反動制御が貧弱です。
Ambidexterity 特典は少し役立ちますが、最良の解決策は、屋内の音声範囲で作業することです。可能な限り弾薬を会話するようにしてください。トリガーを引くたびに 2 つの弾丸が発射されることを忘れないでください。
軽いアーマーを使いたい人にとっては、28-30 の隠蔽が得られるものなら何でも使用できますが、ツーピース スーツよりもこの方法でクリティカルを得るのは難しくなります。
はい、Akimbo Grims DB は良いヤダヤダです。
泥棒
何を言いたいの?ステルスパークデッキです。すべてのステルス アクションが高速になります。
なに、まだここに?わかりました。
はい、ヤクザとハッカーは ECM ラッシュに適しています。しかし、最近のほとんどの強盗は「急いでやらない」ように設計されているため、どちらも信頼できるスキル、優れたコミュニケーション、完璧な実行力を備えたプレーヤーのチームが必要です。
はい、ステルスをソロにすると、ボットの特典で同じくらい速いアクションが得られます。
これは、ボットの特典と特典デッキがスタックできるという事実を無視した場合にのみカウントされます。
Burgler は、強盗全体を記憶している文字通りの神ではない限り、ステルスのすべての部分をより良く機能させます。
大声で受け止めないでください。冗談でも構いません。
セミステルス ビルドは一般的にひどいアイデアであり、考慮すべきではありません。
潜入者
ソシオパス ジュニア!
一見したところ、インフィルトレーターはソシオパスの副学年に見えます。
問題は、ソシオパスが大量に、そして再生しなければならない方法の数の点で、はるかに多くの再生を取得することです.ソシオパスのすべてが別のタイマー上にあるため、安全性が大幅に向上し、アーマーとヘルスの両方が再生されます.
唯一の利点は、Infiltrator を使用するために Hotline Miami 2 を所有する必要がないことです。
しかしそれを超えると、このデッキはかなり使い物になりません.このデッキを試してみますが、マニアックのように、オーバーキル以下でプレイしている新規プレイヤーにはお勧めしません.
ここでは、ソシオパスからのアドバイスのほとんどが当てはまります。
主な違いは、インフィルトレーターには耐性があり、命中するとヘルスが得られることです。
しかし、インフィルトレーターでの全体的な回復はひどいものであり、物理的にはレジスタンスは良さそうに見えますが、健康を守るためのアーマー ゲーティングがなければ、あまり意味がありません。
ただし、キルではなくヒットでヘルスが得られるため、すべての近接特典を忘れて、武器のお尻またはノヴァシャンクを実行し、必要なときに敵を突いてヘルスを得ることができます.
注意すべきもう 1 つの点は、Overdog の持続時間を 7 秒に延長する Advanced Close Combat の一覧にない効果です。
Bloodthirst からの MASSIVE ダメージ ボーナスは、ブルドーザーでさえすべてを一発で撃ち切ることを意味し (事前にキルを達成できると仮定して)、ヒットを記録するたびに Overdog のタイマーがすでにリセットされているため、これはほとんど意味がありません。
ソシオパス
一見すると、この特典デッキは、誰に尋ねるか、どのくらい Payday をプレイしているかによって、本当に良いか悪いかのどちらかに見えます。
大規模な近接バフの前日には、多くのプレイヤーがゲームで最悪のデッキだったので、それを手に負えなくなっていました.
新しいプレイヤーは、一度それを実行し、ブルドーザーを充電してスラグを取得し、それを誓ってグラインダーの使用に戻ります.
ソシオパスには 3 つの問題があります。
<オール>明らかに、この特典デッキを最大限に活用するには、Fugitive の Brawler スキル ツリーに投資する必要があります。ここにあるものはすべて、Counter Strike に適しています。 Cloakers がチャージする前に単純に撃つか、敵の射程外にいる間に攻撃をチャージして急いで倒す方がはるかに簡単です。
もう1つのことは、カウンターストライクを使用して敵を攻撃した場合、オーバードッグがトリガーされないことです.
Bloodthirsty と Pumping Iron エースをつかむだけで、メイヘムでドーザーを 2 回撃てるようになります。これは必ずしも賢明な選択ではありませんが、テンション、クリーン ヒット、オーバードーズによる再生が、受けるダメージの一部を吸収します。
格闘技のエースを取ることは避けてください。ノックダウンの影響を受けないブルドーザー以外のすべてを 1 発撃った場合、追加のノックダウンは何の意味もありません。
パニックは警官ごとにトリガーされるようです。上限があるかどうかはわかりませんが、効果を確認した警官の最大数は 2 人です。
それについて何をすべきかについては、まあ、彼らを近接攻撃するだけです。報復できないため、基本的に無料の応急処置キットになります。そのため、近接攻撃によってアーマーが粉々になるリスクはありません。
悲しいことに、必殺技は免疫があるため、ブルドーザーのショットガン パンチやクローカーからは保護されません。
アンダードッグをつかむと、射程距離が近いため、この特典デッキに自然に適合するショットガン スキルがアンロックされます。火炎放射器もかなりうまく機能し、OVK のこぎりを武器として使用したい場合は、これが最適な特典デッキになると思います.
Frenzy と Berzerker は追加ダメージが大きいため、最適な選択肢です。ただし、体力の低下に対処したくない場合は、エンフォーサー ツリーからのオーバーキルの方が安全です。
または、3 つすべてを実行して、ダメージ タウンの王になることもできます。
Tension と Overdose によるアーマーの回復は、Bullseye とは別のクールダウンとトリガーで実行されます。アーマーゲーティングの機会が増えるため、より軽いベストを着用して逃げることができますが、死の宣告で 3 ヒットアーマーを取得できるため、ICTV を使用するのがおそらく最善です.
私は個人的にはもう少し機動力のあるヘビー バリスティック ベストを好みますが、ライト ウェイト バリスティック ベストを信頼しているプレイヤーを少なくとも 1 人知っています。
カバー内またはターゲットがあなたを撃っていないときに、近接攻撃をチャージすることを忘れないでください。ブルドーザーを倒す最善の方法は、突然、予期せぬことです。
近接攻撃を特別なキラーとして使用したくない場合は、ナガントを銃剣で走らせることができます。これは、一撃の警察と最も弱い特殊部隊に十分強力ですが、ゲームで最速の単発近接武器でもあります.
さらに、スナイパー ライフルでアーマー ゲーティングができる可能性は、非常に優れています。
オーバードッグのバフは、アクティブ中にストライキを逃すと失われます。
オーバードッグは、味方のジョーカーや民間人を攻撃することでも発動できます。
ギャンブラー
タレットユーザーの特典デッキ。
ギャンブラーは、拾った弾薬箱ごとに少量の HP を回復します。最大になると、弾薬とヘルスもチームと共有されます。これにより、弾薬を大量に消費する武器やタレットを実行するのに最適なパーク デッキになります。
この特典デッキの欠点は、少しコミュニケーションが必要なことです。他のプレイヤーの弾薬を盗むことはそれほど悪くありません。しかし、彼らがあなたのものを盗むのはかなり悪いことです!
すでに述べたように、そしてこれからも言い続けます。タレットはこの特典デッキと非常にうまく機能します。多くのものを殺して、たくさんの弾薬を与えてくれます。彼らはまた、驚異的な量のダメージを吸収し、チームを熱く保つことができます. AP 弾のアップグレードを入手し、タレットを通常の弾ではなく AP 弾で展開するように設定してください。タレットのセットアップにかかる時間を節約できます。
タレットのもう 1 つの点は、煙や催涙ガスなどの視界を遮る効果を透視でき、フラッシュ バンで気絶させられないことです。また、他のターゲットが存在しない場合、人質を狙うため、向きを変えるのに時間がかかるため、速度が低下する可能性があります.
タワー ディフェンスの最後から 2 番目のタレット特典はほんの一握りです。
一方では、4 つのタレット全体で強盗のほぼ全体を封鎖できます。
一方で、弾薬とヘルスを補充したり、強盗の別の場所に移動したりするために、タレットを拾って交換するのにより多くの時間を費やすことになります.
ほとんどは好み次第ですが、個人的には、移動が多い強盗では基本的なタワー ディフェンスのみを実行することをお勧めします。
奇妙にうまく機能するもう 1 つのアイテムは、弾薬バッグです。
In-fact the entire Ammo Specialist tree is good for you. It’s all about getting more ammo pick up, which works very well for Gamblers. Some times.
The risk to this tree is that if your ammo is full then you an’t pick up more boxes to get health.
Of course you can just… Shoot, your gun. At the floor or something.
But its not always something that I remember to do cause it just seems so illogical.
Even if you don’t want to use all of Ammo Specialist. Scavenger is a mandatory pick for Gambler. Extra ammo drops and easier pick up are HUGE.
The big risk is that you need to kill cops AND loot them before you get anything meaningful out of this deck. To that end grabbing Parkour alongside Duck and Cover from under Artful Dodger will help mitigate the risks of sticking your neck out.
But your still best off running heavier armour and abusing armour gate all times to keep yourself alive.
Gambler can run just about any weapon comfortably but the need to constantly pick up ammo incentivises things like LMGs and automatics that have high rates of fire and good pick up.
Snipers can work well and efficiently despite their limited reserves.
Flamethrowers and miniguns are also a barrel of fun even if they aren’t the best weapons.
Uniquely the choice between First Aid Kids and Doctor Bags isn’t so cut and dry with Gambler.
Your regeneration is less reliable than other Decks, but you also DO have regeneration.
Personally I make more use of Doctor Bags with this perk deck but you might find the opposite.
Ultimately if you find that Turrets are too good to turn down, grabbing Jack of All Trades will speed up your deploy and pick up times as well as let you run a second deployable. I don’t recommend trying to max out two deployables since you can only bring half of your secondary pick. Tailor your secondary to the team or the heist at and.
For your own sake set your turrets to use AP rounds when you equip them in your inventory, and never EVER mix Turrets with any weapon that can’t pick ammo off the ground.
Especially the OVE Saw because a single turret costs an entire saw blade/clip/magazine.
Grinder
Why are you down? Just left click.
Grinder is very OP, but its lack of armour or dodge means it starts to loose out on the higher difficulties.
Seriously Overkill or less and you basically can’t die with the amount of regeneration this deck gives you.
Your big weakness is that you can’t use any armour other than the Lightweight Ballistic Vest and Two Piece Suit.
Therefore you need to combine Grinder with any and every defensive edge you can get, Jokers and Hostage Taker are great perks because of the increased health and passive regeneration they give you.
Everything under the Enforcer’s Tank tree is a godsend, unless your running dodge.
Dodge works well with Grinder because of the limited armour selection. But be wary of using criticals, you may be called a try hard.
Unlike Leech you get HP on HIT not on kill, seek big targets that can take lots of abuse, Dozers are basically walking doctor bags for you. Especially if you set them on fire.
Also Medics can actually be somewhat useful as their ability to revive enemies allows you to continue getting HP off the same target.
Avoid playing with Graze mains they can and will depopulate areas faster than you can.
That said Graze Grinder is possible, but it seems to only count a single hit so it won’t give you as much regeneration as hitting multiple enemies with a shogun.
When it comes to weapons yes the classic “DB Akimbo Brothers Grim Suit Grinder” word salad meta is monsterously powerful.
But its not very fun to play with someone who just runs across the entire map killing everything and never dying.
Therefore two points of advice if you want to consider weapons other than Grim Akimbos:
<オール>Deployables are pretty open, most people run First Aid Kits or Doctor bags. But Grinder’s regeneration can also be triggered by C4 trip mines and Turrets.
Yakuza
Don’t. Yakuza is a pretty bad deck. Yes you get bonuses for being on low health but other perk decks give you way better bonuses without the need to let yourself get crippled.
It can be very fun and exciting to run Yakuza don’t get me wrong, but it is far from the “best” or most reliable way to play just due to the inherent danger of needing to be on low health all the time.
While you can run Berserker to mitigate those risks, and get down to lower health faster pretty much every other deck works better.
If your dead set on Berzerking Anarchist, Armourer, Socciopath and Hitman all have better armour and can protect your smaller health pool more reliably than Yakuza’s mobility.
You also can’t run anything from Mastermind’s Controller because you NEED to take damage to activate Yakuza. No Jokers and no Hostage Taker is a raw deal.
You can technically take Jokers but the extra health and resistances means it takes longer to activate anything Yakuza gives you.
The only thing Yakuza does well is give you mobility but that doesn’t help much in Payday, most open areas are covered by snipers, SWAT Turrets or both making a “run n gun” play style suicidal at best on most maps. You can get away with it on older maps with fewer turret spawns, but even then that’s less than half the game.
One unusual use case for Yakuza is Stealth heists. Molotovs make no sound and can be used to manually lower your health thus raising your speed. Personally I find the benefits of Burglar to be much better, but Yakuza has some niche uses for ECM rushing…Though even that’s a stretch because Hacker can out perform it by using the pocket ECM.
The only legitimate use case for Yakuza I guess is challenge runs?
Since if you keep your health up your basically playing as close to having no perk deck equipped as you can without mods.
I didn’t want this guide to turn opinionated, but I really struggle to find value in Yakuza beyond challenge runs and lulzy builds.
Ex President
Another one of those sketchy perk decks that falls under the category of “totally viable I just suck”
With Ex President you build a reserve of health with every kill. When your armour is emptied and then fully recovered the health is also given to you.
That’s it, the deck offers no resistance or armour bonuses. Just a useless plus 10 dodge.
With more armour you get to recover less health, which is stupid.
Ex President doesn’t do anything to boost armour recovery or regeneration so why should it matter?
The problem is that it requires your armour to be FULLY broken before you can recover your HP. Which is always hard, on lower difficulties just taking enough damage to open your armour is difficult but on Death Wish it becomes much easier but then you pretty much die in one hit as soon as it’s blown.
So first things first you must mitigate the risk of going down once your armour is open.
The best way to do that is to grab everything in the Tank tree and then also grab Second Wind from Silent Killer.
Bullseye is weird, yes armour gating would help you live but you also want your armour to break.
Other perks, getting Hostage Taker is a must, probably more so than anything in Tank.
Ex President’s healing is powerful but unreliable at best.
Also take First Aid Kits, use them more for getting uppers when your healing fails and for your team than for restoring your health when you take small amounts of damage.
As for what armour to run I guess the Light Weight Ballistic Vest. It gives you the second most HP storage behind only the Two Piece Suit. No mater what armour you run it won’t fill your HP completely when it dumps, so its better to go with the safer option.
Weapons wise is free game, no range or concealment requirements. Snipers and Graze will keep your armour up. Shotguns are top tier and have lots of applications. Assault rifles are just pure fun. Really its up to you.
The hard part is learning how much you can expose yourself, how many hits will crack your armour and when to fall back. But if you play well Ex President does become an immensely capable deck. It just requires a lot of skill at the game and it subtracts many of the passive crutches other decks give you like damage resistance or dodge.
Maniac
Don’t. Even less than Yakuza. Don’t even think about running this deck.
Every other deck has a niche, or can be made useful with the right perks. Maniac just doesn’t.
The damage resistance is pathetic. Above Overkill its outright meaningless, it doesn’t even let you take an extra hit on Deathwish.
Just save yourself the pain, run literally anything else. If you want to support your team use Crew Chief if you want to tank lots of damage Anarchist, Muscle, even Armourer are better picks.
Anarchist
“In great armour I will clad them and with the mightiest weapons they will be armed.”
This is it, the wide load deck, thicc boi town.
Anarchist is one of the best perk decks in the game, not because its powerful but because its dead simple.
You exchange health for armour, instead of traditional armour recovery where it all floods back at once Anarchist has it trickling back in smaller amounts over a longer stretch of time.
How much time is dependant on your armour. But the real secret is that the trickle recovery is always counting down and like Hitman armour recovery can happen while you are actively taking damage or being suppressed.
Also Anarchist stole Armourer’s two seconds of invulnerability on armour break. Which is long enough for a single Bullseye headshot to refill part of your armour.
Oh and before I forget when you reach max level in Anarchist you also get an additional 30 ARMOUR PER KILL! Which for some reason is incorrectly listed as 10.
This becomes so effective because as long as you have a single point of armour you cannot take health damage. (Falling and snipers not withstanding)
First things first, Enforcer Tank tree. Everything that gives you more armour points. Don’t bother with recovery buffs they are nullified by the first card in the Anarchist deck.
Bullseye is your bread and butter the main thing that keeps you alive. Remember, increasing Anarchist’s overall armour amount with perks does not slow the trickling recovery. That is controlled by what armour your wearing not its rating.
Speaking of armour when it comes to how thicc you should be most people swear by the Two Piece Suit or the Light Weight Ballistic Vest.
The Suit has the fastest trickle/tick time of 2 seconds, but the LWB has more armour to fall back on and is better for learning the deck.
I know I’ll catch flak for this but even with its glacial eight second trickle ICTV Anarchist is also viable on Mayhem and bellow. Death Wish is a stretch but its possible.
Running the suit also gives five free dodge, not much. But it is there just to make you that little bit tougher.
Another good skill is Transporter, since Anarchist converts health into armour this massively raises the effect of Transporter, making Anarchist the definitive choice for schlepping many bags.
The best skills for Anarchist outside of Enforcer are Frenzy and Berserker from Brawler in Fugitive.
Your already dependant on armour so sacrificing even more health to gain massive damage and increased resistance is an easy choice.
This also lets you wield alternative weapons more freely.
There’s also Second Wind which helps take advantage of Anarchist’s brief invulnerability after an armour break.
Resist the urge to invest in fast firing LMGs. You may miss too many headshots to keep your armour constantly up.
Instead consider Graze. With Frenzy-serker the 200 damage sniper rifles (mainly the R700 and Repeater 1874) suddenly hit breakpoints and the reliance on head shots feeds into Bullseye keeping your armour fuller than just spraying away and relying on Body Expertise.
If you do grab Frenzy, the bayoneted Nagant sniper suddenly has incredible potential as a last ditch weapon to one shot smaller specials whenever you run out of ammo.
Because it’s so maddeningly tough to crack Anarchist’s constant armour recovery there is not really a heist that it runs poorly on.
If you run Graze it will excel at narrow heists like No Mercy, Mall Crasher and Shacklethorne Auction.
If you run Body Expertise go for heists that throw large clumps of cops like Panic Room and Slaughterhouse.
Lastly its one of my go to decks to run C4 with, because it needs so few perks to unlock its survivablity and with the suit you run so fast the two are a match made in heaven for speed running heists like Nightclub and Big Bank.
Biker
Remember when I said Gambler was the best for Turrets?
I lied.
Despite its reputation Biker is one of my go-to decks. If you threw me in an unknown no players no AI loud heist I’d probably bring Turrets and Biker.
Even though to put it diplomatically as possible this deck has a divisive reputation.
Bad players using it to “enslave” their teams and failing to provide any buffs. Be prepared to be called unskilled or a troll if you run this in pubs.
How it works is every kill made by your team whether its an AI, Joker, Turret or C4 will restore a fixed amount of health and armour.
The amount of restoration also increases the less health and armour you have. More health with damaged armour, more armour with damaged health. So just like Stoic you can get a little more aggressive when your pushed to get that extra healing.
If you make it past the bad reputation for this deck then you want max your kills. So Turrets are the most obvious choice.
If you go this route same as with Gambler avoid weapons that can’t get ammo pickup.
However Turrets are expensive so once you factor in weapon skills they won’t leave you with much room to pick &mix for survivability. As always Tower Defence is users preference
However you can forego Turrets altogether for traditional survival skills like Master Mind’s Controller tree.
There is no reason not to take the ICTV with Biker. It just doesn’t get enough bonuses or resistances to survive with anything else.
Running Controller for passive healing and resistances also gives your teammates buffs, which can help to offset the selfish nature of Biker.
Like the trailer for this deck says “The team helps you help the team”
Since Biker has no range or concealment limits you can run whatever weapons you want.
If you grab Turrets guns with lots of ammo pick up are the best choice. Low damage automatics and LMGs are the best, the Bootlegger has good ammo pick up and huge magazines without the limits of being an LMG.
If you go the other route and run Controller then consider weapons with high threat ratings, Graze snipers have good threat for getting Jokers and can pummel Bulldozers and Captain Winters from a safe distance.
Since Biker has such good regeneration you don’t need healing from deployables and can freely take whatever you want. Turrets have come up a lot but for me personally Biker is part of my “holy trinity of C4 builds”.
If you really want to offset this Deck’s reputation for selfishness the best way to do it is drop everything into Technician’s Breacher tree.
C4 is the best deployable, its great for defence and it can shave whole minutes off some heists. Grabbing drill skills is a natural compliment because if you can’t blow it you can probably drill it.
And since Biker leeches health from team mates kills while you’re pushing the objective they are healing you.
Kingpin
R.I.P one of the most unique perk decks in the game.
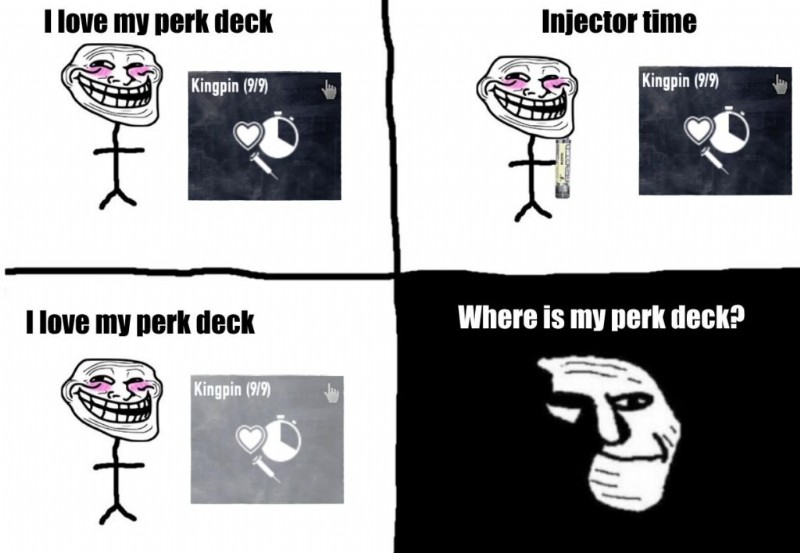
I honestly considered not writing about this deck because the only way for a new player to get it is with a DLC unlocker or other sketchy mod/cheat.
If you were lucky enough to get this deck when it came out then bless you.
Kingpin is the reverse of Stoic, instead of saying “that was a lot of damage” you’ll be saying “this will be a lot of damage”
You equip the injector and then can at will turn yourself nearly invulnerable. The timing for this is tricky and will come down to your situation.
Personally my gut always says “wait until your armour is broken”
But that is entirely wrong because Kingpin sits OVER TOP your armour and grants you HP back every time you take armour damage. So make sure to activate it while you still have armour!
For perk selection, heavier armour and passive health are musts. ICTV Kingpin is an absolute beast.
Yes you can get some health back with the injector but its not always reliable and it doesn’t let you restore your full health so you should consider working with a Crew Chief or running Hostage Taker yourself if you can.
Although you are basically invulnerable remember turrets are still God.
Nothing says fair and balanced gameplay like popping Kingpin, dumping four rockets into a SWAT Turret with the Commando 101 watching them all get blown up in your face, curling on the floor and sobbing as it mows down your entire team.
Or if your lucky enough to get a hit, you can enjoy the brief sensation of victory as you waddle over to the closest ammo bag.
Then resume sobbing when you remember you gotta do it three more times.
Unlike Stoic this perk deck is great if you want to tank through environmental damage like tear gas and fire. You can use it to cheese Hotline Miami Day 2’s thermal drill, or ignore the tear gas on Dragon Heist.
Jokers are amazing, you have health on par with Muscle and now you just get free damage resistance on top of it.
Remember you cannot activate the injector while you are firing your gun! It’s embarrassing but its killed me more times than I’d like to admit.
Siccario
AKA Sicco Mode.
It’s a perk deck I struggle with. The big upside of throwing your smoke grenade (going Sicco Mode) is that you can basically stand in the open and do an objective, like repairing the drill or revive a teammate with very little risk because of the guaranteed dodges However both of these can be done faster and safer with Kickstarter or Inspire.
The problem with Siccario is that there are far better choices for everything it does.
Dodge? Rogue, Hacker and Crook have much higher dodge chances (outside of smoke) and Crook has armour for you to fall back on while Hacker has innate healing.
Saving skill points? Suit Anarchist with C4 not only costs less skill points but you can skip objectives which is far faster than using smoke to make them “safer”.
Siccario as a tool for speeding up heists is… bad.
Outright bad. C4 exists and can be taken with any perk deck, so can the OVK Saw.
The only objectives Siccario helps with are ones that cannot be perked like lifting the vault on Panic Room, the security boxes on Scarface Mansion, or crowbaring boxes on Henry’s Rock. However most of those are so long that by the time your half way done you’ll be out of smoke and fully exposed or as is the case with the cars on Scarface Mansion you’ll have to delay the heist to wait for your cool down.
Another issue with Siccario is that your throwable is a grenade. Not an instant item like every other perk deck based throwable replacement. You have to deal with the 60 second cool down, the timer on the grenade AND PAYDAY’s scuffed grenade physics.
Say you try to use it to take down a SWAT turret or Bulldozer. By the time it has gone off and started producing smoke a normal player has stolen your kill with a single HRL-7 rocket.
So what good actually is the Siccario smoke?
Unlike what Overkill advises in the trailer for the perk deck the primary value for the smoke is for areas you intend to pass through rather than take and hold.
Such as the sewer entrance on Birth of Sky, an escape zone at the end of any heist, the vault door on Big Bank or anywhere you move a lot of bags through.
When fully upgraded you can even stand right in front of a SWAT Turret if you wish. Though this is best used to take its fire off a team mate so they can hit it with an HLR-7 rocket.
Since Siccario NEEDS dodge lacking any kind of innate defence the most important thing to remember is the Detection rating break points for Low Blow and Sneaky Bastard.
5 for basic, 25 for aced.
Siccario is also one of two perk decks that actually lets you dodge while wearing the Light Weight Ballistic Vest. But if you wanna do that take Crook instead.
While Kickstarter and Inspire are powerful abilities they’re also expensive as hell.
With Siccario dodge is obviously a must but once you got Sneaky Bastard and Low Blow you can take the points saved and dump them into Mastermind’s Controller tree to make up for your lack of self healing or Enforcers Tank tree for better armour gating. But again, Crook does this better as you can take full advantage of the Tank tree.
Speaking of saving points Siccario’s smoke provides us a reasonable window of nearly 100% dodge chance and free armour restoration on dodge. Therefore timing it well can basically replace the need for Uppers. Just pop smoke, drop a First Aid Kit at your feet and use it before the smoke fades.
Of course this only works if your good enough to not need an Upper more often than every 60 seconds. And Uppers is necessary to get the full 14 FAKs.
Crits Dodge Siccario is reasonably powerful and very tempting but it’s also expensive and demands good weapon choices and careful ammo management.
I wouldn’t recommend it for new players or people just looking to dip their toes into an alternate play style.
If your running Crits stay away from the temptation of the high rate of fire Akimbo SMGs like the Micro Uzis or the Miyaka 10s.
Yes firing lots of shots means lots of crits but emptying 100 rounds in less than a second is hardly ever a good idea. 1000 Rounds Per Minute is pushing it, anything over that is too much.
Pistols work very well with Low Blow. Since low damage akimbo pistols like the Bernette 9 have great concealment, high rate of fire, solid ammo pickup and you can easily run the 5/7 AP pistol as a secondary to cut through shields.
A fast firing SMG secondary can be very useful for melting Bulldozers, if your good it can even serve as a reliable replacement for a primary.
The classic GL40 and Micro Uzi combo works as well with Siccario as it does any other perk deck with no throwables.
If your having trouble getting good concealment remember to take Optical Illusions and Inner Pockets. Also make sure you have a 32 concealment melee like the Nova Shank, Butterfly Knife, or the Leather Sap.
If you want to run melee and dodge the Ice Pick hits all the damage breakpoints of the Katana with reduced range and swing speed but the all important 32 concealment.
どのように? I have no clue.
Also remember teammates can benefit from your smoke the same as you, if you see someone holding F throw them some smoke!
Stoic
The Yang to the Kingpin’s Ying.
Stoic is all about negating damage with your massive health bar and high resistances.
Every hit you take is converted into Damage Over Time (DOT) which can then be refunded for health using your Flask.
Don’t forget that kills refill your Flask and kills while under 35% refill it TWICE as fast. When pushed, PUSH BACK.
Overall while this deck sounds pretty sweet the downsides do require some reconstructive forethought.
The big one is that you have NO armour. All your armour is converted into health, this means snipers are absolutely lethal and great care must be taken whenever you cross an open area.
The same goes for Cloakers. While the kick isn’t too bad the health loss when you get up is.
You also have to rethink your play style. You really want to avoid a “death by a thousand cuts” where you get ground down by constant one on one encounters never taking enough damage to justify using your Flask. You also lack a throwable which might require some adjustment.
Also while Stoic can restore some of your health beyond the DOT its not much. You need a steady stream of regeneration from an outside source to make the most of this deck.
Because of this you’re going to feel pigeonholed for deployables the only really useful ones are First Aid Kits from the Mastermind’s Medic tree, may as well grab Inspire while your there since its a great perk.
You can pull away from FAKs by grabbing Hostage Taker but I’d still recommend at least taking the basic ones. In my experience I’d get cloaked or sniped and then struggle to recover my health without them.
You could (against my recommendation and better judgement) go full “combat build” and just take basic FAKs and put the rest of the points into resistances and weapons.
Uppers seem unreliable with Stoic. Some times you will be restored with full health, other times with just a bit of DOT or you can have an entire bar of ticking DOT requiring an immediate Flask. Not sure what causes it.
Hostage Taker and Jokers make nice add-ons, extra regeneration will make up for Stoic’s lack of restorative power and the extra resistance will replace later skills from the Enforcer’s Tank tree.
Since we have no traditional armour it doesn’t mater how quickly it recovers so you can safely avoid Enforcer’s Tank perks, only Resilience Aced and Die Hard aced give you anything of value. Even then though, flash bang resistance is questionable and the extra 20 health from Diehard aced may not always be felt.
Unlike the armour perks, Underdog is huge and it leads into the powerful Shotgunner tree. Even if you don’t plan on taking shotguns you will almost always be within 18 meters of MANY enemies.
As for what vest to wear, I personally stick with the Light Weight Ballistic Vest. As it keeps you mobile enough to be lighter on your feet than your average Muscle or Anarchist user.
But its up to you, really anything works with Stoic even the suit.
Of course the ICTV is the most common choice and probably the only one if your playing on Death Sentence. But if your doing that why are you asking me for guidance?
Since there’s no point in investing in Tank and First Aid Kids are pretty cheap you can pretty much run whatever weapons you want. Shotguns are great because you can bring a secondary with Slugs/Explosives to deal with shields, snipers with Graze will keep your Flask refilled, or you could just bring the 5/7 AP Pistol or the Rus-12 Angry Tiger since they have innate armour piercing.
Personally I highly recommend bringing a grenade launcher, it’s a huge adjustment playing without a throwable so having some kind of crowd clearing explosive is a solid crutch.
Just remember, you’ve got skills to make your primary work, but the Rus-12, 5/7 and Compact 40 are all great even without skills.
Graze and Hostage Taker don’t mix so exercise caution if you take them together.
I’m not sure if its the way damage/resistance is calculated or if its just the sheer volume of hits but environmental damage will annihilate you with this deck. Avoid tear gas and fire like the plague.
SWAT Turrets also tend to wreck your ♥♥♥, don’t run this deck on Heat Street or San Martin Bank unless you want to blow through all your FAKs faster than you can say “virtue is the only good.”
Just like Kingpin! Remember you cannot drink the flask while you are firing your gun!
Tag Team
Just get a friend who runs Crew Chief, Leech, or Gambler. Seriously Tag Team has a lot of potential.
Though it lacks any resistances or bonus HP. I find the best use case is for a newer player. All the other throwable decks have much more power and potential but only during their short bursts. What Tag Team gives you, is the some of the most consistent healing in the game.
Assuming you have a teammate to use it on and that both of you can get a great many kills.
How it works is you “tag” a teammate and the two of you become linked in a fashion similar to Biker. Every kill you get, heals both parties by an amount depending on if you are the tag holder (7.5 HP) or the tag placer (15 HP).
The other effects don’t sound too great, 20 points of damage absorption laughably small, but with Tier 9 “Harmony” card every single kill made by either of you cool down by two seconds. This means it is entirely possible to have another tag ready to go the moment the link breaks AND with the 1.3 second extension time per kill its also theoretically possible to have the tag last an entire heist.
Although in my experience it usually lasts for around a full minute before needing to be replaced. Which can be done in less than 0.2 seconds depending on how fast you can hit the throwable button.
The hardest part of Tag Team is staying close enough to keep it active, you have to be within 18 meters and no walls between you and your target. Do your best to communicate and always keep your allies close at hand to give them a tag whenever you want.
Running this deck along side Crew Chief is absolutely the best choice. While other decks can increase the healing only Crew Chief gives the Tag Team user extra health and armour to make up for their lack of innate survivablity, plus the healing from Hostage Situation and you can start to see some really crazy good healing.
Add in Hostage Taker and you basically become a pair of immortal vape juice fuelled war gods.
However Tag Team obviously has its down sides. Few players will stand still long enough to let you tag them. Some hosts might kick you as soon as they see your running content from the H3 pack, or they might accuse you of trolling or needing to be carried.
The best use for Tag Team, is for new players. It encourages them to stick to other players, follow them around and learn how each heist is laid out and how to tackle the objectives as they come up. It can be very powerful in skilled hands but it’s not as good as other throwable focused decks once you’ve gotten good enough to stand on your own.
As long as you have an ally to help you and you don’t try to stack Hostage Taker twice you’re pretty much golden you can run whatever you want with this one. ‘Cept for dodge I guess.
Weapons wise anything that gets lots of kills. Graze, high explosives, you know the works by now. Graze is a personal favourite of mine for this deck, since your focus should be on quantity of kills not quality. Another fun thing to use is run a high capacity primary like an LMG or assault rifle and the HLR-7. The LMG shreads commons and a single rocket can drop a Bulldozer which is always fun.
Armour should be heavy. You lack innate resistances and have no bonuses to dodge so you may as well go big. If you do, grab Duck &Cover along with Parkour and Second Wind. They all help your mobility and survival just as much as Tank.
Remember you can’t use the gas while firing your weapon!
Hacker
So what does Hacker do exactly?
It replaces your throwable with two “Pocket ECMs” instead of throwing a grenade you can unleash an instant but shorter ECM effect. In stealth it acts exactly like a stock ECM, disabling cameras and pagers for six seconds.
While in loud it becomes ECM Overdrive, playing the worst sound in the world and stunning enemies for the same six seconds.
The Deck itself at cards 5 and 9 grants a hidden +15% Dodge.
Tier 7 grants a burst of 20% dodge for 30 seconds if you get a single kill while its active, but the real power comes from tier 9 any kill, regardless if the enemy is stunned or not made while hacker is active restores 10 HP to the player responsible with no upper limit.
If you could kill 27 cops in six seconds you could restore your full 276 hp.
Since you have TWO pocket ECMs you have two charges, but they will only recharge one at a time so be wary of using both at once unless you really need to. The recharge is also quite long at 100 seconds per ECM. You do knock six seconds off after every kill, even while the ECM is active but it’s still going to be slow.
Offensively you’re best off taking weapons that can get multiple kills quickly the usual suspects Graze snipers, shotguns and grenade launchers all work well with Hacker.
Your best defence is to take advantage of that 30% extra dodge, which also leads naturally into crits which will help you get lots of kills to keep your ECMs charged.
For deployables you are cautioned to take First Aid Kits as Hacker’s healing is on a long cool down and can’t always be relied on. Though you can also spec into Controller for healing with Hostage Haker.
Stunning enemies with your pocket is fun and cool but did you know you can also stun Bulldozers? While they have a much higher resistance than normal cops, when it happens its a great opportunity to clincher them.
It’s hilarious when it happens to a Minigun Dozer.
A cool trick is since Hacker’s pocket ECM works like a normal ECM during stealth if your playing with an idiot who fires his gun as soon as he spawns in (read:Me)
You can pop a pocket ECM to buy some time and maybe tie a hostage to delay the assault.
Since the pocket ECM works just like a regular ECM you can actually turn SWAT turrets to your side temporarily! Though this does require standing quite close to the turret, without standing so close it gasses you AND surviving being exposed to all the cops that inevitably crowd around the thing, without being able to take full cover beside it because of the aforementioned gas AND getting away from it once the six seconds are up.
And they make their own unique annoying noise for which there is no cure. Yeaah… I’d still sooner just not have these things in my game tbh.
Remember ALL your teammates get healed when you activate a pocket ECM, watch out for Berzerker mains. Hacker’s 9th tier can non-consensually heal them for the full amount (even if they have Frenzy) negating the Berzerker perks entire effect.
As soon as they hear that ECM override sound they will flip.
Just like Stoic and Kingpin:you cannot pocket ecm while shooting!
Leech
The most busted perk deck in the game at time of writing.
Press the 3 key to become almost unstoppable by activating an ability hereafter refered to as “Ampule”
You loose armour and your health is converted into “chunks” with each hit removing a single chunk. Killing two cops (any two cops you can mix specials and regular units) will restore a chunk. There is no time limit on how far apart the kills must be, they can be with the same Graze sniper shot or you can wait out your entire Ampule duration.
For many reasons, some of which are more obvious than others this is outright busted.
Unlike Grinder, Leech can use ANY armour set in the game.
Medics should be your first targets. Their resurrection ability can seriously hamper your regeneration and is one of three enemies that can actually slow you down.
Cloakers are the second enemy that can actually slow you down, their kicks will ignore Leech’s invulnerability.
Turrets are the final word in Payday. Even with the Leech ampule they will turn you into paste in a few seconds.
Since the ampule makes you only loose health in chunks of 20/10% you actually become immune to Sniper fire. The same applies to ZEAL Marksmen.
When trying to get regenerate avoid high health targets like Bulldozers or the Captain as they can be time consuming to kill.
Focus on non-special cops, especially ones who are climbing and can’t attack you. Using your Ampule as a group of cops repels into the level in say Hoxton Breakout day 2 or Mall Crasher will get you HUGE HP regeneration.
I highly recommend Hostage Taker or working with a player who has Crew Chief equipped. The passive regeneration while Leech is deactivated is great, Jokers can also massively increase your survivability.
Killing police hostages also triggers Leech. Providing a reliable, if unsavoury means of obtaining health.
Any kills caused by C4 trip mines will trigger Leech. Unlike Grinder Turrets do not trigger it.
In my mind Leech’s self resurrection is an awkward ability.
The only meaningful use is to save team mates by chaining together Inspire. Having to use a Doctor Bag after every self revive limits its use unless you were already grey.
That said it does reset the timer, so you can use it to give yourself another 25 seconds which can save your ass but I think its best to just not go down in the first place.
(I say, as the player who routinely has most downs out of all my friends)
Be mindful the ampule does not stop fall or self damage, so be careful if you launch grenades at your feet! Also your armour will remain depleted after using the ampule until it refills as normal.
Unlike other support decks Leech does not heal players with the Berzerker perk. So you don’t have to worry about them calling you a troll.
For weapons anything that lets you kill multiple targets works exceedingly well with Leech. Grenade launchers, Sniper rifles, and Shotguns are not only the best weapons in the game but their ability to kill multiple targets with a single bullet (or around/through cover) means you can top yourself off instantly. Grenade launchers in particular can help offset your “weakness” to Bulldozers, a single grenade will shatter both layers of their face plate and kill any other cops near them.
Secondaries are a free choice, if you want suggestions the HRL-7 can one shot Bulldozers and get huge multi-kills, and HE rounds Judge will melt their face plates or the stalwart 5/7 AP and RUS-12 pistols pierce shields.
It’s my recommendation in the debate between Doctor Bags and First Aid Kits to take FAKs, but ultimately the choice is up to you. Leech’s regeneration is insane so you won’t need the healing from FAKs much. Doctor Bags are great for carrying bad teammates though, and there is no shortage of them in PAYDAY 2.
Really your only weakness is you cannot ampule while firing your gun!
General Tips and Closing Thoughts
These tips can work for any deck, or just PAYDAY in general.
Remember, percentage healed scales with total health. Fixed remains fixed.
A lot of perk decks have broken descriptions.
There are mods that fix that, this is the one I run:
Your end of heist card doesn’t matter. Your reward is fixed anyway, don’t make the team sit for five minutes while you pick a card.
You only need one hostage to delay an assault wave. And only if they are tied before the anticipation phase begins. You’ll know its worked when Bain says “Every hostage you take buys you more time” though I think he’ll only talk about it before the first wave.
Deployables aren’t just for you. No mater what you do don’t be the guy who shows up to a heist with only a single ammo bag and when asked if he grabbed the wrong deployable says “It’s a combat build” unless you wanna be part of a inside joke that’s lasted since 2018. Inversely, don’t be the guy who shows up with 14 First Aid Kits and only ever drops them to give himself Uppers.
Graze and other area of effect attacks don’t mix with hostages. You can’t always know what other players are running, but do your best to minimise collateral damage.
Suppressors are a great survival tool. Because of the way AI aggression is calculated “noisy” players are targeted more than “quiet” ones. It’s most noticeable with cops that are farthest from any players.
Don’t fear the meta. Just because you’re not running “crits dragon breath akimbo grims” or some other magic combination doesn’t mean you won’t succeed.
Turrets and Jokers can draw a lot of fire. You won’t see what you prevent with these guys unless you really look. But the difference is staggering.
Never mix Turrets with any weapon that can’t pick ammo off the ground.
Teamwork makes the dream work. Don’t be shy about communicating, even just typing “Cloaker” in the chat when you get kicked can be an invaluable tip off to your team mates.
When in doubt, C4. It’s the best deployable, nearly every heist has a drill or lock that can be skipped with C4 and those that don’t will have at least one choke point or cop spawn you can rope off.
Lastly and most importantly. Any deck can work on any heist and all decks are viable. I myself have beaten heists on Death Wish with Yakuza. I’ve even done loud heists with Burglar.
10% of this game is your build 30% deployables and the rest is you. Heist knowledge is an invaluable skill that can only be gained with time. Knowing what to bring where and when to bring it is priceless.
TL;DR