Regions Of Ruin – 役立つヒントとコツ (プレイスルー)
成功するためのヒントを含むゲームの一般的なガイド。
プレイガイド
はじめに
Regions of Ruin は素晴らしいゲームだと思います。楽しい側面の 1 つは、ゲーム内のすべてのシステムを学習することです。だから、ここに私がプレイ中に学んだすべてのコレクションがあります.私は 20 時間でゲームを終了し、バニー殺し以外のすべての実績をアンロックしました (あとどれくらい残っているかわかりませんし、それを行う忍耐力があるかどうかもわかりません)。
このガイドは、ゲームをかなり壊し、通常の難易度でほとんど止められないようにします.私が共有するトリックの 1 つは、まっすぐなチートです。そのため、控えめに使用してください。ただし、これらのほとんどは、エクスペリエンスを簡素化するための一般的な情報にすぎません。
他の人が作成したガイドを確認してください。特に、いくつかのパズルに問題がある場合は.
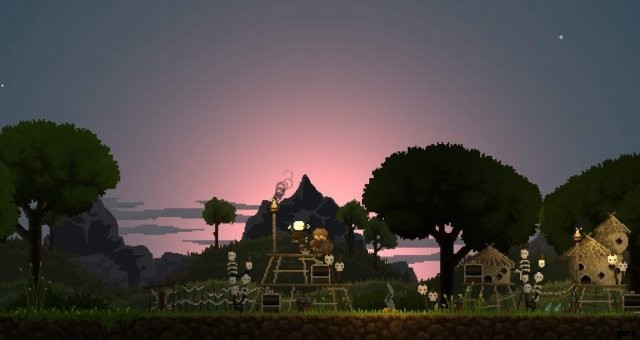
あなたの村
村の作成は、ゲームの筋書きと進行の中心です。各建物が提供するものとアップグレードの優先順位を理解することは、非常に役立ちます。
建物の順序と配置
建物によっては、他の建物よりも頻繁に訪れることがあります。そのため、訪問するときに足の移動を最小限に抑える方法でそれらを配置すると便利です。最適なパスのために、これらを中心 (最も訪問者が多い) から病棟 (最も訪問者が少ない) にリストしています。
- キャンプファイヤー: これはあなたのために中央に配置されたと思います(覚えていません)そうでない場合は、マップの中央に配置することをお勧めします
- ストレージ: すぐに売りたくない戦利品を持ち込むことはよくあることなので、これをキャンプファイヤーのすぐ隣に置きます (左)。
- 酒場: これをキャンプファイヤーの反対側 (右) に置きます。アップグレードしたら前のチェストからゴールドを集めたいからです。
- 市場: 訪問するたびに戦利品を販売するのに便利なので、その近くが必要です.すべての商人が隣り合わせになるように、酒場の隣が理想的です。
- 鍛冶屋: ある時点で、資源 (特に金属) の戦利品を廃棄し始めます。武器の価値が高くなる傾向があるため、私は一般的に防具を廃棄して武器を販売しています。
- 製錬所: 金属タイプの作成と変換に使用されます。村の建物をアップグレードするための金属をクラフトするために、ゲームの途中でこれを頻繁に使用するでしょう。
- 薬剤師: 回復アイテムを作るためにここを訪れます。ただし、プレイ スタイル (および難易度) によっては、頻繁にアクセスしない場合があります。
- ルーンフォージ: 使用することにした場合は、戦利品を分解してから、鍛冶屋で分解するか、ベンダーで販売する習慣を身につけることができます。この建物が重要/推奨されない理由については後で説明します。
- 貿易倉庫: リソースの売買用。このミッド/レイト ゲームを使用することもできますが、たまにしか使用しないでください。
- ライブラリ: 間違いなくこれを使用しますが、ごくたまにしか使用しません。
- 訓練場: これは建物をアップグレードするためだけに訪れるので、遠い端に配置してください。
居酒屋クリッカーゲーム
これは、それ自体の言及に値します。酒場を建てて酒場の主人に話しかける。クリッカー ミニゲームをプレイします。町に新しい建物を建てるたびに、ゲームで採掘する新しいリソースのロックを解除し、さらにアップグレードのロックを解除します。ミニゲーム画面の左側にトロフィーが表示されます。それをクリックして、ロックを解除するアップグレードを確認します。これらはゲームの残りの部分に影響を与え、非常に強力です。できるだけ早くロックを解除したいので、マップの場所に優先的にアクセスして、新しい建物を建設するためのリソースを取得し、建物ごとに新しい上限に達するまでミニゲームをプレイします.また、ミニゲーム画面の右側 (トロフィーの反対側) にあるマスクに注意してください。プロセスをスピードアップできる場合は、これらのアップグレードを購入してください。
図書館のアップグレード
世界中の本のページを集めて (本のケースと台座の本を見つけたらアクティブにします)、お金を使って本をまとめてゲーム内ボーナスを獲得します (酒場のミニゲームのボーナスに似ています)。これらのロックを解除するには、時間 (と多額の費用) がかかります。酒場のミニゲームのボーナスの 1 つは、ページを見つける速度を上げ、これをかなり高速化します。すべての本のロックを解除するのに十分なお金を得る前に、すべてのページを持っていました.
収納スペース
ストレージの建物は、リソースの上限だけでなく、個人のストレージも増加させるため、早期にアップグレードする価値があります。
地図の場所と資源の収集
村をどのように構築したいかについて良いアイデアが得られたので、次は大変な作業を開始するときです。マップを「探索」して戦争の霧を取り除くには、食料を消費する必要があります。次に、発見されたマップの場所に移動してクリアします。
各場所には有限量のリソースがあり、その場所をクリアすると収集できます。各場所にアクセスするまで、各場所にどのようなリソースがあるかはわかりませんが、場所をクリアする必要はありません。アクセスすると、マップ内のマップの場所をクリックすると、リソースが表示されます。また、ある場所から別の場所への移動は、地図を探索するだけで、食べ物を消費するようには見えません.
資源の輸送
利用可能なリソースでマップの場所のロックを解除したら、それらを村に運ぶ必要があります。マップ画面の左下には、商品を村に移動する労働者を指定するためのメニューを開くアイコンがあります。必要に応じて割り当ててください。 Remember to check this every once in a while.
Workers
You gain workers by doing quests to clear map locations and by freeing dwarfs from cages in various map locations. I’m going to give you some counter intuitive advice. Don’t free every dwarf you see in a cage! By mid game you will have plenty of resources and your village unlocks maxed out. Any idle dwarfs will just hang out in you village map and make it hard to see merchants and other NPCs you want to interact with. I recommend freeing dwarfs until you have maybe 10 available workers, then getting the rest from quests. You should have plenty.
Character Leveling and Combat
The leveling system is pretty straight forward so I won’t go into a lot of detail here. I’d say split your base stats evenly as they benefit all play styles.
特典
Perks are very playstyle dependent, however some branches benefit everyone. I would rate their importance from Quick Attacks, Defense, Power Attacks and finally Thrown.
- Prioritize unlocking the Unblockable Quick attack ASAP (never get blocked by enemy shields).
- Get the Defensive (shield) passive ability that halves your chance of getting an injury. It will save you a lot of visits to the doctor or first aid uses.
- Unlock the ground slam Power Attack.
- Unlock all of the passive Quick Attack abilities that don’t require another special attack type (large square).
I only used throwing attacks to take out barricades when I needed to stay out of range of an archer. It’s not very useful against moving targets. So you can probably get away with getting the initial ability that unlocks throwing and ignore this branch of perks if you want.
Combat Styles
My combat tactic was generally to just get close to enemies and repeatedly jump and attack in no particular order. It required very little finesse and avoided a great deal of damage. Thus I never really worried about blocking.
Collecting Equipment
Upgrading the equipment you wear is a big part of the game’s progression system and will make you incredibly powerful.
Basically loot all of the chests as you go along and equip anything that is better than what you are wearing, then sell anything not as good. I will usually adventure until I am injured or my inventory is near full, then head to the village to heal/sell and repeat. You should make enough profit doing this to be able to afford items merchants carry if they have anything good.
Item Rarity:Items are color coded White, Blue, Orange and Purple. Purple items are unique quest rewards with fixed stats and worth keeping in your village storage chest. The rest are randomly generated. Orange being the best you can find.
Item Type:Weapon type should match your combat style, while armor type is just a straight upgrade as far as I can tell (Adamantium being the best).
Item Stats
Damage Resistances:I’d say this is one of the most important. You want to aim for as broad a range as possible on each piece to get each resistance as high as possible (total). This will greatly improve survivability and make your near invincible by late game.
Base Stat Buffs:Buffs to STR, DEX, CON are probably secondary, but still very powerful. For example a weapon that boosts Strength by a lot may ultimately do more damage than a weapon with a higher base damage stat.
Crafting &Enchanting
You can craft your own items at the Smithy in your village. However I found the base stats of these not that impressive. Even with a fully upgraded building. You also have no control over the stats, so it feels like you spend resources to spawn a random gen unenchanted item.
You can enchant items (either ones you have crafted or loot you have disenchanted) at the Mana Forge. However you can only craft items up to equivalent Blue rarity (or max 5,000 mana). As a comparison, you can find Orange quality items with enchantments exceeding 16,000. Hypothetically perhaps you can craft very specific equipment builds with enchantments that fit a particular play technique or are resistant to a damage type of a particular region of the world map, but I didn’t see it being worth the effort.
Save Scumming Chests
You will find gold lined chests as rewards at some map locations. These generally reward you with higher quality and quantity loot. If you don’t mind cheating, you can save your game next to the chest and repeatedly quick load (default F8) until you get an item you want. You can do this and quickly get a full set of very powerful Orange quality equipment from just a few map locations.
Companions
Companions are a fun addition to the game and can be extremely overpowered. Fully upgraded they are pretty unstoppable. Their main weakness is an inability to navigate platforming areas of maps. This can be fixed by saving and loading to reset their location to you.
You can hire companions at your village tavern as soon as you build it. You can hire up to 10 at one time and they will all follow you. Early game they are quite weak, however as you level up the village training yard they will become incredibly strong.
Ranged Companions are the most useful and will attack enemies before you can get within melee range.
Rogues are also powerful as they sneak up and do a lot of damage.
A full party of companions can make it difficult to do any fighting yourself. This is comical for a while, but not very fun. You can always dismiss some or all if you want to.
I’m not sure if you continue to gain experience for kills your companions do, but there is a chance using them will slow or halt your ability to level up.
If you have the siege DLC, you can take a party of 10 fully upgraded companions and let them do all/most of the fighting for easy resource collection.