Castlevania:Symphony of the Night 初心者向けガイド:モンスターを倒し、すべての秘密を明らかにするためのヒント、トリック、および戦略
それは 1792 年のことでした。強力なヴァンパイア ハンター、ベルモント一族のリヒター ベルモントは、彼の鞭であるヴァンパイア キラーを使ってドラキュラ伯爵を倒しました。しばらくの間、ヨーロッパ全体に平和が回復しましたが、5 年が経過し、すべてが思い通りにはなりません.
現在は 1797 年ですが、ドラキュラ卿の城、キャッスルヴァニアは、まるで彼がまだ生きているかのように無傷のままです。リヒター・ベルモントは行方不明になりましたが、多くの人が亡くなったこの暗い城に新たな救世主が呼ばれました:吸血鬼の領主の息子であるアルカードという男です.城は、呪いを解こうとするベルモント一族の努力にもかかわらず、彼の先祖代々の家が無傷のままである理由を明らかにしようとするアルカードの帰還を手招きします。キャッスルヴァニアへようこそ。 1 人、全員で来て、夜の交響曲に五感を貸してください。
コナミのクラシックでジャンルを定義する傑作、悪魔城ドラキュラ:夜の交響曲 は、Google Play と App Store の両方で購入できるモバイル ゲームになりました。アルカードが父の平和を求めて、ドラキュラの城の呪われた呪われたホールを横断する懐かしさを追体験してください。オリジナルの PlayStation (PSX) と PlayStation Portable (PSP) で実行されましたが、Symphony of the Night は新世代のゲーマーを歓迎し、その機能を探求し、すべての秘密を見つけ、史上最高のゲームの 1 つを楽しんでいます。フランチャイズ自体から来ています。
難易度はそれほど変わっていませんが、たまたまこの新世代のゲーマーの中にいたとしても、心配する必要はありません。ゲームが非常に難しいことを認識しています。どのようにして城を通り抜け、そのすべての秘密を明らかにしたいかを理解するのに十分な好奇心がありますか? 悪魔城ドラキュラ:夜の交響曲初心者向けガイドをご覧ください。
目次- このゲームは何?!みじめな小さな秘密の山!
- 名前入力
- リヒターの最後の戦い
- アーカードの詳細
- 一時停止メニューとその操作方法
- アーカードの致命的な恩寵
- サブウェポン
- 魔法書
- ダーティ コンバット 101 (AKA ファイティング スマート)
- 興味深いアイテム
- ファミリアに慣れる
- 遺物とその入手先
- 地図の読み方
- 探索と後戻りが鍵
- まとめと結論
このゲームとは?!みじめな小さな秘密の山!
上記のヘッダーは、PSX バージョンに存在した元の安っぽいセリフを参照していますが、このポートには代わりに PSP バージョンの音声とセリフが含まれています。参考文献はさておき、キャッスルヴァニアが正確に何であるか疑問に思っていると確信しています.心配はいりません。簡単な歴史のレッスンを行います。
キャッスルヴァニアは、吸血鬼ハンターの強力な一族であるベルモント一族がドラキュラ ヴラド ツェペシュ伯爵を死なせようとする取り組みを描いた、ほとんどが横スクロールのゲームです。彼らが世界に破滅をもたらさないようにしようとしているのがドラキュラではない場合、少なくとも世紀ごとに彼の復活を叫ぶのはドラキュラの狂ったカルト信者です(本当のファンクラブについて話してください)。時折、ベルモント一族が戦いを行っているのではなく、ドラキュラの手から土地を解放しようとしている他の者がいる可能性があります.
これらの注目すべき例は、Hector です。ドラキュラの下で、ドラキュラの悪魔の軍隊であるシャノアの作成を担当するデビルフォージマスターとして働いた人間。エクレシア騎士団と呼ばれる組織の謎の女性、ジョナサン・モリスとシャーロット・オーリン。ベルモント一族とベルナデス一族(ベルモントと同盟を結んだスペルキャスターの一族)と血縁関係にある吸血鬼ハンターのペア、コーネル。養子の妹エイダがドラキュラを復活させるための犠牲になることから救うために探求を続ける若い狼男、そしてこのタイトルではアルカード。ドラキュラの半分人間で半分吸血鬼の息子で、自分の母親が再び人間に危害を加え始めた場合、父親を休ませると約束した.
関連: Castlevania:Symphony of the Night ウォークスルー パート 1
「夜の交響曲」は、「メトロイドヴァニア」というジャンルを生み出したので、特筆に値します。このジャンルの語源は、「メトロイド」と「キャッスルヴァニア」のかばん語に由来します。このゲームは確かにキャッスルヴァニアのタイトルですが、メトロイドのゲーム シリーズが持つ探索機能とバックトラック機能を共有しています。ゲームをさらに進めるために必要な特定のパワーアップとアイテムがあり、ほとんどの場合、あちこちに大量の秘密が隠されています。秘密のいくつかは、ボスやゲームを壊す装備である可能性があります。 (はい、クリサグリムについて話しているのです)。
最後の段落で述べたように、Symphony of the Night は長いゲームです。いつでも好きなときに手に取って置くことができますが、黄金の結末を手に入れたい場合は、多くの忍耐とスキルが必要です.このゲームには少なくとも 4 つのエンディングがありますが、そのほとんどを自分で探索することはできません。このガイドでは、役に立ついくつかの秘密のみを公開しますが、ストーリーの筋書きを台無しにするものは何もありません.
ゲームに飛び込むとすぐに、まだ Alucard としてプレイすることはありません — リヒターとしてプレイし、ゲームの前作である Super Nintendo Entertainment System (SNES) のドラキュラ X でドラキュラに対する勝利を再現します。
名前入力
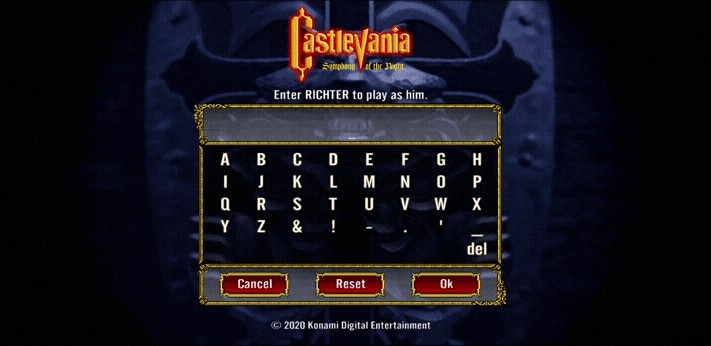
このゲームはモバイル デバイスに移植されてから、より多くの機能が追加されました:呪文や変換のボタン、インベントリ内を簡単にナビゲートする方法など。前任者と比較したこの移植の特徴は、名前入力画面で RICHTER または MARIA と入力することで、すぐに Richter Belmont または Maria Renard としてプレイできることです。
これら 2 人のキャラクターは、それ自体が強力ですが、そうではありません レベルアップしなくてもすぐに城を通り抜けることができるので、初心者におすすめです。それらが推奨されない理由は、移動するのにスキルが必要な城の一部があるためです。そのうちの何人かはボスです。
そうは言っても、城の内外をよりよく学び、ゲームのストーリーを明らかにするため、新しいプレイヤーにはアルカードとしてゲームをプレイすることをお勧めします. Alucard としてプレイするには、自分の名前を何でも入力する必要があります。使用できるその他の興味深い名前を次に示しますが、RICHTER や MARIA と同様に、初心者にはお勧めできません。
- X-X!V''Q — 運モード。 Alucard は 99 の LCK 統計から始まりますが、他のすべての数値が大幅に減少しています (概観すると、Alucard は通常 70 HP で開始しますが、ここでは 20 HP です)。彼はまた、ラピスラズリを装備した状態で開始し、さらに多くの LCK を付与します。
- AXEARMOR — Alucard はインベントリに Ax Armor を持った状態で開始します。これを装備すると、彼はアックスアーマーと呼ばれる敵になります。独自の動きがありますが、通常のように高くジャンプすることはできません。任意のエンディングでゲームを終了する必要があります。そうしないと、この名前は機能しません。
ストーリーといえば、イントロの最後の戦いはどうですか?
リヒターの最後の戦い

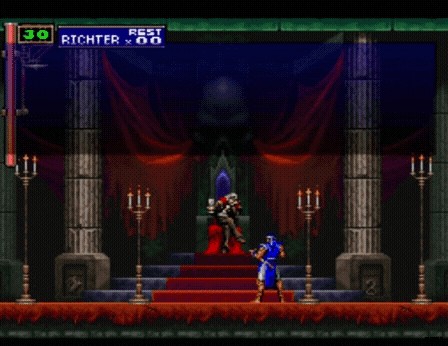
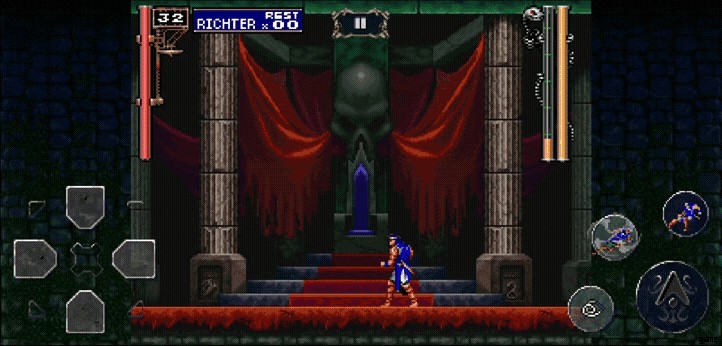
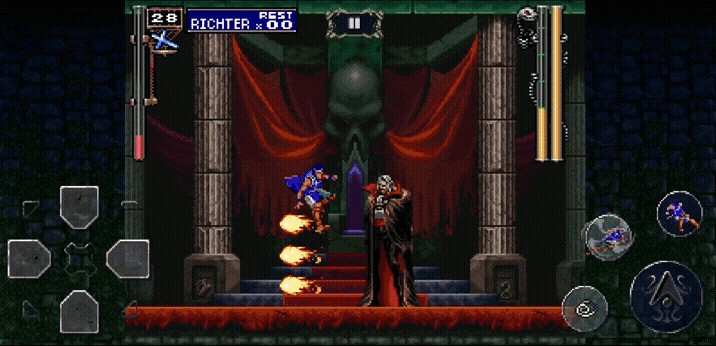
ドラキュラの屋敷のてっぺんに吹く風がすぐにあなたを迎えてくれます。血のように真っ赤なじゅうたんが敷かれた長い階段があなたの前にあり、あなた、リヒター・ベルモントはその仕事をきっぱりと終わらせようとしています。失敗しますか、それとも成功しますか?
これがキャッスルヴァニアのゲームであることを考えると、ろうそく、壷、花瓶、ランプなど、武器を振ろうとするものなら何でも破壊できます。これらはハートを落とします。これらのヒーリングと混同しないでください。ただし、サブウェポンの弾薬を補充するだけです。そうしないと、これらのろうそくの一部がサブウェポン自体をドロップします。
たとえば、階段の一番上にある最初の燭台は十字架をドロップします (サブウェポンについては後で詳しく説明します)。ドラキュラの玉座の間の前のホールへの入り口のように、壁の一部も破壊できます。入り口の天井の角を叩くと、下の写真のような部屋につながる秘密の階段を開くスイッチが表示されます。

残念ながら、中のアイテムはゲームのアルカードの部分に持ち越すことはできません.これが今かかっているのは、ドラキュラをどのように倒すかです。リヒターの動かし方はもうお分かりだと思いますが、以下の図は各ボタンがリヒターに対して何をするかを示したものです:
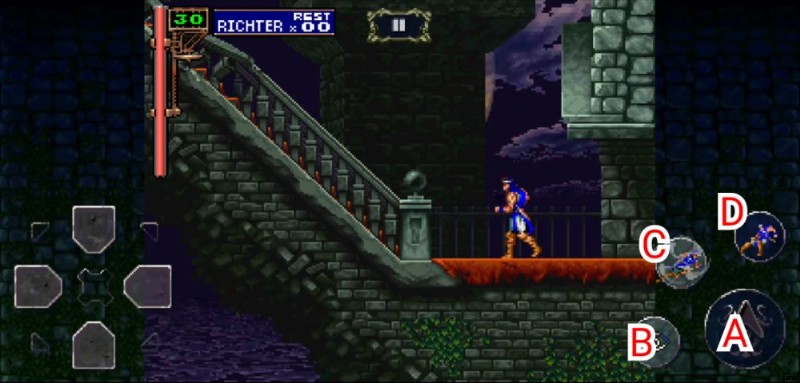
a.ジャンプ — 典型的な能力。このボタンを押すと、リヒターは障害物を飛び越えます。 2 回タップすると、彼はバク転を実行できます。
b.むち — これを押すと、リヒターは目の前にあるものにヴァンパイア キラーをぶつけます。このボタンを長押しすると、リヒターが地面に落とします。このモードでは、方向パッドを使用して、それを振り回したり、回転させたりすることができます。
c.タックル — リヒターは力を振り絞り、前方にダッシュし、目の前のあらゆるものを突き破ります。損傷の原因となります。
d.スライド — このボタンを押すと、Richter は非常に素早いスライドを実行します。 2 回押すと、Richter が空中に飛び上がり、走り幅跳びのように機能します。
これらすべてとは別に、方向パッドを左または右にダブルタップして、Richter を実行できます。 [ICN:下] [ICN:上] + ジャンプをすばやく押して、リヒターにスーパー ジャンプを実行させることもできます。スーパージャンプは、レベルの天井に向かってリヒターを即座に推進します。これは、背の高いもの (またはボス、*wink wink*) を飛び越えるのに便利です。 ).
[ICN:上] を押しながら鞭ボタンを押すと、リヒターはサブウェポンを使用します (これは空中でも実行できます)。[ICN:上] を押しながらタックル ボタンを押すと、リヒターはアイテム クラッシュを実行します。 .アイテム クラッシュはリヒター専用の強力な呪文で、大量のハートを消費します。リヒターのサブウェポンの詳細は次のとおりです:
| サブウェポン |  |  |
| なし | なし | フレイムウィップ — リヒターのウィップに一時的に追加ダメージを与えます。 (15❤) |
 クロス | Richter はクロスを前方に投げ、ブーメランのように戻ってくる前に短時間スピンします。 (1❤) | グランド クロス — リヒターは神聖の力を召喚し、2 つの巨大な十字架を彼の周りに渦巻かせて、エリア全体を聖なる光で浄化します。 (20❤) |
| 聖水 | Richter は聖水のボトルを地面に投げつけ、粉々に砕きます。青い炎の波を放ち、不浄の地を浄化する。 (1❤) | ハイドロ ストーム — リヒターが空から聖なる雨を降らせ、周囲のすべてのものに短時間ダメージを与えます。 (15❤) |
あなたが彼としてプレイする場合、リヒターは他のすべてのサブウェポンにアクセスできます。ただし、このガイドでは Alucard に焦点を当てるため、これらを自分で発見できるようにします.これらがすべてクリアされたので、ドラキュラとの戦いに進みましょう.これは、リヒターをずっと左に持ってくる部分です。
(注:一度に持てるサブウェポンは 1 つだけです。現在もう 1 つを持っているときに 1 つを拾うと、前に持っていたものを床に落とします。賢く選んでください。)
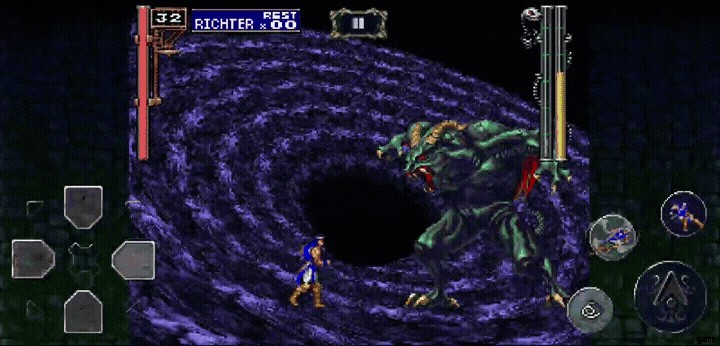
リヒターとドラキュラのやり取りの後、本当の戦いが始まる。核心に入る前に、ドラキュラについて知っておくべきことがいくつかあります:
- ドラキュラの頭だけがダメージを受けやすい。最初のライフバーを使い果たした後、彼は真の姿を現します。このフォームはどこでも攻撃できます。
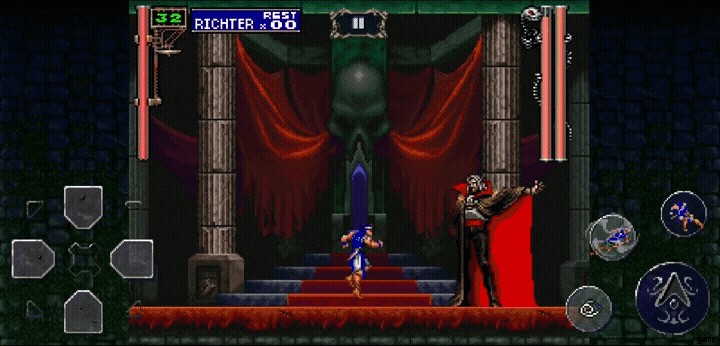
- ドラキュラの最初のフォームでは、テレポートしてマントを外側に広げ、3 つの火の玉を発射します。このトリオは、ヴァンパイアキラーを使用して破壊できます。最も効果的なのは、長押しと方向ボタンで回転させることです。ただし、ドラキュラは破壊できない大きな火の玉を時々発射します。これらを回避するには、最初の 1 つの下に隠れてもう 1 つを飛び越えるか、スーパー ジャンプを実行するか、彼の頭にタックルします。
- ドラキュラの 2 番目のフォームでは、3 つの攻撃があります。口から火の玉を数個吐き出すか、ジャンプして押しつぶそうとするか、上に飛んで邪悪なボルトを降らせます。彼の口から出る火の玉は破壊できませんが、ボルトは破壊できます。
ドラキュラに十分なダメージを与えると、ドラキュラを倒すことに成功します。万歳!しかし待ってください、リヒターは若いマリア・レナードが彼の命を救うために現れた彼を殺すのに十分なダメージを受けましたか?サブウェポンなしで倒したの?これらはすべて、直後のアルカードの統計に影響します。考えられるすべてのシナリオは次のとおりです:
| 状態 | アルカードへの影響 |
| ダメージを受けずにドラキュラを倒す。 | アルカードは、HP の最大値が +5 の状態で開始します。 |
| サブウェポンを拾わず、炎の鞭を使わずにドラキュラを倒す。 | Alucard の最大 HP が +5、STR、CON、INT が +1、LCK が +5 の状態で開始します。 |
| プロローグ全体を 1 分以内に完了してください。 | アルカードの HP、ハーツ最大値、STR、CON、INT、LCK が +5 増加します。 |
| 聖水を装備してドラキュラを倒す | アルカードは、MP の最大値とハートの最大値が +5 の状態で開始します。 |
| 十字架を装備してドラキュラを倒す | Alucard は MP が最大 +10、ハートが最大 +5 の状態で開始します。 |
| プロローグでハートを 40 個以上集める。 | Alucard はインベントリに中性子爆弾を持って開始します。 |
| リヒターのハートをすべて消費する。 | アーカードは、持ち物にあるハート リフレッシュから始めます。 |
| リヒターは HP をすべて失い、マリアが彼を復活させるために到着します。 | アルカードは持ち物にポーションがある状態で開始します。 |
最初の 3 つを達成することができ (リヒターとドラキュラの間の説明的な会話は、画面をタップしてスキップできます)、それらを達成するには、非常に強力な Alucard から始めます。彼の HP は 85、MP は 25、ハートは 55、STR は 14、INT は 13、CON は 13、LCK は 17 です。そのような偉業を達成できない場合は、ゲームを終了して新しいセーブを作成することで、好きなだけ継続的に練習できるため、まったく問題ありません。いずれにせよ、ゲームは依然として非常に難しいままです。
ゲームのアルカードの部分に!
アーカードの詳細
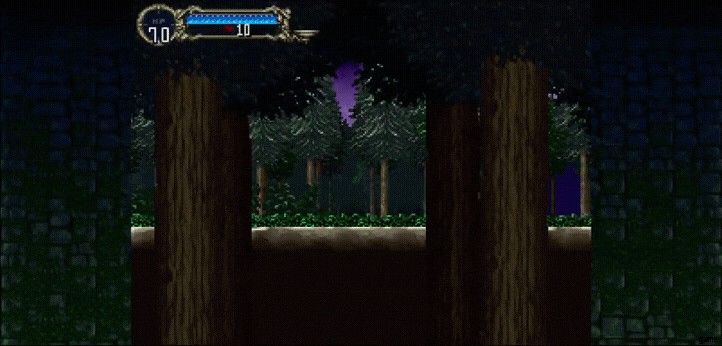
稲妻が夜空を突き抜け、強風が木々の間を吹き抜け、マントをまとった孤独な男が運命に向かって急いでいる。橋を飛び越えた後、アルカードは自分が後戻りできない地点に到達したことに気づきます。
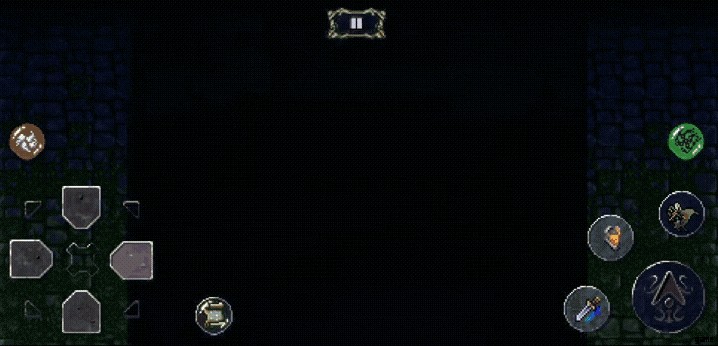
プレイヤーがアルカードを操作した瞬間、リヒターを使用していたときとは異なる何かがあることに気づきます。アルカードは強力な存在です。彼の足取りには恵みがあり、彼の攻撃には怒りがあり、彼の後には死があります — アルカードは確かにドラキュラ卿の息子であり、彼は考慮すべき力です.
彼の刃は目の前の悪魔をバターを切り裂く熱いナイフのように切り裂き、彼の盾は彼に向けられた発射体から彼を守ります。しかし、彼が正確にどのように機能するかについて混乱している方もいるかもしれません。心配する必要はありません。コントロール スキームは次のとおりです:
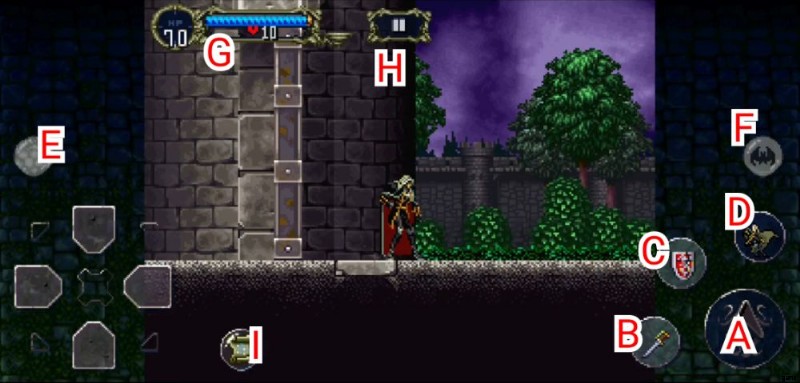
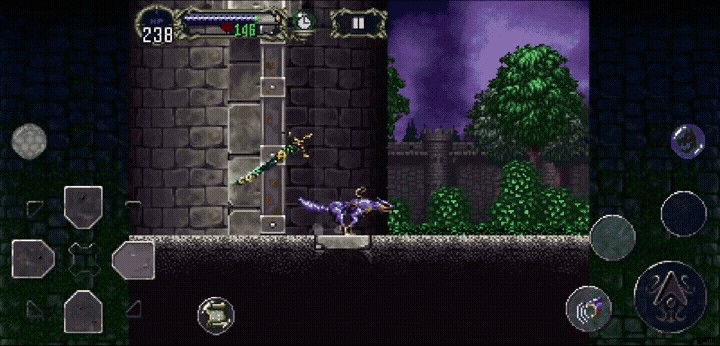
a.ジャンプ — リヒターと同じように、アルカードのジャンプ ボタンは同じ方向にあります。ここでの違いは、ジャンプ ボタンを長押しすると、Alucard は Richter よりもはるかに高く、遠くにジャンプできることです。薄い棚の上では、Alucard は下ボタンとジャンプ ボタンを同時に押すと、下にジャンプできます。また、空中でジャンプの方向を変えることもできます。リープストーンを入手するとアルカードはダブルジャンプが可能になり、グラビティブーツを入手するとスーパージャンプが可能になります。これらの詳細については、遺物とその場所のセクションをご覧ください。
b.右手 — このボタンを押すと、アルカードは現在右手に装備されているものを使用できます。 [ICN:上] を押しながらこれを押すと、アルカードはサブウェポンを使用します。
c.左手 — このボタンは、アルカードが左手に持っているアイテムを使用するようにします。右手と同じように、[ICN:上] を押しながらこのボタンを押すと、アルカードはサブウェポンを使用します。
d.バックダッシュ — アルカードは素早く後方にダッシュすることで攻撃を巧みに回避します。これは素早く移動する手段として使用できますが、敵に注意してください!
e.呪文 — このボタンを 1 回タップすると、Alucard がこのスロットで現在強調表示されている呪文を実行します。このボタンを長押しすると、Alucard の使用可能なすべての呪文が最初に実行された場合に循環することができます。
f.変換 — このボタンを 1 回タップすると、アルカードが現在選択されているフォームに変身します。このボタンを親指で押し続けると、収集したレリックを通じて、持っているフォームから選択できます。
g.ステータス バー — これは、ダンピール* ヒーローの現在のステータスを示しています。バーの左端の数字は現在の HP を表しており、健康状態が完全な場合は明るい白で表示されます。これらが 0 になると、彼は死亡します。青く光るバーが彼の MP です。呪文を唱えたり、特定の武器スキルを実行して MP を消費すると、バーの光が止まります。 MPは時間経過で回復する。
MP バーの下には、彼のハート カウントがあります。ハートの数が0になると、それ以上集めないとサブウェポンが使えなくなります。ステータスバーの右端にあるレセプタクルには、アルカードが現在装備しているサブウェポンが入ります。これらについては、サブ武器のセクションで説明します。
h.一時停止メニュー — このボタンはゲームを一時停止し、Alucard のインベントリ、彼が学んだ呪文、彼が収集したレリック、彼のファミリア、およびゲームのオプションにアクセスできるようにします。その内容については後で詳しく説明します。
私。地図 — これを押すと、城の地図を読むことができます。これについては、地図の読み方セクションで説明します。
アルカードの左手または右手には何でも装備できます。あなたにとって重要なのは、どちらかを快適に使用できるかどうかです。たとえば、ゲームはデフォルトで武器を右手に装備し、盾は左手に装備します。彼がそれを逆に使用したい場合は、そうすることができます.上の GIF に示されているように、彼は 2 つの異なる武器を使用することもあります。シールドといえば、たまたま装備している手を長押しすると、シールドを使用できることに気付くでしょう。
シールドがアルカードの体を覆う。構えたまま前に走ることもできる。シールドが実際にできることは、骨、斧、火の玉など、迫り来る発射物から彼を保護することです。ほとんどの発射体は、Alucard にシールドを上げさせることでブロックできます。ただし、彼がブロックできないのは、近接攻撃、火の流れまたはプルーム、稲妻、および個別の発射物として表示されないものです。

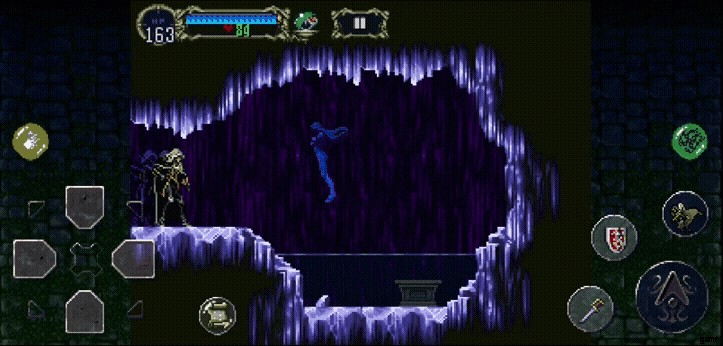
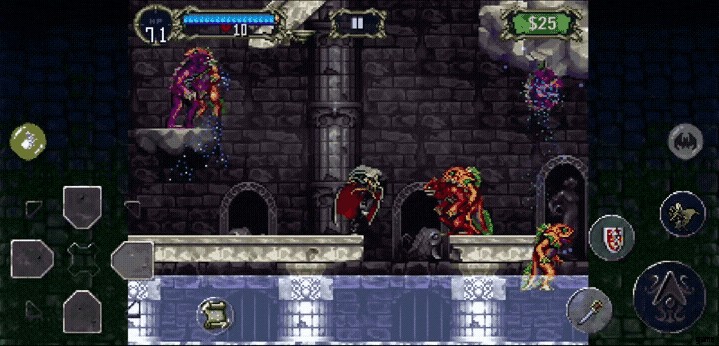
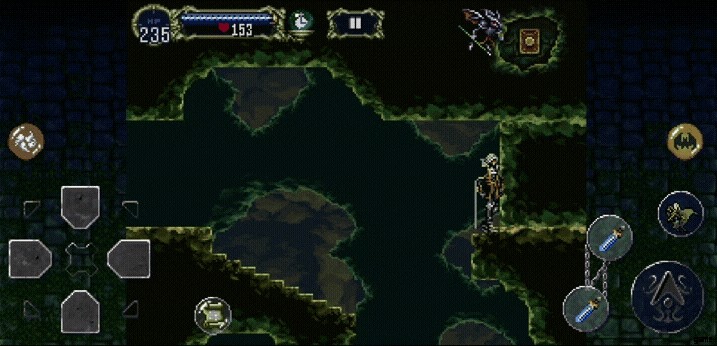
城の入り口を通り抜けると、最終的にマーマンが無限に出現する場所に遭遇します。階段の上部には飛び越えることができる巨大な岩があり、下部にはマーマンが小さな池で繁栄しています。岩は破壊できるので、剣を振るとポットローストが与えられます.この秘密のトンネルを通過すると、もう一方の端も破壊できます。これは、ほぼすべてのキャッスルヴァニア ゲームの機能です。特定の壁と床 (または天井) を破壊できます。
面白そうな壁に武器を振ってみてください。アルカードの攻撃が壁を突き破って驚くかもしれません。これらの多くは、特別なアイテムをドロップしたり、秘密の部屋を発見したりすることさえあります.マーマンに関しては、ドラキュラの城の水がアルカードに敵対していることにも気付くでしょう.少なくともホーリー シンボルを見つけるまでは、彼を水に沈めないでください。そうしないと、彼はダメージを受けます。
マーメンを通り過ぎると、アルカードは彼の乳母である死に遭遇します(冗談ではありません、死は彼が子供の頃から本当に彼の世話をしていました).死はアルカードが自分で城を攻撃するのを思いとどまらせようとしますが、後者は固執します.前者は、彼のすべての機器を奪うことによって、不機嫌な悪党を罰することにしました.これらは後で見つけることができます。 Alucard の不足している装備は次のとおりです:
(注:このガイドでは、攻撃機能を表すためにアルカードの剣のアイコンを使用します。)
| ITEM | TYPE | 効果 | スペシャル スキル |
 アルカードソード | 剣 | 攻撃力+42、斬撃ダメージ | 後ろから攻撃: MPを5消費 |
 アルカードシールド | シールド | DEF +5 | シールドロッドの呪文: 敵に255のダメージを与え、8HPと1❤を回復し、3秒間の無敵を付与します。シールドを上げている間、継続的に MP を吸収します。 |
 アルカードメール | 本文 | DEF +20、火、雷、氷属性のダメージに耐性 | なし |
 ドラゴンヘルム | ヘッドギア | STR +4、DEF +3、敵の防御力を半減 | なし |
 トワイライトマント | マント | CON +10 | なし |
 Jのネックレス | アクセサリー | DEF +5 | なし |
興味深いアイテムのセクションで詳しく説明する城には、もっと興味深いアイテムがたくさんあります。彼らの場所を教えますが、Alucard 機器の場所は驚きのままにします。
ゲームのこの時点で、Alucard にはアイテムが何もないことがわかります。ここからが本当のゲームの始まりです。このゲームでは、剣を振るう 2 つのスケルトンが表示されます。それらを倒すと、一方がショート ソードをドロップし、もう一方がレッド ラストをドロップします。
レッドラストはシンフォニーで最悪の剣の1つであるため、ショートソードは2つのうちでより優れた剣です.誇張ではありませんが、レッドラストには実際にドッペルゲンガー(ボス)が剣を抜くのを止めることができる用途があります.赤錆は時折鞘に引っかかる呪われた剣なので、自己責任で使用してください。
とはいえ、城のどこにいても興味深いアイテムを見つけることができます。必要なのは、ある程度の機知です。時々、あなたの進歩をより速く進める特別なアイテムを手に入れるための興味深い方法をいくつか指摘します.遺物が必要なエリアの後ろで立ち往生しているアイテムを入手できる場合もあります。気をつけて!
アイテム、アイテム、アイテム。ここには開梱するものがたくさんありますよね?一時停止メニューを見てみましょう。
*Dhampir — (n.) 半分人間で半分吸血鬼である人の正式な用語。
一時停止メニューとその操作方法
Symphony of the Night の一時停止メニューでは、Alucard のステータスを表示したり、Alucard の現在の装備セットをカスタマイズしたり、学んだ呪文やこれまでに収集したレリックを参照したり、彼の使い魔を変更したりできます。これの最も複雑な部分はたまたま彼の機器セクションです.
初めてのプレイヤーの多くは、これがいかに混乱を招くかを推測できます。多くの場合、彼らは新しいアイテムを手に入れるかもしれませんが、それを装備する方法を知りません.心配しないでください。ここに表示される内容の簡単な内訳があります。まず、ステータス画面から始めます。
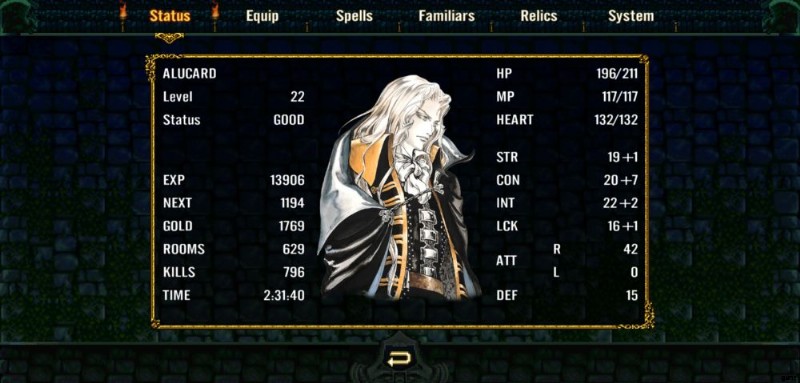
ステータス画面には、平均的な RPG ゲーマーにはある程度なじみのある用語や数字が多数表示されます。しかし、Symphony に飛び乗ったばかりで、これらが何であるかを理解していない人のために、そこに含まれるすべての項目が何を意味するかについての簡単な用語集を次に示します。
- レベル — これはアルカードの現在のレベルを表示します。彼が何かを殺すたびに、彼は経験値または経験値を獲得します。城内の各モンスターの EXP は異なり、通常、倒すのが難しいほど、より多くの EXP を与えます。
- ステータス — Alucard のデフォルト ステータスは GOOD である必要があります。毒(POISON)、石化(STONE)、呪い(CURSE)にかかった場合、これらに変化する。毒は彼の全体的なダメージを半分に減らし、アンチヴェノムで治すことができます.
ここで石化を選択したのは、方向パッドをさまざまな方向に繰り返しこすることによってのみ治癒できるか、Faerie Familiar を持っている場合、彼女はインベントリからハンマーを使用できるためです.
- 経験値 — これは、アルカードが獲得した経験値の合計を表します。
- 次へ — ここの数字は、アルカードがレベルアップするために必要な経験値です。 0 までカウントダウンします。0 になると、アルカードはレベルアップし、次のレベルに必要な EXP が増加します。
- ゴールド —これは、アルカードが現在彼に持っているお金です。
- 部屋 — アルカードが探索した部屋の総数です。部屋とは、フェード トランジションで区切られた城内の任意の領域です。出入り口が城のさまざまなエリアを隔てています。
- キル — これらの数字は、アルカードが倒した敵の総数を表しています。
- 時間 — これは、ゲームのプレイに費やした合計時間です。一時停止メニューにいるときは、タイマーは動きません。
- HP — ステータス バーを見る Alucard in Detail セクションの下にある は、Health Points を表します。これは、レベルアップするか、ボスがドロップし、一部の部屋に隠されているHP最大ポーションを収集することで増加できます.
- MP — ステータス バーを見る Alucard in Detail セクションの下にある は、Magic Points の略です。これはレベルアップすることで増やすことができます。
- ハート — ステータス バーを見る 詳細セクションのAlucardの下。一部の部屋に隠されているハートマックスポーションを集めることで、これを増やすことができます。
- STR ――これがアルカードの強み。より多くの STR は、彼が現在手に持っている武器をより強く攻撃するようになります。それは彼のATTステータスとスタックします。これは、レベルアップごとに増加します。
- CON — これは、アルカードの体質または彼の「自然な」防御を表しています。 CONが10ポイント増えるごとにDEFが1ポイント上昇する。これも 2.5 ポイントごとに発生します。 CONは、彼が毒または呪われている期間も決定します。 CON が高いほど、これらのステータスが維持される時間が短くなります。これは、レベルアップごとに増加します。
- INT — ここの数値は、アルカードの全体的な知性です。 INTの数値が高いほど、武器以外で与えるダメージが増加します。これらには、彼の呪文またはサブウェポンが含まれます。一般的に言えば、攻撃がアルカードのMPまたはハートの使用を必要とする場合、彼が与えるダメージはこの統計から導き出されます.これは、レベルアップごとに増加します。
- LCK — これはアルカードの運ステータスです。 LCKが高いほど、クリティカルヒットを獲得したり、アイテムをドロップしたりする可能性が高くなります。このステータスは、装備を強化する場合に必要です。タリスマン アクセサリもこのステータスに依存しています。
- ATT R — これは、アルカードが現在右手に持っている武器に与える全体的なダメージです。 The damage in both hands will be the same if he currently has a two-handed weapon equipped.
- ATT L — This is the overall damage that Alucard deals with the weapon currently in his Left Hand. The damage in both hands will be the same if he currently has a two-handed weapon equipped.
- DEF — This is the amount of damage mitigated from enemy attacks by Alucard’s armor.
In the tab next to it, you should see what he is capable of equipping. This is the Equip screen. Here, he has a total of 7 slots in which you can equip him with certain items:
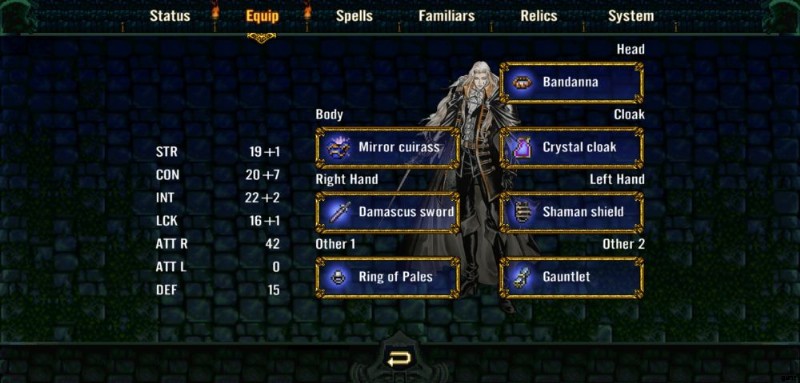
- Head — Helmets, headgear, and anything that might fit on Alucard’s head.
- Body — Armor to protect our hero.
- Cloak — This is where you can fit Alucard with the incredibly stylish cloaks you can find all throughout the castle.
- Right Hand — Weapons, items, shields.
- Left Hand — Just like the Right Hand, but on the Left.
- Other 1 &2 — These are accessory slots. Rings, necklaces, anything that doesn’t seem to fit elsewhere. They’re interchangeable and you can mix and match whichever accessories you seem to like together.
Selecting any of these slots will allow you to browse the Equipment available. By tapping the Filter button that appears on the upper-right portion of the screen, you’ll be able to sift through what you’ll be able to put in the slot but this only applies to what you can use in his Right Hand or Left Hand.
One thing we’d like to point out is how Alucard would restore his HP or MP by drinking potions or eating food. Unlike modern RPGs where you can simply choose the item and then hit a “Use” button, you will have to give Alucard your desired item.
Let’s say that you’d like for him to drink a Potion to recover his HP. You will have to equip the Potion first in either hand, and unpause the game. When you’re in play, tap the Hand which you’ve equipped the Potion in and he will drink it. For food, it’s basically the same thing, except Alucard will prefer to toss the food down on the floor first. Walking over the food he dropped will make him eat it. He’s quite sophisticated, you see.
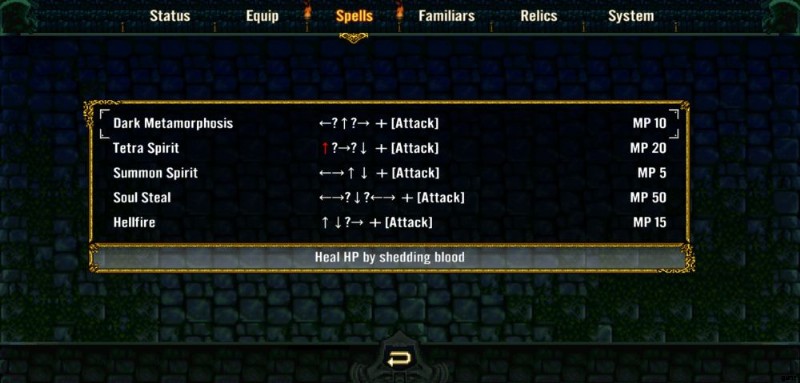
This section displays any and every spell Alucard has already cast. It will display a sequence of buttons to cast first, and then they will be available for selection using the Spell button. Because the game’s button sequences aren’t that reliable, we will outline every single spell and what they do in the Spellbook section.
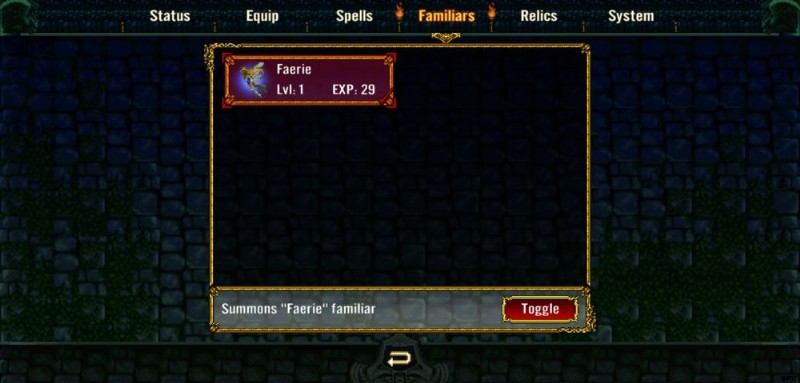
This is where all the Familiars you have found can be summoned and dismissed. Simply tapping any of their names will call them to Alucard’s side. To view them in detail, please see the Get Familiar with Your Familiars section.
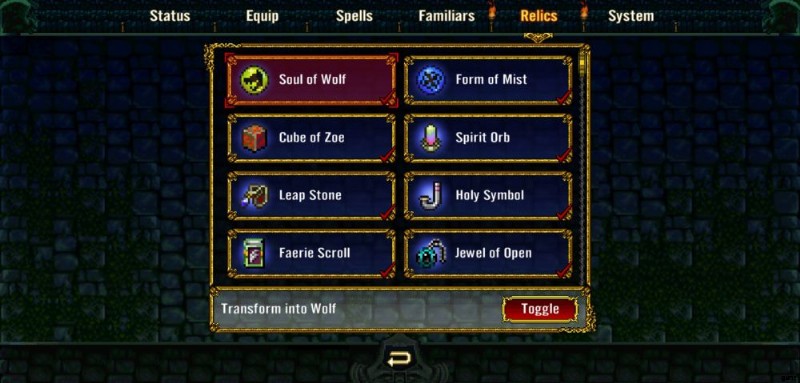
This is a part of the Pause Menu where you can browse the Relics that you’ve collected thus far. They also each have a brief description of what they do. If you’re up for a challenge, you may also disable some Relics, but be warned, you will need some of these. To see an in-depth guide to each of them, they are found in the Relics and Where to Find Them section of this guide.
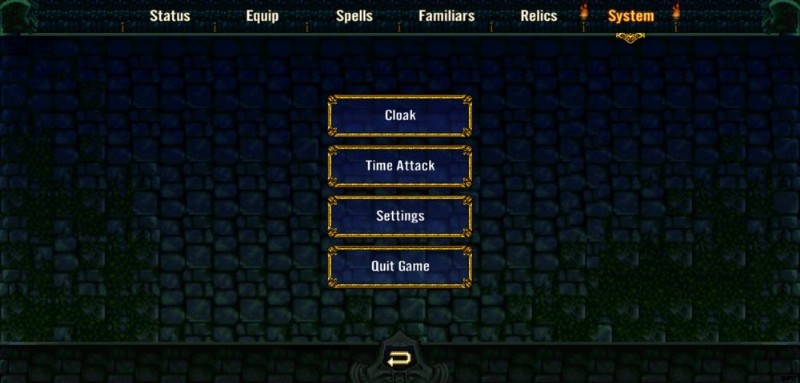
Lastly, you have the System menu. Here, you can change the lining of the Reverse Cloak, the colors of the Joseph’s Cloak, change the game’s languages, or even return to the main menu. Simple.
We’re getting to the juicier part of the guide. This is the best part of Castlevania as a whole:combat. Ready yourself!
Alucard’s Deadly Grace
One thing you are bound to notice immediately after taking control of Alucard is that he is quite fluid in every single move he makes.
His sword swings are swift and deadly, his jumps are far and high, and the way he runs through the castle halls is as though he were gliding on air. He is smooth, deft, and deadly. This is further exemplified by the way his controls work. As discussed earlier in this guide, he can carry one thing in each hand, backdash, perform Spells, and collect Relics to further improve the way he fights. But the spell-casting and Relic usage will be discussed in the Dirty Combat 101 section. Here, we will cover the basics of his actions.
By tapping the Right Hand button (assuming this is where you equipped a weapon), Alucard will swing at the enemy directly in front of him. He can also do this while ducking by holding [ICN:Down] on the d-pad, and even attack downward with most weapons by long-pressing [ICN:DgDownRight] or [ICN:DgDownLeft] depending on where you want him to face. The downward strikes are usually for smaller enemies like Fleamen and Frogs.
Apart from using his shield, Alucard can also attack certain projectiles to destroy them. He can also attack in midair, swing across from him or downward using the same controls. Most weapons each have varying swing speed with two-handed swords being slower than many.
If you fancy dual-wielding, you can equip two different weapons in each hand and use one or the other when the time arises. For instance, wielding a Firebrand in the Right Hand and an Icebrand in the Left allows you to tackle enemies with different elemental resistances.
When unsure of an enemy’s attack, ducking is a safe bet, but pressing the Backdash button is safer. What happens is that Alucard will swiftly glide backwards, away from the enemy’s attack. Jumping over enemy attacks also works as some of them can be perfectly evaded that way. Holding down the Jump button will result in higher and longer jumps.
But combat aside, doing long jumps can get you across wider gaps (at least until Alucard can turn into a Bat or after you find the Leap Stone or the Gravity Boots), and Backdashing makes you travel slightly faster than running through the castle’s halls (until you find the Power of Wolf Relic).
Just like Richter, Alucard can also equip Sub-Weapons and use them. The next section will discuss them in detail.
Sub-Weapons

Upon obtaining the Cube of Zoe, your first Relic, destroying candles, lamps, and any flame attached to a wall will drop hearts, money, and the occasional Sub-Weapon.
As explained earlier, Sub-Weapons are small but deadly items that can be utilized by holding (ICN:Up) and then pressing any Hand Button (ICN:AlcSub). Each Sub-Weapon has its own consumption of Hearts and its own behavior. Naturally, more Hearts consumed means that the weapon is more powerful. Below is a table of any and every Sub-Weapon that Alucard can obtain in the castle as well as their Heart consumption and what they can do:
| SUB-WEAPON | HEARTS REQUIRED | WHAT IT DOES |
 Knife | 1❤ | Flies straight at the enemy, can be thrown rapidly. |
 Axe | 4❤ | Hurled upwards in an arc, pierces through multiple enemies as it rises and falls. |
 Holy Water | 3❤ | Emits a brief, green flame that rapidly damages anything caught in it. |
 Rebound Stone | 2❤ | Bounces all over a room, damaging any enemy it passes through. |
 Bible | 5❤ | Violently flies around Alucard, damaging enemies hit by it and destroying projectiles. |
 Stopwatch | 20❤ | Stops time for a few seconds. Some enemies may be immune. |
 Vibhuti | 3❤ | Scatters holy ashes on the floor, damaging enemies that step on them. The ashes linger for a short while. |
 Agunea | 5❤ | Fires lightning bolts at the enemy, can be fired rapidly. |
 Cross | 100❤ | Grand Cross — Alucard summons the powers of holiness and causes two massive crucifixes to swirl around him, purifying the entire area with holy light. |
Each of these Sub-Weapons have their own unique uses that suit the game’s different enemies and bosses. One example we can give is the Axe’s use on the game’s first boss, Slogra and Gaibon. This can be used to damage them when Gaibon lifts Slogra up into the air. When tossed, the Axe will slash through both of them, damaging them just enough for you to defeat them both. We’ll cover more of this in the Dirty Combat 101 section.
Sub-Weapons aside, there are still other ways Alucard can dispatch his enemies. This is where things are going to get tricky!
The Spellbook
Among Symphony of the Night’s many secrets is Alucard’s ability to perform Spells.
This is a secret because only those familiar with the inputs are able to cast them. Most people will not have tried performing these and would rather finish the game without them. This goes especially for the PSX and PSP versions of the game. Sure, they can be purchased from the Master Librarian in the Long Library, but many of them can be cast right off the bat if Alucard has enough MP to perform them.
Do know that the sequences of these inputs should be cast perfectly in order. If you miss a button or do not fit the requirements of the spell (not enough MP, missing Relic, etc.), you will not be able to cast it successfully.
Each and every Spell that Alucard casts varies in MP and has its own unique behavior and usage as well — some of these focus on healing the dhampir, while others are solely used to heavily damage enemies. Below is a table of any and all Spells that Alucard can cast. Be warned that some of them will require certain things to be effectively cast:
(NOTE:This is all assuming Alucard is facing the right. If he is facing the left, the spell has to be done the other way. Meaning, if you plan to cast Dark Metamorphosis while he is facing the left of the screen, you have to start with the [ICN:Right] button, Tetra Spirit’s arrows should descend to the left instead of the right, etc.)
| SPELL | MP USAGE | INPUT &REQUIREMENTS | BEHAVIOR |
| Summon Spirit | 5 |  | A spirit flies out from the center of the screen and repeatedly attacks some enemies present before flying out. |
| Tetra Spirit | 20 |  (  should be held for at least 2 seconds) should be held for at least 2 seconds) | A salvo of four spirits fly out from the center of the screen, attacking multiple enemies repeatedly. Can focus on a single target for massive damage. |
| Dark Metamorphosis | 10 |  | Alucard awakens the darkness of his vampiric side and can heal by getting showered on by enemies that shed blood. He will need to use a weapon that cuts for them to bleed. |
| Hellfire | 15 |  | Alucard performs his father’s trademark Spell. He will teleport and then reappear before lifting his cape to shoot a trio of fireballs.ホールディング  after he reappears will cause him to launch the bigger fireballs. after he reappears will cause him to launch the bigger fireballs. |
| Soul Steal | 50 |  | Alucard draws out the life energies of all the enemies around him, restoring his health. Useful against bosses with a lot of HP or when Alucard needs healing in general. |
| Wing Smash | 8 | (Bat Form only)  | Alucard flies at the enemy at a high speed. His flight can be controlled at an upward or downward angle. |
| Wolf Charge | 10 | (Wolf Form only, requires Skill of Wolf Relic)  | Alucard lunges at his enemy with a vicious bite. He also tears through multiple enemies using this. |
| Sword Brothers | 30 | (Requires Sword Familiar summoned)  (  key should be held for at least 2 seconds) key should be held for at least 2 seconds) | The Sword Familiar will damage all enemies on screen. |
These can all be cast anytime, anywhere. That said, they can also be applied to bosses!
Dirty Combat 101 (AKA Fighting Smart)
Does a specific boss get you down? Is an enemy in particular blocking the way? Make them move not just with what weapons you wield, but the Spells and Sub-Weapons you currently have.
Each weapon class has its own attribute and effects. Naturally, most swords have the Cut attribute unless they are said to be elemental. These attributes can be used against specific enemies and bosses. Spells like Summon Spirit and Tetra Spirit will be the easiest to cast early on due to their low MP requirements and their high damage output.
The Hellfire Spell also qualifies, since it allows Alucard a brief moment of invulnerability while he casts it as well as the ability to teleport anywhere on a flat surface. To give you an example of how to fight smart, let’s cover how you can take down the first two bosses of the game rather easily:
| BOSS | LOCATION | WHAT TO BRING |
| Slogra and Gaibon | Alchemy Laboratory | Axe (Sub-Weapon) |
| Doppelganger 10 | Outer Wall | Red Rust, Holy Water (Sub-Weapon) or Stopwatch (Sub-Weapon) |
Let’s first talk about Slogra and Gaibon. These two demons are Death’s trusted minions who have been sent to kill Alucard in the hopes that he doesn’t prevent Dracula’s resurrection. Hitting Slogra (the bird with the spear) will cause him to jump backwards, forcing Gaibon (the blue one that flies) to catch him midair. Slogra will then angle his spear downward and Gaibon will try to drop him on Alucard. While Slogra is getting picked up or while he is in midair with Gaibon, chuck some Axes on them.
You can also cast Summon Spirit or Tetra Spirit if you have them unlocked to further damage them. After hurting Slogra enough, he will lose his spear and resort to stabbing Alucard with his beak instead. When Slogra dies, Gaibon will try to spew fireballs at Alucard which are easily destroyed by blocking with his shield or by attacking them. His first attempt would be to fly upward and spit them from there.
After reaching a height, Gaibon will drop and shoot more fireballs at Alucard while standing upright. Alucard can duck under the stream of fireballs and cut Gaibon in the stomach repeatedly. When Gaibon hits a certain HP threshold, he will turn red and spew bigger fireballs at a rapid pace but the same tactic can be applied here. Killing Gaibon first will make the fight easy as Slogra will repeatedly leap backwards when hurt, having nobody to catch him, but this is harder to pull off since Gaibon often flies about.
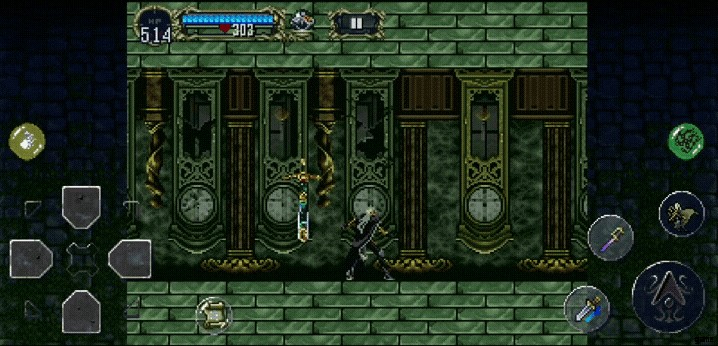
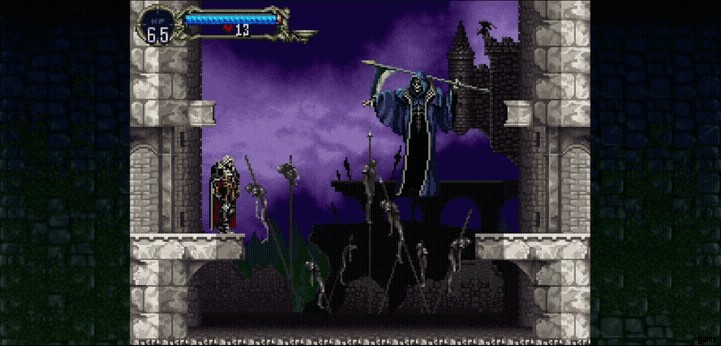
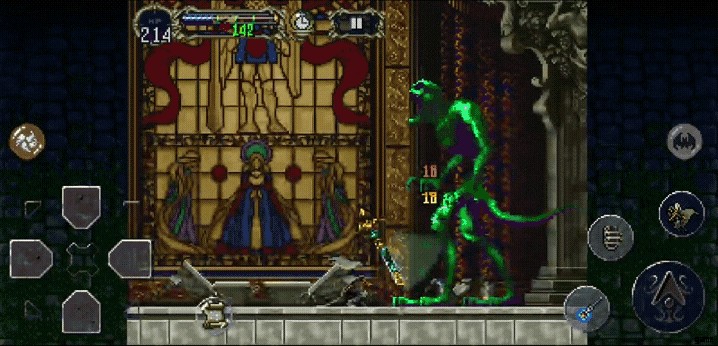
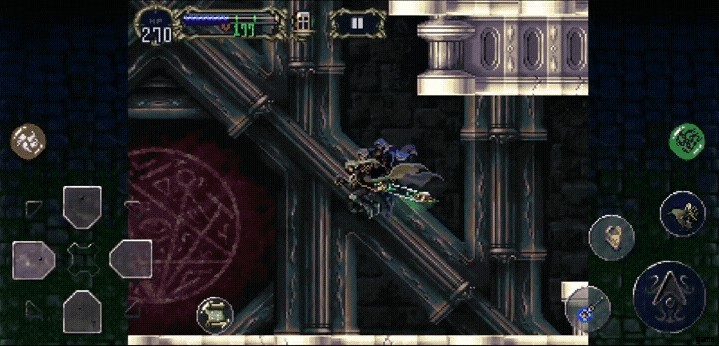
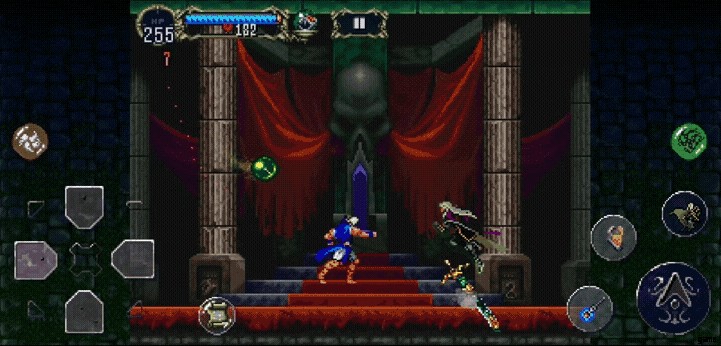
The Doppelganger, on the other hand, is quite challenging if you aren’t prepared. Ensure first that you aren’t carrying a Knife Sub-Weapon since he will copy your every move. You can prevent him from advancing toward you by dropping Holy Water in front of him. The flames will stagger him. Additionally, equipping the Red Rust and landing a hit on him will Curse him, preventing him from drawing his sword.
Of course, you’ll have to re-equip whatever sword you had initially before this, because the Red Rust’s attack power is terrible. If you happen to have carried the Stopwatch from the Marble Gallery, you can freeze the Doppelganger in place and slash at him repeatedly, killing him effortlessly. This was captured in the GIF above.
These are but two bosses in the whole game. There are many more ways you can win, and to give you food for thought, we’ve prepared a list of items worth looking for.
Interesting Items

Much like every RPG out there, Symphony of the Night is chock full of surprises. Below is a list of a few items and their locations. Having any of these can help make your run smoother or more enjoyable:
| ITEM | ITEM TYPE | LOCATION | USAGE | SPECIAL SKILL |
 Walk Armor | Body | Catacombs | Exploring the castle will increase its overall defense. This includes areas you have already discovered. | n/a |
| Holy Rod | Club | Long Library | A very useful weapon that can easily dispatch most enemies in the castle — many of which have a weakness to Holy damage. |  Holy Explosion — Alucard delivers a mighty swing, increasing the radius of the Holy Rod’s power. It also deals more damage than a regular swing. |
 Holy Sword | Sword | Colosseum, also dropped by the Vandal Sword enemies from the Clock Tower | A powerful weapon that is considerably stronger than the Holy Rod. However, the Holy Rod’s speed might favor more players. Both can be wielded in each hand. Finding this in the Colosseum will require flight, however. |  Holy Burst — Alucard causes a small explosion of holy energy in his immediate vicinity, finishing off the attack with a powerful swing. |
 Joseph's Cloak | Cloak | Sold by Master Librarian ($30,000) | This is the second best Cloak in the game. You can change the colors of this cloak in the System Menu under the Cloak option. | n/a |
 Crissaegrim | Sword | Forbidden Library, dropped by Schmoos | You have won the game. | n/a |
   Alucart Set | Sword, Body, Shield | Marble Gallery, requires the Leap Stone and the Stopwatch (Sub-Weapon) | This set dramatically boosts Alucard’s LCK stat, making it easy to farm for rare items. Be warned that the stats this set offers doesn’t add much. Also puts Alucard under the special status “ALUCART”. | n/a |
 Ring of Ares | Accessory | Abandoned Pit to the Catacomb | A ring that grants Alucard the strength of 24 men, but at the cost of 24 of his current Defense. High risk, high reward as it makes Alucard hit so much harder in the early game. | n/a |
 Shield Rod | Club | Colosseum, Final Stage:Bloodlines (Easter Egg only) | A special rod that is extremely powerful with a shield. It can be used simultaneously with a different shield to cast a different spell each time. |  Shield Spell — Simultaneously pressing the Shield Rod and the Shield you are currently equipped with casts a spell based on the shield.  Star Shield — Alucard generates a floating, energy shield that blocks projectiles where it’s cast. |
 Rune Sword | Sword | Dropped by the Dodo | Arguably the rarest sword of the game. It’s similar to the Heaven Sword but instead cleaves whatever’s in front of Alucard when thrown. |  Extended Throw |
 Brilliant Mail | Body | Dropped by the Snipers of Goth | A suit of armor that greatly improves the power of Sub-Weapons. | n/a |
There are still more items out there, but we’d rather you find them out yourself. Trust us, the surprises are all worth it!
Now how about some Familiars?
Get Familiar with Your Familiars
Familiars are little helpers that assist Alucard in battle. Each of them have their own unique abilities, but in the case of this port, there are at least two of these Familiars that share the same stats and moves as their regular counterparts (with minor differences).
Finding Familiars can help you explore the castle more safely as with each time they level up, they grow stronger in power. Just like Alucard, they gain EXP but this time, it’s based on the longer they are kept by his side. Below is a list of all the available Familiars in the game and where you can find them.
| FAMILIAR | FEATURES | LOCATION |
| Faerie | Can automatically heal Alucard using Golden Apples or any Potions and dispel him of debuffs using items from his inventory. She can also buff him with potions of specific Resistance if Alucard is hit by a particular element. | Long Library (Faerie Card) |
| Devil | Fights by Alucard's side. Gains the ability to perform elemental spells with his trident as he levels up. Can press switches. | Abandoned Pit to the Catacombs (Demon Card) |
| Bat | Fights by Alucard's side. Swoops at enemies and becomes more aggressive every level. When Alucard is in Bat Form, it will mimic Alucard's fireball attack (Fire of Bat). At higher levels, it will have additional bats by its side that will also mimic Alucard's fireballs. | Alchemy Laboratory (Bat Card) |
| Ghost | Fights by Alucard's side. It latches onto enemies and causes small explosions dealing magic damage which increase in speed per level. At Lv70, its attacks heal Alucard for 8 HP each. If Alucard assumes the Bat form, it will leave. Turning back to his original form, his Wolf form, or his Mist form will call the Ghost back. It can be ordered to attack particular enemies by making Alucard pass an enemy of choice in his Mist form. | Castle Keep (Ghost Card) |
| Sword | Fights by Alucard's side. It will fly at an enemy's location and swing in a circular motion, causing rapid damage. As its level goes up, its aggression grows and at Lv50, it will disappear from the screen and appear in Alucard's inventory as a regular sword to wield. It can be re-summoned as a Familiar through this menu. It will change appearance at Lv60, becoming even more aggressive as a Familiar and more powerful as a sword. It also comes with the powerful Sword Brothers spell (see the Spellbook section). | Olrox's Quarters (Sword Card) |
| N Demon | Similar to the Devil Familiar. The only exception to it is that it has a large nose, glasses, and a funnier personality as opposed to the Devil's more formal one. | Colosseum (N Demon Card) |
| Fairy | Similar to the Faerie Familiar. Unlike the Faerie, however, this one will sing Alucard a lullaby and put him to sleep if you make him sit on a chair by pressing ↑ when in front of one. | Olrox's Quarters (Fairy Card) |
Leveling up your familiars is hard work, but pick one that suits your needs and it’ll take great care of you. It’s always good to invest in one early, especially as soon as you get its card. Be warned that you can only summon one Familiar at a time.
Familiar Cards are Relics by themselves. The question is, which items are specifically classified as Relics, exactly? Let us tell you!
Relics and Where to Find Them
Relics are powerful items that are required for you to traverse the castle’s various obstacles.
Some of these involve places where you’d need to fit in like grills or small gaps, some of them require Alucard to jump a certain height, others have more essential abilities that you will eventually need since the game only gets harder as you progress. Below is the complete list of Relics, excluding the aforementioned Familiar Cards:
| RELIC | LOCATION | USAGE |
 Cube of Zoe | Entrance | Your first Relic. Items now drop from candles and lamps. |
 Spirit Orb | Marble Gallery | Shows how much damage you deal. |
 Faerie Scroll | Long Library | Tells you the name of each enemy you attack. |
 Jewel of Open | Sold by Master Librarian ($500) | Opens Blue Doors. |
 Leap Stone | Castle Keep | Allows Alucard to Double Jump by pressing the Jump button again in midair. |
 Gravity Boots | Marble Gallery, requires Soul of Bat | Allows Alucard to Super Jump by pressing the below command: Can be done repeatedly in midair. |
| Merman Statue | Underground Caverns | Summons the mysterious oarsman at large bodies of water. |
 Holy Symbol | Underground Caverns, requires Merman Statue | Allows Alucard to go underwater without taking damage. |
 Soul of Wolf | Outer Wall | Grants Alucard the Wolf Form, can run as a wolf by double tapping  or or  |
| Power of Wolf | Entrance, requires Soul of Bat or Gravity Boots | Alucard’s speed as he runs in Wolf Form increases overtime, a great way to travel long hallways. |
 Skill of Wolf | Alchemy Laboratory, requires Soul of Bat or Gravity Boots | Grants Alucard the ability to perform the Wolf Charge Spell, see the Spellbook section for its input command. |
 Form of Mist | Colosseum | Grants Alucard the Mist Form. Allows him to pass through grills. |
 Power of Mist | Castle Keep, requires Soul of Bat. Fire of Bat optional. | Prolongs the Mist Form. |
 Gas Cloud | Floating Catacombs, defeat Galamoth | Mist Form now damages enemies. |
 Soul of Bat | Long Library, requires Form of Mist | Grants Alucard the Bat Form, allows him to fly. |
 Fire of Bat | Clock Tower, requires Soul of Bat or Gravity Boots | Gives Alucard’s Bat Form the ability to spit fireballs. |
 Echo of Bat | Olrox’s Quarters, requires Soul of Bat or Gravity Boots, defeat Olrox | Allows Alucard’s Bat Form to use its echoes in dark places. |
 Force of Echo | Reverse Caverns | Alucard’s Bat Form can now use its echo to damage enemies. |
 Ring of Vlad | Defeat Darkwing Bat | INT +10, allows entry to the final boss room |
 Rib of Vlad | Defeat Akmodan II | CON +10, allows entry to the final boss room |
 Heart of Vlad | Defeat Medusa | Immunity to Curse, allows entry to the final boss room |
 Tooth of Vlad | Defeat The Creature | STR +10, allows entry to the final boss room |
 Eye of Vlad | Defeat Death | LCK +10, allows entry to the final boss room |
The last five Relics are quite important since they will allow you to find the room of your final battle. Once you have successfully obtained these as well as defeated the bosses that guard them, you may find it in the heart of the Black Marble Gallery. Do note that the Golden Ending requires you to have explored everything with a completion rate of at least 196% of castle exploration (200.6%, total).
Location, location, location — you’ve seen this repeated a couple of times in the guide now. Problem is, how does one read the map? It’s actually simpler than it looks.
How to Read the Map
Dracula’s castle is HUGE . If this game didn’t have a map system of some sort, we’d all be lost.
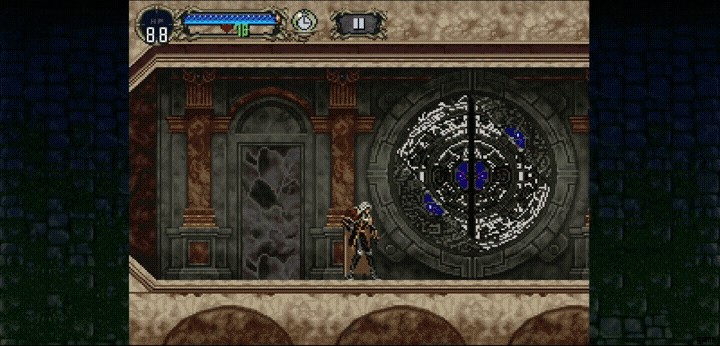
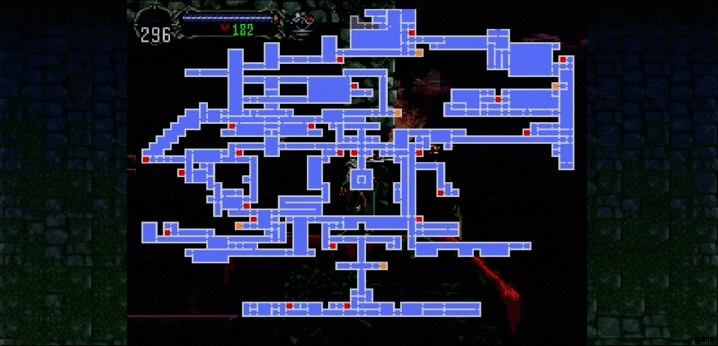
Thankfully, the developers thought ahead and gave everyone a map which you can buy from the Master Librarian in the Long Library. The item itself grants the player a basic outline of the castle, though, each player has the Map Button from the start, as seen in the Alucard in Detail section. Pressing this will reveal the rooms you have discovered and the rooms you are yet to discover.
Of course, any area that doesn’t seem highlighted hasn’t been discovered yet, but at the same time, there are hidden areas that only you can find out by breaking them with your weapon or having the Faerie Familiar summoned. There are a few other things that stand out in the map when you look at it.
The white, pulsating circle is your current location — it shows where you are in a room, hallway, or tower. There are also tiny rooms that are colored red and yellow. These rooms are quite important because they provide essential features that help you explore the castle and keep healthy. The red ones are Save Points.
A large, golden crystal that beats like a heart morphs into Alucard’s coffin when you choose to save. Making contact with this crystal by pressing the [ICN:Up] button will replenish all of Alucard’s HP and MP.
Conversely, the yellow rooms are Warp Rooms. These rooms allow Alucard to walk through their glowing portals by pressing the [ICN:Up] button. However, you will have to observe the animal head atop the portal, as each of them signify which room Alucard might currently be in:
- Scorpion — Outer Wall
- Horse — Entrance
- Lion — Castle Keep
- Goat — Olrox’s Quarters
- Snake — Abandoned Pit to the Catacomb
With the essentiality of Warp Rooms mentioned, this is where the charm of Castlevania comes from:exploration.
Exploration and Backtracking is Key
You will quickly notice that there are some places that are hard to reach. These require specific Relics or Familiars to uncover.
Symphony of the Night is not a linear game. This means that the stages you find are not particularly in an order you need to follow. The game can be played at your own pace, meaning you can use time between hunting down bosses to farm for equipment or gold to buy all sorts of neat things from the Master Librarian. You can utilize Warp Rooms to get around, or the Library Card to bring yourself to the Master Librarian’s shop if you need to.
As far as equipment and weapons are concerned, follow this rule of thumb:if it wields a weapon, it most certainly drops one. For gold, keep mental notes of which candles in specific areas drop them. Some of them can drop bags of gold that cost as much as $2000, but these are usually placed in hard-to-reach places. Look out!
Do not also be ashamed of dying. Dying on any of your attempts actually gives you ideas on how to tackle a problem better. Perhaps you might’ve been wearing the wrong equipment, or you haven’t thoroughly studied a boss’ attacks. It’s all a matter of understanding how to explore the game.
No enemy is unkillable (except for Stone Skulls; those are invulnerable), and each area has its own little secret to uncover. If anything, keep a stash of Library Cards ready just in case you need to escape the wrath of a boss or a particularly difficult area.
Summary and Conclusion
As a whole, Symphony of the Night is a very complex game. Unless you know entirely what you’re doing, the game cannot be completed in a single day. You will have to consistently visit Save Points, explore every nook and cranny of the castle in order to gain the Golden Ending. Essentially, just remember what you’ve learned from this guide:
- Defeating Dracula as Richter will directly affect Alucard’s stats. The best outcome would be to complete the entire Prologue under 60 seconds, have Richter not take a single hit of damage, and to defeat Dracula without the use of a Sub-Weapon or Richter’s Flame Whip. Achieving this isn’t easy, but it won’t hurt to try.
- Alucard’s full set is powerful, but there are more powerful items hidden in the castle. Good luck finding them!
- Sub-Weapons can be utilized when the situation or enemy arises. They all have their own form of efficacy and they can be made stronger when wearing the Brilliant Mail.
- Alucard can cast Spells without having to buy the command sheets from the Master Librarian. Casting them early on (like in the very beginning) permanently unlocks them for use.
- Use everything you have at your disposal when fighting a boss or a particularly hard enemy to get past. Spells and Sub-Weapons make boss fights easier if you use them correctly. Give any and every of them a try!
- Relics are used to get past various obstacles. Vlad’s treasures are also needed in order to fight the true final boss of the game.
- Read the map often just so you don’t get lost. Red rooms are Save Points which restore Alucard and yellow rooms are Warp Points which bring you around the castle.
- Explore every room thoroughly. You’ll find passages that require certain Relics that also hide little secrets. Dying should also help you figure out what you should do in order to prevent it from happening again.
And this concludes our beginner’s guide for Castlevania:Symphony of the Night! A long journey awaits you and only you can see it through until the end. Are you an experienced hunter of the night? Do you know other secrets about this game that we might have missed here? Leave your thoughts in the comment section down below!