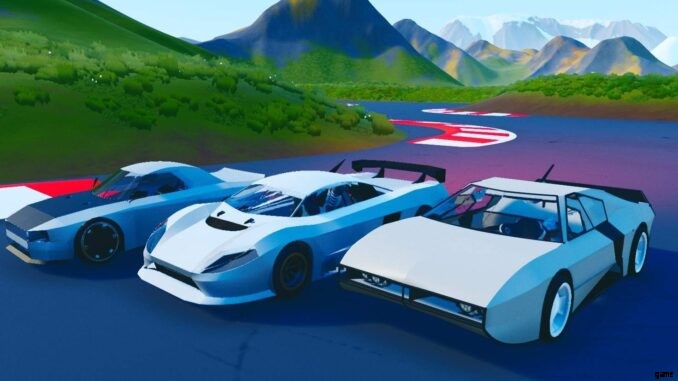
メイン アセンブリ – ドリフト ガイド

この短いガイドでは、Main Assembly で機能するドリフト カーを作成する方法について説明します。
ドリフトのガイド
免責事項
メイン アセンブリの物理的な仕組みにより、このガイドで紹介するドリフト セットアップは、対象の車を非常に滑りやすい (ほとんど滑りやすい) ジムカーナ車に変えてしまいます。より現実的な処理が必要な場合は、追加のプログラミングが必要になる場合があります。
パート 1:グリップを失う
Main Assembly のホイールの物理特性は非常に悪いですが、ホイールのタイヤは実際には非常にグリップ力があります。これは、後輪をブレーキでロックするのと同じくらい簡単にスライドを開始できる場合でも、サイドスライドの試みがすぐに殺されることを意味します。したがって、ドリフト中に横方向の速度を維持するには、いくつかの追加手順を実行する必要があります。
車輪の準備
車のチューニング 101 ガイドで説明されているとおりです (未読の場合はお読みください)。サスペンションとステアリングを組み合わせたエンジン部分に直付けすると、車輪のグリップが増します。その余分なグリップを取り除くには、シャーシをエンジンに取り付けてから、ホイールをシャーシに取り付けます。これにより、ホイールが回転しやすくなります。この方法では、ホイールの間隔を調整することもできます。これは、ビルドによっては有益です。
車輪を回す
ドリフトしてドリフトを維持するには、ホイールをできるだけ速く回転させる必要があります。したがって、車は大型エンジンを収容できる大きさで、できるだけ軽量でなければなりません。より現実的な方法でホイールを回転させるには、複数のエンジンを積み重ねて、それらすべてをホイールが接続されているシャーシに溶接すると、出力が大幅に増加するため、ホイールを希望の速度で回転させる可能性が高くなります。 「カーチューニング 101 ガイド」で紹介されているブレーキバグを使用しても、同じ効果が得られます。
ただし、この方法の欠点は、ホイールの選択が制限されることです。選択したホイールが目的の表面でのグリップを高めている場合、ホイールはスピンして道路に引っかかることはありません。したがって、エンジン スタック トリックとブレーキ バグを使用する場合、ホイールは目的のドライブ サーフェスで最大でも平均的なグリップしか持たない必要があります。
なんらかの理由で (主に審美的な理由で) ハイグリップ ホイールが選択された場合、コーナーで車を横向きに保つ唯一の方法は RCS スラスターです。車に正の反重力値を割り当てることで、車は「軽く」なり、車輪の回転が非常に簡単になります。反重力の正確な値と取り付けられた RCS スラスターの正確な数は、車の重量と車両の望ましい操作によって異なります。しかし、RCS スラスターのプログラミングの可能性を広げるために、車輪の近くに RCS スラスターを取り付けることは常に有益です。個人的には、RCS スラスターをエンジン部分が載っているプレートに直接取り付けます。
ただし、グリップが低下すると、車両の旋回、加速、および制動が低下します。この問題を解決するには、スロットルを RCS スラスターの前方/後方にバインドし、ヨーに回し、ブレーキを反速度にします。私の個人的な好みでは、メイン アセンブリーのブレーキはグリップが低下してもかなり強いので、通常は RCS ブレーキをスキップします。
メイン アセンブリーのホイール グリップに一貫性がないため、ホイールを適切に回転させるには、通常、RCS 方式を使用することをお勧めします。
ドリフト チューニング
ドリフトカーはチューニングなしではダメです。 To start the tuning, first get a drifting started at a flat part of map (Norrland sliding circle is perfect for this), then observe how the car behave when there is no steering input. If the car tends to correct itself during drift, lower the speed:power ratio of the front engine to reduce front wheel torque and increase the speed:power ratio of the rear engine for more torque. If the car tends to spin-out, increase the front wheel torque and reduce rear wheel torque. If the RCS thrusters are used and they are mounted in the way I had introduced, decrease the front anti-gravity would make the car spin-out more and decrease the rear anti-gravity would make the car correct itself more. Ideally, the car should hold its drift (neither correcting nor spinning out) when there is no steering input. If the car has too little grip, decrease the anti-gravity value and vice versa.
Part 2:Drifting Aesthetics (AKA Tire Smoke)
Drifting is an art. One important part of this art is the tire smoke. However, since Main Assembly has very subtle tire smoke, we have to make our own with the trail makers and speedometer.
The location the smoke would come out is the wheel well. This means the perfect location for the trail makers would be the exact plate the engine is mounted to and facing outwards. In this way, when the smoke comes out of the trail maker, it would look like the tire smoke.
For real cars, most tire smoke would come out in two main situations:
<オール>Both situations are the result of the difference between the real speed of the car and the wheel speed. To get the wheel speed, simply multiply the rotation speed of the engine by pi (3.1416) and the diameter of the wheel in meters. Then take the absolute value of the difference between wheel speed and the real speed of the car and feed it through a step function. By setting the step threshold, the amount of wheel spin required to produce tire smoke can be fine tuned. Since not all four tires are spinning and producing smoke for real cars, it is recommended to run this calculation for front engines and rear engines separately.
Part 3:Miscellaneous
This part is for some features that can be incorporated into the car for a better driving experience.
Drift angle
Although seemingly useless, this data is very cool when it appears on the HUD. To calculate drift angle, simply divide the rightward speed from speedometer by the speed. Then feed the result to a arcsin function. After that, convert the value from radians to degrees by dividing the value by pi(3.1416) and multiply the result by 180. The resulting angle would be in degrees which can be fed into a debug node and show up on the HUD.
Camera Turning
If you like to drive in first person, this part will be helpful. Having the camera rotates towards the direction the car is going would greatly improve the drifting experience. To do that, simply attach the view camera to a servo and use the drift angle in radians (or the ratio of rightward speed and speed) as input to adjust direction the camera is looking at. The range of motion of the servo and the scaling of the input may also need to be adjusted to get the best out of this function.
結論
This guide is not the end all be all guide for drifting in Main Assembly. The purpose of this guide is to inspire more players to try making drift cars and find new building techniques that can contribute to the community. I hope you all enjoy the process of making a good drift car and have fun drifting. I am hoping to see more drift maps and perhaps do some tandem drift with players online.
