Twitch でストリーミングする方法:エキスパート ガイド
この記事では、Twitch でストリーミングするために必要なものを紹介します。誰でもいつでも参加できる、世界最大のライブ ストリーミングおよびオンライン チャット プラットフォーム。さらに、さまざまなコンソールからストリーミングできます。
電話を使って Twitch でストリーミングする方法
携帯電話でストリーミングするにはいくつかの方法があります。どちらが最適かは、iOS と Android のどちらを使用しているかによって異なります。考慮すべきもう 1 つの要素は、何をストリーミングするかです。
携帯電話からストリーミングする必要があるものがあるかどうかも考慮する必要があります。

モバイルの要件は何ですか?
iOS と Android のどちらを使用していますか?
Twitch にはオンラインで利用できる公式アプリがありますが、必要なものは携帯電話の OS によって異なります。 iOS アプリは Android では機能せず、その逆も同様です。 iOS 用の Twitch アプリは、App Store からダウンロードできます。 Android 用の Twitch アプリについては、Google Play ストアからダウンロードできます。
既存のTwitchアカウントをお持ちですか?あとは、アプリを開いてアカウントにログインするだけです。
そうでない場合は、最初に作成します。簡単で、数分しかかかりません。まず、スマートフォンで Twitch アプリを開き、[サインアップ] をクリックします。次に、「次へ」をクリックする前に、すべての必須フィールドに入力できます。最後に、アプリはあなたの番号に送信される確認コードを要求します.受け取った6桁のコードを入力するだけで、登録プロセスは完了です。おめでとうございます。Twitch にサインアップしました!

必要なハードウェアは?
ゲーム内で使用できるのは、携帯電話の内蔵カメラとマイクだけです。ゲームをプレイしていない間は、ストリームに外部ハードウェアを使用できます。今すぐオンラインで購入して、ストリーミング体験をアップグレードすることもできます。
Amazonで最初に購入できるのはBOYA BY-Mです。これは無指向性マイクで、長さ 6 メートルのケーブルが付属しています。今すぐこの製品を入手して、視聴者にあなたの声がよりはっきり聞こえるようにしてください。

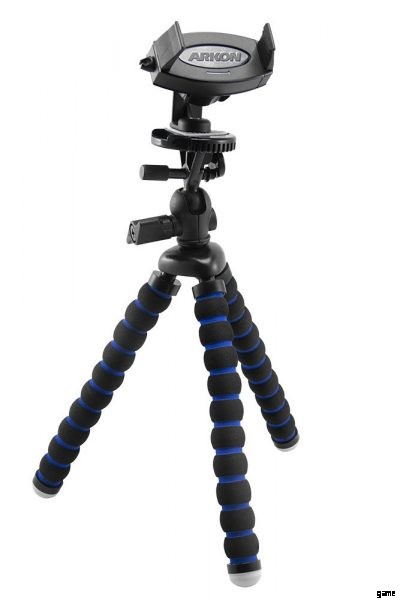
スマートフォンでゲームをストリーミングする際のもう 1 つの必需品は、スマートフォンの三脚です。これにより、ブレを抑えて安定した動画撮影が可能になります。この好例の 1 つが Arkon iPhone Tripod です。これをストリーミング アーセナルに今すぐ追加して、「不安定なカメラ」を永久に排除してください。
段階的な手順
現在プレイしているゲームをストリーミングするには、追加のアプリが必要です。携帯電話の OS に応じて必要なアプリケーションは次のとおりです。
お使いの携帯電話は Android で動作しますか?
- Google Play からストリーム スクリーン ミラーリング アプリをダウンロードします。
- 携帯電話でアプリを開きます。
- アプリが携帯電話の画面をミラーリングおよびストリーミングできるようにするためのポップアップに同意します。
- 画面の左上にあるメニューを開きます。
- 「Twitch」を選択します。
- [Twitch でログイン] を選択します。
- ストリーム スクリーン ミラーリングを介してゲームをストリーミングする権限を Twitch アプリに付与します。
- 緑の開始ボタンをタップしてストリーミングを開始します。
お使いの携帯電話は iOS で動作しますか?
- App Store から Omlet Arcade アプリをダウンロードします。
- 携帯電話でアプリを開きます。
- Omlet Arcade のアカウントを作成します。
- 希望するユーザー名を所定のスペースに入力してください。
- 指定されたスペースにパスワードを入力してください。
- 指定されたスペースにパスワードを再入力してください。
- 空欄にメールアドレスを入力してください。
- メールでアカウントの作成を確認してください。
- お好きなゲームをプレイしてください。
- ゲーム内の「ストリーミング開始」ポップアップをタップします。
- 「Omlet Arcade」を選択します。
- 「Twitch」を選択します。
- 「Twitch でログイン」を選択します。
- ストリームにタイトルを付けます。
- [ストリーミングを開始] をタップします。
ゲームをストリーミングできるだけでなく、毎日のアクティビティを視聴者に見せることもできます。これを行うには、以下の手順に従うだけです:
- 携帯電話で Twitch アプリを開きます。
- ステータス ページの右側にあるカメラ ボタンをタップして、ストリーミングを開始します。
PC で Twitch でストリーミングする方法
PC を使用して Twitch でストリーミングするには、いくつかの方法があります。どちらも、さらにアプリをダウンロードする必要があります。 1 つ目は Open Broadcaster Software (OBS) で、2 つ目は XSplit です。

PC の要件は何ですか?
PC からストリーミングを開始する前に、いくつかの要件が必要です。この中で最も重要なのは、アクティブな Twitch アカウントを持っていることです。アカウントを持っているかどうかに関係なく、何をすべきかについてのガイドを次に示します。既存のTwitchアカウントをお持ちですか?次に、アカウントにログインするだけで、以下で説明する次のステップに進むことができます.ただし、アカウントを持っていない場合は、最初に作成してください。簡単で、数分しかかかりません。 https://twitch.tv にアクセスし、[サインアップ] をクリックして登録を開始してください。次に、必要なフィールドに入力して、CAPTCHA プロンプトを完了します。最後のステップでは、電子メールで登録を確認する必要があります。電子メールを探し、確認リンクをクリックしてプロセスを完了してください。

PC で Twitch をセットアップする
- 画面右上のメニューを開きます。
- 「ダッシュボード」を選択します。
- [再生中] タブを開きます。
- ストリーミングしたいものを選択してください。
- ストリームのタイトルを入力してください。
必要なハードウェアは?
ゲームをストリーミングする場合、基本的な PC セットアップ以外に追加のハードウェアは必要ありません。ただし、自分でストリーミングしたり、ストリームにコメントを追加したりする場合は、さらにハードウェアが必要になります。
PC での Twitch エクスペリエンスを最大限に活用するために、さまざまなハードウェアから選択できます。また、基本的な PC セットアップでも、ハードウェアによって優れているものがあります。
現在 Amazon で入手できるのは、Dell M27BLK です。 27型液晶モニター。今すぐこのモニターを入手して、ストリームを高解像度で表示してください。

基本的な PC セットアップ以外では、Logitech C922 Pro Stream Webcam を強くお勧めします。 Amazonでも販売されています。主な機能には、HD ガラス レンズとプレミアム オートフォーカスが含まれます。長さ 5 フィートのケーブルと 2 つの内蔵マイクが付属しており、汎用性が向上しています。今すぐこのカメラを購入して、視聴者にあなたの姿をもっとはっきりと見せましょう。

OBS を使用して Twitch でストリーミングする方法
OBSはOpen Broadcasting Softwareの略です。これは、さまざまな OS で実行できるオープンソースの録音およびストリーミング プログラムです。これらには、Windows、Mac、および Linux が含まれます。開発者のウェブサイト obsproject.com から無料でダウンロードできます。
XSplit と比較した場合の OBS の欠点は、セットアップと使用に時間がかかることです。

OBS の設定
- PC で OBS を開きます。
- OBS 設定メニューを開きます。
- [ブロードキャスト設定] を選択します。
- [ストリーミング サービス] メニューを開きます。
- 「Twitch」を選択します。
- メニューの左下にある [最適化] をクリックします。
- Twitch ダッシュボードに移動します。
- 「ストリーム キー」を選択します。
- 画面の指示に従ってストリーム キーを取得します。
- ストリーム キーをコピーします。
- OBS の放送設定に戻ります。
- 指定されたスペースにストリーム キーを貼り付けます。
- [OK] を選択します。
- OBS の設定が完了したら、ストリーミングを開始できます。
OBS でのストリーミング
- メインの OBS ページに戻る
- [ソース] を右クリックします。
- [追加] メニューを開きます。
- 「ゲーム キャプチャ」を選択します。
- 好みのゲームを選択してください。
- ストリームの一部として画面を表示する場合は、[モニター キャプチャ] をクリックします。
- [ビデオ キャプチャ] を押して、ウェブカメラのフィードをストリームの一部としてストリーミングします。
- 上記のキャプチャ オプションのいずれか、または任意の組み合わせをストリーミングできます。
- [OK] をクリックします。
- [ソース] をもう一度右クリックして、ストリームをカスタマイズします。
ストリームにテキストを追加する
- [追加] メニューを開きます。
- 「テキスト」を選択します。
- テキストの名前またはソースを指定してください。
- 画面上のテキスト ボックスに目的のテキストを入力します。
- 提供されているツールとオプションを使用して、テキストのフォント、サイズ、さらには色を変更できます。
- [OK] をクリックして、目的のテキストを保存します。
ストリームに画像を追加する
- OBS でストリームに画像を追加するには、コンピュータに画像を保存する必要があることに注意してください。
- [追加] メニューを開きます。
- 「画像」を選択します。
- 画像の名前またはソースを入力してください。
- [参照] をクリックして、目的の画像の場所を見つけて開きます。
- [開く] をクリックして、目的の画像を選択します。
- 提供されているツールとオプションを使用して設定を調整できます。
- [OK] をクリックして目的の画像を保存します。
- ストリームには複数のテキストと画像を追加できます。必要に応じて位置とサイズを調整することもできます。
- [シーンを編集] を選択して、必要に応じてテキストや画像をドラッグ アンド ドロップします。
- 画像またはテキストの周りの赤い点をクリックしてドラッグし、必要に応じてサイズを調整します。
OBS ストリームの開始
- [プレビュー ストリーム] を押して、ストリーミングの前にさらに変更を加える必要があるかどうかを確認してください。
- [ストリーミングを開始] をクリックして終了します。
XSplit を使用して Twitch でストリーミングする方法
XSplit は、ライブ ストリーミングおよびレコーディング アプリケーションです。公式 Web サイト xsplit.com から無料でダウンロードできます。ただし、無料版では一部の機能や機能が利用できません。これらの機能を利用するには、月額サブスクリプションを取得してください。ただし、Twitch でストリーミングするには無料版で十分です。
OBS と比較して、XSplit はより直感的で使いやすいです。

XSplit の設定
- PC で XSplit を開きます。
- 画面上部の [ブロードキャスト] をクリックします。
- 「Twitch」を選択します。
- [認証] をクリックして、Twitch ログイン ページを表示します。
- 指定されたスペースにユーザー名を入力してください。
- 指定されたスペースにパスワードを入力してください。
- [ログイン] をクリックします。
- XSplit の [完了] をクリックして解像度を最適化します。
- 必要に応じてストリーム プロパティを調整します。
- [OK] をクリックしてセットアップを終了します。

XSplit でのストリーミング
XSplit のメイン ページの左下にある [追加] メニューを開きます。
- 「ゲーム キャプチャ」メニューを開きます。
- 好みのゲームを選択してください。
- [ウェブカメラ、キャプチャ カード、ビデオ デバイス] メニューを開きます。
- ストリームのソースを選択してください。
- [メディア ファイル (画像、動画、HTML)…] をクリックして、代わりにメディア ファイルをストリーミングします。
- ストリーミングしたいメディア ファイルを見つけます。
- [開く] をクリックします。
- [スクリーン キャプチャ] を選択して、代わりに画面をストリーミングしてください。
- 上記のキャプチャ オプションのいずれか、または任意の組み合わせをストリーミングできます。
XSplit ストリームの開始
- 必要に応じてストリーム ソースをドラッグしてサイズを変更します。
- 画面上部の [ブロードキャスト] をもう一度クリックします。
- 「Twitch」を選択してストリーミングを開始します。
PS4 で Twitch でストリーミングする方法
携帯電話や PC と比較して、PS4 でのストリーミングははるかに簡単です。最初にアプリをさらにダウンロードしたり、新しいプログラムをインストールしたりする必要はありません。とはいえ、PS4 でストリーミングするには、まだいくつかのことが必要です。

要件は何ですか?
既存の Twitch アカウントをお持ちですか?
- その場合は、携帯電話または PC でログインする必要があります。 PS4 で Twitch アカウントにログインすることはできません。
- お持ちでない場合は、携帯電話または PC でアカウントを作成する必要があります。 PS4 で Twitch アカウントを作成することはできません。
必要なハードウェアは?
ゲームをストリーミングするには、PS4、テレビ画面、およびコントローラーの基本的なセットアップで十分です。ただし、Twitch のストリーミング エクスペリエンスを最大限に活用するための多くのオプションがあります。
PlayStation Cameraは確かなオプションで、Amazonで今すぐ入手できます.内蔵マイクを使用すると、ストリーミングしているゲームに自分自身と解説を追加できます。顔認識や音声認識など、他の機能もあります。また、Playstation VR を使用すると、ゲーム体験にインタラクティブな次元が追加されます。今すぐプレイステーション カメラを入手して、PS4 からストリーミングを今すぐ始めましょう!

段階的な手順
最初にストリーミングしたいゲームを開きます。
Twitch for PS4 を有効にするには、携帯電話または PC も必要です。
ゲームプレイのブロードキャスト手順:
- コントローラーの共有ボタンを押してください。
- 画面メニューで「ゲームプレイをブロードキャスト」を選択します。
- 利用可能なオプションのリストで [Twitch] をタップします。
- 携帯電話または PC で https://twitch.tv/activate にアクセスして、アクティベーション コードを取得してください。
- PS4 でアクティベーション コードを入力してください。
- [有効化] をタップします。
- [OK] をタップします。
- コントローラーの共有ボタンをもう一度押してください。
- 画面メニューで「ゲームプレイをブロードキャスト」を選択します。
- 利用可能なオプションのリストで [Twitch] をタップします。
- 設定をカスタマイズします。
- [配信開始] をタップして配信を開始してください。
Xbox One で Twitch でストリーミングする方法
PS4 と同様に、携帯電話や PC よりも Xbox One でのストリーミングの方がはるかに簡単です。ただし、Xbox One で Twitch でストリーミングするには、アプリをダウンロードする必要があります。

要件は何ですか?
Do you have an existing Twitch account?
- If you do, then you need to login on your phone or PC. You cannot log in to your Twitch account with an Xbox One.
- If you don’t, then you need to create an account on your phone or PC. You cannot create a Twitch account with an Xbox One.
What hardware do you need?
The basic setup of an Xbox One, TV screen and the controller will be enough to stream a game with. But, you have many options with which to make the best of the Twitch streaming experience.
A solid option you can get on Amazon is the Microsoft Xbox One Kinect Sensor Bar. Its built-in camera and microphone let you add yourself and more to the stream. You even use them to perform Skype calls. The gaming experience is further enhanced through facial and voice recognition features. Get the Xbox One Kinect Sensor Bar right now and add another element to your stream.

Step-by-Step Procedure
Downloading Twitch on Xbox
- Go to the Xbox Live Store.
- Download the Twitch app for Xbox.
- Launch the Twitch app on your Xbox.
- Select ‘Log In’.
- As with PS4, you will need your phone or PC to activate Twitch for Xbox.
Activating The Twitch Account
- Go to https://twitch.tv/activate on your phone or PC to get an activation code.
- Enter the activation code with your Xbox.
- Click ‘Activate’.
- Open the game you want to stream.
- Press the home button on your controller twice.
- Open the ‘Snap’ menu at the bottom left of the screen.
- Select ‘Twitch’.
- Note:You can also use Kinect’s voice recognition to do this. Use the verbal command ‘Cortana, open Twitch’ to do so.
Broadcasting on Xbox
- Tap ‘Broadcast’.
- Give a title for your stream.
- Customize your settings.
- Tap ‘Start Broadcast’ to begin streaming.
Improving the Twitch Experience
What is Twitch Prime?
Twitch Prime is a premium service that comes bundled with Amazon Prime and Prime Video memberships.

Members of Twitch Prime enjoy many benefits for a monthly fee. These include:
- Bonus games
- Exclusive in-game content
- Free subscriptions to affiliate and partner channels
- Exclusive emoticons available on chat
- An exclusive badge on chat
Sign up for Amazon &Twitch Prime today to receive special in-game items.
What is Twitch Turbo?
Twitch Turbo is a monthly subscription offered by Twitch. For a monthly fee, members enjoy many benefits:
- Ad-free viewing
- More emoticons available on chat
- Color customization for chat usernames
- An exclusive badge on chat
- Expanded memory for past streams
- Priority status for customer support
You’ll need a Twitch account to sign up for Twitch Turbo. Once you do, you can view Twitch Turbo’s monthly fee. Sign-up for Twitch Turbo today and enjoy ad-free viewing of your favorite streams.

Twitch Prime vs Twitch Turbo
As tempting as it would be to have both Prime and Turbo, you can’t have both. So if you have to choose between Prime and Turbo, which should you choose?
Based on benefits alone, Twitch Prime would be the way to go, as it offers more and better benefits. These include bonus games and in-game content, which are exclusive to Twitch Prime. Other free subscriptions would need payment if ever you want to level up.
That is not to say that Twitch Turbo doesn’t have anything over Prime. Its benefits are less exclusive, but there’s one that’s exclusive to Turbo. Twitch Turbo is the only Twitch service guaranteed to be ad-free. This makes it more convenient for your streaming or viewing satisfaction. No more ads popping up in the middle of streams that break your immersion.
To sum it up, Prime would be the way to go if you’re focused on bonus content. But when it comes to convenience, Turbo would be the obvious choice.

What is a Twitch Raid?
Raids are a community function offered on Twitch. They allow a streamer to send their viewers to another channel. This lets streamers to provide support to one another, and help expand the community.
Raiding is completely voluntary. A viewer can choose not to take part in a raid. The streamer behind the raid will be streaming the raided channel, though. So even if the viewer doesn’t join the raid, they can see it ongoing.

Launching a raid is simple and easy, with a simple step-by-step process to follow.
- Add ‘/raid’ next to the name of the channel you want to raid.
- Click ‘Raid Now’ after a ten-second countdown.
- If you do not click ‘Raid Now’, the raid will start in eighty seconds by default.
- You can also cancel the raid within those same eighty seconds.
- You and your viewers will arrive at the target channel once the raid begins.
- The owner of the raided channel will also receive notice of the ongoing raid.
What is a Twitch Affiliate?
Twitch Affiliates is a program allowing streamers to earn money from their broadcasts. One way is through accepting subscriptions from their viewers. Affiliates also get a share from total Twitch Prime subscriptions.
Affiliates can also earn from Bits to Cheer on their channels. Bought by viewers, these and used in chat. Affiliates receive a share of the amount paid for the bits used on their channel.
Affiliates can also make money by the games or in-game items they’re streaming. If either is available on Twitch, viewers have the option to buy during the stream. The Affiliate will receive a percentage from sales made on their channel.

Not everyone can be a Twitch Affiliate, though. There are qualifications needed to receive an invitation to become an Affiliate. These include at least:
- 50 followers.
- 500 minutes broadcast time
- 7 unique broadcasts
- 3 or more viewers on average at any single time
Other Relevant Topics

Twitch Stream Connection Failure
There are many possible causes why your stream disconnects in the middle. Whether you’re the one streaming or watching the stream, this is annoying. Here are the most common causes and their fixes.
Modem/Router Issues
The most common cause of your stream getting disconnected is your hardware. You can resolve this with ease, though.
The simplest and most effective solution is to reset both your modem and router. If that doesn’t work, you can try connecting your computer to the modem, and bypass the router completely.
A shared wi-fi could also be a problem, as other computers on the network compete with yours for bandwidth. In this case, either disconnect them from the wi-fi or wait until fewer computers are using the wi-fi.
Other Software
Another common reason behind a stream getting disconnected is other software. These include Skype, Steam, Torrent, and other similar programs that compete for bandwidth. Again, the solution is quite simple. Shut down those competing programs, and remove competition for Twitch on bandwidth.
Internet Service Provider Issues
Your Internet Service Provider (ISP) could also be a problem. The most common issue here is technical difficulties. This can be a broken cable, ongoing maintenance, or an issue on your ISP’s end. The only solution here is to contact your ISP and inquire about the problem. If they are unaware, then notify them to get a fix as soon as possible. Once or if they’re already aware, you wait until the issue gets resolved and you can resume streaming.
Another issue when streaming is that your stream exceeds your allotted upload speed. Even if your package from your ISP has fast download speeds, your upload speed may be much lower.
Again, contact your ISP and inquire about higher upload speeds to resolve the issue.

Location
One more issue is that of location, which often has to do with the distance. For example, you’re in Asia while Twitch’s servers are in America or Europe. The distance could leave the connection unreliable, especially at peak hours. Unfortunately, this is one issue that has no easy solution. You may be better served to find another, closer streaming service.
Stream Key on Twitch
A Stream Key is a unique code meant to identify you as the source of a broadcast stream. It’s not usually given or required by Twitch, but you will need it when setting up OBS for Twitch.
You can get the Stream Key on your Twitch account’s Dashboard. This is then entered into your OBS’ broadcast settings, as part of the setup.

How old do you have to be to Stream on Twitch?
Twitch does not extend its services to anyone below the age of 13. This is why account creation asks for your birthdate. The burden of responsibility is on you when you declare you’re 13 years old or older.
Twitch also assumes that users between the ages of 13 and 18 are under parental supervision. Parents are responsible for their compliance with the Terms and Conditions of service.
Best Time to Stream on Twitch
Twitch’s popularity and large user base mean that Twitch is always under heavy load. There are peaks of activity based on timezone, though. And from there, you can find when it’s more convenient to stream on Twitch.
In general, activity on Twitch peaks at daytime in America, and nighttime in Europe. For a more precise time, this is from 8 AM to 7 PM PST in the USA. In Europe, this would be from 3 PM to 2 AM GMT. Since this is when Twitch is under the heaviest load, you might want to avoid streaming at these times.
How to Stream on Private on Twitch
You can’t do a private stream on Twitch. This would go against its purpose as a streaming community. The closest you can get is to set your channel to ‘not playing’ while streaming. This would make it seem to other users that nothing is happening on your channel. But, should they view your channel, then they can see your stream regardless.
If you want to do a private stream with friends, then it would be best to explore other sites. Youtube allows for private streaming. You can also use Skype and screen share with your selected audience.
Can you stream movies on Twitch?
No, you cannot stream movies or other copyrighted materials on Twitch. This is in Twitch’s Terms and Conditions of Service. A violation would result in account deletion or even legal action.

If you want to want to watch movies for free online, there are sites where you can do so. One of those is Netflix, while others include FreeFlix and Youtube.
What else am I not allowed to stream on Twitch?
Apart from copyrighted materials, there are many subjects you cannot stream on Twitch. These include:
- Pornographic materials
- Excessive violence
- Hate speech
- Violating the privacy of others
- Illegal activities
- Harassing or threatening others
Streaming on Twitch to collect funds for political purposes is also prohibited. Candidates for political office are also not allowed to make money on Twitch. Unsolicited offers, advertisements, spamming, and other similar activities are also not allowed.
Test Twitch Stream
This is a function that allows you to check in advance if you can stream. Twitch has a built-in feature to perform this, called Broadcast Inspector. You don’t have to test before you stream, but there are two cases wherein you should test. The first is when you stream from a new location, and after you change your ISP. Note that you can only do this with a PC.
Performing a test stream is simple:
- Go to your broadcast settings.
- Select the closest Twitch server to your location.
- Starting the test depends on whether you’re using OBS or XSplit.
- For OBS, add ‘?bandwidthtest’ to your Stream Key.
- For XSplit, use the ‘Test Bandwidth’ feature in the server list menu.
If the test proceeds without issue, then you can go ahead and stream. If there are issues, usually dropped frames, I would suggest you switch to another server.
Twitch Squad Stream
Squad stream is a feature that allows up to four people to stream together in one window. It allows for more than one perspective on a stream, or to cover an event all at once. Starting a stream is quick and simple:

- Go to your Twitch Dashboard.
- Select ‘Squad Stream’.
- Click ‘Add a Channel’.
- Enter the channel you want to invite into the squad.
- Click the next ‘Add a Channel’ to send more invites.
- Remember that a squad stream can only have four people at most.
- Click ‘Start Squad Stream’ to begin streaming.
- Unless all invitees are present, a squad stream can’t begin.
The squad stream will end once all streamers leave the squad. But, it will continue even if only one member is streaming.
Best Games to Stream on Twitch
There are currently 38 genres of games on Twitch. These vary from Action, Adventure, Mobile Games, and even Visual Novels. From those genres, the top five games of Twitch at present are:

- Fortnite (Shooter)
- League of Legends (MOBA)
- Grand Theft Auto V (Driving/Racing, Action, Adventure)
- Teamfight Tactics (Strategy, Autobattler, Card &Board)
- World of Warcraft (MMORPG, RPG)
These are five games that guarantee you a large audience at present. But you are free to stream about any of the games you love including games like PUBG Mobile and DOTA 2.