Century:Age of Ashes – プレイテストに役立つヒント
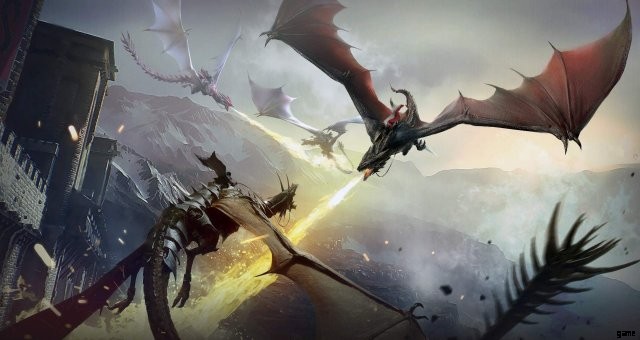
プレイテスト中にゲームプレイを改善するための基本的なヒントのガイド。
センチュリー プレイテストのヒント
はじめに
このガイドは、新しいプレーヤーに、パフォーマンスを向上させ、勝率を上げるための簡単なヒントを提供することを目的としています.私はほぼ独占的にウィンドガードをプレイしてきたので、他のクラスについての私の理解は限られており、それらとの戦いや、それらのクラスをより多くプレイした友人との議論から来ていることに注意してください.もちろん、これはプレイテストにすぎないため、状況は変化する可能性があり、誰も話す経験はありませんが、初期の段階でいくつかの成功を収め、トップ 100 プレイヤーに到達することができたので、私の洞察が役立つことを願っています.
このガイドがお役に立てば幸いです。ドラゴンドリフトを楽しんでください!
ゲーム自体と同様に、このガイドは進行中の作業です。カバーしてほしい点や修正が必要な点があれば、コメントを残してください。
一般的なゲームプレイ
一般的なヒント
- ホーム画面の左下隅に無料のドラゴン スキンを請求できるバナーがあります。
- ショップには日替わりの無料ギフトがありますので、チェックインして受け取ってください。
- レベルアップで無料の XP ブースターを受け取ったら、忘れずに有効にしてください。個人的にブーストを得るだけでなく、チーム内のブースターごとに全員が 2% のスタックを獲得します。これは、スキンのドラゴンを孵化させるときに特に役立ちます。ドラゴンが孵化するまで、すべての試合の終わりに経験値の半分を消費するため、孵化が速くなるだけでなく、レベルアップも速くなります。
- レベリングで獲得できる無料ジェムの数には限りがあるため、ジェムを XP ブースターに費やさないことをお勧めします。そのため、ストアの限定アイテムにジェムを使用すると、XP に変換するよりも価値が高くなります。
戦闘のヒント
- ロックオンされていても、ファイアボールを回避する方法はいくつかあります。大きく曲がって、それらが消えるのを待ったり、狭いスペースや障害物の周りにすばやく曲がったりして、自分以外のものに影響を与えることができます。多くの場合、トンネルやアーチを通過するだけで、いくつかのものが環境に衝突するのに十分な場合があります.
- パワーアップを無視しないでください!シールドとブーストのパワーアップは、対戦相手に対して大きなアドバンテージを与えることができるので、戦闘の合間または最中に敵を必要なパワーアップの方向に引き寄せることによって、それらを拾い続けてください。
- あなたの炎の息は、敵の近くにいると壊滅的であり、あなたの周りの広い弧を描いて敵にロックオンすることができます.狭いスペースや方向感覚を失ったドッグファイトでは、他のアビリティを慎重に狙うことができないときにアクティブにしてダメージを与え続ける必要があります。
- 地面に沿った光る小道、囲まれたトンネル、エア ジェットなど、マップのすべての光る要素はスタミナを回復するので、それらを頻繁に通過するようにしてください。
大虐殺
アリーナに出現する特別なパワーアップを伴う 6 対 6 の殺し合いで、対戦相手に地獄を解き放ちます。ドラゴンライダースタイルのチームデスマッチです!
一般的なヒント
- 死なずに複数の敵を倒すと、賞金 (最大:6) を獲得できます。キルはチームにとって 1 ポイントの価値があります。バウンティでプレイヤーを倒した場合、バウンティ スコアに見合う価値があるため、バウンティが大きい (3+) プレイヤーはより頻繁にターゲットにされます。
- チームと協力して大きな賞金首を狙う敵を追い詰め、チームのために多くのポイントを獲得しましょう。同様に、敵が得点するのを防ぐために、多額の報奨金で味方を守りましょう。
- 報奨金は最終的には消えていくので、マークされた敵を素早く追跡し、味方が消えるまで味方を守りましょう。
クラス
ファントム
ファントムは小競り合いで非常に強力です。そのキットにより、敵を混乱させ、危険にさらされたときに簡単に離脱できるからです。
- ミスティック シュラウド:これにより、ファントムは戦闘から逃れたり、待ち伏せを仕掛けたりすることができます。シュラウドは、複数のファイアボールによってロックオンされているときに使用して、それらがあなたを追跡するのを防ぐことができます.また、近くで追跡されたときに使用して、位置を変えて戦いの流れを有利に変えることもできます. クローク中にファイアボールで攻撃すると、あなたを明らかにしながらより多くのダメージを与えることができます. Take note that any attack or ability you use while cloaked will reveal you so make sure you take your time to assess the situation, reposition and grab shields before you drop Mystic Shroud.
- Mine:Mine is a tool that is very rewarding when used tactically. It will fire in the direction of your cursor and attach to the first surface it lands on so you can use it to cut off enemies trying to escape. It can also be used to prevent enemies from pursuing you or even to finish an enemy that thinks they have you on the run. A tactic that often proves effective is to position your Mine on tight tunnels and draw the enemy into chasing you through them during a fight. If they were low congratulations on your stylish kill, if not they’re now vulnerable and can be picked off if you wheel around and turn on them and if you’re just too low then they’re likely to peal off and recover health. In all situations you will likely survive the encounter.
- Blast:Blast is an excellent tools for disrupting the enemy team from hunting down or even escaping your allies. When used in tight spaces it will often throw enemies into the wall leaving them vulnerable as they have to build up speed and maneuver away from the environment. When an ally with a large bounty is being hunted you can use to give them time to flee. If fired into a pack of enemies you may be able spread them out, allowing you to pick one off before pealing off and coming around again for another attack.
Windguard
- Abilities:Windguard excels at area defence and supporting allies. Blast is a very effective tool but it is also available to Phantoms so I often avoid taking it and only take it if the team had 3+ Windguards all with Smoke Trail.
- Salvation Surge:An simple but extremely useful ability. As a Windguard you should always be ready to come to your team’s aid so you can peel enemies off of them and give high bounty allies a shield. They are obviously the enemy team’s main target so apply this as often as you can to keep them healthy. The dash attached to Salvation Surge also allows you to keep pace allies and avoid enemies even when out of stamina. This can be used with Smoke Trail to give you cover or simply to remain close and soak Fireballs on their behalf.
- Smoke Trail:Unlike Gates of Fire there is no clear path you can lay your Smoke trail on and you must follow the flow of fights. This will prevent enemies from following directly behind causing them to peel off and giving your carrier a short reprieve from being battered with Fireballs. Any enemies that take too long to change course will also be softened up by your Smoke Trail allowing your rear guard to pick them off if they don’t die outright. If you have recently died or are otherwise separated from your carrier you should fly one or two gates ahead and begin laying down your Smoke Trail along the route so they can fly through without being closely pursued.
- When the enemy has the flag I like to fly backwards along the route starting just one or two gates ahead and flying towards the carrier. This way the Smoke Trail runs along the exact path they want to follow so the carrier is forced to choose between taking damage but maintaining their momentum or pulling up and avoiding the Smoke until it clears. If they choose to push through you should cut across the map and cut them off at an upcoming gate as they should be low enough to pick off. If they however choose to wait then all Windguards should circle the gate they missed and deploy more Smoke to delay them further which buys your team time to whittle down the enemy forces and claim the flag for yourselves. At any point you see the enemy carrier has missed a gate and you still have your Smoke Trail you should circle around the gate and use the ability to further delay and disorient them.
- Blast:If you do take Blast you should use it right as the enemy flag carrier reaches their next gate. When timed correctly Blast can shove them off course into awkward spots where they will either have to stop completely to turn into the gate or make a large banking turn for another pass. Either way they’re delayed from scoring and vulnerable while they manoeuvre around a small area.
Marauder
- Abilities:An offensive powerhouse. Marauders work best when hunting a single foe. They have abilities that allow them to stick closely to enemies and harry them with powerful attacks.
- Hunter’s Mark:This allows the Marauder to mark an enemy and quickly tear them apart with increased damage against them. This should generally be used on high bounty enemies to quickly claim their points before disengaging and picking a new fight. It can also be used to defend your own team when they’re being pursued by a single enemy.
- Gust:Is excellent for fighting in the middle of a pack as you can remove the lock-on from enemy Fireballs and become temporarily unlockable. When another class might be forced to leave the pack and recover you can remain in the action and continue to rip and tear.
- Frost Bolts:Are effective at tearing down shields on well protected enemies or can be used to hamper the movement of defenceless enemies. Always use this first against enemies with large shields so you’re not wasting damage. If the enemy doesn’t have shields use this freely to slow them down, giving you and your team time to get in range for other attacks.
サバイバル
A Last Team Standing mode where up to 18 players divide into 3 teams (6v6v6). Respawn is limited and can only be done through ally rescue!
Gates of Fire
A unique mode in which two teams clash over possession of the flag. Gain points by flying through special gates around the arena while holding the flag!”
一般的なヒント
- If you find yourself lagging behind the carrier stop following the track and cut ahead in front of them. You can also use this time to grab the power-ups along your new route to give you a better shot at claiming the flag for your own team.
- Rushing to claim the flag at the beginning of a round is extremely risky as all players will be alive and gathered in the same spot. It’s very likely even if your team does claim it the carrier will be immediately eliminated. Using Blast as the flag spawns can help your team claim it and get some much needed distance to stabilise and score early gates without being eliminated so quickly.
- As the carrier remember you’re vulnerable. You cannot use any abilities so use what you can as you approach the flag.
- As the carrier you should also make every effort to not run out of stamina as once you do you will be torn apart and the flag will likely turn over to the other team. Constant boosting is your only hope so pay attention when you’re down one/two stamina pips and make sure you plan your path through an air jet or boost power-up to prevent yourself from running out entirely.
- If the enemy has the flag do everything you can to disrupt their path and send them off course. If the carrier is allowed to make a straight run through gates then a round can be over within 60 seconds.
- Likewise, if your team has the flag do everything you can to protect them and keep the enemy team from catching up or having clear shots at them. If you can buy them enough time and space they can easily win a round within 60 seconds.
- Change overs are extremely dangerous. It can be hard to recover in Gates of Fire once one team gets ahead so do everything you can to protect your carrier and disrupt theirs.
- If your carrier is low on health you can fly close behind them to force enemies to target you instead or simply to be there to swoop the flag up in case they die anyway.
- When the enemy carrier is low and you can afford to wait you might want to hold off on killing them until your team is positioned well and ready to grab the dropped flag before the enemy team. If you kill them right away when your team aren’t close enough you may end up allowing the enemy to swap the flag to a healthier carrier making it even harder to claim it yourselves.
- If you are on low health as the carrier and your team are too far away to recover it before the enemy does, you may want to buy time for them. You can do this by flying off course or positioning yourself such that the flag will be left against a wall or in a tight space so the enemy struggles to retrieve the flag and get back on the track.
Classes
Phantom
I found that Phantom’s unique ability had little use in this mode as the flag-carrier cannot use abilities so being able to stealth is far less effective than in other modes. Phantom does however have access to both Mine and Blast which are excellent tools for disrupting the enemy team and preventing them from getting a clear run through gates. I would recommend that if you are pre-made with others any phantom players avoid taking the flag unless they are the only one close enough to do so. They are more effective as a rear guard, being able to disrupt pursing enemies and using their Mystic Shroud when hunted to make fights last longer and delay the enemy team from disengaging and catching up to their own carrier.
Windguard
- Abilities:Not only my favourite class but a class with a perfect kit for Gates of Fire. I would strongly suggest taking Smoke Trail as most players will be flying in a very predictable path allowing us Windguards to make the most of our Smoke. Blast is also a very effective tool but it is also available to Phantoms so I would personally only take it if the team had 3+ Windguards all with Smoke Trail. All of Windguard’s abilities work best when leading the pack so always be prepared to swoop up the flag as you will often be in a good position to become the carrier.
- Salvation Surge:An simple but extremely useful ability for this mode. As a Windguard you should always be close to the carrier so you can easily buff allied carriers by giving them shields. They are obviously the enemy team’s main target so apply this as often as you can to keep them healthy. The dash attached to Salvation Surge also allows you to keep pace with your carrier even when out of stamina. This allows you to place your Smoke Trail right behind them and continue to soak Fireballs on their behalf.
- Smoke Trail:If your team has the flag you should fly just ahead or in tandem with your carrier while deploying your Smoke Trail. This will prevent enemies from following directly behind causing them to peel off and giving your carrier a short reprieve from being battered with Fireballs. Any enemies that take too long to change course will also be softened up by your Smoke Trail allowing your rear guard to pick them off if they don’t die outright. If you have recently died or are otherwise separated from your carrier you should fly one or two gates ahead and begin laying down your Smoke Trail along the route so they can fly through without being closely pursued.
- When the enemy has the flag I like to fly backwards along the route starting just one or two gates ahead and flying towards the carrier. This way the Smoke Trail runs along the exact path they want to follow so the carrier is forced to choose between taking damage but maintaining their momentum or pulling up and avoiding the Smoke until it clears. If they choose to push through you should cut across the map and cut them off at an upcoming gate as they should be low enough to pick off. If they however choose to wait then all Windguards should circle the gate they missed and deploy more Smoke to delay them further which buys your team time to whittle down the enemy forces and claim the flag for yourselves. At any point you see the enemy carrier has missed a gate and you still have your Smoke Trail you should circle around the gate and use the ability to further delay and disorient them.
- Blast:If you do take Blast you should use it right as the enemy flag carrier reaches their next gate. When timed correctly Blast can shove them off course into awkward spots where they will either have to stop completely to turn into the gate or make a large banking turn for another pass. Either way they’re delayed from scoring and vulnerable while they manoeuvre around a small area.
Marauder
- Abilities:An offensive powerhouse. Marauders work best as rear guard, protecting the carrier by eliminating those that are hunting them. They have abilities that allow them to stick closely to enemies and harry them with powerful attacks.
- Hunter’s Mark:This allows the Marauder to mark an enemy and quickly tear them apart with increased damage against them. This should generally-if not always-be used against the enemy carrier or the enemy closest to your own carrier. Your job will be to protect your carrier by killing the enemies that currently pose the largest threat.
- Gust:Is excellent for fighting in the middle of a pack as you can remove the lock-on from enemy Fireballs and become temporarily unlockable. When another class might be forced to leave the pack and recover you can remain in the action and continue to protect the carrier or hunt theirs.
- Frost Bolts:These really shine in Gates of Fire. Used against a well shielded carrier you can remove their defences and quickly cause a turnover or if used on a defenceless carrier you prevent them from evading your team leaving them extremely vulnerable. Always use this on the enemy carrier or the enemy closest to your carrier.