Vampyr – ハード モード ガイド (ヒント付き)
ハード モードの限られた XP リソースを最大限に活用するための短いガイド。
ハードモードのガイド
ハード モードとあなた
ハードモードでは、敵を倒して得られる経験値が半分になり、一般的に敵の抵抗力とダメージが増加します。もちろん、あなたと敵のレベル差も、受ける/与えるダメージに正または負の修正として適用されます。自分よりも 8 ~ 10 レベル高い敵に対処するのは非常に面倒です。また、抱きしめることで得られる経験値を削っているため、ゲームを進めれば進めるほど、これはますます一般的になるでしょう。問題は、それをどのように打ち負かすかです。
XP の獲得とレベルアップのタイミング
ハード モードでは、ストーリーの進行、人々の回復、ヒントから完全な XP を獲得できます。すべてを見つけ、収集可能なものをすべて手に入れ、市民と話し、彼らのクエストを実行してください。見つけた敵を倒してみてください。それぞれ 2.5 xp (端数切り上げ) しか得られませんが、それらのドロップは、良質で高価なクラフト材料として、または 500 を持っていてお金で売れるランダムなジャンクとして、かなり優れています.
アグレッシブ スキルを平準化すると、大きなダメージ スパイクが発生します。これは、クラフト コンポーネントが限られている初期のゲームで非常に役立ちます。攻撃スキルをアップグレードするためのレベル要件に到達するのに十分なXPを費やしてから、数千のXPをスキルに投じて大きなダメージスパイクを狙うことをお勧めします.リソースが限られている場合は、1 つのアグレッシブ スキルを最大レベルに維持することができます。エンドゲームまでには、おそらく最後のレベルを維持する余裕がないため、アグレッシブ スキルを 2 つ習得することはお勧めしません。本当に必要な場合は、respec オプションがあります。初回は無料です。その後は 250xp の費用がかかり、ここから値上がりします。
アクティブ スキル
アクティブ スキルでは、3 つのアグレッシブ スキル、3 つのアルティメット、2 つのタクティカル スキル、2 つのディフェンシブ スキル、およびヒーリング スキルから選択できます。各カテゴリのスキルを 1 つだけ選択し、それを使い続けることをお勧めします。
アグレッシブ スキル:
- 爪: 他のスキルはさまざまな形のダメージを与えますが、クローは武器と同じ古い近接ダメージを与えます。このスキルは悪化したダメージを与えますが、ほとんどの敵は噛みつき攻撃で回復し、噛み付いた場合でも、あなたの悪化したダメージがあってもほぼ完全に回復します. Claws の本当の利点は、スタミナの少ない素早い攻撃であることです。これは、スタミナ プールが限られている序盤のゲームで特に重要です。素早い Claw 攻撃とそれに続く回避は、ほとんどの場合安全です。敵を殴っている最中にスタミナが切れて回避できなくなった場合は、爪攻撃を投げます。ほとんどの場合、アニメーション中に敵がよろめき、スタミナが回復し始めます。このスキルへのアップグレードは、より多くのダメージとスタンの追加、または非常に限られた血の獲得とクールダウンの短縮のいずれかです。私はスパム バージョンを好みますが (詳細は後述します)、どちらかを選びます。
- ブラッドスピア: 血のダメージを開きます。私はダメージが本当に鈍いと感じる傾向がありますが、敵はしばしばあなたに突撃するので、複数の敵を串刺しにすることが期待できます.ここで言うことはあまりありませんが、優れた遠距離攻撃です。アップグレードでは、より大きな槍または複数の槍を入手できます。最も困難な遭遇はほとんどの場合ボスであり、彼らが不機嫌になることはめったにないので、私は毎日弱い者のより大きな槍を選びます.
- シャドウ ミスト: シャドウダメージを開きます。スキルの使い方は少しトリッキーですが、敵のロックを解除して足元の影の領域を召喚するのは便利なトリックになるでしょう.とはいえ、スキルの着陸はそれほど難しくなく、敵が攻撃を開始する範囲内に近づくまで待ってから、スキルを呼び出し、横に回避して完了します.ターゲットに向かって泣き叫び、近接攻撃と飛び出したときの影からの追加ダメージの両方でターゲットをよろめかせることができます。ボスはスキルの範囲を飛び回る傾向があるので、タイミングに注意するか、凝固で動きを止めてください。アップグレードは、より大きな爆発、または継続的なダメージのオプションです。注意してください、たとえそのダメージが本当に低くても、時間の経過とともにダメージがCoagulateをポップします.敵の動きを制限できる場合は、継続ダメージ オプションの方が優れているため、直感的にはブラッド バリアの方がうまく機能します。バリアをキャストし、霧を落とし、バリアが保持されることを期待して、近接攻撃で暴徒に泣き叫びます.それでも私はもっと大きな爆発の方が好きです.
全体として、これら 3 つのスキルは非常に有用です。好きなものを選んで使い続けてください。きっと役に立ちます。
アルティメット:
- 怒り: 唯一の「罠」スキル。このスキルはあなたを殺します。それはあなたのロックをキャンセルし、開始と回復のアニメーションが遅く、5回攻撃している間、同じターゲットへの後続のヒットは半分のダメージしか与えません(したがって、1人の男に5回ヒットしても、1回ヒットした場合の2倍のダメージしか与えられません). .避けて、避けて、避けて。
- アビス: おそらく最高のロットです。ターゲットが防御できない間、スキルをキャストして泣き叫びます。動けなくするだけでも、このスキルはそれだけの価値があり、ダメージは最高です。ただし、アニメーション中はターゲットに気絶ダメージを与えることはできませんのでご注意ください。
- 血の大釜: このアルティメットは、フランキーを召喚する少数のボスにとって非常に価値があります。また、数秒後にアニメーションで敵をトラップするので、その時点で泣き叫ぶ.繰り返しますが、ここで言うことは何もありません。これは単に優れたアルティメットです。
アルティメットにはひどいクールダウンがありますが、費用はかかりません。レイジ以外にも、あなたの努力に非常に役立ちます.それらを使用することを躊躇しないでください。そうは言っても、それらはレベル 1 から使用可能であり、血の大釜と深淵の最良の部分はよろめきであるため、レベル 1 のままにして、XP を他のことに費やすことをお勧めします。
戦術スキル:
- 春: 古い信頼できる。血のコストがかかり、レベル 1 と 1 つのアップグレード パスで 10 秒の完全なクールダウンがあります。このスキルはかなり便利だと思います。これにより、スタミナを消費せずにバックラインの敵に即座に到達できるため、コンボに十分な量を確保してから再び回避することができ、最も一般的な敵とうまく機能するヒットアンドランのプレイスタイルが可能になります.アップグレードの場合は、5 秒のクールダウンを確保するのに十分な投資をして、ここに残します。 1 つのアップグレード パスから追加されたスタン ダメージは特に役立つとは思いませんが、オフハンドのスタン武器と比較したスプリングの素早さは価値があり、また、銃で遠距離で敵をスタンさせることが多い場合は、オートバイトも価値があります。
- シャドウ ベール: スタミナの消耗は驚くほど大したことではありません。戦闘以外では、このスキルを使用すると、ほとんどの戦いをバイトで開始できます。これは素晴らしいことです.そして、このスキルを再び使用できるようになる前に、おそらく戦闘は終了します。 1 つのアップグレード パスは血のコストを取り除き、クールダウンを短縮し、もう 1 つのアップグレード パスはステルスを破った後に与えるダメージを増やします。後者は、通常通り敵に忍び寄ることですでにバイトを開始している場合に役立ちます。
全体として、これらのスキルの優先度はかなり低いです。 Spring に 2 つのレベルを配置してそれで完了しますが、これらのスキルはかなり安価なので、ここで戦術的な利点が見られる場合は、躊躇しないでそれらに投資してください。春を選択する場合は、2 番目のレベルを早めに取得することをお勧めします。大きな違いになります。
防御スキル:
- 凝固: 射程内にいる 1 人の敵を数秒間停止させることは、実際にはかなり有効です。その時間を使って彼の相棒を嘆き悲しむか、味方を彼から引き離してから、彼に春を告げて彼を殺す時間を与えてください。血の増加のアップグレードは、無料の血を与え、血を養うための最も安全な方法です。たとえば、新しいボスに直面していて、彼に近づいても安全な時期が正確にわからない場合などです。より長い持続時間のアップグレードにより、いつでも世界中で彼の仲間を殺すことができます。または、ボス戦中に少し呼吸できるようになり、スタミナの再生とクールダウンの終了が可能になります。
- 血液バリア: このシールド能力はこれまで以上に優れています。特定のものに対しては機能しませんが、アニメーションが遅い重い武器が好きな場合、このアビリティは、いまいましいものとのコンボを完了する唯一の方法かもしれません.ダメージのアップグレードは非常に異なる能力で、かなり多額の血のコストが追加されますが、クールダウン期間が半分になり、スキルが終了する前に吸収されるヒット数が減少します.もう 1 つのパスは、3 番目の攻撃をブロックし、保護の持続時間を延長します。どちらも非常に優れています。ここで失敗することはありません。
どちらのスキルを選択しても、3 番目のレベルを取得し、血液関門のダメージ アップグレードを選択してここに残しておけば、4 番目のレベルに投資する可能性があります。 Blood Barrier の 2 番目のレベルはかなり良いですが、xp のタイトさが少し緩和されるまで、Coagulate を 1 のままにしておくことができます。ブラッド バリアは実際よりも無敵に感じさせてくれるので、私は凝固の方が好きです。ハード モードでは、これはあなたを殺します。
ヒーリング スキル:
- オートファジー: 少し回復するための長いクールダウン。ほとんどのボスは大量の追加ダメージを与え、回復能力を半分に減らします。私はスキルをレベル 1 または 2 のままにしますが、半分のクールダウンでより多くのヒーリングを得るために、即時ヒーリング パスでレベル 4 に上げるという議論があります。その後のボスは、時間の経過とともに膨大な量のダメージを与えます。オートファジーをレベル 2 のままにしておくと、回復によって殺される可能性があります。
パッシブ スキルとスキルの優先度
最も受動的なスキル ほとんどのレベルで同じ利益を提供しますが、それらを上げるための価格は増加し続け、徐々にあなたの支出に見合う価値がなくなります.アクティブ スキルと比較するとコストがはるかに低く、攻撃スキルの次のレベルを購入するためにできるだけ多くの xp が残っている状態で、xp を次のレベルに到達するように修正する主な方法です。
ヘルス/スタミナ/血液スキル: ヘルスは完全に線形で、レベルごとに常に +50 のヘルスを提供します。ブレークポイントはなく、1 回の攻撃で受けるダメージの量が馬鹿げているため、それを上げたいと考えています。 Later in the game the need for more health abates somewhat. Stamina is really important and unlike Health, does have a break point, specifically at the +100% endurance mark, since it is a 25% increase. Stamina is extremely useful, do invest in it. Blood is a bit of a complicated case. You gain 5 blood points per level in the skill. Meaning that you need 4 levels in it to squeeze one more cast of Shadow Mist for example. 5% is the worst increase ratio out of these three skills and while you will use a lot of blood, gaining it back is easy. You can live without raising this skill, but if you need to spend xp to level up and other skills would cost too much, (or your playstyle warrants a higher blood total) it’s not a bad deal either. Side note, Health is a hard +50 health instead of the percentile increases of Stamina and Blood because level ups do increase your Health total. The more you know.
Bite skills: I initially slept on those, and I shouldn’t have. An unupgraded Bite deals 25 damage, heals for 100hp and gives 30 blood. Stunning enemies is a thing you will be doing a lot of, so getting something out of these stuns is very good, especially the cheap lower levels. Hard Biting has an irregular progression, but getting to 600% damage is cheap enough. Fast Regen and Big Thirst are linear. While Fast Regen is cheaper, the increase in hp healed is too small in my opinion. Big thirst’s worth depends on the blood cost of your usual skills, getting enough in one bite so you can use your usual strategy is pretty good.
Gear skills: These skills are pretty much at the bottom of my priorities. The 9mm Parabellum shoots three bullets at once, so if you use it a lot and find yourself constrained by your amount of bullets, getting enough bullets to get one more burst can be worth it.多分。 For syringes, I recommend not using them against normal enemies nor the first couple of times you’re fighting a boss, but if you’re starting to have the patterns of the boss down, don’t be afraid to use them. The ingredients to craft them are mostly plentiful, and money is not a problem, so don’t fall in the trap of never using them. That being said, finishing the game in hard mode without ever using them is perfectly doable. In most cases, 2 syringes of each type is plenty, but the upgrade is cheap.
So with all that, what should your priorities be?
Your aggressive skill.いつも。 You can leave Autophagy and your defensive/tactical/ultimate skills at level 1 for most of the game (though some really benefit from level 2). Put the bulk of the rest of your xp in passive skills, Health, Stamina, Hard Bite and big Thirst do a lot of heavy lifting here. With the leftover xp you can raise your other skills to taste. You will still reach level 26 on a No Embrace Hard mode run and possibly more if you avoid missing hints. It’s not enough xp to invest in multiple aggressive skills, but it’s more than enough to go on a shopping spree or two when it comes to passive skills.
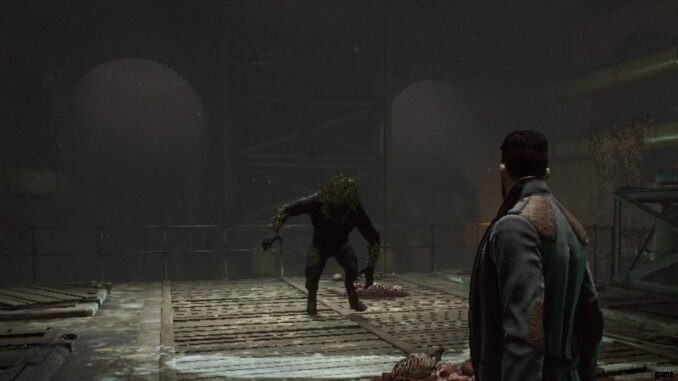
Combat in Hard Mode
Hard mode will teach you to hate Vampyr’s dodge. It is deceptively easy to get blocked on the environment, and killed in a corner. Enemies also pivot 270° like nobody’s business and often reach a lot further than you think. Some enemy attacks come out faster than your one handed weapon strikes, and some enemies do enjoy hyper armor on many attacks. This makes defensive plays difficult, especially since dodging drains your limited stamina and on hard mode killing enemies requires more attacks, straining your stamina reserves even more. There are relatively few enemy types in the game and they only have a few patterns each, for most non-boss fights, your main problem will be their numbers and the environment. There are also relatively few bosses, but most deal ludicrous amounts of aggravated damage and unless you really invested in it, there is no way Autophagy will be able to keep up.
Work on your timing and sense of distance, the later being more important. You usually have more reach than your enemies and your attacks have a big step-in, so start your attacks out of their range and go from here.
You have access to a few weapons, one-handed, off-hand, and two-handed. Do not hesitate to enhance weapons, you’ll get more than enough crafting parts, and money is rarely a problem. I recommend upgrading the following:
Hacksaw/Dragonsbane/Saber (eventually): Fast one-handed attacks, deceptively long reach on the Saber. You can upgrade these weapons for a mix of damage and blood, or going full blood gain on the Hacksaw. A distressing number of enemies are awkward to attack with two handed weapons due to the attack speed, and the blood gain on the one-handed weapons will allow you to use some skills without letting up on your attacks. This is your bread and butter, and there is nothing wrong with fully upgrading the Hacksaw you get early on. The hatchet could be interesting, but 3 stun per attack is just not enough.
Liston knife/dagger: Blood gain, blood gain, blood gain. These weapons attack extremely quickly, stagger, and replenish your blood. Excellent.
Stake/Truncheon: Vey slow attack speed. This will screw you over if you mess up your pacing. The stamina consumption is also huge. Unless you have Blood Barrier, do not bother attacking twice in a row with these, you’ll get hit and interrupted. Early on, even without any skill investment, stunning enemies restores 30 blood, nothing to scoff at.
Scythe/Any 2-handed weapon with Parry: This right here is your defensive option. Enemies in this game are very rythmical, making parries easy after a few tries. Even if you mess it up, you’ll still stagger your enemy, either back off to regen stamina, or sneak a hit in (or a Claw attack). Even mis-timed parries will stop enemy attacks in their tracks if you did it too early, you can use this to shut down teleporting skals (at a high stamina cost). This is my boss killer. Read the patterns, parry, sneak a hit in, bite.繰り返す。 After some testing you’ll learn what exactly you can do between boss attacks before you have to parry again. Learn the timings and repeat until the boss falls. This weapon is also a godsend early game against skals. When they take their parry stance, attack them normally, wait a tiny bit and then parry. When they jump at you for a bite attack, hit them with a parry when they’re in the air. Parries will work against all melee attacks, grab attacks, dashes, you name it. As long as your parry is well-timed, you’re safe. I find it a lot more reliable thand dodging, especially against bosses.
Guns are optional really, but there is nothing wrong with using the Parabellum or any kind of pistol or shotgun. Pistols are your nice ranged option with some stun damage, while Shotguns are more akin to Claw attacks, a quick stamina-less blow. Use them when a fight is really down to the wire.
Different Enemies Are Weak to Different Strategies
Some enemies have really low stagger resistance, others have very low stun resistance, and while most bosses will force you to hit and run (or parry and bash), mini-bosses are souped up versions of normal enemies. They may kill you in 1-2 hits and take an ungodly amount of time to kill, but some enemies simply do not have answers to some strategies.
As an example, a quick dagger hit followed by a Claw attack (with lowered cooldown), rinse and repeat, will come out extremely fast, cost barely any stamina, will generate as much blood as you need or more, and may endlessly stagger lighter enemies. Some mini-bosses at the end of the game are a real threat, but this will entirely shut them down.
Bigger enemies will be able to avoid the stagger, or start an attack with hyper armor, you just need to find what you can get away with, one dagger hit followed by a Claw attack? If you need to dodge in and out between each attack, this may not be worth it, you might as well bring out a stake, hit the enemy until they’re one hit away from being stunned, empty your blood pool by spamming Claw attacks, and when you’re almost out of stamina, land the stun, bite them, regain health/blood and even stamina, and repeat.
What goes for you goes for the enemy. Blood Barrier doesn’t protect you from aggravated damage? That means Claws will go through an enemy vampire’s Blood Barrier too. Claws also go through enemy parry stances too.
Don’t try to mash attack after being hit by an enemy to hit him back and stagger him, your attack will be slower than the next hit in his combo. Dodging away is the way to go.
This is why I recommend upgrading different weapons, sometimes regaining blood through a quick and safe attack is the way to go, sometimes enemy openings between attacks are awkward for a 2-handed weapon. Bosses are designed at being good at roll-catching you, but parrying them is easy.
Die and learn until you get through.