Madness:Project Nexus – 究極の基本ガイド (ヒントとコツ付き)
これは、ゲームに苦労し、コツをつかめないと感じているプレイヤーのためのガイドです。これは、一般的なゲームプレイのヒントとボス戦をカバーします.明らかなネタバレです。
基本の決定版ガイド
能力
キャラクターをコントロールし、すべての能力を有利に使用する方法を知ることは、一般的なゲームプレイに関して大きな進歩をもたらします.まず、すべてのキャラクターが持っている、ゲーム全体を通して役立つ能力について説明します。
コーパス
あなたのコーパスはあなたの健康です。デフォルトでは、ほとんどのキャラクターは 3 コーパスから始まります。コーパスは、ほとんどのヘルス バーとは少し異なる働きをします。コーパスの各ブロックには、壊れる前に受けることができるダメージの量が制限されています。コーパスを破壊すると、すぐにラグドール化され、戦術バーがわずかに上昇します。すべてのコーパスが破損すると、死亡します。コーパスは、壊れていなければ、ダメージを受けずに十分長く続ければ、受けたヒットを補充できます。敵を回避し、コーパスが再生成されるのを待ってから、再び戦闘に参加することが実行可能な場合もあります.
基本/弱攻撃
この攻撃は最も基本的な攻撃です。マウスの左ボタンを押すと、キャラクターが実行します。軽い攻撃は、手だけでなく近接武器でも実行できます。これらの攻撃は非常に高速ですが、それほど多くのダメージを与えることはありません。これらの攻撃は、主に単一のターゲットとスタンロックの開始に使用されます。危険な敵を気絶させ、できるだけ長く攻撃を防ぐことは常に良い考えです.
強攻撃
強攻撃は、このゲームで最も有用で信頼できる能力の 1 つです。 Shift キーを押しながら LMB を押します。強攻撃は追加のダメージを与え、同時に複数のターゲットを攻撃することもできます.これにより、近接武器は優れたクラウド コントロール デバイスになり、1 回の攻撃で複数の敵を倒すことができます。重攻撃は、重装甲の敵に対しても理想的です。弱攻撃はあまりダメージを与えず、一日中そこにいることになるからです.
チャージ攻撃
ヘビー攻撃と同様に、チャージ攻撃は複数の敵にヒットし、クラウド コントロールに使用できます。 LMB を押したまま攻撃をチャージします。攻撃を解き放つには、LMB を離すだけです。突撃攻撃には 2 つの段階があり、段階 1 では目の前で激しい一掃を行うことができ、邪魔をしている敵を倒すことができます。ステージ2は、周囲の敵を攻撃して吹き飛ばす回転攻撃。一部のキャラクターは特別なチャージ攻撃を持っていますが、それについては後で説明します.
クリティカルヒット
敵と戦っているときに気づくかもしれませんが、光の閃光とそれに続く効果音が現れます。これらはクリティカル ヒットです。クリティカル ヒットはダメージとコンボ メーターを 2 倍にし、より多くのダメージを与えることができます。敵を攻撃する直前に LMB を押すタイミングを含むスキルにより、軽い攻撃がクリティカル ヒットを与える可能性が最も高くなります。強攻撃もクリティカルヒットの可能性がありますが、可能性ははるかに低くなります.素手攻撃を使用する際は、この点に注意してください。
二刀流
武器を二刀流にするには、武器を手に取り、Q キーを押したままにします。これにより、地面にある武器が強調表示されます。武器をオフハンドに入れるには、地面にある武器を右クリックします。これで二刀流が可能になります。二刀流はダメージが少なくなる傾向がありますが、攻撃ははるかに速くなります。 2 つの武器による激しい攻撃も、より多くの表面積をカバーすることを可能にします。
ブロック
ダメージを回避するだけでなく、スタンロックを回避したい場合は、ブロッキングが最適です。マウスの右ボタンを押し続けると、キャラクターがブロックします。これにより、近接攻撃によるダメージが軽減されます。スタンロックに巻き込まれた場合は、ブロックのタイミングを合わせることで脱出できます。一部のキャラクターは、ブロックで弾丸をブロックおよび/または偏向することもできます.
スイートスポット
スイート スポットは、遠距離武器を持っている場合にのみ表示されます。銃を向けると、地面に小さな緑色のバーとして表示されます。一部の武器は、射程に応じてスイート スポットが短くなったり長くなったりします。敵がスイート スポットに立っている間に敵を撃つと、敵のタック バーをバイパスし、重大なダメージを与えることができます。
TACバー
このゲームでは、遠距離の敵に対処する際に TAC バーが命綱となります。遠距離の敵と戦っている場合、撃たれたときに常にダメージを受けるとは限らないことに気付くかもしれません。これは、TAC バーが原因です。このバーはコーパス メーターの下と、撃たれているプレイヤー キャラクターの周囲に表示されます。タックバーは撃たれると徐々に減少し、バーがゼロになるとダメージを受け始めます。一部の敵には、スイート スポット スキルなど、Tac バーをバイパスできるスキルがあります。後ろから撃たれた場合、戦術バーの効果も 50% 低下します。タックバーを補充するには、敵を殺さなければなりません。処刑などの特殊な動きは、敵を普通に殺すよりも、tac を大幅に増加させます。
シュート
このゲームの銃には、狙いを定めてからヘッドショットを狙うという 2 つのことができます。マウスの右ボタンを押したままにすると、銃の照準を合わせて精度を上げることができます。一部のキャラクターは反動補正スキルを持っており、十分に長く狙うと反動を完全に無効にします。 Shift キーを押し続けると、ヘッドショットを狙うことができ、敵に対するダメージを増加させることができます。常にヘッドショットを狙うことをお勧めします。
回避
スペースバーをタップすると、キャラクターが回避を実行します。主人公などの高レベルのキャラクターは、デフォルトで素早い回避を行います。この動きは、スタンロックを回避したり、敵との距離を縮めたりするのに理想的です。スタンロックに巻き込まれた場合は、タイミングを合わせて回避することで逃げることができます。素早い回避を実行した直後にスペースバーをもう一度押すと、キャラクターは重い回避を行います。この回避により、より多くの距離をカバーできますが、実行に時間がかかります。強く回避したいだけの場合は、Shift キーを押しながらスペースを押します。
物を投げる
Q キーを押しながら LMB を押すと、キャラクターは手に持っているアイテムを投げます。もう一方の手で武器を投げたい場合は、RMB を押します。武器を投げることは、銃器を使用せずに遠距離でのアドバンテージを得る効果的な方法です。グレネード スロットにデフォルト設定される特定の武器を投げることもあります。 G を押して投げます。
ポンメルストライク
遠隔武器でマウスの中ボタンを押すと、銃の台尻で敵をピストル ウィップできます。これは、銃を使用するために必要な距離を作ることができるように、いくつかの迅速なダメージを与えてそれらを取り除くための良い方法です.この攻撃は敵を殺すこともできますが、あまり効果的ではありません.
キック
Shift キーを押しながらマウスの中ボタンを押すと、キックを実行できます。このスパルタン キックは、敵を遠ざけたり、敵のシールドを蹴り飛ばして攻撃を受けやすくしたりするのに適しています。一部のキャラクターはこのキックを持たず、突きに置き換えられますが、同じ効果を得るために使用できます。
アーマー
あなたがプレイするほとんどのキャラクターは、まともな装甲を備えており、非装甲の自己と装甲の自己との間にいくつかの違いがあることに気付くでしょう.あなたの鎧はまた、後ろからの効果が半分しかありません.アーマーはアリーナ モードでより一般的ですが、主人公はストーリーが進むにつれてよりしっかりとアーマーを身に付けます。
特殊能力
一部のキャラクターには、実行できる特別な動きがあります。たとえば、クリストフ博士です。彼の敬虔な力により、クリストフは戦闘で有利になるいくつかの特別な能力を持っています。
クリストフのチャージ攻撃
このチャージ攻撃は、通常のチャージ攻撃と同じように 2 つの段階がありますが、異なることを行います。ステージ 1 のチャージ攻撃はジェブの周囲に小さな力で押し込み、敵を押しのけ、吹き飛ばす可能性があります。このチャージ攻撃のステージ 2 は、AOE 不協和攻撃を行い、それに巻き込まれた敵を気化させます。
クリストフの不協和音
Gキーを押すと、クリストフは不協和音のボルトを投げることができます。これらのホーミング発射体は、単一のターゲットに大きなダメージを与え、それらを蒸発させることができます.ただし、制限があるため、慎重に使用してください。
クリストフの長距離ピックアップ
クリストフはテレキネシスを有利に利用でき、近づかなくても武器やアイテムを拾うことができます。 Q を押したまま、必要なアイテムの上で LMB を押すだけで、Jeb の手に浮かびます。
サンフォードのフック
サンフォードのフックは特殊な武器であると同時に、特殊なアビリティが付属しています。このフックを投げると、敵に引っ掛かり、サンフォードに戻ってきます。これは、遠距離の敵との距離を縮めるだけでなく、単一のターゲットに大きなダメージを与える優れた方法です。ただし、サンフォードに連れてこられない敵は、代わりにサンフォードを連れてくることに注意してください。
ダイモスの素早いキック
特筆すべきは、ダイモスの方がキックが速いことです。
大型近接武器
このゲームの一部の近接武器は巨大で、振るのに非常に時間がかかります。これらの武器でチャージ攻撃を行うと、特別なアニメーションが発生します。特に、この攻撃は壊滅的なダメージを与えたり、敵の群れを残忍にしたりするのに理想的です.
武器
このゲームには多種多様な武器があるため、個々の武器については説明しませんが、武器の種類ごとに説明します。武器は次のカテゴリに分類できます:
- 光
- 重い
- 大量
- 遠距離光
- 遠距離ヘビー
- 遠距離で大規模
- スペシャル
軽い武器
軽量武器は、通常片手で持つことができる小さな武器です。これらの武器は攻撃が非常に速く、耐久性が低い傾向にあります。これらの武器は素早く使用でき、素早くダメージを与えることができます。
重い
重い武器は両手持ちになりがちですが、キャラによっては片手でも持つことができます。これらの武器は、スイング速度を犠牲にして、より多くの生ダメージを与える傾向があります。それにもかかわらず、これらの武器は依然として非常に実行可能であり、軽量武器よりも優れている傾向があります.
大規模
これらの武器は巨大で、非常にゆっくりと振れます。成功した場合、これらの武器は複数のターゲットに壊滅的なダメージを与えることができます。これらの武器のみでチャージ攻撃を使用することを強くお勧めします。
遠距離光
軽量の遠隔武器は、ピストル、リボルバー、および SMG です。これらの武器は通常片手で持つことができ、単一のターゲットを取り出すのに最適です. Revolvers fire slower, but do much more damage. SMGs have high capacity at the cost of damage, and are recommended for spraying into large groups of enemies.
Ranged Heavy
Rifles and Shotguns tend to make up the bulk of this category. Rifles have high capacity and high damage, and it’s recommended you use these weapons to their fullest. By aiming down the sights, you can tap the LMB to fire single shots. Otherwise, the weapon will fire 3 round burst. Shotguns do heavy damage at the cost of capacity, being able to do devastating damage to single targets.
Ranged Massive
LMGs, Anti-Tank rifles, and Explosives make up this category. LMGs have high capacity and are recommended for taking out large groups of enemies or mag-dumping into a tankier foe. The anti-tank rifle is a very large, slow firing weapon, but does insane amounts of damage to single targets. Explosives such as the bazooka can destroy large groups of enemies in an instant, but will also damage you if you’re too close.
Special
Special weapons come in all shapes and sizes, so we’ll cover some individually.
Hook
While useful in the hands of someone without a special skill, this weapon mostly shines in its ability to return to the thrower when cast. This requires a special skill, which can be learned by Arena characters. There are also weapons with a similar function, such as the boomerang, the throwing disk, and the crecent hook.
Dissonance Weapons
Dissonance weapons are weapons that fire dissonance energy, hence the name. These weapons can vaporize targets and do heavy damage extremely quickly. The dissonance Lancer is a fast firing dissonance weapon, firing bursts of dissonance bolts that hone in on targets and vaporize them. The dissonance cannon fires a massive, explosive dissonance bolt, which annihilates anything it hits to terrifying effect. The dissonance scatter gun is a dissonance shotgun, dealing heavy vaporizing damage to multiple targets at once.
Broken Hilt/Shard
The broken hilt is a weapon that can only be obtained by breaking a melee weapon. This weapon will allow you to perform an execution on single targets, dealing heavy damage and potentially killing them.
Screwdriver/Scalpel
These small weapons aren’t much when it comes to actually fighting with them, but they can be used to execute a single target for free.
Enemies
This game has a wide variety of enemies, too many to cover all at once. I’ll spend most of this portion of the guide covering enemy classes, since they operate mostly the same across all factions.
Stunlocking
This mechanic is extremely important to understand while fighting enemies. The stunlock can work towards your advantage as well as your detriment. Light attacks from a melee weapon will always stunlock enemies, allowing you to pummel them. But, enemies can also stunlock you with their melee attacks. To escape this, time your dodge or your block and make distance from the enemy. A good way to know when an enemy is about to attack is when they flash red.
Weak Enemies/Small Targets
These enemies tend to be on the weaker side and show up in bulk. They can be killed relatively easily with light and/or heavy attacks. Ranged weapons are also ideal for taking out clusters of these types of enemies.
Stronger Enemies
These enemies tend to have tac bars as well as more corpus blocks. To circumvent their tac bar, use melee weapons or shoot them in the sweet spot. Shooting them normally will also drain their tac bar, if it reaches zero, you can shoot them dead.
Big Boys
Big enemies tend to come in the form of G03LMs, which come in different armors. Attacking a G03LM with melee is the deal way to take it down, as enough melee attacks will send it into a frenzy. After it’s done doing its frenzy attack, walk up behind it and perform an execution. Sometimes this execution is required, as some G03LMs have bulletproof armor.
MAG Agents
MAGs are massive enemies, being able to absorb lots of damage. You want to throw everything you have at these enemies, as they are extremely tanky. Heavy melee attacks are ideal for dishing out as much damage as possible. Broken weapons and any weapons that allow executions are also ideal. Power weapons such as dissonance weapons or explosives such as the Bazooka are equally as ideal.
Chargers/Berzerkers
These enemies have a charge attack where they will flash red and then charge at the player. If they successfully charge you, they can ragdoll you or grapple you. To escape a grapple, follow the onscreen prompt and mash attack or dodge.
Grapplers
Grappling enemies tend to come in the form of Zeds, who would try to grab you. To escape their grip, spam the dodge button. Other grappling enemies come in the form of elves or hiveslugs, which will grab onto you and explode. It’s best to avoid getting grabbed by these enemies.
Bossfights
This game has quite a few bosses, all of which will be encountered through the campaign. I will try to give proper strategy guides to defeating each boss ideally, but experiences may vary.
MAG Bandit
This gargantuan bandit is the first boss and thus is the easiest one. It’s highly recommended to kill the spawning bandit minions during this fight in order to obtain weapons that will be useful during this fight. Getting close to MAG Bandit is the best and most reliable way to deal damage to him. I recommend using exclusively heavy attacks here, as they will do the most damage and break your weapons quickly. Using broken weapon shards here is good for dealing a lot of damage to MAG Bandit.
His attacks are relatively straight forward and extremely telegraphed. When it looks like he’s about to attack, move out of the way to avoid taking massive damage.
Church and Jorge, Round 1
During this fight, you’ll find yourself in an arena with Church and Jorge. Church is an aggresive physical attacker, honing in on the player and attacking them with devastating melee attacks. During this fight, it’s best to evade him and focus on killing Jorge. Your ally AI partner can act as an excellent distraction here. Killing the MERC Minions that show up during this fight is a great way to get your hands on some guns that will make taking out Jorge easier.
Jorge in this fight has an anti-tank rifle that you wanna get your hands on. Focus on killing Jorge, due to his specialty in ranged weapons, he isn’t much of a physical attacker. Shoot him full of lead and pummel with with melee to kill him quickly. Once he’s dead, grab his rifle and use it to finish off Church.
The Sheriff
- Phase 1:During this fight, you will encounter the sheriff on the other side of a massive pit. On each side of your side of the pit, there is a lever. Run to the left lever and pull it, which will cause a box to appear from the left side of the Sheriff’s side of the pit. Quickly run over to the lever on the right, and pull it when the box is over the Sheriff’s head. This is how you damage him. Use your AI partner as a distraction from the minions that will be swarming you. Drop another box on the Sheriff’s head and that’s phase 1 complete.
- Phase 2:After running away, the Sheriff will hide behind sandbags. During this segment, you’ll have to fight your way through some enemies, one of which will drop some C4. Pick up the C4 and place it on the sandbags to destroy them. I recommend using Sanford’s grenades on the MERC Snipers positioned on top of the building, as they can be the most annoying during this phase.
- Phase 3:It’s 1v2 time with the Sheriff. He’ll draw his gun on you and start shooting. My strategy here though is to rush the Sheriff with melee, which will cause him to dodge backwards. This makes it easy for him to corner himself, allowing you to pummel him with melee weapons.
MAG Bandit, Round 2
The strategy here is largely the same as last time, use heavy attacks and any guns around the area to deal as much damage as possible, all while dodging his attacks. MAG Bandit’s heavy slam attack will cause rubble to fall down from the ceiling, which you’ll wanna avoid.
Church and Jorge, Round 2
During this fight, you’ll be in a much more open arena with the duo. This time, I would recommend focusing on Church, using Sanford’s grenades to ragdoll him which will allow you to pummel him and do a lot of damage. Jorge here has a flamethrower, and it’s recommended you don’t get close. You mostly wanna ignore him here, as he isn’t very threatening. Once Chruch is dead, take out Jorge and end the fight.
Dr. Crackpot
The ex-Nexus scientist makes his debut here as a mad cult leader. First he’ll spawn two Gravedigger bandits, which you’ll wanna take out. Then, he’ll try to deal with you personally. I highly recommend melee attacking Crackpot, as it’s the easiest and most reliable way of hurting him. His light armor also makes him very fragile.
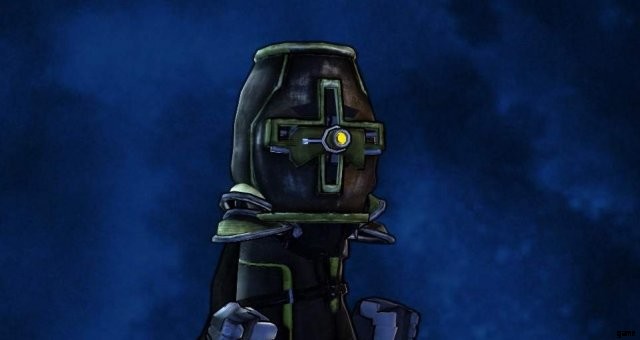
Dr. Christoff
Jeb makes his debut wanting to fight Hank. At the start of the fight, Jeb will pull out his revolver and start shooting you. I recommend using any guns you found earlier in the stage and lighting Jeb up with as much lead as possible. After this, he’ll swap to his binary sword, and it’s melee time. Do your best to keep Jeb in a stucklock and evade his melee attacks, as they can be devastating. Overpower and overwhelm him, and this fight should be pretty easy.
Church and Jorge, Final Round
This fight is a bit of a doozy. Church here returns wielding a shock harpoon, which makes him a very deadly physical attacker. The small arena here makes it difficult to evade him. I would recommend using the same strategy with the grenades here, as it’s the most reliable way to take him out. Jorge is sporting a sludge gun, which spouts poisonous sludge that slows you down. I would still recommend ignoring him here though, as he still isn’t very threatening.
Ghoul
Ghoul is a giant robotic ant spider thing, I don’t really know how to describe him, I just know he freaks me out. Ghoul will enter the stage from the ceiling, and you’ll wanna pump as much lead into him as possible if you have it. If not, get close and heavy attack.
His second phase has him jumping up and down into the ceiling, where he’ll try to crush you to death. Run around and evade his crushing attacks, to where he’ll eventually knock out a part of the elevator and become stuck. Use this chance to heavy attack his face and deal as much damage as possible. After a few cycles of this, Ghoul should be no more.
Hive
This freak of nature isn’t actually all that threatening, and this fight is more an endurance test if anything. Hive is largely invulnerable, save for a few moments that you’ll wanna take advantage of. Hive will do an electricity attack which will leave him open briefly, use this to dish out a little bit of damage. He will also try to shoot missiles at the ground, which are telegraphed, try your best to avoid them. Nexus agents will come in through the windows, kill them and grab their guns.
Eventually, Hive will spit out hiveslugs, which you wanna kill with guns. They die and one hit and you don’t wanna let them get close, or else they’ll explode on you. Hive will then leave his gut open, to where you can heavy attack it with melee to do the most damage possible. Alternatively, you can use Jeb’s dissonance bolts here. After a few cycles, Hive should be no more.
Project Gestalt
This big bastard has been hounding you the whole game, time to put an end to him. While Jeb is operating the divergence engine, focus on grabbing the plugs and throwing them into the plug slots. Be sure to only throw the second plug into the other slot when Gestalt is in the center of the room, or else the attack won’t work. Once gestalt is vulnerable, get close to his shoe with melee and slash away. Repeat the plug process and break another one of Gestalt’s corpus. The 3rd time around, gestalt has put flesh tentacles over the plug slots. Shoot them away and then repeat the process.
Phase 2:Gestalt’s got wings now, and you gotta take him out. I recommend grabbing the Dissonance Lancer here, as it’s the quickest way to take him. Keep your pointer on Gestalt and keep firing, it should take no more than 2 mags of the Lancer to take him out. He has a beam attack and some dissonance attacks that are pretty easy to evade given how much they’re telegraphed.
Director Phobos
I ain’t ‘fraid of no ghost! Except this one. This fight is genuinely really difficult and you’ll have to use every skill you’ve learned in order to survive.
Phobos will start by hovering around the stage, grab guns here and shoot him up as best you can. Once he’s lost a few corpus, he’ll throw rubble at you and be invincible while doing it. Use this time to grab any weapons and focus on avoiding the rubble. Then, he’ll spawn enemies, use your weapons to take them out since they’re pretty weak.
After dealing more damage to him, Phobos will spawn a dissonance binary sword which he’ll use and try to vaporize your soul. After this, Phobos will randomly attack from a corner of the screen with terrifying speed. Constantly keep dodging and moving around and try to avoid this attack as best you can. You wanna keep as much distance from him here as possible as he’ll constantly be trying to get close to you. Use guns around the stage to shoot him up as much as possible, melee here should be looked at as a last resort.
During his final phases, Phobos will steal the Halo from Jeb and become supercharged. Usually by this point, you’ll have run out of bullets to sling his way, and you’ll be forced into melee. Put on your big boy britches cuz it’s time to take Phobos on personally. I highly recommend Hank’s katana here, as it attacks very quickly and does a lot of damage. Phobos will do various AOE and sword attacks to get you off him, dodge out of the way and use the brief window to deal damage to him. Once this is done, Phobos is no more.
Hank J. Wimbleton
After a stunning display of betrayal, you will be forced to battle Hank. He’ll first move to the far right on the screen, on top of a ledge, I recommend using your grenades here to take out one of his corpus. Then, he’ll run around the floor, shooting at you. Use your gun and try to shoot him as much as you can, if he gets close, pistol whip him.
Then, he’ll get on top of a center piece of the room, I also recommend using your grenades here. If not, you can shoot at him or use Sanford’s hook.
Hank’s back on the ground, do the same thing as before. Shoot him, melee if he gets close.
Hank will then get on top of Gestalt’s head, to where you can shoot him, use grenades, or your hook. Once he’s on the ground for the 3rd time, you should be able to kill him.