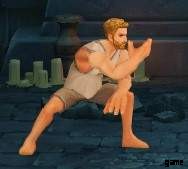
Soulfire – 初心者向けガイド (ヒントとコツ)
まず、Soulfire は多人数参加型の戦術的な対戦ゲームです。
- 60 人のプレイヤーが 3 人ずつの 20 チームに分かれて戦います。
- 1 回のゲーム ラウンドで、プレイヤーはせいぜい 20 分しかかかりませんでした。
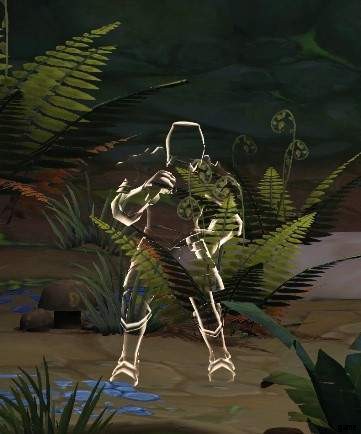
- プレイヤーはアイテムなしでダンジョンにテレポートされます。彼らは、武器、基本的な防具、強化アイテム、呪文を、胸を調べたり樽を壊したりして集めることができます。
- プレイヤーは戦闘を通じて他のプレイヤーを追放できます。追放されたチームは復活できません。
- ダンジョン マップは 12 の異なるエリアで構成されており、2 つのエリアには通路がつながっています。
- 数分後、一部のブロックが毒物エリアに変わります。
- ドリームランド ゲートは安全地帯が 1 つしかないときに表示されます。最初にドリームランド ゲートに入ったチームが勝利します。
初心者のためのサバイバルの基本戦略
多くの敵が存在する中央エリアへのテレポートを避けるようにしてください
新しい初心者は、操作スキルとトリックで不利な立場にあるため、物資の優位性を確保するために、初心者は静かな場所にテレポートすることをお勧めします.
チームと足並みをそろえ、一人にならないでください
これはチームワーク ゲームです。各チームは最大 3 人のプレーヤーで構成され、ノックダウンされたチームメイトは制限時間内に救出されます。したがって、新しい初心者は数的優位性を利用してゲーム経験の不足を補うことができます。
速攻は避ける、オイルランプは避ける
これらのアイテムを使用すると、ミニマップ上の自分の位置が探索され、敵の待ち伏せが発生する可能性があります。初心者はこれを知らないことが多く、意のままに急いで走り、チームの位置を探ります。
チームメイトの衝突に注意し、ブロックを妨げないでください
チームメイトが近距離武器を使用しているときは、束ねるのではなく、遠距離武器や呪文を試すことができます。 [ショートボウ]や[ライトクロスボウ]を使い、敵に近づかずに[ファイアボール]と合わせることで、初心者でも独自の戦闘価値を生み出すことができます。ただし、遠距離用の武器や呪文を持っていない場合は、チームメイトにジャンプバックすることを忘れないでください.
最高の状態であることを確認してください
新しい初心者は、武器や防具の修理や HP の回復を忘れがちで、戦闘開始時に不利な状況に陥ることがよくあります。
ping システムを使用してチームメイトと通信する方法を学びます
未知のチームメイトと一致し、マイクを使用できない場合でも、チームメイトとのチャットをあきらめないでください。ゲームには ping システムがあるため、プレーヤーはそれを使用してチームメイトとより便利に通信できます。 ping システムの詳細については、第 V 章で確認できます。
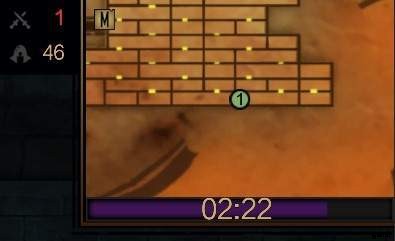
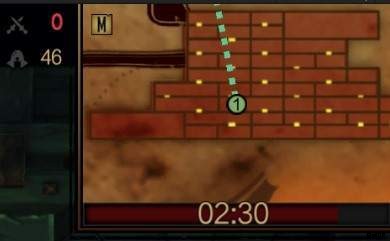
テレポーテーションの場所の選択
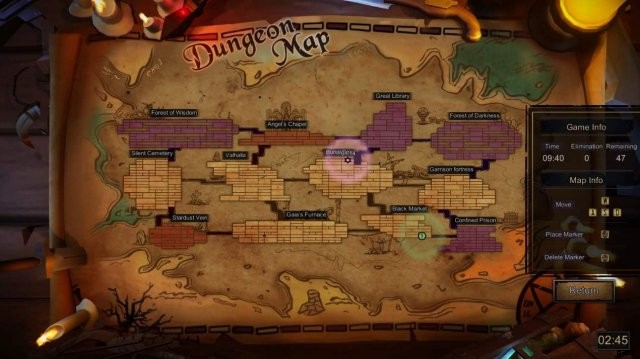
以下に示すように、ダンジョン マップには 12 の異なるエリアがあり、異なるエリアには異なる風景があり、すべてのエリアは空の通路でつながっています。
ゲームの開始時に、テレポーテーション セクションが表示されます。その後、展開されたマップ (以下に示す) が表示されます。このステージによってリスポーン エリアが決まります。
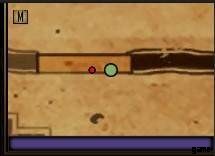
- テレポーテーション フェーズが始まると、プレイヤーは羽ペンを使ってダンジョン マップを横断します。キャプテンはいつでも [スペース] を押して羽ペンから離れ、チームの動きをコントロールできます。
- マップ上の各スポットは 1 人のプレイヤーを表し、矢印はプレイヤーが進む方向を示し、緑色の円は移動時間を逆方向にカウントします。
- 初心者が船長の場合は、リソースを略奪するための静かな場所を見つけるようにしてください
- プレイヤーは自分の判断でテレポーテーションの場所を選択できますが、提案として、新しい初心者はチーム テレポーテーションに従うことをお勧めします。
- 各ブロックはいくつかの部屋で構成され、各ブロックは部屋を表します。これを覚えておいてください:1 つのエリアの大きな部屋には、より多くの戦利品があります。たとえば、下の写真を見てください。ブロックの左下と右上隅に 2 つの大きな部屋があります。
プレーヤーが大きな部屋に入ると、視野が自動的に広がります。大きな部屋のチェストは必然的に重い武器と軽い鎧のセットを生成し、バレルは高度な鎧とレアアイテムを生成する可能性が高くなります.したがって、プレイヤーが大きな部屋でテレポートすることを選択した場合、早期にアドバンテージが確立されます。
装備の略奪
プレイヤーがバトルラウンドに入ると、部屋が水平方向にドアで、垂直方向に階段でつながっているのがわかります。 [W]を押してドアを開閉します。 [W] &[S] を押して階段を上り下りします。
現在、プレイヤーは、リソースを略奪して強くなる必要があることに気付いています。装備の入手方法はいくつかあります。
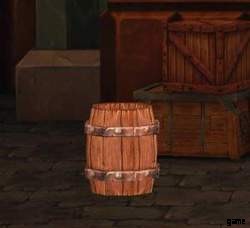
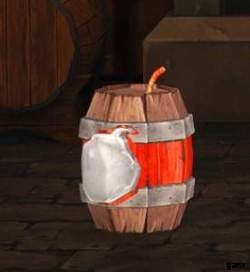
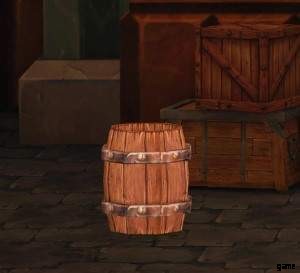
- バレル:プレイヤーは、攻撃またはローリングによってバレルを壊すことができます。バレルを壊した後、装備をドロップする可能性があります。
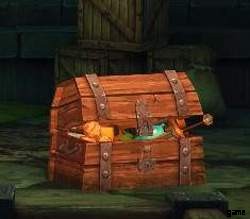
- チェスト:プレイヤーはチェストを開けて装備を入手できます。チェストにはさまざまなアイテムが入っている必要があります。
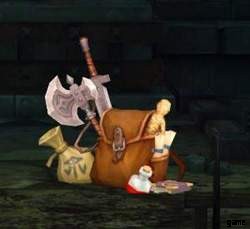
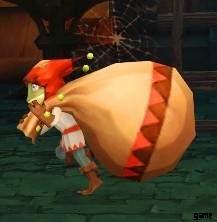
- トロフィー バッグ:プレイヤーは敵のバックパックを拾ったり、敵を追い出した後に敵のバックパックを略奪したりできます。
- Treasure hunter:The treasure hunter will drop one item while being attacked, one chest will drop after the fifth attack or when time runs off.
Barrel:
Chest:
Trophy bag:
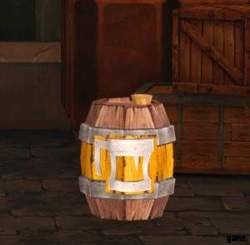
There are also some barrels in different colors, it is noticeable that the barrels will explode when the players breaking them up, and players can press [F] to lift up the barrel, then press the attack key to through them out.

The Characters Statistics and Combat Equipment
Character Statistics
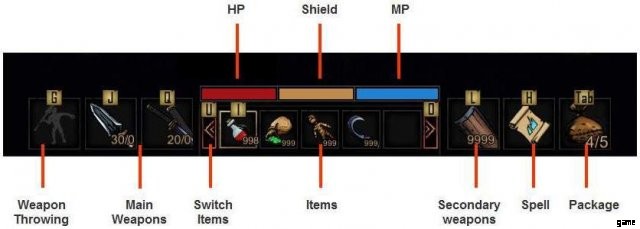
HP:red bar. When HP drops to zero, the player will down and unable to move, the teammates can come close to the player and rescue him/her, and help the player recover a fraction of his/her life.
In the same way, the player can expel the down enemies, but the expel can be interrupted during the startup. The expelled players cannot be rescued.
Amor:yellow bar. The gained armor is similar to the extra HP, players who suffer the damage will deduct their armor points first, and the players can repair the armor by using the items, but some damage ignores armor points, for example, the poisoned fog.
MP:blue bar. Using spells will cost MP; the players can recover the MP by using the items.
Stamina:The stamina does not show on the game all the time, only when a player makes a physical action will cause the yellow bar reveal. Such as attacking, dashing, rolling, going upstairs.
When the stamina drops to zero, the player will be exhaust, and then move slower, cannot perform any action that consumes stamina.
Combat Equipment
Main weapon:
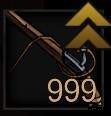
The player can equip two main melee weapons, switch the weapons via [Q] key, if the player switches the weapons during using the first main weapon, it will automatically show the effects of the second weapon.The weapons using is limited by the durability, every attacks launched by the players will consume the durability of the weapons. If the durability point drops to zero, the weapon will break, the player will be empty-handed.Players can repair the weapons by using the stardust; one stardust represents 1-point durability. The main weapon are divided into 3 levels, so the stardust correspondingly has three levels. The T1 stardust can restore the durability of T1 weapons.
Sub weapon:The sub weapon can be divided into weapons and shield, one player can equip only one sub weapon. In addition, there is a limit on the amount of ammos for the sub weapons, and durability for shield. The ammo will recover automatically over time.
Spell:The player can equip only one spell; the spell will cost the MP.
Backpack:The backpack is separated into three levels, every backpacks capacity increases at each stage.
Press [TAB] to open the backpack at any time, as shown in the picture below.
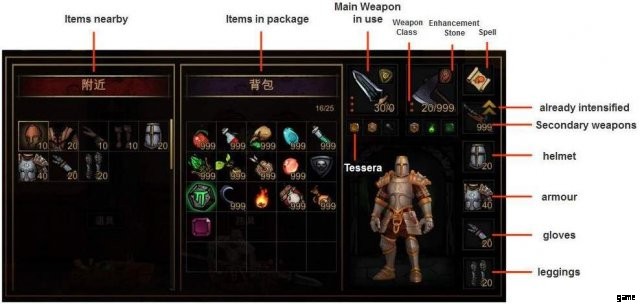
Enhancement Stone, Inlays and Enhancement Accessory
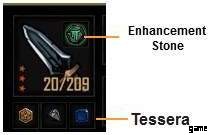
Enhancement stone:The main weapon can be inlayed on one enhancement stone; it will increase the damage of the main weapon by a percentage.
Inlays:The main weapon can be inlayed on three inlays optionally, and every inlays have their unique effect.
Enhancement accessory:Sub weapons and spells have their corresponding enhancement accessory, and they are not applicable to each other. In addition, if the player equips the enhancement accessory, it will not able to be unequipped. The enhanced sub weapons and spells will have their corresponding icon on the top right corners.
Armor
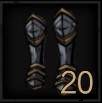
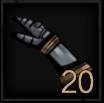
Every players will have four blocks to equip their armors; the four parts are helmet, armor, gauntlet, and legging. Each armors will increase the players’ armor point.
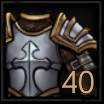
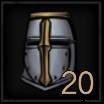
The players could find two different levels of armors. A suit of basic armor can increase 50 armors bonus; advanced armor can increase 100 armor bonus.
Loots
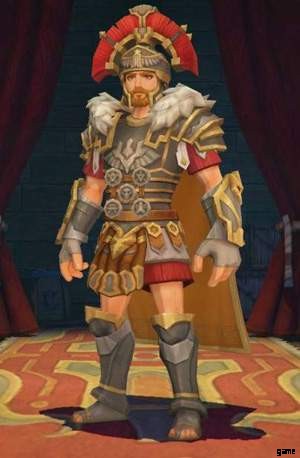
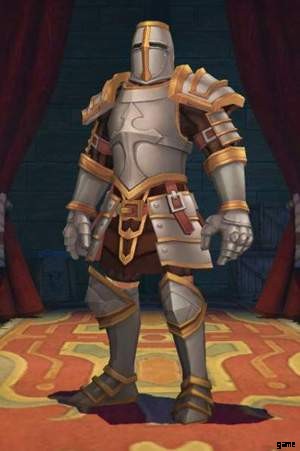
Players can buy and equip loots out of the battle round in the store, this will substitute the appearances of the armors and weapons, but the loots cannot bring extra effect.
For example, the players’ default armor is a suit of Medieval kings guard armor, if the player change the Roman style armor, the appearance of player will show as the picture below.
Some Advices of Items Choosing for New Beginners
- Main weapon:
The beginner had better choose the fast attack speed and proper length weapons, such as [Twin Blades] [Rapier] etc. Heavy weapons are suitable for multiplayers combat, the disadvantage of heavy weapon is that once the enemies closely attack the player, it is too heavy to counter the attack quickly and easy to interrupt, such as [Great Scythe]; In addition, the light weapon is too short, and skillful, such as [Dagger]. - Sub weapon:It’s better to choose the [Light Crossbow], [Short Bow], [Fukiya] these are long-distance weapons with a short animation, as long as don’t forget to use it launch attacks, the player can kill or hurt the enemies easily. [Shield] and [blunderbuss] are difficult to use, the shield parry and blunderbuss parry need more practice before it can be used in the real combat. [Longbow], [Harquebus] and [Repeater crossbow] are suitable to use in the team fight, their animation is longer, so it is difficult to use it in solo.
- Spell:For beginners, it’s better to equip the [Escapology],once the player recovering from the hit by combat skills can use the Escapology, this will help you out of enemies ’combo, and keep a much safer distance from the enemies; Otherwise, [Fireball] is also a good choice for beginners, It means the player have one more ranged damage ability. When player becomes more familiar with this game, there are more spell options to choose.
- Armor:The armor is divided into two levels and 4 parts, if there is a higher level in the same part, change the higher one. There is a little tip:when the enemy has been expelled, the dropped armor will be fixed up automatically, so after fighting, there is no rush to fix up your own armors, the player can pick up the loots directly.
- Enhancement accessory:The most important accessory is the enhancement stone, there are +1, +2, +4, +6, +8, five kind of enhancement stones, the +8 enhancement stone can increase the melee weapon damage by 80%. The other enhancement stone, it is better to equip.
- Items:The health potion and repair items are essential. Although, other items have their own values, but it is not necessary for the new beginners. However, do remember to pick up the [Hunter’s mark], when walking into the passageway, checking out if there are enemies ambushing.
Mark
If we match the unknown teammates and unable to use the microphone, do not be silly to give up chatting with your teammates, because the game has the ping system, the player can use it to chat with teammates more conveniently.
Mark key:in full keyboard mode, press [N] to open the mark system, in keyboard &mouse mode, press [C] to open it, in controller system, press [Down key] to open it.
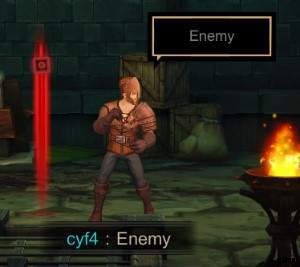
Quickly double-click the mark key, tell the teammates you have found an enemy; hold the mark key, the mark roulette will appear.

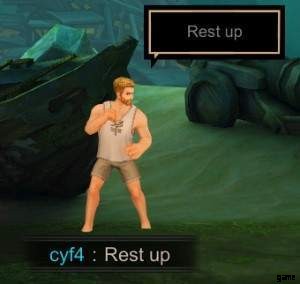
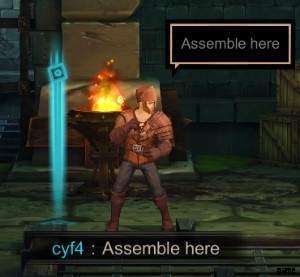
There are eight orders on the roulette, they are:
- W Got it S Provoke moves.
- E Rest up Z Head to the safe zone.
- D Assemble here A Retreat.
- C I need healing Q Don’t pursue.
Select the corresponding key, and then release the mark key to send the mark, a dialog box will show up on the top of the role.
Scene Mark
In all marks, there are three markers will show up in the scene and corresponding mini-map.それらは:
Assemble mark:
Blue sign, it represents the assemblage in the mark place.
Enemy spotted:red sign. Double-click the mark key; it can quickly mark the enemies’ spot.
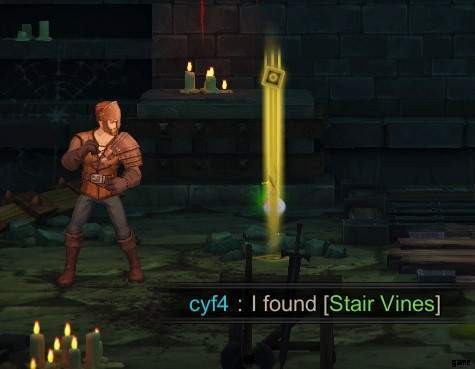
Found the items:yellow sign. Click the [N] while pointing towards the items on the ground; it will give a notice of the item spot to the teammates.
In the empty ground, the player can click the mark key to cancel the above three kinds of marks.
Provoke Move
The provoke move is not a mark, it is an action, if there is an enemy in the provoke range effect, it means the provoke move is successful; the movements of the enemy will be spotted to the provocateur in a short period.
Map
The mini-map is in the upper right corner of the screen.
- The players own position is shown as a number in the circle; and the teammates are different colors and numbers.
- Black blocks represent the rooms.
- Yellow points represent the stairs.
- The upper number represents the kills; the lower number represents the left.
If you are out of the safe zone, there will be a dotted line leads where you are supposed to move.
Press [M] to open the large map.
- The purple areas represent the poisoned areas, the poison will reduce the player’s HP
- The red areas represent when the countdown is over, it will become the poisoned zone.
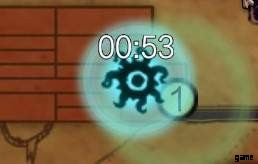
- The hexagons and countdown represent where the treasure hunter is about to appear. When treasure hunter appears, it will be marked as a gift bag.
- The safe zone will get smaller and smaller over time.
Combat Detection and Hiding
- In the battleground, it is very important to know the location information of the enemy in advance, so that the player can obtain an advantage by using the information, here are some different ways you should know.
- The fighting sounds and footsteps can spread over a certain distance. Listening carefully to the sounds in your headphones can help you identify the enemy’s position.
- When a player dashes by holding the [Space], a red dot will appear on the mini-map of the nearby enemy player. It will explode your position to the enemies, so the more you find the trace of the nearby enemy; the more cautious you should use the dashing.
- The player can stays 5 seconds to enter [Eavesdropping status], and you can hear the enemy next door, and show up as a red dot.
- Some equips have the effect of detecting enemies’ positions, such as the [Eagle Eye] and [Hunter’s Mark]
The Eagle Eye can help you mark the enemies’ position that appears in the detective range of it. Also, it can detect the invisible enemies who are within the half screen.

The Hunter’s Eye can mark the nearest enemies on the mini-map immediately, and it will last for 30 seconds.
- When you find the enemy, all your teammates will also be able to see the red dots, which represent the enemy on their mini-maps.
- When you are under attack, you will not be able to dash for 10 seconds, and the position will be exposed to the enemy.
Hiding
Since there are so many detection methods, it is essential to master some ambush skills.
Barrel
Players can hide in the barrel by pressing [F] besides the barrel. However, any operation will cause you out of the barrel. Using [Camouflage] will create a barrel in front of you. If you see a red dot moving toward you on your mini-map, you can consider ambushing in a barrel, and prepare to launch a surprised attack.
Bushes
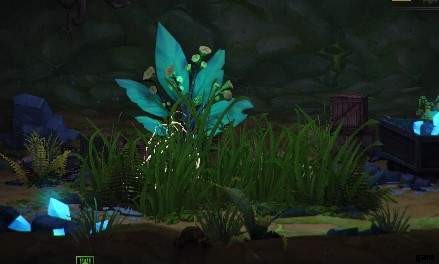
There must be bushes in the passageway. Enemies outside the bushes cannot see players hide in the bushes. Besides, using items in the bushes cannot be exposed, but launch the attack will make you expose.
If the enemy chooses to ambush you in the passageways, he may choose to hide in the bushes. In addition, place a trap in the bushes can hardly be found.
Stealth
The players can use the Stealth, it will make you invisible for a while, but if you launch an attack or use the items will make you out of the invisible condition.
Wary Skills
- After introducing the ways of detection and hiding, let us end with some tips.
- It is not recommended to climb the stairs to chase enemies when you are not sure. Because, the moment you go up the staircases cannot avoid attacks. It is easy to be attacked by the enemies, many people also like to ambush at the staircases entrance.
- When you are running through the passageway, while running out of the poison, it is better to use the Hunter’s Mark to detect if there are enemies ambushing you. Also, you can use the Stealth to through the passageway.
- If it is necessary to face the combat, we suggest the player who equips the shield go front of the team, also be careful with the traps!
- The barrels would not refresh, if you found the barrels in the middle and late stages of the game round, it may be the enemies’ ambush by using the Camouflage.
- If you hear the sound of using stealth, you had better use the Eagle Eye or using the Hunter’s Mark, also you can play a tap close to you.
- The escapology is versatile to escape from the combat. If you are in recovery mode, it is also works.
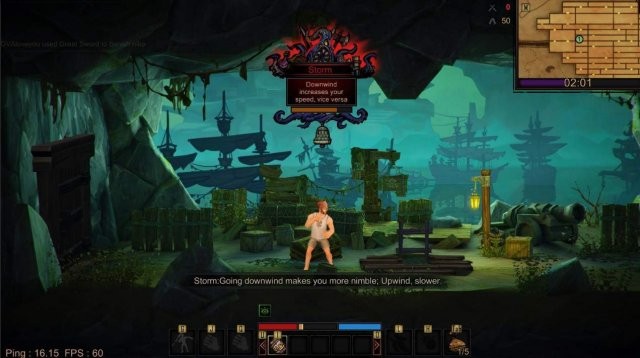
The Map Random Events &Treasure Hunter
In the game round, sometimes an icon with bells and tentacles pops up in the middle of the screen, which indicates the random events happen in this area. There are many types of the random events, good or bad.
Such as [Invigorate], this will increase the player’s stamina limit and recovery speed in this event area.
Such as [Storm], the player can fly with the wind; against it will make you slower.
When you leave the block or the duration ends, the effect will disappear.
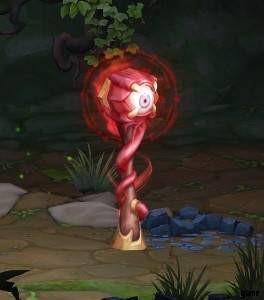
The Treasure Hunter
The Treasure Hunter is a wizard who spawns in safe zone, bring rare items – some are exclusive. Players can obtain the items dropped by attacking him.
Look at the arrow below, this icon represents a treasure hunter will refresh in 1min38sec, every time the player attacks the treasure hunter, he will drop an item and run faster.
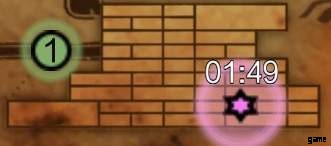
When Treasure Hunter appears, the icon will become a chest on the map.

After five attacks, the Treasure Hunter will run away and leave the treasure chest.Since the equipment in the treasure chest are more advanced, the beginners had better not chase the Treasure Hunter, this can effectively avoid being besieged, unless the Treasure Hunter refreshes nearby.
Final Fight
When the game enters the last block, an icon will show up on the map and say:The Dreamland Gate has appeared, please evacuate the dungeon. Shown as the picture below:
When the countdown is over, the Dreamland Gate will appear, it is surrounded by a golden light transmission zone. This area is able to avoid poison.
Players standing in this area can read a bar to through the Dreamland Gate, which takes 20 seconds. Once you enter the Dreamland Gate, the result interface will pop up.
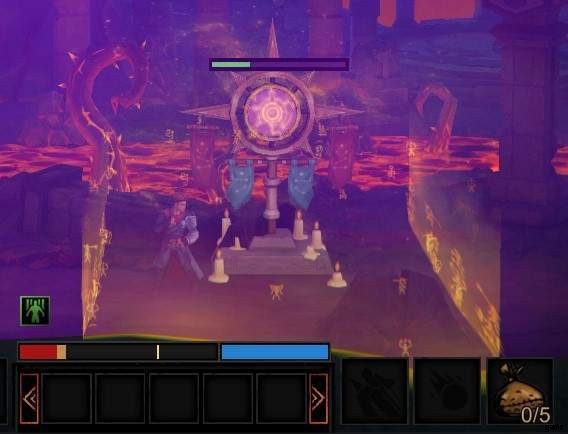
- If there are players from other teams are standing in this block, the read bar will pause.
- If members of your team leave this area, the read bar will fall back to zero.
- Only one team can read the bar, so you must wait until the other teams’ read bar back to zero, you can open your teams’ read bar.
- At the end of the countdown, the player team will be teleported.
Finally, the ranking of teams is determined according to the order of teleportation to the Dreamland Gate. When there are no surviving players in the game round, the game is over.