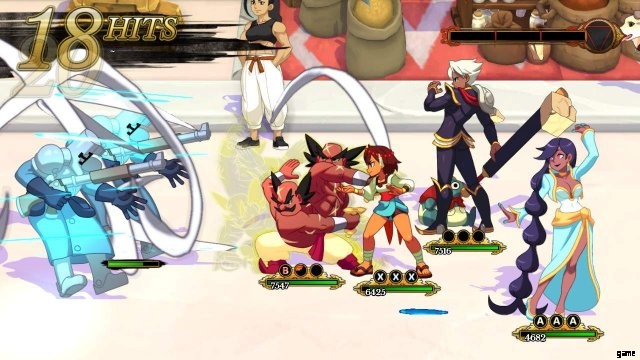
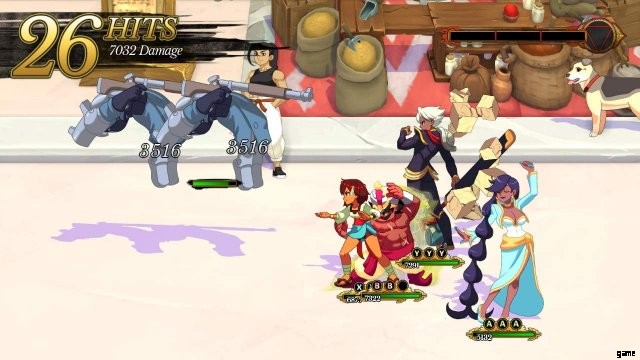
不可分 – キャラクター戦闘ガイド
すべてのキャラクターの動きと使い方のドキュメント
はじめに
このガイドは、特定の動きがどのように機能するかを理解するのに問題がある人、または単にどのキャラクターが何をするのかを知るためにここにあります.誰にでもわかるように、説明はできるだけ明確にしようとしました。キャラクターは、ロック解除された順にリストされています。
私は外に出て、各キャラクターについて以下をリストしました:
統計
- 健康、攻撃力、スピード
役割
- キャラクターの主な用途 (例:ヒーラー、AoE 攻撃など)
推奨される位置
- キャラクターが最もうまく機能するパーティ内のポジション
ムーブ リスト
キャラクターが持っている攻撃の簡単なリスト。
- 普通 – キャラクターの攻撃ボタンを押したときに実行される攻撃
- ダウン – 下ボタンを押したままキャラクターの攻撃ボタンを押すと実行される攻撃
- アップ – コントローラーの上ボタンを押したまま、または上に押したままキャラクターの攻撃ボタンを押すと実行される攻撃
- スペシャル (1 バー) – フォーカスボタンを押しながらキャラクターの攻撃ボタンを 1 回押すと実行される攻撃
- スペシャル (2 バー) – フォーカスボタンを押しながらキャラクターの攻撃ボタンを 2 回押すと実行される攻撃
- スペシャル (3 バー) – フォーカスボタンを押しながらキャラクターの攻撃ボタンを 3 回押すと実行される攻撃
- 空中 – 攻撃が空中のターゲットを攻撃できるかどうか
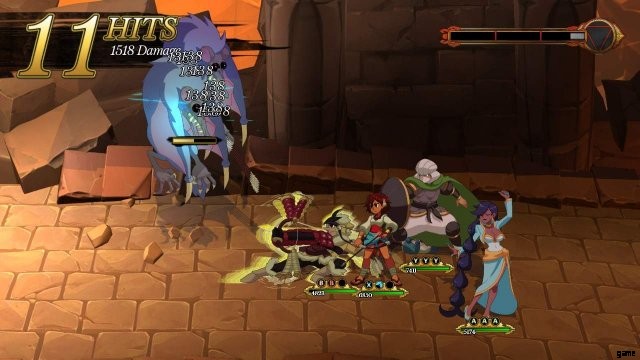
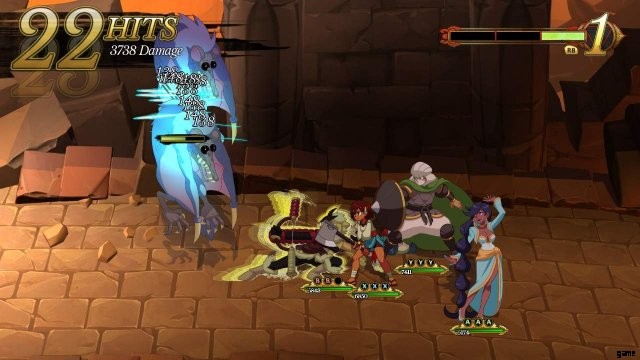
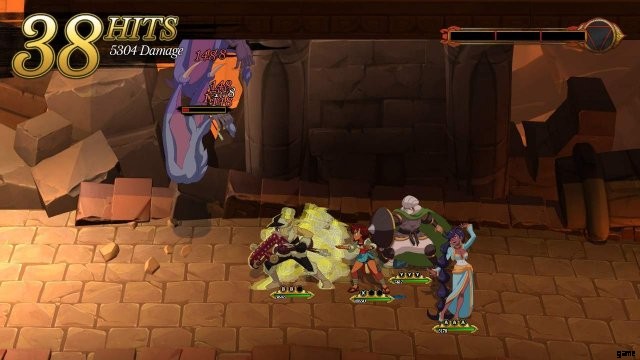
- エリア – 攻撃の方向。これにより、敵が同時に攻撃を受けるために整列する必要がある方向が決まります。
- 生成されたイッディ – 攻撃によって生成される iddhi の量。最初の攻撃と、異なる場合はその後の攻撃を文書化します。
ムーブの使い方
各動きの詳細な説明。
基本的なゲームプレイ
キャラの使い方。おそらくこのガイドで最も意見の分かれる部分ですが、できる限り事実に基づくように努めました。
コンボ
このガイドを書いているときに見つけた潜在的なコンボ。
明らかに、このゲームは出たばかりです。まだすべてのキャラクターのロックを解除していません。また、このゲームを 1 回でプレイする時間もありません。
用語の定義
一部の人にとって混乱を招く可能性のある用語を使用しています。これは主に、キャラクターの役割を定義する方法に関係しています。
エリア
攻撃のヒットボックスが移動する方向。それらは水平または垂直のいずれかです。
- 水平
ほとんどの攻撃の方向。攻撃の当たり判定は右から左に移動し、横一列のターゲットにダメージを与えます。代表的な例は、Anja の通常フォローアップ攻撃、Phoebe の通常攻撃、Tungar の必殺技 1&2 です。
- 垂直
ほとんどの範囲攻撃の方向。攻撃の当たり判定がキャラクターの上下に広がり、縦一列の対象にダメージを与える。垂直範囲に影響を与えるほとんどの攻撃は、水平範囲も大きくなります。主な例としては、ダールの通常攻撃、ラズミの必殺技 3 攻撃、アンジャの 3 回目の通常フォロー アップ攻撃があります。
サポート
ギミックのあるキャラクターは、攻撃するのではなく、他のパーティーメンバーをサポートすることに依存しています。
範囲ダメージ
簡単に言えば、1回の攻撃で複数の敵にダメージを与えます。例としては、ダールの必殺技やゼベイのアップ攻撃などがあります。
バーストダメージ
絶え間ない素早い攻撃ではなく、大きな「チャック」でダメージを与えるキャラクター。典型的な例は、Dhar のダウン攻撃で攻撃を保存して、高ダメージの攻撃を強化する方法です。
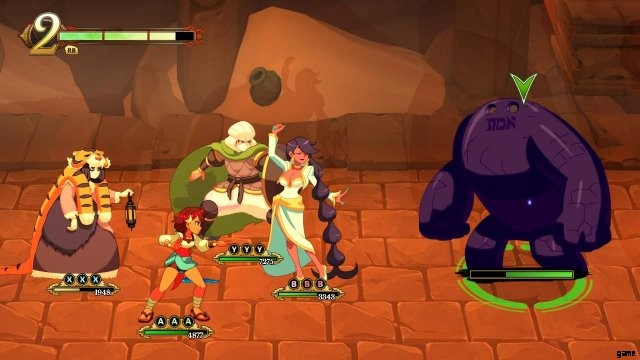
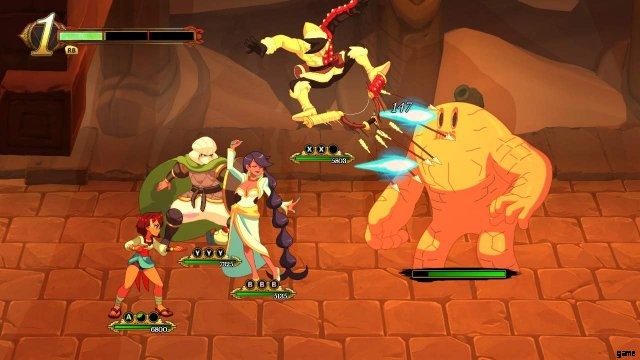
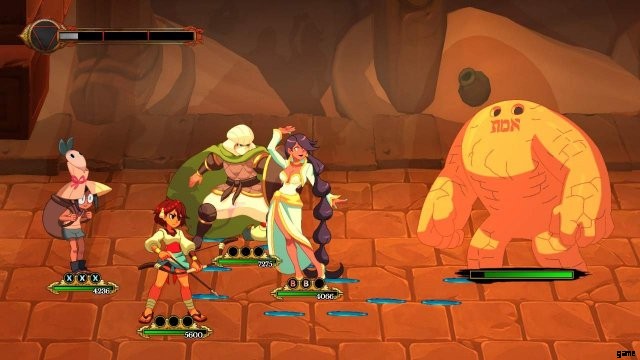
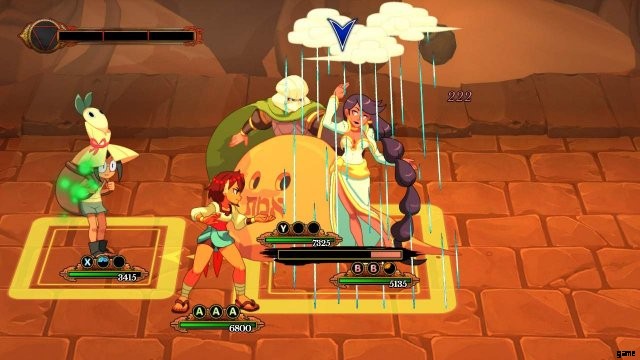
位置
私は「Face The Enemy」フォーメーションを使用しているため、常に同じ方向を向くことができます。表は表、裏は裏、上下は「側面」です。
4 つの基本統計
各キャラクターには、健康、攻撃、速度の 3 つのステータスのバランスがあります。これら 3 つのステータスは、すべてのキャラクターのバランスを保つようにバランスが取れています。
たとえば、Razmi と Phoebe は攻撃値が高いかもしれませんが、速度はほとんどありません。
健康
ヘルスは、キャラクターのヘルスの量を決定します。通常、治癒能力を持つキャラクターは体力が低下します。
攻撃
キャラクターの攻撃による基本ダメージ。高い攻撃値を持つキャラクターは、間に長いリチャージがありますが、数千のダメージを与えることができます.
スピード
キャラクターの攻撃チャージがリチャージする速さ。速度ステータスが高いキャラクターは、高速でスパム攻撃を行うことができます。
基地イッディ
すべてのキャラクターは、攻撃を開始するときに少量のiddhiを生成します。攻撃値が高いキャラクターは、通常、ベース iddhi が低くなります。
攻撃 vs 速度
コメントの誰もが尋ね続けていることの1つ。確かに、一部のキャラクターは攻撃が高くなりますが、速度が速いキャラクターも同様に多くのダメージを与えることができます.ヤンのようなキャラクターは、攻撃のリチャージが非常に速いため、フィービーやラズミのようなキャラクターよりも実際に高いダメージ出力を持つことができます.言うまでもなく、速度の高いキャラクターは、遅くて打撃の強いキャラクターよりも高速に iddhi を生成します。
イディ ビルディング
戦闘画面の上部に、イッディ メーターがあります。攻撃を実行することでメーターを埋めることができます。バーがいっぱいになると、キャラクターの特別な攻撃を使用できます。各キャラクターには 3 つの特殊攻撃があり、各攻撃には 1 ~ 3 バーがかかります。
イッディの建造に関する情報
- すべての攻撃は、起動時に基本量の iddhi を生成します。すべての計算はこれを考慮に入れています。
- 生成されるベース iddhi の量は、キャラクターによって異なります。キャラクターのページに掲載されます。
- 追加の攻撃は通常、追加の (1) iddhi を生成します。これはキャラクターの移動リストに表示されます。
- 必殺技はiddhiを生成しません。
- ダメージはiddhiの生成に影響しません。ジェネレーションは、攻撃と命中したターゲットの数によって決まります。
- シールドされたターゲットのガードを崩すと、追加の iddhi が 30 生成されます。
- シールドされたターゲットを攻撃すると、iddhi が 50% 減少します。
- 空中にノックアップされ、空中で命中したターゲットは、3 ~ 5 個の追加イッディを生成します。
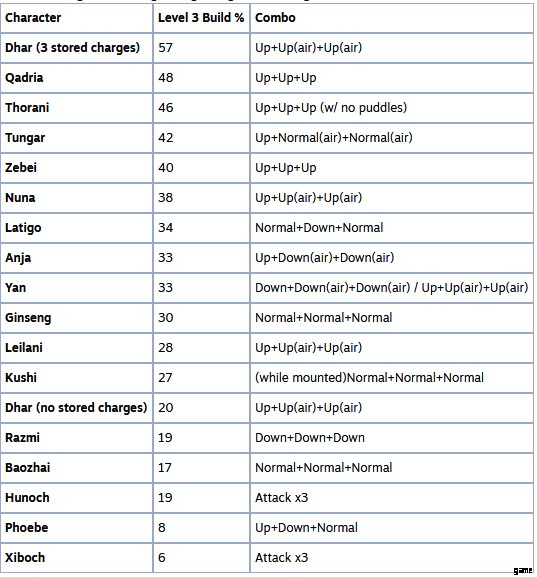
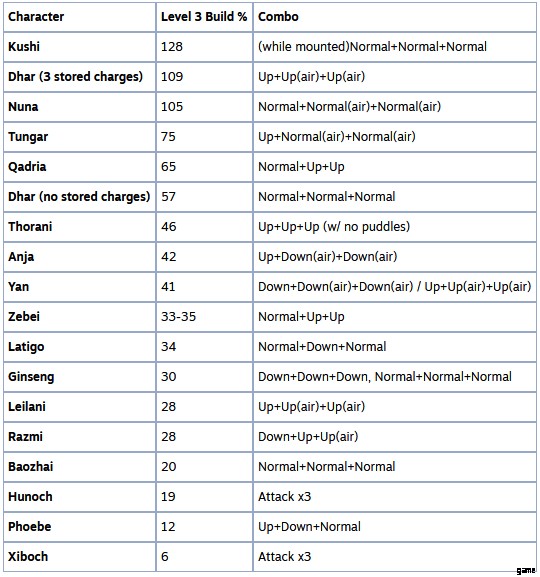
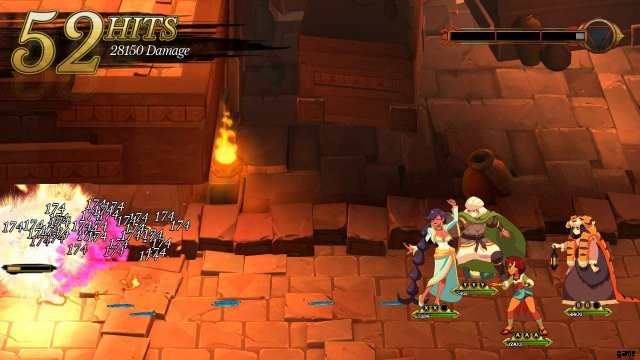
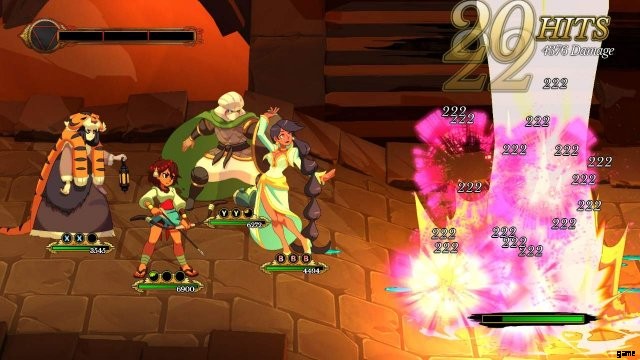
イッディ ビルド チャート
次の表は、キャラクターとの 1 つのコンボからどれだけの iddhi を生成できるかを大まかに測定したものです。すべての計算は、単一のターゲットの練習と 5 つのターゲットの練習に対して、トレーニング アリーナで実行されました。
- (air) は、ターゲットが空中にいる間に命中する必要があることを示します
- カドリアのすべての攻撃には、追加の追加攻撃が含まれています。
これは攻撃レベル 3 でのみ測定されますが、レベル 4 と 5 ではランキングがほぼ同じままであることがわかりました。攻撃ごとに生成される iddhi の量については、キャラクターのセクションを参照してください。
これは、iddhi を構築するのに適したキャラクターの一般的なランキングを理解するのに役立ちます。これを各キャラクターの速度と組み合わせて、各キャラクターがどれだけ速くiddhiを構築できるかを理解してください.
単一ターゲットのイッディ世代(lv.3)
1 つの大きな無防備なターゲットに対して測定。
群集イッディ世代(lv.3)
5 つの通常のターゲットに対して測定。
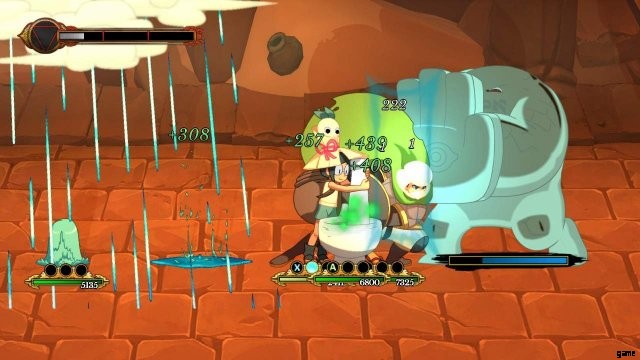
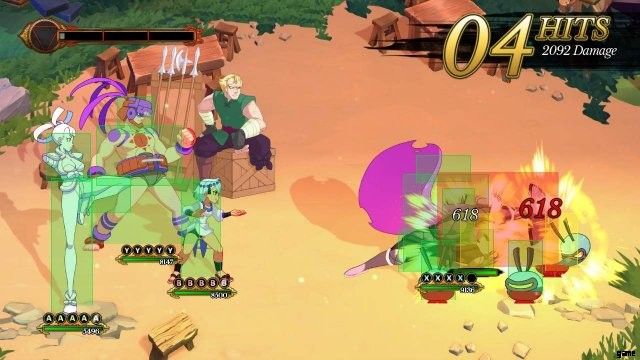
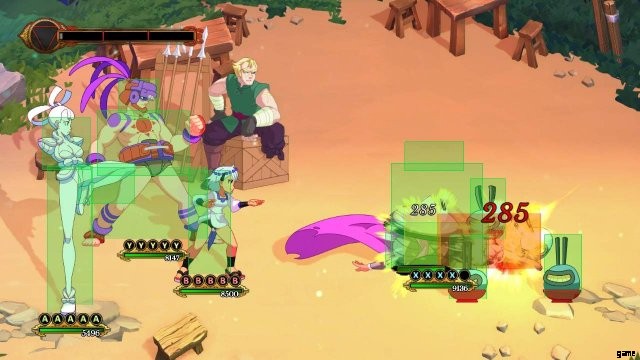
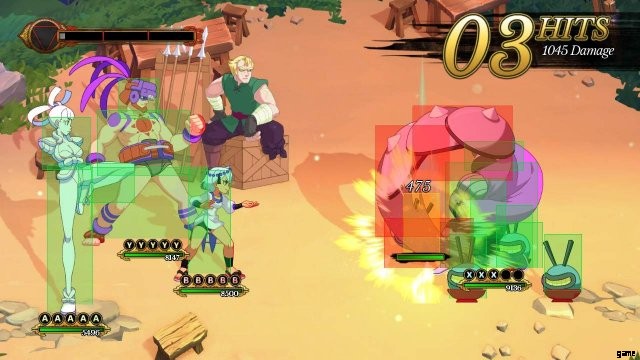
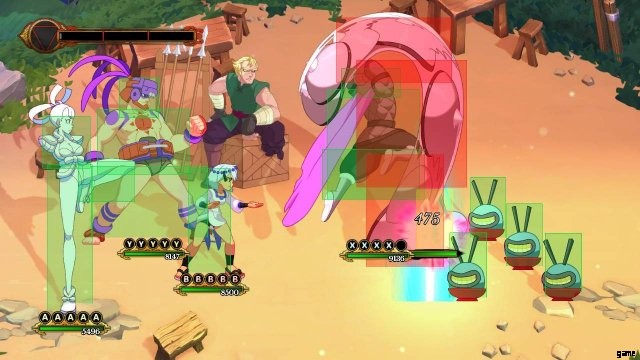
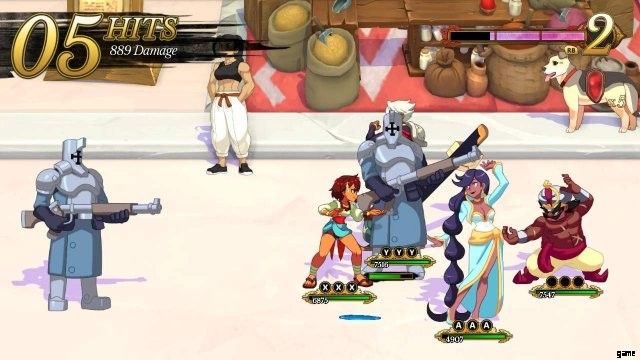
アジナ
ゲームが進むにつれて、Ajnaの攻撃は変化します。ここで基本的なムーブ リストを作成し、すべてのロックが解除されてすべてが文書化されるのを待ちます。
執筆時点での最新の武器のロック解除:スピア。
執筆時点での攻撃レベル:5.
統計
- 健康 - 星 3 つ
- 攻撃 – 3つ星
- スピード - 星 3 つ
役割
- プライマリ:ダメージ
- 二次:混合
推奨される位置
ムーブ リスト
Anja には 2 つの移動リストがあります。Anja には、最初の攻撃とは関係のない多くの追加攻撃があるためです。一部の追撃には追加の追撃があります。それらはコンボ セクションに記載されています。
最初の攻撃
普通
Anja はターゲットをパンチします。
- 空挺:いいえ
- エリア:横 - 小
斧に置き換えられました。
ダウン
Anja はしゃがみ込み、ターゲットをジャブします。
- 空挺:いいえ
- エリア:横 - 小
斧が必要です。
アップ (非武装)
Anja は広範囲のターゲットにヒットする回転キックを実行します。
- 空挺:いいえ
- エリア:横 – 中
斧が必要です。
アップ(斧)
Anja はしゃがみ込み、斧でターゲットを打ち上げます。
- 空挺:いいえ
- エリア:横 – 中
斧が必要です。
スペシャル (1 バー)
Anja はターゲットに対して一連のパーム ストライクを実行し、最後に ax チョップを行います。
- 空挺:いいえ
- 面積:横 - 小、縦 - 中
斧が必要です。
スペシャル(バー2本)
Anja は、2 回の斧のチョップで終了する一連のパーム ストライクをターゲットに実行します。
- 空挺:いいえ
- 面積:横 - 小、縦 - 中
斧が必要です。
スペシャル (3 バー)
Anja は自分のエネルギーをビームに注ぎ、フィールド全体に放ちます。
- 空挺:はい
- エリア:水平 - エクストリーム
フォローアップ攻撃
普通
Anja は槍でターゲットを倒します。
- 空挺:いいえ
- エリア:横 – 中
槍が必要です。
ダウン
Anja は斧でターゲットを 2 回切り刻みます。
- 空挺:いいえ
- エリア:横 – 中
槍が必要です。
上へ
Anja は的に向かって弓を放ちます。
- 空挺:はい
- エリア:横 - 小
弓が必要です。
コンボ
基本チョップ
<オール>Anja は斧でターゲットを切り刻みます。通常の通常追撃のように槍を抜かないのが妙。この攻撃の縦方向のヒットボックスは中程度です。
爆発ショット
<オール>Anja は弓でターゲットを撃ち、矢が爆発するときに歓声を上げます。この攻撃は横方向の攻撃判定が小さい。
ダール
統計
- 健康 - 星 3 つ
- 攻撃 – 星3つ以上
- スピード - 星 1 つ以上
役割
- プライマリ: 範囲ダメージ
- 二次: バーストダメージ
推奨される位置
前面または側面。
ムーブ リスト
ムーブの使い方
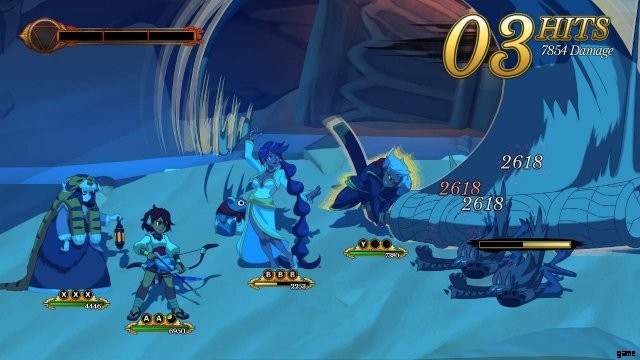
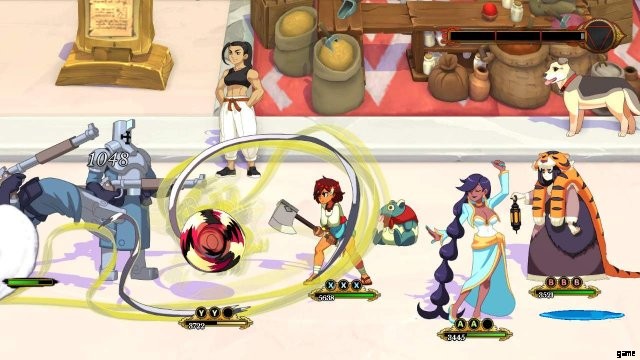
ニュートラルアタック:グラウンドスラッシュ
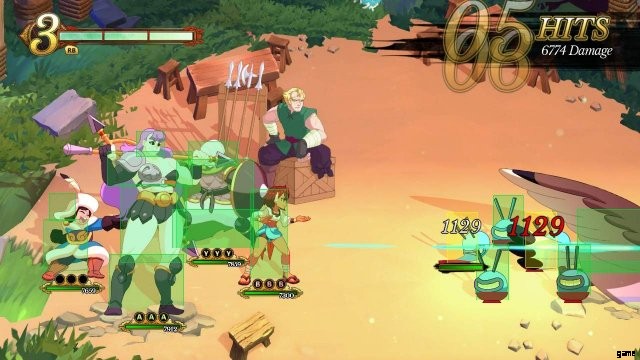
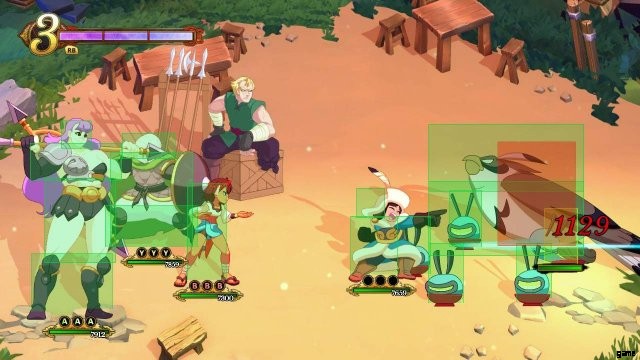
ダールが的を斬る。ほとんどの場合、十分に近い場合、これは複数のターゲットにヒットします。この攻撃は、別のニュートラル攻撃またはアップ攻撃とすばやく連続してコンボできますが、追加のダメージは与えません.この攻撃は Dhar's Down 攻撃の恩恵を受けます。
写真 1 は、ブーストされていない攻撃です。写真 2 はブーストされた攻撃を示しています。
ダウンアタック:大地の怒り
Dhar は別の攻撃をパワーアップするために 1 つの攻撃を保存します。ダールを周回する石の量によって、どれだけの力を蓄えたかを測定できます。攻撃ごとに、蓄えられたパワーが 1 チャージ消費されます。
Dhar の攻撃とどのように相互作用するかは次のとおりです。
- ニュートラル: ターゲットヒットごとに 4 回の攻撃ヒット (空中ターゲットを除く)
- 上: 攻撃は 2 回ヒットします。
- スペシャル: 何もしません。
奇妙なことに、Dhar の通常攻撃と特殊攻撃は、空中の敵に対して使用すると正しく機能しないように見えます。チャージは消費されるが、ダメージは通常攻撃と変わらない。これを書いている間、ブーストされた特別な攻撃のダメージにも違いが見つかりませんでした.バグがあるか、特定のトリガーがあります。
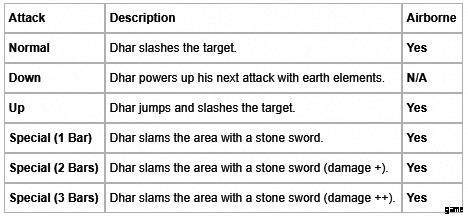
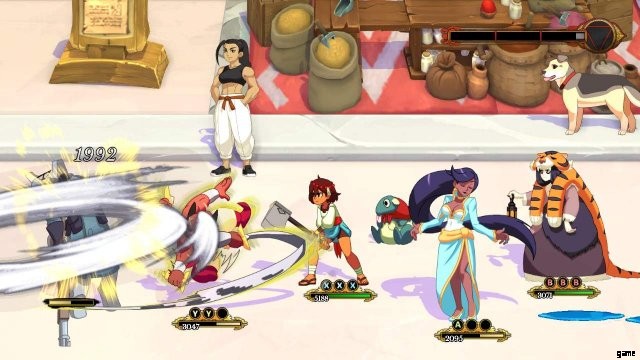
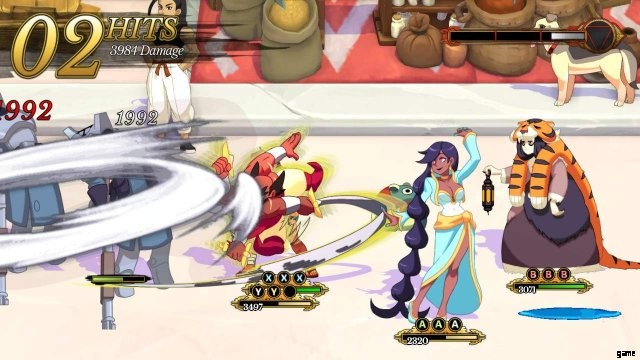
アップアタック:鍾乳石のスパイク
Dhar jumps into the air and slashes at the target. This attack does not hit multiple targets, despite how it looks. This is an easy way to bring airborne targets down into melee range.
Picture 1 is a non-boosted attack. Picture 2 shows a boosted attack.
Special Attack (1 Bar):Groundpound
Dhar slams the field with a giant stone sword, hitting everything in the area. This includes airborne foes.
Special Attack (2 Bars):Earthbreaker

Dhar slams the field with a giant stone sword, hitting everything in the area. This includes airborne foes. This does around 60%-70% more damage than special attack 1.
Special Attack (3 Bars):Terraquake
Dhar slams the field with a giant stone sword, hitting everything in the area. This includes airborne foes. This does around 60%-70% more damage than special attack 2.
Basic Gameplay
Dhar is great because he can deal out high single-target damage and has AoE attacks that can hit a lot of targets at once. He even has an up attack that works on the first attack looking at you, Anja. He’s a flexible damage character that can work well in a variety or situations.
Dhar’s only minor drawback is that he does need to charge up before he can deal some solid damage. This is minor mainly because of how fast his attacks recharge. For being listed as a 1.5 speed, he attacks recharge at a rate closer to that of a 2 or 2.5 speed.
Combos
Basic Combo
- Down Attack.
- Down Attack (skip if attack level is lower than 4).
- Normal attack.
- Normal attack.
Use this when you just need to deal damage. Boosting Dhar’s normal attack will make it hit four times. Adding in the fact that it is almost guaranteed to hit all targets on the field, you can deal out a lot of damage quickly with this combo.
Razmi (&Bom)
Stats
- Health 0+ stars
- Attack 4 stars
- Speed 0+ stars
Roles
- Primary: AoE damage
- Secondary: Healing
Recommended Position
The back.
Can be moved to the sides if another character needs to be in back.
Move List

Move Usage
Neutral Attack:Bon
Bon flames a target for a good amount of damage. The attack can hit airborne targets.
Down Attack:Glare
Razmi curses the target, causing them to have a longer wait between attacks. From what I was able to measure, each curse level causes the target to attack ~33% slower, up to 100% slower at level 3. You can tell what level curse a target has by how dark it is shaded.
Pictures show the color difference between a level 1 and level 3 glare.
Up Attack:Pounce
Bon launches upwards from the ground to the target. This means that if you target an airborne target with foes below it, it will hit both. It does slightly less damage than her Normal attack.
Special Attack (1 Bar):Calming Aura
Razmi heals the party for a large amount of health. Use this when you’re in trouble. If you’re using Razmi as your main healer, you’ll be using this a lot.
Special Attack (2 Bars):Vengeful Spirit
Razmi launches Bon forward across the field, hitting everything in his path. This attack is devastating against large groups of foes. It also knocks down airborne foes.
Special Attack (3 Bars):Hellfire
Razmi calls in an orbital strike unleashes Bon, having him rain down fire on the target’s side of the field causing massive damage. Like special attack 2, this hits everything, but does more damage and looks insane. For those that can never have enough fire.
Basic Gameplay
Razmi excels at dealing with large groups of foes. Special attacks 2 &3 can hit multiple foes read:everything at once, and up attack can as well to a lesser degree. She can even heal a good amount of health for just one bar too, making her a good all-around character. I am unsure yet if Razmi works well enough as a lone healer (she’s probably fine).
Glare works best for bosses, or targets that already have long waits between attacks.
Razmi’s major drawback is her small health pool. You’ll need to watch her health closely to know when to drop some healing.
She also has one of the lowest speeds of all the characters. Her attacks can take a long time to recharge if you blow them all at once. This also makes comboing harder.
Razmi’s minor drawback is that she doesn’t become powerful until you get three meter charges. Having your only source of healing eat the entire meter is a pain, and not to mention that you don’t get her devastating AoE attacks. She becomes much better later on.
Also note that because Razmi lacks a downward attack, she can not break guarded targets.
Combos
Unsure. With her slow speed, most of the time you’ll be saving Razmi’s attacks for when you’re able to use her special. Her up attack works well with other party members, but the recharge on her attacks makes comboing with her a pain.
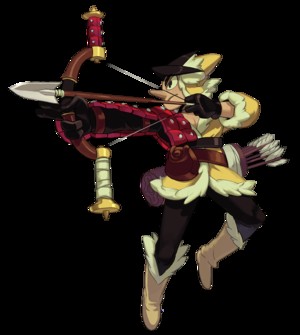
Zebei
Stats
- Health 1+ stars
- Attack 2 stars
- Speed 4 stars
Roles
- Primary: Airborne target damage
- Secondary: Burst damage
Recommended Position
The back.
Can be moved to the sides if another character needs to be in back.
Move List
Move Usage
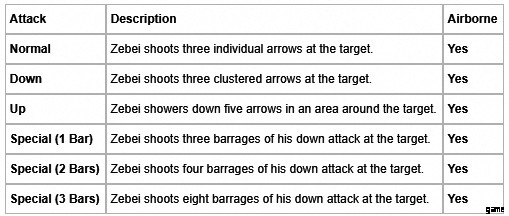
Normal Attack:Straight Shot
Zebei shoots three individual arrows at the target. These arrows do moderate damage. This attack very rarely hits multiple targets.
Down Attack:Cluster Shot
Zebei shoots three clustered arrows at the target. These arrows do slightly less damage than the normal attack. However, there’s a high chance that the attack will hit targets that are clustered together.
Picture 2 shows two targets being hit at once.
Up Attack:Spread Shot
Zebei shoots six arrows downward at the target. These arrows do slightly more damage than the normal attack. The main feature of this attack is how the arrows spread across the enemy’s side of the field. If an arrow collides with a foe’s hitbox, it will do damage well duh, that’s how games work. It can potentially lead to some arrows not hitting anything due to the spread.
Do note that an arrow can only hit one target. Once it collides with something (terrain or foe), it will not deal damage anymore.
Picture 1 shows how arrows can miss the targets due to the spread (the bat higher up can also evade the shot).
Picture 2 shows the shot angle of the attack.
Special Attack (1 Bar):Arrow Hail
Zebei shoots three barrages of his down attack at the target. The arrow cluster contains 5 arrows, for a total of 15 arrows shot.
Special Attack (2 Bars):Arrow Blizzard
Zebei shoots four barrages of his down attack at the target. The arrow cluster contains 5 arrows, for a total of 20 arrows shot.
Special Attack (3 Bars):Arrow Avalanche
Zebei shoots eight barrages of his down attack at the target. The arrow cluster contains 5 arrows, for a total of 40 arrows shot.
Basic Gameplay
The main use I find for Zebei is to deal with airborne targets. All of Zebei’s attacks will hit airborne targets without fail, allowing you to set up combos with ground based party members who can’t reach those targets. Use the normal attack to down lone targets, and the down or up attack to down multiple targets.
Zebei’s minor drawback is the simplicity of his kit. There’s not much potential to branch out and set up fancy combos that I’ve found yet. I find that it’s more efficient to only bring him out when I know I have to deal with airborne foes, as there are better options for facing only ground foes.
Combos
These combos focus on damage to airborne targets.
Icicle Shower
- Down Attack
- Up Attack
- Up Attack
(Attack with melee party members)
This combo is mainly here to help set up attacks for your other party members. Use down attack to knock down the airborne target(s), then follow up with up attacks to pelt everything on the ground. You can then use other party members to combo off of the downed target(s).
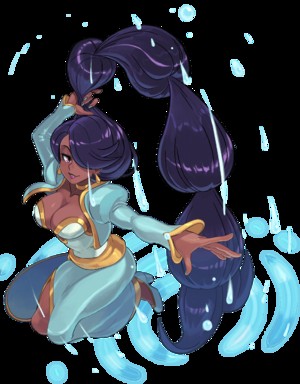
Thorani
Stats
- Health 1 star
- Attack 1+ stars
- Speed 3 stars
Roles
- Primary: Healer
- Secondary: AoE Damage
Recommended Position
- Front for ground battles.
- Sides if there are airborne enemies.
- Avoid the back.
Move List
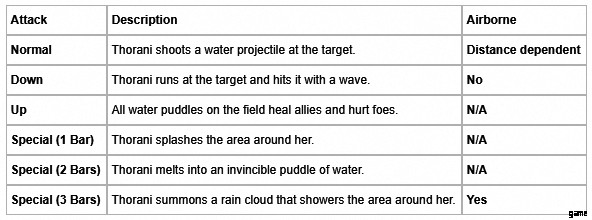
Move Usage
Normal Attack:Water Blast

Thorani shoots a single water projectile at the target. The puddles will form around your target and directly behind Thorani. Usually, one attack will create one puddle at the target and one behind you. I recommend using this move when you want to have an even spread of puddles around the field. This can hit airborne targets if there is enough distance between Thorani and the target.
Picture shows puddle distribution after three normal attacks.
Down Attack:Water Wave

Thorani runs up to the target and hits it with a wave of water. The vast majority of puddles will form around the target, with a few forming between the target and Thorani’s position in the party. Use this move when you want to surround the opponent’s side of the field with puddles.
Picture shows puddle distribution after five down attacks.
Up Attack:Sparkling Water
Thorani activates all puddles on the field, causing them to have two effects:
<オール>Any ally that touches a puddle (or is already touching a puddle) will instantly be healed for a decent amount of health. Most of the puddles that you’ll be using for healing will be near the party. However, you can activate Thorani’s up attack while another character is attacking a foe surrounded by puddles to heal that character while dealing damage to the foe.
Any foe that touched a puddle will take a moderate amount of damage. While the primary focus of this attack is to heal allies, this is also a good way to deal out some aoe damage across the entire field.
Pictures show both functions of the up attack.
Special Attack (1 Bar):Drizzle
Thorani shakes her hair and surrounds the area around her with puddles. This move is best used when you need to dish out a lot of healing. The best position to use this attack from is the front, as it covers the area where almost all movement will be happening (from both allies and foes). Using it in another position could create puddles that would never be touched.
Special Attack (2 Bars):Melt Away

Thorani melts away into a puddle of water, removing her from the field. She can not be targeted or damaged, and reappears about 5-7 seconds after the attack is used. The puddle automatically activates, letting you position a healing/damage puddle anywhere.
Special Attack (3 Bars):Rain Shower

Thorani summons a rain could for ~10 seconds that acts as a mobile active puddle. This means that any ally that moves past her (or is next to her) will be healed, and any foe that runs past her (or attacks her) will suffer damage. The damage and healing is reapplied once every second.
Once again, having Thorani in the front position will benefit you the most as everyone (friend or foe alike) must move past her to attack (excluding ranged attacks). Use this move as a better alternative to her 1 bar special, as it can output more healing than regular puddles can.
Basic Gameplay
Thorani excels at healing characters that are constantly attacking/moving. Therefore, she’s best for players that like to attack with characters continuously instead of attacking with every character all at once.
For a focus on healing:
- Have Thorani attack first.
- Use her normal attack, as the puddles land inside your party as well as in front of any foe you attacked.
- Remember to save your last attack to activate your puddles, so you can heal any ally about to attack.
- Use Special attack 1 for a quick burst of healing around the party.
- Use Special attack 3 for massive amounts of healing.
For a focus on damage:
- Use her down attack, as the puddles land mainly around the foe(s) you attack.
- Use special attack 1 to create a damage zone around the party.
Thorani’s main drawback is that she is an indirect healer. You have to plan on where your puddles will land and where your characters are moving in order to heal them.
Also note that because Thorani lacks a up attack, she can not break guarded targets.
Combos
These combos focus less of damage and more on healing.
Raging Stream
- Down Attack
- Normal Attack
(Attack with melee party members)
(While party members are attacking) Up Attack
This will heal all the characters that are attacking the target, while also dealing a small amount of damage. I recommend using this as your main form of attack, as it gives your party a constant source of healing.
Alternatively, you can replace your third attack with a normal attack if you don’t need to heal your party at the moment.
Pure Waters
- Down Attack
- Special attack 2
(Attack with melee party members)
By activating special attack 2 after using down attack, you can leave a large permanent puddle that can be used by other characters while they attack for easy healing. This also damages foes touching it.
Showers of Life
Special Attack 3
<オール>Use this when you need to heal every party member at once with no failure or puddle movement. By timing your attacks right, you can have your whole party run past Thorani first for 1 heal, then have her join the rest of the party at the target to constantly be healing them. Space out your attacks so you can hold your characters next to Thorani as long as possible. Since Thorani will be down one attack from activating the special attack, she will run back first. Use this to then heal your party as they run back into their positions.
This combo is slightly spotty, as the healing is only triggered once per second. This is more of a guaranteed way to heal the whole party or just use Ginseng.
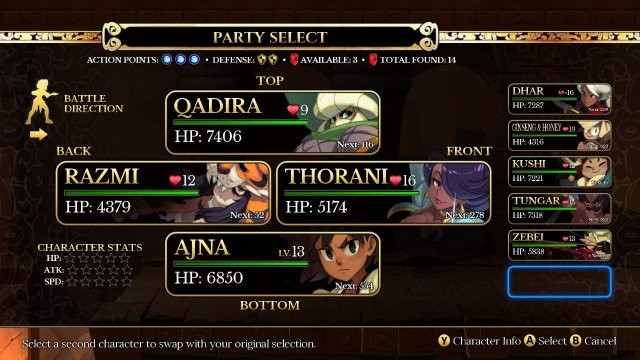
Qadira
Roles
- Primary:Damage
- Secondary:–
Recommended Position
- Any.
Move Usage
Neutral Attack:Shield Smash
- Qadira runs at the target and smashes into it. Since the hitbox for this attack is active untill the frame that she leans into her shield, you can usualy hit the enemy behind your target if you wait long enough.
- The follow up for this attack will have Qadira extend her shield out a bit farther as she bashes the target. This must be executed before she returns to her default animation.
- Both of these attacks will push the target back. Useful for trying to position targets.
- I personally use this attack when I want to focus on damage.
Down Attack:Sliding Uppercut
- Qadira slides along the ground into the target. This slide will actually send her behind the target.
- The follow up for this attack will have Qadira perform an uppercut on the target, launching it into the air. This must be executed before she fully stands up.
- Since the slide will send Qadira behind the target, the attack is very useful for pushing a target closer to the party. Follow up with a few normal attacks to knock it closer.
Up Attack:Skyward Smash
- Qadira runs up to the target and bashes it into the air. She’ll jump up with the target.
- The follow up for this attack will have Qadira slam the target back into the ground. This must be executed before she lands on the ground.
- I personally use this attack when I want to generate iddhi, as airborne targets generate more iddhi.
Special Attack (1 Bar):Saharan Smash
- Qadira rushes at the target and repeatedly slams into it. This will push the target quite far. This version hits 6 times.
- All of Qadira’s supers excel at pushing the target either closer or away from the party.
Special Attack (2 Bars):Unrelenting Force
- Qadira rushes at the target and repeatedly slams into it. This will push the target quite far. This version hits 9 times.
Special Attack (3 Bars):Shieldmaiden’s Charge
- Qadira rushes at the target and repeatedly slams into it. This will push the target quite far. This version hits 15 times.
Basic Gameplay
- Qadira is one of the best iddhi generating characters in the game, when you string together her Up attacks. She also deals a solid amount of damage, and her speed is very manageable despite being a 1 speed character.
- She’s a solid choice to have in your party.
Combos
- For iddhi generation, use a string of Up attacks. The bonus generated from hitting airborne targets is one of the highest in the game.
- For damage, use a string of Neutral attacks. Her Neutral attacks have the highest damage of all her non-special attacks.
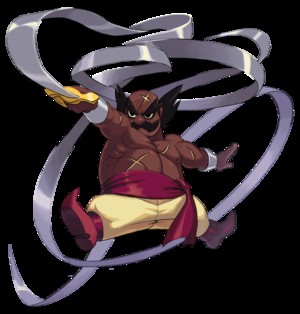
Tungar
Roles
- Primary:Damage
- Secondary:AoE Damage
Recommended Position
- Any.
Move Usage
Neutral Attack:Turban Slash
- Tungar runs up and performs a single slash at the target. This attack does not have a follow up attack.
Down Attack:1,001 Slashes
- Tungar runs up to the target and slashes around the entire area multiple times. This will hit all foes in the area, including airborne foes.
- One thing to note is that the meter build for this attack is low. Use this attack when you want to spread damage around.
Up Attack:Roundabout Slash
- Tungar runs up and slashes a target twice. The first slash swings long and low, and does moderate damage. With the second slash, Tungar whips his blade back at an upwards angle and knocks the target(s) upwards and towards the party. This attack happens about 0.3 seconds after the first slash. This attack can connect with targets that are halfway off of the ground.
- The important thing to remember about this attack is that it should not be spammed. Since the second slash keeps the target off of the ground, an Up attack executed directly after the first attack will not connect on the first hit. The second slash will still connect, but you will loose some damage since half of the attack didn’t connect.
Use this attack when you want to drag a target close to the party. See the combos section for characters that could benefit from this.
Picture shows just how close a target can be brought to the party.
Special Attack (1 Bar):Swordsman’s Spin

- Tungar runs up and slashes a target for good damage. This can hit multiple targets, but they need to be horizontally aligned. That means that the easiest way to line up targets is to wait for a target to attack, then use the Special attack as it runs in front of another target. This can be hard to achieve.
Special Attack (2 Bars):Sundown Spin
- The same as Special attack 1, but does ~90% more damage. The same targeting principles apply.
Special Attack (3 Bars):Sandstorm of Slashes
Tungar launches his blade out and swirls it around the entire field, dealing high damage. There are a few aspects of this attack to note:
- The damage for this attack is not calculated until Tungar ends his attack. Hits will register, but the damage will not be delt until the very end.
- The initial thrust of the blade does not deal damage.
Basic Gameplay
While that game only tells you about Tungar’s Down attack, Tungar only has two reliable AoE attacks. All his other attacks require the targets to be carefully aligned to hit multiple targets. His basic attacks also don’t have any follow up attacks, which makes him slightly weaker than other heavy damage dealers.
I honestly don’t know why Tungar would be a prefered choice. I would pick Dhar or Razmi over him, as both offer better flexibility in attack choices and better damage potential.
Combos
Into the Fire
<オール>
- Ginseng’s Special 3
Allows the healing effect of the attack to hit the entire party with no movement. - Thorani’s Puddles
Bringing the target closer to the party lets Thorani’s attacks create puddles inside the party. Use this for better healing.
Avoid using Razmi’s Special 3 with this, as it’s more effective to use her Down attack to achieve the same effect. Thorani’s Special 3 could also be used, but I believe that there are better uses for that many special meters.
Kushi &Altun

Roles
- Primary:Damage
- Secondary:AoE Damage
Recommended Position
- Sides.
Move Usage
Unmounted
Neutral Attack:Protector’s Punch

Kushi runs up and punches the target. This attack can be followed up with additional Neutral attacks to extend the horizontal range of the attack.
Down Attack:Dotterel Dive
Kushi sends forth Altun, who then dive bombs the area around the target. The horizontal range of this target is entirely dependent on where Kushi is standing. If you use this attack after using a Neutral attack, there is a chance you could miss targets directly behind you see picture 2).
The optimal usage of this attack is to target the foe in the front of the field while standing with the party. This ensures that you will receive the most damage from the attack.
This attack can be followed up with additional Down attacks to have Altun dive bomb the target again. Note that Altun will aim for the current position of the target.
It also looks great when you align Altun just right.
Up Attack:Mount
Kushi jumps up and grabs onto Altun’s talons. This has two effects:
- Changes attack mode
You’re attacks are replaced with different attacks while flying. - Disables Blocking
When riding Altun, Kushi is unable to block. This can be dangerous if Kushi is at low health, or if you are fighting a foe with high damage attacks. Being hit while flying will dismount you from Altun.
Mounted
Neutral Attack:Harrier Howl
Altun flies up to the target and screeches, hitting everything in a large range both horizontally and vertically. This attack should be prioritized if there are a large amount of foes on the field.
Down Attack:Unmount
Kushi drops back down to the ground. This has two effects:
- Changes attack mode
You’re attacks are replaced with different attacks while on the ground. - Enables Blocking
You are able to block again once on the ground. You can even have Altun sent out and you will still be able to block.
Up Attack:Soaring Smash

Altun soars high into the sky, removing Kushi from the field. After ~7 seconds Altun will smash into the target, dealing good damage to all targets in a large area.
The special aspect to this attack is how it can be powered up depending on the amount of attacks remaining when Up attack is executed.
Basic Gameplay
So the first thing you’ll notice about Kushi is that she lacks Special attacks. I believe this is simply due to the fact that she already has a second set of attacks, and also because her Mounted Up attack is like a mini-special attack. This only hinders her slightly, as most of her moves already have a good damage output.
Another drawback is that she can not block while flying. Flying lets you perform two of your most damaging attacks, so you will be flying quite often. Being attacked while flying will also dismount you, which will waste an attack to remount Altun. You can avoid being knocked off if the foe’s attack does not extend high up enough to hit Kushi (credit:glovetheglove). This is also why you should keep Kushi on the side of the party, as long horizontal attacks down the middle of the party will hit both the front and back.
You should bring Kushi into battle for when you will be dealing with multiple foes. Out of her 3 AoE attacks, two of them have a large horizontal and vertical range that can deal high damage.