7 Days to Die – 基本ガイド (力学、プレイスタイル、略奪)
7D2D の基本的な仕組みの概要と、この驚異的なゲームで初心者プレイヤーがより早く足を踏み入れるのに役立つプレイ スタイルとヒントとコツ。 Minecraft と Left For Dead が出会う無限の多様性を探索してください。
基本ガイド
ゲームのセットアップと開始
私の 7 Days to Die (7D2D) ガイドへようこそ。このガイドは、初心者プレイヤーが初期のゲームでの課題を解決するためのロードマップを提供し、将来の目標 (クラフト、ベース、ロールプレイングなど) を提供することを目的としています。
7D2D のインストールと起動に成功したと仮定すると、メイン メニューには多くのオプションが表示されます。一部のサーバーはナビゲートが非常に難しい場合があるため、現時点では「マルチプレイヤー」ではなく「新しいゲーム」を選択してください。好みに合わせてアバターを作成しますが、これはすべてのシングルおよびマルチプレイヤー ゲームであなたのものになることを忘れないでください。
これが完了すると、マップを選択するオプションが表示されます (「Navezgame」から始めると、簡単に学ぶことができます)。右側にはたくさんのオプションがあります。この段階では、このゲームは最初は十分に挑戦的であるため、5 分ごとに死んで進行状況がすべて失われることを心配することなく、最も簡単な難易度を選択してください。詳細設定で、「Keep Toolbelt on Death」も選択します。死に備えて在庫を維持するかどうかはあなた次第です😉しかし、危険を味わうためには、それをやめてください. XP を 300% に増やし、ゾンビの夜間速度を「ジョギング」に落とします。確信が持てない限り、他の設定には触れないでください!!!
画面左側でゲームを起動します。おめでとう、あなたはサバイバーの道を歩んでいます!
ゲームの基本
1.コントロール
すべてのコンピューターは異なりますが、基本的なコントロールは他の同様のゲームとほぼ同じです。キーボードのエスケープ (Esc) ボタンを押して一時停止メニューを開き、コントロールを確認してください。キーボードがゲーム内で希望どおりに構成されていることを確認してください。手元に置いておくべき重要なもの:方向 (WASD)、アクション ボタン ('E')、リロード ('R')、ツール ベルトへのショートカット (1234567890)、ツール ベルトの次のアイテム ('Q')、ステルス (「X」)、ジャンプ (「スペースバー」)、およびインベントリ (左タブ) とマウス ボタンをアクティブにします:発射/ヒット – 左クリック、エイム – 右クリック、およびズーム – ホイール。好きなように自由に設定してください。ただし、基本的なキーに慣れていることを確認してください。
快適になったら、セットアップに合わせてグラフィックをスケーリングします。最善の方法は、ゾンビがシステムに与える影響を測定するまで、許容できる最低レベルで実行することです.
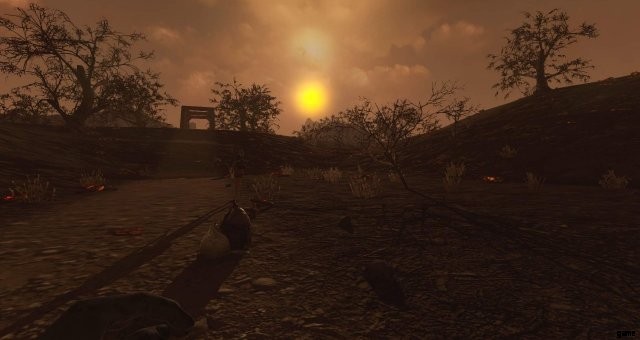
ゲームに戻り、スポーンした場所を見回してください。ゲームには、森林から砂漠、雪に至るまで、さまざまな環境 (「バイオーム」) があります。さらに、いたるところに古い都市や町が点在し、マップの境界には放射能エリア (即死…) があります。道路はすべての入植地、トレーダー ポスト、ほとんどの建物をつないでいます。未舗装の道路は一般に商人や小さな家屋に通じていますが、舗装された道路は「都市」を結んでいます。
ヘッドアップ ディスプレイ (HUD) に多くのものが表示されます:時計と日番号 (最初は 1 日目)、および画面の下部中央に沿ってツール ベルトにある多数のアイテムと、一番上にコンパスレチクル。左下は体力とスタミナです。デフォルトでは、体力は時間の経過とともに増加しません。食べ物を食べてゆっくりと回復するか、いくつかの薬を使用するか、特定の才能ポイントを選択する必要があります.スタミナはかなり早く回復し、タレントでさらに増やすことができます。ゲームのレベルごとに、体力とスタミナが 1 ポイント得られます。
2.死ぬ
体力が 0 以下になると死亡します。単純。以下を含む多くのことが健康を損なう原因となります:
- ゾンビの攻撃
- ゾンビ動物 (オオカミ、コヨーテ、ハゲワシ、クマ)
- 非ゾンビ動物の攻撃 (コヨーテ、オオカミ、クマ、イノシシ、スノー キャット)
- 高所からの落下
- 洞窟
- 爆発 (地雷、手榴弾、ロケットランチャーなど)
- トラップ
- PvP サーバー上の他のプレイヤー…
空腹または喉の渇きのレベルが 0 を下回ると、死亡します。実生活と同じように、本当にシンプルです。 IRL とは異なり、食物と水のレベルはほぼ同じ割合で低下するため、毎日食べたり飲んだりする必要があります。のどが渇いたり空腹になるとスタミナが低下し、スタミナが 0 になると死亡します。
高所から落下すると、足を捻挫し、足を骨折し、健康を失い、死亡する可能性があります。タレント、本、装備で落下によるダメージを相殺できます。
あなたが死亡した場合、開始クエスト中にゲームの開始時に作成したベッドロールにリスポーンします。ベッドロールをなくしたり、死亡時に別の場所 (基地など) にスポーンしたい場合は、植物繊維から新しいベッドロールを作成してください。
3.紹介クエスト
入門クエストは、新進気鋭のプレイヤーを始めるために必要な最小限のクラフトとビルドを紹介します。材料を収穫するには、マウスの左ボタンを使用して草、植物、木、丸太、岩を「ヒット」し、植物繊維、木材、石を取得します。 Tab を押してインベントリを開き、これらの材料を使用して石斧を作成します。より多くの植物繊維を集めて裸体を隠す服を作り、狩りをしている間は鳥の巣に注意して矢の羽を集めましょう。斧で巣をハッキングして、さらにいくつかの羽を生み出すこともできます。要求されたすべてのアイテムを作成し、暖炉、木製ブロック、ベッドロールをツール ベルトに配置して配置し、それらを選択して、マウスの右ボタンを使用して必要な場所に配置します。木製のブロックに近づき、マウスの右ボタンを押したままにして、石の斧を使用して木製のブロックをアップグレードしました。
おめでとうございます。これで、基本的な石器、武器、および基本的なクラフトの知識が得られました。また、タレント画面で使える 4 ポイントもあります (これについては後で詳しく説明します)。ゲームは、数メートルから数キロ/マイル離れた最も近いトレーダー前哨基地にあなたを導きます.非常に近い場合を除き、その方向に向かう前に時間をかけてください.
4.ゲーム変数
注意すべき要素がいくつかあります:
- ゾンビは愚かです。彼らはあなたへの最速の道を見つけようとします。これには、壁を通り抜けることも含まれます…
- ゾンビは、プレイヤーの動きに基づいてプレイヤーを「追跡」します。ゾンビは、視界を失った場合、プレイヤーをターゲットにする前に、最も近い「プレイヤーが知っている」場所に向かいます。
- ゾンビは騒音に惹かれます。影響を受ける領域はさまざまです。絶え間ない大きな騒音 (採掘など) は叫び声を引き付ける可能性があり、これは非常に悪いことかもしれません…).
- ゾンビに噛まれると感染する可能性があります。アーマーとハチミツ/ハーブ薬/抗生物質の在庫が揃うまで、近接戦闘は避けてください。
- 病気はマイナーな特徴ですが、間違った時期に発見されると致命的になる可能性があります。可能であれば、危険な食べ物を食べないようにしてください (濁った水、カビの生えたパン、古いシャム サンドイッチなど)。
- 環境と天候は、体温に影響を与えます。最適な範囲外では、食物と水の使用量が増加します。濡れていることは、暑い環境では役に立ちますが、寒い環境では役に立ちません (現実を考えてみてください…)。
- ゾンビは熱や熱を発生するものを嫌います。これには、鍛冶場、キャンプファイヤー、トーチ、燃焼バレル、ケミストリー セットが含まれます。これらのクラスターは、叫び声や他のゾンビを引き付ける「ヒート アイランド」を生み出します。可能であれば、電化製品を使用してベースの熱を下げてください。
- 毎日食べたり飲んだりする必要があります。理想的には、病気を避けるために、ボトル入りの水または醸造飲料を飲み、缶詰食品を食べる.より良い食事を作るためのレシピを集める
初心者向けのヒント
1.才能
才能には 5 つのセットがあります:
- 知覚
- 強さ
- 不屈の精神
- 敏捷性
- 知性
タレントの各セットには、それが専門とする独自の武器と、その他の利点があります。才能の広がりから、このゲームが専門化とチームワークを促進することは明らかですが、各セットから独自のビルドを選択して選択できるため、さまざまなオプションがさまざまなプレイ スタイルを提供します (一部のビルドとロールプレイスタイル)
最初に、筋力と不屈の才能にポイントを入れることをお勧めします。
- 棍棒で敵の頭を殴る – 1 ポイント
採掘 – 鉄の道具の作成と収集の増加 – 1 ポイントのロックを解除します。
- 体力の再生 – 1 ポイント
- ランニング時のスタミナの減少 – 1 ポイント
今のところ、Strength と Fortitude の値を増やすためにポイントを投入する必要はありませんが、XP 乗数が高いため、すぐに多くのポイントを消費できます。ショットガンは弾薬を作るために真ちゅうを必要とせず、クラブは最初から定期的に頭を粉砕するための最良のツールであるため、最初はショットガンとクラブに特化することをお勧めします.別の良い支出は、より多くのレシピが見つかるまで生き残るための基本的なレシピのロックを解除するための、料理の 1 つのポイントです。
最初の 40 レベルでポイントを使用する方法に関するその他の提案については、以下のロール プレイング セクションの「オールラウンダー」ビルドを確認してください。
2.書籍
多くの建物やその他の場所には、見つけることができる本があります。ほとんどの場合、それらは本棚、ファイリング キャビネット、机、引き出しの中にありますが、ごくまれに木枠、ゴミの山、チェストの中にあります。これらはトレーダーからシークレット スタッシュ セクションでプレミアム価格で購入することも、クエストの戦利品として入手することもできます。
本には、ボーナスの才能とスキルが 7 巻セットで含まれています。 7 巻すべてを持っていると、巻数に応じてボーナス タレントが付与されます。詳細については、タレント画面の本のセクションをご覧ください。経験豊富なプレイヤーの中には、最初の数日間本を探すのに費やす人もいますが、この段階ですぐに死んでしまう可能性がある初心者プレイヤー向けではありません!他の本、回路図は、鍛冶屋、ツールベンチ、ショットガン、さらにはジャイロコプターなど、才能を発揮できるほぼすべてのアイテムの作り方を教えてくれます!そのため、一部のタレントは、ゲームの後半で冗長になり、それらのポイントがロックを解除するすべてのものを作成するためのすべての回路図を見つけることができます.これにより、Intellect のタレントを持たないプレイヤーが、最終的にゲーム内のすべての建築アイテムと乗り物をアンロックできるようになりますが、これらのタレントが与えるボーナスはありません…特定のアイテムの製作をアンロックする他のすべてのタレントにも同じことが当てはまります。トレーダーは「グランパの忘却の解決策」のバイアルを販売して、才能をリセットできるようにします。
本と回路図は、世界でランダムに生成された戦利品です。 Xp または再販価値がはるかに高いため、誤ってそれらを紙に「スケープ」しないように注意してください。
3.アーマーに関する注意事項
- アーマーはあなたの味方です。持てば持つほど、受けるダメージが少なくなり、死亡する可能性が低くなります。各ポイントは、ヒットごとに最大 1% 少ないダメージに相当します。それがなければ、あなたはすぐに死ぬでしょう…
- 鎧には重装と軽装の 2 種類があります。 There are specialty points in Fortitude and Agility to enable you to make them, and to offset the disadvantages in speed and stamina regeneration associated with using them.
- Each type of armour has different classes.
- Heavy:Scrap, Iron, Steel, SWAT.
- Light:Padded, Leather, Military.
- Military armour and Steel armour require ‘Parts’ from scrapped armour of the same type of otherwise found in the world as loot. Steel and Military armours also require schematics to build them.
- Use the best of any armour you find in the world, or craft yourself. At present, there are no advantages or disadvantages to wearing ‘sets’ of armour beyond the visible stats. Mix and match what is best for you.
- SWAT armour can’t be crafted at the moment but helmets can be found in the world and Traders.
4. Key points with Stealth
- Stealth is a major advantage in the early game and even with no extra points in Agility provides a 2x bonus to any attack if the zombie/animal hasn’t noticed you yet. In the early game, it can provide a crucial advantage. Play styles such as the “Ninja Assassin” and “Hunter-Gatherer” both rely on Stealth early on.
- When in stealth mode, many variables affect how ‘stealthy’ you are (ie. how much less noticeable than ‘normal’ you are):Light &shadows, time of day, armour type, armour mods, tool use, movement speed, talents, books, zombie vigilance, zombie line of sight
- Try to approach zombies from behind if they are not asleep.
- Armour increases your noise. The heavier, the louder. Padded armour doesn’t increase noise, but is much less strong than other types.
- Some armour mods can decrease your noise.
- Stealth doesn’t work on blood moon horde nights as the horde can find you anywhere you are.
Looting for Beginners
In the beginning, everything seems useful and essential. In truth, many things are redundant by mid-late game as loot accumulates quickly. While dropping those sewing kits or lead items may seem like a waste, I’m going to run you through the main sources of essential components and other ways to get them.
Starting out, your main focus will be getting food, and finding enough essentials to start a basic base for the first horde night (yes, it might be at the end of day 7, but it arrives sooner than you expect!). Priorities for the first week:
- All food items &drinks (these are your lifeline in the early game until you have a decent stockpile).
- Finding a pot and metal grill for your campfire.
- Wood, stones and clay for your base.
- Any iron tools (especially a pick axe!).
- Wood/iron for spike traps.
- Clothing suitable for the climate (to avoid increased food/drink consumption).
- Surviving until day 8.
If you find any guns, use them until you find those you want to specialise in. You can’t afford to be picky early on, and if you are more experienced, you won’t need this guide to direct you! Role playing aside, a survivor just needs to survive.
There are 24 fundamental components, that cannot be made from anything else. These are:
- Small Stones
- Iron
- Lead
- Nitrate
- Oil Shale
- Charcoal
- Clay Soil
- Wood
- Plant Fibres
- Dirty Water/Snow
- Brass (from Radiators, trophies, candlesticks, and doorknobs)
- Plant Seeds
- Metal Springs (from cars, beds, sofas and some electrical appliances)
- Plastic Scraps (many sources)
- Bone (animals, rotting corpses, trash…)
- Food items (fresh meat, fat, fruit, vegetables etc.)
- Motors
- Steel tool Parts
- Motor Tool Parts
- Weapon Parts
- Armour Parts
- Sewing Kits
- Bottles of Acid
- Headlights
All other items can be made from a combination of these using the appropriate tools and talents/books/schematics. As such, once you have the relevant tools and knowledge, the actual scavenging is a matter of preference where many items are redundant and can be scrapped.
- The first 10 items on the list can be readily mined/found in the world. Some biomes contain more of these than others. Most can be ignored while looting to save on precious inventory space while in towns and cities.
- Brass is a scarce commodity but can be obtained by melting down radiators from house walls and cars, brass candlesticks, brass doorknobs, brass trophies and Dukes Tokens. Ideally, do not scrap these items to get the most from them (scrapping loses 25% of the total resource, rounded down). Brass can also be found loose as loot, and wrenched from brass lamps and from door if you find the relevant book.
- Bullets are easier to make than loot in large enough quantities needed to survive. You will need to make gunpowder, brass bullet casings and lead bullet tips for most ammunition types then ‘construct’ them at the workbench.
- Shotgun ammo is different and needs paper, gunpowder and shotgun pellets. The lack of brass makes this of real benefit for much of the game.
- Gunpowder is slow by hand, but much faster (and more economical!) with a chemistry set, and best with 1 point in Yeah Science! to benefit from bulk building with 800 apiece of nitrate and coal to make stacks of 1000 gunpowder.
- Wood is easy to find by cutting down trees.
- Motors can be found sporadically in vehicles you wrench into pieces and garages.
- Slain animals, zombie or alive, can be cut apart with knives (or other tools for a lesser yield) to obtain fresh meat (rotten if from zombies/corpses), bones and animal fat. The yield can be increased with talents (but it’s not all that worth it at the moment to be honest…)
- Regular looting will reveal many sources of plastic and other items that can be broken down as needed or kept in their original form if deemed valuable enough (eg. Medical kits and bandages, tinned food, ammunition etc.).
- Lead items should not be scavenged as lead is easily obtainable from mining in larger quantities even in the early game. The same applies to coal and nitrate in most cases. Iron, as it is so abundant in both looting and in mining, may be kept. Many items wrenched then produce, or scrap to, iron while exploring.
- Bottles of acid are used to make wheels and a few high level food items (don’t ask me… I didn’t write the recipes…) so few are actually needed. They do sell for a reasonable price however.
- Headlights are used to make some vehicle accessories, lanterns and spotlights. They also sell for a reasonable amount.
- Clothing can be easily scrapped to cloth, as can excess bandages.
- Low level (1-2) armour, steel tools and weapons should be scrapped for parts or resources as the value of each piece is relatively low.
- Higher level items (3+) should be repaired and sold.
- Adding mods to items increases their value as well as saving inventory space.
Keep your eyes open for storage mods to extend your carrying capacity and avoid being burdened. With the right mods on all clothing (pockets) and armour (storage packs) all burden can be alleviated without putting points into Pack Mule in the early game. In the late game, points in Pack Mule allow alternative mods on armour to boost effectiveness.
Base Building and Design
When building your first base, stay simple to begin with. You can always build a bigger, better one later on. The world is your oyster and if you can imagine it, you can probably make it!
1. Basic Starter Base
The following basic base model shouldn’t take more than 2 game days (2 hours IRL) to obtain all the components, make the parts, and do the building. It’s based on a design by *** which in turn is inspired by roman watchtowers. Simple but very effective. It can be expanded as needed.
Build a shovel and make a 6×6 hole 1 tile deep. This should give you lots of clay soil (600+). Hack apart bounders or mine stone underground until you have about 600 stone then combine with the clay to make ‘cobblestones’. 4x cobblestone can be made into a cobblestone block which is much stronger than wooden blocks. They can be easily upgraded into flagstone blocks with 10 cobblestone later on, and then concrete when you have obtained it. Fill the 6×6 hole with 36 of the cobblestone blocks, then build up 4 walls leaving space for a doorway. Build a door from wood (or iron is better if you have it). Ideally, you want the walls to be 5 high, though 4 is enough. Build a ladder from wood to climb up and down.
Add a ceiling to your new base with more blocks, leaving space to access your ladder. Consider leaving some space to provide a line of attack to any zombies that get in to your base and start climbing the ladder. Build a few Secure Wooden Chests (10 wood each) to store your items safely in your base as anything left out will disappear after a few minutes. Build wooden bars (not the central ones!) and place them around the top of your wall so you can fire down on enemies. Add more bars in front to prevent you falling off (happens easily during blood moon nights)!
Make a trapdoor from wood (or better iron!) and upgrade it fully to cover up your ladder. Make a roof from more blocks at least 3 blocks above the 1st to allow easy space to move. You can alter the shape of the blocks by holding the ‘R’ key and selecting the shapes. Use the ‘plate’ option to have more overhead space. Make wooden spikes and place them all around your walls expect for the front door to encourage the zombies to attack from that direction alone. Upgrade everything you can with more cobblestone (priority to the first two levels of blocks in your walls), mining more stone and clay as needed. This should be sufficient for the first few horde nights. Expand defences and upgrade the walls periodically.
To defend, use a combo of bullets where you have them, stone arrows otherwise, and any junk turrets you find to focus fire on the front door, and later on the ladder. Avoid melee as the shear number will quickly overwhelm even experienced players. Breaking the ladder will encourage the zombies to attack your base to bring the building down…
2. Keys to a good base
Location, location, location
- The more central your base, the easier it is to go looting to nearby cities. However, on multiplayer servers with free-for-all rules, this may make you a target…
- Consider a site close to a sizeable city and nearby to a trader for ease of access. Makes questing much more enjoyable!
- Sheer cliffs prevent zombie spawning, so a location with one entry point and vertical cliffs on 3 sides around is ideal for a horde base (as long as they can’t jump down onto you!)
- Consider the biome you want to base yourself in. Forest biomes are much more forgiving than desert and snow biomes, though the abundance of oil shale and other natural resources in the desert biome may offset this somewhat.
- Naturally occurring or artificial islands can be used to slow the movement of zombies and add another layer of protection to bases.
- Zombies can climb ladders!
- Somehow the zombies also home in on the weakest section of your base. Use this to plan where you want the zombies to attack by reinforcing other areas more and focusing your defences.
Building tips
- Build up, not down. Zombies can dig to you if it’s the easiest path to get to you… but they can’t fly (except those damn vultures!) so build UP!
- Zombies will path along the line of least resistance, so fix you walls after each attack to avoid weak points they will home in on.
- Zombies don’t like spikes and will avoid them (more or less) if they can. Use them liberally. However, you don’t get points for spike kills…
- If using electrical traps such as Shotgun and SMG turrets, blade traps and more, be sure to put points into Intellect to gain experience from these kills. 5/5 in mechanical expertise gives a total of 50% of the Xp for just watching the traps do the job for you!
- Upgrade everything periodically. The strongest blocks are steel upgraded from reinforced concrete. A fully upgraded block will cost at least 20 cement and 10 steel (86 stone, 200 iron scraps and 100 clay soil in raw ingredients).
- If zombies can’t find a clear way to get to you, or if the path is too difficult to overcome, they will simply attack the walls and any supports you have to try and bring the building crashing down. Unless you have an external building supporting your base (eg. ***) then you are better off giving them a clear path to follow.
- Some buildings make great bases if appropriately adapted. These include unfinished skyscrapers, apartment complexes, and military complexes. Use your imagination to create an appropriate base.
- Plan ahead. Whether it’s plans to deal with cops, screamers, or mid-late game demolishers (they like to go ‘boom’ and destroy walls and traps alike…), there is no one solution. Check out the many Youtube videos on the topic for ideas and further tips!
3. Expansion ideas
- Add a 2x2x2 moat and slope the sides to make it easy to walk into but steep to get out of. Fill with spikes (wooden or iron). Ring your base and add a bridge or two for you! Bonus points if you fill it with water (slows zombie movement) using a bucket.
- Add electrical lights around the outside and inside that only light during hours of darkness using timed electrical relays
- Set up external walls and ditches to force attacking hordes to pass through a network of traps. Bonus if you add iron bars over the top to fire down through. Double bonus for making iron cages to shoot at vultures easily.
- Make a dedicated horde base away from your crafting areas. This might be a single level with traps and other defences, or a tower with layers of defences going up level by level. How long can you survive on a massive horde night with 64 zombies per wave?
- Add ever greater rings of walls with layers of spikes between them and pillars to fire between. Hats off to Vedui for the inspirational videos showing this idea.
- Build your base on a remote cliff with on access side. Burrow down into the rock and create your own underground factory and extensive defences from both above and below.
- Build a helicopter/chopper pad on the roof of your base with a launch ramp to escape if the horde breaks through!
- Build an underground escape tunnel with a getaway vehicle connected to another safe house and further defences!
- Turn your base into a fortress with turrets, ramparts, murder holes, and use only wooden bows, crossbows, spears and other melee weapons to defend against the horde! Bonus points for building it to scale based on a real castle! Double bonus for using only stone blocks and no concrete or steel!
Role Playing and Weaponry
While absolutely not necessary to play the game, when starting a game for the second or third time, or just planning your build, it can be fun to approach it from a role playing perspective. This can be as a member of a team in multiplayer (essential on higher difficulties in the first weeks as each member is dependant on the others for survival), or as a solo character playing a particular style. Each role is my own invention for others to use as they will. I have allocated points up to level 40 without particular for books and schematics found in the world which add to the uniqueness of each character. Each character has a melee weapon and/or medium range firearm and/or long range weapon for a total of 2/3 per character.
1. The All Rounder
This is the one man, jack-of-all-trades, solo adventurer with his/her base of operations and a range of talents to go exploring, find food and trade and generally survive. Talents are in many skill sets to enable a variety of tasks to be performed as needed, and any tools needed to be made. A combo of shotguns and rifles takes advantage of the relative abundances of these munitions in the world and ease of fabrication, while the club backs them up, just in case…
- Perception (3):Deadeye (2), Lockpicking (1), Animal Tracking (2), Lucky Looter (1), Salvage Operations (1).
- Strength (5):Boomstick (3), Pummel Pete (3), Sexual Tyrannosaurus (4), Pack Mule (1), Miner 69’er (4), Mother Lode (4).
- Fortitude (1):Living off the Land (1), Healing Factor (1), Rule 1 Cardio (1).
- Intellect:(4):Advanced Engineering (2), Grease Monkey (1), Yeah Science (1).
2. The Base Builder
No fooling around for this guy/gal. Serious about building, mining, and crafting, the Base Builder heavily specialises in Intellect for crafting and a little in Strength to enhance resource acquisition. Predominantly armed with twin Scrap Turrets, backed up with a Shotgun and Sledgehammer, the Base Builder is a mean powerhouse of destruction that didn’t leave the welcome mat outside the door. Cross that bridge at your peril.
- Strength (3):Boomstick (1), Skull Crusher (2), Sexual Tyrannosaurus (3), Miner 69’er (3), Mother Lode (3).
- Fortitude (1):Living off the Land (1), Healing Factor (1),.
- Intellect:(10):Turret Syndrome (5), Advanced Engineering (3), Yeah Science (2).
3. Ninja Assassin
Trained by the legendary masters of Japan before the war, the Ninja Assassin relies on Stealth, Blades, and Archery. Proficiency in long range fire arms is also encouraged for more challenging foes. With a heavy emphasis on the Agility skill tree, with select Perception perks for explosive effect, the Ninja Assassin’s primary mode of gaining experience is thorough contract clearing of buildings and package acquisition with high stakes. Lethal, but almost invisible, and ruthlessly fast, he/she is most hated by zombies. Silencers are recommended for all firearms.
- Perception (3):Deadeye (2), Lockpicking (1), The Infiltrator (2), Animal Tracking (2), The Penetrator (2).
- Fortitude (1):Living off the Land (1), Healing Factor (1).
- Agility (7):Archery (3), Deep Cuts (3), Light Armour (3), Parkour (3), Hidden Strike (4), From the Shadows (3).
- Intellect:(1):Advanced Engineering (1).
4. The Titan
Need a one man army? The Titan is here for the task. Be it pummelling zombies with fists of steel, or tearing into zombies with streams of bullets, this bit of bad news has come to Navezgame. The Titan balances Strength and Fortitude with heavy armour, insane health regen and stamina control. Add in a flaming sledgehammer for effect… Unleash the untamed beast!
- Strength (5):Skull Crusher (3), Sexual Tyrannosaurus (4), Master Chef (1).
- Fortitude (8):The Brawler (4), Machine Gunner (2), Living off the Land (1), Healing Factor (4), Rule 1 Cardio (4).
- Agility (1):Flurry of Blows (1).
- Intellect:(1):Advanced Engineering (1).
5. The Hunter-Gatherer
Falling back to the “caveman vs the world” approach, the Survivor places their trust in the wild. Paranoid and basic in their needs, hunter-gatherers have stuck with the basics because they work. Spears, Archery and occasionally a Club, the nomadic ways serve this survivor well in finding prey and lasting long after lesser men die of hunger and thirst in the wilds. In tribes, the hunter-gatherer uses rifles to bring down more prey with eagle-eyed precision and cook the most sumptuous meals to sustain the tribe.
- Perception (5):Deadeye (3), Javelin Master (3), Animal Tracking (3).
- Strength (3):Sexual Tyrannosaurus (3), Master Chef (2), Miner 69’er (1).
- Fortitude (5):The Huntsman (3), Well Insulated (3) Living off the Land (3), Healing Factor (3), Rule 1 Cardio (2).
- Agility (1):Archery (1), Hidden Strike (1).
- Intellect:(1):Advanced Engineering (1).
6. The Urban Looter
A scavenger by nature, this creature excels in urban environments, ripping everything of value from home after home like a materialistic locust. While a parasitic entity by definition, this role doesn’t only destroy but produces essential components needed by others and himself to outfit a strong base. Armed primarily with a wrench (grade 6 if possible, and fully modded) as well as a shotgun and scrap turret, the Urban Looter can break into anywhere and take everything. Never the less, this character is more a lover than a fighter!
- Perception (6):Lockpicking (1), Lucky Looter (4), Salvage Operations (3).
- Strength (5):Boomstick (1), Sexual Tyrannosaurus (4), Miner 69’er (2).
- Fortitude (1):Healing Factor (1).
- Intellect:(6):Turret’s Syndrome (1), Advanced Engineering (2), Grease Monkey (1), Yeah Science (1).
7. The Quester
Living for the next great deed, and dedicated to uplifting the needs of the post-apocalyptic people, for a price of course. Questers journey from trader to trader taking on the most challenging of tasks for the greatest loot and glory and cash. From buried treasure to levels of slaughter that would quell most pirates, the Questers travel near and far to make the most of their calling. As such only the smartest and most fortuitous survive. Armed with stun batons, dual turrets, and long rifles, they are fearsome foes.
- Perception (3):Deadeye (2), Lucky Looter (3), Salvage Operations (2).
- Strength (1):Pack Mule (1), Master Chef (1), Miner 69’er (1).
- Fortitude (1):Healing Factor (1).
- Intellect:(10):Electrocutioner (1), Turret’s Syndrome (5), The Daring Adventurer (5), Advanced Engineering (2), Grease Monkey (3).
8. The Masters (Multiplayer Co-op only)
The ultimate leaders and traders, they make their mark pushing others to do better and be better, and make themselves richer doing so. Ultimately, The Master can only do so if others are around to enable their benefit, but alas, it is a lonely world. Eminently proud and reluctant to get their hands dirty, the masters employ a turret and .44 Revolver to handle any unpleasantness that comes to pass, as well as having the sweetest rides around, they are also medics and can sweet talk everything they need otherwise… The Master wears only fine suits.
- Fortitude (1):Healing Factor (1).
- Agility (3):Gunslinger (2).
- Intellect:(10):Turret’s Syndrome (4), Better Barter (5), Charismatic Nature (4), Physician (5) Yeah Science! (4).