Lost in Blue 初心者向けガイド:神秘的な無人島で生き残るためのヒント、コツ、戦略
これを以前に聞いたことがあるなら止めてください:商用飛行機が不思議な事故に見舞われ、神がどこにあるかを知っている島に墜落し、生存者は島の神秘的で悪意のある実体と戦うために団結しなければなりません.はい、これは以前に聞いたことがあります。 It's Lost... in Blue.
ロスト イン ブルー まさにその通りです - それは飛行機墜落事故の幸運な (不運な?) 生存者の役割を引き受けるサバイバル シミュレーション スラッシュ RPG です。ゲームを始めて数秒で、突然変異した人間 (実際にはゾンビに似ています) に襲われます。暴力の必要性だけに駆り立てられた、無知で貪欲な獣です。

この緑の地獄で、新しい家で生き残るだけでなく、そこで繁栄し、いつかそれを支配することさえできるように、自分自身を作り、構築し、訓練します. Volcano Force が発行した Lost in Blue は、Google Play ストアと App Store の両方で入手できます。
Lost in Blue は非常に直感的なゲームであり、かなり長く複雑なチュートリアルがあります。ただし、島のミュータントについてさらに詳しく知りたい場合は、Lost in Blue 初心者向けガイドをお読みください。 役立つヒント、コツ、戦略をご覧ください!
サバイバルのために戦う
Lost in Blue で身を守ることができなければ、長続きしません。ミュータントの大群があなたを捕まえようとしているだけでなく、野生生物でさえ、ねじれているように、あなたの進歩を止めようとしています。生き残って次の日を見るには、体と精神の両方を磨き、致命的で強力な武器を作る必要があります.
基本戦闘
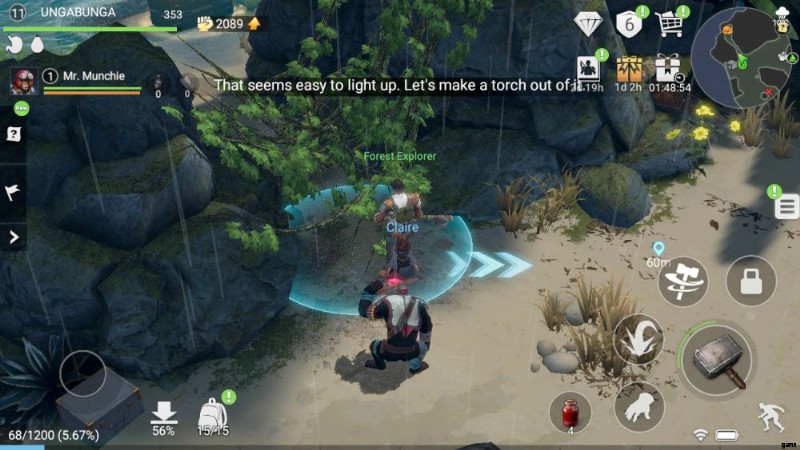
Lost in Blue の戦闘は非常にシンプルです。 画面の右下に、装備している武器の大きなボタンがあります。 通常攻撃を実行するタップ 自動ターゲティングしたものは何でも。武器の種類にはそれぞれ長所と短所があることに注意してください。
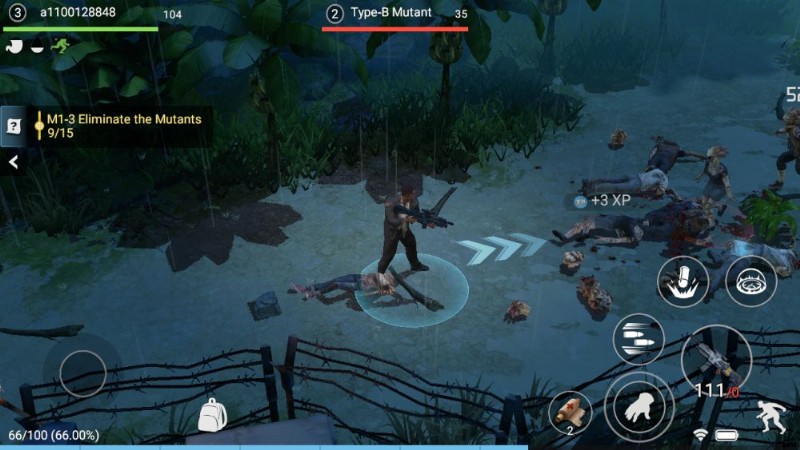
At the top of the screen is the name of your current target, its health represented as a red bar, and a number which details its actual HP value. Similarly, your own HP value is located in the upper left, with a green bar representing how much percent of health you have left.
Weapon Types
There are six different weapon types in Lost in Blue.
Swords and shields provide decent protection while offering some offense, spears are for safely engaging at a distance, large blunt weapons deal a lot of damage while stunning foes, and slings and bows allows you to dispatch enemies without fear of reprisal.
Each of these weapons has their own attack speed; naturally, the heavier the weapon, the slower it’ll hit. There’s no attack speed stat either, so no, you can’t swing that giant hammer of bone and wood like a child’s toy.
Firearms are also present in the game, ranging from simple handguns to rifles and shotguns. For those that play long enough, you’ll start to see some truly strange weapons – railguns and energy rifles are just scratching the surface.
Skills
Each weapon type has its own skills to choose from.
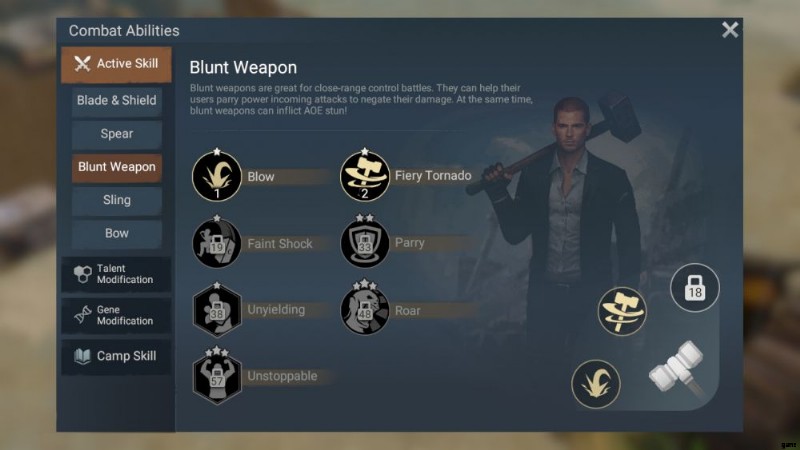
Up to 3 skills can be selected, with a second skill slot unlocking relatively early into the game, and a third slot at level 18.
Skills can also be upgraded by spending island coins , which serve as currency on the island. By improving your skills, you can increase their numbers. Who doesn’t like more numbers?
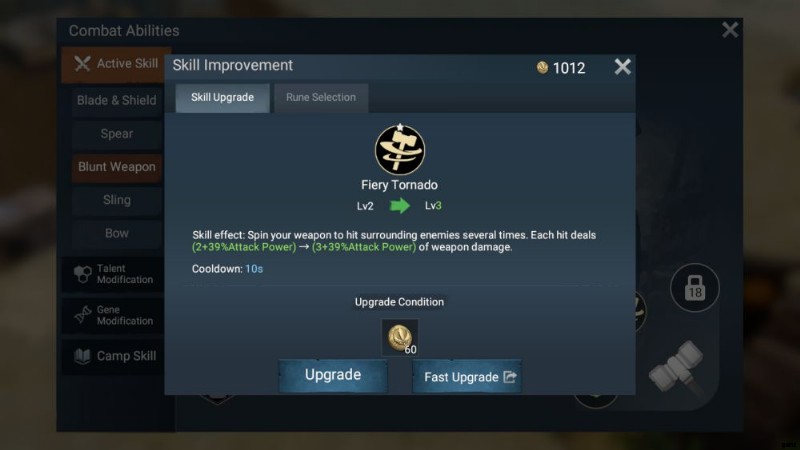
If you’ve neglected training a skill, or switched weapon types, you can use the fast upgrade option – just drag the slider all the way to the end to match the skill level to your current character level, then shell out coins.
Do note that a skill’s level cannot exceed your own character level.
Stealth
If you’re not confident in your fighting abilities, or if you want to get a big wallop of damage on an enemy (which is fantastic for boss fights, by the way), you can take advantage of the game’s stealth mode.

To enter stealth mode, tap the crouching icon on the lower right of the screen. This will cause your character to crouch down and move more silently. During stealth mode, enemies have reduced aggro radii, and any attack made that breaks stealth deals a huge amount of bonus damage – and yes, this includes skills.
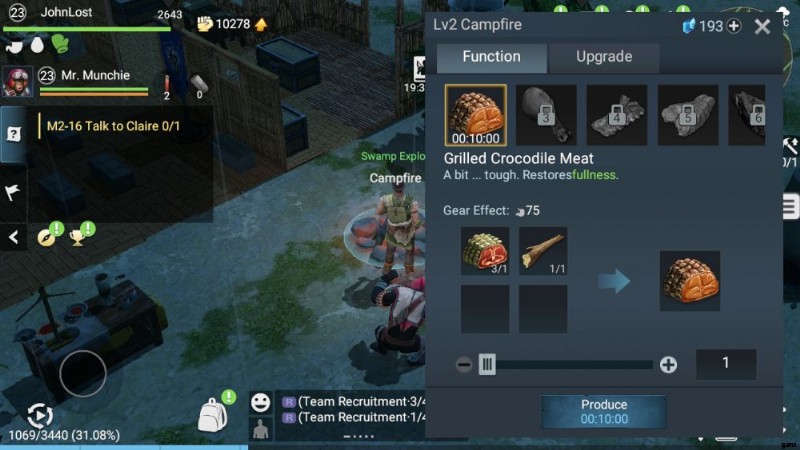
Upgrading Your Gear
Gear that isn’t firearms can be upgraded to boost its stats.
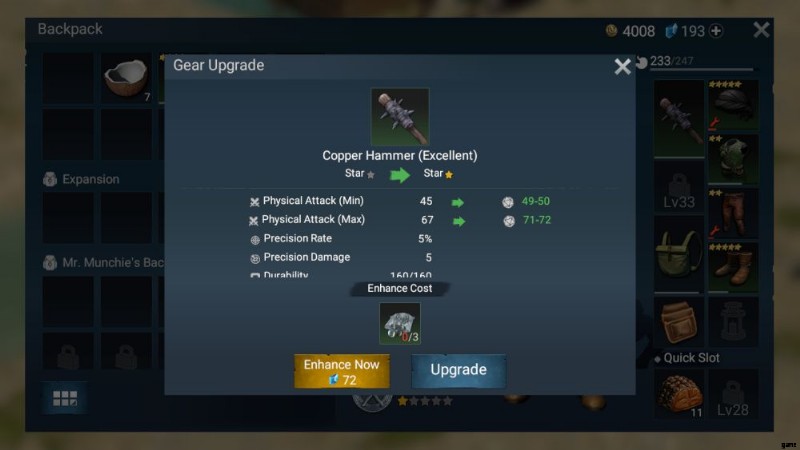
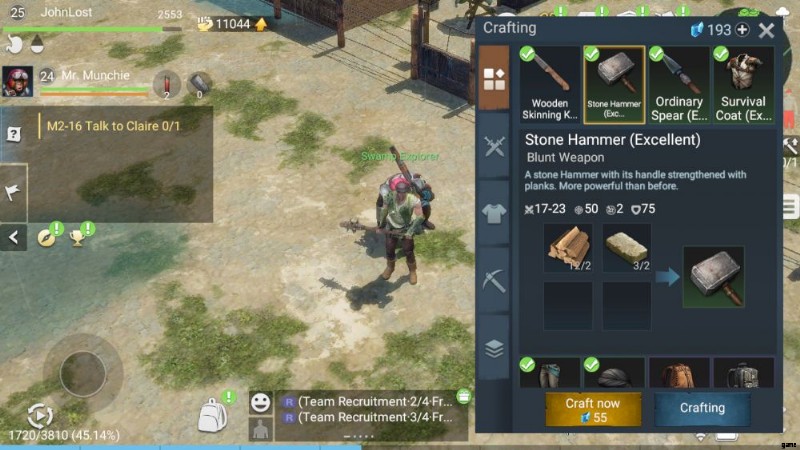
To upgrade an item, you’ll need certain ingredients – usually the same items used to craft that piece of gear in the first place. You’ll then hit the upgrade button, then pray to RNGesus that you max roll your upgrade, the range of which appears as a dice icon (in the image above, it’s only a 1 point difference).
Equipment can be upgraded until it reaches 5 stars, aka 5 times . Do note that you should still tech up your gear whenever possible; your +5 club may be good now, but a +5 excellent club (also crafted) boasts much higher base stats. Also, it’s not just weapons that can be upgraded. Your armor can also benefit from these boosts, so if you find yourself dying a lot, do some uprades.
Modifying Your Gear
Your beloved equipment can also be modified through the use of blueprints. This allows you to squeeze even more performance out of them, as well as create specialized builds and kit for any situation.
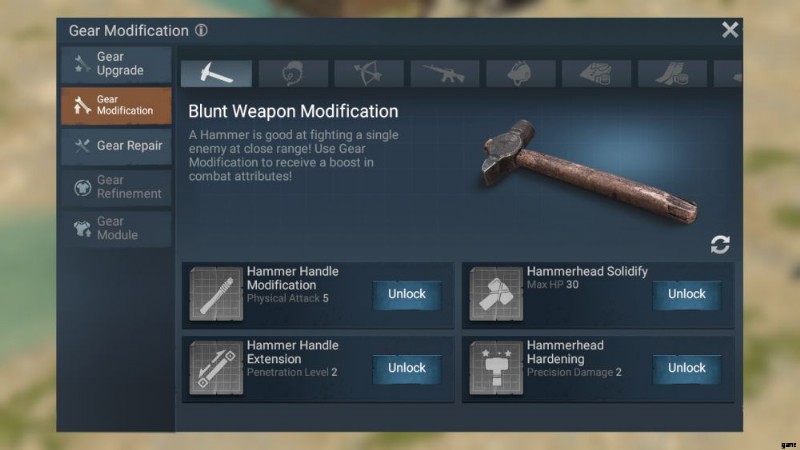
Modifying equipment requires the use of blueprints. These blueprints can be acquired by exchanging camp medals at the camp store .
Companions
You don’t have to tackle the horrors of the island on your own. As you progress, you’ll gain access to the companion tab, where you can recruit new friends and allies to assist you on the field. At the beginning, you’ll only have one companion slot, but as you progress, you’ll be able to field up to 4 extra companions.
Your companions will accompany you as you travel, and will engage enemies on their own. Don’t worry about companions pulling unwanted aggro – the only time they’ll attack is if a mob is already aggressive towards you, or if you’ve initiated combat. At the same time, don’t condemn your partners to just meatshields – they do have hitpoints, and can fall in battle. Companions also have endurance points , which essentially serves as their fuel gauge. Run out of endurance, and that companion becomes unavailable for a while as they take a break.
Companions can also lug around extra loot for you, though like your pitiful backpack, they’ve got an absolutely miniscule inventory space. You will also have to transfer items from your companion inventories to your own by double tapping said items on the inventory screen.
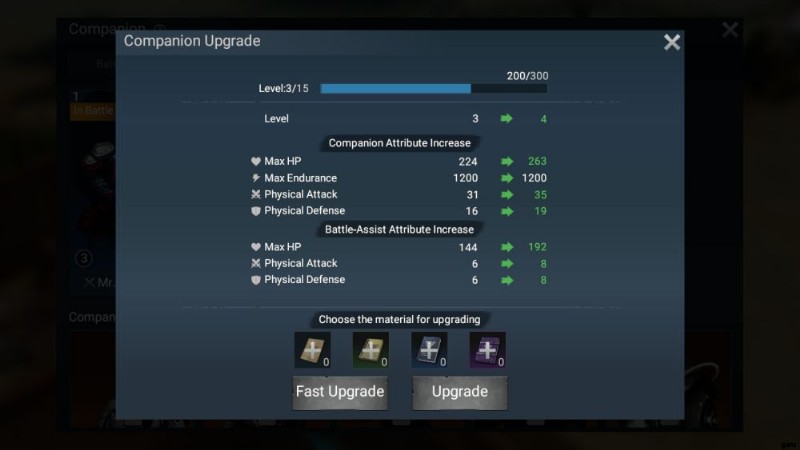
Companions can be upgraded in two ways. The easier, simpler method is by increasing their level. This is done by feeding them combat manuals , which you can get from shops, the hive annihilation dungeon, and main quests.
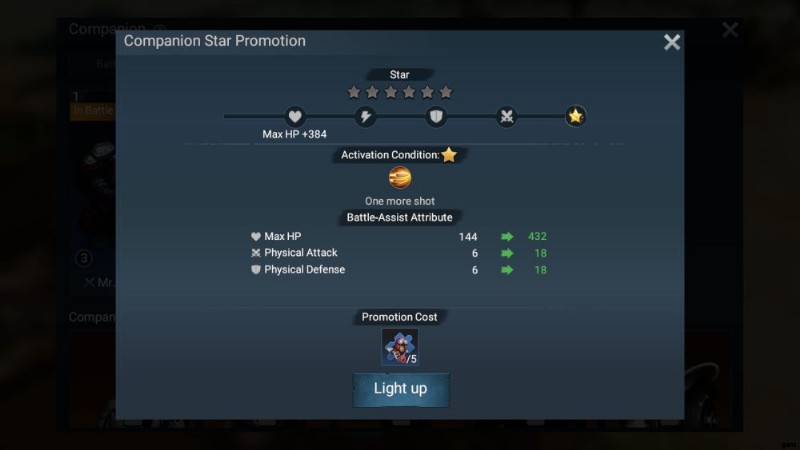
The second, more difficult way to strengthen a companion is to increase their star rank. Like most mobile games, this is done by sacrificing shards of that character to boost their rank up progression. Progression is divided into thresholds, and meeting each threshold gives that companion a sizeable stat boost – this way, you can keep working towards getting their next star without walking home empty-handed.
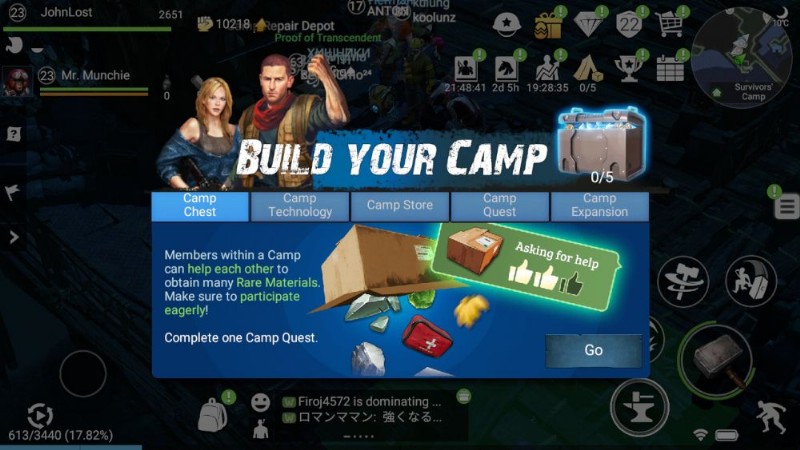
Build Yourself Up For Survival
It’s not enough to have a big stick on this island. You’ll need to train your body and mind if you want to carve out a new home for yourself in this hellhole.
Hydration and Nourishment
Your character requires food and drink to survive. If either of these meters hits zero, you’ll start losing health at a steady pace – definitely something you want to avoid while you’re out and about.
To alleviate that, you’ll need to find and cook food and drink on the island. Finding food is easy – there’s lots of bananas and coconuts lying around, which will be more than enough to satisfy your basic needs. Do note that you need to finish the eating or drinking animation to get 100% of the benefits of the item you use up – spamming the item will just waste more of that consumable.

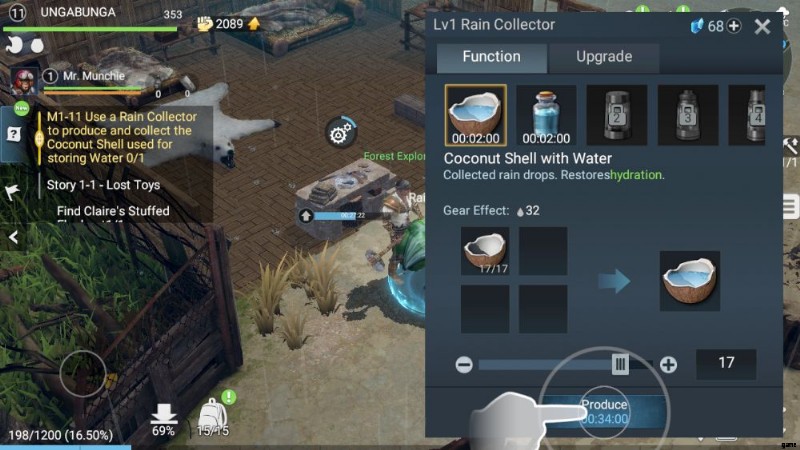
As you grow stronger and venture further, you’ll be able to hunt animals for meat which you can cook, and build a Rain Collector in your camp.
Experience Points and Leveling Up
It’s not hard to get experience points in Lost in Blue. Virtually everything you do – crafting, killing, harvesting – nets you experience points.
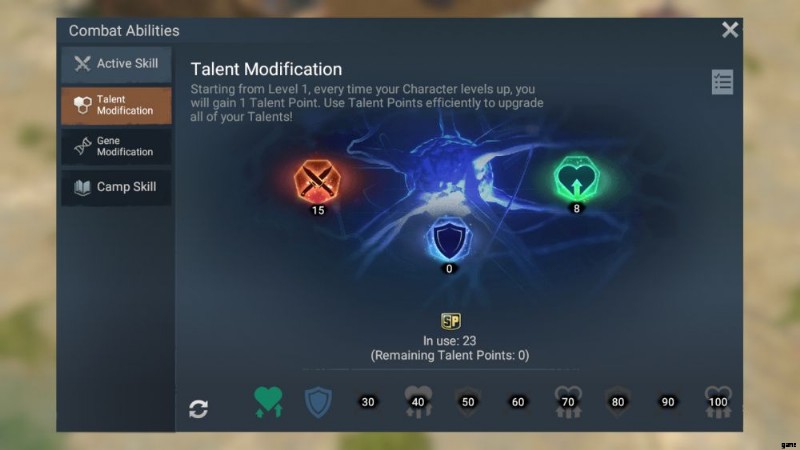
Whenever you level up, you’ll gain a talent point. As you progress through the story, you’ll gain the ability to spend your talent points to increase one of three stats:attack, HP, or defense. While these stat increases aren’t very big, they can still play a key part in your character build.
More importantly, you want to level up quickly since a lot of the game is gated by your character level. With that in mind, you should always aim to finish main quests when they’re available as these give out a huge amount of experience points, enough to catapult you to the next progress threshold.
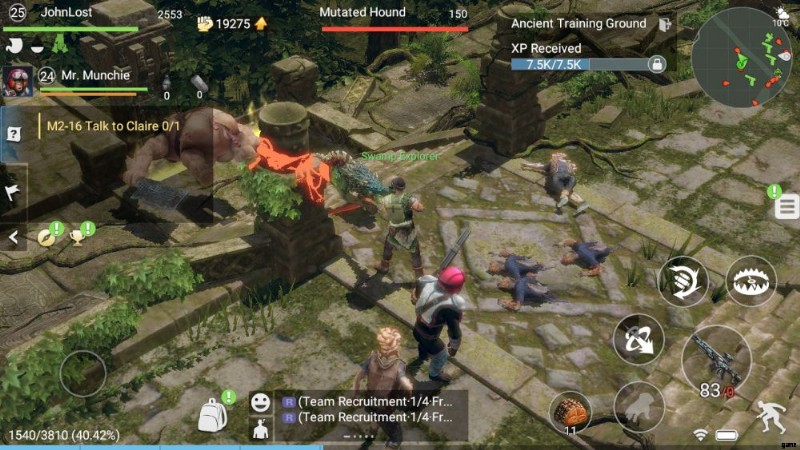
One of the fastest ways to gain experience – though you can only get up to 7500 experience per day – is the Ancient Training Ground. In here, you’ll be able to wail on monsters that barely do any damage but give a huge chunk of experience points per kill. You’ll even be able to use guns and buffs strewn about on the battlefield, if you want to go even faster. With them, you’ll blitz to 7500 experience in no time – and if you want even more experience, you can shell out some Crystals.
Offline Experience
Finally, Lost in Blue accumulates experience for you whenever you’re not playing. The next time you login, you’ll gain a small amount of offline experience proportional to how long you spent offline. While I haven’t noticed any upper limit, most games of this type usually have a maximum of 1-2 days worth of offline experience, unless you buy VIP – so do try to log in from time to time, even if it’s just to collect this pool of experience.
Talent Medals
You can use Medal Points from Lost in Blue’ s battle pass to further boost your character with a range of neat passive skills that offer a slew of bonuses.
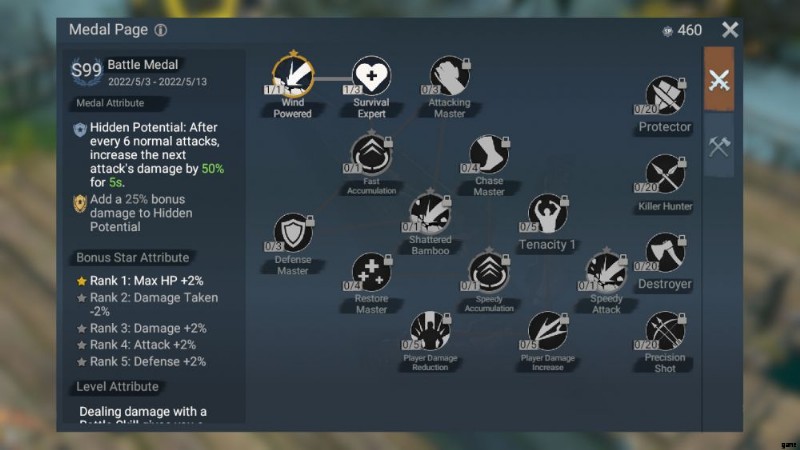
These points can be used in both a battle and production 木。 While achievements in the medal pass award you with generic points, do note that each of these trees have their own currency – meaning that earning 500 medals gives you 500 battle medals and 500 production medals.
To access these trees, tap on the Battle Medal or Production Medal icons below your character in the inventory.
Survival Profession
You can also choose to focus your efforts towards development in a single production type.
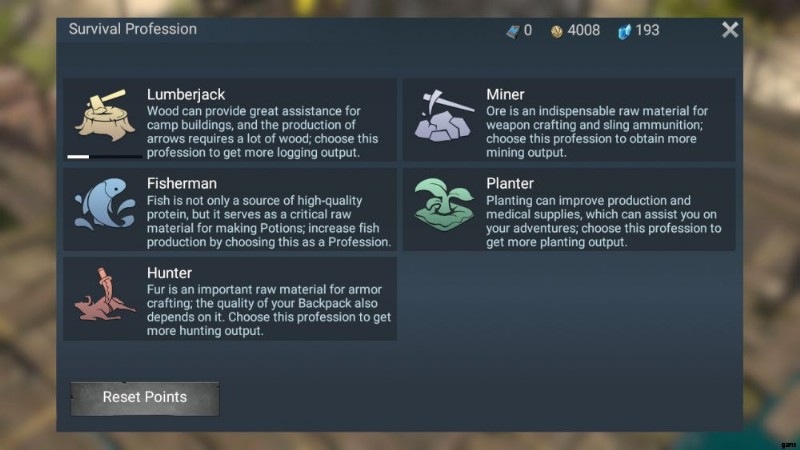
While your chosen survival profession grants you powerful bonuses in that activity, you have to commit to each skill tree. Once chosen, you can’t leave your current tree unless you either master all the skills in that tree, or reset.
Island Terminal
For those willing to spend real money (via Crystals) to improve their character, the Island Terminal is here for you.
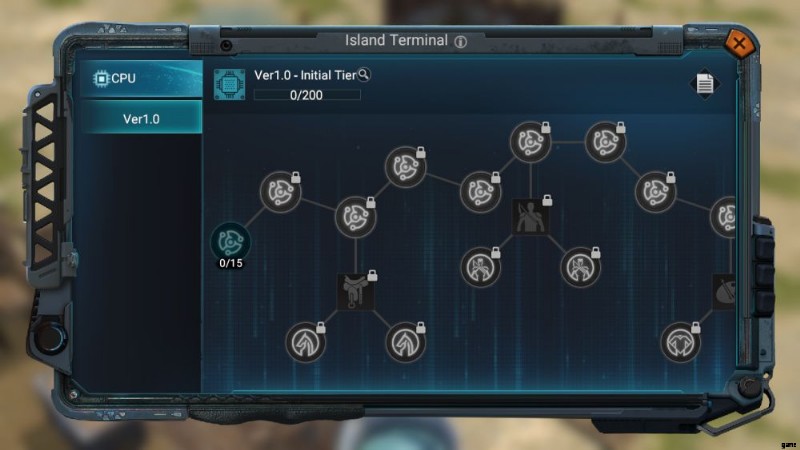
Via the Island Terminal, you’ll be able to invest bionic data into various nodes, each of which provide minor bonuses. This passive tree is pretty expansive, and while its bonuses aren’t worth much individually, it’s the sum that really counts.
Building Stuff For Survival
You’ll have to make things if you want to survive in Lost in Blue. Not just spears and makeshift clothes, no. You’ll need to establish a base camp where you can process resources to get even better stuff.
The All-Important Item Source Button
Before I talk about crafting, let’s talk about the Item Source button.

Lost in Blue has a ton of items, and as a new player, you’ll likely be confused as to where the hell some of this stuff is coming from. Even worse is trying to figure out where to get more of the aforementioned stuff. That’s where the Item Source button comes in – if you’re ever unsure as to how to get an item, you can always tap it and tap “Item Source” to see where it comes from.
Gathering Resources
Fortunately for us, the island provides plenty of raw materials that we can process into tools, weapons, armor, food, and much more. However, many things on the island will require you to gather them before you can do anything else.
To gather a resource node, such as a tree, a pile of rocks, or an animal carcass, you’ll need the appropriate tool. Axes are for trees, picks are for stone, and skinning knives are for hunted animals. Without these tools, you won’t be able to do anything.
It’s not enough to just have the right tool for the job, it’s gotta be made of strong enough stuff for the task at hand. While you can always craft basic stone tools, you will need fancier, more durable tools for areas beyond the beach, forest, and swamp. With that in mind, always be paranoid about repairing your higher-tier tools, and if you really want to be safe, you can stash an extra set back at your base camp.

Once you progress far enough, you’ll also unlock auto gather mode. This configurable mode will have your character run around your current map, collecting all the raw materials they can find. You can also further configure this to also skin or gather from enemies that other players have killed (though some of these features require VIP), and even open crates. However, do remember to check back from time to time as your pitiful backpack can only carry so much.
You can also configure auto gather to kill mobs for you, if you need monster drops. To do so, toggle auto-attack monsters on in the Easy Collect menu of the settings.
Don’t worry about ever running out of materials either – there are enough sticks, stones, and grass lying around, so you can never be without the most basic of tools .
Your Base Camp
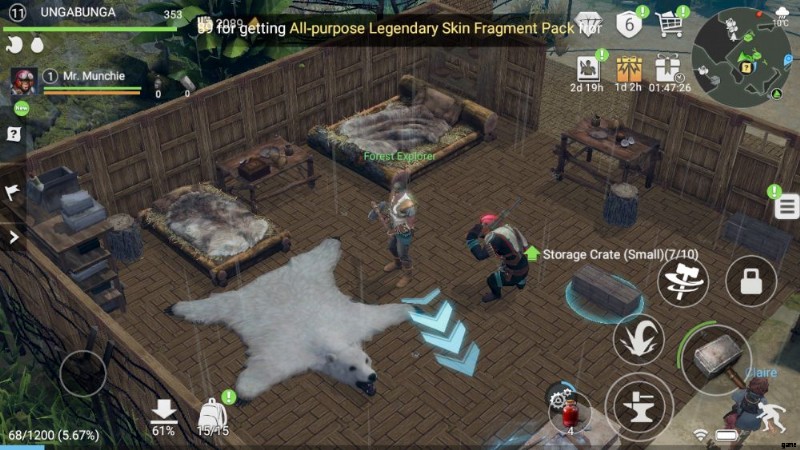
Your base camp serves as your little patch of heaven (or hell, as it were) on this island. It’s here that you can set up crafting facilities, storage sites, and other structures. You also have the freedom to build and model your erstwhile home with walls, windows, doors, and other building pieces.
Once you gain access to Salvation Town and complete a few talk quests there, your camp will be moved to the new Survivor’s Camp area. Don’t worry – anything you’ve placed and anything that’s being processed will be carried over perfectly to the new camp.
Item Storage
At this point in time, I’m 100% sure you’re annoyed by that “inventory is full” message that always, always pops up. To help alleviate that, you can build storage crates in your camp to cram all that extra loot in.
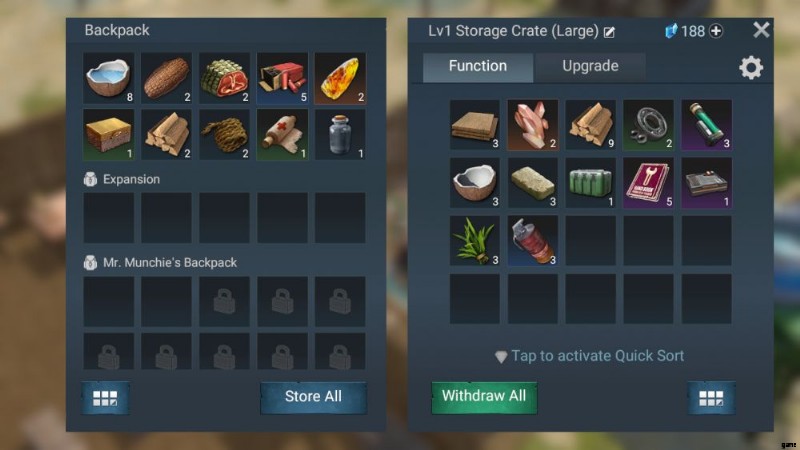
Bear in mind that there is a limit as to how many storage crates you can build , and that this limit is shared between storage crate types. In other words, if you have a limit of 10 crates, you can build 5 large and 5 small crates (or 10 large ones, which you should be doing).
Even with these storage crates, you won’t have too much space to work with. Each normal crate gives 10 slots, and each large one gives 20 slots – both of which are good, but nothing too crazy. The best way to get around this is to organize your storage so don’t you don’t accidentally have a single type of item eating up tons of storage slots.
Item Processing
Item processing is a very big part of Lost in Blue, and it’s imperative that you set up enough facilities to constantly produce materials for you. Crafting things on your own is all well and good, but when it comes to say, processing wood and stone or refining ore, you’ll need camp structures to back you up.
To process items, you’ll first need the appropriate workbench, which can be built in your camp via the facilities menu. Some workbenches will also requires an appropriate blueprint item, which you can usually get by doing main or side quests.
You can craft multiple copies of some workbenches , and I highly suggest you do. This way, you’ll be able to double your output and make the most out of the very long crafting times in Lost in Blue.
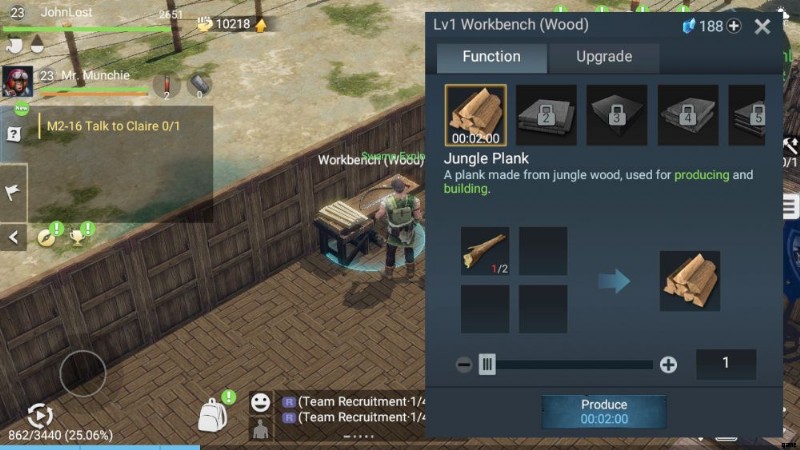
Once your workbenches have been set up, simply walk near them and tap the anvil icon in the lower right to bring up the crafting menu for that bench. You’ll notice that not all recipes are available to you – and you’ll have to upgrade your workbenches to gain access to more recipes.
When you find an item you want to craft, simply increase the timer at the bottom to produce more at once. This is very important as crafting you can neither add to, subtract from, or cancel crafting in progress. With that in mind, I find it easier if I put off mass item processing until I’m about to log out so that all my gathered materials will be used.
The best part about crafting in Lost in Blue is that while you’re in your base camp, crafting recipes, whether done via workbench or in your personal crafting menu, will pull resources from storage chests.
Fast Travel
With all the back-and-forth you’ll be doing, it’s important that you learn about the game’s fast travel feature.
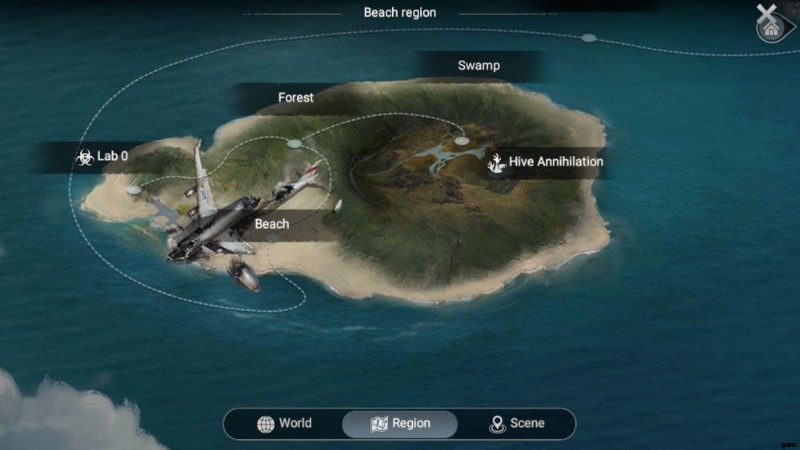
To visit a place you’ve been to before, tap the minimap in the upper right. After that, go to either World or Region to view the rest of the game world. Once you’ve found where you want to travel, go to Region and just tap on the area name. Confirm your wish to travel, and hey, you’re there!
Camp For Survival
One of the first things you should do in Lost in Blue, as soon as the function is unlocked, is to join a capital C Camp. Camps are Lost in Blue’s equivalent of player guilds, and the sooner you join one, the sooner you can reap the benefits of a Camp.
The Camp Store
One of the biggest benefits you can get from joining a Camp is access to the Camp Store .
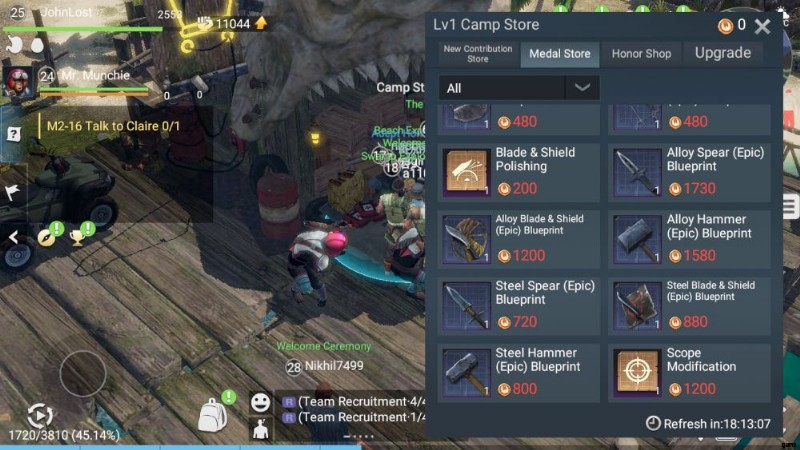
The Camp Store stocks some super-important items, such as blueprints for gear modification, raw materials for crafting and upgrading, and companion-related stuff. But this store isn’t interested in your Island Coins. To buy stuff from the Camp Store, you’ll need to do various Camp-related activities to earn currency that you can then exchange for all of that good stuff.
Camp Contribution Points
The most common kind of currency that you can use in the Camp Store is Camp Contribution Points . These are earned from most activities, but the most reliable way to get them is by doing daily quests and donation.
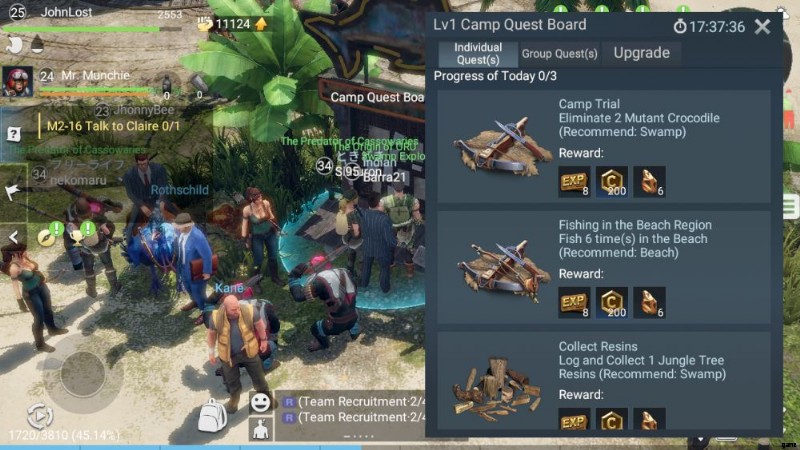
With that goal in mind, head to the bulletin board in Salvation Town if you want to pick up some daily Camp quests. Do bear in mind that you can only do up to 3 of these a day, so don’t skip out.
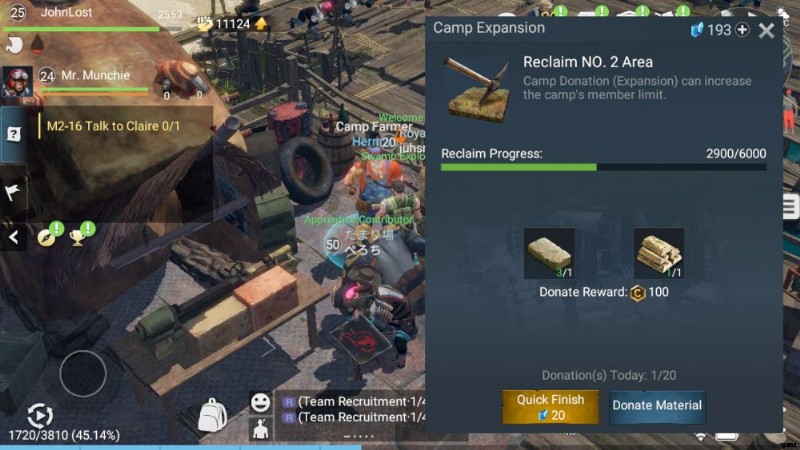
Another reliable way to earn Camp Contribution Points is to donate to your camp’s current repair project. You can do this by going to Herman in Salvation Town, then tapping Camp Expansion . You can donate up to 20 times per day for a grand total of 2000 Camp Contribution Points. If you lack the items being requested, or can’t be bothered to make them, you can also make an offering of 20 Crystals for one donation.
Camp Technology
Camps also have access to Camp Technology , a collection of passive skills that affect all Camp members.

By donating items to Camp Technology projects, you’ll not only help your camp unlock new passives, but also gain some Camp Contribution Points to spend in the Camp Store!
To donate to Camp Technology research, look for the computer at the lower right area of Salvation Town, near the Camp Store and Herman.
Monster Invasion
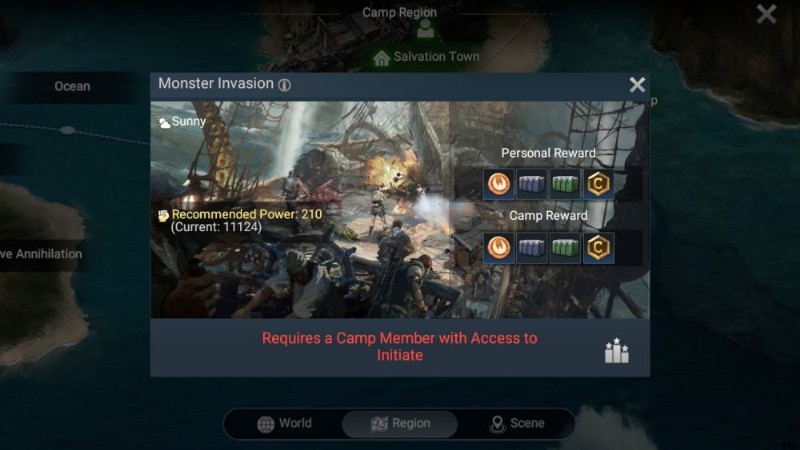
While I sadly could not join a single Monster Invasion party due to conflicting timezones, this battlefield is where you earn Medals for buying blueprints at the Camp Store.
Get Free Stuff For Survival
With so many things to do – monsters to kill, forts to build, equipment to craft and upgrade – you’re going to need a lot of resources. And luckily, there’s a lot of ways to earn free resources in the game. Here’s a list of some of the free stuff you should check out.
First 7 Day Login
The first 7 day login is super important because completing it gives you a bag that can hold 10 items, instead of your measly 5 slot bag.
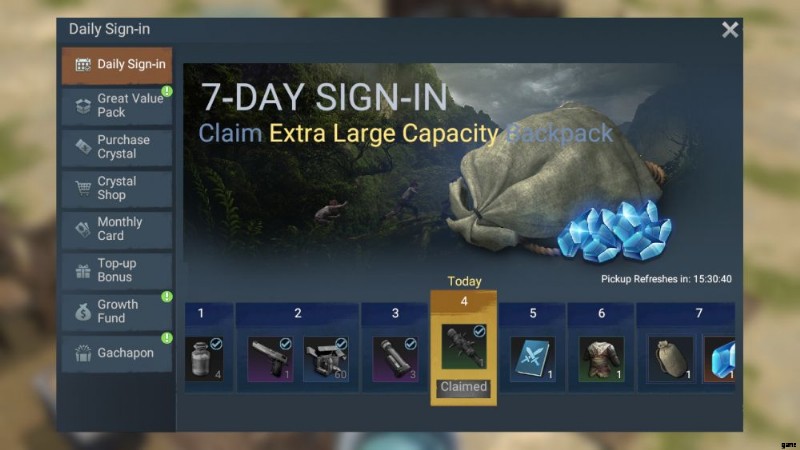
This initial login reward also gives you some other materials and equipment, such as a Desert Eagle and 60 .45 rounds, in case you want to terrify level 2 mutant crabs with a gun.
Event Logins
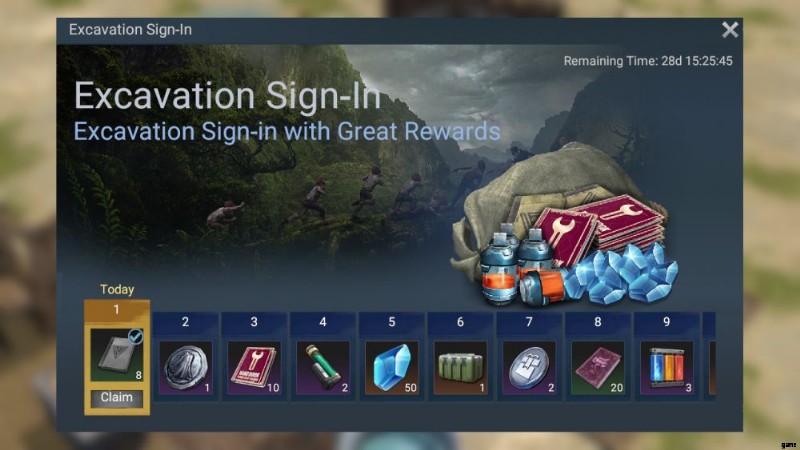
From time to time, Lost in Blue offers login campaigns, which usually give out rewards that are part of newly-released features. To access these login menus, tap the gift box in the upper right menu.
The Adventure Guide and Region Challenges
As you progress through the game, you’ll also accrue rewards. To access the challenge menu, tap the trophy or the compass icons below your quest screen.
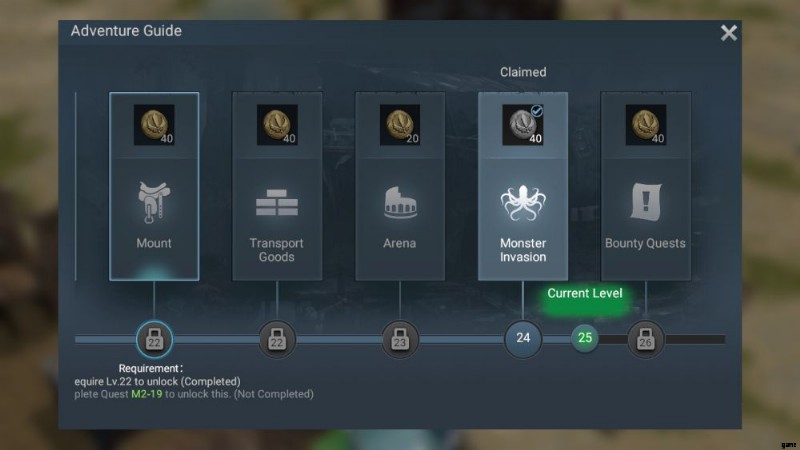
The compass will bring you to the adventure guide, where you can redeem island coins for each character level you’ve gained. It’s not much, but free is free.
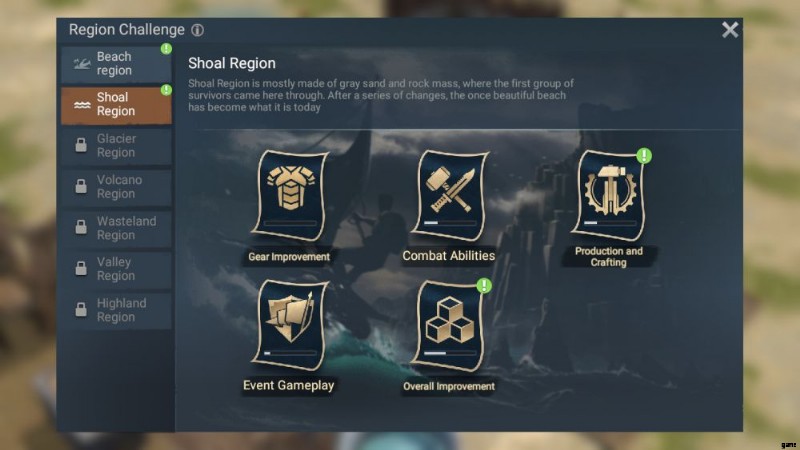
The trophy, on the other hand, brings you to the region challenge screen. As the name suggests, regional challenges are a set of tasks that you can complete in each region. These usually serve to ease you into the new mechanics that each region presents. Just like the Adventure Guide, you’ll usually get island coins from these.
New Player Pass
The new player pass , as the name suggests, is a special battle pass that’s exclusive to new players. Its timer starts counting down when you first log in the game, and lasts for around 14 days.
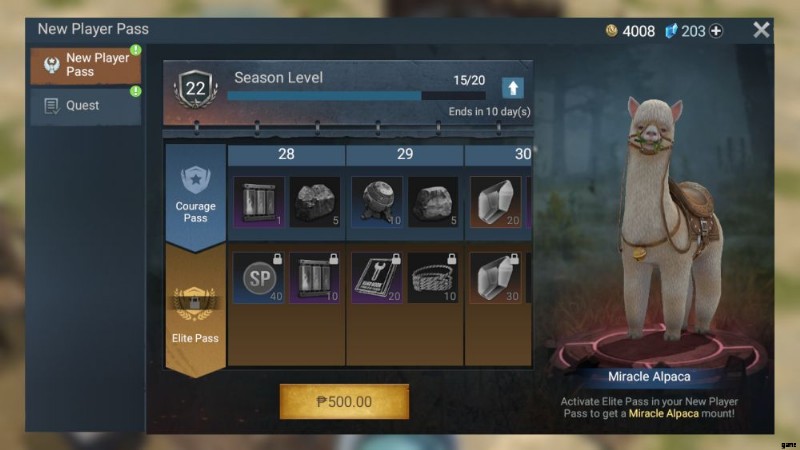
This pass gives out a lot of materials that you’ll no doubt find a use for, from simple companion experience notes to modification materials. You’ll even be able to pick up a few Crystals along the way!
To level up your new player pass, you’ll need to complete the quests that are available in the same tab. Said quests also fill up an activity meter below, and you’ll need to tap on the activity meter’s extra prizes to redeem them.
While I’m not 100% sure on this, I suspect that once your “new player” status is over, this will be rebranded as the regular seasonal battle pass , as the points you need for battle and production medals come from here.
Survival? No, Thriving! (Thrivival?)
Lost in Blue has a lot of very complex systems, but hopefully you’ll be able to navigate the fundamentals required to reach the top and eventually dominate the island.

With that, our Lost in Blue beginner’s guide comes to an end. If you have anything to add, or have something you want to share, make yourself heard in the comments below!