スーパー オート ペット ビギナーズ ガイド:熾烈なチームを編成し、敵を圧倒するためのヒント、コツ、戦略
動物 - 動物はどこにでもいて、私たちはたくさん見てきましたが、動物についてはほとんど知りません (あなたが専門の動物学者であるか、動物の本を読むのが好きであるか、動物のドキュメンタリーを熱心に見ている場合を除きます)。
これらの神秘的な生き物は太古の昔から存在しており、人類に仲間、栄養、衣服、さらには危険さえも与えてきました.動物は、その目的に関係なく、特に現代では人間と共存してきました。ここで示したすべての例に加えて、それらがどのように交際を提供するかについて話しましょう.
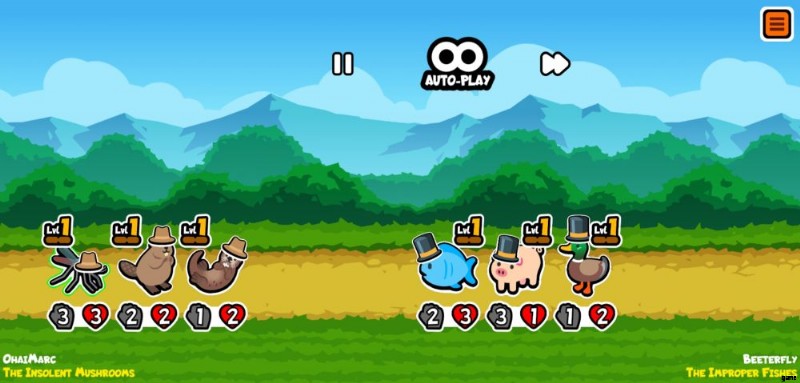
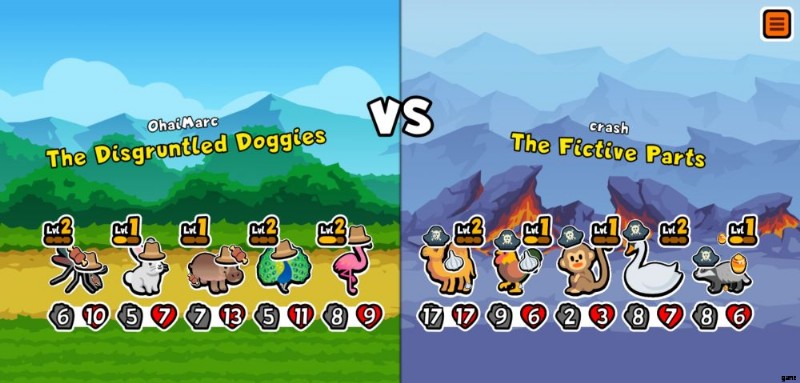
一部の動物は、狩猟、救助、害虫駆除などで人間の仲間を助けるように訓練されています.しかし、多くの場合、人間との交際を提供する動物はペットと見なされます。ここでは、利用可能なポケモンのゲームと同様に、ペットを使って戦うゲームを紹介します。これはスーパー オート ペットです .
Team Wood Games によって作成された Super Auto Pets は、多くの戦略を必要とする熱狂的なマルチプラットフォームの自動バトラーです。今日存在するほとんどのオートバトラーとは異なり、スーパーオートペットは、統計だけに頼るのではなく、各クリーチャーがどのように行動するかを理解することにゲームプレイを誇りに思っています。そうは言っても、スーパーオートペットは非常に複雑で、最初は威圧的です。しかし、親愛なるペットバトラー、恐れることはありません。そのため、このガイドを作成することにしました!
スーパー オート ペットは複雑なため、ゲームの基本、準備と戦略、戦闘、チーム編成の例など、ゲームについて説明します。このゲームを手にしたばかりで、すぐに始めたい場合は、スーパー オート ペット ビギナーズ ガイドをお読みください。
ゲームの目的
何よりもまず、このゲームのルールとその目的を説明します。
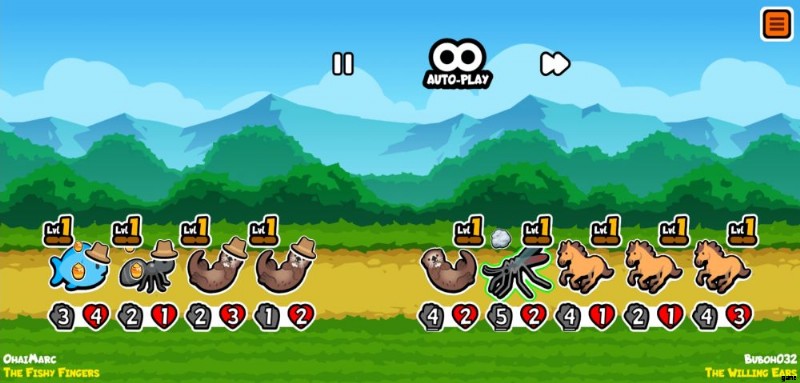
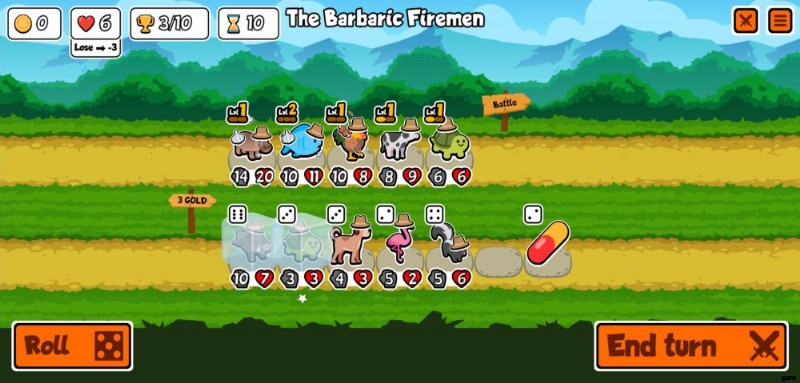
ゲームは、ショップ フェーズと戦闘フェーズの 2 つのフェーズで構成されます。ショップ フェイズ中に自分のターンが終了するたびに、戦闘フェイズが始まります。

2 ターンごと、または奇数ターンごとに、ゲームの Tier が上がります。これは、より強力なペットとアイテムが利用可能になることを意味します。ティアが高いということは、敗北ごとに失われるハートの数が増えることも意味します。ゲームごとに最大 10 個のハートを獲得できます。
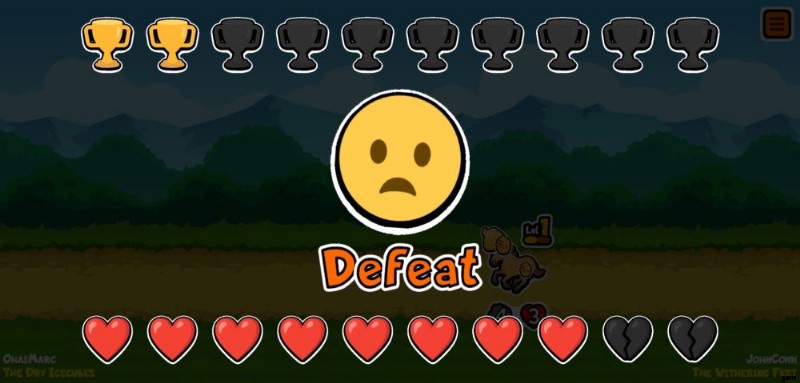
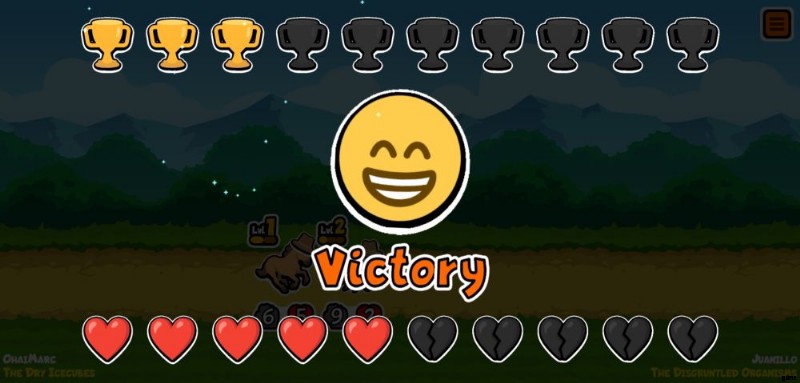
戦いに勝つとトロフィーを獲得し、戦いに負けるとハートを失い、引き分けは何も起こりません。これらの条件のどれも、Tier の上昇を妨げません。
相手を圧倒できる動物とアイテムの組み合わせを利用する必要があります。ここでの問題は、次の対戦相手がわからないということです。そのため、準備をしておくことが最善です。

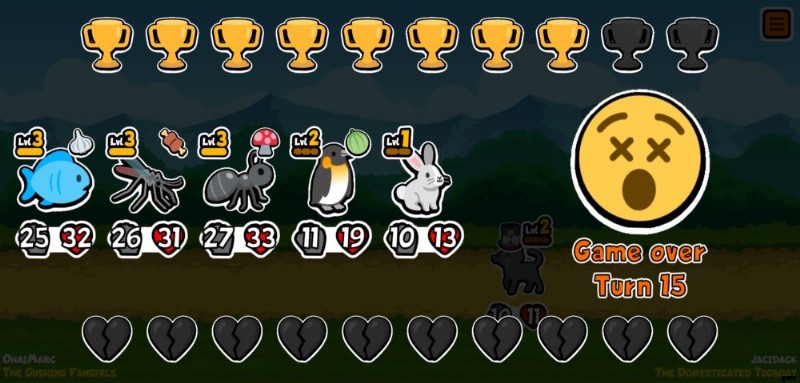
ハートをすべて失うか、トロフィーを 10 個獲得すると、ゲームは終了します。集めたトロフィーは、ショップの化粧品に使用できます。
最初は難解に見えますが、核心に取り掛かりましょう!
ゲームの基本
Super Auto Pets についての否定できない真実は、そのかなり単純な性質にもかかわらず、ゲームは圧倒され、時々理解するのが難しい場合があるということです.迷子にならないように、ゲームの基本を詳しく説明します。
ショップの仕組みを学ぶ
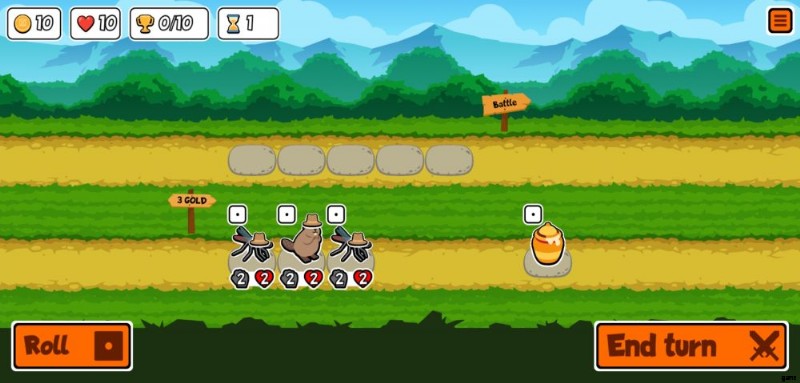
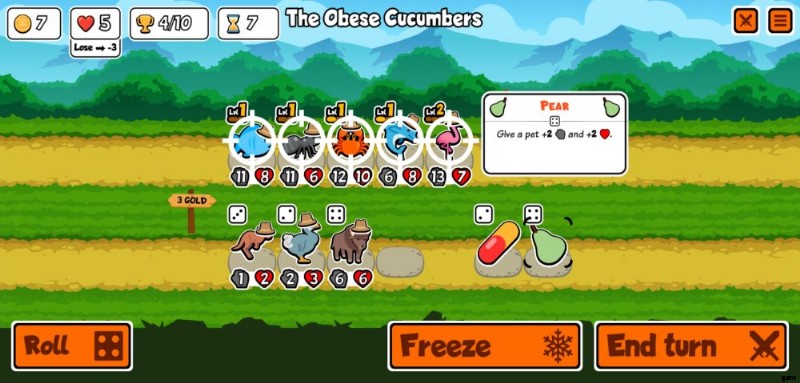
戦闘に入る前に、まずショップと動物がどのように機能するかを理解する必要がありますが、最も重要なのはショップです。
ショップは、参加する前にチームを計画するために、平和に戦略を立てることができる場所です.時間制限のある対戦をプレイしている場合を除き、リソースがなくなるまでここで次の動きを無期限に考えることができます。ベテランは瞬く間に動きを完了する可能性が高いですが、初心者にとっては、このインターフェースは少し混乱するかもしれません.
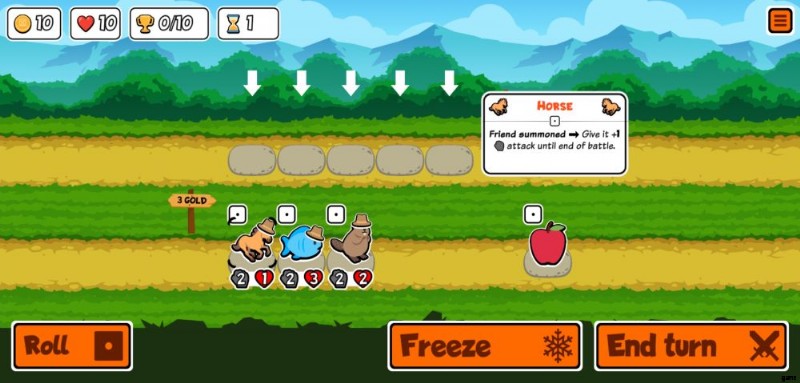
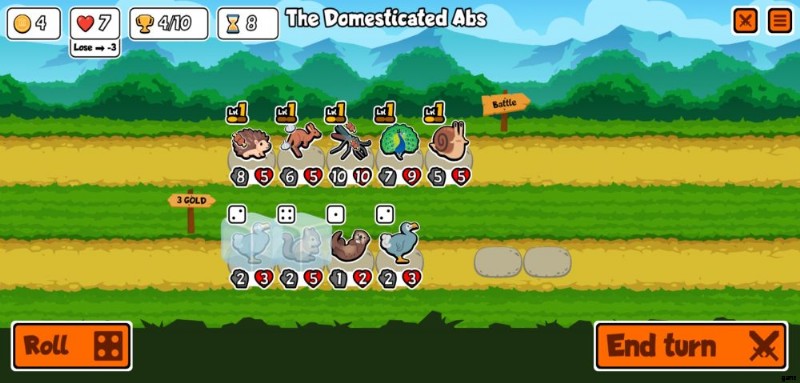
ショップ画面を分析してみましょうか?
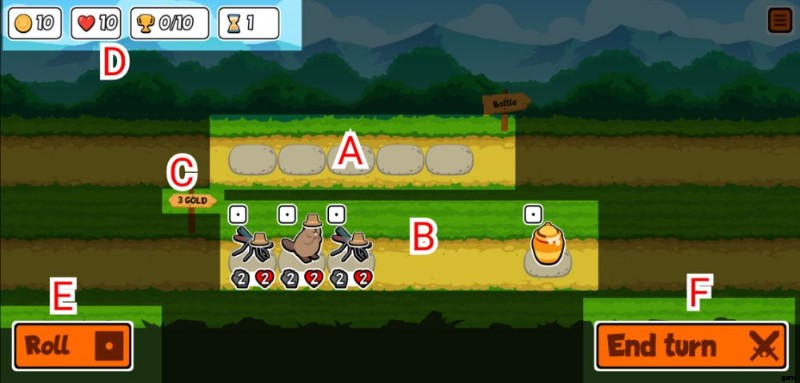
a. ラインナップ – ここに動物が配置されます。ペットをショップからスロットにドラッグまたはタップするだけで、購入が完了します。現在チームにいる動物の複製をショップが所有している場合、複製したショップのペットを既存のペットにドラッグまたはタップすることで、この動物をレベルアップできます。ただし、後で説明するように、これは必ずしも良い考えではありません。
b.ペットと食品の販売 – ラインナップの下の行は、ショップが販売するものです。一方はペット、もう一方は食べ物です。これらのいずれかをタップすると、[ターン終了] ボタンの横に表示されるボタンで [凍結] を選択するか、既に凍結されている場合は [凍結解除] を選択できます。ペットと食べ物の両方を凍結するのは完全に無料です。これにより、ロール ボタンを押すか、戦闘から戻った後にペットが取り除かれるのを防ぐことができます。
c. 価格 – これは、ショップ内のすべてのアイテムに 3 ゴールドがかかることを示す簡単なリマインダーです。これは、食品のみを割引するリスがチームにいる場合を除きます。
d.あなたの統計 – このバーはあなたの統計を表しています。各シンボルは何かを表しています:
- 🪙 – 現在のゴールド。戦闘後、常に 10 ゴールドを受け取ります。余ったゴールドでターンを終了したり、戦いに勝ったりしても、この金額は増加しません。
- ❤ – これはあなたのライフ数を表します。最初は、負けるたびにライフを 1 つだけ失いますが、ティアが上がるたびに、負けごとにより多くのハートを失うようになります。遠くに行くほど、ゲームに負けやすくなります。
- 🏆 – これらはあなたの勝利です。ハートとは異なり、Tier に関係なく、1 回の勝利で獲得できるトロフィーは 1 つだけです。トロフィーを 10 個獲得すると、ゲームに勝利したことになります。上記のように、獲得したトロフィーは、化粧品の購入に使用できるポイントに変換されます。
- ⏳ – あなたの現在のターン。戦闘を終了すると、次のターンに移動します。奇数ターンごとにティアが上がり、ショップはより強力な動物や食べ物を生み出すことができます。
e. 選択の再ロール – ローリングコストは 1 ゴールドです。ショップの選択が気に入らない場合、または特定の動物を手に入れようとしている場合にのみ、これを行ってください.これらはすべて完全にランダムなので、自己責任で転がしてください。動物や食べ物を買う余裕がない場合は、後で食べたい動物や食べ物を冷凍することを忘れないでください。
f. ターン終了 – ターンを終了すると、すぐにチームがバトルに送られます。これは、すべてのゴールドを使い果たした後、決定に完全に確信がある場合にのみ行う必要があります。ターンを戻すことはできません。頑張ってください!
ツールチップと数字を読む
これは、ゲーム全体がどのように機能するかを理解する上で最も重要です。
店のメニューに行くたびに、各ペットや各アイテムが何をするかを見る習慣をつけてください。そこにあるものをタップするだけで、そのアイテムが今必要か後で必要かがわかります。ここで一部のプレーヤーが理解していないのは、戦略を広げ、優先順位を広げたチームを持つことは、敗北への一方通行の切符だということです。
各動物とアイテムからポップアップするツールチップとは別に、あなたの動物の下に数字があります.一時的なバフを与える動物やアイテムもあれば、永続的なバフを与える動物やアイテムもあります。どのように見分けることができるかわからない場合は、ペットの数字を非常に微妙に調整する必要があります。下線です。たとえば、馬が友人をバフするたびに、その友人のステータスブーストは、今後の戦いのためだけになります.番号の下に細い線が表示されます。馬とは異なり、カワウソと魚はこれを永続的に行います。
ここで、早い段階でいくつかの間違いを避けるために、またツールチップを読むことが重要であることがわかったので、一部のアイテムやペットを特定の順序で購入することを検討してください。
順番に物を売買する
現在、馬とカワウソの両方が店にいるとします。どれを最初に買うべきだと思いますか?
多くの初心者の心にしばらく残るのは、これらの質問です。しかし、その質問にお答えしましょう。馬はカワウソよりも先に購入する必要があります。最初にカワウソを購入してから馬を購入しても、何も起こりません。 前に馬を購入した場合 カワウソを購入すると、馬は戦闘のためにカワウソをバフし、カワウソは馬を一時的にバフします。
各ペットとアイテムのツールチップを読むと、特定の順序で購入 (場合によっては売却) する必要があるものがあることがすぐにわかります。たとえば、ショップ ペットを購入する前に缶詰食品を購入することは非常に重要です。このアイテムは、ショップ ペットの健康と攻撃、および再ロールのたびにポップアップするショップ ペットを強化するためです。
物を売る場合、ショップからペットを購入する前にチームでアヒルを売ることで、店のペットのステータスがわずかに上がります。ただし、これは 前 にのみ行ってください 持っているロールから購入することにします。ショップをリロールした後に欲しかったペットが来た場合、アヒルのボーナスはなくなります。缶詰と同じようには機能しません。
同様に、ビーバーはいつでも売却できますが、スペースを確保したいペットを見つけた場合は売却する必要があります。これは少し複雑になる可能性があるため、後で詳しく説明します。
ステータスブーストに関する限り、一時的なものもあれば永続的なものもあります.これがゲームに与える影響について説明しましょう。
一時的なボーナスよりも永続的なボーナスを選ぶ
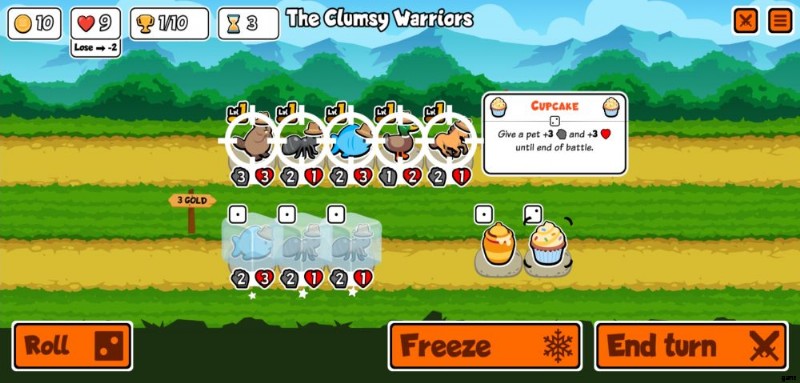
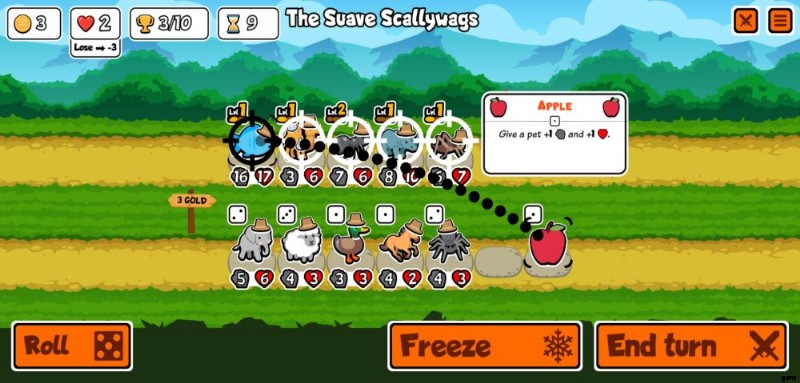
ペットにカップケーキとリンゴのどちらを食べさせますか?両方を見てみましょう。
Appleはシンプルなアイテムです。ペットの攻撃と防御の両方に永続的に+1を与えます。一方、カップケーキはペットの攻撃力と防御力を一時的に +3 します。勝率が少し上がるのでカップケーキの方が優れていると思われるかもしれませんが、その効果は一時的なものです。ここであなたが直面する可能性が高い問題は、あなたよりもはるかに強いクリーチャーを持つ対戦相手です。このような戦いで負けると、Cupcake のお金が無駄になる可能性があります。
一時的な修正ではなく、恒久的な修正に投資します。リンゴ、サラダ、寿司、ピザのスライス、その他カップケーキ以外の商品を購入します。彼らはどこかに実行可能な戦略を持っているかもしれませんが、彼らの目的は物事の壮大な計画には役立ちません.恒久的なボーナスは、ペットがゆっくりと、しかし確実に戦場を平準化するのに役立ちます。 These will be even more powerful when you obtain pets like the Rabbit or the Worm that benefit greatly from eating food from the shop.
Food aside, let’s now talk about leveling pets up.
Save Level Ups For Tiers 2 Or 3 In The Early Game

As you play through any mode, you’ll notice that you can level up your pets. But should you?
We will soon discuss why having duplicate animals early game but first let us address why the title of this item says what it says. It sounds easier said than done, that’s for sure. Here’s our explanation.
If you’re unfamiliar with how the game works, every time you do battle, you will finish a turn. Every odd-numbered turn, your game will go up a Tier. This is where you face stronger opponents but have the chance to get stronger pets, too. These are the moments you should start leveling up your pets.
Why this should be is because you get a new pet in the shop with one Tier higher than your current Roll every time you level up any of your pets. Getting a higher-Tiered pet early could situate you in an advantage during your next battle (that is unless you are matched with someone just as skilled or more skilled than you). Regardless the outcome of the next battle, your high-Tiered animal should be something that fits the composition of your team.
That wraps up the game’s basic techniques. Let’s now get a little bit more advanced.
PREPARATION AND STRATEGY
This section of the guide is where you will learn how to make use of your time in the shop. As we’ve stated earlier, Super Auto Pets does not come with combat ratings per animal. Each animal is useful in their own right and therefore strategy and planning often wins battles. Raw numbers can prevail, but doing so will require lots of dedication. For now, we will discuss what ideas you should explore while you’re in the shop screen.
Multiple Animals Are Better Than Singular Ones… Sometimes
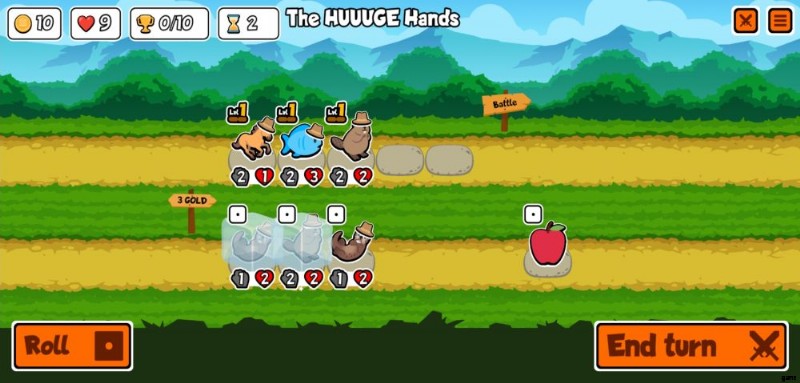
You start your game with two Horses and a Cricket. Do you merge the two Horses together?
Remember what we said about saving your level-ups for higher Tiers? Apply that thinking here. Taking the example above, both Horses will buff the summoned Cricket twice, making it hit substantially harder. This technique is very important in the early game and could carry you well over into mid-game.
Another example would be having two Sheep in your team and having a single Turkey in the back. The Turkey should be able to buff the Ram pairs that spawn after the Sheep die. If you have two Turkeys, it will be much more powerful since they will both buff the army of Sheep advancing at the enemy team.
There’s also having two Crabs or so, both mimicking the animal in your roster with the highest HP. Putting them one after the other is sure to give the enemy two walls to face, both of which may delay their advances. But this is all provided that the Crabs do have a friend to copy HP from.
But how is it possible to get multiple animals at once? This is where you take a gamble, friends!
Don’t Be Stingy With Your Rolls
Super Auto Pets operates greatly on a dice system.
Each roll of the dice during the shop phase grants you different animals every time. To squander your Rolls solely on purchases could mean the demise of your team, but this doesn’t mean to say that you should constantly re-roll the shop. This is all within reason, of course.
What we are trying to say is that you should try to Roll for the items and pets that you want, to cast the die every time the shop’s display isn’t to your liking. You will always have a chance to find that one thing that will make your lineup stronger than it was last turn. Whether it’s a better pet or a great piece of food, it’s all hidden under a couple of Rolls depending on your plan.
This is also why the game asks you if you want to end your turn with excess gold. The gold you don’t spend does not carry over to the next turn, so you’re encouraged to just spend it. After buying things from the shop, there’s no other thing to do but re-Roll the shop. Even though the Roll gets refreshed next turn, better that you make the Roll before you end the turn so you can Freeze whatever might come up.
This is extremely important especially if you find two animals that work well together… Did you know that some animals do work well together?
Get Animals That Synergize Together

Just like in real life where some animals have a mutualism-type relationship, Super Auto Pets has this, too (but not realistically). We will discuss this bullet in detail below, but let us give you a quick sunmary on what this is all about.
Imagine your team like a machine. All animals in your team have to possess and wield skills that are complementary to each other. If one animal is out of place, you will lose entirely. Take for instance a Peacock and an Elephant.
The Elephant damages whatever’s behind it before it attacks. The Peacock gains damage as it takes a hit. This synergy is quite powerful provided that the Elephant doesn’t kill the Peacock immediately. Or the Ant being able to buff any friend it has on the team when it dies. Setup is very important and it’s all a matter of experimentation.
If you would like to know more possible animal pairings or combinations, look no further than the bottom of this guide. For now, let’s tackle another important aspect of preparation:placement.
Placement Is Important
The animals line up and the battle rages on! But oh no! Your plan didn’t seem to work out as well as you’d hoped! Perhaps the placement of one of your animals is off?
Placement is quite important in Super Auto Pets. You have a team of five slots. Each slot can hold one animal. The slot placement is as follows:
5 4 3 2 1
That said, a Sheep can spawn 2 Rams when it faints, but if placed in the very front of a full team (slot 1), it will only spawn 1. Why? Because of the slots rule. Same goes for a Cricket bearing a Honeypot. If the Cricket is way up front and faints first, the Bee will not spawn.
One more thing we can add to this bullet is that there are certain positions in your team that are more important than others. The most important slots are usually slots 1 and 5. Slot 1 is typically used for tanks and hard-hitters while slot 5 is used for buffers like Turkeys and Horses or animals equipped with the Honeypot. Sharks also greatly benefit from the 5th slot.
Beware that some animals attack these slots. The Crocodile, for example, targets the last animal on the enemy’s team with its skill. We all go back to the whole “reading the tooltips” bit as this should determine the apt placement of each animal. Where does a Badger go? Or a Hedgehog? Or a Dog or a Cat? We’ll let you figure these out yourself!
Animals can win on their own at times, but feeding them is just as important as placing them.
Feed Your Pets Wisely
You only have 10 gold per turn unless you have a Swan, a Squirrel, or a couple of Pigs on your team to save money. How should you feed your pets then?
Here’s an easy, categorized lineup of the different food you can encounter:
- Strengthening Food – 🍎🍐🥛 These will permanently increase the health and attack of a singular animal. The most powerful one, the Milk, comes from the Cow. After buying a Cow, it turns all the shop food into Milk. The best part is, the Milk is completely free and this counts if you buy a Cow to level up your existing one.
- Group Strengthening Food – 🥗🍣🍕 These will permanently increase the health and attack of multiple random animals on your team. The Salad and Sushi will strengthen 2 random animals while the Pizza Slice strengthens 3.
- Utility Food – 🍯💊🍫🥫 The food in this category have special effects that aren’t like the other food. The Honeypot allows your pet to spawn a Bee as soon as it faints, the Sleeping Pill causes a pet to faint permanently, the Chocolate Bar adds experience points to a pet’s current level, and the Canned Food strengthens current and future shop pets.
Let’s talk about the Sleeping Pill in particular. It can summon a random Tier 3 pet when used on a Spider, and can cause permanent upgrades to come from the Ant, Flamingo, and Mammoth. The use of the food in this category is completely situational.
- Defense Food – 🧄🍈 The food grouped here add a layer of armor to a selected pet. The Garlic allows them to take 2 damage less while the Melon allows them to take 20 damage less, but only once per round.
- Attack Food – 🍖🥩🌶 Lastly, these types of food will grant your pet a boost in their attack. While the Meat and the Steak greatly increase your pet’s raw damage, the Chili Pepper allows your pet to attack the first two pets it hits.
Deciding on how you wanna feed your pets should be done before you run out of gold or right as the shop phase begins. Study your lineup and throw them what you think will work for them. Just remember that some pets like Oxen will overwrite the effect of any Honeypot, Meat, Steak, Garlic, or Melon effects when they use their skills.
Most of what happens in preparing for your next fight is reading. Read everything before you end your turn. Once you completely understand how it all works and after you’ve decided on a strategy, it’s time to fight.
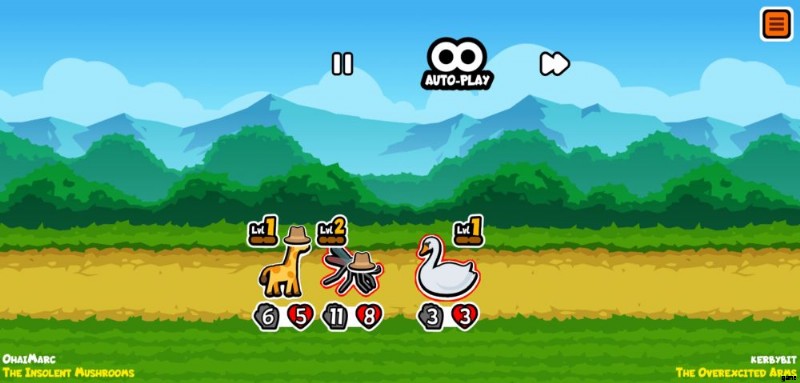
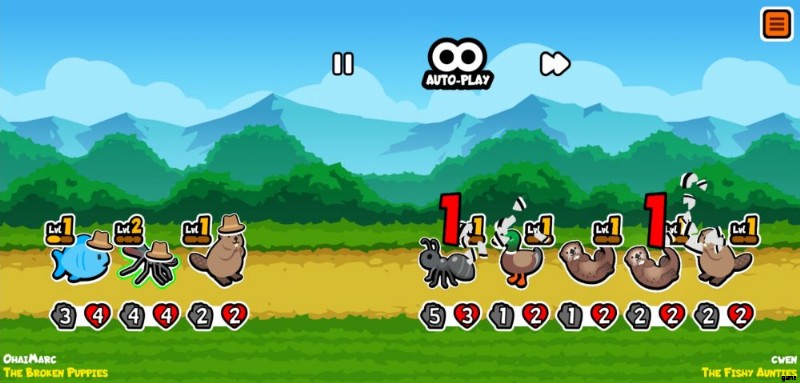
BATTLE
Here comes the enjoyably frustrating part of the game. The battles in Super Auto Pets are unpredictable as they are chaotic. Pets popping up from everywhere, some coming back from the dead, Honey Badger Clutches, and more. The battlefield is where you will learn many things, but here are a few firsthand tips from us to you!
Expect A Draw Or Defeat The First Few Rounds
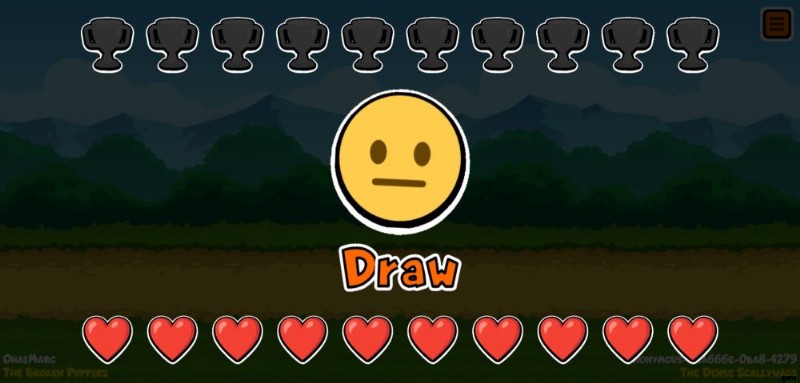
The game can be rough but let’s set something straight here:you are most likely to have a draw or lose outright in the first few rounds.
Can you secure a win at least?はい。 But given the animals in Tier 1, they all possess low health and attack. The battles here can be swift and unforgiving and most of the time, you really can’t gauge what your opponent will pull off. A simple tip that we can give you here is to stick to the Fish (if you get these early).
Another reason why you are less likely to win early on is because most of the Tier 1 pets are quite plain in skill. The really exciting or powerful pets come along, but building on a Tier 1 until it gets super strong will propel you through your later matches. Just make sure you stick to one pet to strengthen at this moment and you’ll start to see trophies pop up.
There is one Tier 1 item that stands out…
Honey Can Help Win Early Fights
What’s golden and precious and rhymes with money?それは正しい! Sweet, sweet Honey!
If you didn’t know already, Honey allows your pet to summon a Honeybee when it dies. This bee, although bearing only 1 attack and 1 health, is usually a trump card for many. Here’s a very likely scenario that could happen in the many early battles:
Each of your pets and the pets of the enemy knock each other out of the match and you’re down to your last pet. Oftentimes, it will result in a draw but not if your final pet has Honey. It will result in a draw if your opponent has Honey, too, and worse if they have a Cricket using Honey. The latter will result in a loss for you (but hey, take that as a tip! *wink wink*).
Speaking of which, let’s touch upon a particular strategy that could help you in the early game.
Commit To A Single Animal As Much As Possible
Imagine this for a moment:you start out with the Tier 1 animals but as you fight, there is one of them that you just won’t sell. This is a viable tactic.
Keeping any animal and building your team around how they play can propel you forward. Let’s take a look at the Fish, for example. This creature starts with pretty high stats and has a great skill it uses upon leveling up. Beefing the Fish up with lots of food will guarantee you a couple of wins as you go.
This also helps if you know what kind of skills your animal possesses. This time, we take a look at the Horse. The Horse is quite deadly if it is joined by the likes of Crickets, Sheep, Roosters, or Deer. Basically, anything that gets summoned, it strengthens. Have a Turkey join the Horse, and you have the strength of an army at your disposal.
But this also begs the question:what should you value more? An animal’s raw numbers or their skills?
Numbers Or Skills?
Some pets bear high stats, some of them have really low ones but have powerful skills at their disposal. Who is it that you should choose?
The answer here is:it depends! Yes, it really depends on who you want to build on. We mentioned early on that the Fish is quite meaty with its basic stats (2 Attack, 3 Health). By itself, the Fish can become quite the monster if fed properly and often. But then, there are those that could give boosts to anyone on their team. Let’s talk about the Ant, this time.
The humble Ant is a welcome addition to any team. As it faints, it bestows an attack and health bonus to a random animal on your team. Similar animals are the Flamingo and the Mammoth, both quite powerful in their own right but not through raw stats. Just like the Ant, they give out powerful buffs onto their living allies after they’ve lost, only the Flamingo does this to the two allies behind it and the Mammoth does it for everyone.
Surely a balance between these two conflicting schools of thought is needed, but most players just stick to one or the other. It all depends on what you think your current team values more. In all honesty, finding out what works for you will make you get through your fights more.
Observation is only secondary, and that can be achieved through playing lots of Arena Mode.
Play Arena Mode… A Lot!
Arena Mode! The mode where only the finest salt is mined! It’s brutal, it’s difficult, it’s infuriatingly satisfying! This is where your dreams are made or where they are crushed and thus it’s important to play here and see where you stand!
In all seriousness, you play here to observe your opponents as well as figure out what build works for you. Look at how your opponents play and learn from their builds; observe which animals and items they use so the next time you come across them, you’ll know how they behave and how you can use them to your advantage or defeat them if they’re on the enemy’s team.
The Arena Mode also teaches you how to strategize on the spot by being in the shop menu. Once you’ve reached a high enough Tier, you’ll be finding ways to make your team stronger than before and that making bad decisions could teach you valuable lessons through failure. The game tends to match you with people more powerful than you and you will only get stronger if you prepare well.
While we might have not said so much here, we mean it when we say that Arena Mode is the best place for you to practice. It’s this mode that will prepare you for the time you’ll want to play this game with friends since the shop menu in Versus Mode is timed. The best way to go about this is to have fun and never stop fighting.
We’ve discussed the basics of battle and the core mechanics of the game. Now it’s time for us to impart great knowledge upon you, dear reader.
ANIMALS AND ITEMS THAT WORK TOGETHER
There are tons of ways to make animals work together. But from us to you, here are a few combinations that work:
- Ant in Slot 4 with an Animal Behind It
Pros: Cheap, Easy
Cons: Animal behind the Ant should be powerful
Notes: This is a very easy tactic that can be useful even late into the game.
- Peacock with Garlic Armor and Camel in front with Garlic Armor
Pros: Powerful, Camel is tanky
Cons: Peacock may need to be strengthened beforehand
Notes: The Camel buffs whoever’s behind it every time it gets hit. Once the Camel faints, the Peacock is ready to fight. Not to mention, the Garlic Armor keeps them protected, maximizing the amount of buffs they get.
- Honey Badger Clutch (Badger with Honey Pot in Slot 5)
Pros: Fun, Easy to Use
Cons: Badger has to be last to fight or the clutch will fail, will also fail if the last enemy animal was also equipped with a Honey Pot
Notes: Upon fainting, the Badger deals its attack damage to the animals adjacent to it. This is basically the Badger taking its enemy with it having the Honeybee pop up out of nowhere to be abuzz with your victory.
- Kangaroo with Meat Behind Peacock with Garlic Armor
Pros: Minimal setup
Cons: Both animals may need to be strengthened for maximum efficiency
Notes: As the Kangaroo braces itself through the Peacock’s defense, it’s sure to give its opponent a knockout punch after the Peacock falls.
- Blowfish with Garlic Armor, Snake Behind Blowfish
Pros: Powerful artillery strikes
Cons: Late-game setup, Snake can be rare
Notes: As the Blowfish takes hits and fires at random enemies, so too, does the Snake since it attacks anyone at random when the animal in front of it attacks.
- Turkey Behind Sheep, Roosters, Deer, Crickets, or Flies
Pros: Buries enemies in summoned animals
Cons: Turkey can’t do much to protect itself, Turkey is susceptible to Crocodiles if put at the last slot
Notes: The Turkey buffs any animal that spawns (Buses are not animals, but still). This works for any of the animals mentioned in this tip.
- Ox Behind a Sheep, a Cricket, a Deer, or a Rooster
Pros: Ox wields its might at a withered enemy team
Cons: Ox can get sniped by a Skunk if its health is the highest, Ox cannot equip other kinds of armor
Notes: Granted that an Ox will power itself up as its friend in front of it faints, the Ox is best placed behind these animals since they technically faint twice.
- Whale Behind Deer with Mushroom
Pros: Unexpected bus attacks!
Cons: Deer won’t be able to do much, Whale may need strengthening, will require proper positioning
Notes: The Whale swallows the Deer, causing it to faint and spawn the Bus, the Deer will revive again as a level 1, ready to spawn another Bus when it dies.
- Dodo Behind Crab
Pros: Relatively easy setup
Cons: Both Dodo and Crab will need some strengthening, Crab will need an animal with high health to copy
Notes: The Crab copies the health of the animal with the highest health, the Dodo makes the Crab stronger. An easy strategy but requires a tiny bit of setup.
- Boar with Garlic Armor
Pros: Brings out the Boar’s full potential
Cons: May need friends to back it up
Notes: The Boar raises its health and attack with every attack. Giving it Garlic Armor grants it the chance to grow in power as it fights as well as keeps it alive much longer.
To conclude this guide to Super Auto Pets, it’s all in the reading of the tooltips and experimentation. Fighting in Arena Mode is the most important aspect of the game as it teaches you possible combinations of animals and items that work. Save your animal fusions for whenever you go up a Tier so you can get an early high-Tier animal after a successful level up. Good luck and have fun!
Do you have any tips of your own or more combinations that you can add to our list? Leave them in the comment section below!