Warlings 2:Total Armageddon 初心者向けガイド:対戦相手を支配するためのヒント、コツ、戦略
90 年代初頭のゲーマーは、おそらく DOS ベースの戦略砲兵ゲームである Scorched Earth に精通していますが、それ以降のゲーマーは、少なくとも Worms シリーズのゲームについて聞いたことがあるはずです。これらのタイプのゲームは、コンピューターと対戦するか、他のプレイヤーと対戦するかに関係なく、気軽にプレイするのに楽しい時間を過ごすことができます.運はゲーム メカニクスで考慮すべき要素ですが、砲兵ゲームは依然としてスキルと戦略に大きく依存しています。
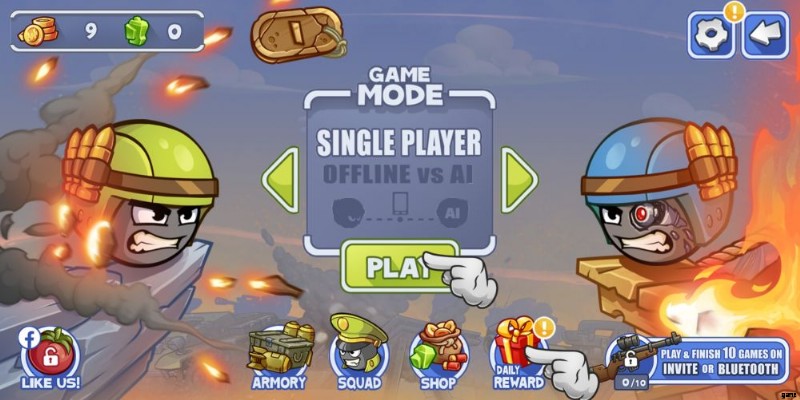
Warlings 2:Total Armageddon は、ピクセル ポーランドの 17 番目の Warlings:Armageddon の続編であり、現在 Android デバイスで利用可能な改良された代替品として非常に役立ちます。 Warlings 2:Total Armageddon は、どの「Worms」ゲームにも匹敵しますが、完全に無料でプレイでき、さらにシンプルなゲームプレイ メカニズムを提供します。ロックを解除して敵に使用できる 38 のユニークな武器と、チームにさらに多様性をもたらす兵士のクラスがあります。
ゲームに参加するとすぐに、短くて簡単なチュートリアルが表示されます。プレイして最初の 1 分以内に、次の試合で生き残ることができるとすぐにわかります。活気に満ちた漫画のようなグラフィックは、初心者に優しいコントロールとインターフェース。ただし、Warlings 2:Total Armageddon は、習得するのは簡単ですがマスターするのは難しいゲームの 1 つです。引き続き、Warlings 2:Total Armageddon ビギナーズ ガイドの詳細を読んで、対戦相手を圧倒するためのヒント、トリック、戦略を確認してください!
1.基本をマスター
Warlings 2:Total Armageddon で進行するテンポの速いチュートリアル ラウンドでは、すべてのプレイヤーが次の戦闘に進む前に知っておく必要があるいくつかの重要な詳細を見逃している可能性があります。チュートリアルで最初に直面するのは、すべてではないにしてもほとんどが簡単に勝つことができるはずのいくつかの敵であるため、次の戦いの選択はより多くの課題を提示します.短い練習ラウンドと見なすことはできますが、これで学習フェーズが終了するとは期待できません。
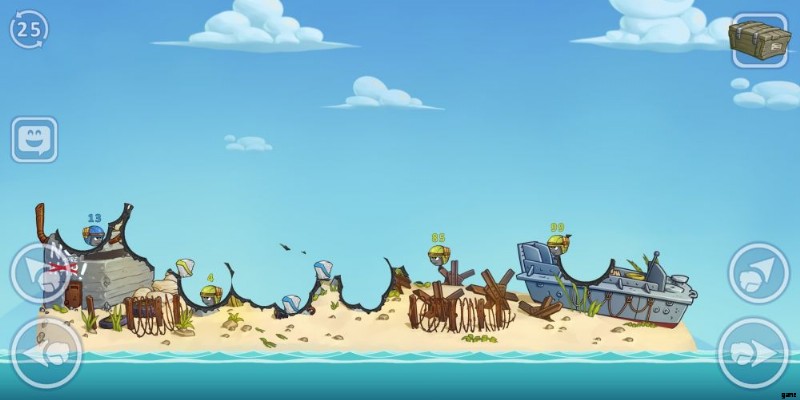
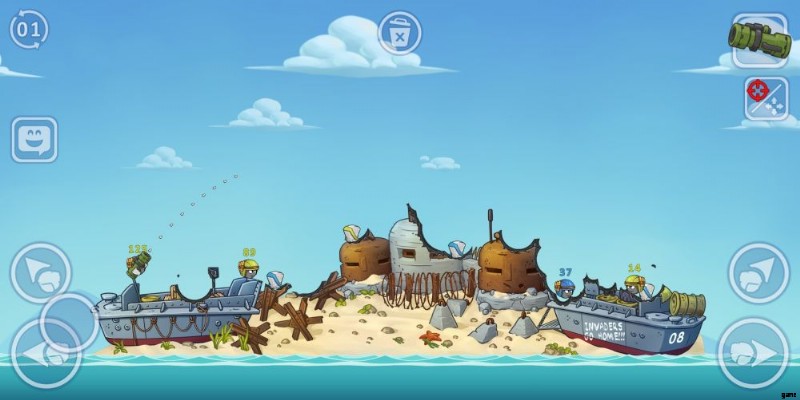
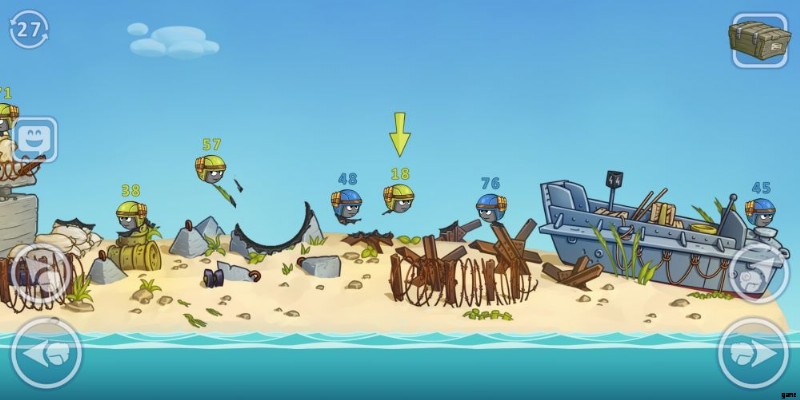
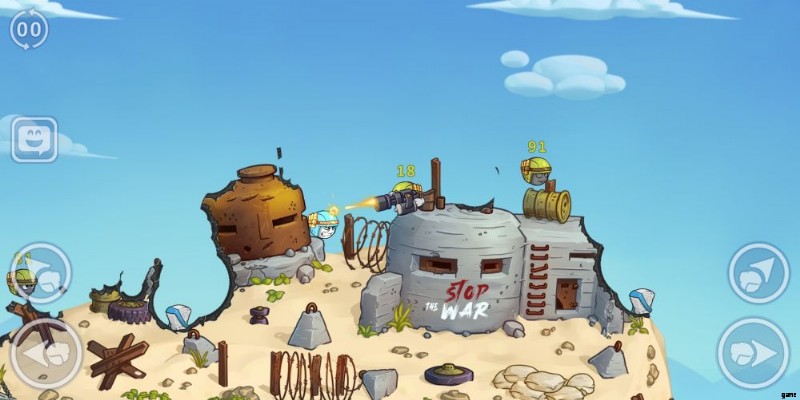
Warlings 2:Total Armageddon はターン制の 4 対 4 の戦術戦闘で、自分の部隊と敵の部隊をマップ上のランダムな場所に配置します。各兵士が地形のどこに配置されるかという点で運が役割を果たしますが、それよりも重要なのは、スキルと精度が重要な試合です。 Warlings 2:Total Armageddon は、グレネードやロケットの弾道を計算し、着弾点を予測する方法をよく理解している必要があるため、物理学の考え方が重要なゲームです。
便利なことに、各ショットがどのように進むかをより正確に予測するのに役立つ投影軌道線があります。ただし、ラインは非常に短いため、長距離攻撃はより困難になります.自分の番が始まったら、30 秒以内に移動します。最初のステップは、見やすいようにビューと位置を調整することです。ピンチ ジェスチャを使用してバトル アリーナをズームインおよびズームアウトしたり、画面をスワイプしてビューを調整したりできます。
小さなワーリングの位置を決めるときは、画面の左右に矢印キーがあり、向きを変えて左右に移動します。左右の斜め矢印キーでジャンプボタンも使えます。武器を選択する前に、キャラクターがどこを向いているかを考慮することが重要です。準備ができたら、画面の右上にあるクレートをクリックして、使用する武器を選択できます。
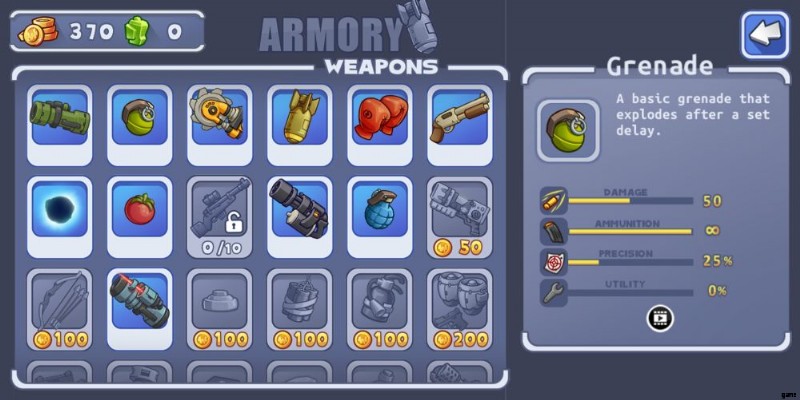
ロケットランチャーとグレネードは武器庫の中で最も基本的な武器であり、無限の用途があります。 Warlings 2:Total Armageddon では、両方を使いこなすことを学ぶことが基本的に必要であり、状況に応じてどちらを使用するかを決定することも同様に必要です。使用する武器は他にもたくさんありますが、これらの 2 つは最も一般的で、より頻繁に使用する基本的なものです。ロケットは着弾時に爆発しますが、グレネードは爆発するまでに時間がかかるため、投げてから爆発するまでの間に移動する時間ができます。
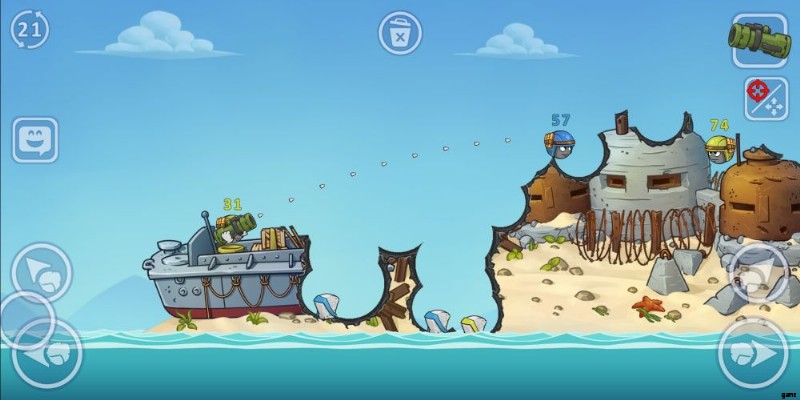
各ショットの目的地を制御できるだけでなく、ほとんどの場合、その背後にあるパワーの量を調整することもできます.点線のガイドラインに注意を払うと、ターゲットから遠ざかると点線のガイドラインがさらに広がり、ショットの軌道が変化します。ショットの軌道を調整するときに、チュートリアルが画面の上部中央を指す重要な理由もあります。ターゲットが遠くにある場合は、画面の中央でタップ アンド ホールドを開始すると、必要に応じてショットの威力を上げる余地が増えます。
Warlings 2:Total Armageddon を他のものよりもシンプルで簡単にする考慮すべき要因の 1 つは、バトル アリーナに風がないことです。大まかに似たようなゲームを以前にプレイしたことがある場合は、風がどのようにユニークな機会と脅威をもたらすかを知っています.風は、基本的な武器だけでは届きにくいエリアを攻撃するのに役立ちますが、風は各ショットと各戦闘をより不安定でトリッキーにします.
2.各武器に慣れる
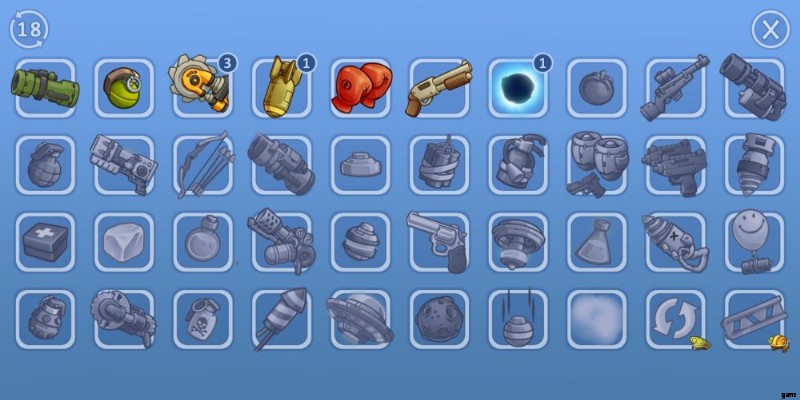
Warlings 2:Total Armageddon では、武器庫にある少なくとも 8 つの異なるアイテムをすぐに使用できるようになります。全部で 38 個の武器とアイテムをアンロックできますが、利用可能な砲兵の完全な品揃えを楽しむ前に、コインの長いグラインドがあります。コインはチームのさまざまなクラスのキャラクターのロックを解除するためにも使用できますが、武器庫、特に戦闘で役立つと思われる武器庫を優先することをお勧めします。
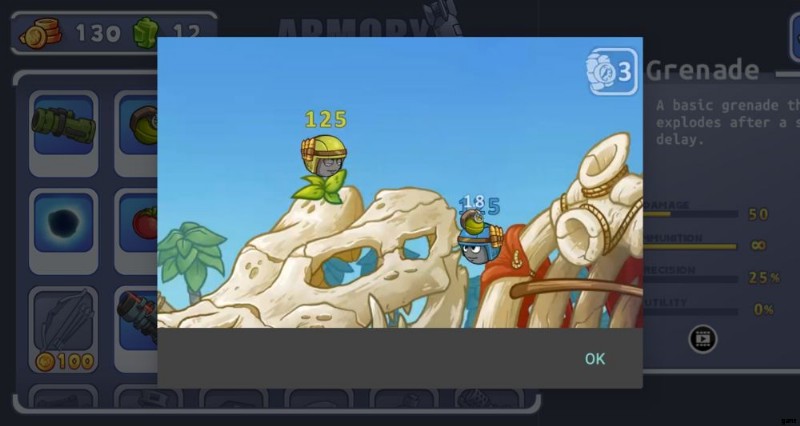
ただし、初心者の場合は、好みやプレイ スタイルを考慮してプレイヤーごとに異なるため、どのアイテムが最も役立つかについてまだしっかりした考えを持っていない可能性があります。いずれにせよ、ロックを解除して使用するための資金を実際に用意する前に、それぞれが実際に何をするかを確認することをお勧めします.武器庫で武器を強調表示した後に表示される説明に加えて、右側のウィンドウのビデオ アイコンをクリックして、武器またはツールのデモを表示することもできます。
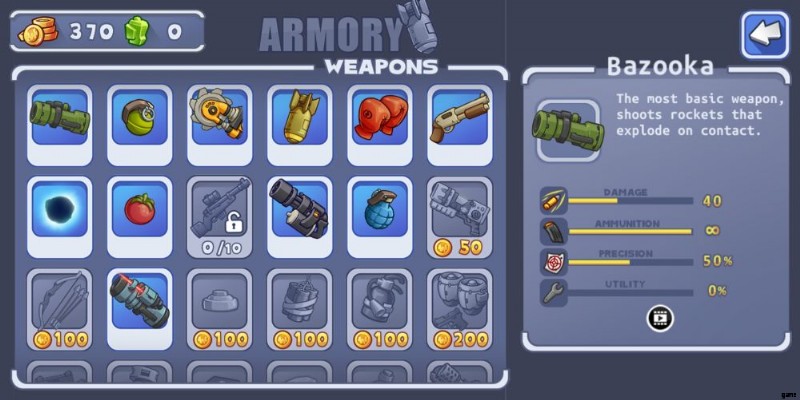
バズーカは最も基本的な武器であり、ロケットは着弾時に爆発します。パーフェクト ヒットで 40 ダメージしか与えられませんが、通常、オープン エリアで敵に対して使用するのが最も簡単な武器です。バトルアリーナのすべてが破壊される可能性があることを考えると、ロケットランチャーは、障害物を「掘って」ターゲットをより適切に狙うための最良のツールとしても機能します.
グレネードはロケットランチャーに匹敵することが多いですが、投げてから爆発するまでに時間がかかります。手榴弾を選択したら、画面の右上にある数字アイコンで爆発するまでの時間を設定できることに注意してください。これにより、特別な場合に空中で爆発させることが可能になります。
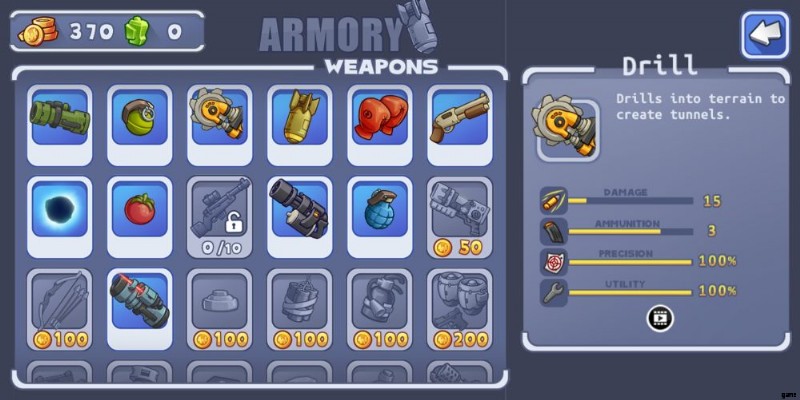
武器庫の最初の基本的なユーティリティはドリルで、戦略的な理由で地形を掘削するために使用されます。 You can dig a tunnel for your own protection and you can also pierce through obstacles to get to an enemy. This tool can also deal damage to enemies and have 3 uses per battle.
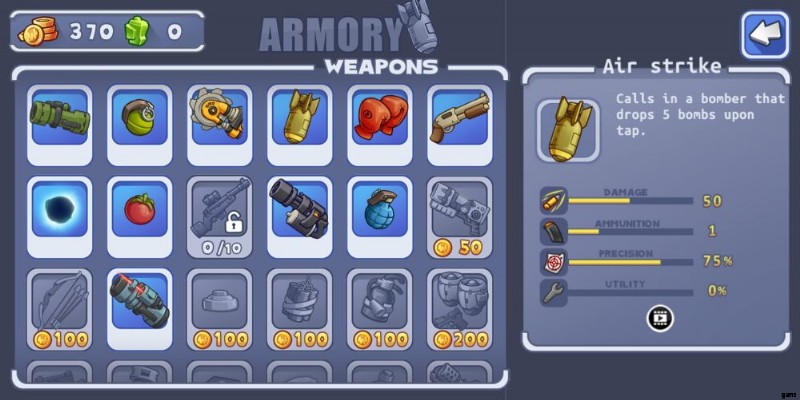
The Air Strike lets you drop 5 bombs on an enemy or a group of them. It can deal 50 damage at most but chances are that dropping 5 bombs will not reach its max potential. Note that while this is best used to strike multiple targets impossible or difficult to hit with other weapons, it is more of a finisher move to save for late game. The plane that carries the bomb will travel from left to right but it will travel back before the time to trigger expires. You should consider dropping bombs a little ahead of the time.
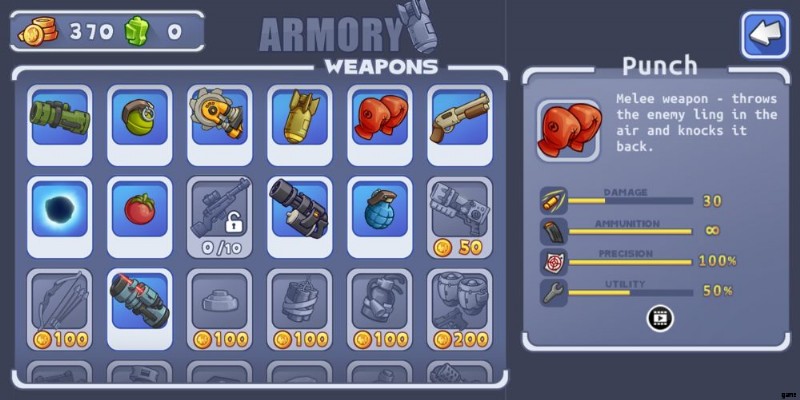
The Punch is a weak melee weapon that has a specialized use. It only does 10 damage to its target but it can fling them a short distance without necessarily damaging yourself. When an enemy is close to or at the edge of the stage, this is the right tool to easily throw them out into the ocean. Be careful though as you might miss if the gloves move past the enemy Warling.
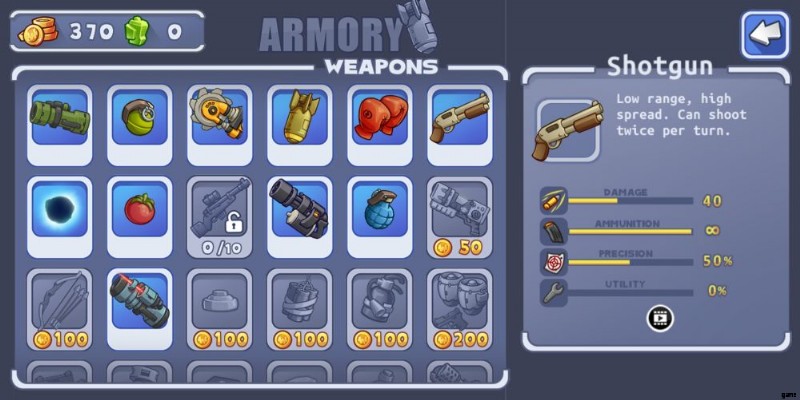
Another short range weapon you might often use is the Shotgun. It deals up to 40 damage with 2 shots and you can move and reposition your aim between the 2 shots. If you are close to the target and would not want yourself taking damage with the Bazooka or Grenade, then this is the best tool for the job.
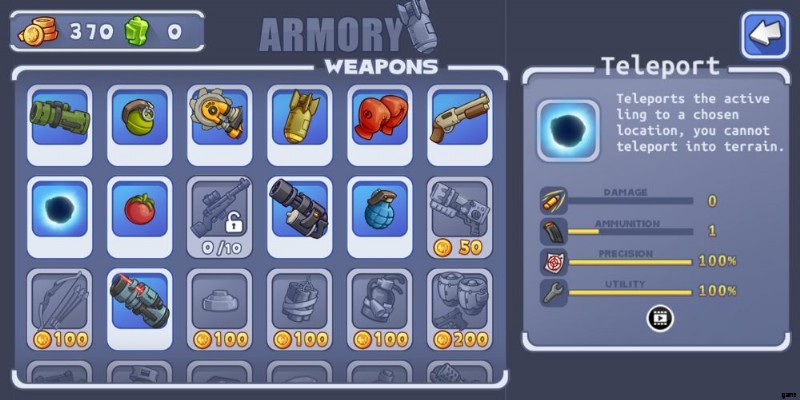
The Teleport function is an excellent tool to instantly relocate the Warling using it. You can teleport to any area on the map so long as it is not obstructed. One issue you might encounter using this is if you fail to zoom out of the map prior to choosing it. There is an icon on the upper right side of the screen that lets you choose between aiming and panning the screen.
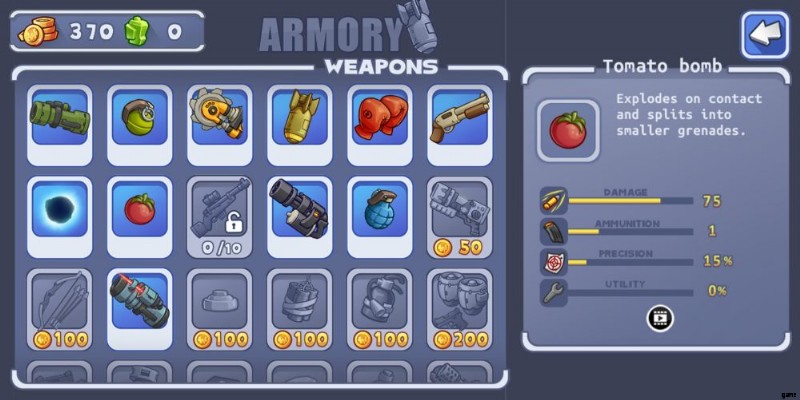
The Tomato Bomb is a powerful grenade that explodes on impact and also breaks into 5 pieces that each explodes on impact as well. It can deal a maximum of 75 damage provided that the main explosion as well as the exploding shrapnel all do a close to direct hit. This is perfect for targets inside a small hole.
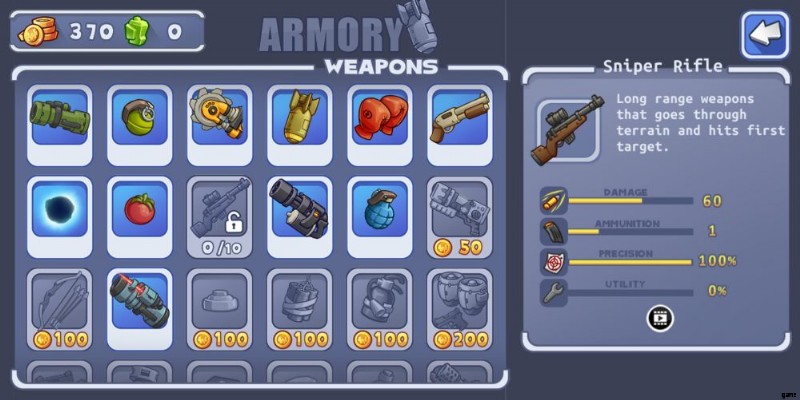
The Sniper Rifle is the only weapon in Warlings 2:Total Armageddon that cannot be purchased with coins. Instead, you need to partake in 10 matches via invite or Bluetooth. This can deal 60 points of damage to a single target and bores through all obstacles in its path.
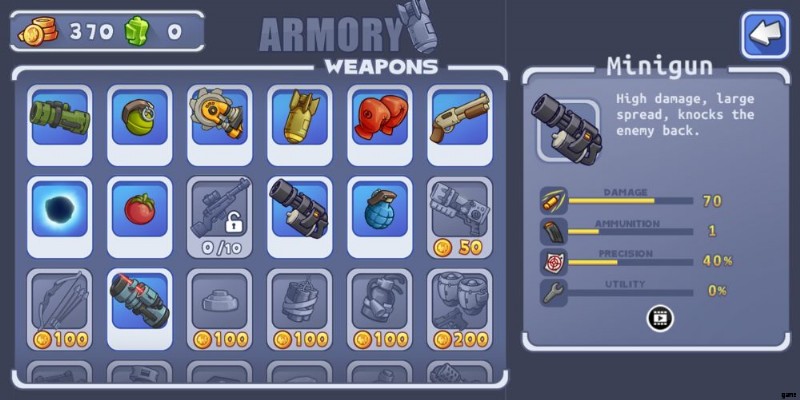
The Minigun also has high damage potential with a maximum of 70 damage. It’s rate of fire is not perfectly consistent so it becomes more suitable against enemies in close range. Each hit will also push the enemy back and since you will not be able to aim it while shooting, the latter bullets are likely to miss if there are no walls behind your target.
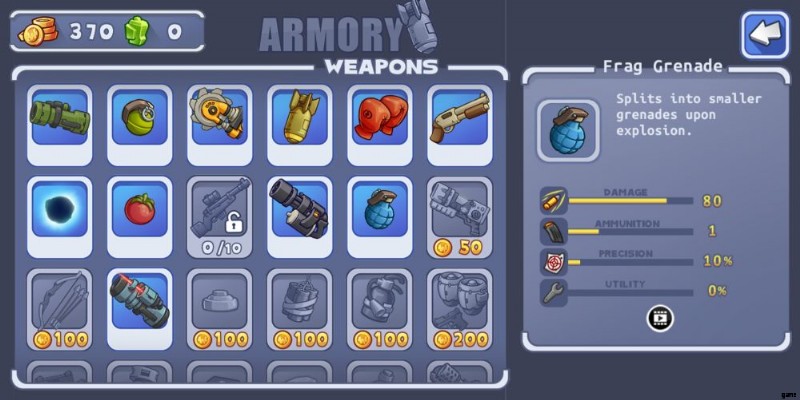
The Frag Grenade works much like the Tomato Bomb and can deal up to 80 points of damage. The difference is that the Frag Grenade will not explode on impact. There might only be small differences in terms of using one over the other given different circumstances, but we consider using both especially when enemies are in a hole.
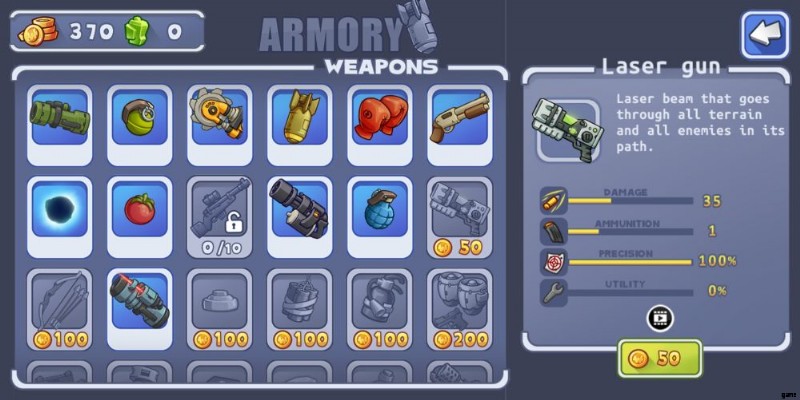
The Laser Gun is like the Sniper rifle but deals only 35 damage and only has 1 use per battle. The difference it offers is that it can hit multiple enemies provided that they are lined up, even across terrain. Note that with friendly fire always on in Warlings 2:Total Armageddon, allies within its line of fire will also take a hit.
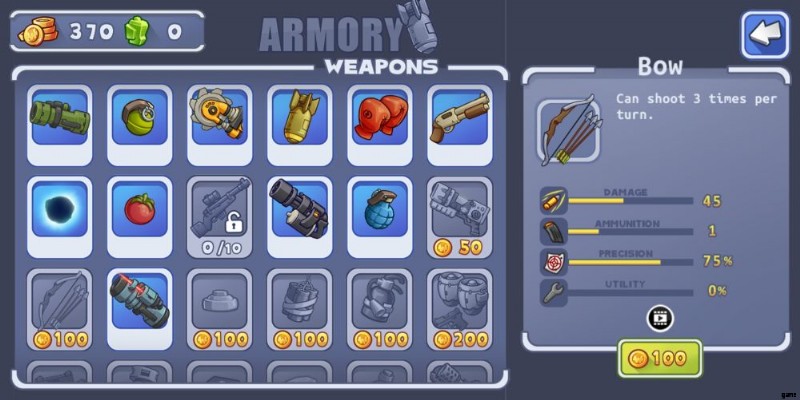
Although it might seem less appealing than the other weapons, the Bow is the only one that can shoot 3 times in one turn. Each shot can deal up to 15 damage for a total of 45 but its accuracy is expected to be lower than most other shooting weapons.
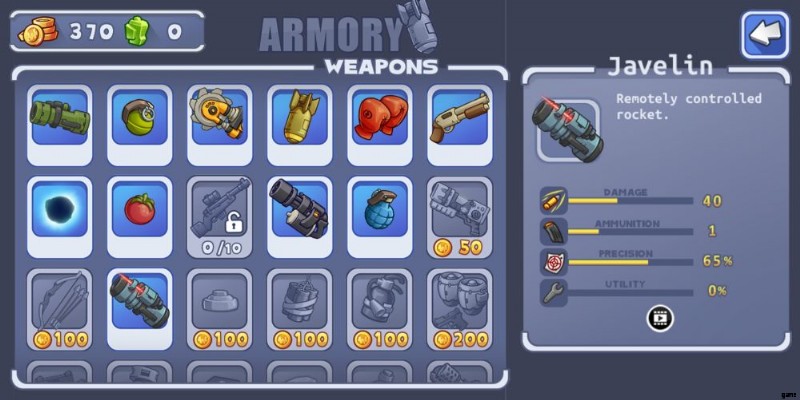
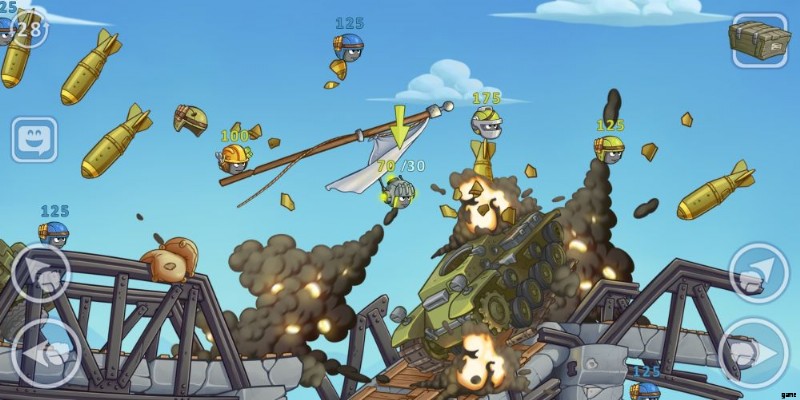
The Javelin fires a rocket that you can control to some extent, perfect for enemies that will otherwise be impossible to hit with other weapons. The rocket does 40 damage on a direct hit and to control it, you need to basically tap the screen when you want the rocket to turn. CPU enemies seem to make it easy using this weapon but it is hard to master and may take a lot of practice.
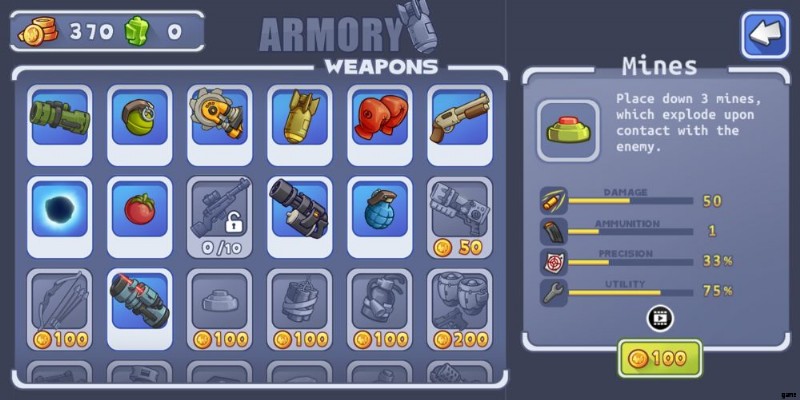
Mines actually let you deploy 3 mines on the field, with each capable of dealing 50 damage to an enemy who comes in contact with it. You can drop it on an enemy inside a hole if you are close enough or set is as a defensive countermeasure if you do not want them walking close to where you are.
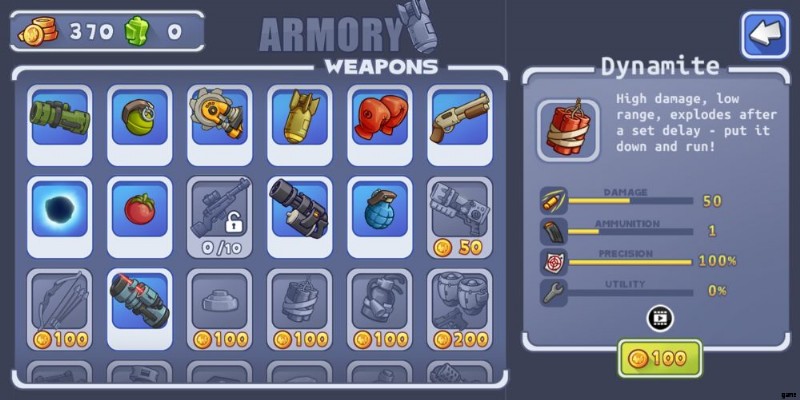
Dynamites come packed with a tremendous explosion that does 50 damage. It can be put down just like mines and will explode after a set period of time. Dynamites are also great to combo with deployed mines and can be used to deal damage to multiple targets close to one another.
As odd as it seems, the Extinguisher is among the weapons in the armory in Warlings 2:Total Armageddon. No, it will not be used to put out fires but instead, it creates a foamy mass much like part of the terrain, deals 25 enemies to enemies it hits, and even keeps them immobilized.

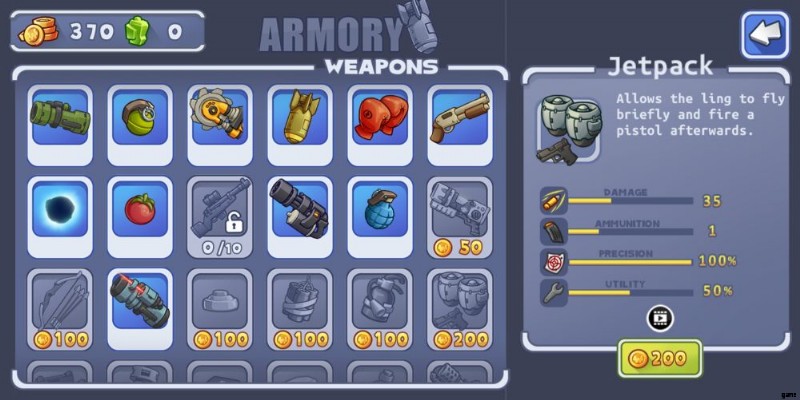
An all too familiar utility item in similar games, the Jetpack in Warlings 2:Total Armageddon lets you fly for a very short span of time to get to higher ground and comes with a pistol you can use afterwards. Be very careful when using this item as you might let go of your hold and end your flight prematurely. Losing flight midway can be very dangerous and might lead to you taking fall damage or worse.
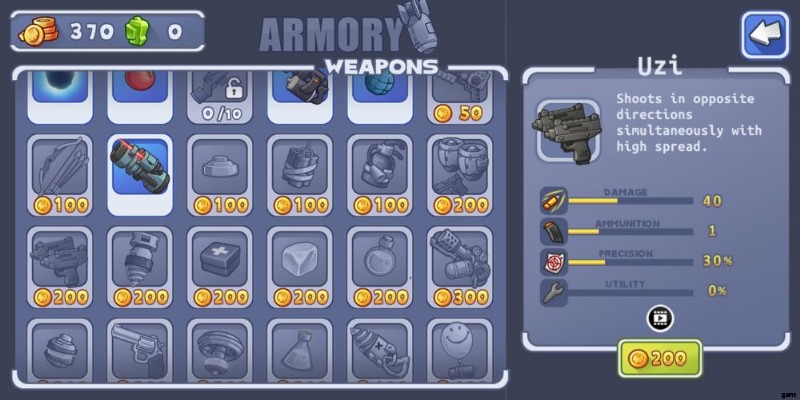
The Uzi works much like a mini gun that shoots in opposite directions. It has a wide spread bringing its accuracy to one of the lowest possible and comes with risks as well of damaging your allies. While largely beyond what we would recommend, it can be useful in case you are pinned by enemies on both sides and have no better options.
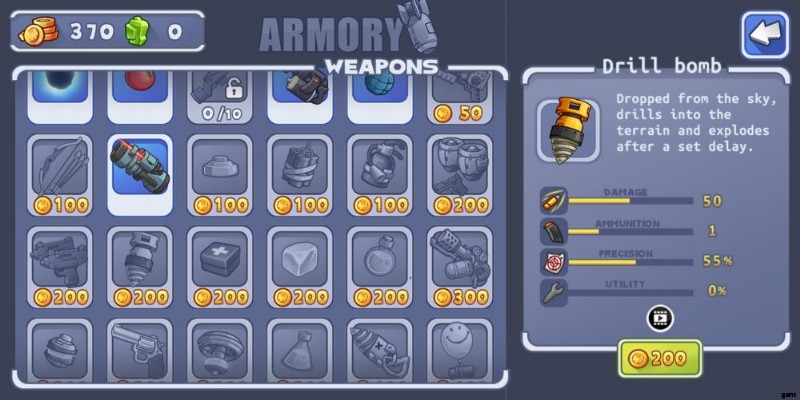
If an enemy is beyond the reach of every weapon in your arsenal, most especially with terrain above them, then the Drill Bomb is your best weapon for the job. The Drill Bomb drops from the sky and bores through terrain, exploding after a set period of time. This may very much require some practice to master as well, but at 50 damage on a direct hit, it is certainly among our favorite weapons.
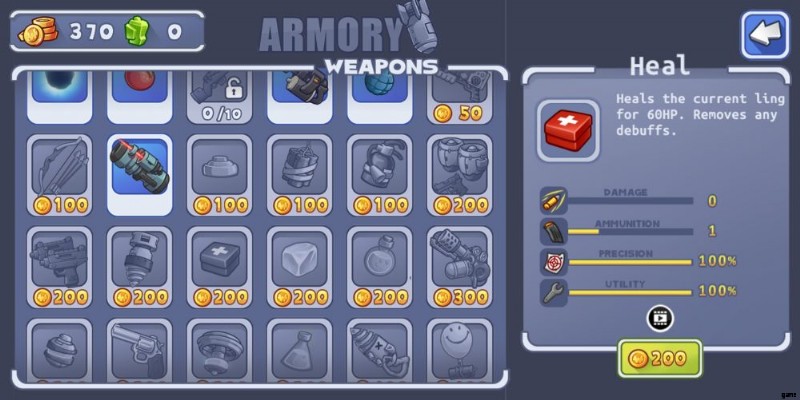
As what it basically says, the Heal item can restore health to the Warling using it. It replenishes health by 60 points and removes all debuffs as well.
The Freeze weapon deals 30 damage to enemies within the area of effect of its impact, freezing them as well. Frozen enemies will not be able to move until after they received damage from another source.

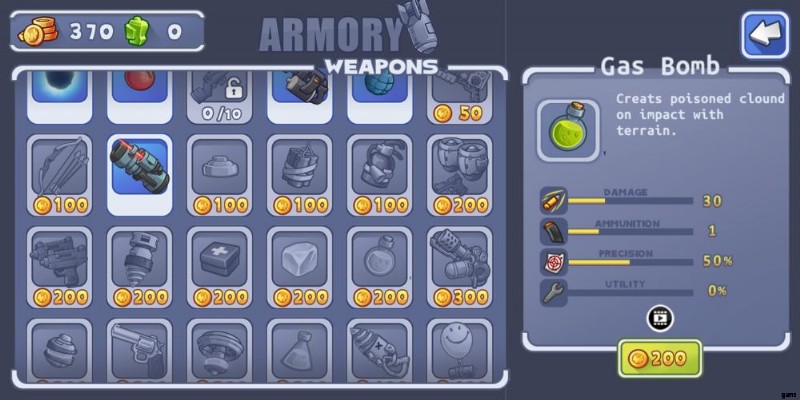
The Gas Bomb is a unique grenade that contains poison gas. It explodes on impact unleashing a poison gas cloud that slowly drifts lower. It deals 30 damage on impact and poisons enemies it hits with 5 damage in succeeding turns.
The Flamethrower is short range weapon that fires a continuous stream of flame when used. Although the details only show 40 damage, it can actually deal as much as 70 damage on an enemy. Although the flames will not destroy terrain, it can pass through it to damage enemies on the other side.

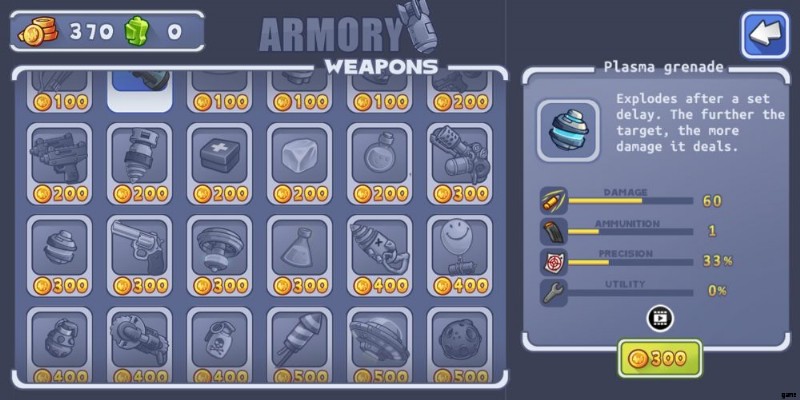
The Plasma Grenade is a powerful AoE grenade that deals damage based on its distance to the target, with a max damage of 60. Plasma Grenades will not destroy terrain they hit and are best utilized against multiple enemies close enough to one another.
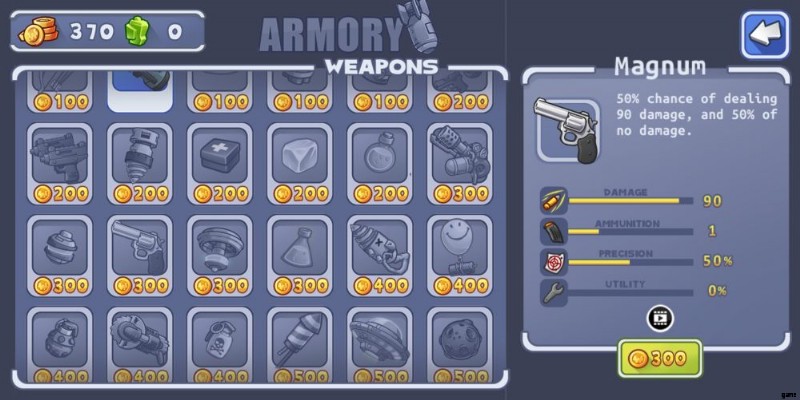
A very powerful pistol, the Magnum can deal 90 damage 50% of the time. However, it also leaves a 50% chance to miss its target. It is best reserved for shots you can actually afford to miss but we recommend going with anything else you can use.
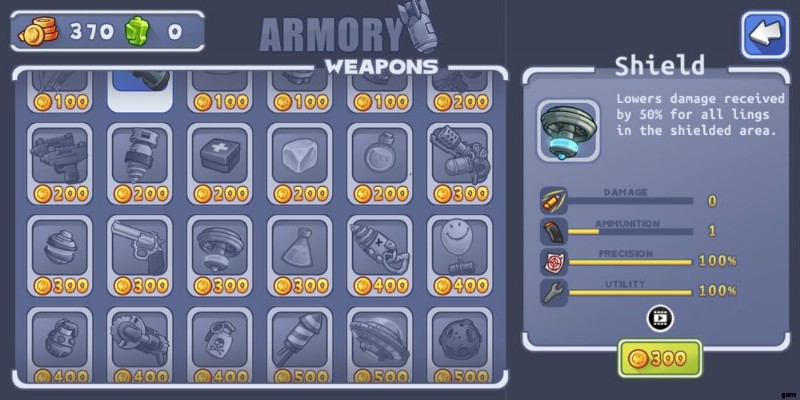
The Shield can lower damage received in the area by 50%, making it a perfect defensive tool in situations where your teammates are close to one another and have no interest in moving out of it.
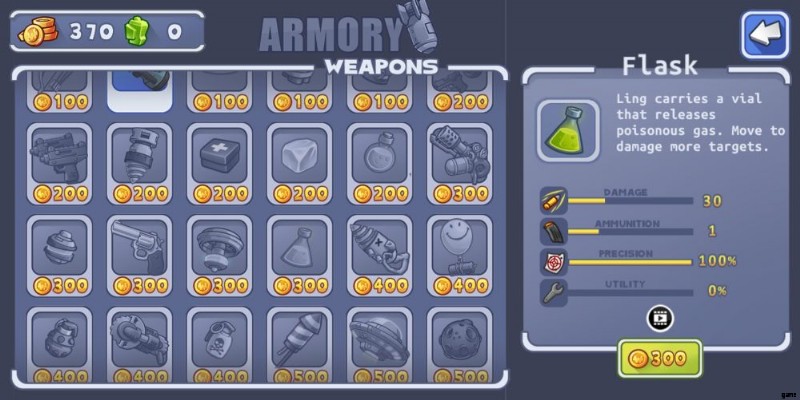
The Flask is a weapon that actually requires you to walk after using it to maximize its damage. The flask will be carried by the Warling and every enemy you come in contact with takes 30 poison damage.
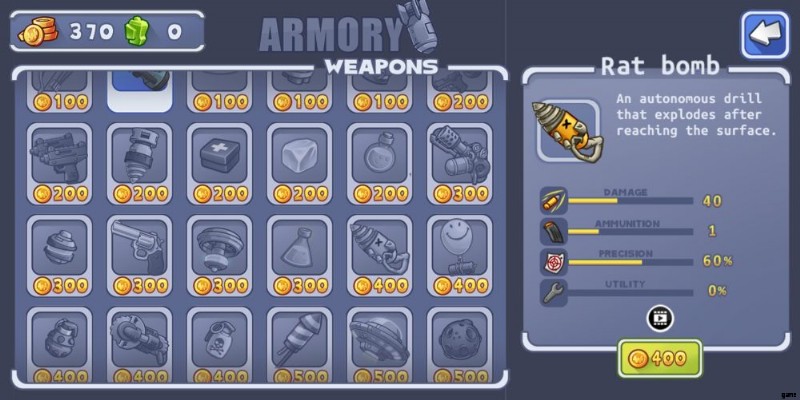
The Rat Bomb is like the opposite of the Drill Bomb. Both will drill through the terrain but the Rat Bomb needs to start within the terrain. It will explode once it bores through the terrain and deal as much as 40 damage to enemies the explosion hits.
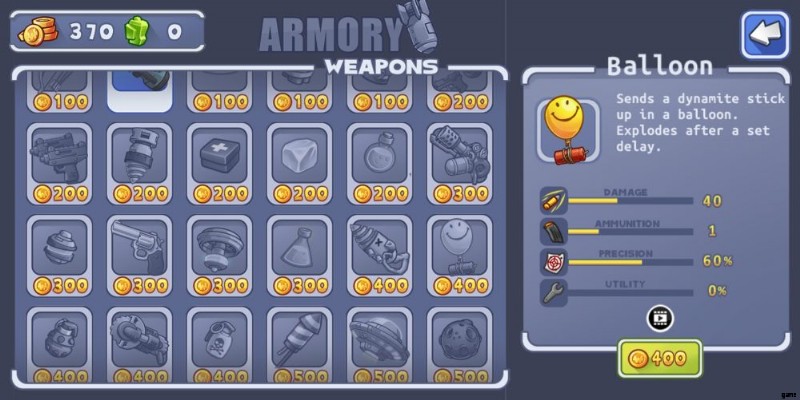
The Balloon lets you deal damage to an enemy or enemies above you. It is tied up to a stick of dynamite that explodes and deals 40 damage after a set period of time. The balloon can pass through terrain as well and its flight path does not necessarily have to be a straight line.
The Tap Grenade works very much like the Frag Grenade but instead of exploding on impact, you can tap after throwing it to have it explode. Each shrapnel from it explodes and can deal as much as 50 damage to its target, making it a powerful weapon against confined enemies in a given location.

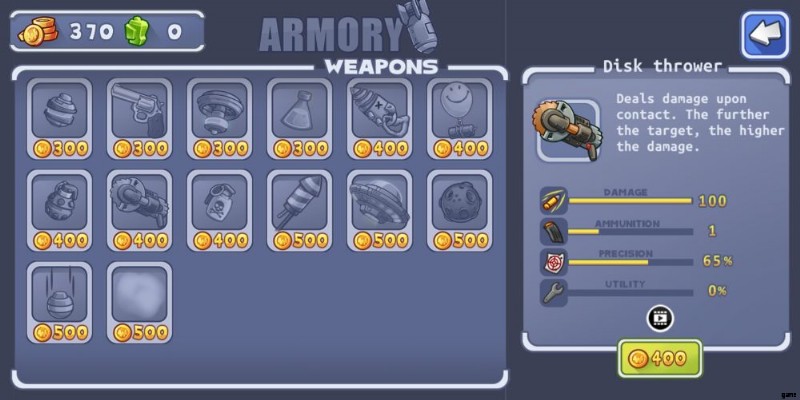
The Disk Thrower lets you shoot a spinning circular blade on an enemy. The damage it does can reach 100 points but depends on the distance the disk travels.
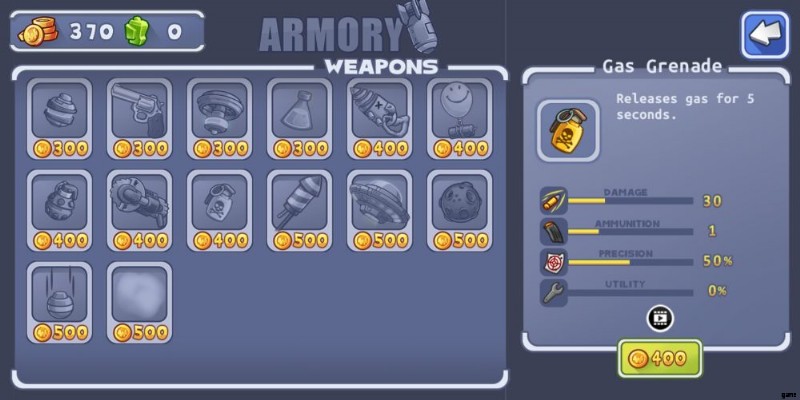
The Gas Grenade is yet another gas-based weapon of destruction that continuously emits gas that can damage nearby units. Gas travels upwards and will not have a wide reach so only enemies in the grenade’s flight path the ones on top of where it lands will be damaged.
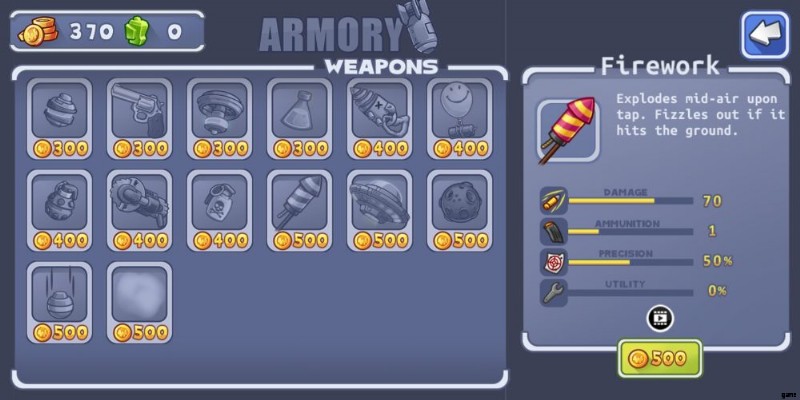
The Firework tool is like the bazooka that does not explode and is wasted if it hits a terrain. It can deal as much as 70 damage to enemies in its area of effect but needs to be detonated in mid-air with a tap after its launch.
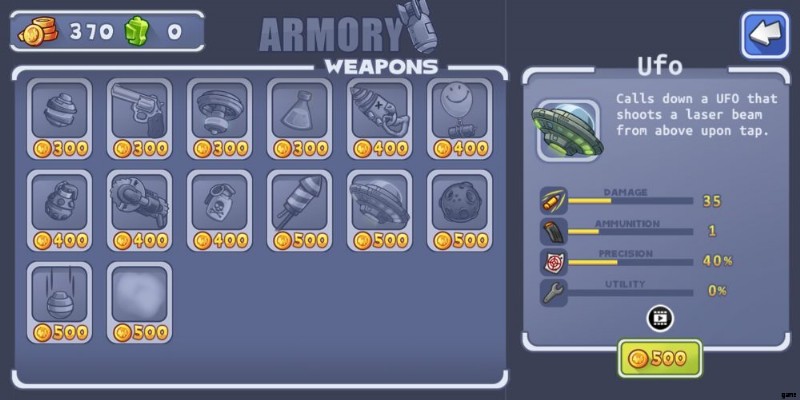
The UFO is certainly one of the weirder tools in our opinion. Using it summons a UFO that moves rather unpredictably in the sky. Tapping at any time during its flight will unleash a laser that does 35 damage to its target directly below it.
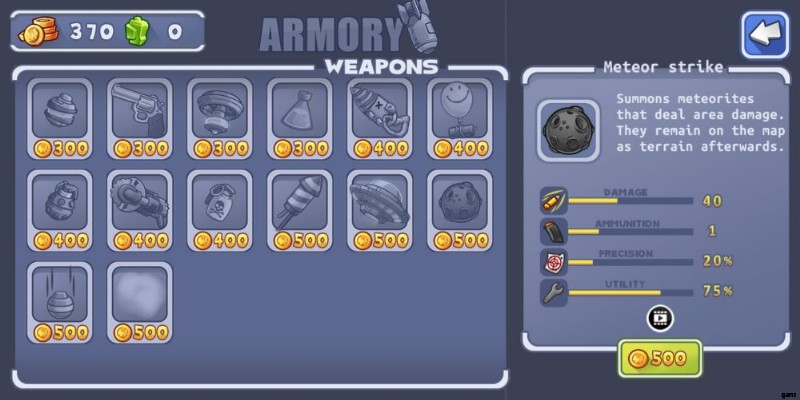
Whether if it is for the 40 points of damage per meteorite, or encasing enemies under new terrain, the Meteor Strike is a fancy weapon that can do both. Accuracy is rather low and may require some practice to utilize perfectly.
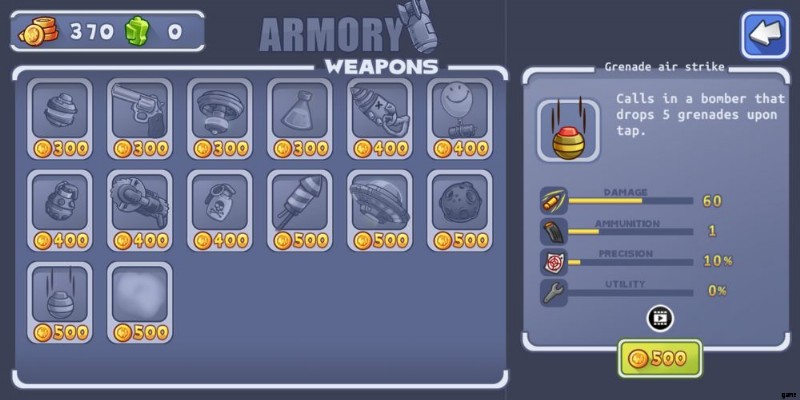
The Grenade Air Strike works much like the regular one but drops grenades instead of bombs that explode on impact. Although it may be a little trickier to utilize on an almost leveled field, this works okay against multiple targets especially ones on a lower ground where the grenades can roll into.
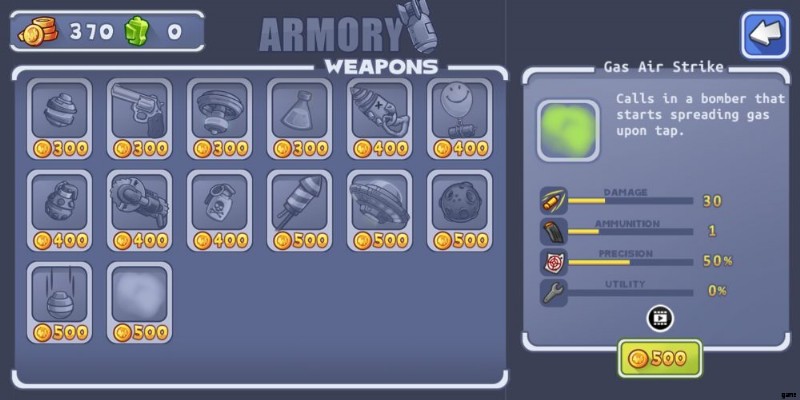
The last, but definitely not the least item in the armory is the Gas Air Strike. This item will call in a bomber that will deploy gas following your tap. The gas unleashed actually covers a large area and deals 30 damage to each unit it covers. Using this will highly likely damage some of your troops along the way.
Familiarization with each weapon and utility tool is just half of knowledge you need with regard to their use. Knowing when to use each one as well as using them precisely will take some time and effort to completely master.
3. Practice Makes Perfect
Given that wind is not a factor to consider with each shot you make; you can be certain that the likelihood of performing loosely similar shots can take place across different battles. It may not sound much but having a relatively consistent trajectory of shots will naturally improve your aim with repetition. In this sense, among others, practice is a very important activity you should dive into if you are aiming to play like a pro.
There are no practice stages in Warlings 2:Total Armageddon but the single player mode is the next best thing to consider to earn actual combat experience before taking on your friends or other players in PvP combat. Likewise, engaging in single player skirmishes will also earn you coins regardless if you win or lose the match. Consider the total amount of coins you need to unlock all the weapons and the character classes as being able to afford all of them should mean that you are close to, if not already, a master of this game.

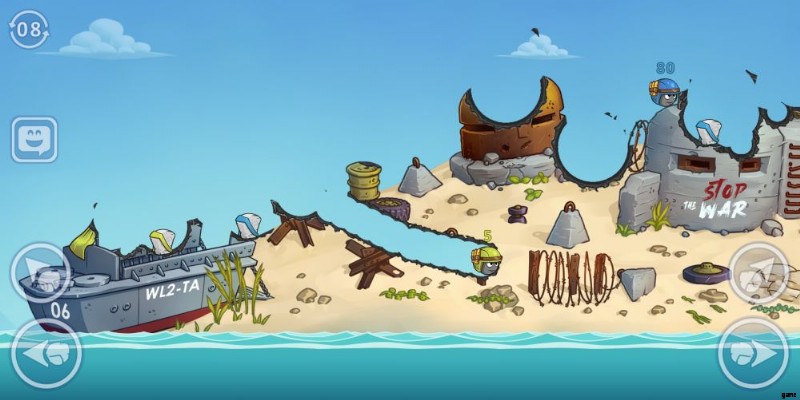
There are currently 7 different maps to engage matches in Warlings 2:Total Armageddon. 3 of them will be readily available and the rest can be unlocked gradually by playing matches. It only takes 64 matches, win or lose, to unlock the last stage and by that time, you should already have enough skills and weapons to take on that level. Although we feel that the stages are somewhat arranged based on difficulty, they seem to be rather arranged by complexity. Regardless of any stage’s layout, difficulty level can have some variables in it as well, especially considering the random deployment of friendly and opposing units on the map.
There are also 3 difficulty settings to choose from with the hardest one granting you the biggest potential to earn more coins. There are some misconceptions relating to difficulty choices in Warlings 2:Total Armageddon. Just because you choose to play in easy mode does not necessarily mean that the enemies will play dumb throughout the match. Being on Easy Mode instead makes it less likely for enemy units to make those ultra-precise perfect shots that can give you a shock in disbelief.
Do not be surprised if some matches in normal mode will seem to make it easier for you to bag a win as the random element of opponents becoming instantly smart in one turn may come more often on higher difficulty settings but will not ultimately decide how difficult it will become to triumph over them.
4. Build Your Perfect Team One Step At A Time
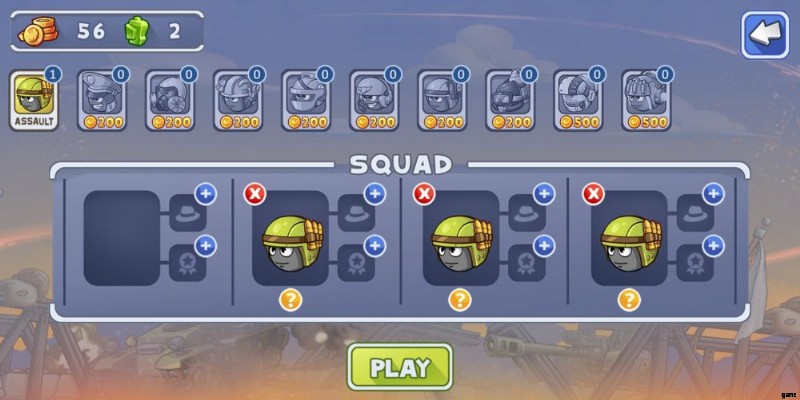
One of the elements that make Warlings 2:Total Armageddon a lot more fun and engaging comes from the host of character classes that you can unlock and use in matches. In addition to the default Assault type unit, which is a generic character, you can unlock more by spending coins to purchase them. With a 4-man team, you can have a full roster composed of unique individuals. This does not prevent you from using some classes more than once, though.
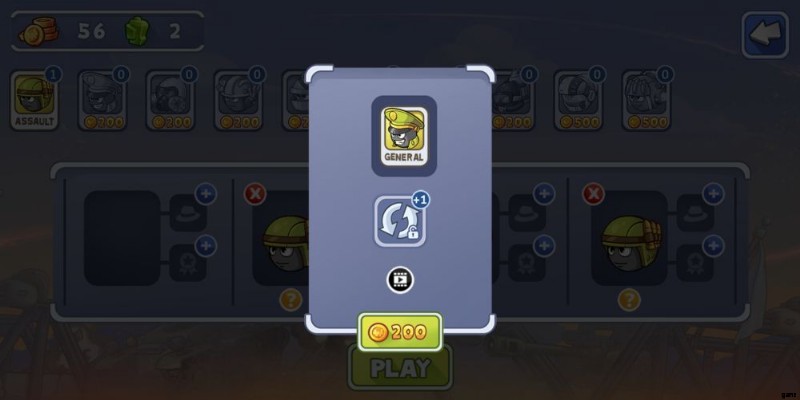
We are pretty sure that at this point in time, you have encountered scenarios when you wish you were controlling another unit. Allied troops and enemy troops take turns by cycling through each available character in their respective teams and instances where your unit who has the current turn will hardly have a chance to do something productive given his location. The General is a class that can switch control to another unit on his turn. It may not seem much but it is certainly a very useful skill that can spell the difference between winning and losing.
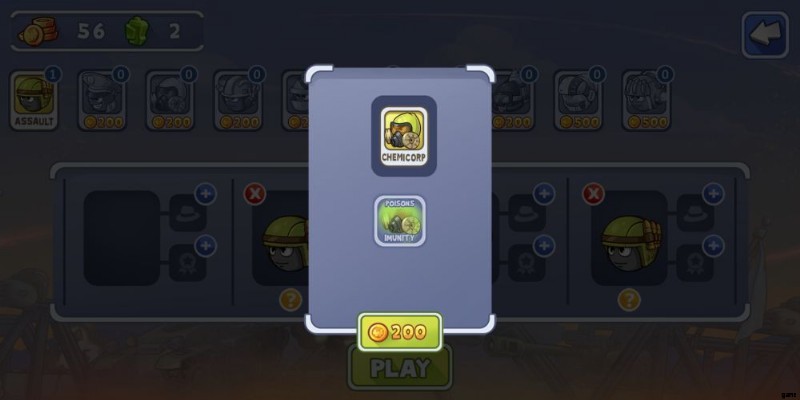
The Chemcorp unit has a breathing mask equipped, giving him immunity from all kinds of gas attacks. Although there are no guarantees that this will be useful in every match, it is still a skill that makes him a better unit than the default one.
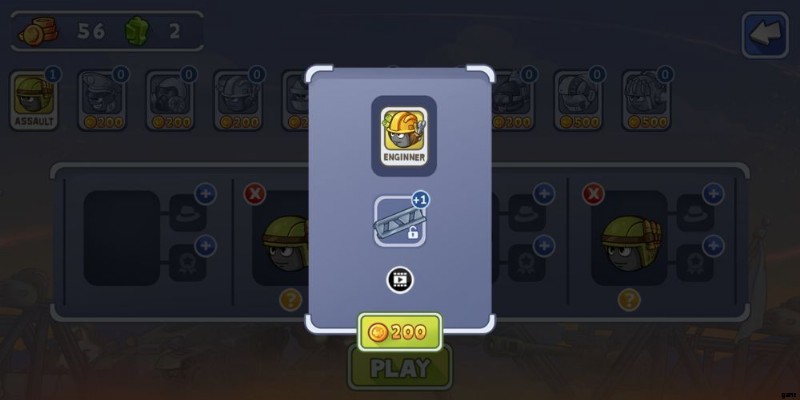
The Engineer is an excellent support unit that can deploy girders for a variety of purposes. If you need extra roof or blockades for protection or want an extra bridge to make it easier to move around the battle arena, then you may want to consider unlocking this guy first. On a more strategic offense support role, you can even create a funnel that encases an enemy, making it easier for any ally to dunk in some grenades on a target.
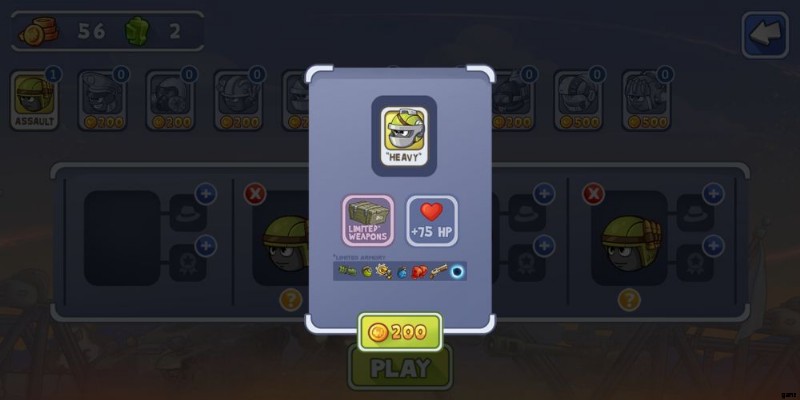
The Heavy unit can call in some random weapon and is also tougher than most Warlings with a +75 health boost. For its relative cost compared to other unlockable units, the Heavy unit is a good pick for beginners who value survival more than offensive strength.
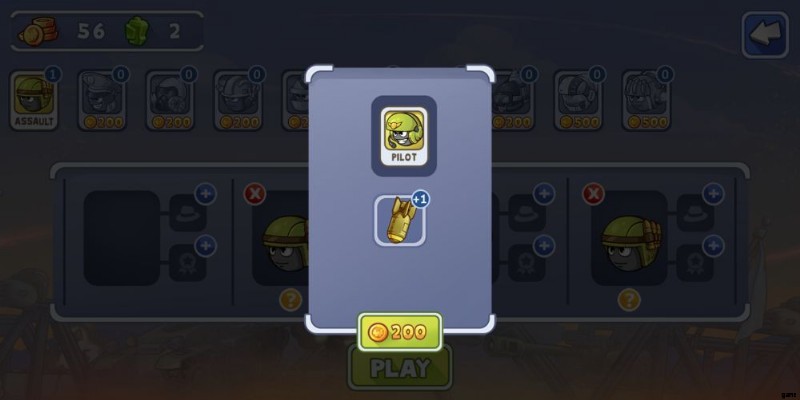
If you are a huge fan of air strikes, then you may want to consider having a pilot in your team. Pilots give you an extra airstrike and while air strikes may lack the accuracy most weapons have, having 2 of them instead of one can still help you in a lot of matches.
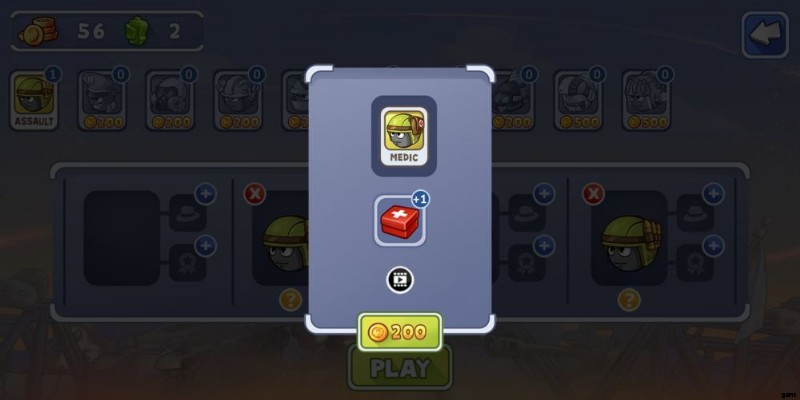
If you want an extra health kit instead, then the Medic is an attractive unit that you should consider. An extra med pack can go a long way with its heal for 60 points. There are plenty of weapons enemies can use to drain away that 60 points on their turn but used strategically, an extra HP restoration can tilt the tide of battle in your favor.
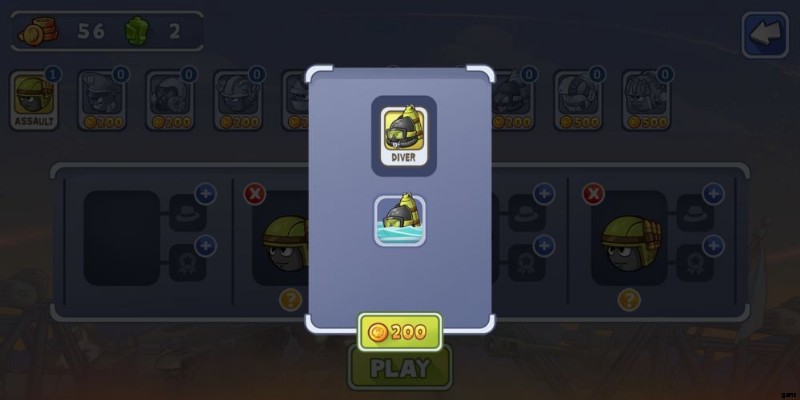
It probably won’t happen consistently across every match but you are bound to experience a unit with full health dying because of drowning. If you want to have a unit that can survive the waters around every battle arena, then the Diver is a good pick for you. The Diver has no extra stats or armaments but surviving the ocean is already a huge perk in Warlings 2:Total Armageddon.
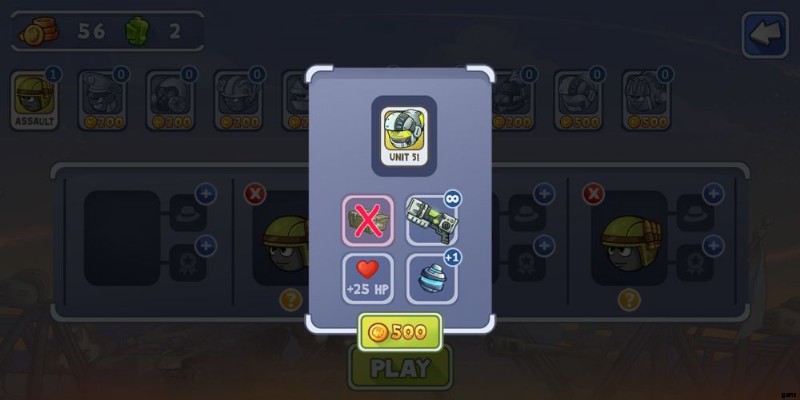
On to the more expensive characters that cost 500 coins, the Unit 51 comes packed with infinite laser guns, a +25 HP boost, and an extra plasma grenade. He is, however, unable to use much of anything else and is probably a purchase you may want to save for later.
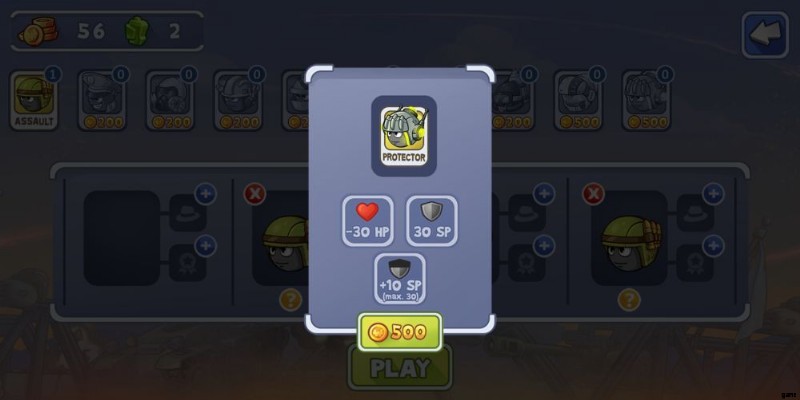
The Protector is the other expensive character class that has 30 less HP but has 30 shield and replenishes 10 shield every turn. Just like unit 51, the Protector is a fine addition to the roster of character classes to unlock but considering the cost to unlock him, we recommend prioritizing the cheaper options first.
5. Learn To Play Defense
Warlings 2:Total Armageddon, much like similar games, tend to lead players into thinking that it is all about offense. With “War” actually being the root word for the titular characters, the basic idea would naturally center around eliminating all enemies on the field. Even the quick tutorial session exclusively teaches you how to choose weapons and aim at your targets.
Considering everything, however, Warlings 2:Total Armageddon is not devoid of defensive countermeasures. In fact, browsing through the armory already hints about utilizing defensive strategies given the assortment of utility tools you can use. The drill, the girder, and the shield are just a few examples with mines and jet packs presenting equally viable options to give you protection instead of giving you extra offensive means.
When we talked about practicing with CPU opponents early on, we were not exclusively limiting practice sessions to improve your accuracy as far as aiming and choosing the right weapons go. Taking on CPU opponents of varying difficulty levels across different stages should present numerous opportunities for you to discover and utilize creative means to gain the advantage in every match.
Surely enough, the completely random placement of units at the start of each match can be a strong factor swerving in favor of one team but with the right strategic calls and some patience, even the direst starting scenarios can be overturned. With every turn, there is a stronger inclination to deal damage to any enemy unit you have decent sights on but, for the most part as well, taking that shot will also leave you open.
In general, you should try to squeeze some damages in without necessarily putting a unit at risk and while these instances are scarcely possible, sometimes there will be opportunities to do so. Shots that will eliminate an enemy unit should definitely be taken, but if it won’t and risks more units from your team to take damage next turn, then you may want to consider other options.
Playing defensively should not be taken in the absolute as well as there are instances when you simply have to make sacrifices. The Gas Air Strike seems like a solid hint relating to making sacrifices and there are plenty of other weapons that are just too open for friendly fire scenarios. In any case, practice across multiple session will help you improve your decisions as to when to consider defense and when to take risks. With that, you should now be ready to engage in PvP matches.
While CPU enemies set to hard difficulty can pose a great challenge, you should always expect to encounter even more challenging teams in online PvP. CPU enemies may often exhibit unparalleled levels of precision, but a thinking opponent who also have creativity and patience always has a potential to be a bigger threat. Regardless of whether you take the win or not in online matches, remember to enjoy and continue learning from each match you dive into.
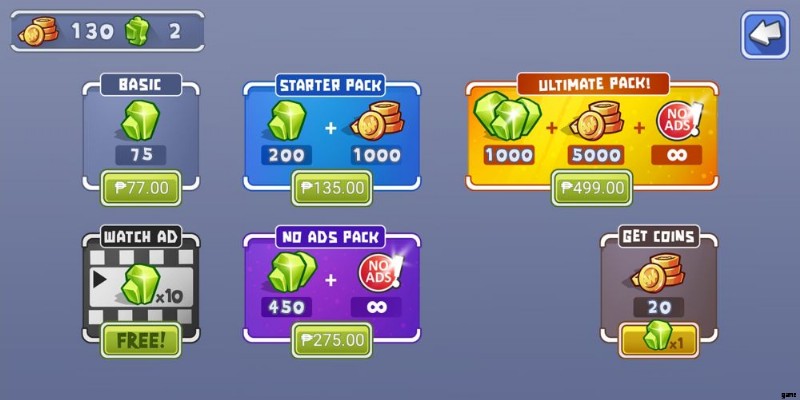
Warlings 2:Total Armageddon does not require online connectivity for you to engage in matches against CPU teams. However, there are also extra perks you can earn by running the app with an internet connection. In addition to the daily login rewards, you can claim 10 gems from the shop after playing a 15 to 30-second video ad. After some matches, there will also be opportunities to earn an extra gem if you play a short ad.
Although gems purchases are largely attributable to head gears and patches that are entirely cosmetic, a gem can also be exchanged for 20 coins each at the shop. Coins may be a basic currency in the game but you will certainly need a whole lot of it to complete your assortment of weapons and characters, so every additional opportunity to earn more coins and gems should be taken advantage of.
That ends our Warlings 2:Total Armageddon Beginner’s Guide. We certainly hope that the simple tips and strategies we provided will pave the way towards your domination of succeeding matches you engage in, whether against the hardest CPU levels or even the wittiest random players. If you have your very own tricks or tactics to add to our list, feel free to drop us one or a couple down in the comments!