Cube World – 究極のガイド (クラス、武器、マップ、クエスト、アイテム)
キューブワールドは大きく変わりました。古いやり方にしがみついて捕まらないでください。常駐の知識探求者である Darkmega によるこの (最終的には) 究極のガイドを使用して、知識を更新する時が来ました。
キューブワールドガイド:
- クイック スタート ガイド。
- 2019 年初心者向けガイド
- クラス専門化ガイド
- 高度な動きのガイド
- ペットを飼いならす方法
古いアルファ プレイヤーが知っておくべき最大の違い
主な違い
Cubeworld はもはやレベリング付きの標準的な RPG ではありません!これは現在、完全に EQUIPMENT ベースの RPG であり、スタッガード エリアの探索と発見に重点が置かれています。
プレイヤーはもはや、楽しみと個人的な利益のために野生動物やその他のしょっぱい冒険タイプを殺すのが好きで、進んでいくうちに物事を理解する (レベリングとスキルの選択/トレーニング) 幸せな冒険家ではありません。
プレーヤーは、アーティファクト、権力、名声を収集するために、土地を横切って一生の探求を続ける、クラス タイプのすでにある程度熟練した代表者です。
誰もが嫌う大きな違い
経験値バーや従来のレベリング メカニクスはもうありません。最終的にはスケーリングで減衰するスキルの固着点はもうありません。大きな数字を見るためだけに何年もパワー レベリングを続ける必要もありません。次の次のダンジョンを倒すために際限なくそこに行きます。それよりももう少し従量制です。
これらの変更の意味
殺人や時折のクールな装備品を探す代わりに、今はほとんどの場合、装備品と、これを促進する特別なアイテムを探しています。通常は、より多くの移動手段や戦利品を含む場所を開くことによって.
野生動物と戦うことはできますが、彼らは光沢のあるもの(金と残り物)やその他の小片を吐き出します.しかし、彼らは自分自身を守ります。同様に装備を整えるか、チーズとスキルの絶妙な混合物を惜しみなく適用しない限り、ティアレベルを超えるものはあなたを完全に破壊します.
ああ、戦利品と特別なアイテムのほとんどは、それらが見つかったエリアに調整されています。別のエリアに移動すると、それらは完全に消えるか、ティア1ギアと同じくらい効果的になります。その場所の富を一掃するためのギアとアーティファクトを見つけて、もう一度続けます。この進行については後で詳しく説明します。
考え方
基本的には、あるエリアを冒険し、すべてのことを行ってクールなギアを手に入れ、そのクールなギアを新しい場所に持ってきて、それが「新しいゲーム プラス」キットとなる新しい場所に持っていきます。新しいエリアと同等のパワーを保持するキットをさらに見つけてください。
移行が容易になる場合は、そのように考えてください。それは、最終的には雲と高い期待を除いてあなたの邪魔になるものは何もない天国への線ではなく、シームレスなレベルスケーリング円です.しかし、ハイティアキットを手に入れて、現在のエリアを一瞬でクリアできるようになると、そのように感じるかもしれません。また、素晴らしいギアを見つけて、それが見つかった、または作成されたエリアを離れてパワーダウンするだけで、同じようにやる気をなくすように感じることがあります.
各バイオーム自体は、基本的に小さな自己完結型のクエスト ランドまたはミクロの世界であり、すべてが相互に接続されており、ワシまたは陸/海でシームレスに移動できます。
あなたはもはや、あなたの道にあるすべてのものを消費し、最終的には平凡な戦利品を拾いすぎたり、完全に伝説的または神のようなアパレルを装備したりして、満足を感じなくなる、圧倒的な殺人に飢えた大国になることはありません.少なくとも、販売のために手元に置いておくことができ、いくつかのレアアイテムはある程度境界を越えて機能することができます.結局のところ、ゴールドにも多少の用途があります。
キャラクターを選ぼう! [ならず者]
最初に行うことは非常に簡単ですが、大きな問題は、どのクラスになるべきかということです。これはプレイスタイルに大きく依存します。ですから、トップから始めて、あなたが楽しめるクラスを手に入れましょう.
暗殺者
サプライズ イニシエーション ダメージ ディーラー。
[ローグを選ぶときはこの男から始めますが、町で忍者に切り替えることができます.]
あなたのシフトはステルス移動能力です。ステルスを使用して徐々に透明になり、忍び寄るとマナを生成します。ステルス状態が最大に近づくと、クリティカル率が大幅に向上し、大きなダメージを与えます!ステルスはまた、スニークキーを保持している限り、古いゲームとは異なり、スニーク速度で移動しても、完全にアグロレートをゼロに減らします.陰になったエリアで忍び寄ると、より速く構築できることに注意してください。ステルスして敵から遠ざかることで、敵との敵対関係をより迅速に解消できる場合とそうでない場合があるため、敵に忍び寄って不気味な悪い時間を与えることに戻ることができます.
シフトを押しながら右クリックするとインターセプトになり、右クリックが出る前にダッシュできるようにスタミナを 25 消費します。カーソル/その下の敵にホームします。フルチャージからは使用せず、実際にはインパクトまたはダッシュの最後に右クリックを使用するだけなので、実際には使用するには少しマナが必要です.それを使ってステルスから飛び出し、家に帰り、フロアの人々と戦いを始めましょう。
R、カモフラージュは 40 秒のクールダウンで 20 秒間これに折りたたまれ、移動中や攻撃中も完全にステルス状態になります。それが何を意味するか知っていますか?簡単なピッキング、常にマナを生成し、より大きなダメージを与えるためのより多くの刺し傷、全速力で移動し、ステルス効果を維持する能力。
入力なしで中クリックすると、スタミナをすべて消費して毒の小瓶をチャックします。それは空中に入り、それからカーブボールのようなもので、狙っていたエリアに激突します。敵に毒を与え、時間の経過とともにダメージ ティックを受け、毒エリアに立っていると一定のダメージを受けます。あなたが交戦しようとしているときに、敵の後ろにステルスからそれを使用してください.バイアルを投げて、それが落ちてきたときに近距離で個人的な右クリック攻撃を行い、Rで見えない間に町に行きます.ほとんどの場合、それで十分です.
それらを床に置かない場合は注意してください。スタミナの使用量のフルバーは、捕まったり、メイジのレーザービーム/竜巻から抜け出す必要がある場合に、少しの間ロールがないことを意味します.また、使用すると 1 秒ほど速度が低下するため、戦闘中に使用するのは最適ではありませんが、友人が熱を持っているか、敵を倒したばかりで、もう少しダメージを与えてください。
忍者
改悪して修正しました。高速で機敏な近接攻撃 + 遠隔ハイブリッド ダメージ ディーラーとディストラクター。もはや批判的なスパマーではありません。それでもトラックのようにヒットします。
キューブワールド アルファとは異なり、忍者にはステルス機能がありません。代わりに、彼はスピーディーなボーイです。
シフトを保持すると、スタミナの一定の消耗を犠牲にして、基本的にマウントされているのと同じくらい速く走ることができるスプリントが得られます.スプリント中にジャンプすると、約 2 倍の高さのフロント フリップ ジャンプのようになり、背の高い障害物を簡単に飛び越えたり、崖をよじ登ったりすることができます。スタミナを 25 消費します。
Shift キーを押しながら攻撃すると、近接攻撃が手裏剣投げに変わります。手裏剣のダメージは武器のダメージに比例し、通常は通常の衝撃攻撃よりも多くのダメージを与えます。手裏剣を投げるたびにスタミナが 25 消費されます。それらを使用して遠くから戦いを開始し、敵が近づいたら、逃げて障害物を乗り越えて手裏剣を使い続けるか、手裏剣の攻撃から得たマナを使用して近接戦闘に変換します.はい、近接攻撃と手裏剣攻撃の両方でマナを生成します。かなり遠くに弧を描くこともできるので、かなり良いですが、浮いていて移動時間があるので、うまく狙いましょう.
Shiftとマウス2は引き続きインターセプトです。手裏剣投げからマナを取得し、それを使用して、近づきすぎて敵がスペシャルを充電するのを妨害したり、手裏剣を浴びせたりするまで絶対にあなたを殺してしまう厄介なメイジを倒したりします。視線を壊すことで近くにおびき寄せる…
手裏剣の雹といえばRは忍術!使用時の 60 秒のクールダウンでは、近接攻撃を無料で高速な手裏剣投げに変換し、デフォルトで右クリックをインターセプトに変換します (スタミナ消費なし)。それは 20 秒間続き、1 日すべてを台無しにする主な方法です。射程距離に到達し、忍術をオンにし、星でホースエムダウンし、近づいたら、攻撃をロールスルーし、インターセプトでカウンターしてダウンさせ、発砲し続けます.手裏剣の嵐に安全な見晴らしの良い場所から話をさせるだけで、自分より 1 層か 2 層上のモブを簡単に追い払うことができます。
忍者は、ロール時にダメージをかわしてパーティクル効果バフを得る能力を保持しています。このバフにより、次の右クリックまたはインターセプト ブーストされた右クリックが自動的にクリティカルになります。また、チャージ中のアビリティを中断したり、攻撃の途中で敵をノックダウンしたりした場合にも、獲得できる場合があります。しかし、私はこの部分について確信が持てません。しかし、近接戦闘は基本的に、攻撃をかわして無料のバーストマナとパーティクルを獲得し、バーを埋めるためにいくつかのヒットを忍び込ませ(または連続してさらに多くの動きをかわす)、巨大なクリティカルといくつかの生意気な忍者の星でそれらを吹き飛ばします。何度も何度も ♥ につけます。
これは、ローグのスキルを視覚的に紹介する YouTube の Colde Blauth のビデオです!
キャラクターを選ぼう! [レンジャーズ]
スナイパー
ステルスと回避に基づく長距離バースト ダメージ。
【レンジャーを選ぶときはこのクラスからスタート!町でスカウトに切り替える]
基本的に遠距離アサシンです。
暗殺者とほぼ同じようにシフトでこっそり、攻撃するか手放してダウンさせます。こっそりと先制的にマナを構築し、いくつかのおいしいクリティカルを獲得してください。ブーム、ヘッドショット! (ヘッドショットはありません。クリティカルと考えてください)。
右クリック攻撃をチャージすると、ステルスも構築されます。ステルスを常に少し上げて、クリティカルチャンスと無料でマナを生成し、遠くから地獄の雨を降らせるようにしてください.私は本当に遠くを意味します。敵があなたに近づきたくありません。クリティカル スナイプとチャージ ショットで、できるだけ ♥ を維持するようにしてください。
スナイパーはまた、連続してより多くの攻撃を当てるほどボーナス攻撃速度を獲得し、ターゲットを撃つだけになると、標準で遠くから矢を放って敵を追い詰めることができます.
入力なしで中クリックすると、かなりの速度でカメラに向かってバックフリップし、スタミナバーを即座に消費しますが、ステルスも完全に充電します.それを使用してステルスを高く保ち、小さな棚を巧みに跳ね上げたり、隙間を越えて敵を攻撃したり、スペースを空けたりします。ジャンプの頂点で使用するか、下を向いて角度を選択します。
回転しないようにしてください。使用する回転数が多いほど、スタミナがバックフリップを使用するのを待つ時間が長くなります。もちろん、遠距離攻撃を行うボスや、自分よりも速く敵を近接攻撃する場合は、言うは易く行うは難しです。
あなたの R は、約 20 秒間あなたを追いかけるシャドウ クローン コンパニオンです。彼らはあなたと同じように見えますが、影があり、忍者の影のパーティクルがオンになっており、あなたが見ている場所を撃ち、突撃しますが、退却すると、彼女は時々あなたから離れます.彼女がアグロを拾うことができることを願っていますが、このゲームでアグロが機能する傾向がある方法は、誰かがノックダウンでリダイレクトして追跡を失う場合を除いて、最初にヒットしたものに来ることです.
また、ダメージのパーセンテージしか与えないため、出力が 2 倍になるわけではありませんが、クリティカルは確かに痛いです。
スカウト
速い、トリッキー、手がつけられない。近接敵の日の荒廃。
スカウトは、忍者のようにシフト移動でスプリントするのと同じ能力を獲得します。また、障害物をスケーリングし、こっそりと回避するためのフロント フリップ ジャンプもあります。
自分自身を怒らせる代わりに、静止した中クリックで敵を怒らせましょう。それは素早く、わずかに弱いが、敵をノックダウンしたかどうかに関係なく、敵を吹き飛ばすノックダウン回し蹴りのまともなチャンスです。スタミナを50消費しますが、何度でも使えます。敵が崖を 10 秒間登っただけのときに、敵を蹴り飛ばすために使用される究極のディックムーブ。
そして今、あなたが近接敵の時代の破滅者である理由.
あなたのRは、あなたの場所に大きな円形の流砂のトラップの一種のエリアフィールドを置きます。これは約 15 ~ 20 秒間静止し、通り抜けようとする敵はほとんど足を止められ、少し沈み込むように見えます。彼らにとって楽しい時間ではありません。この時点でダメージを浴びせることができ、まるでコンボを構築したかのように機能します!そうです、このことで立ち往生している敵は防御力が低下しているため、より高いレベルの敵を問題なく切り抜けることができます.もちろん、彼らの健康を減らすためにダメージを与える必要がありますが、少なくとも彼らの鎧は文字通り何も与えないわけではありません.置いて放置することもできます。つまり、メイジやレンジャーのグループをそれに餌付けし、AI が実際に攻撃を開始する範囲の外からそれらを撃ち続けることができます。タイムアウトに気をつけて、レーザーが飛び始める前にいつ隠れるべきかを判断してください。
コンボで自然な攻撃速度を得る代わりに、Ranger はランダムにバフを発動し、右クリック攻撃を即座にチャージできるピンク色の粒子を与えます。あなたは通常、これをフルで使用して最大のインパクトを与えるか、フルに近づけたいと考えています。これはかなり頻繁に進行し、キック以外のパワーショットは敵をノックダウンする別の方法であるため、ゴールデンです.蹴ったり、撃ったり、より強く撃ったり、一般的には難しいものを捕まえたりしてください.
これは、レンジャーのスキルを視覚的に紹介する YouTube の Colde Blauth のビデオです!
キャラクターを選ぼう! [戦士]
バーサーカー
近接ブロウラーと「ダメージタンク」。ノックダウンのスペシャリスト。
[最初はこの男としてスポーンします]
バーサーカーは、ヒット数が多いほど攻撃速度が上がるメレー ボーイです。これにより、コンボカウンターが提供する生のダメージだけでなく、全体的なダメージをディフェンダーよりも速く上昇させることができます。あなたは、スイングするのに時間がかかる重い武器から始めますが、強くヒットし、3 ヒット コンボがあります。発生するのに 1 秒かかるダウン スイング、ダメージが少ない突進、そして KO の可能性があるアップスイング。ただし、片手または盾と剣を 2 つ使用することをお勧めします。攻撃速度が速くなり、攻撃速度が速くなるからです。
シフト長押しでスピン攻撃。シールドで積極的にブロックを保持していない場合(右クリックのチャージに付属)、ブロックゲージを介して攻撃をブロックし、周囲の敵に一定のダメージを与えることができます。コンボを構築したり、戦いに「遭遇」して最初の攻撃をブロックしたりするのに最適です。また、自分よりも弱い敵を倒して、それらを集めてすばやく破壊してギアファーミングを行うことができます.
スピンを押したままジャンプすると、スカウトや忍者のフリップ ジャンプと同じくらいの高さで面白い小さなヘリコプター スピン スラッシュを空中に放つことができます。チャージ攻撃またはアルティメットを使用するなどの他の形の割り込み。
ミドルクリックはあなたの飛躍的な地面ポンドです。これは、KO耐性がない、または超高レベルではない、またはすべてをブロックすることができた独自の防御的な動きをしている敵に着陸することができ、通常はダウンします.また、大ダメージを与えますが、すべてのスタミナを消費します。つまり、使用後に転がすことはできないので、見逃さないように注意してください。または、スピンしたり転がったりするためのスタミナがなく、少しの間大きく開いています.
あなたのアルティメットは、すべてのファルコン パンチの母です。大きなダメージを与え、敵を空高く飛ばしてノックダウンする巨大な拳が端に付いているので、遠距離ダッシュを素早く行うことができます。解放と魅力の両方に適しています。しかし、それらはヒットした時点で発射されるため、距離とスペースを学習して着地し、スペースにパンチされてから降りるまでにオープナーとして使用する場合、近くのどこかにいるようにします。しばらく気絶することはありません。タイミングよくロールしたり、右クリックをチャージしたりして距離を飛ばしたくない場合は、キャンセルすることもできます。生のダメージ、ポーションの中断、群衆の粉砕、または20秒のクールダウンでそこから飛び出すために使用できます.いいですね。
ダメージを与えると、突然効果音が聞こえて赤くなることがあります。これを私は「ソース」と呼んでいますが、おそらくバトルフューリーバフに似ています.それが何をするかというと、攻撃時にライフを盗み、チャージされた攻撃をほぼ瞬時に充電し、6〜8秒間のように見える間、受けるダメージを大幅に減らしますが、攻撃速度も得られる可能性があります.はい、ソースアップ中にバフを再起動してリフレッシュできます。したがって、このバフを有効にすると、すぐにそこに入り、処理できる限り多くの敵と戦い、できるだけ多くの敵を攻撃して、得られるすべてのライフスティールから利益を得ることができます。あなたが順番に与えるダメージの量。これには、バインドされたときに適切に配置されたグラウンド スラムからのほぼ完全な回復が含まれます。
バーサーカーは、最初はローグ、レンジャー、メイジよりも少し苦しむでしょう。 「気合を入れる」ためにダメージを与えるためにそこに入ることができる必要があることを考えると、彼は範囲内にいるかのように、彼のリーグ外にいるチーズモブに対して、他のクラスの遠隔またはサプライズ/スキルの利点の多くを欠いています攻撃する、彼らはあなたを攻撃する範囲内です。したがって、慎重に戦いを選択し、シールドの使用を検討してください。これにより、チャージ攻撃を使用して攻撃をブロックする追加のレイヤーを得ることができます。少なくとも最初は、ある程度の生存率が得られるまでです。楽しい時間を過ごしながら、同時に生きる、タンクする、殺すためにアクティブ化されます。ロック フィスト アウトとスピン ジャンプで最も近い障害物を飛び越え、ポーションも機能します。
ディフェンダー
ディフェンダーとの主な違いは、ヒットごとに攻撃速度が上がる代わりに、ボーナス HP と、付属の武器、デュアルソード、強力な武器のセットで防御する能力を獲得できることだけです。大武器の特攻も微妙に違う。攻撃をブロックすると、チャージされた攻撃のチャージが速くなるという利点がありますが、アルファ版で使用されていたようなボーナス マナは得られないようです。彼らはまた、よりタフなブロックを持っているかもしれませんか?ウォリーが読んでいるなら、正直に言うべきです。
ディフェンダーは引き続きソース バトル フュリーをアクティブにして、ライフスティールと実質的に瞬時のチャージ攻撃を取得し、耐性を増加させることができます。運が悪かった場合を除き、それを proc にするのは少し難しいようですが.
ただし、ロック フィストの代わりにヒロイック シャウトを獲得できます。いいえ、それはfus-ro-dahではありません。これは、敵が向かっている場所ではなく、自然なアグロ範囲内にいる敵をあなたに引き寄せ、赤く光らせて挑発する効果範囲の挑発です。また、約 10 秒間、1 秒あたりのチャンクでヘルスを再生させるというマークのない効果もあります。
これは、YouTube の Colde Blauth のビデオで、ウォリアーズのスキルを視覚的に紹介しています!
キャラクターを選ぼう! [メイジ]
ファイアメイジ
遠距離 DPS、ノックダウンのスペシャリスト、大砲。
[スポーン時にこのように開始します!]
魔術師。 ♥魔法使いなど。敵として圧倒され、プレイヤーの手にとっても同様に強力です。ただし、最初に言及することは、メイジに関してはかなり大きな違いです。攻撃時にマナを生成する代わりに、ステルス/回避メイジのような他の手段でマナを生成する代わりに、時間の経過とともにマナを比較的急速に最大 100 まで生成します。その他の能力は若干異なります。
ファイア メイジのパッシブにより、スカウトのピンクのパーティクルと同様に、着地時に輝くファイア パーティクルを獲得することができます。これにより、メイジは右クリックを即座にキャストできます。そうすることもマナを消費しません。最初に右クリックを使用してバットをノックダウンし、通常のヒットを使用して、うまくいけばその間に再びプロセスし、チャージを保持して、必要に応じて別のノックダウンを使用し、必要に応じていつでも使用します。さまざまな効果で、すぐに再び ♥ をノックダウンする必要があります。
シフトをメイジとして保持すると、フロート/ホバリングできます。フローティングは、蓄積されたすべての落下距離をキャンセルし、地面に浮く前に一時的に空中に一時停止します。自分自身を比較的水平に保つために、落下速度を少し上げ始めたときにフローティング効果を再適用して、自分自身を再浮上させることができます。あなたが適用できるもう1つのトリックは、ジャンプしてから、ジャンプから上に向かってすぐにシフトして、自分を空中にスリングショットすることです.正しく行えば、非常に簡単に木に飛び乗って近接敵から安全を確保し、浮遊が完全に自由であるように見えるので比較的簡単に崖を登ることができます.いいですね。
Shift+左クリックで約 50 マナの火炎爆発。それはあなたの上下に当たる球形のキャストで、比較的早く出てきます。小さなダメージを与え、敵をノックバックします。スカウトからのより狭いキックほど効果的ではありませんが、ノックダウンする可能性も十分にあります.
入力なしのミドルクリックには十分なマナが必要ですが、場所を取得するためのミッドレンジ テレポートです。出てくるまでに少し時間がかかるので、回避するために使用している場合は、あまり長く待たないでください。
最後に、あなたのアルティメットはファイアミサイルです。これにより、4つの大きな火の玉が一斉に発射され、その後すぐに目的の場所に降りてきます.彼らは非常に大きなエリアで非常に激しく攻撃し、通常は一日を台無しにし、ノックダウンを引き起こします.
AIがあなたにこれを使用することを決定した場合、通常はボスから、あなたの装備ランクと同じかそれより低い場合は♥さよならのキスをすることができます.あなたの人生がそれにかかっているように、それが転がり始めるのを見るなら.
マナを使用するこれらすべての素晴らしい点は、メイジが他のことのためにスタミナを必要としないことです。そのため、敵が近づいた場合にマナを待っている間、敵の周りを微調整するために、好きなだけ回避するために完全に使用できます.
ウォーターメイジ
キック♥もタンクもできるヒーラー。
ウォーター メイジは、おそらくアルファ プレイヤーに紹介する必要はありません。彼らのキットを使用すると、攻撃による回復と特殊能力を使用して回復アイテムを実質的に差し控えることができるため、彼らはほとんどメイジの選択肢であり、OP でした。
ウォーター メイジのダメージは、水の魔法で敵を追い詰めることで発生します。スナイパーやバーサーカーのように、連続ヒット数が多ければ多いほど、最大まで速く撃てますが、射程が長く、派手です。
水しぶきといえば、水魔道士が地形に衝突したときの攻撃は、ダメージ半径が数秒間留まる青い点滅する水たまりで強調表示されます。これらの水たまりに立っている味方は徐々に回復します...そして、何らかの理由で彼らはスタックします.つまり、敵をより速くホースで倒すことができれば、床に非常に多くの水たまりを作ることができるので、立ち止まって自分の水たまりに立っている間に発砲することで、ダメージタンクになることができます。必死にあなたを殺そうとしています。
テレポートはそのままで、シフトはホバーのままですが、シフト + 左クリックで爆発する代わりに、水蒸気の渦が発生するか、「ヒーリング ストリーム」と呼ばれます。左クリックすると、急速に回復するあなたとその周辺に集中します。右クリックでカーソルに焦点を合わせると、あなたがいる良いサポートのような範囲で他の人を素早く癒すことができます.これはどちらのバージョンをキャストするにも急速にマナを消費します。
地獄の雨の代わりにあなたのアルティメットはあなたの周りにきれいな水の泡を放ちます。それらの約6つがあり、一種の粘着性のあるリモートマインとして機能します.それらは上を走った敵にくっつき、その後、泡が詰まった敵または地面の泡だけに魔法を発射して爆発させることができます。これにより、泡が破裂し、治癒の水たまりがいたるところに残り、泡ごとにかなりのダメージが発生し、本当に大きな破滅のスプラッシュに至ります.
これは、メイジのスキルを視覚的に紹介する YouTube の Colde Blauth のビデオです!
はじめる
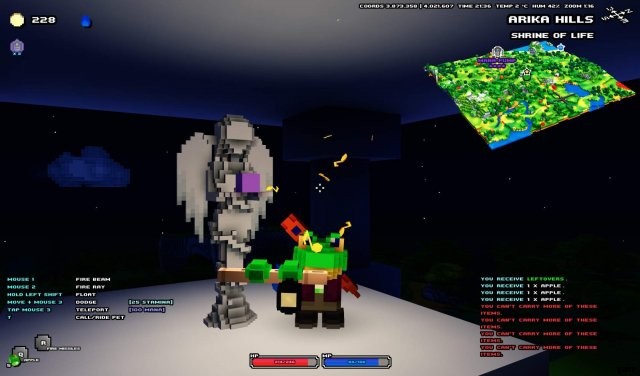
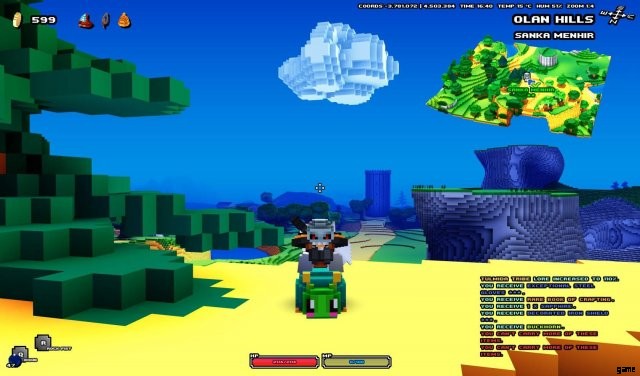
さて、ここに、クエストや発見物でいっぱいの真新しいバイオームがあります。町の近くにある生命の神殿にスポーンする必要があります。
シュライン オブ ライフ
シュライン オブ ライフは、アンロックしてアクティブにするとリスポーン ポイントとクイック トラベル ポイントの両方となる、小さな白い神殿にある天使の像です。光を放っているので活性化されていることがわかります。通常、野生で見つけた場合、アクティブ化されません。アクティブでないものの近くで E を押して、それをオンにする小さなフルートの曲を再生します。これにより、現在のスポーン ポイントが作成され、移動に使用できるようになります。神殿に移動すると、同時にそれがリスポーンとしてマークされます。
スターティング キット
まあ、あなたはおそらくそこに出て殺人を始めたいと思うでしょう.しかし、あなたは何かに気付くはずです。デフォルトでは、インベントリ ボタンの B を押します。
インベントリには、現在のクラス用の 3 セットの武器があります。あなたにとってよりクールだと思うものを選んでください。武器の種類ごとに、使用スタイルと右クリック攻撃が異なります。武器については後述します。ただし、最初に知っておくべきその他の事柄がいくつかあります…
統計に注意を払い、敵と比較してください
インベントリで画面の左側を確認してください。アーマーと武器のスター ランキングに基づいて、どのような敵と交戦する必要があるかが一目でわかります。キット レベルを超える敵はすぐにあなたを破壊しますが、2 レベルの敵は、チーズを適用して高いコンボ カウンターを取得し、ゲームに長けてダメージを増加させない限り、タッチでおそらくあなたを全滅させます.
範囲内の敵にマウスを合わせると、その名前の色に気付くでしょう。ホワイト、グリーン、ブルー、パープル、ゴールド。あなたのレベルまたはそれより上のレベルの敵と戦ってください。しかし、ダメージは王様です。運が良ければ、武器ベースの良いドロップが得られれば、武器はステータスをレベルアップするためのヘルスも提供するため、より簡単に時間を過ごすことができます。より優れたモブと戦うために、より優れた装備を使用してください。
スター ランキング システムを有効にすると、オプション メニューで各ティアが何であるかを簡単に確認できます。
クエストを受ける
町の人々と話をして、クエストに行くバイオームの興味のある分野を明らかにするクエスト ding を得ることを望みます。ほとんどの人はランダムな冗談を言いますが、誰かが邪悪な暴徒に捕らえられている可能性のある場所や、移動や戦利品の収集に役立つ特別な重要なアイテムを見たことを覚えている場所について話す人もいます.
すべてのものを略奪しましょう!資本主義、ほら!
きのこ、レモン、低木、綿などのすべてのクラフト マットとアイテムを収集します。それらは販売できるので、代わりに超基本的なキットを購入して少し強くしたり、雑貨店でペットフードやポーションボトルなどのアイテムを入手したりできます.
お金は、通常は町の真ん中にいるフライトマスターのイーグルガイで使用できる、バイオーム周辺のフライトポイントを購入するために使用することもできます (または、必要に応じて他のバイオームに移動することもできます!)。一度購入すると、何度でも使用でき、さまざまな場所に行って神社を探したり、目的や興味のあるポイントに近づいたりするのに適しています.
コースを描く
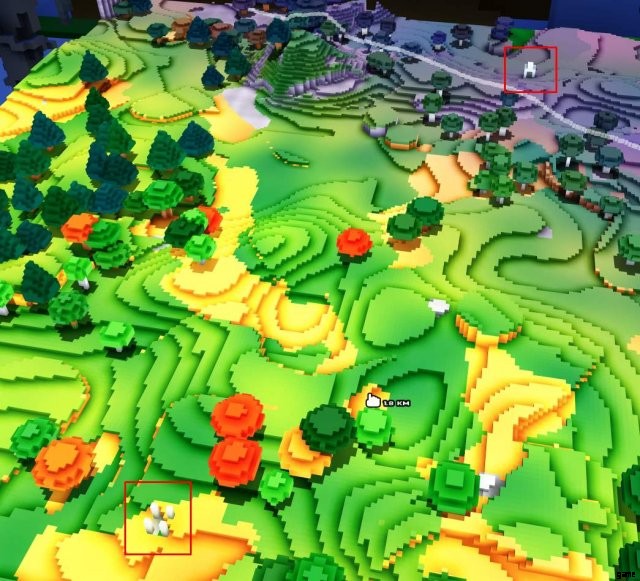
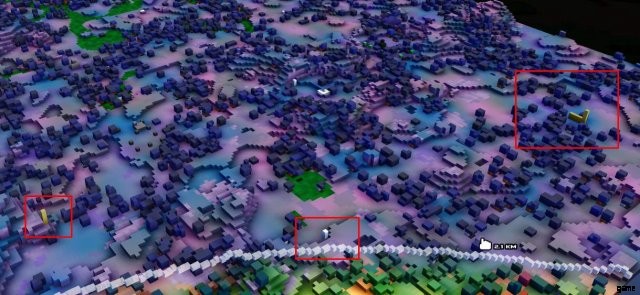
M でマップを確認し、マウス ホイールでズームインおよびズームアウトします。マップ上では、通常、クレーター、暗い森、魔法の森、墓地、町、その他のものなど、かなり明白なランドマークを見ることができます.
リバイバルの神社は通常、地図上で遠くから見ると小さな白い立方体のように見えますが、茶色の建物の集まり、孤独な灰色の神社、金色の塔、柱のある円形の台座など、別の色のものはすべて注意が必要な場所です.
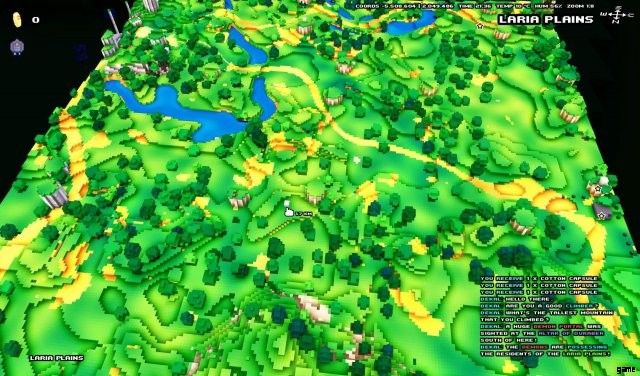
完全にズームインすると、オブジェクトがより鮮明に表示されます。そのため、目立っていたり疑わしいと思われる場合は、詳しく調べてください。
中クリックのタップで興味のあるポイントをマークできます。右クリックでパン、左クリックで回転/見回す。ミニマップをズームアウトすると、作成した関心のあるポイントがミニマップに表示されるので、どこに行くべきかを把握できます。
開始するときは、通常、出発点に戻ることができない神社が近くにない限り、あまりにもタフなものを殺そうとしないことをお勧めします.
昼、夜、モンスターのリスポーンとキャンプ
キューブワールドの時間はかなり長く、夜は本当に暗くなります。レンジャーや暗殺者に最適です。ただし、キャンプファイヤーや他の冒険者、ランタンを持ち出すモブなどの光源が見やすくなります。
通常は日中に冒険したいので、町に戻って宿屋を利用して、暗くなりすぎて見えなくなった朝に戻します。あるいは、キャンプの近くやその周辺にスポーンする寝袋で寝ることを望まない場合は、体力が徐々に回復し、時間の流れが速くなります。
夜の時間は、ただぶらぶらして、昼に変わる前に地図を精査するのに最適です。しかし、ステルスキャラクターとして、それを暗くしておくことが有益な場合もあります.真夜中に近づくと、ピッチャーが暗くなることを知っておいてください。通常、反対側で約 1 ~ 2 時間は暗すぎて作業できませんが、3 時間は、一般的にステルス状態を維持し、ステルス状態を長く維持できる一方で、視認性には適しています。
午前 12 時になると、ダンジョンのクエストに参加していない Mob もリスポーンし、戦利品をさらに集めることができます。荒野にあるクラフト マットもリスポーンされるようです。
野生のキューブ
見つけたクラフトマットがどこにあるか覚えておいてください。これらの場所に戻って農業を行い、販売や武器のアップグレード/クラフトのために収集することができます.
これには、無料の戦闘外ヒーリングの素晴らしいソースであるリンゴの木や、バフポーションを作成して敵よりも少し優位に立つために使用できるその他のポーションマットなども含まれます。ゼネラル ストアからのボトルの。
見知らぬ人に注意
日ごとに変わるのは、他の放浪者と探検家です。 However it can sometimes be hard to tell if they’re friend or foe, and the last thing you want is to walk up to some people wanting to talk then instantly get hitscan lasered back to your shrine. So just like mobs, mouse over them first.
You’ll usually show name rarity colors and stars if you have the setting on which lets you know they’re hostile. Otherwise they should have a light blue name above them and wave when you get within chatting distance. Adventurers are another good source of quest and location data.
Lightsouls
The game can get pretty hard if you’re not kitted out for the content, but fear not, you can always try again or come back later, death doesn’t have a drawback. Just travel time and a critical hit to the pride or a cargoship full of salt depending on how you went out.
Find yourself a friend
The general store usually sells a pet food item a day very cheaply and sooner or later you’ll also have them drop as loot also.
Having a pet gives a slightly extra source of DPS, potentially a distraction once aggro can be shifted properly and sometimes something cute to follow you around if you get the right food.
Eventually a set of Reins key item can be found in each biome that lets you ride your pet to gain increased speed which is WONDERFUL for people who need to keep at a range or need to get some distance to get healed. Don’t worry if the pet goes down. It’ll respawn after a short time close to you.
Your pet will also try to fight whatever you initially try to fight, but if you want it to come to you so you can say, make a quick getaway with the reins hit T to blow your trusty pet whistle and call them back to you. If they’re considerably far away they’ll be teleported.
Weapons and You [Basics and Warrior]
Each class, as I mentioned in the above section spawns with a set of 3 weapons for your testing pleasure. Each has some positive and negative things to them to be aware of that I’ll cover now when it comes to checking your favorite.
基本
Unarmed
For everyone if you’re using singlehanded weapon but don’t equip a weapon in your main hand (the slot that you equip to when you left click) you’ll instead have unarmed strikes, except for the mage, who’s unarmed works just like a very low powered bracelet set. The rightclick is a short range roundhouse kick. But you typically don’t ever want to be unarmed.
Combo Counter
A Hit chain counter is visible near your cursor when attacking enemies. As this climbs to a maximum value (usually around 20-30 depending on class) you’ll build damage. The combo counter will gain an exclamation mark and turn bright blue when it’s fully charged so you know you’ve capped out on damage and or attack speed gains etc.
The damage gained from gaining combo feels like a form of armor ignore. Building your combo sufficiently will usually allow damage to start creeping through even tougher enemies, such as fighting rocklings with a freshly spawned fire mage.
EG:At first your shots will be doing close to nothing with some minor damage and having knockdown potential on rightclick. But as the hits climb your damage will go up until at full chain you can seem to damage them normally, even if you’re still only doing around 12 or so damage a shot and 50 a charge shot with your tiny fireballs.
Missing any attacks or specials with clear hitbox (wiffed ground pound or shuriken for example) will immediately drop your counter to zero and you’ll lose the penetration gained from the counter. It also means say goodbye to your attack speed gains for water mage, berserker and Sniper. You CAN however transfer your attacks between any targets as long as you keep dealing damage and not missing your clicks as the combo will also expire after what feels like 5 seconds. So feel free to roll around and mix and match your attacks as long as you land them.
Warrior Weapon Analysis
Great Mace, Sword, Axe
When you first pop in, this is what you’ll be holding. At first, it’s like a tree trunk, but you can get better weapons but all in this class work the same. Holding it requires two hands, but normally they deal damage which is better than having a sword and shield or dual one handers.
The great weapons have a three hit combo which works differently than most other weapon types. Their big drawback is how slow you go when using them. It takes a little bit for you to roll up a strike which brings the weapon down overhead directly infront of you. The second hit is a jab with the weapon in it’s down state which comes out a lot quicker but causes less damage. While the third strike is special. You flick the weapon back up and over your head behind you after a similar delay to the first attack. The third strike is unique is that what the weapon has in slowness, it makes up for in free stuns! The third strike has an alright chance to flick the enemy and stun them if you can land it.
Berserkers when charging their rightclick charge up an angry overhead swing that brings it immediately down infront of you when released dealing big damage with good stun potential. Because of charge attacks and their inherent speed due to their attack time being charge related you can use these relatively quick overhead bashes to bring out some quick damage and build some quick combo.
But if used with a Defender, you’ll instead take a defensive stance which allows you to block even with this big two hander due to defender’s passive. When released it’s instead a sideways swipe that deals good damage and hits in an wider area and is typically quicker than your normal big beefy overhead swing. Due to gaining mana on damage block it’s also a good way to quickly deal some hits to build combo and attempt to get sauced up War fury to proc quickly making twohanders a bit more redeemable early on in their hands.
Being a big tough guy weapon it deals big tough guy damage, but I tend to find it’s slowness of reaching it’s third strike before you’re actually dead tends to hold it back early game. But later when you’re surviving more hits and dealing overall more damage it becomes an oppressive weapon that can bring the pain and knockdowns quickly, and provides good scaling to your special moves due to it’s big damage, and good life return while mad, provided you can use it.
Single Mace, Sword, Axe and/or Shield
There are two ways you can generally wield these. You can take two at the same time to improve your damage, or you can use it with a shield which is classified as a type of “weapon” due to how it influences your charge attack and given that the character bashes with it.
Having both onehanded weapons allows you to swing both one after another, being a fast set of weapons this can allow you to build up combo stacks quickly which means faster chances of proccing Fury and more combo counter so your attacks pierce through as your damage will typically be lower per hit. For Berzerker, it also means quicker gains in attack speed and so more damage output.
As mentioned, because of damage being lower sometimes for tougher enemies above your tier you need to build some combo before the damage starts punching through a bit better.
Berserker can’t block with dual handers so you have to rely solely on attacking quickly to get fury as fast as possible. When using your rightclick it uses a dualbladed spin attack which moves you forward slightly. This hits multiple times and can hit multiple enemies. At low charge you won’t get too much damage but a few quick spins after a single hit to get mana can quickly build some combo without eating into stamina to spin attack, and despite being low uncharged and hence low damage if you’re lucky you might just get a knockdown here and there while trying to proc your fury and build hits with this.
As before, A Defender using dual weapons can actually still block, and they still have the spin attack, so due to not attacking as fast the spin attack is a good bet to try to gain fury procs quick to sustain you in the fight along with the ability to block and gaining mana and charge power per blocked attack these spin attacks make for great counter attacks which can knockdown enemies if they inadvertently charge you up too much.
If you instead choose to use a shield with your one hander your berserker will now be able to block naturally without having to rely on the hold shift spin attack. Naturally your defender though will just have an even tougher guard as you’re now using a shield, a tool for actually blocking.
Having a shield on changes your rightclick special to a quick “out of shield” spin swipe with your weapon. The effect is misleading in that the area of effect isn’t as big as the air swipe makes it out to be as you still have to be within attack range to land it. However, it can hit in an area and knocks down fairly reliably even half mana. Because of blocking you can instantly charge the attack without waiting by blocking an attack while holding rightclick! Defender gaining mana on block also further improves this allowing you to almost constantly swipe with fairly damaging and quickly charging small area attacks for applying damage, knockdown, combo counter and fury proc chances.
Personal Favorite
Sword and Shield, because of strong counterattack play with defender and extra layer of survivability especially for early berserker. Occasionally play around with twohander or dual once some gear is gotten.
Weapons and You [Rogue]
The rough has three types of weapons. All of them hit quickly and have rightclick attacks which come out immediately when used and can be bolstered with the use of Intercept to make you zoom at your enemy from afar before using it.
Fists
Fists attack very quickly, however what you’ll also quickly notice is the lack of damage until some combo builds. it also has a very high combo capacity to max out being 50 due to how fast they hit. Unless you’re causing some crits it won’t hit very hard.
The rightclick attack is a roundhouse kick. The damage is quite low and so is the chance of knockdown respectively if used when mana is low. but above 50% is when you start getting some alright to relatively kickass damage out of the hit. 100% mana and some crits from stealth or ninja evasion proc? It might just sting a bit.
Daggers
They’re in a similar bag to fists. They’re pointy and attack like a flurry, but deal not amazing damage until you really start drilling it in at which time it’ll start rocketing. But they have an added benefit that the fists don’t. Daggers when you land your rightclick they also poison the enemy! This buff lasts around 5 ticks over 5 seconds and can stack with more rightclick applications.
From some minor testing the damage appears to be based on the original damage your rightclick attack did when it landed. So once more, try to have atleast 50% before going for it. This is usually easy when combined with easy stealth mana, or a few shots from shurikens into intercept. A crit is what you want, cause if that crit goes off, they’re gonna melt, because not only will it hit for the initial strike, it’ll change that damage into that strength per tick. So store up that ninja crit, or stealth up and deliver some enemies the cure for wellness. Or if you just want to be silly, land a hit then poison them over and over and watch them turn bright green for ♥ and giggles.
Something to note with both fists and the daggers the weapon that is in your righthand (left click to equip!) is the style of attack animation and rightclick attack it will use. So if you want poison, put a dagger in the right and fist in the right. Instead of punching you’ll be thrusting as if stabbing with your claw/brass knuckle fist and poisoning with it using the dagger rightclick attack. Where-as if you use a fist on right and a dagger on left you’ll kinda awkwardly try to punch the enemy to death with the hilt/side of the blade of the dagger and will instead roundhouse kick (no roundhouse poison. :<).
Longsword
A crowd personal favorite and go-to for rogue. It’s got the damage and strikes wide. Generally, unless you’re playing with some hit and run poison tactics this is where you wanna be weapon wise. It attacks a touch slower and so has a lower max required combo of 30 before it caps out. But even for attacking standards it’s still quite fast cause it’s rogue, the fast guys.
The rightclick strike is a lunging stab which deals 4-5 hits of damage which can very quickly build said combo, you can also kinda sweep it around at enemies ahead of you. If you crit at lower power or even naturally at higher power you’ll most likely knock stuff down.
Usually providing the best total damage this converts well into shuriken/poison vial toss overall damage and most later long swords just look really cool.
Personal Favorite
Typically longsword to start and as a main-stay. But if I get good daggers I don’t mind them.
Weapons and You [Rangers]
Rangers are blessed with… well… Range! Their three selections of equipment are the Bow, Crossbow and Boomerang.
Bow
Projectiles from the bow are fired towards the cursor and travel in a soft gravity arc. With skill, you can shoot stuff from all the way to the view distance if you care to, most cases, further the better so you’ve got longer time for sniper to spin up to practically become a minigun, or ranger to proc a bunch of free rightclick charges.
The Rightclick of the bow is a volley of four arrows. These are fired with stronger velocity and are less affected by gravity. You can sweep the shots to spray around an area, and they have minor splash damage on impact. So a cluster of enemies can all be stunned and damaged simultaneously.
Being a rapid fire volley you can actually spam it at low charge to gain combo if you’re so inclined since the bow has a 30 hit combo to build before it peaks. Spamming rightclick for combo is particularly useful to build your attack speed rate or to get your damage up quicker off a downed enemy who won’t dodge too much.
Crossbow
Crossbow follows a similar deal with the bow. Arc-able projectiles, solid damage per shot. Ideal pick for sniper cause it usually has higher damage but random loot is random, so not always but it tends to be.
It’s rightclick charge shot is a single charged bolt with energy swirling around it. It deals big damage, but just like bow you can rapidly click rightclick to fire dud projectiles even without mana to build combo the cheesy way since it’ll fire them as fast as you can rightclick. Just don’t do yourself an RSI (repetitive strain injury). I tend to favor crossbow with sniper due to the single shot being ideal for watching those massive crits fly and high knockdown power from full charge due to the high damage connected to it.
It has a similarly big 30 hit combo to be built for it to get maximum spin up and damage penetration.
ブーメラン
The Boomerang is an unique weapon in that it’s one of the only weapons that you can control around and redirect during it’s default attack rather than firing straight projectiles or casting area of effects. The boomerang throw sticks to the position under your cursor be it the ground infront of you spinning to hit a few enemies, or the enemy’s face that you tossed it at.
It tends to cause more hits of damage the closer the enemy is as the time that it stays out is on a timer. It also follows the mouse around but still will get foiled by a lack of line of sight. These damage ticks are generally weak but they stack up… and more often than not, they need to be stacked up to deal considerable damage unless you over level your enemy. That’s not to say it’s a weak weapon. It’s just got a slow start up at 80 hits maximum combo… Yeah…
At first you’ll notice it has maximum range, although it’s fairly reasonable for most peoples uses, but as I mentioned you get maximum hits the closer the enemy is. From simply nicking them for one or two ticks at max range, to a whole slew of 7 or 8 hits at practically face range. You can also toss the boomerang quickly and still have it continue spinning after cancelling into a dodge roll if an enemy is sticking to you, so it has that going for it as being a highly versatile outplay weapon provided you can get it to deal damage.
The Rightclick charge attack is a dual boomerang toss. Your character whips out a second boomerang while seething with rage (anger charging shakes) and lobs them one after another extending the amount of hits by a bit under double and dealing overall more damage per hit if close to max.
Charged up it has good knockdown potential PROVIDED that the hits are dealing damage. So if you can deal atleast a bit of damage at close range you’ll have a good chance at knocking down. Where as fully charged and with some combo in it to really drive in the damage it’ll more than likely knock something over when the second boomerang slams into them.
It’s probably not something you want to use on sniper, although maybe with all those crits I’ll eat my words? I didn’t actually try it. But holy ♥ does it mop up on a scout!
You know how the quicksand trap causes the enemy’s resistance and armor to be stripped while they’re drowning? Well… get ready to deal some TERRIBLE-TERRIBLE DAMAGE at any level. The ability for the multihits to work even on stronger enemies caught in a trap ruin just about anything’s day who is unfortunate to be swimming around in it.
Personal Recommendation
Bow or Crossbow at first for damage and knockdowns. But if going to be using scout, give boomerang a shot, especially if you can loot a better one.
Weapons and You [Mages]
Mages use semi-typical spell casting apparatus to bring big pain and heavy rain on enemies. Some weapons are easier to use in some situations than others though. As I might’ve mentioned in the mage section all your rightclick specials consumes 30 mana which regenerates rapidly when not in use.
Just remember, as water mages spin up a lot of their cast times and recoils will diminish as the combo climbs to maximum. And in the case of fire mages having your special particles makes a rightclick cast come out instantly without any charge time and not consume mana.
Staff
The weapon you start with. The primary attack of the staff creates a small tornado at the location of your mouse. It takes close to a second to charge up and spins in place once active. It has a maximum range that while not restrictive isn’t super ideal either given the keep back nature of the mage (unless you’re heal cheesing at face range with water mage). The multihit nature of the tornado tends to help fire mage proc a crapload of fire buffs too for instant rightclicks.
Speaking of which, the rightclick is a much BIGGER tornado also at your mouse point which hits for longer and harder and can knockdown albeit semi-unreliably. Sometimes it might ko straight off, sometimes it takes a few ticks sometimes you’ll be praying for a ko to save yourself but it doesn’t happen. :V This big tornado hits a fairly decent area but it takes around twice as long to channel up.
In both cases once the tornado is set it’ll continue to spin in the spot it was left. It can’t be moved around anymore. The multi-hit nature of the tornado causes it to have a 50 hit max combo to build before peaking. However it’s rather lenient in that as long as a single hit of the entire hit streak of the tornado lands it’ll continue it. So you can be a little inaccurate as long as you don’t flat out wiff.
However the tornados have a fairly large drawback in that they don’t continue to spin after you roll. you must stay in your cast animation for it to continue damaging. This wouldn’t be a big issue if the enemies wouldn’t make a B-line for you.
I’d suggest mostly using the staff with friends, so a melee/dodgy friend can take the heat and you can support them by having them pull the enemies into your tornados for free damage, but can’t recommend using it solo.
Wand
The wand used to be a spray of projectiles, but since beta is now a thing it got updated to be practically a beam sniper… yeah. It’s a twohanded weapon seemingly wielded in one hand with each shot taking maybe half a second to charge and then it fires a pinpoint beam that penetrates in a line. Keep in mind it’s not infinite range, but it’s range is usually sufficiently far and it’s completely hit scan. Only a single hit despite looking like it can be moved around though and thats on the first moment it comes out so aim well.
The rightclick takes a further second to charge then produces a much thicker damage over time laser beam that can comb through multiple enemies and hits a wider area for a total of around 10-12 hits. This is kinda amazing since the wand only needs a 20 hit combo to peak in damage.
However it has a couple of fairly glaring draw backs. The hitscan nature can sometimes have issue with close by tiered terrain and small targets who hide within them making you sometimes catch the edge of terrain you didn’t want to hit and lose your combo. The giant laser also needs to hit CONTINUOUSLY to actually count. If even a single damage proc hits the terrain without hitting an enemy first it will ruin your entire combo! D:this includes if the enemy dies from the hit and then the last hit phases through the dead body before you can redirect it on another foe.
If you think your laser is gonna over do it or you’re running out of targets or just want to stop lasering consider rolling to animation/action cancel. Obviously the big laser also won’t continue if you roll, so you’ll waste mana and damage in a fight that requires you to evade close range if you don’t have an escape and an unsteady/unreliable aim due to close range panic can ruin your combo and hence your damage if facing tougher enemies you need the combo strength to cut through.
Still it’s considered one of the better weapons to use. Although the time between each laser tap makes fire mage attack procs a little iffy to acquire cause of it’s slow shots.
Bracelets
Large circular bracelets over your hands which amplify mage’s unarmed fire balls with some oomph. bracelets let you fire alternating long range fire/water balls. They’re projectiles and have no gravity and will just keep on flying allowing you to snipe at ranges similar to shooting with your ranger shots. They’re the quickest to fire firing almost immediately.
The rightclick is a single much larger fireball which splashes in an area. It needs to hit directly to count towards combo but will hit a small area when it explodes and causes knockdowns quite reliably because of it’s single strong shot nature. It also only takes half of charging to come out so you can easily evade an attack and stun in between enemy attacks giving you some breathing room and if you want to burst something down you can release multiple of them one after another quite quickly.
The combo counter is fairly quick at 20 hits just like the wand. Nothing much else to them. Just small and large projectiles much more suited for action combat rather than long range combat. Combat mage as it were. Ironically the nature of the projectiles makes bracer mages easier to deal with as AIs than any of the others with their hit scan perfect aim bull. :V
A drawback could probably be the need to get two of them to have both your shots deal same or similar reliable damage. As having one purple and one green just like any other weapon that requires two is that only your every other hit will deal good damage.
Personal Favorite
Bracelets for reliable stuns, long range shots with no gravity and quicker up takes allowing you to manage close fights easier. You also become a machinegun with water mage. Wand if I have something better or feel cheesy. Staff never unless it’s just really good. Might try it if I ever do multiplayer though.
Picking Up the Pace
Here’s a healthy helping of more tips for you to use to get going into the game and some stuff thats worth being aware of.
Hunt lore Pieces
Lore are usually on stone tablets, in small self contained crypts or in ruins. Usually they’re similarly curious little structures visible from orbital map view when you zoom in. A grey set of stone circles, a weird white colored spire of rocks, a tiny grey structure, a slightly larger thing looking like a respawn structure, all potential spots to pick up a piece of procedurally generated lore you can use to think up a story about the various generated clans and factions. Lore pieces also have a big hand in revealing the location of the artifacts that the game uses to level you up.
Those who bear their name
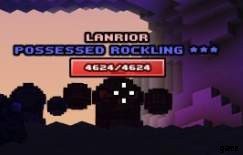
Sometimes you might run into larger mobs with colored names hanging out with their smaller counter parts. These are procedurally generated world bosses. At base they’re souped up boss versions of their original mob and can be anything from a white tier lowly king of seagulls, to a massive gold tier alpha of the alpha dogs. As seen here, they can also be “possessed” which improves their stats and lethality. The possessed stat can also appear on other normal mobs to the same effect, but thats another effect for another tip for later.
These random bosses also sometimes come with one or two special moves they might randomly throw out. Stuff like warrior ground stomps, fire mage missiles or even weirder stuff like summoning zombies or weaker copies of themselves to slowing lava traps or channeled explosions. Don’t get caught out. One moment you can be fighting them quite decently then one of these moves comes out of left field and melts you…
The great thing about them though is that they’re a great source of randomly generated loot, usually dropping items which are a tier higher than themselves as a reward (or equivalent if they’re already gold tier). Since they respawn the next day keep in mind where they spawn early and if they’re too strong note them down to fight later when you get tougher.
Eagle air drops and fast travel
At the town you can find a person called a “Flight master” hanging out next to a giant eagle on a perch. These guy when talked to opens the map and reveals points on the map represented as large “+” symbols. These are flight points.
Most flight points within your biome and those just over are normally 100 gold a piece. You can buy these flight points which permanently unlocks them for free super fast transit to again at any time. Once you reach the point the eagle will drop you off high in the sky and provide you with a free glider even when you don’t have it allowing you to reach nearby areas easily.
JUST. DON’T. HIT. E. IF.あなた。 DON’T. HAVE. THE. GLIDER. ALREADY. You will not be able to re-open your glider cause you don’t actually have one and will fall to your death like a dumbass if you do it too high. Unless of course you just float down with mage, cause mage traversal op. But anyone else will hit the ground and cease to exist quite literally on impact.
As you accrue gold if you’re not saving up for hopeful items or supplies consider using a flight point to get you across the map and closer to key objectives like traversal or questing items that you can tackle or areas of interest so you can unlock the shrines nearby to get to later.
Grab traversal kit when you can
If you manage to get clued in by an npc on the location of a traversal item like the glider, boat or reins, consider going to collect them to make getting around in your current biome easier. The boat is really fast, and having a pet you can ride around is both good for exploration and in combat escapes.
The glider could take some getting used to, as you need a sufficiently high area to jump off. Normally a tree won’t do but once you get into the air you’re a bit more fine.
Simply hold forward in the direction you want to be traveling. At first you’ll most likely start to dip into a downwards trajectory. Hold space to pull up and consume stamina to swoop yourself upwards. Do this usually in chunks of a quarter and a bit of stamina and then do it again once you start going down again and stamina begins regenning to keep yourself afloat. Just careful of smacking into solid surfaces from too high or near enemies as you’ll stun yourself temporarily on a bad landing.
Treasure any + gear that you find
It’s a part of the game design that could be improved, hopefully in time, but when you cross the boundary to a new area all your equipment will become nullified. Maybe through some kind of differences in mana or some kind of magic seal or peculiarity in the world this effectively renders the gear similar in power to starting equipment and negates it’s tier color. Crossing back into the original location will reactivate the gear back to it’s former glory.
How do you get around this? You hope to get lucky and find equipment with a + attached to it. Plus gear is special in that it stays active when within the borders of adjacent lands to the one it was found in giving you a leg up on combat and equipment in your next area’s exploration.
Don’t let go of them if they’re useful to you, keep them and use them to bolster your exploration into neighboring zones in search of more adventure, different scenery, pets, artifacts and general adventure.
Where’d my stuff go?
Each area also has it’s own armor and weapons equipment tab that is switched to when you cross the border usually that can be switched between in any location. It might look like all your other armor and weapon stuff was tossed out, but it’s actually safely still in the other inventory of the previous map you can switch to.
To that point, it’s probably a decent idea to consider entering a new region from the air by eagle closest to it’s regional village so that you can have a safe location to fly in and acquire quests and such.
In much the same way traversal items and key items like gliders, reins, boats, spirit bells etc will also disappear and have to be reacquired. It’s kinda unfortunate but thats the way it works I guess…
I need healing!
The only classes that can really self heal are warriors and water mages. Any other class would need to rely on a water mage or the defender’s shout for healing or use the variety of healing items required. Remember that potions can be chugged on the move while food items are consumed sitting down over a longer duration. It’s probably pretty clear, but eat your food items while out and about out of combat but switch to your potions before a fight. Don’t accidentally try to have food while fighting like I used to do cause I’d forget to switch my quck tab.
Cartography Quickly
This is gonna get screenshot heavy. But heres a whole bunch of sights from orbital view that you can use to eyeball points of interest at a glance without having them be marked by npcs for you. Some are obvious, some curious. Few different biome types most from relatively zoomed out but some locational special features or types of places can show up just about anywhere.
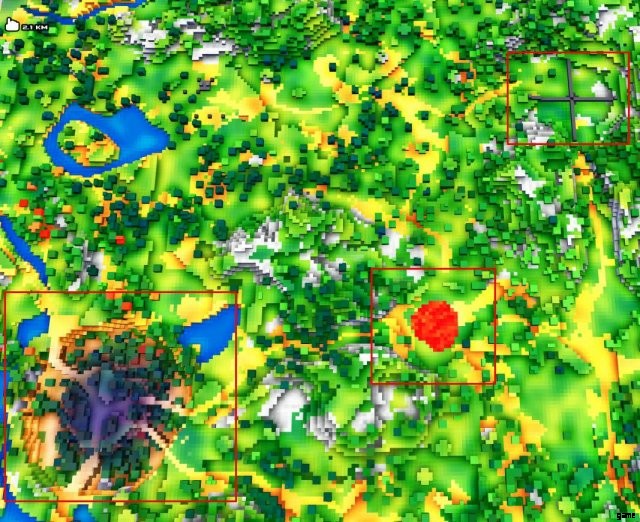
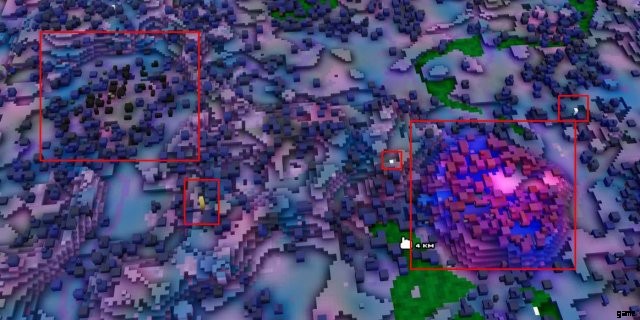
Here you can notice the discoloration of a dark forest. A lava lake, which is out of place in a land of green pastures and water. Also a mana pump, a place where the steel legion is draining mana from the surrounding biome to fuel their machines.詳細は後述します。
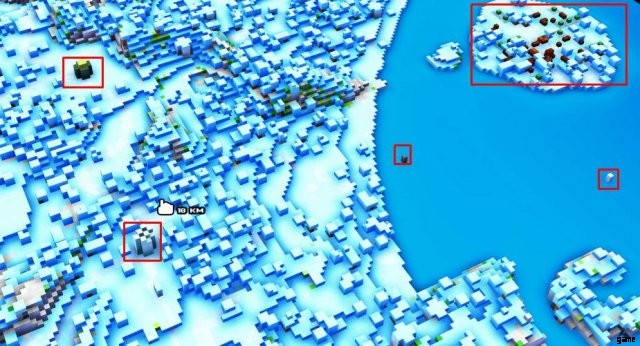
Here we can see a large chunk of raised terrain and several small dotting structures out on the water. White dots can be lore or respawn points. The grey ones, potentially towers containing unlockable loot or lore or even a little sky altar.
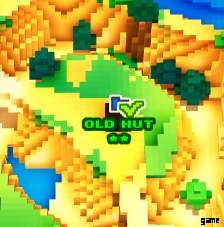
Big volcano with what seems to be a lore structure floating off it’s coast. Theres also a large grey cube from this far away that could be a lone crypt or old hut by the lake and a large cube on top of a mesa thats probably a piece of lore structure or a life shrine.
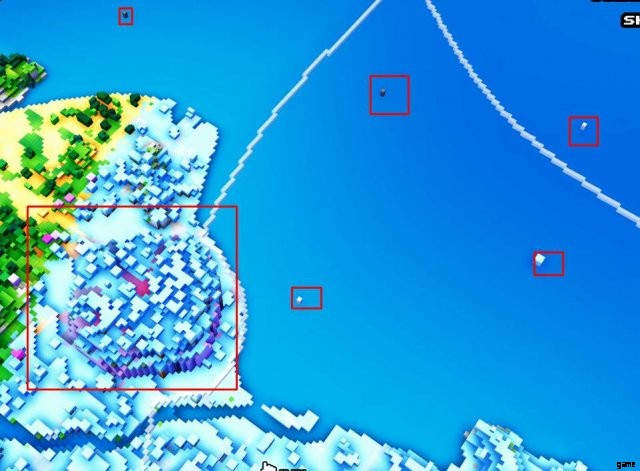
Up close here we can see one of our small tiny white structures turned into what appears to be an altar or maybe sky island access point. while the other one with it’s open sides is most likely a life shrine in the next biome over.

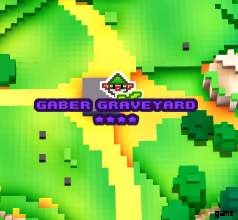
Here we have what appears to be an overgrown lore structure pillar and a graveyard/crypt access point. Graveyards can sometimes be just top side, containing anything from a combat encounter to a captured npcs, but sometimes they can be access points to catacombs down below which are a type of super dungeon that contain an artifact.
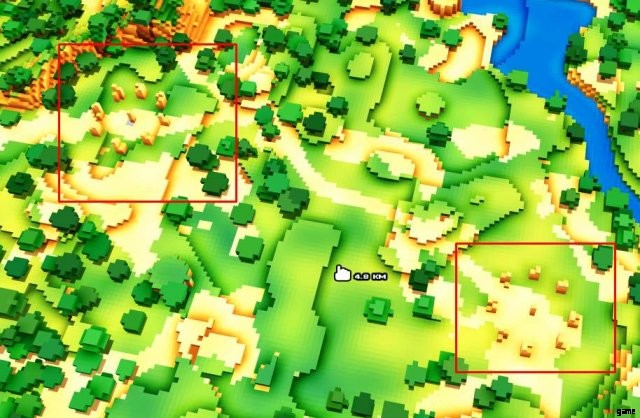
Here’s an lighter colored forest within a dark forest overall biome, probably an enchanted grove of some kind. Theres also a golden tower, a form of locked up loot structure that could require a special key item or mechanic to be used to get in. Also a village, but at this distance it could also be some ruins as the builds look very similar from this far away and village colors could be different in this biome.
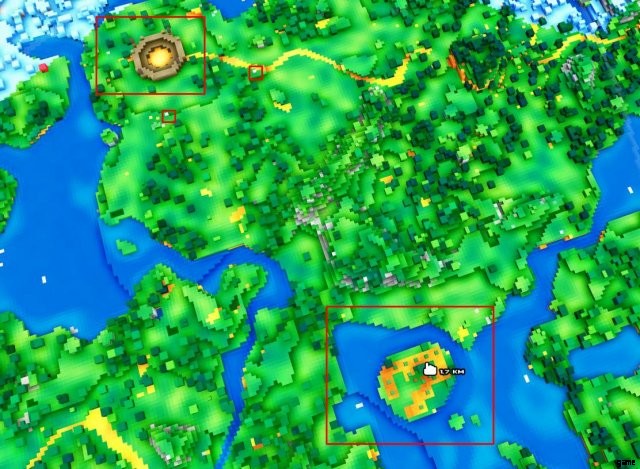
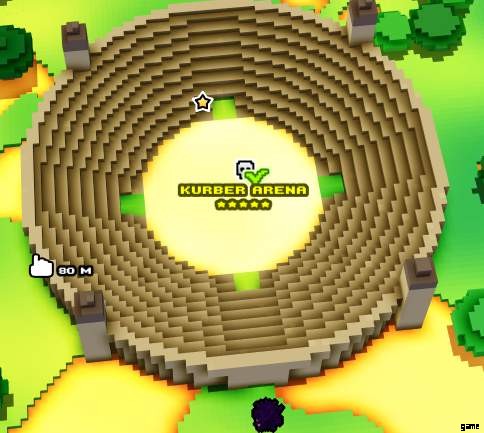
Here we’ve got an Arena, these provide you with what is essentially a boss rush from easy to godlike hard that you can use to get good equipment from both the bosses and it’s completion. Theres also what is probably a farm on a lake island nearby and a few white cubes of interest.
Here we have a dense cluster of trees which could be a grove or small forest of some kind and a castle in the biome over.
Castles tend to be really easy to see and tend to be big dungeons also containing an artifact.
A bit closer in, here we’ve got a white cube of interest, a loot tower and what appears to be the entrance hall to a “vault” another type of underground dungeon. note the difference of the long section after the tower.
also closer in, here we’ve got some stonehenge looking places with spire like rocks the color of the biomes rocks or terrain. These would probably be rings of power, which have a boss guarding an unlit flame holder. Beat the boss who can vary in strength to get the item to light it which provides a slight power boost within the biome it’s attached to.
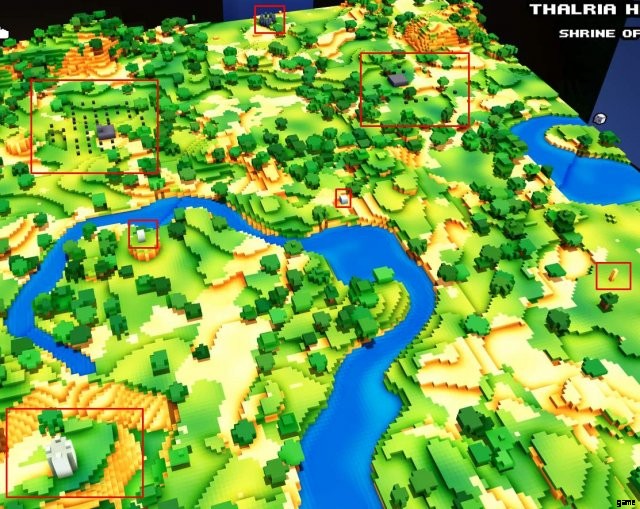
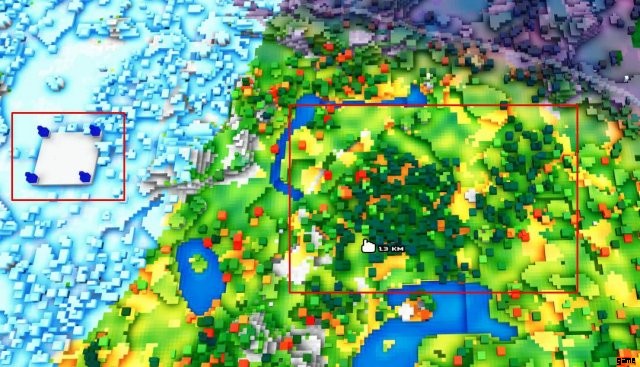
Here we have a few things. What appears to be a large mesa could possibly be an unroofed wizard tower. A pair of crypts or graveyards, a loot tower, a couple different cubes of interest and a dark grey lore henge in the distance.
More crummy wizards probably, and a town on an island plus two different cubes of interest. One is probably lore related or a grey colored sky island access point.
Get the idea? Theres are others that are less obvious, like large hills, or a cluster of close together mesas that can form an “insert name here” rocks zone. But this should give you an idea on what to look out for. Just if you find an area, survey it for enemies, you don’t want to use all that time getting there and get smashed by some overpowered enemies. Be sure to try to find a nearby respawn shrine before doing anything silly. Frustration is killer.
Key Items and You
Whats all this about loot dungeons, artifacts and key items? Well, they’re special items you can collect along your travels through a biome that aide you in busting into dungeons fully or looting certain structures. Often you can get clued into their location by npcs in your starting village or npcs out in the world who’re willing to talk.

Traversal Kit
Hang glider: I mentioned it before but it’s a glider best used from high locations to keep you in the air and make you go slightly faster. As you hold forward to keep straight as you dip down pull up with space bar and stamina consumption periodically to keep yourself up. you also get to use it temporarily for free when a travel master hawk drops you off at your location.
Boat: Use it on water to make yourself go really fast and not sink. The boat is nice in that once you set a direction you’ll keep sailing that way. Got a lot of ocean surrounding your starting area? Find the boat and if theres much interesting stuff out there go for a leisurely sail in that general direction while perusing your map during the trip. Just don’t cross the boundary or it’ll evaporate out from under you cause of peculiar region locking game mechanics.
Reins: Wonderful riding apparatus to allow you to go fast across the land by using a suitable pet as a mount. I particularly like my caterpillar. (so damn cute)
Simply hit T as if calling your pet but when you’re right next to it and you’ll hop on. Some pets can’t be ridden at a fast rate though. Usually discernible by if you can pick them up at close range with E.
Climbing Spikes: (the last item in the set I showed) Not super required, but these allow you to nullify all costs to climbing around on surfaces allowing you to quite easily climb out of dark pits in dungeons that you survived falls or up and around edges without worrying about falling.
Key Items
Sky flute: The sky flute allows you access to sky islands. Use it near the little structure of a bird surrounded by pillars and you’ll play a little tune, then suddenly a flock of blue birds will come and levitate you up to the floating island. If you go up, I suggest you have a hang glider, jump into water or teleport back down from the nearest respawner… or… y’know… float down… as mage…
Divine harp: The harp allows you to unlock golden doors. Usually blocking access within dungeons or walling off loot inside loot towers. Simply approach and use the prompt to play a little tune that opens the gate. They look gold and shiney almost with an eye kind of motif in the center.
Spirit bell: The spirit bell once again, is used to access areas walled off. In this case, it’s metal grated portcullises. They’re usually silvery and reflective to tell you that they’re the type. When you play it you’ll be “transported to the spirit realm”, which makes you turn transparent like a ghost and able to simply phase through doors of this type for around 45 seconds. During this time the music will get spooky and an eerie fog will close in around you and the colors of the surrounding area will look different.
I’ve heard mention that being in spirit world mode is a good way to enable yourself to see easier at night due to the change in color hue and overlay effects. If you ever want to play or use any of your key items manually you can do so from your inventory. The Bell is typically the only one that still does anything as the harp and flute require certain objects to be nearby.
The Treasure Spirit: Finally this little blue raindrop spirit allows you to easily search for loot hidden around a biome. Sometimes loot can just be hidden in little caves, underground in burried shrines under breakable terrain on top of Mesas inside hollow logs and all sorts of places.
If you’re within a decent distance from an item lying around to be discovered the treasure spirit will pop out of you and start hovering around you acting like a compass. Running towards the spirit will take you in the direction of the item in question letting you find stuff ranging from simple (and salty) bags of gold to rare/epic/legendary loot that adapts to your class when you pick it up. Quite useful if found early while a lot of exploration is needed, but I don’t think I’ve ever had someone point me in it’s direction, so it’s a little random to find him.
A Questing We Shall Go!
There are numerous quests and locations you can find scattered around the world either by running into them or being told they’re there. Here’s a quick run down of the types I’ve found and their effects on the world around you, if any.
Combat encounter:These are simple fight mission encounters with a faction or group of enemies. It can range anywhere from a group of necromancers raising or empowered some undead. A bunch of guys and their boss hanging out or some enemies with a captive in the area all the way up to a full blown warzone of paladins fighting unholy pact legions or druids of mana being assaulted by the steel empire.
Simply fight the small fry and kill the boss, or in some cases hunt down and destroy spawning structures like mini demon portals or mana generators set up by the opposing faction that will naturally be hostile towards you.
Crafting Kit encounters are similar to a combat encounter but they can involved bosses or captured npcs but they reward a book of crafting based on the level. These unlock crafting recipes that you can make for yourself. I honestly can’t suggest crafting, but collect them and check what they have, you might get lucky and have a piece of plus gear you could flat out craft to keep you set for later biomes.
A supplier gnome has been captured by unsavoury mobs and enemies and is probably being stewed alive or kept for experimentation or something in the general area. Find and defeat the enemies and he’ll go free, providing you with some loot while also upgrading the inventory of village armor and weapon shops based on the number of freed gnomes. There is usually 4 of them to an area.
Shops resupply every day reset, so check the shops regularly, they can actually sell that shiny plus gear you so desire in their stocks some time.
A mage tower is a tower inhabited by a mage watching over a magical crystal of some kind. There can sometimes be multiple of them in an area. Being a MAGE tower the boss is always a mage, so they can be rough fights. But both the boss and the crystal will drop loot when destroyed and breaking all crystals in the biome will break the spell on blue forcefield doors you otherwise wouldn’t be able to get through. They’re basically mini and very vertical dungeons.
A circle of power is like a little stonehenge of pointy spires. Within the area will usually be a lore piece or two, a boss watching over the area, and a large unlit brazier. Defeating the boss will drop “eternal embers” which allows you to ignite the brazier which improves your “power” throughout the region. I’m not sure what that entails, probably some small stat boosts, but it appears in the top left buff bar when completed.

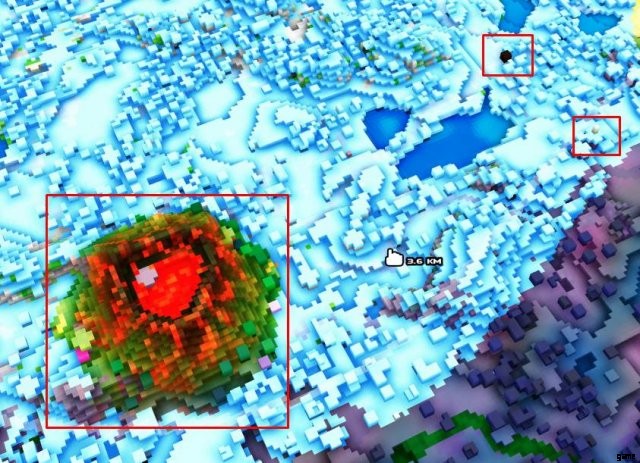
Demon Portals are bad news because around the biome you’ll see mobs who are big, red and possessed, more often than not they’re also bosses I’ve noticed. Possesed mobs and bosses are overall a portion stronger than normal which can cause troubles especially when it comes to large grand bosses at skull encounter zones, mage towers or in arenas or dungeons. Sometimes they even possess villagers in the town who will attack you and probably force you to murder them. They will respawn with the day mobs, but will remain possessed and hostile until the portal is busted.
When you get there some Cult of doom enemies will be channeling energy to keep a demon portal active. It’ll have a lot of HP and defeating the humanoid enemies there channeling into it will reduce it’s health (and it probably heals as they channel into it? so theres that). The portal constantly spits out imps who’ll try to murder you but the aim is to just smash the portal closing it stopping magical invisible demons from possessing creatures, bosses and characters around the biome.
This is a witch boss. Sometimes you’ll come across a town where all the people in it are turned to stone and you can’t speak or interact with them. This is unfortunate and usually means theres a witch hiding out in a hut or location somewhere that you’ll need to murder to cancel the curse and bring everyone back to living again.
A Mana Pump built by the steel legion to extract and refine mana from the environment to power their machines and technology.

If you notice an icon that looks like this in your buff bar it means you’re under the effects of “Mana absorption”. Mana absorption isn’t a massive deal but there can be multiples of them. Mana absorption slightly slows the rate at which you build mana from your attacks to power your rightclick attacks and pumps are culprit.
To break them you need to find the 4 arms of the pump structure and defeat the boss guard patrolling around it’s mana inducer. This generator structure becomes vulnerable when they’re killed and must be smashed. When all inducers are smashed the big officer of the installation will appear in the central platform where the pump itself is and be ready for a fight. Smash him too then smash the pump to get sweet loot and turn down the mana absorption effects in the biome.
This Skull icon means there is some kind of boss encounter at this location. Usually a grand boss like a yeti, mammoth or saurian… Even a giant enemy crab!
This boss will probably absolutely smash you if you’re unkitted. They can be a rough time. Especially from arenas where you have to go through 3 rounds of other bosses before the big guy is let loose on you. But the loot is nice, and like world bosses even after you beat them I think they should respawn with the day.
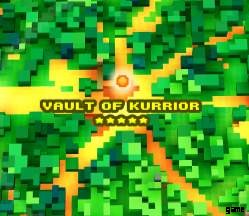
Cue up your favorite dungeon diving music. This glowy icon when revealed is normally your ultimate goal in the region. Finding a special artifact mentioned in the lore of the biome that you’ve been exploring. You can of course, stumble across the dungeon itself before it’s even revealed, but sometimes you’ll need the key items from last section to fully crack into them. Usually littered with parkour traps, enemies, bosses all varying anywhere from green to yellow and of varying lengths.
Cracking in and getting the relic affords you a level up and a small boost to one of your traversal skills which stack and stack to buggery and beyond as you collect more and show off who’s the best artifact hunter.
Hopefully one day they’ll have a much better use… We can always dream… but for now, it’s just bragging rights mostly and satisfaction of beating an area. Although keep in mind there can be more than a single relic in any given biome. Search well, and hoard all of them.
Gameplay Tips and Tricks
If you’ve gotten this far through my guide and indepth ramblings here is where you’ll my best tip, and maybe a few more if I get some questions that I can answer!
Early Morning Double Dip
This is a tip for farming loot and materials for whatever you need quickly. I hope you’ve been marking all the locations of bosses and clusters or good materials you need like gems and metal! Cause you know how mobs and resource respawn at 12 AM? Well at the town you can reset the day for 10 pieces of gold at the inn every day between 18:00 in the evening and 6:00 in the morning. The effect this has is effectively setting it to 7 AM bright and early so you have daylight and resetting the world.
See where this is going? Essentially At 12 you go for a round trip of all your favorite resource points, bosses and respawning encounters across the world to farm your loot. Then, before 6 AM hits, go back to town and pay to stay at the inn. The world will get reset to 7 AM again and you can do another round in quick succession for more success. This is great for gathering materials which you can only find a few of usually like gems, silver, gold and of course the bosses (or all mobs really) and their drops.
If it’s just way too dark, like i mentioned in key items see if having the spirit bell active helps at all, or sleep in a bed in villages or sleeping bags generated in camps to restore health and hurry the clock along till it lightens up a bit.
Volcano Panic, Icy Blues and Toxic Greens
There are a few drink items you can make in your recipes called lemonade, hot chocolate and green smoothie. These items are used to save you from environmental effects. Lemonade shields you from hot damage like the lava in volcanos where sometimes key items can be spawned forcing you to toast yourself… Hot chocolate would stop you becoming an icy pole if you take a swim in a cold biome. While the water in dark forests seems quite sickly and probably poisons you, so if I’m correct (I’ve never actually gone into one yet) the green smoothie probably helps with that.
- Ice cubes apparently spawn under the water in ice biomes.
- Cocoa beans feel like they’d spawn in some kind of tropical jungle region. Same with the bananas.
- Kale appears in some farms occasionally.
- The General store sells sugar cubes.
- Lemons spawn fallen from trees just like apples.